English
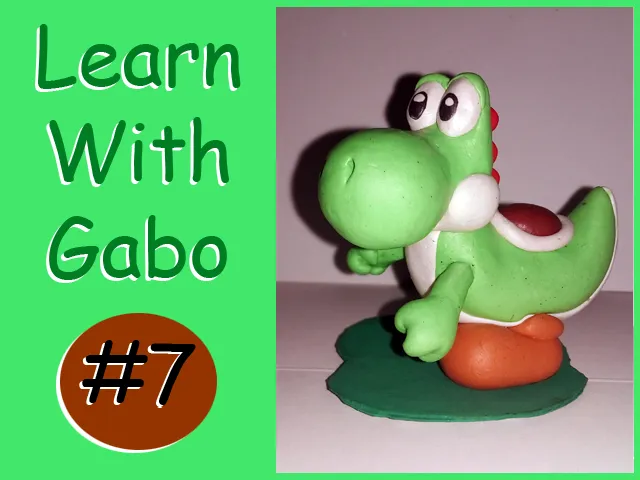
Greetings to all, fellow creatives. Welcome to a new installment of learn with Gabo. This time I will teach you how to make a plasticine Yoshi. Yoshi is one of the characters of the famous Mario Bros.
In the previous installment I taught you how to make a Baby Groot, but some who follow my work recommended me to do something a little simpler in video, which I thought was a good idea, because this way you can see some techniques that I have shown in other installments, only now by video.
You can see the last five installments of Learn With Gabo by following these links:
#2 Teddy bears:
@gaboamc2393/learn-with-gabo-2-learn-with-gabo-2-engesp
#3 Kirby:
@gaboamc2393/learn-with-gabo-3-learn-with-gabo-3-engesp
#4 Bomberman:
@gaboamc2393/learn-with-gabo-4-learn-with-gabo-4-espeng
#5 Black cat:
@gaboamc2393/learn-with-gabo-5
#6 Baby Groot
@gaboamc2393/yvbcnyzi
All that said, I hope you enjoy this video tutorial, installment #7 of "Learn With Gabo".
Saludos a todos, compañeros creativos. Sean bienvenidos a una nueva entrega de aprende con Gabo. En esta ocasión les enseñaré a hacer un Yoshi de plastilina. Yoshi es uno de los personajes del famoso juego de Mario Bros. Español
En la entrega anterior les enseñé a hacer un Baby Groot, pero algunos que siguen mi trabajo me recomendaron hacer algo un poco más sencillo en video, lo cual me pareció una buena idea acertada, pues así podrán ver algunas técnicas que he mostrado en otras entregas, solo que ahora por video.
Pueden ver las últimas cinto entregas de Learn With Gabo siguiendo estos enlaces:
#2 Teddy bears:
@gaboamc2393/learn-with-gabo-2-aprende-con-gabo-2-engesp
#3 Kirby:
@gaboamc2393/learn-with-gabo-3-aprende-con-gabo-3-engesp
#4 Bomberman:
@gaboamc2393/learn-with-gabo-4-aprende-con-gabo-4-espeng
#5 Black cat:
@gaboamc2393/learn-with-gabo-5
#6 Baby Groot
@gaboamc2393/yvbcnyzi
Dicho todo esto, espero que disfruten este video tutorial, la entrega #7 de "Learn With Gabo"
Resumen
English
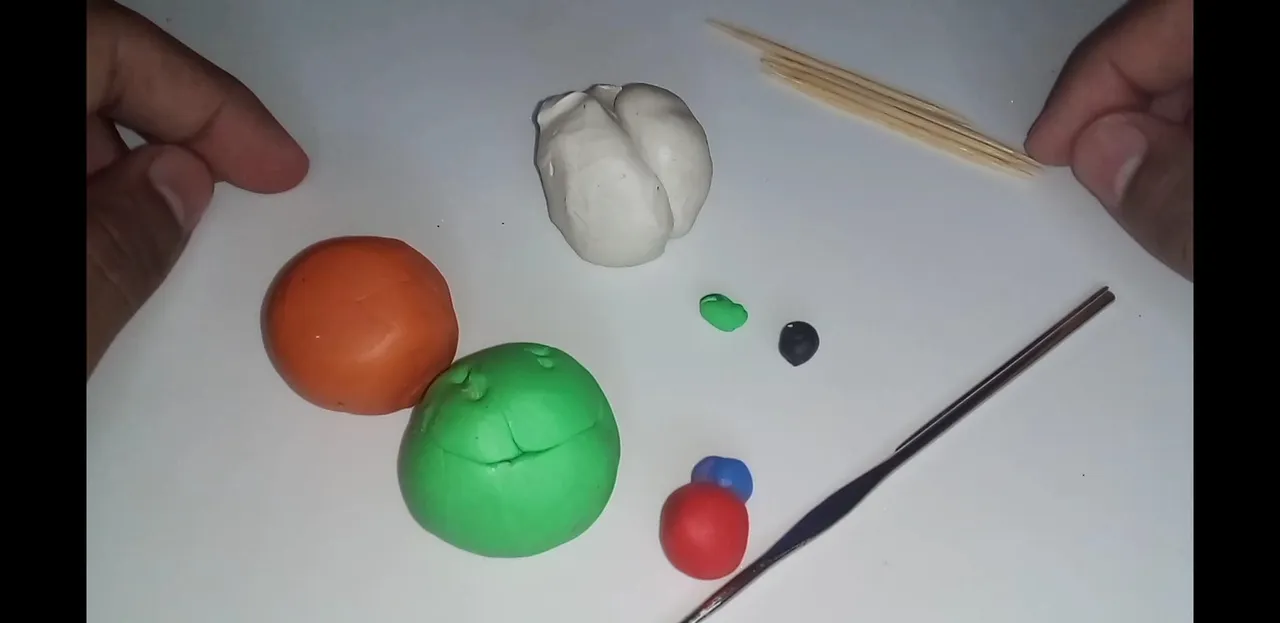
As always, in the video I start by showing you the materials and tools used; in this case they were the following:
*Plastilina of different colors
*Wooden sticks
*Sewing and knitting needles
I also used a small piece of cardboard and green paint to make a small base; I also used glue, to glue the figure to the base already mentioned.
Español
Como siempre, en el video comienzo mostrándoles los materiales y herramientas utilizadas; en este caso fueron los siguientes:
*Plastilina de distintos colores
*Palillos de madera
*Aguja de coser y tejer
También usé un pequeño trozo de cartón y pintura verde para hacer una pequeña base; también usé pegamento, para pegar la figura a la base ya mencionada.
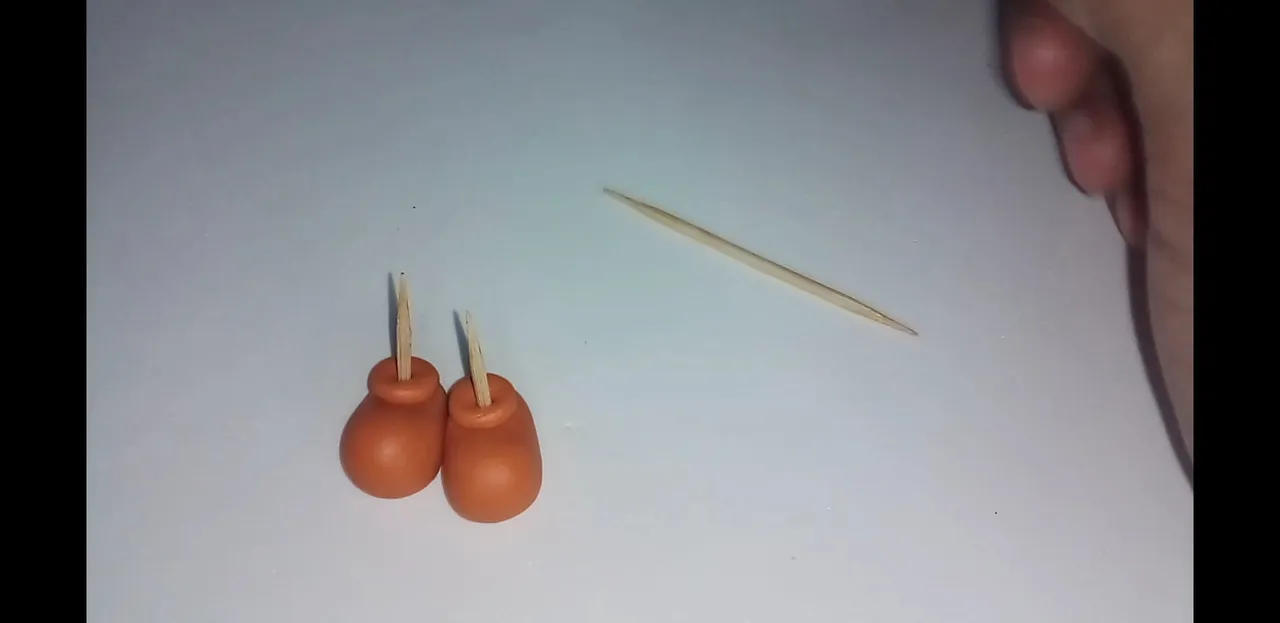
After detailing the materials, I start with the molding of the figure. The first thing I did, as almost always in all my figures, were the feet. In this case, Yoshi wears shoes; I used orange plasticine to make them.
At this point I used the wooden sticks. I broke one in half and attached each half to the shoes, so that they would serve as a support for the figure.
Tras detallar los materiales, comienzo con el moldeado de la figura. Lo primero que hice, como casi siempre en todas mis figuras, fueron los pies. En este caso, Yoshi usa zapatos; yo usé plastilina naranja para hacerlos.
En este momento usé los palillos de madera. Partí uno a la mitad y fijé cada mitad en los zapatos, para que sirviesen de soporte para la figura.
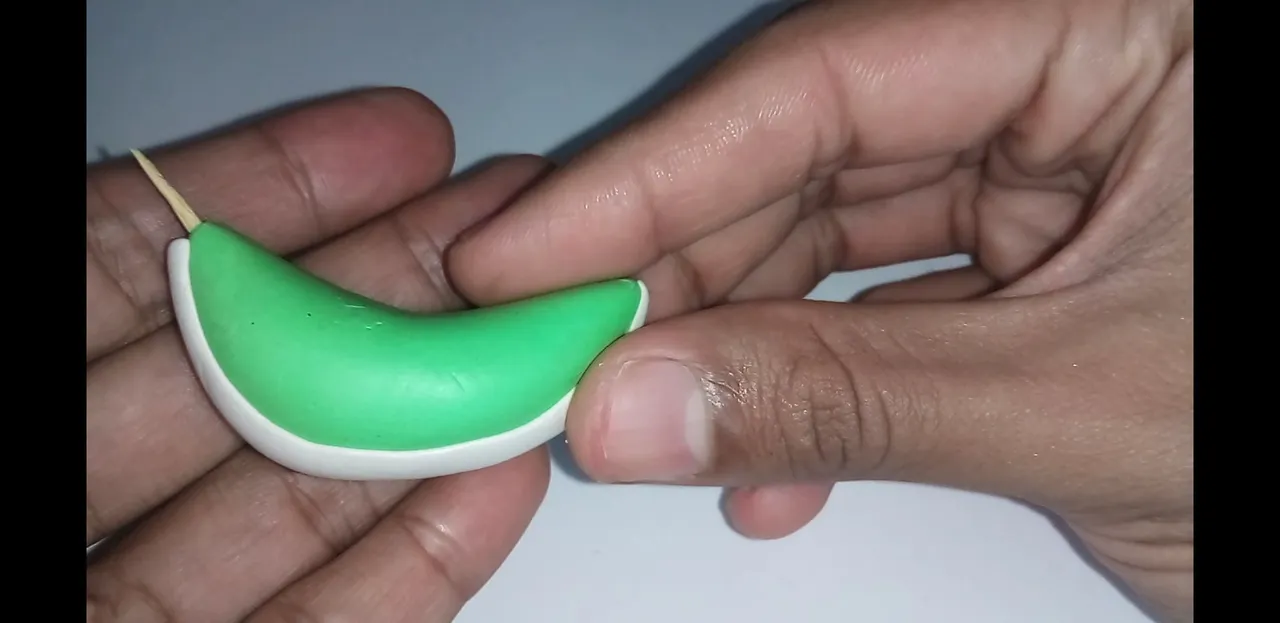
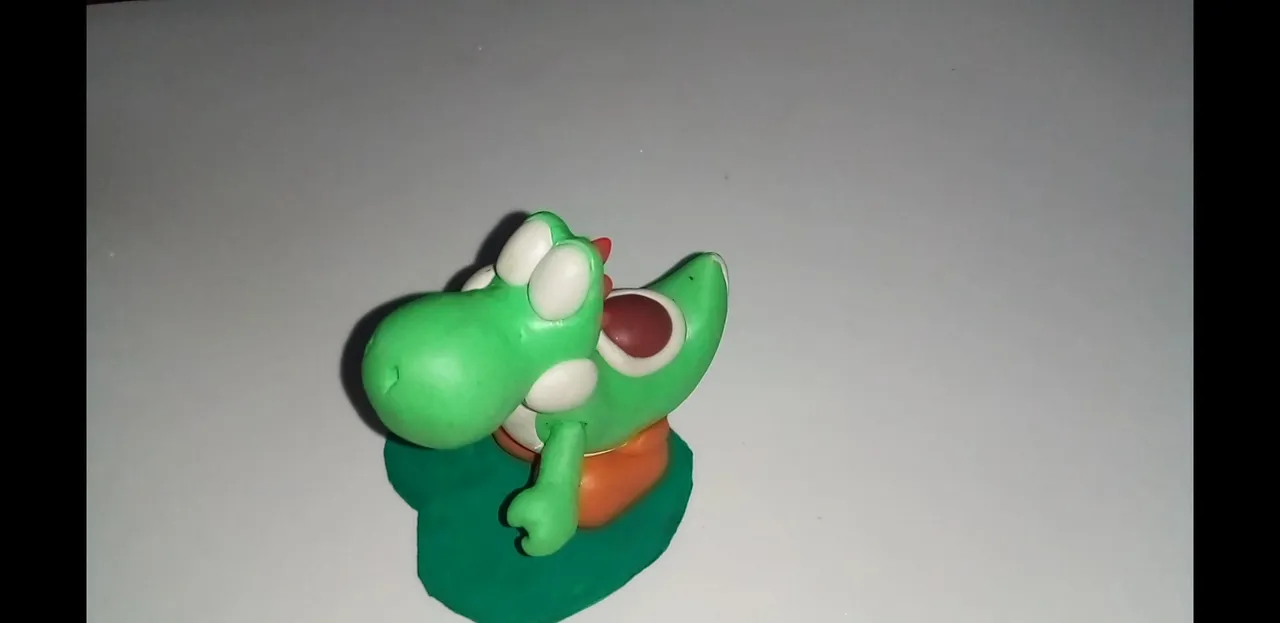
Below I show you how to make Yoshi's body. This character has an elongated body; thin at the neck and tail, but wide at the belly part.
It is formed by two parts; the green part, which is the bigger one; and the white part, which is the thinner part located at the bottom of the body, as you can see in the image below:
Más adelante les muestro cómo hacer el cuerpo de Yoshi. Este personaje tiene un cuerpo alargado; delgado en el cuelo y la cola, pero ancho en la parte de a panza.
Está formado por dos partes; la parte verde, que es la más grande; y la parte blanca, que es es la parte más delgada que se encuentra en la zona de abajo del cuerpo, tal como se observa en la imagen a continuación:
As I mentioned, each shoe has a wooden stick. Each toothpick is embedded in the lowest part of the figurine's body.
With the help of the needle, I first made the holes where I would fit the wooden sticks, then put each shoe in place.
Como ya mencioné, cada zapato tiene un palillo de madera. Cada palillo va incrustado en la parte más baja del cuerpo de la figurita.
Con ayuda de la aguja, primero hice los agujeros en donde calzaría a los palillos de madera, luego coloque cada zapato en su lugar.
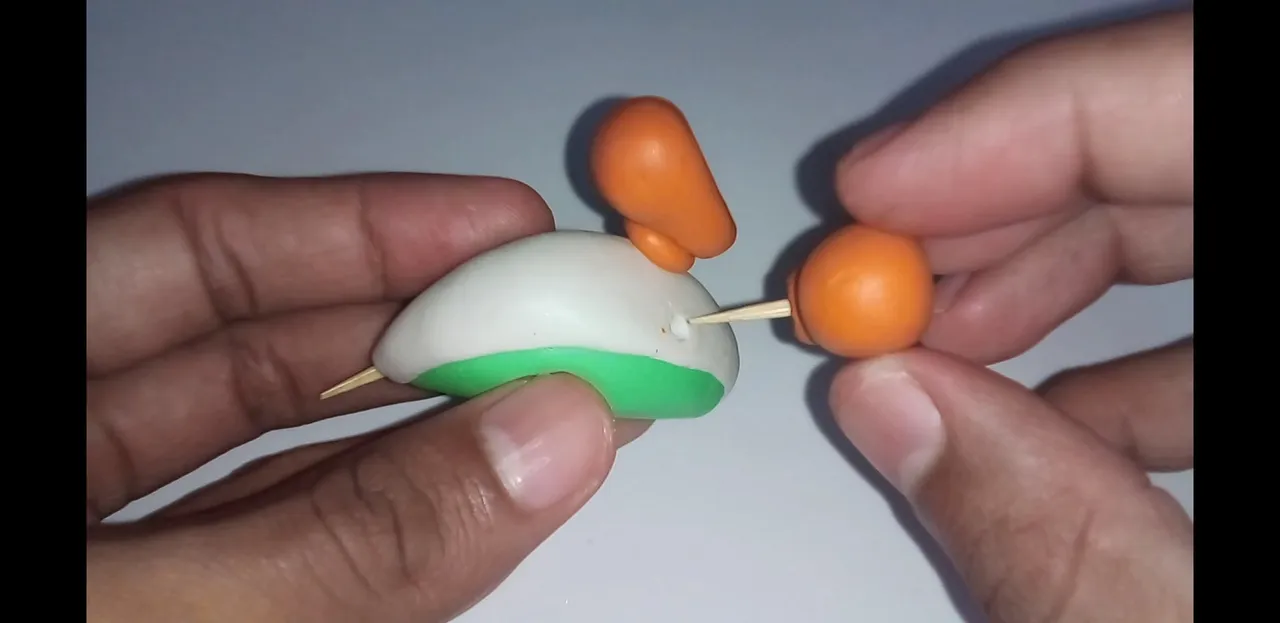
After making the shoes and the body, it was time to make the arms. For the arms I also used a wooden stick, which I broke in half, one half for each arm. Each piece of stick I covered it with plasticine, molded it in half and then placed each arm in its place.
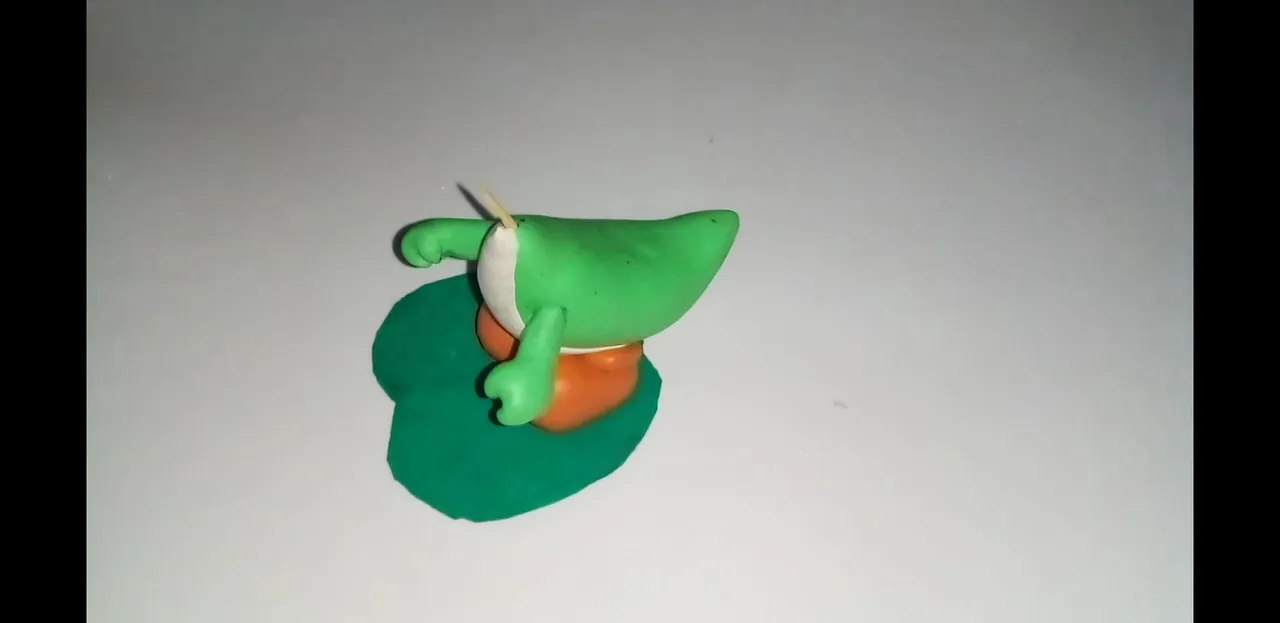
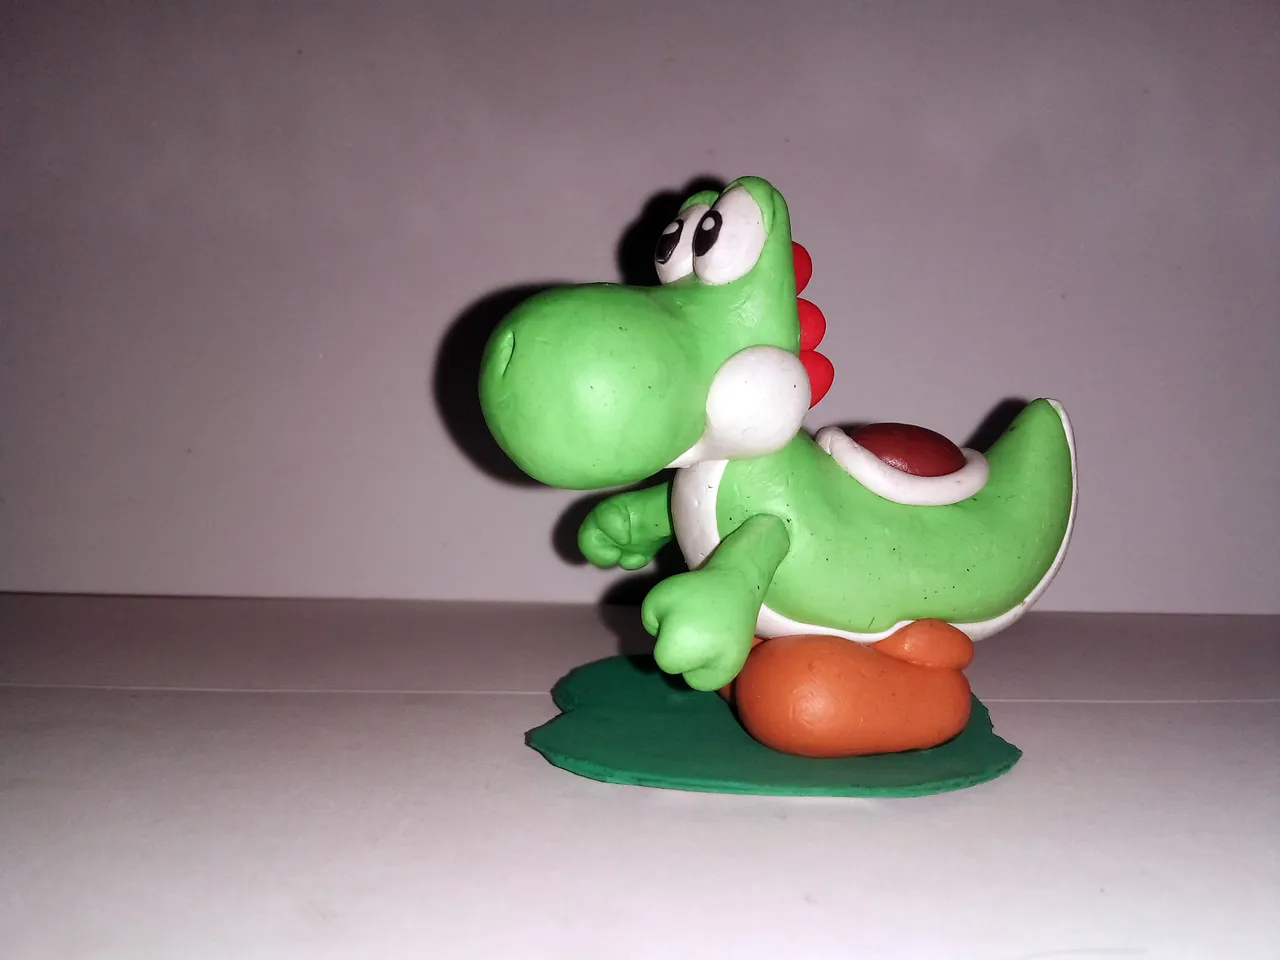
It should be noted that I mentioned earlier that I would make a base for the figure. It is not at all difficult to make, it is just a piece of cardboard that I painted green; then, with glue, I attached the figurine to this base, as seen in the image below:
Después de hacer los zapatos y el cuerpo, llegó la hora de hacer los brazos. Para los brazos también ocupé un palillo de madera, el cual partí a la mitad, una mitad para cada brazo. Cada trozo de palillo lo cubrí con plastilina, lo moldeé a la mitad y entonces coloqué cada brazo en su lugar.
Cabe destacar que anteriormente mencioné que le haría una base a la figura. No es para nada difícil de hacer, solo es un trozo de cartón que pinté de color verde; luego, con pegamento, fijé la figurita en esta base, tal como se observa en la imagen a continuación:
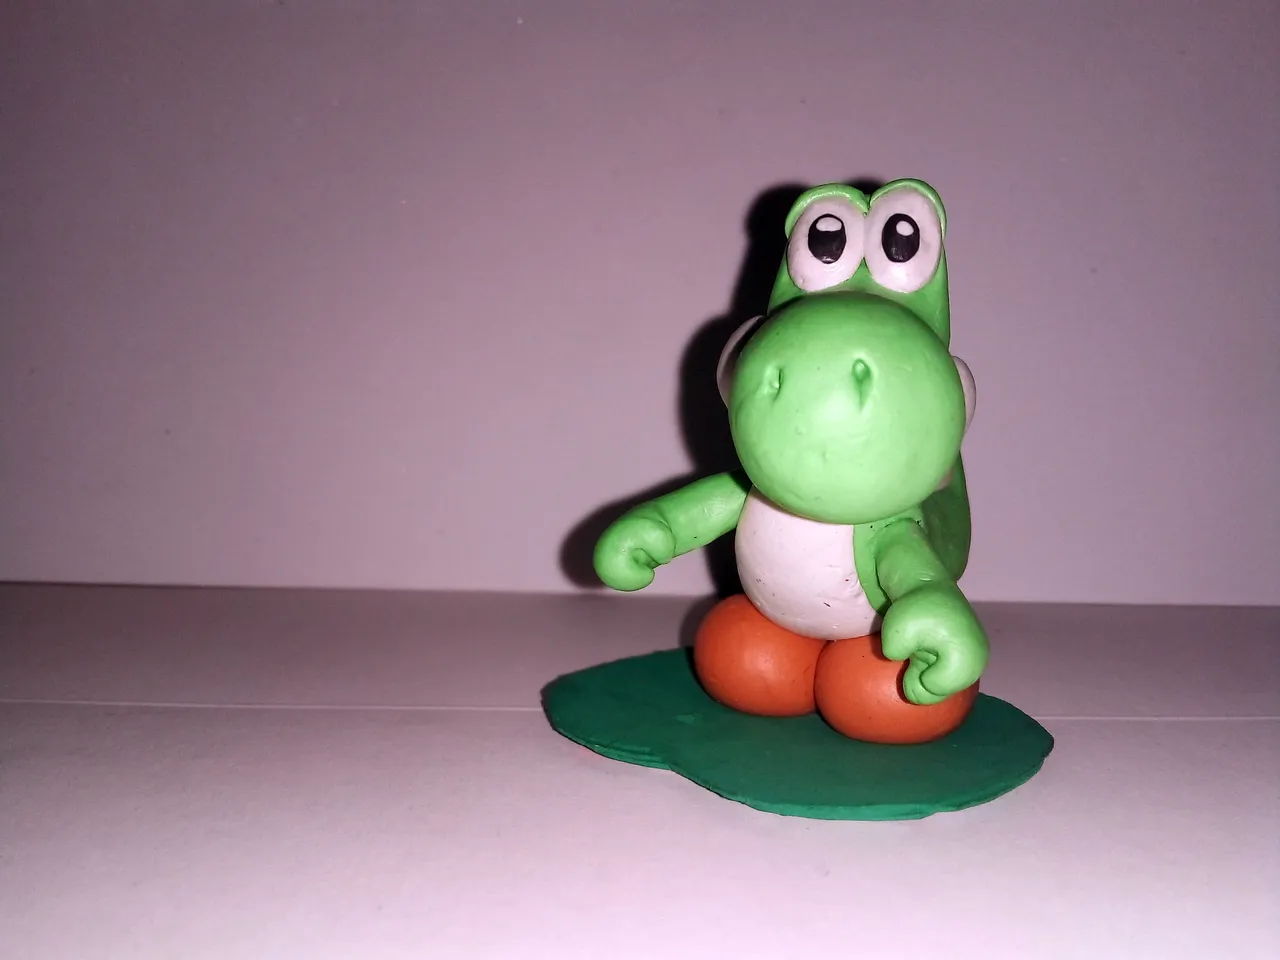
After all the above, I started working on the head. The video details all the steps to make it, from the nose to the mouth, so you can see them in detail.
Luego de todo lo anterior, comencé a trabajar en la cabeza. En el video se detallan todos los pasos para hacerla, desde la nariz hasta la boca, así que ahí pueden velos con lujo de detalle.
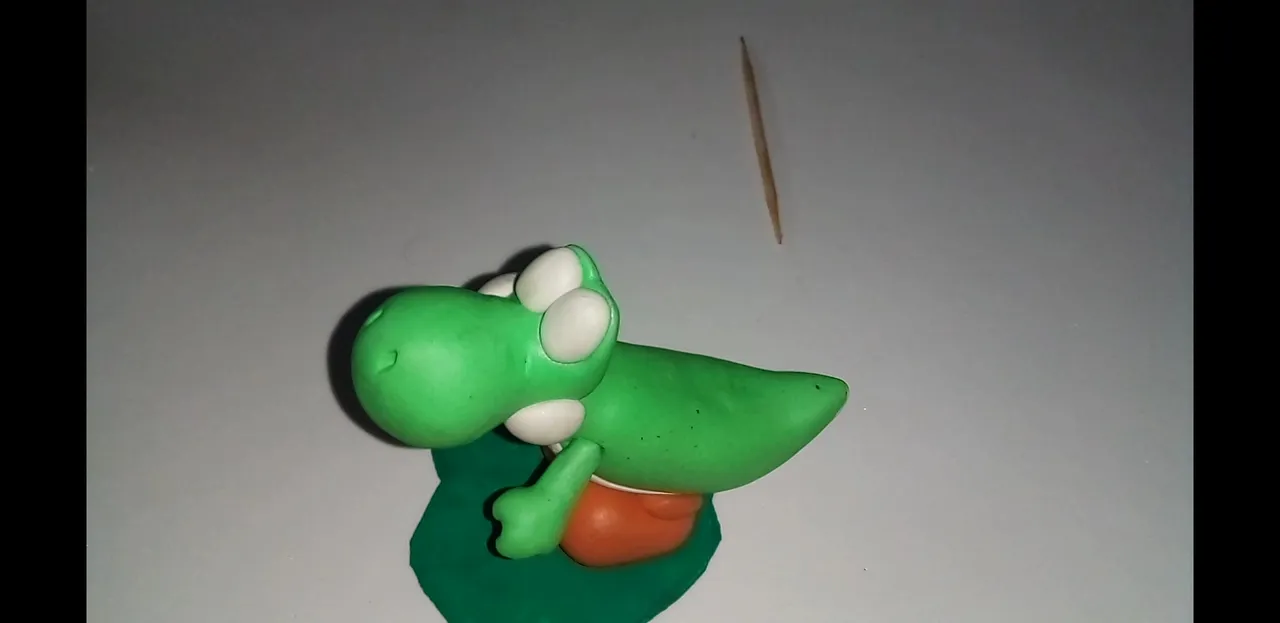
I also added other little things that Yoshi has, like a crest on the back of his head and a turtle shell on his back.
También agregué otras cositas que tiene Yoshi, como una cresta en la parte trasera de la cabeza y un caparazón de tortuga en la espalda.
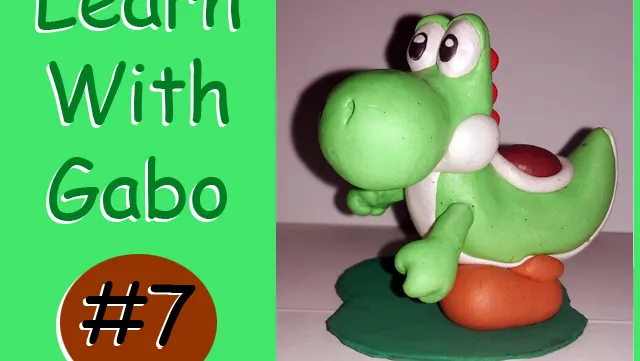
The last thing I did was to make the eyes and eyelids, thus finishing the figurine.
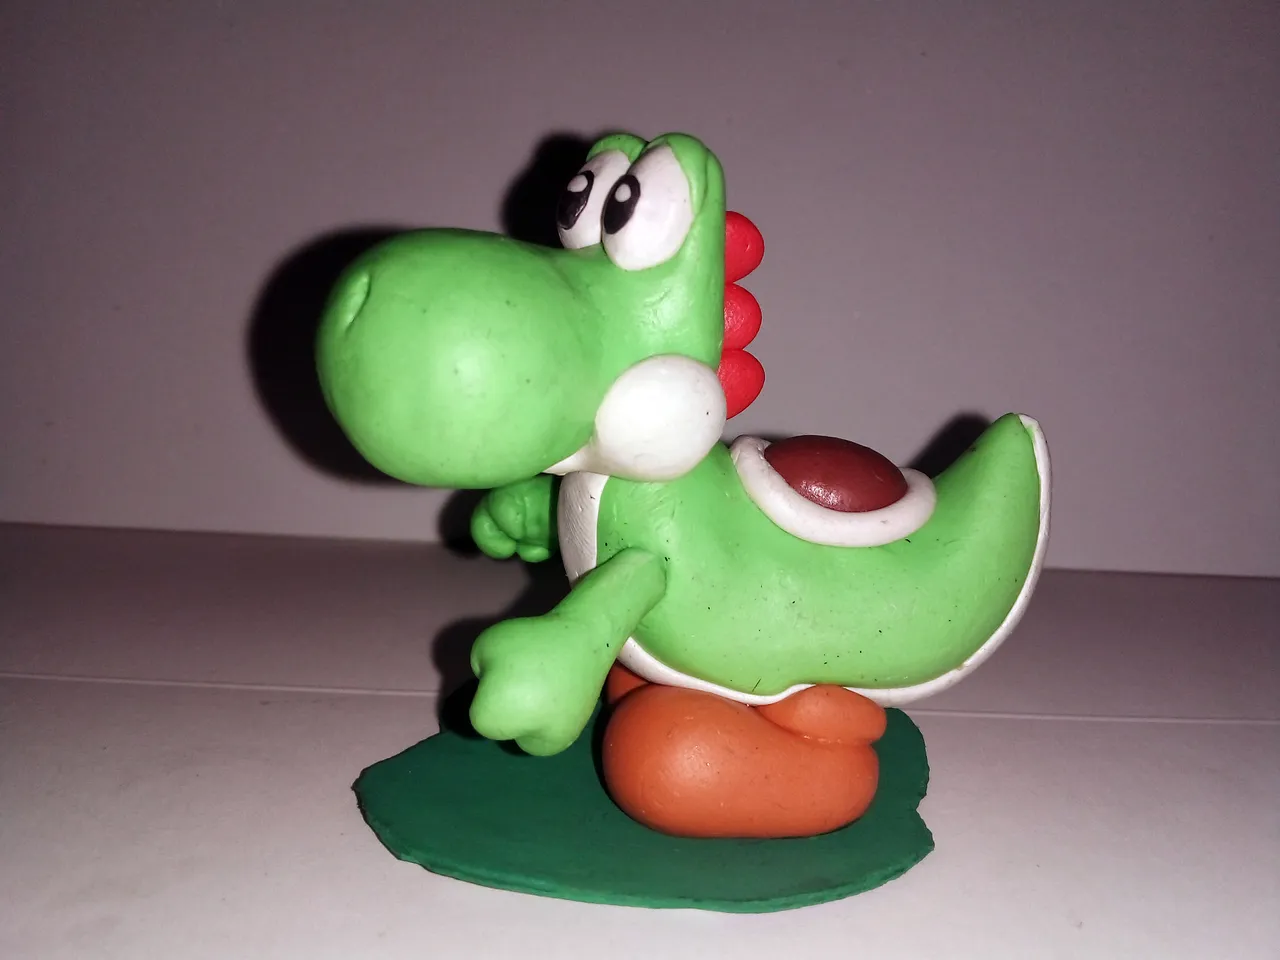
Below you can see some pictures of the final result:
Lo último que hice fue hacer los ojos y los parpados, terminándo así la figurita.
A continuación pueden ver unas fotografías del resultado final:

What did you think? I loved the final result, what about you?
Although I don't know if I will make them in this section, I intend to make several characters from the Mario game, such as Toad, Princess Peach, among others. I have already made two characters, Yoshi and Mario, so I should finish the collection....
You can see the Mario figure following this link:
@gaboamc2393/super-mario-64-sculpture-eng
Well folks, that's all for now. It was a pleasure to have shared this video tutorial and this summary with you.
If you like you can leave your opinions below in the comments, as always I will be happy to read them. With nothing more to add, I'll say goodbye then....
See you next time!
¿Qué les pareció? A mi me encantó el resultado final, ¿y a ustedes?
Aunque no sé si los haré en esta sección, tengo la intención de hacer varios personajes del juego de Mario, como Toad, la princesa Peach, entre otros. Ya he hecho a dos personajes, Yoshi y Mario, así que debo terminar la colección...
Puedes ver a figura de Mario siguiendo este enlace:
@gaboamc2393/super-mario-64-sculpture-eng
Bien amigos, esto ha sido todo por ahora. Fue un placer haber compartido este video tutorial y este resumen con ustedes.
Si gustan pueden dejar sus opiniones abajo en los comentarios, como siempre estaré encantado de leerlos. Sin más que agregar, me despido entonces...¡Hasta la próxima!

Traducido con DeepL
Source Music:
Obra: Un Día Para Recordar
Música de https://www.fiftysounds.com/es/
Gabo Play Megaman x4 #7
Adventure Weekend
Green & Gray


▶️ 3Speak