*****English version*****
(Abajo está la versión en español)
Welcome to the second installment of learn with Gabo. In the previous installment I showed you how to make a small plasticine berengena following a series of fairly simple steps.
You can read Learn with Gabo #1 by following this link:
@gaboamc2393/learn-with-gabo-1-aprende-con-gabo-1-engesp
That post is the first in a series of posts that are geared towards teaching plasticine molding, or similar materials, for beginners. In this post we will do something a little more complicated than a berengena, we will make a couple of teddy bears in the style of a teddy bear:

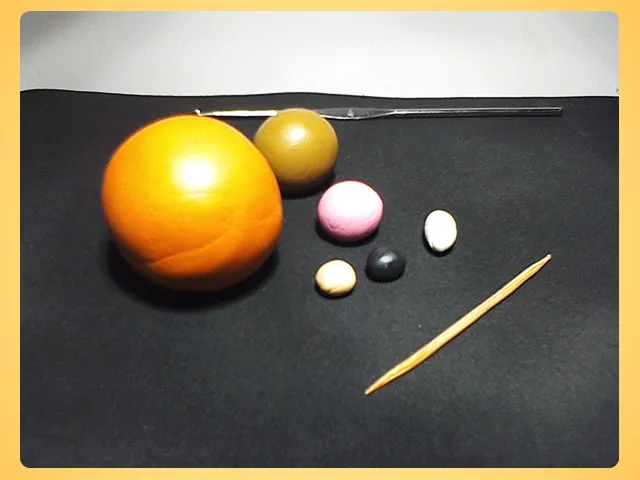
As it should be done with every tutorial, first we must mention the materials to work with, in my case they were the following:
*Plastiline of various colors.
*Knitting needle.
*Wooden sticks.
*The hands.
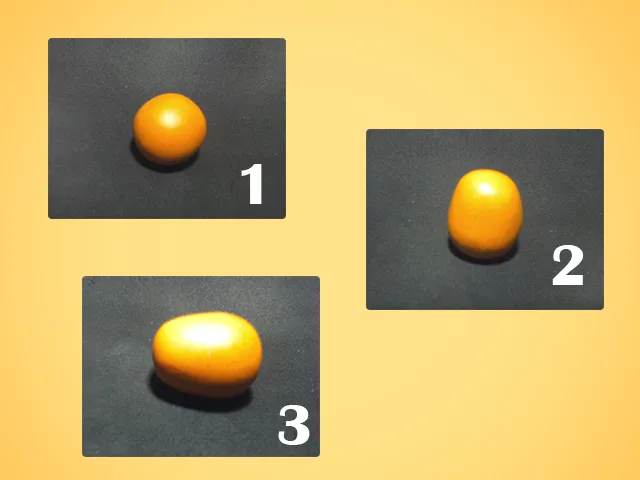
As I mentioned in the previous lesson, most of the complicated shapes of a figure arise from a sphere, this case would be no exception. First we make a sphere for the body of our teddy bear (1), then we roll it on a surface to elongate it, leaving one side flatter than the other (2). Next, we lay down the torso of our teddy bear and flatten it a little, not too much (3).
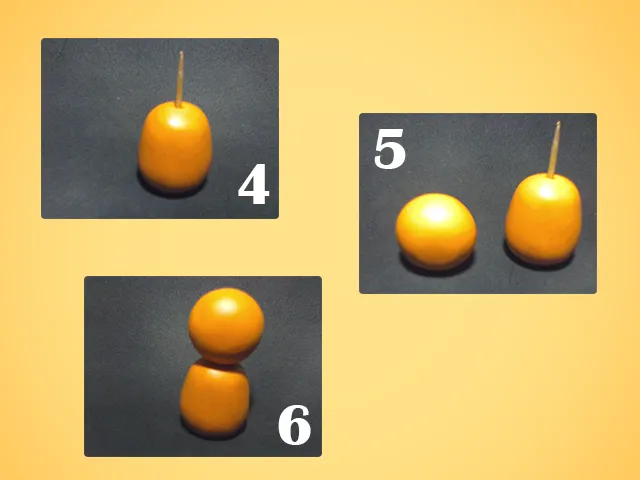
Once the torso is ready, we place a toothpick in the middle, to fix what will be the head (4). The next step is much simpler, we make a sphere of the same size as the one we used for the torso (5) and fix it in place (6).
It is time to make the muzzle. To do this we make another sphere of a light brown color (7 and 8), lay the sphere down and flatten it against a flat surface (9). As shown in the image (10 and 11), it should be flat on one side and rounded on the other.

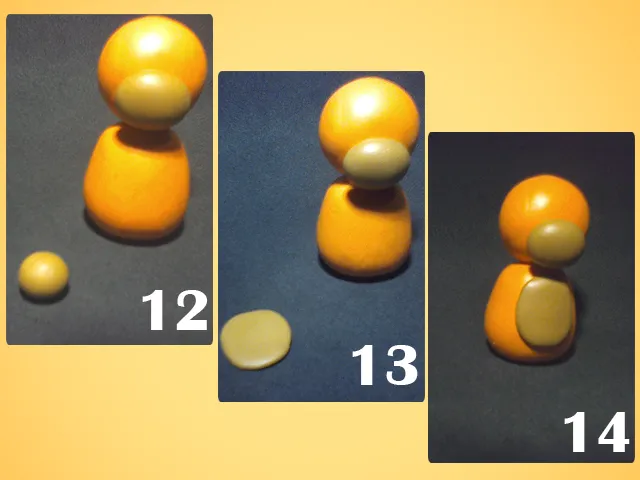
Put the snout in place and make another sphere of the same color, a little smaller (12). Flatten the sphere as if it were a tortilla, which will be the belly of our bear (13) and put it in place (14).
Now that we have the torso and part of the head ready, let's go with the legs. To do this we will make two orange spheres (15), then we mold them into a tubular shape (16) and with the help of the needle, we flatten it in the place where we want the foot of our teddy bear (17).

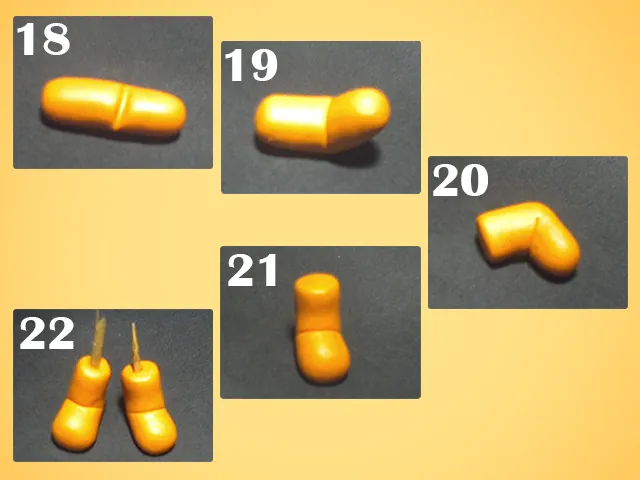
Next, take the tubular-shaped plasticine and fold it right in the incision we made with the needle (18 and 19). We fold it until it looks like a leg and flatten a little the side that will be attached to the torso (20). We must flatten the foot, so that it remains upright when we place it on a flat surface (21), then we place sticks to fix each leg to the torso (22).
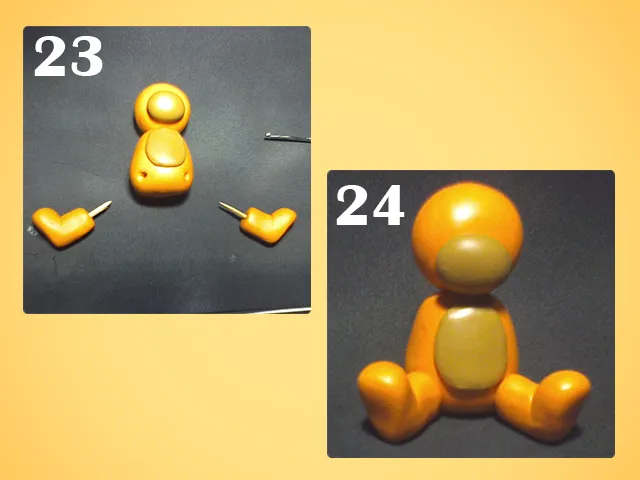
With the help of the same knitting needle, we make the holes where we will fix the legs (23), then we sit our bear to make sure it stays seated (24).
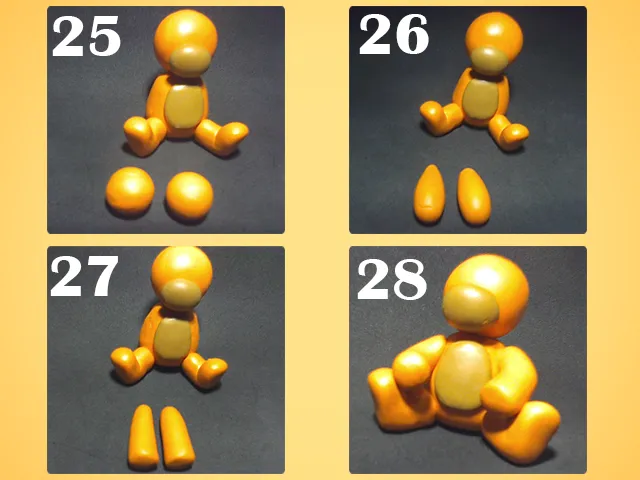
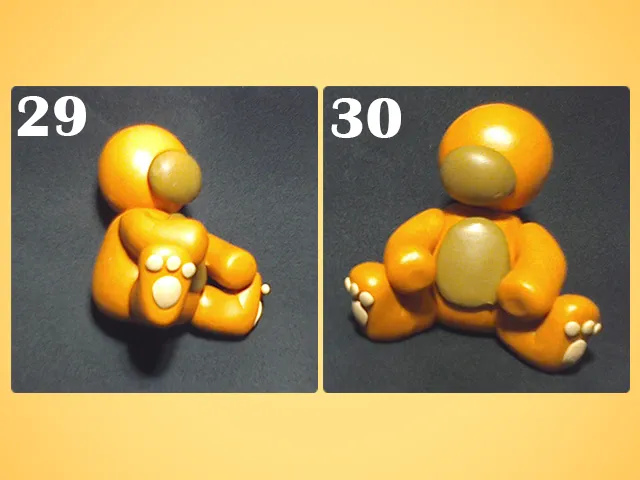
Time to make the arms. It is a procedure similar to the one we did for the legs; two orange spheres (25), we give them water drops shapes (26), we lengthen them a little more and flatten what would be the bear's fists (27). The next thing is to fix it on the torso, using a pair of toothpicks, just as we did with the legs (28).
To make the footprints on our bear's hind feet we simply use different sized spheres and flatten them against each foot, as shown in the images below:
Now that we have the whole body ready, we must continue with the bear's head. For the eyes and nose, we will simply take small pieces of plasticine; a flattened triangle for the nose (31) and a couple of flattened spheres for the eyes (32).
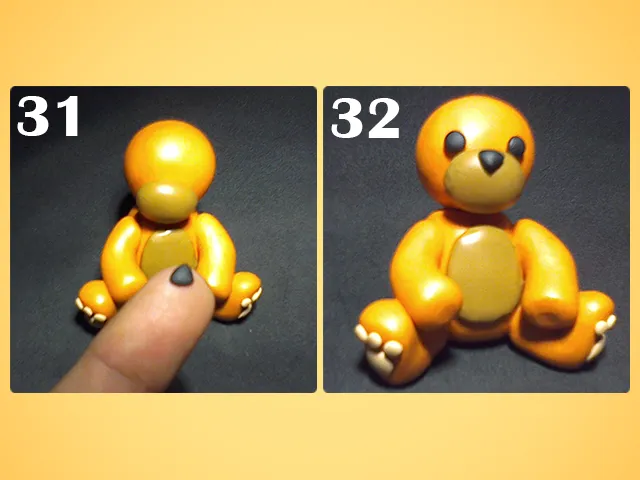
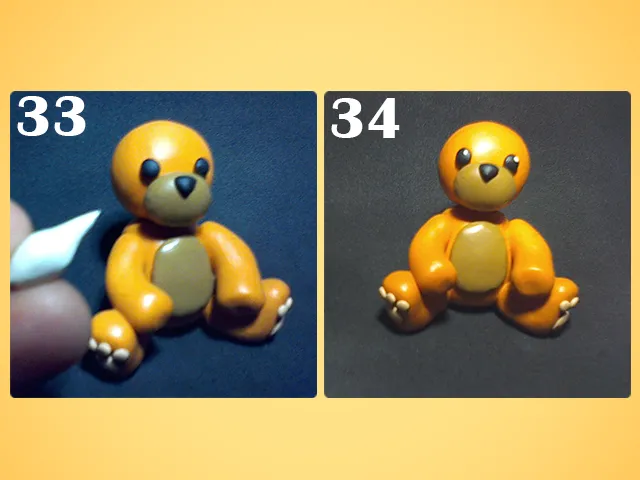
To give a more adorable touch to our bear, we will use a small ball of white plasticine, which we will place in a part of the eye to simulate brightness.
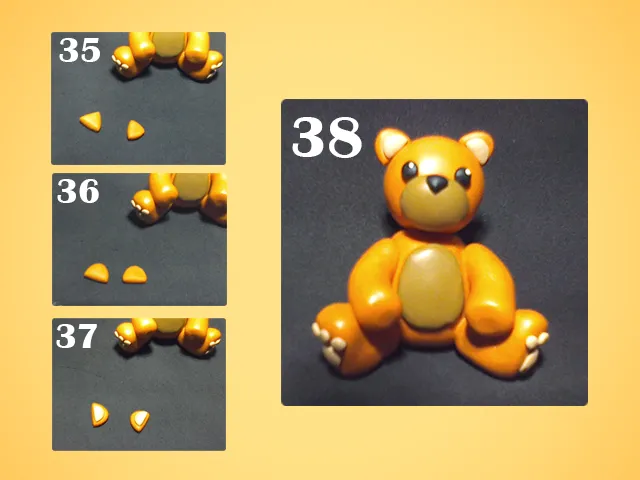
To make the ears we simply make two triangles of orange plasticine (35) and round one of the corners of each one (36). We use the same color we used for the footprints and make a tortilla, cut it in half and place one half in each orange ear (37). The last step to finish our bear is to simply pin the ears in place.
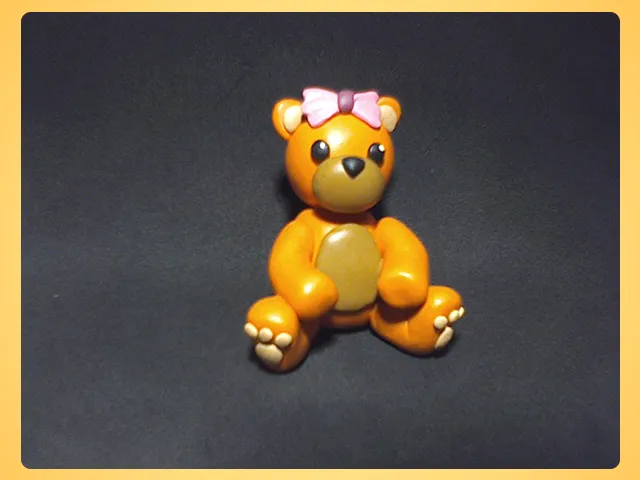
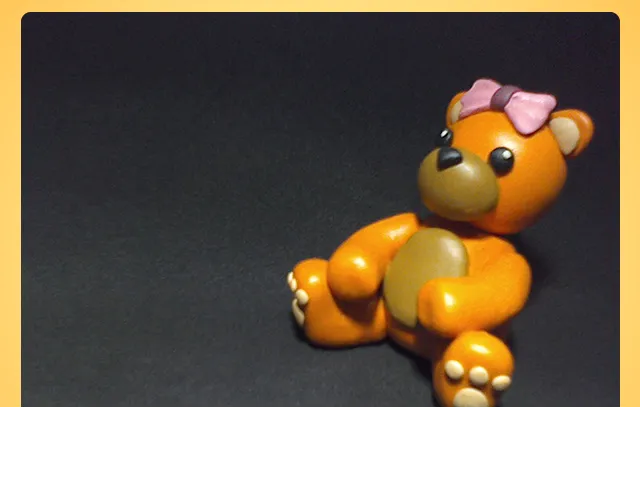
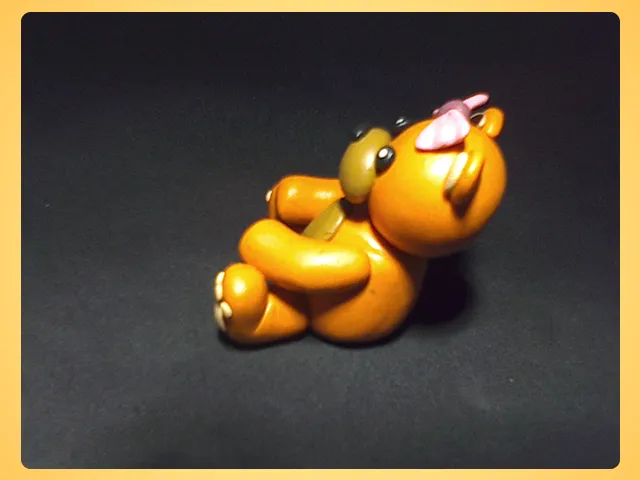
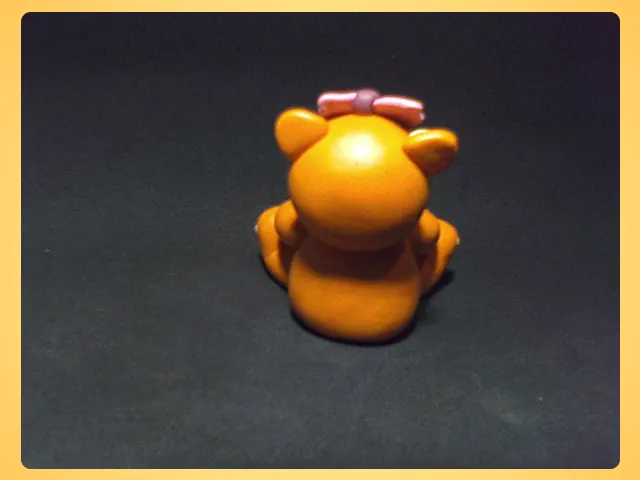
This way our teddy bear is finished. I made a little bow that I placed on his head, this is simply to make a small sphere and on each side place a plasticine triangle. Here are some pictures so you can see it from different angles:
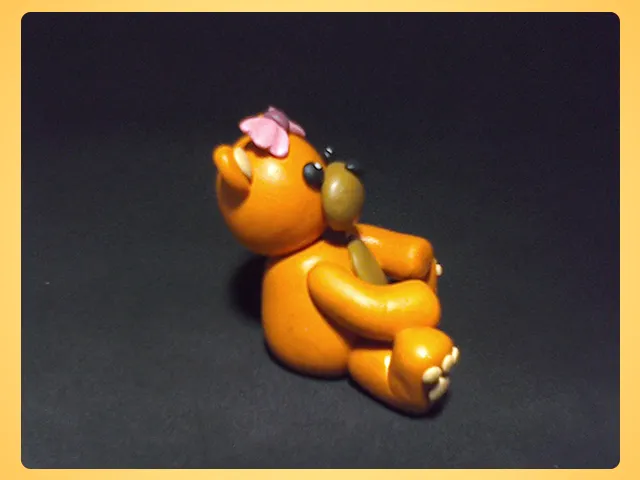

You may remember that the teddy bear in the main image has a heart. I will show you how I did it. Again we make a red sphere (39), we make it in the shape of a water drop (40) and at the rounded end we flatten it in half with a toothpick or, as I did, with a knitting needle (41).

He looks adorable our teddy bear with his heart and bow on his head.

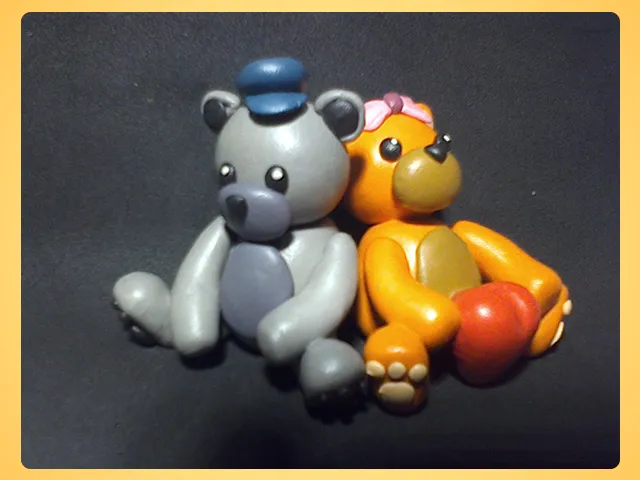
All of the above steps can be repeated with different colored play dough to make more bears. Instead of a bow, you can make other accessories such as a cap or a hat. I show you below the little companion I made for the first bear.


What do you think? These bears can be made following a series of simple steps, using basic shapes that we learned in the previous tutorial. If you dare to make them, I'd love to see your work in the comments, I'd be happy to see it.
I'm open to suggestions for future tutorials, so if you like to leave your opinion, you can do it in the comments. With nothing more to add, I'll say goodbye then....
See you next time!
*****Versión en español*****
Bienvenidos sean todos a la segunda entrega de aprende con Gabo. En la entrega anterior les mostré cómo se puede hacer una pequeña berengena de plástilina siguiendo una serie de pasos bastante sencillos.
Puedes leer el Aprende con Gabo #1 siguiendo este enlace:
@gaboamc2393/learn-with-gabo-1-aprende-con-gabo-1-engesp
Aquella publicación es la primera de una serie de post que estan orientados a enseñar el moldeado en plastilina, o materiales similares, para principiantes. En esta publicación haremos algo un poco más complicado que una berengena, haremos un par de ositos al más puro estilo de un peluche:
Como se debe hacer con todo tutorial, primero hay que mencionar los materiales de trabajo, en mi caso fueron los siguientes:
*Plastilina de diversos colores.
*Aguja de tejer.
*Palillos de madera.
*Las manos.
Como mencioné en la lección anterior, la mayoría de las formas complicadas de una figura surgen a partir de una esfera, este caso no sería la excepción. Lo primero es hacer una esfera para el cuerpo de nuestro osito (1), luego la hacemos rodar sobre una superficie para alargarla, dejando un lado más plano que el otro (2). Seguidamente, acostamos el torso de nuestro osito y lo aplastamos un poco, no demasiado (3).
Listo el torso, le colocamos un palillo en el medio, para fijar lo que será la cabeza (4). El siguiente paso es mucho más simple, hacemos una esfera del mismo tamaño que la que usamos para el torso (5) y la fijamos en su lugar (6).
Toca hacer lo que viene siendo el hocico. Para ello hacemos otra esfera de un color marrón claro (7 y 8), acostamos la esfera y la aplastamos contra una superficie plana (9). Como se observa en la imagen (10 y 11), esta debe quedar plana por un lado y con forma redondeada del otro.
Colocamos el hocico en su lugar y hacemos otra esfera del mismo color, un poco más pequeña (12). Aplastamos la esfera como si fuese una tortilla, la cual será la panza de nuestro osito (13) y lo colocamos en su lugar (14).
Ahora que tenemos listo el torso y parte de la cabeza, vamos con las piernas. Para ello haremos dos esferas naranjas (15), luego las moldeamos hasta que tenga forma tubular (16) y con ayuda de la aguja, la aplastamos en el lugar en el que queremos que quede el pie de nuestro osito (17).
Lo siguiente es tomar la plastilina con forma tubular y doblarla justo en la incisión que hicimos con la aguja (18 y 19). Doblamos hasta que parezca una pierna y aplastamos un poco el lado que estará adherido al torso (20). Debemos aplanar el pie, de manera tal que este se quede de erguido cuando lo coloquemos sobre una superficie plana (21), luego le colocamos palillos para fijar cada pierna en el torso (22).
Con ayuda de la misma aguja de tejer, hacemos los orificios donde fijaremos las piernas (23), luego sentamos a nuestro oso para asegurarnos que este se queda sentado (24).
Hora de hacer los brazos. Es un procedimiento parecido al que hicimos para las piernas; dos esferas color naranja (25), les damos formas de gotas de agua (26), las alargamos un poco más y aplanamos lo que serían los puños del oso (27). Lo siguiente es fijarlo en el torso, usando un par de palillos, tal como hicimos con las piernas (28).
Para hacer las huellas en las patas traseras de nuestro oso simplemente usamos esferas de distintos tamaños y las aplastamos contra el cada pie, tal como se muestra en las imágenes a continuación:
Ya que tenemos todo el cuerpo listo, debemos seguir con la cabeza del oso. Para los ojos y la nariz, simplemente tomaremos pequeños trozos de plastilina; un triangulo aplastado para la nariz (31) y un par de esferas aplastadas para los ojos (32).
Para darle un toque más adorable a nuestro oso, usaremos una pequeña pelotita de plastilina blanca, la cual colocaremos en una parte del ojo para simular brillo.
Para hacer las orejas simplemente hacemos dos triángulos de plastilina naranja (35) y redondeamos una de las esquinas de cada uno (36). Usamos el mismo color que usamos para las huellas y hacemos una tortilla, la partimos a la mitad y colocamos una mitad en cada oreja naranja (37). El último paso para terminar nuestro oso es simplemente fijar las orejas en su lugar.
De esta manera nuestro osito está terminado. Yo le hice un pequeño moño que le coloqué en la cabeza, esto es simplemente hacer una esfera pequeña y a cada lado colocarle un triangulo de plastilina. Les dejo unas fotos para que lo vean desde distintos ángulos:
Tal vez recordarán que el osito de la imagen principal tiene un corazón. Les mostraré cómo lo hice. Nuevamente hacemos una esfera de color rojo (39), la hacemos con forma de gota de agua (40) y en el extremo redondeado la aplastamos a la mitad con un palillo de manera o, como yo lo hice, con una aguja tejer (41).
Se ve adorable nuestro osito con su corazón y su moño en la cabeza.
Todos los pasos anteriores se pueden repetir con plastilinas de distintos colores para hacer más ositos. En lugar de un moño, se pueden hacer otros accesorios como una gorra o un sombrero. Les muestro a continuación el compañerito que hice para el primer osito.
¿Qué les ha parecido? Estos ositos se pueden hacer siguiendo una serie de pasos sencillos, usando formas básicas que aprendimos en el tutorial anterior. Si se animan a hacerlos, me gustaría ver sus trabajos en los comentarios, yo estaría encantado de verlos. Estoy abierto a sugerencias para futuros tutoriales, así que si gustas dejar tu opinión, puedes hacerlo en los comentarios. Sin más que agregar, me despido entonces...
¡Hasta la próxima!

Imagenes editadas con Photoshop
Fotos tomadas con tablet HP stream 7
Traducido con DeepL
Photos edited with Photoshop
Photos taken with HP stream 7 tablet
Translated with DeepL
Últimos tres post/Last three posts:
My elusive visitor / Mi escurridizo visitante
Tutorial: Personaliza tus fuentes
Cuarenta Cuentos #1 - Barrabás