In the case of our physical health and well-being: It's true that hip's dont lie!
Your hips are a great indicator of your physical health. There are over 20 muscles which attach directly to the hips and the hips contain more ligaments than almost anywhere else in the body!
Your hips are very complicated - Anatomically speaking, they are 3 different bones which have fused together over time to become one large bone known as the OS Coxal, Hip Bone, or Innominate Bone (Paradoxically meaning "The bone with no name" although it has actually has 3).
The hips articulate directly with the Sacrum, and the Femoral Heads of the Upper Legs.
They help to provide structural support to the body and they contain the reproductive organs, as-well as house the elimination system. They are also an important attachment point for many muscles (For example the Abdominal Muscles) and are designed specifically for weight bearing.
One small misalignment in your hips can not only cause hip pain, but can compromise the structure of the entire body. What may appear to be a minor problem in the hips can manifest itself as problems in the knees, spine or even higher up in the shoulders or neck.
The hips are considered our true core - Many fitness trainers and professionals will say the abdominal muscles are the "core" of the body - But medically and anatomically speaking, the hips are actually considered the true core of the body, and have vital roles in all forms of movement.
With hip replacement surgery on the rise, and so many people complaining of SI joint pain in today's modern society, it's no wonder yoga classes are being filled with people looking for relief, and quite frankly - its working.
Here are 5 Yoga poses specifically designed to help to open up the hips, correct misalignment, and massage the soft tissue surrounding problem areas.
Pose Number 1: Baddhakonasana
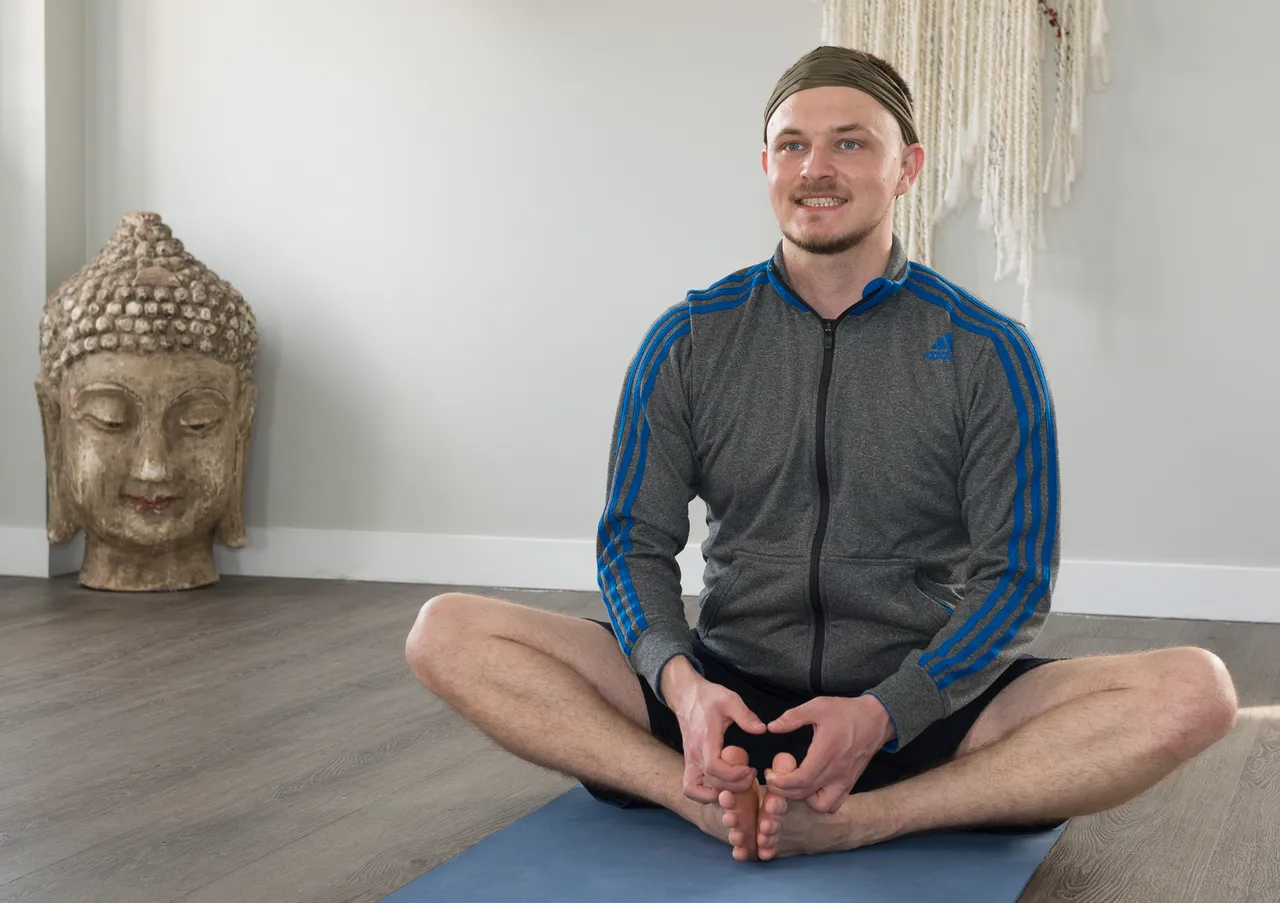
For seasoned yogi's and yogini's - This one is probably pretty obvious.
Baddhakonasana is one of the simplest and easiest poses to open the hips, and it opens them in a very easy and direct way.
Baddhakonasana is simply performed by finding an upright seated position, bringing the soles of the feet together, and allowing the knees to sway out to the sides. It may feel comfortable to grasp either the toes or ankles to help support an upright position, as you fold forward intensifying the stretch.
For people who are having difficulty, you can adjust the intensity and depth of the pose by either bringing the feet closer to you or further away. This can make it easier on the knees, as-well as deepen the stretch on the inner thigh (Stretching through the hip flexors and adductor muscles of the leg).
This is also a great stretch for the piriformis muscles which lie deep to the gluteal muscles posteriorly.
If your looking for a more therapeutic variation - You can also try Supta Baddhakonasana (Reclined Bound Angle) - Which essentially just means your doing the same thing - But laying down on your back.
Pose Number 2: Winged Dragon Pose
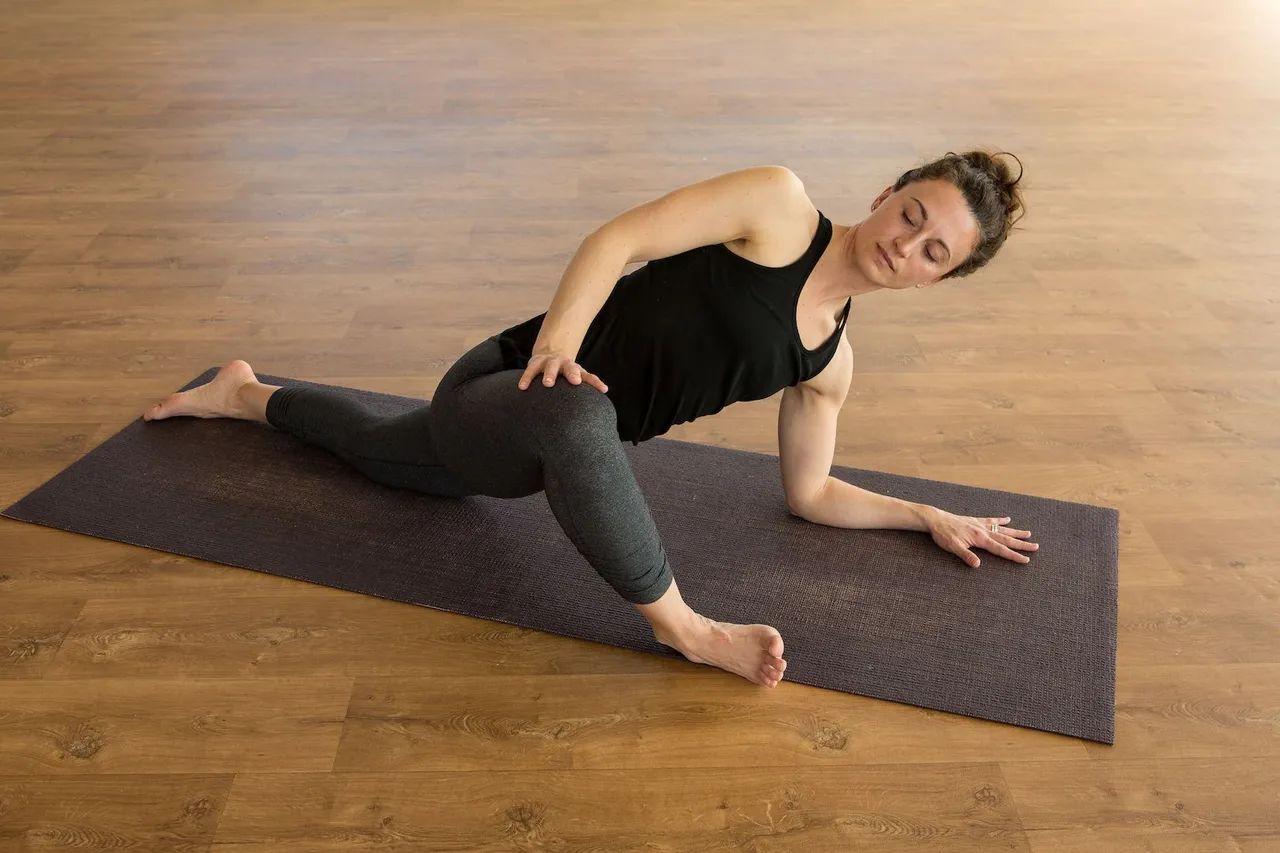
This pose feels about as uncomfortable as it looks. It's hard to believe many yogi's will hold this pose for as long as 15 minutes at a time in a traditional Yin Class. However, luckily for you, in your typical Hatha Yoga class you will only be holding this pose for 1-2 minutes at a time (if not less).
Winged Dragon is easiest performed by coming to a tabletop position.
From here, you will step one of your feet up to meet your hands, bringing both hands to the inside of the foot, and allowing the knee to sway out to the side.
To intensify, come down onto the fore-arms and try not to scream in agony as your hip is pulled from the socket!
This pose pulls the femoral head away from the acetabulum (fancy way of saying "Hip Joint"), allowing synovial fluid to fill the joint cavity providing better lubrication than when standing.
It also stretches through the extra-capsular ligaments of the Hip Joint, and works deeply into the hip flexors, adductor muscles, IT Band, and Gluteal muscles.
As you cringe in horror in this awkward and intense stretch - You can know it was for a good purpose as the deep muscles and ligaments of the hip find release and are restored to harmony and alignment before finally - ahhhhh - getting out of the pose! (My favorite part)
Pose Number 3: Eka Pada Rajakapotasana (Pigeon Pose)
A long sanskrit name for a fairly simple pose. A pose which is at times feared by the inexperienced, but then as it is gradually settled into - Loved by all.
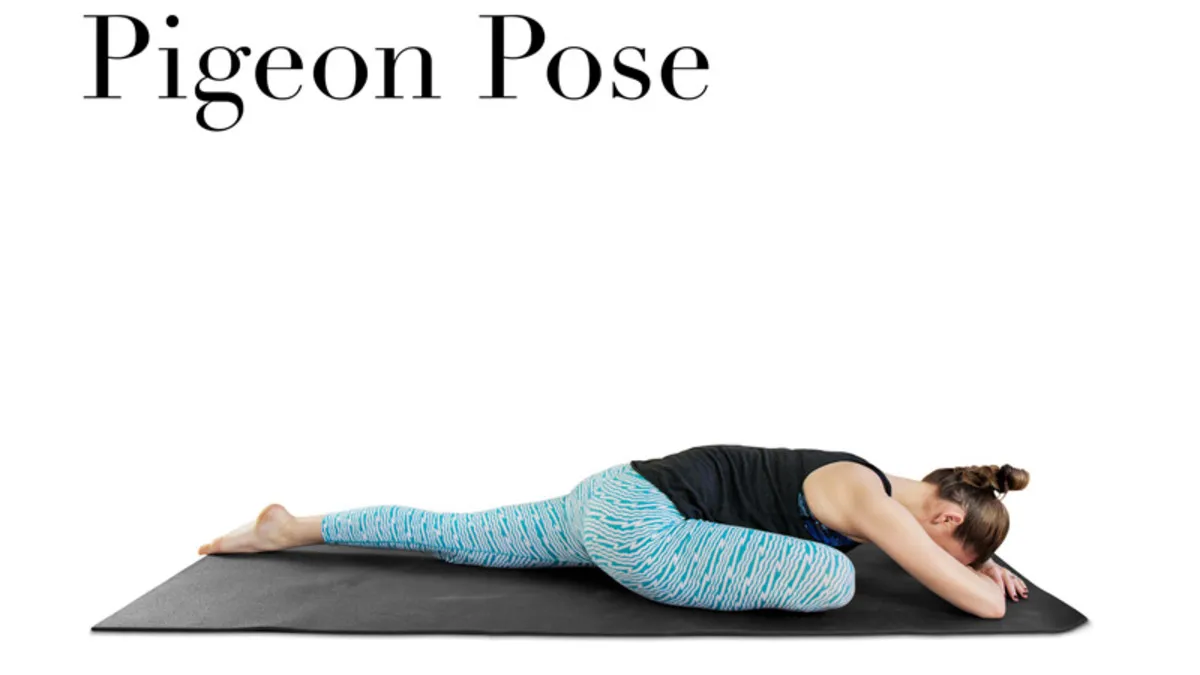
Pigeon Pose is easiest performed by coming into a plank position.
From here, you will bring one of your shins out in front of you and across the mat, so that it runs either horizontally or obliquely infront of you. You will lower your back knee, and untuck the toes so that your opposite hip is in extension.
You can keep the palms of your hands planted, and the trunk of the body lifted, or you can do what I like to do and lower you fore-arms to the mat parallel to one another before dropping the crown of the head down, elongating through the back of the neck.
Pigeon pose is an excellent pose because it helps release so much tension from so many places in the body. Many yogi's report a feeling of release through the backs of the shoulders, but the real magic happens at the hips.
When your in pigeon pose your front leg is causing the gluteal muscles to enter into a deep stretch. This works not only into the well-known gluteus maximus (aka your butt muscle) but also into the gluteus medius and minimus.
Because of the position of the front leg, and the close relationship your gluteal muscles have with your I.T. Band, you are going to feel a deep stretch through the outer-thigh as well. This is excellent for the Iliotibial Band, as it is not actually muscle, but a structure of fascia and connective tissue which help to add stability and support for the body. Working into this deep connective tissue helps to increase the flexibility and elasticity of the fascia and surrounding systems. Furthermore, coming into a deep gluteal stretch is important as the gluteal muscles are actually some of the most strong and important muscles in the body.
If that isn't enough the opposing hip is brought into a deep extension - Releasing through the quadriceps and through the tensor fascia latae - Which is also an important part of the Iliotibial Tract (aka I.T. Band).
Pose Number 4: Prasarita Padottanasana (A, B, C, or D)
For the purpose of this pose, we are going to go into detail and only cover Prasarita Padottanasana D.
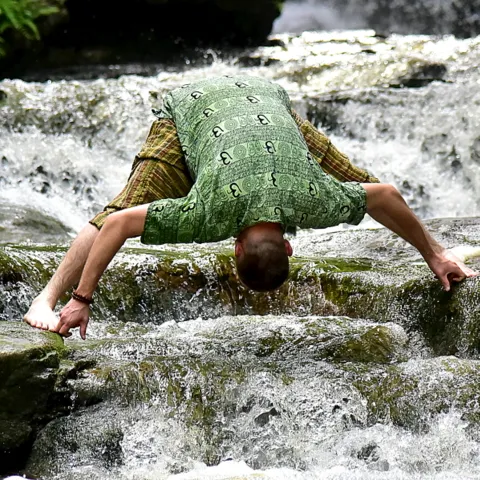
And yes, that is a picture of Dan The Yoga Man holding the dreaded Wide Legged Forward Fold on the slippery rapids of one of Canada's awesome waterfalls.
With patience and determination, you can too! I haven't been practicing Asana's for nearly as long as you may think. If I can do it, you sure can too!
Prasarita Padottanasana (Or the Wide Legged Forward Fold) can be a bit tricky for some - Especially if you have tight hamstrings.
Your Hamstrings are intimately connected to the hip bones and actually have their origin's on the posterior side of the Ischial Tuberosity (Which is a fancy way of saying your "sit bones"). This is why alot of hip openers can be challenging for those who have tight hamstrings. We will go over variations in a minute, but for now, I'd like to explain how to properly perform Prasarita Padottanasana D.
From a neutral standing position, we are going to step our right leg back 4 to 4.5 feet, bringing both feet parallel to one another, and placing our hands on our hips.
With an inhale we will find a backbend (which is excellent to counterpose the forward fold), and with our exhale we are going to fold forward until we grasp both big toes with the index and middle finger.
From here; Inhale - Find length in the spine.
On the exhale we are going to fold forward even deeper until the crown of our head is pointing down towards the ground and our elbows have swayed out to the sides. Keep going until the elbows stack over-top of the wrists, and you find that your arms have taken a 90 degree angle at the elbow.
Prasarita Padottanasana is an excellent way of not only opening up the hips themselves, but also stretching through the inner thighs and hamstrings.
This helps to free up the hip joints a little more indirectly. The adductor muscles (Commonly known as hip flexors) all originate directly from the hips, in the area of the pubis and pubic symphysis, and the Hamstrings originate from the Ischial Tuberosity and travel just behind the Femur.
Tight hamstrings and Hip-Flexors are often a contributing factor to hip health, so this pose helps to stretch and strengthen them so that we can have happy, healthy, and hardy hips in no time!
For people with extremely tight hamstrings or who have a hard time folding forward - I have just the remedy.
Bend the knees!
You are still getting an excellent hip opener, and working into the adductor muscles of the inner thigh.
Another way to make the fold easier is to keep the hands on the hips, while pointing the elbows up towards the sky, instead of grasping the big toes (this variation is known as Prasarita Padottanasana B).
Pose Number 5: Balasana (Childs Pose)
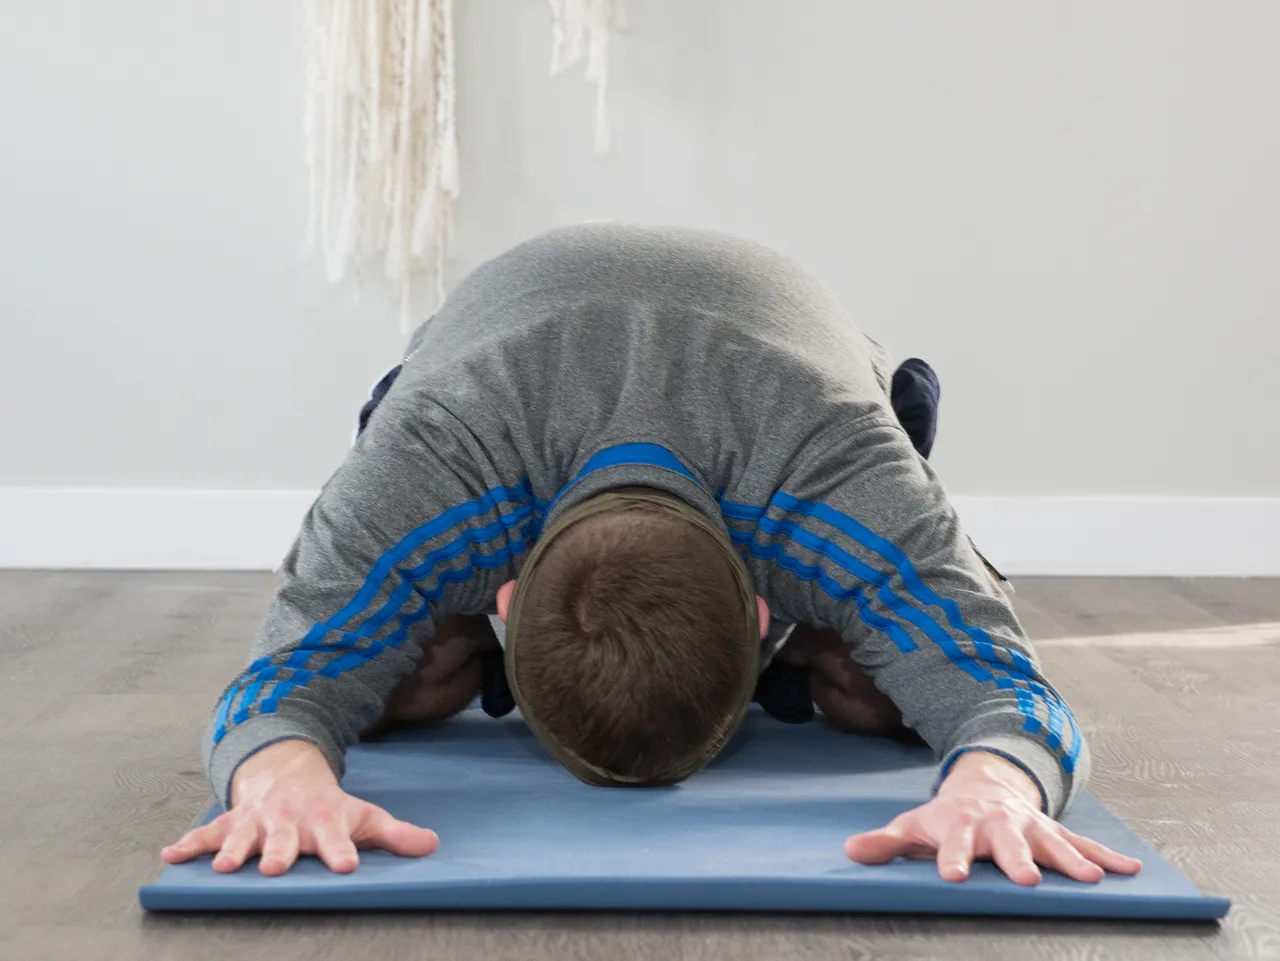
Balasana is often known by almost every yogi as being one of the most comfortable, easy, and therapeutic poses there is. It's also a great resting pose for in-between practice in place of a down-dog.
Balasana is easiest performed from coming to a tabletop position.
From here, you will lower the hips ontop of the heals and spread the knees to about a mat-width distance apart. Arms can come out in front as pictured above, or for those with strong, broad shoulders you can bring the arms down towards the heels to help release tension from the upper back.
Balasana is a great pose as it works directly into the gluteal muscles, the hamstrings, quadriceps and helps to free up the hip joints.
It is easily performed by nearly anybody and has many different variations to accommodate to different body types.
It is relaxing, and is one of the poses which can help with the practice of Dhyana (Internalization of the mind) as one feels safe and secure in this snug position, allowing one to go deeply inward and to still the mind, which is ultimately what the practice of yoga is all about!
Thanks so much for taking the time to read this article, I hope it helps you on your journey to healthier hips, and to a better over-all well-being. Physically, mentally, and emotionally.
In future articles we will go more in-depth about the anatomy of the hips, helping you to understand deeper what the hips are, how they function, and their purpose in the body. The hips are one of the most complicated areas in the body, and one article is truly not enough to go into detail. We will also break down poses piece by piece, allowing you to deepen your practice and gain a deeper understanding of the Asanas.