One of the things I was most excited about when we started planning our move to the farm was making wine. My Momma used to make it when I was little girl out of grape juice that she had canned. I was planning to make blackberry and peach because we have both growing on our farm. We have a couple of fields with blackberries and an old pathway is now covered in them. We foraged all those spots last year. Then in mid-May last year we had a big, hard frost and many of the blooms on the peach tree got bit. Later on, hornets built a nest in the peach tree and I wasn’t going near it. Just as the peaches ripened one of the resident bears came and tore the nest down, or that is what we think. We found pieces of the nest on the ground. I guess the bear ate the rest of the nest AND all of the peaches except a couple of small pans full. So, Blackberries it was! Everyday I picked blackberries. Buckets, baskets or just handfuls.
I read thru about 50 recipes and talked to several people who make Homebrew and came up with my own version. I have made 3 batches with this recipe and they have all 3 turned out a little different but quite tasty. Please make sure you always make home brew with fresh yeast or your initial fermentation may give poor results or develop issues.
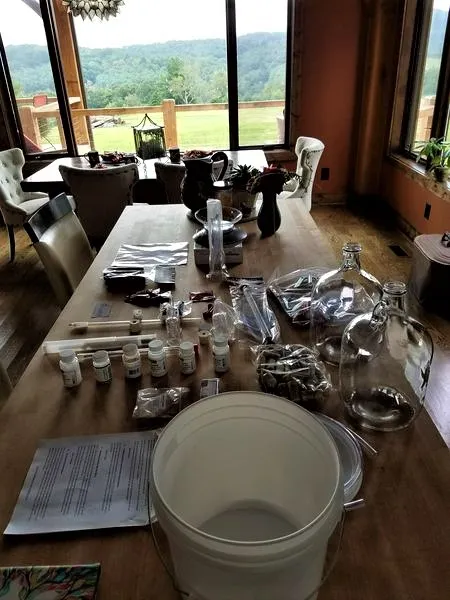
I purchased a wine kit on Amazon with pretty much everything you need, plus some things I have not used but I was happy to have it just in case with these first batches. I also purchased Wine Bottles and an extra Carboy to rack into. You can use wine bottles you have saved but be sure to sanitize. You will screw up your brew in a second using utensils or supplies that might have bacteria on them. I run everything thru scalding, sudsy water and then use Star Sans cleaner which I bought at Amazon too. I rinse very well for a final time with HOT water. If you have a dishwasher with Sanitize cycle, go for it :) I cannot say enough about sanitizing when you are brewing.
Ingredients
4.5 pounds or roughly 18 cups of blackberries
1 tsp pectic enzyme
1 tsp yeast nutrient
Campden tablets
Red Wine yeast
3 pounds or 6 cups of sugar
Yeast
Yeast Nutrient
Equipment
Fermenting Bucket
2 carboys or Gallon containers with with airlocks
Corks
Bottles
Cheesecloth or muslin bag
Sanitizer (I use star San from Amazon and I rinse)
Stainless steel pot
Stainless steel strainer or Sieve
Funnel
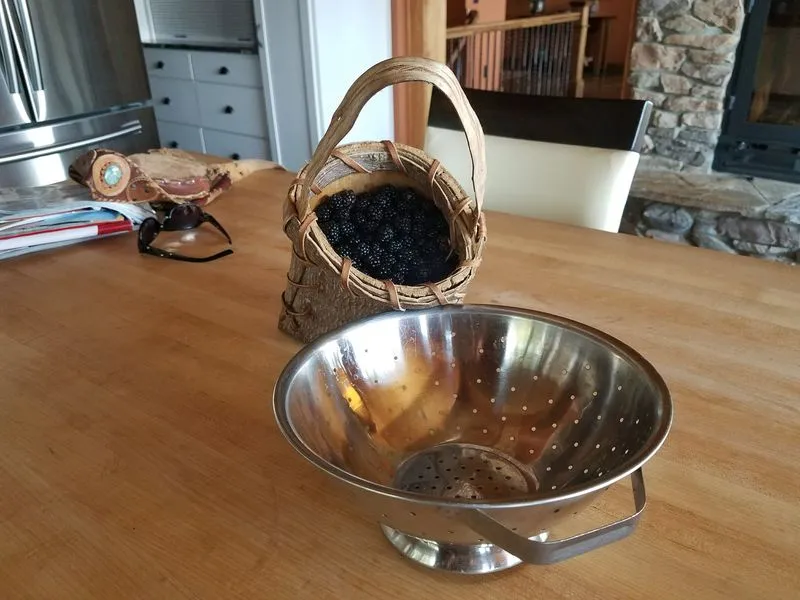
I lightly rinse my berries and remove any debris and any rotten or really soft berries.
Crush the 4.5 pounds of berries slightly in a container to release juices. I use my fermenting bucket for this step and I crush those berries with my sanitized tater masher. Pour 2 pints of boiling water over the berries. Once the water cools completely down, add one tsp pectin enzyme and a crushed campden tablet then stir in well. Pectic enzymes help with the extraction of body and color from the pulp. The enzymes also help the clarification process. Campden tablets are a sulfur-based product basically used to sterilize wine, or beer or cider. It keeps the wild yeast from growing and kills bacteria. It is also used to get rid of chlorine and chloramine from drinking water. Cover container securely and let soak overnight or at least 12 hours.

Next AM, boil 2.5 pints water. Dissolve 3# sugar in the boiling water on stove. Once dissolved pour over the berries and let sit until cooled completely. Has to be cooled for next step or you will kill your yeast. So, be patient until it cools :) Once cooled, Add your pack of Red wine yeast and the yeast nutrient. Give it a real good stir with your sanitized tater masher. Cover the brew bin (bucket) with its lid and leave in a warm, dark place for 5 days. This 5 day fermenting process breaks down berries leaving you with a sort of liquid. Stir twice daily or what is referred to as pushing the must down. It will start smelling like wine real fast and that is exciting!
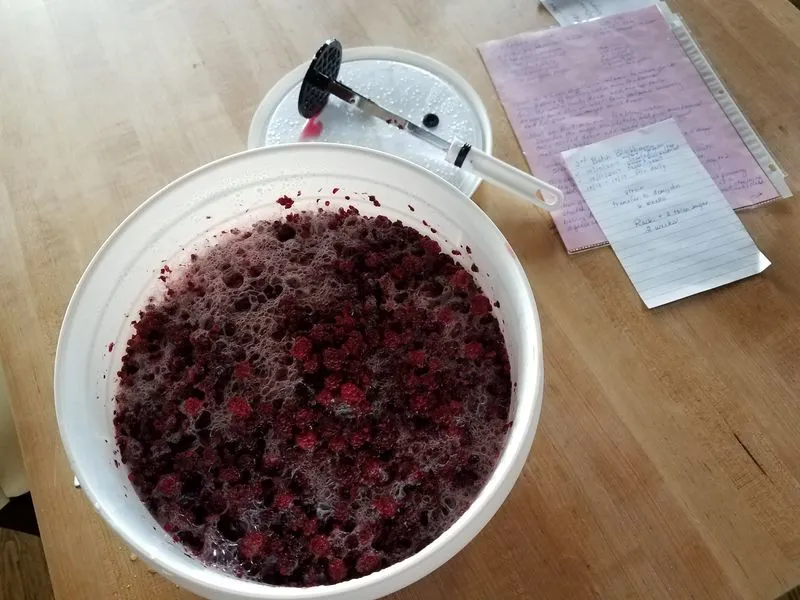
When you open your fermenting bucket to stir, it will look like this. Your berries will have risen to the top.
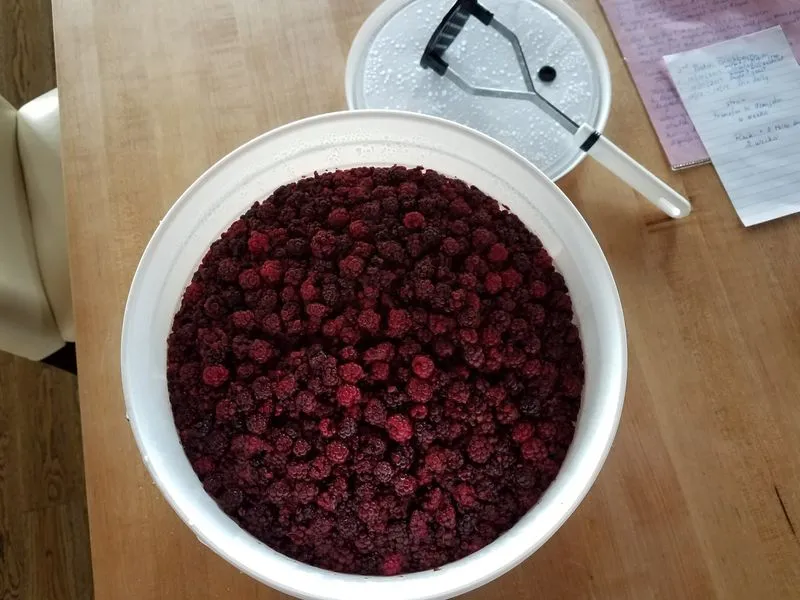
I take my sanitized tater masher and push the must down. Bubbles will come to the top and you will be able to watch it ferment. So cool!
Optimum fermenting temperature is 75F. We were not quite that warm and had no problems. I ferment my brew in our mud room which is kinda dark and the temp stays around 65F. Check your brew closely after 4 days. You want loose liquid, not mushy. You can leave another day or 2 if needed. When you are happy with the consistency, strain your brew into a secondary container. I use my Mommas Old School Strainer over a sanitized aluminum pot.
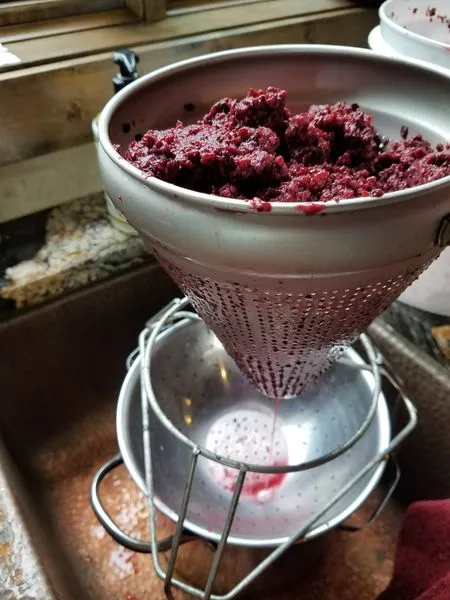

Then I strain a in a muslin bags or cheesecloth. I put the berries in and I squeeze the juice out. Repeat straining until your brew is as clear as possible.

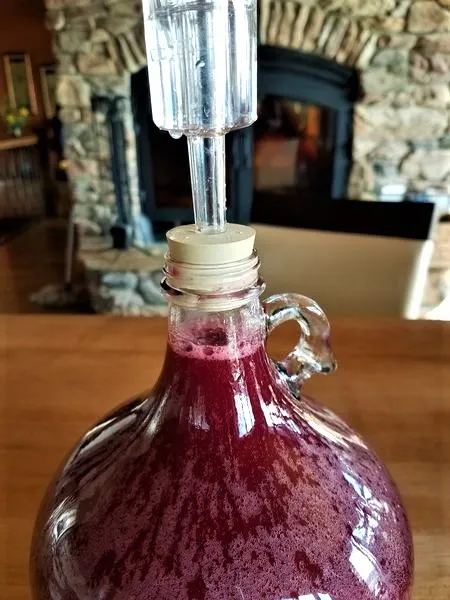
Using a funnel, transfer liquid from the pot to the carboy. If you do not have enough liquid to fill up to the neck you can use filtered or spring water. You can also use a favorite red wine of your own to top off (my choice). I have used wine, but not water. You don’t want to leave alot of head space. It just makes room for a breeding ground of bacteria. Tap in the rubber bung and push the airlock with water in it up to the line into the bung. An airlock lets carbon dioxide (CO2) get out from inside during fermenting wine and beer but does not let any outside air in.
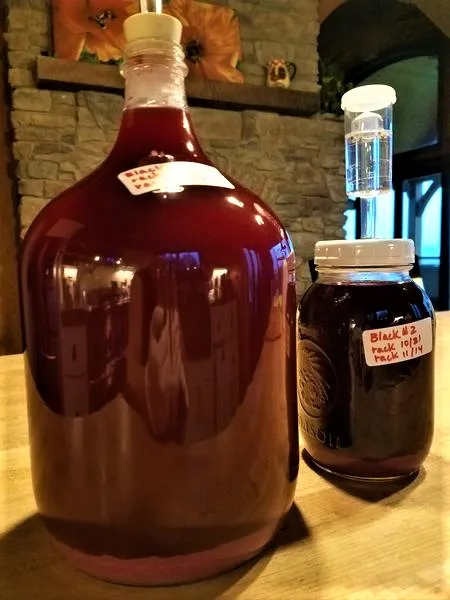
I like to rack mine about every two weeks. That means transfer your brew to a 2nd sanitized carboy. Racking the wine is needed to help clarify it. It also helps to keep the wine from developing unwanted flavors.

You will start to notice some debris in the bottom and that is called Lees. If your wine sits on that too long it kinda starts to sour a bit, not what your going for. Lees is the yeast that have died off. The yeast eat the sugar and eventually die and sink to the bottom. If you make beer, this same thing is called trub.
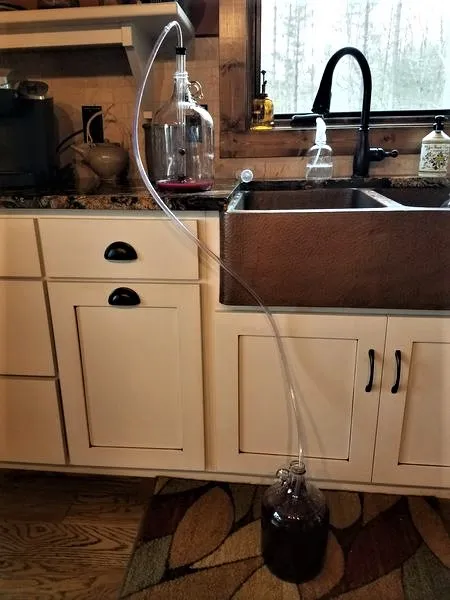
In the same wine kit I ordered is a siphoning kit. I sanitize and use it every time for racking and bottling. When you are siphoning your goal is to be careful and not suck up the lees from the bottom. If it gets all stirred up, take a break for a minute or two. When I get close to the bottom I lean the carboy gently on its side to finish up. You will be racking again soon so don’t fret too much if you rack a of t tiny bit of the lees over. Once all the wine is transferred add the airlock back. I usually sanitize mine before I put it back on or I use another fresh one.
You should expect this 2nd ferment to last about 6 weeks and racking about every two. If your wine is still fermenting big time (still bubbling a lot) you can leave it fermenting and your end product will likely be a little darker, and it will probably taste stronger . As it gets stronger it tastes dry to me and that is not my preference. I like mine on the sweeter side so I do not like mine to ferment much longer. I will rack every week to help calm it down starting at about week 3 if needed.

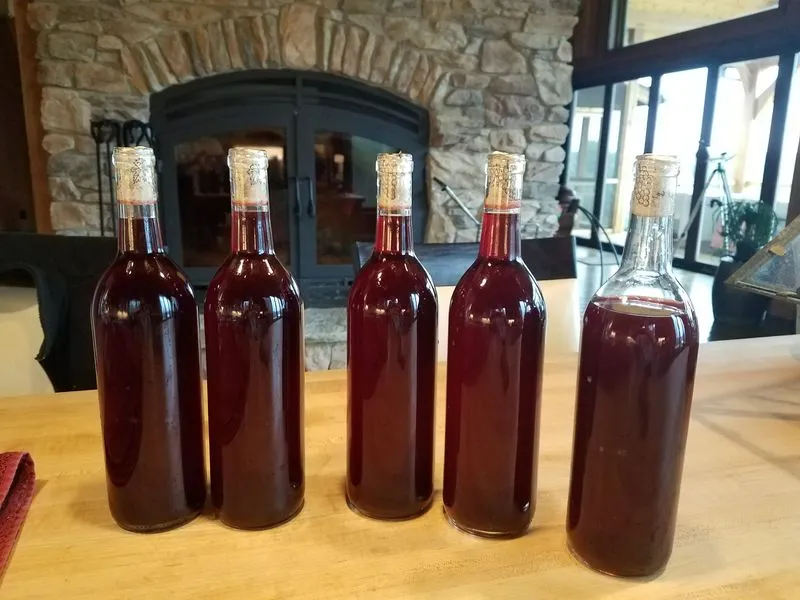
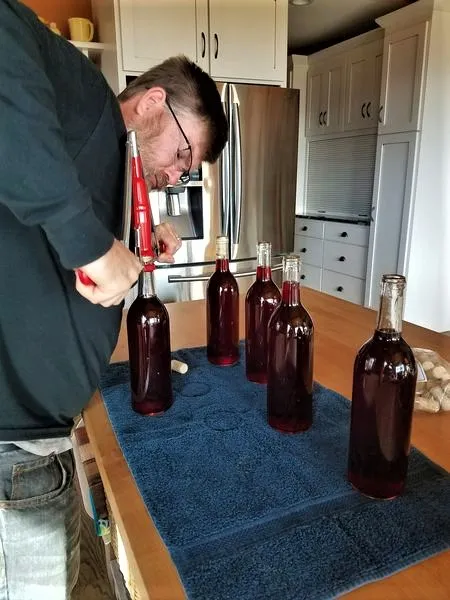
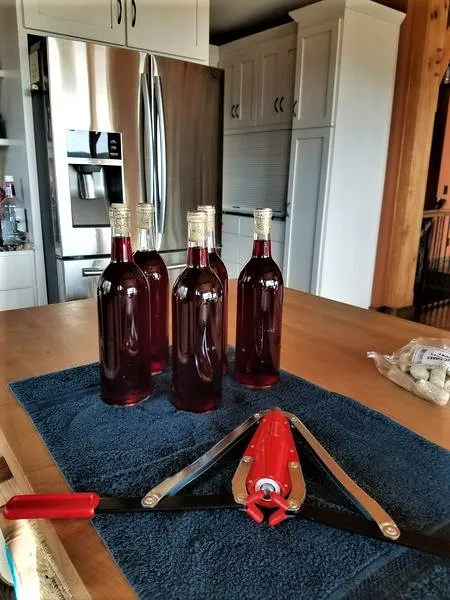
When your wine has finished 2nd ferment you will do a final rack before bottling. You may need to do two racks back to back and that is fine. Once it is clear you are ready to bottle. I have a corker I use (@qberry operates the corker) which also came in my wine kit from Amazon. Transfer the wine to bottles using sanitized siphon or funnel and cork immediately.
You want to have a small space in the neck. If I have a partial bottle, we might just drink that one. There are many recipes out there and all different types of supplies. My recipe and process will at least give you an idea of what all takes place. This recipe makes 5 to 6 bottles of wine.
Personal Notes
I sanitize my utensils when I put them away and again just before I use them
No wooden spoons for this project in case of bacteria. Stainless Steel is best.
I have not used anything else other than the fermenting bucket. It has a hole in the lid so that you can use an airlock, if needed. I just use the lid alone every time during 1st fermentation. If you have a problem with gnats use the airlock. If you continue to have gnats bad you can use vodka in the airlock vs water.
I mix a gallon of star sans and put some in a spritz bottle. I spritz it in my tubes to sanitize and then I rinse well with Hot water right before I use. I air dry.
I have made a batch with fresh berries, a batch with half frozen, and a batch with all frozen. Not sure if it is related but the third batch is stronger by far. I am still learning, sorry.
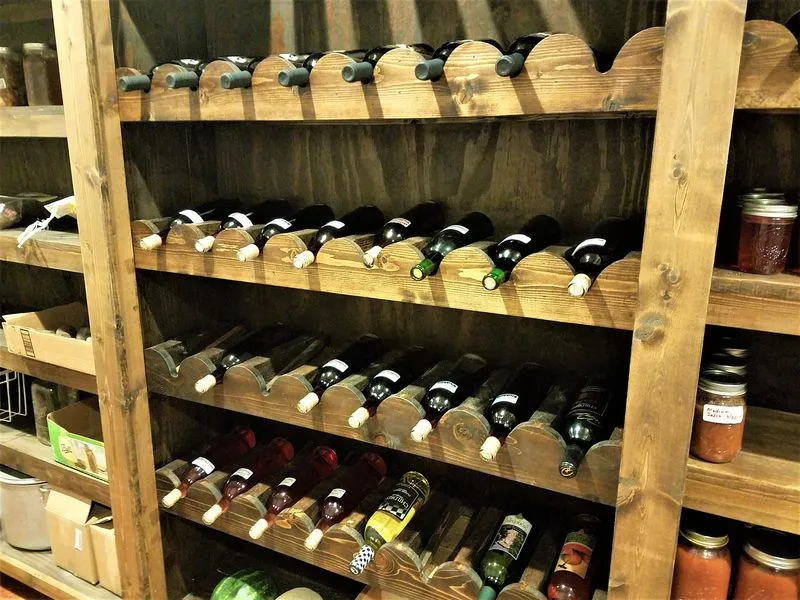
You will want to store your wine on its side. The wine should be up around the cork inside.
There are ways to sweeten your wine near the end of 2nd fermentation. You can take a cup of your brew out and add a cup or so of sugar. Boil, let completely cool to room temperature and add back to your brew. I did sweeten one batch this exact way and it seemed to be stronger than the other batches.
There are devices you can purchase to test the ABV (Alcohol By Volume). You get an initial reading when you start the first ferment in the bucket and then again just before you bottle. I will be working on that this year 2018.
This wine will age after bottled. Best if you wait about 3 months before you drink. I know, its hard. It will be so worth it.
Cheers!
Kimberly
All pics are from my own personal brew experiences.