One-Click Hive Engine Witness
Into
I was excited to see the announcment for Hive Engine Witnesses and I excitedly got to work! I've been pretty distant around here and looking for a project to jump back in with and this seemed perfect.
Seemed.
As you may have learned yourself, if you just follow these instructions as directed in the announcement, you likely didn't have a smooth and simple experience. I've been building servers for over 20 years so this is all second nature to me, and even with that head start this was anything but simple.
Greater Community Participation
With that in mind, I've taken everything I've learned and compiled it all here. Ultimately, I don't think we'll have very many witnesses at all if it is even half this hard, so my goal is to make it so simple literally anyone can launch a witness. I feel like this is as simple as absolutely possible so it is my hope that this will spur a bunch of new witnesses.
Again, I've been deploying servers for 20 years and I had trouble getting started here. That said, I expect this to be a continuing problem so my goal is to put something together that literally anyone can do. My larger goal is to make becoming a witness as simple as possible so we double or even triple the number of active witnesses. Decentralization, by its very name, demands that more of us get on board, this only helps.
Shell Script Server Deployment
In four words, that's exactly what this is. Basically, I've scripted every single step you need to take to deploy your server.
Now, you can open your terminal and paste in these commands one at a time, but this script was written to be executed completely.
If you use DigitalOcean they allow you to deploy a server using one of these scripts through User Data that allows you to fully automate your deployment. I will outline this approach here.
Deploy Droplet
Login to DigitalOcean, click the Create button and select Droplets.
I'm using Ubuntu 20.04 so select that:

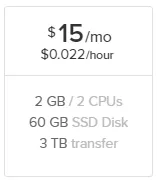
I think the best option is the $15 2GB with 2 CPUs
And then check 'User data' and paste in the script. Be sure to update your account and key!!
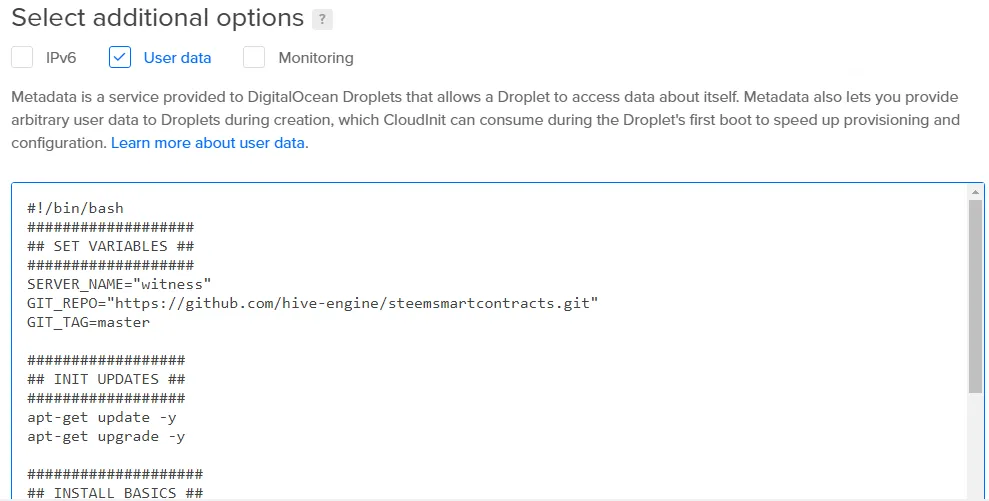
Set the remaining options to your personal preference and once you're ready click 'Create Droplet'
Follow along
The mongodb download and restore takes awhile, but fortunately it's all automated so you can just walk away!
But if you want, you can watch everything as it happens. Just login and type this commend:
tail -f /var/log/cloud-init-output.log
Now you can watch along as everything downloads and installs. Eventually you'll see something like this:
Cloud-init v. 20.4.1-0ubuntu1~20.04.1 finished at Fri, 05 Feb 2021 00:27:58 +0000. Datasource DataSourceDigitalOcean. Up 11.48 seconds
Start it up
Once everything has completed, the final step is to start the witness script!
cd /var/witness
pm2 start app.js --no-treekill --kill-timeout 10000 --no-autorestart --name engwit
You can watch along with this command:
pm2 logs
This does take quite awhile, but again, you can just walk away. The key that you're looking for is a line like this
2021-02-05 12:49:16 info: [Streamer] head_block_number 51065064 currentBlock 51065065 Hive blockchain is 0 blocks ahead
The main thing is '0 blocks ahead' and once you've hit that, you're fully up and running!
Register witness
The last step is to jump over to Tribaldex
Click the 'Register button'
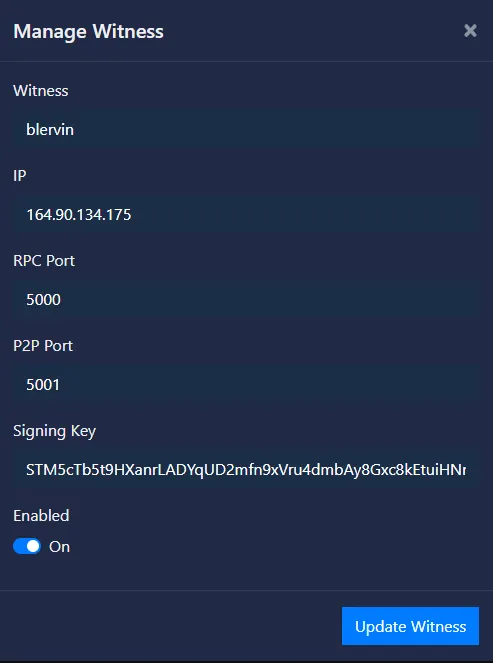
Set your witness name, the IP of your server, and your public 'STM...' active signing key.
Toggle enabled, click 'Update Witness' and you're now a witness!!
Conclusion
I hope this makes deploying a witness much easier for some of you and that we can continue to grow this community even further!
Decentralizing Hive Engine will be a major step forward for Hive and will only move us forward toward greater success.
As I mentioned, I haven't been very active around here so now that I'm working on this I hope to touch base with frequent updates, and little scripts and stuff that I come write as I learn more about tweaking my witness.
They also have a Discord available and if you hit up one of the admins they'll put you in the witnesses profile and unlock another private witness channel.
If you have any WORKERBEE staked, please consider voting for me at Tribaldex, I would really appreciate your support.
Please let me know of any questions you have or touch base here if you run into issues, I'm happy to help troubleshoot.
Full script
#!/bin/bash
###################
## SET VARIABLES ##
###################
SERVER_NAME="witness"
GIT_REPO="https://github.com/hive-engine/steemsmartcontracts.git"
GIT_TAG=master

##################
## INIT UPDATES ##
##################
apt-get update -y
apt-get upgrade -y

####################
## INSTALL BASICS ##
####################
apt install git -y
apt-get -y install npm
apt install ufw -y

################
## CLONE REPO ##
################
mkdir -p /var/$SERVER_NAME
cd /var/$SERVER_NAME
git clone --recursive --branch $GIT_TAG $GIT_REPO ./
git checkout heRelease1.1

######################
## INSTALL FAIL2BAN ##
######################
apt-get -y install fail2ban
touch /etc/fail2ban/jail.local
echo "[DEFAULT]" >> /etc/fail2ban/jail.local
echo "bantime = 3600" >> /etc/fail2ban/jail.local
echo "banaction = iptables-multiport" >> /etc/fail2ban/jail.local
echo "ignoreip = 127.0.0.1/8" >> /etc/fail2ban/jail.local
echo "[sshd]" >> /etc/fail2ban/jail.local
echo "enabled = true" >> /etc/fail2ban/jail.local
systemctl start fail2ban
systemctl enable fail2ban

#####################
## INSTALL MONGODB ##
#####################
cd /var/$SERVER_NAME
wget -qO - https://www.mongodb.org/static/pgp/server-4.4.asc | apt-key add -
echo "deb [ arch=amd64,arm64 ] https://repo.mongodb.org/apt/ubuntu focal/mongodb-org/4.4 multiverse" | tee /etc/apt/sources.list.d/mongodb-org-4.4.list
apt-get update -y
apt-get -y -o Dpkg::Options::="--force-confold" install mongodb-org
sed -i '/replication/a \ \ \ replSetName: "rs0"' /etc/mongod.conf
sed -i 's/#replication/replication/g' /etc/mongod.conf
systemctl stop mongod
systemctl start mongod

################
## RESTORE DB ##
################
cd /var/$SERVER_NAME
wget http://api2.hive-engine.com/hsc_20210203_b50993579.archive
mongo --eval "rs.initiate()"
mongorestore --gzip --archive=hsc_20210203_b50993579.archive

##############
## SET SWAP ##
##############
fallocate -l 2G /swapfile
chmod 600 /swapfile
mkswap /swapfile
swapon /swapfile

##################
## INSTALL NODE ##
##################
curl -sL https://deb.nodesource.com/setup_14.x | -E bash -
apt-get install -y nodejs
apt-get -y install npm

#################
## FINAL SETUP ##
#################
cd /var/$SERVER_NAME
npm install dotenv
npm i
npm i -g pm2
sed -i 's/"startHiveBlock": 41967000/"startHiveBlock": 0/g' config.json
sed -i 's/"witnessEnabled": false/"witnessEnabled": true/g' config.json
ufw allow 5001

#####################
## SET WITNESS KEY ##
#####################
cat > /var/$SERVER_NAME/.env << EOF
ACTIVE_SIGNING_KEY=5K...
ACCOUNT=youraccount
EOF