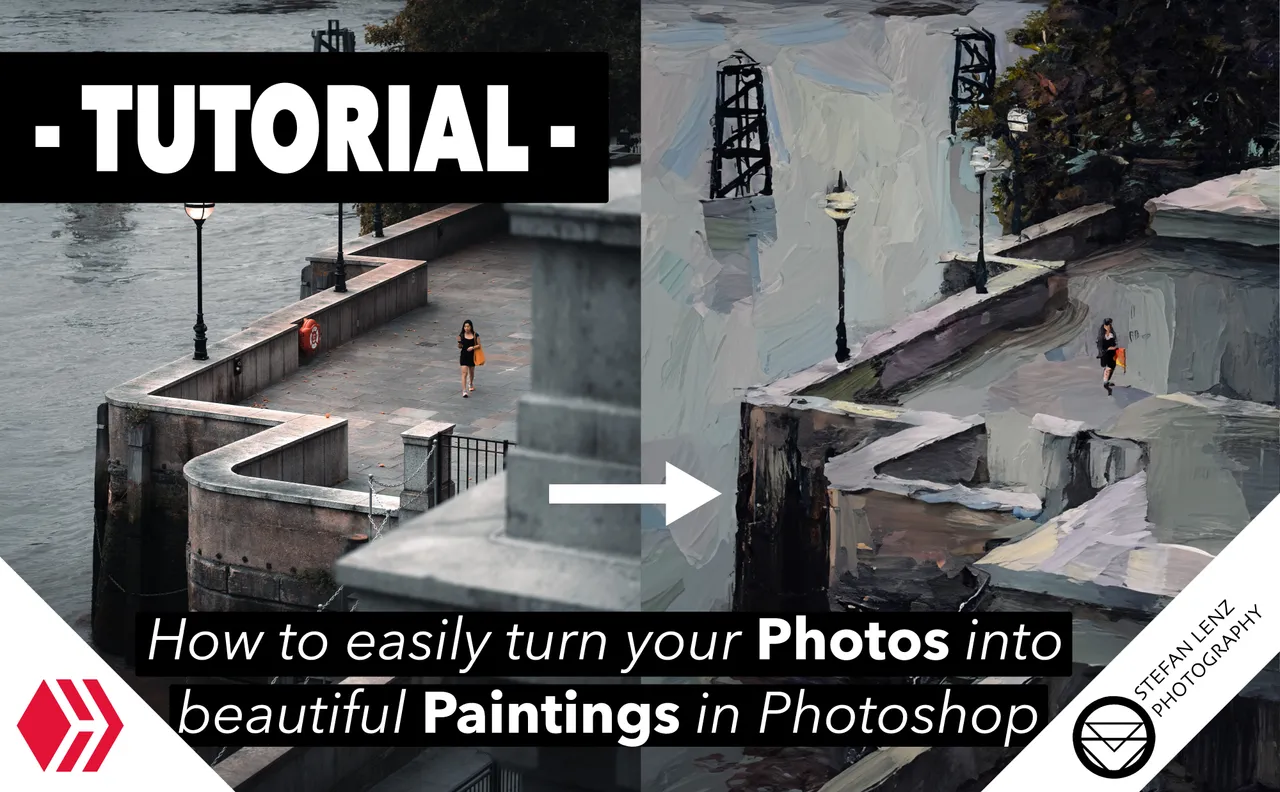
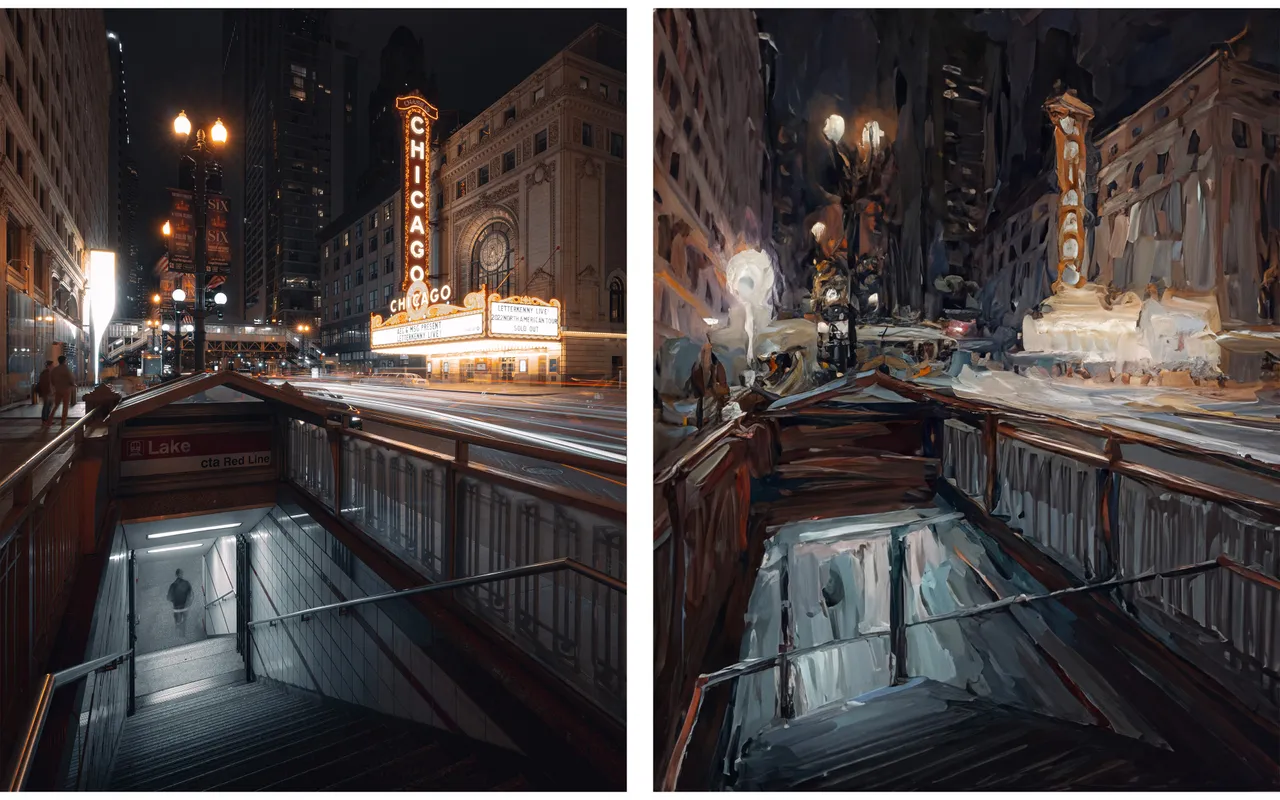
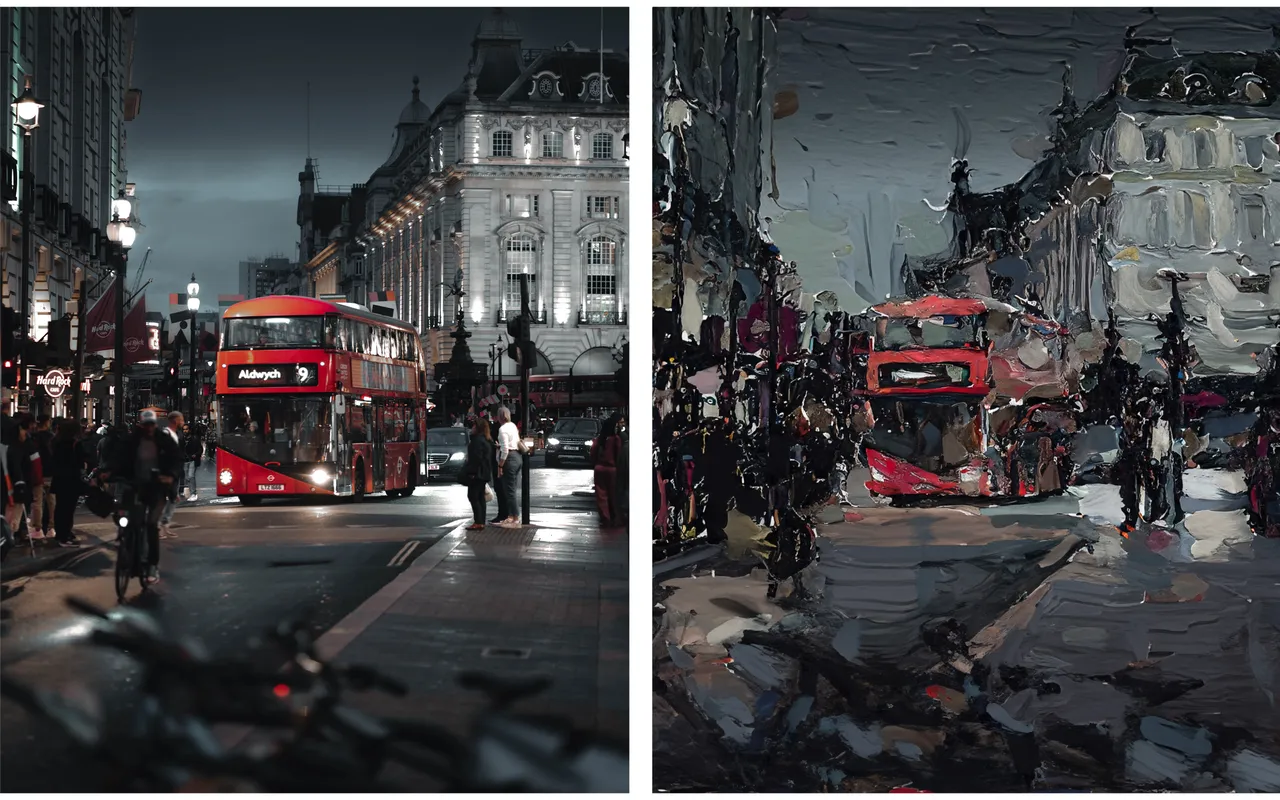
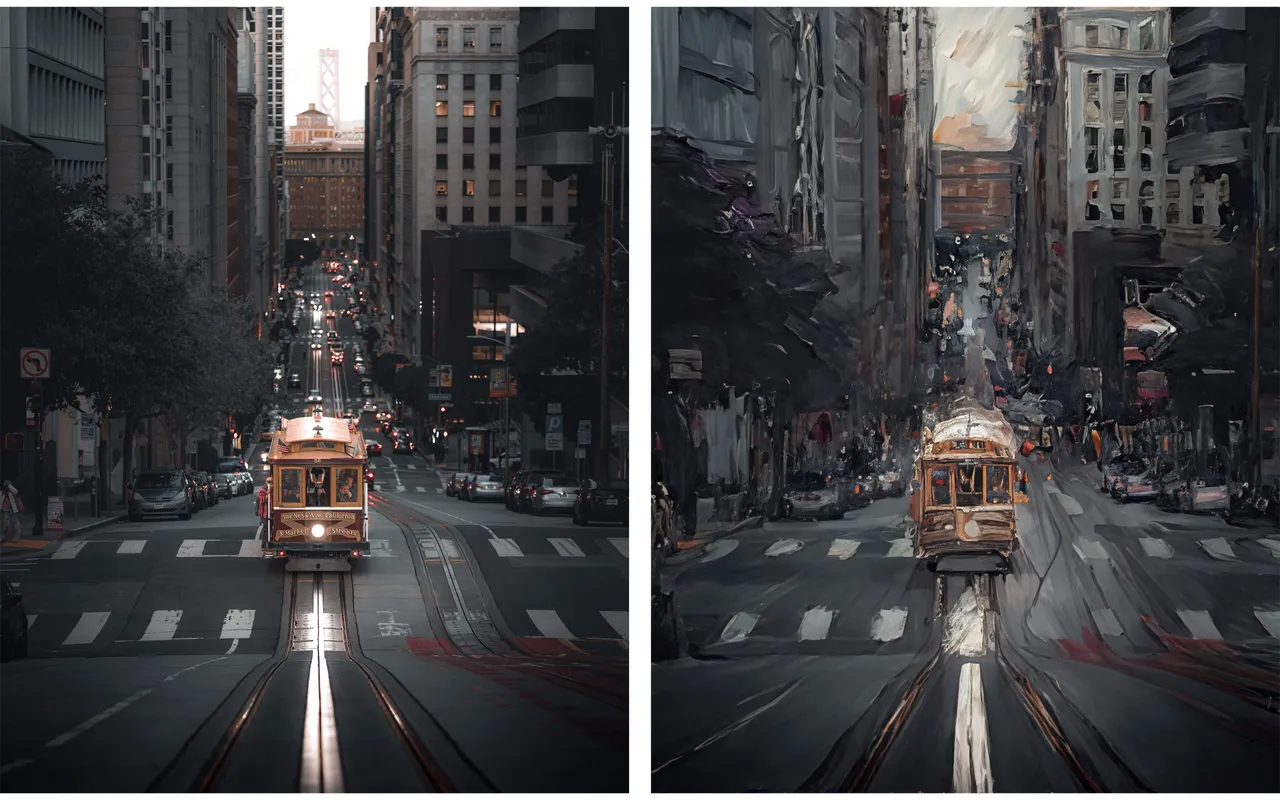
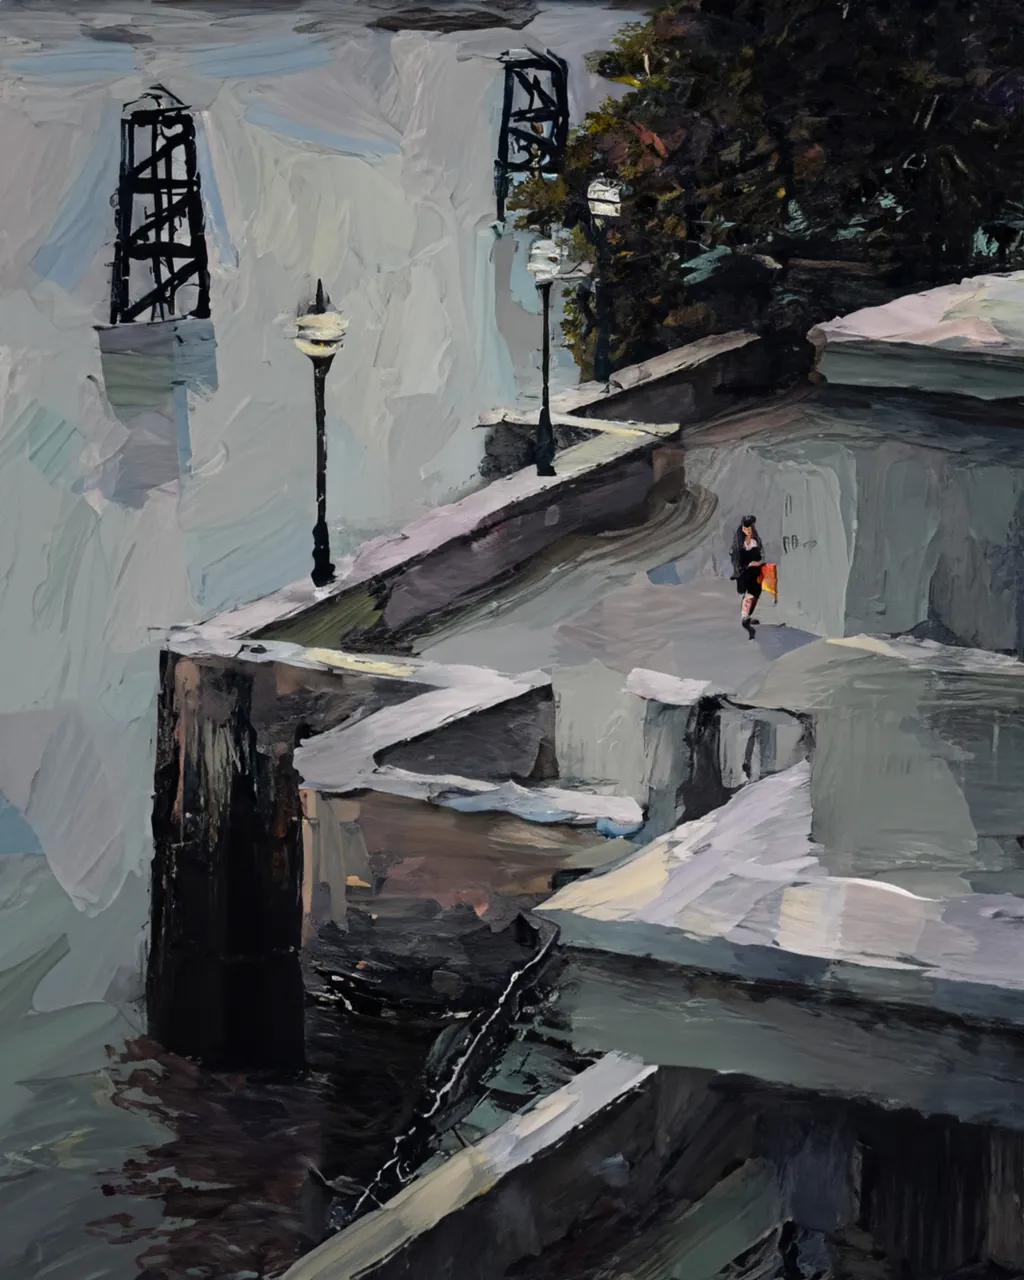
Hi friends! Today I have a little tutorial for you again. In this post I had already shown you how great the new AI-based generative fill in Photoshop works. In the meantime I found out that you can use this function also in a slightly different way. So it is now possible to create stunningly real looking paintings from photos. Just have a look at what I made out of my shots with just a few clicks:
Hallo Freunde! Heute habe ich mal wieder ein kleines Tutorial für euch. In diesem Beitrag hatte euch bereits gezeigt, wie genial das neue KI-basierte generative Füllen in Photoshop funktioniert. Inzwischen habe ich herausgefunden, dass man diese Funktion auch auf eine etwas andere Art und Weise einsetzten kann. So ist es nun möglich, täuschend echt wirkende Malereien aus Fotos zu erzeugen. Schaut euch einfach mal an, was ich mit nur wenigen Klicks aus meinen Fotos gemacht habe:

Now I would like to explain briefly how this works. You still need the beta version of Photoshop at the time of this posting. You can easily download it if you have subscribed to Photoshop.
1.) Open the app and the photo you want to edit.
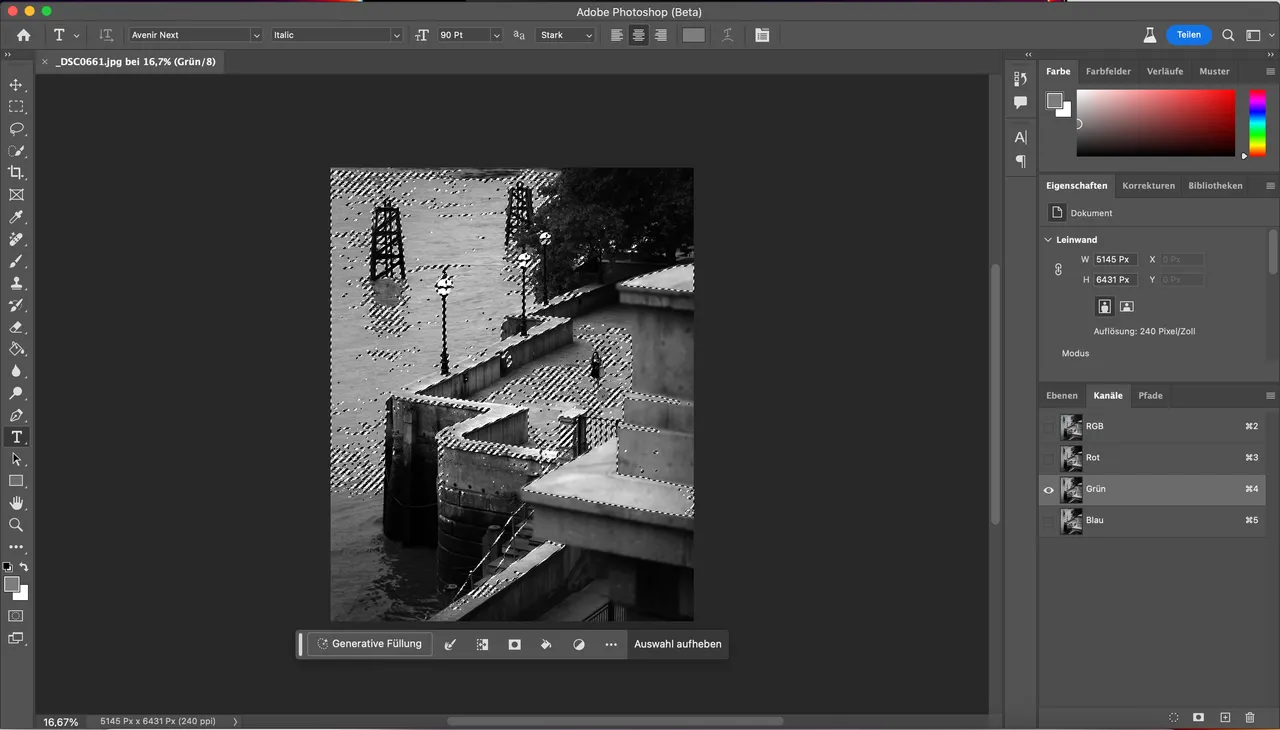
2.) Now click on the "Channels" tab at the bottom right next to the layers.
3.) Select one of the channels (red, green or blue) and highlight it by holding down the Command (Mac) or Ctrl (Windows) key and clicking on it. It is important that you select a color that is strongly represented in the photo. Large parts of your image should now appear highlighted.
Nun möchte ich euch kurz erklären, wie das funktioniert. Ihr benötigt dafür zum Zeitpunkt dieses Postings noch die Beta-Version von Photoshop. Diese könnt ihr euch einfach downloaden, wenn ihr Photoshop abonniert habt.
1.) Öffnet die App und das Foto, das ihr bearbeiten möchtet.
2.) Klickt nun rechts unten neben den Ebenen auf die Registerkarte "Kanäle".
3.) Wählt nun einen der Kanäle (rot, grün oder blau) aus und markiert diesen, indem ihr mit gedrückter Command- (Mac) oder Strg- (Windows) Taste auf diesen Kanal klickt. Wichtig dabei ist, dass ihr eine Farbe auswählt, die im Foto stark vertreten ist. Es sollten nun also große Teile deines Fotos markiert erscheinen.
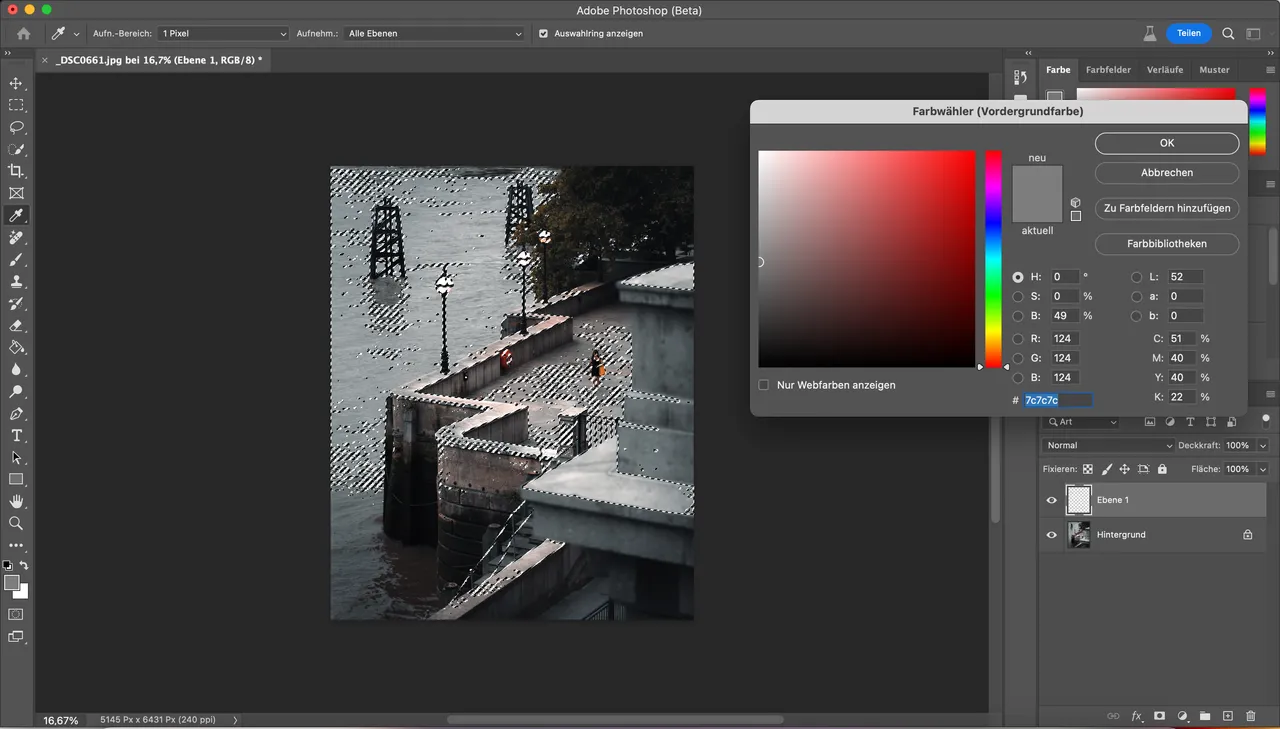
4.) Now go to the Layers tab and create a new layer by clicking on the corresponding icon. Alternatively, you can use the key combination Command/Ctrl + J.
5.) Now click on the Brush tool and select a medium gray as the foreground color (at the bottom left of the toolbar).
6.) Set the opacity of the brush to 35%.
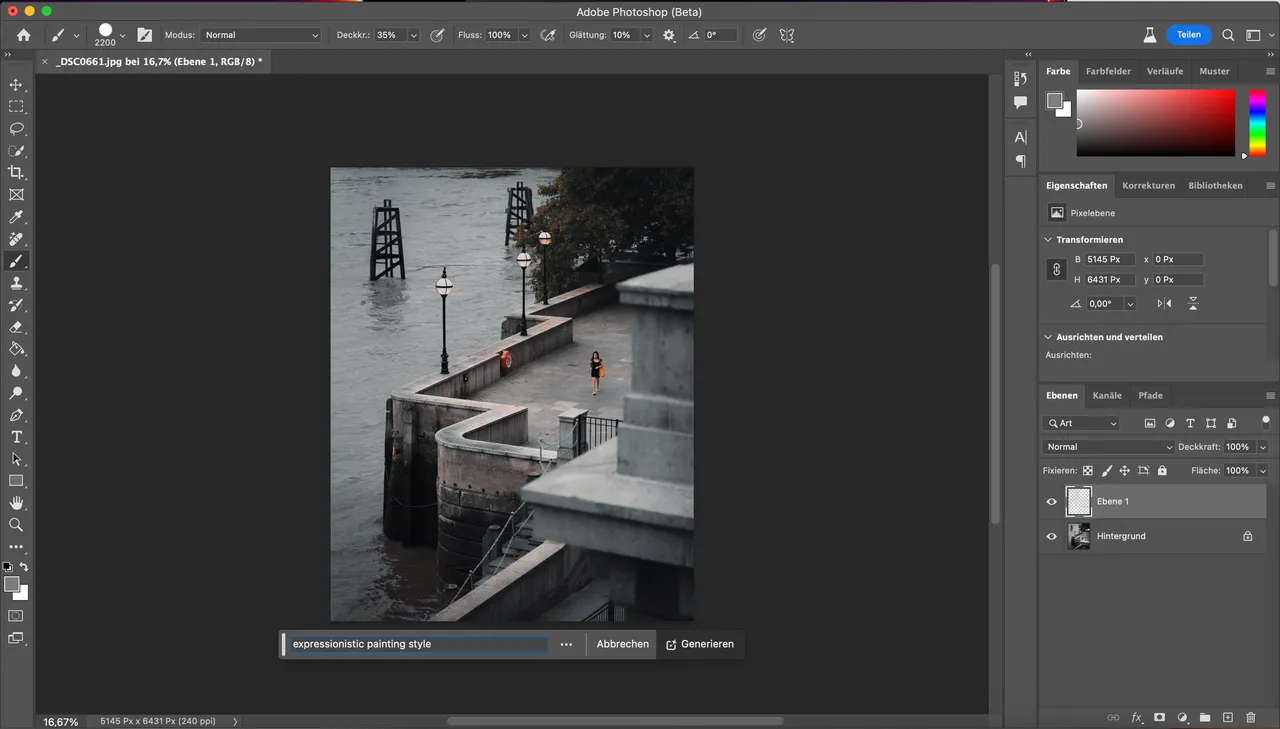
7.) Now paint once over the entire image.
4.) Geht nun zur Registerkarte "Ebenen" und erstellt eine neue Ebene, indem ihr auf das entsprechende Symbol klickt. Alternativ könnt ihr die Tastenkombination Command/Strg + J nutzen.
5.) Nun klickt ihr auf das Pinsel-Werkzeug und wählt als Vodergrundfarbe (links unten in der Werkzeugleiste) ein mittleres Grau aus.
6.) Stellt die Deckkraft des Pinsels auf 35%.
7.) Malt nun einmal über das gesamte Bild.
8.) Next, deselect the layer by pressing the key combination Command/Ctrl + D.
9.) Now click on the new layer while holding down the Command/Ctrl key. An error message appears, which you can simply ignore. You will not see any selection edges, but the layer is selected.
10.) In the last step you enter the prompt for the AI-generated fill. For example "expressionistic painting style" and click on generate. Here you can experiment with different art styles. At the end you will get three variants, from which you can choose the best one.
8.) Als nächstes hebt ihr die Auswahl auf, indem ihr die Tastenkombination Command/Strg + D drückt.
9.) Klickt nun mit gedrückter Command/Strg-Taste auf die neue Ebene. Es erscheint eine Fehlermeldung, die ihr einfach ignorieren könnt. Ihr seht nun keine Auswahlkanten, die Ebene ist aber markiert.
10.) Im letzten Schritt gebt ihr noch den Prompt für das KI-generierte Füllen ein. Zum Beispiel "expressionistic painting style" und klickt auf generieren. Hier könnt ihr mit verschiedenen Kunststilen experimentieren. Am Ende bekommt ihr drei Varianten, von denen ihr euch die beste aussuchen könnt.
You can also experiment with other parameters to get different results. For example, repeat all the steps again with a different color channel to get a stronger effect. You can also enter names of famous artists. I am really excited about the results of this method. Have fun trying yourselves!
Auch mit anderen Parametern könnt ihr experimentieren, um verschiedene Ergebnisse zu erhalten. Wiederholt zum Beispiel alle Schritte nochmals mit einem anderen Farbkanal, um einen stärkeren Effekt zu erhalten. Ihr könnt aber auch Namen von bekannten Künstlern eingeben. Ich bin von den Ergebnissen dieser Methode wirklich begeistert. Viel Spass beim selbst ausprobieren!
See you soon!/Bis bald!
Stefan