
In 2020, a friend and client asked me to make a cake in the shape of a bus for his son Oliver, who was turning 2 years old at that time. To be honest, I had never made such a cake before, but it seemed like an excellent opportunity, since I had little time with my cake business and the desire to learn was huge. So I accepted the request and made my bus-shaped cake. I think that for the first time, it was quite acceptable.
This year, that same client contacted me to make the birthday cake for her second baby, Joaquín, and the cake she asked me for was a Plim Plim bus shaped cake. When I saw the reference image she sent me I was a little scared, because when I researched and searched I realized that there was no cake with that specific bus shape, but luckily I got a tutorial on how to make a cake in the shape of a bus and I took that as a base. As for decorating, I had to figure it out on my own and apply all the knowledge I have acquired during all this time.
Below I will tell you a little about the process of decorating this beautiful cake.
I made some marbled sponge cakes in a rectangular shape. For the filling I prepared a strawberry jam.

After making the filling, I covered the cake with a layer of white chocolate ganache crumb topping. I took it to the refrigerator and the next day, I started to shape it into the bus. I was able to do this because I made a kind of plim plim bus shape pattern.

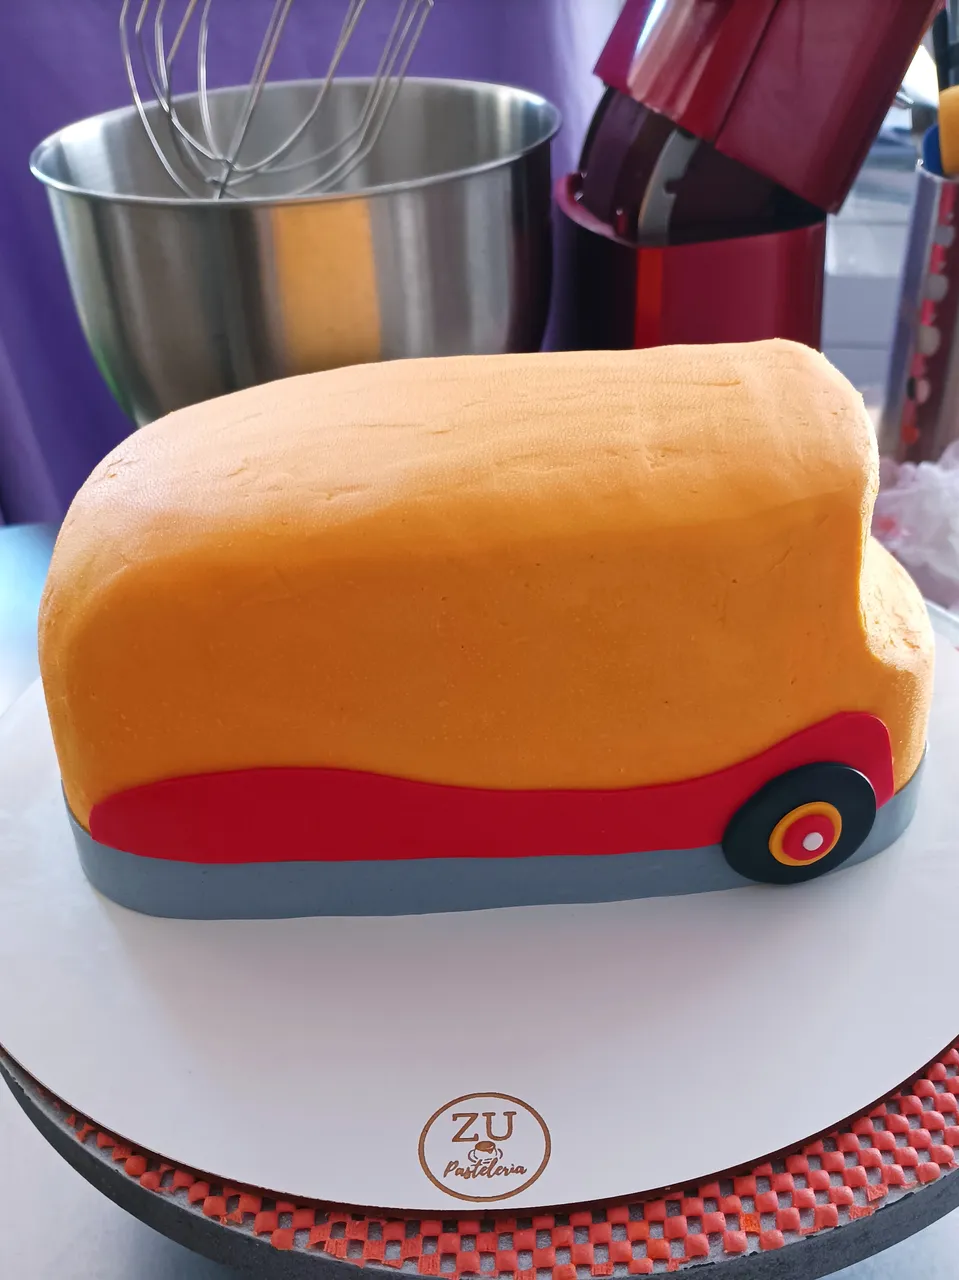
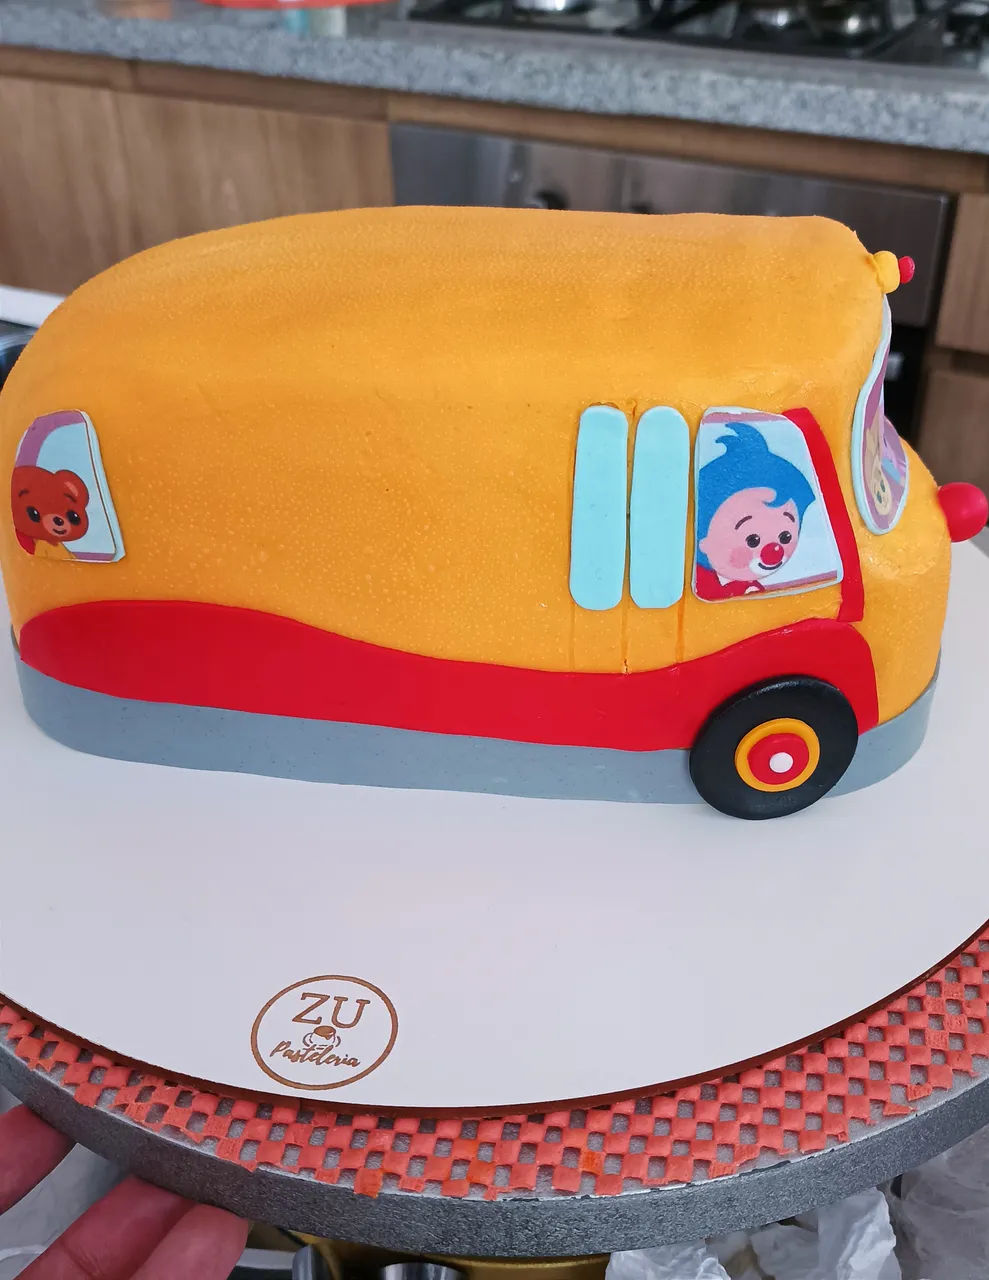
When I was able to get the shape, I put it in the refrigerator for 20 minutes, then I applied the final coat which was yellow. To get an almost perfect smoothing, I helped myself with a little piece of acetate sheet that the sugar paper prints come with. I must say that this part took me quite some time.

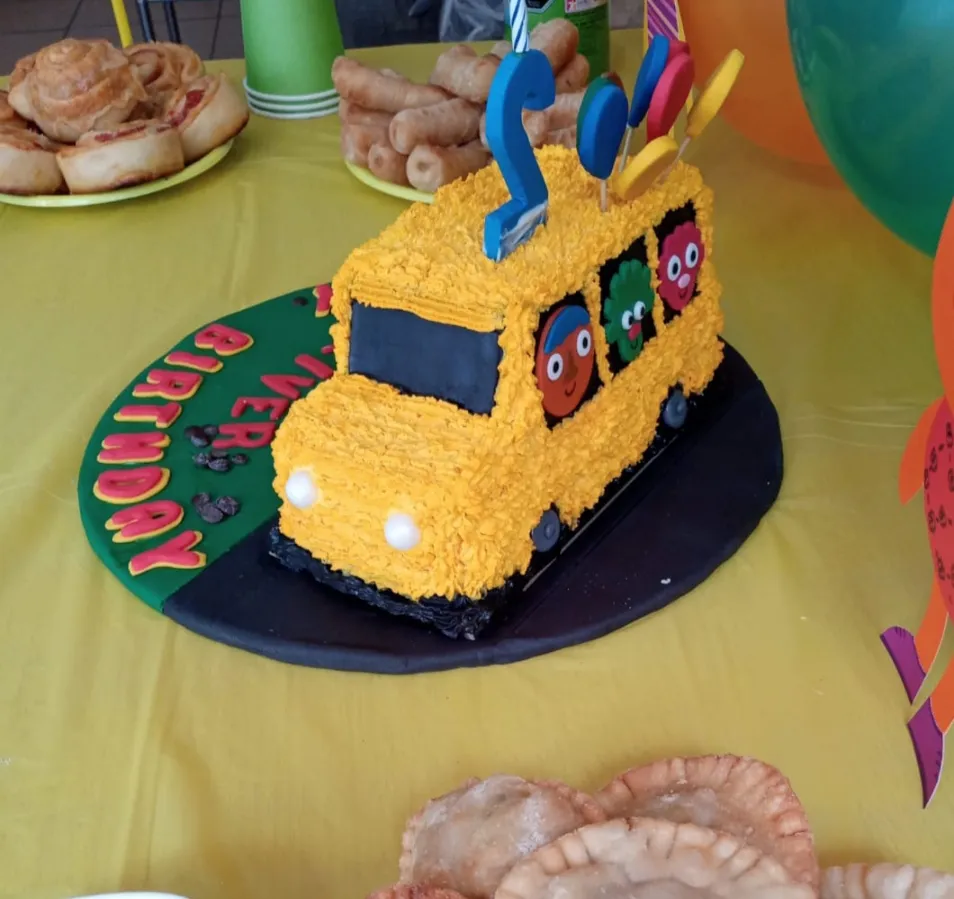
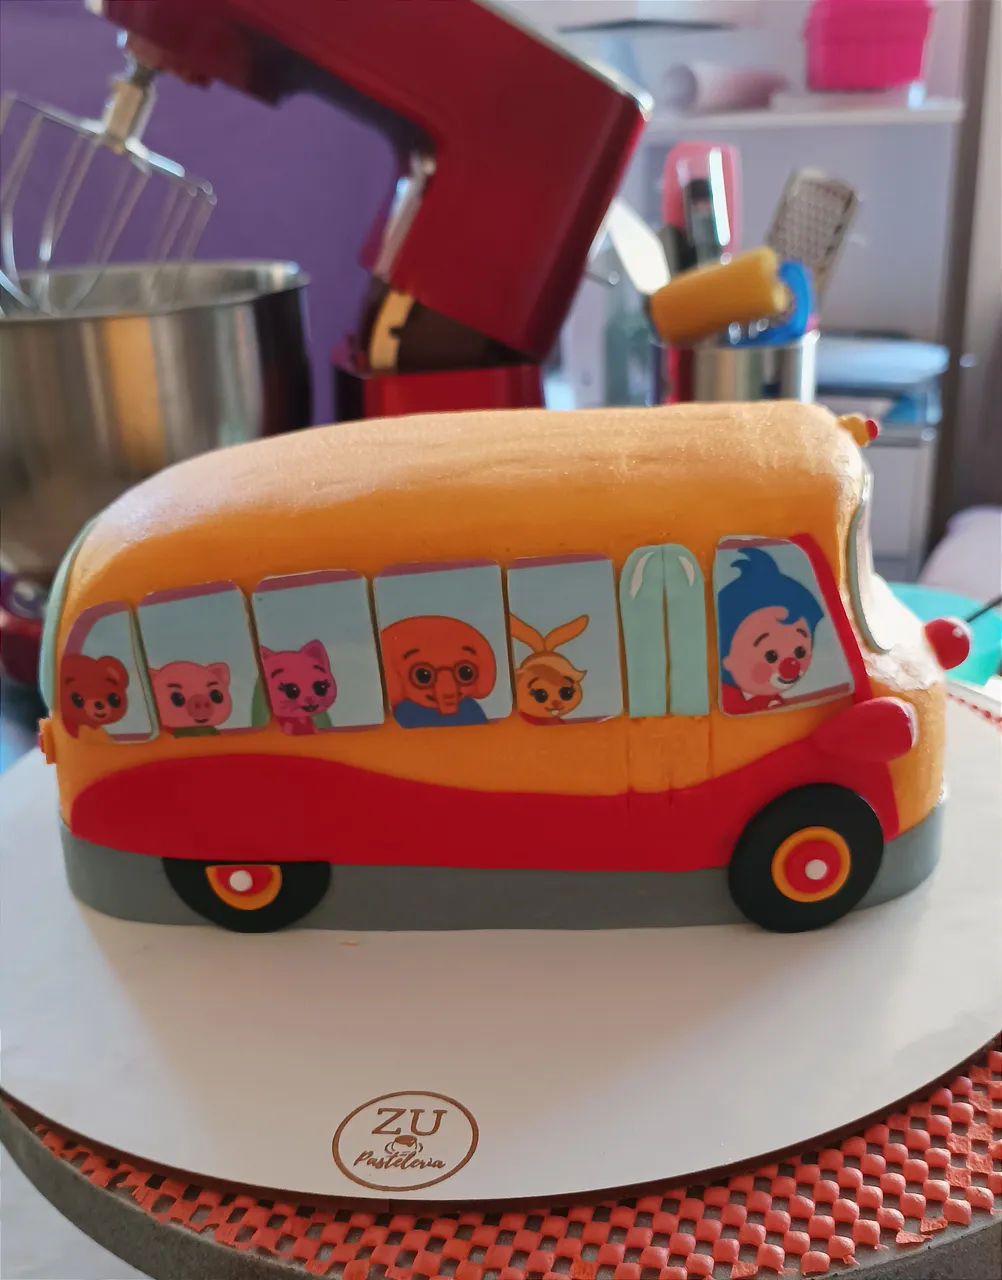
After achieving the smoothness I needed, I started working with the decoration I made with fondant. By the way, to make the shape of the bus more visible, the first thing I did was to place a gray stripe also made with fondant and thus give depth to the bottom of the bus.
I printed the Plim Plim clown and his friends on sugar paper, but I only printed the windows and the windshield. I placed these figures on blue fondant to simulate the glass of the windows.
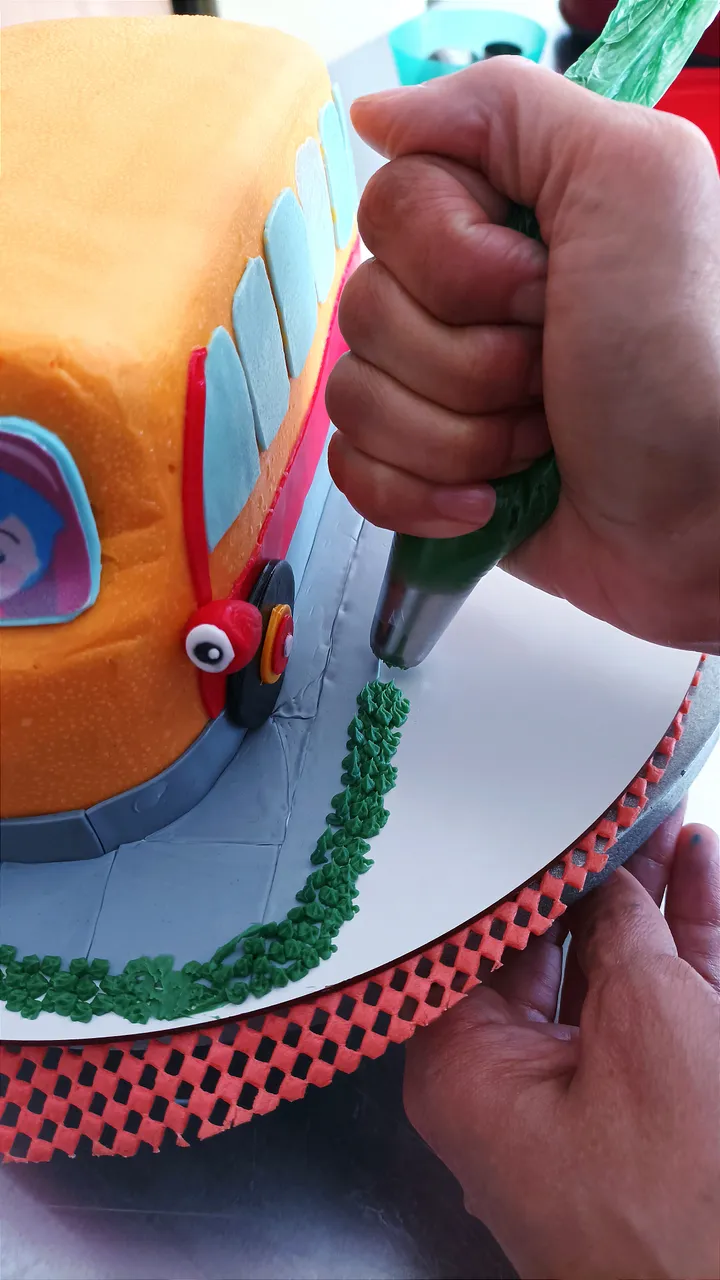
Finally, I made the road with the same fondant and the grass with green chocolate ganache using nozzle 234.
Although at the beginning, I didn't know if I could shape this cake as a Plim Plim bus, everything flowed little by little, since I had enough time to process it in my head and project how I would do everything. That's one of the advantages of having a good client commission a themed cake a month in advance.
I really enjoyed decorating this cake and thank goodness there were no hiccups. All the techniques learned during all these years paid off in this delicious and beautiful cake.
I hope you liked the result of the decoration and if you have any questions about it I will be happy to answer them.
Thank you for joining me in this process and for all the support.
Your friend, Zuuu!
You can also find me on instagram as: @zu_pasteleria, @tayiitos and on RedBubble in my clothes and products store.
All photos and videos in this post were taken with my Xiaomi Redmi 10 cell phone.
Resources: Gifty application, Capcut and Deepl Translator.
En el año 2020, un amigo y cliente me pidió que le hiciera una torta con forma de bus para su hijo Oliver que estaba cumpliendo en aquel tiempo 2 añitos. Para ser sincera, nunca había hecho una torta de ese tipo, pero me pareció una excelente oportunidad, ya que tenía poco tiempo con mi emprendimiento de tortas y las ganas de aprender eran enormes. Así que acepté el pedido e hice mi torta con forma de bus. Creo que para ser la primera vez, me quedó bastante aceptable.
Este año, ese mismo cliente me contactó para que le hiciera la torta de cumpleaños de su segundo bebé, Joaquín y la torta que me pidió fue una torta en forma del bus de Plim Plim. Cuando ví la imagen de referencia que me mando me asusté un poco, porque al investigar y buscar me di cuenta que no había ninguna torta con esa forma específica de bus, pero por suerte conseguí un tutorial de cómo hacer una torta con forma de bus y tomé eso como base. En cuanto a la decoración, tenía que arreglármelas por mí misma y aplicar todos los conocimientos que he adquirido durante todo este tiempo.
A continuación les contaré un poco cómo fue el proceso de decoración de esta hermosa torta.
Hice unos bizcochos marmolados en forma rectangular. Para el relleno preparé una mermelada de fresas.
Después de hacer el relleno, cubrí la torta con una capa recoge miga de ganache de chocolate blanco. La llevé al refrigerador y al siguiente día, empecé a darle la forma del bus. Esto lo logré porque saqué una especie de patrón con la forma del bus de plim plim.
Cuando le pude sacar la forma, la metí en el refrigerador por 20 minutos, luego le coloqué la capa definitiva que era de color amarillo. Para conseguir un alisado casi perfecto, me ayudé de un pedacito de lámina de acetato que traen las impresiones en papel de azúcar. Debo decir que esta parte me llevó bastante tiempo.
Después de lograr el alisado que necesitaba, empecé a trabajar con el decorado que hice con fondant. Por cierto, para que se viera mejor la forma del bus, lo primero que hice fue colocarle una franja gris hecha también con fondant y de esta manera darle profundidad a la parte de abajo del bus.
El payasito Plim Plim y sus amigos, los imprimí en papel de azúcar, pero solo mandé a imprimir lo que son las ventanas y el parabrisas. Estas figuras las coloqué sobre un fondant azul para simular el vidrio de las ventanas.
Finalmente, le hice la carretera con el mismo fondant y la grama con ganache de chocolate verde usando la boquilla 234.
A pesar de que al principio, no sabía si podía darle forma de bus de Plim Plim a esta torta, todo fue fluyendo poco a poco, ya que tuve bastante tiempo para procesarla en mi cabeza y proyectar cómo haría todo. Esa es una de las ventajas de que un buen cliente te encargue una torta con temática con un mes de anticipación.
Disfruté muchísimo hacer el decorado de esta torta y gracias a Dios no se presentó ningún inconveniente. Todas las técnicas aprendidas durante todos estos años dieron sus frutos en esta deliciosa y hermosa torta.
Espero les haya gustado el resultado de la decoración y si tienen alguna pregunta al respecto se las responderé con gusto.
Gracias por acompañarme en este proceso y por todo el apoyo.
¡Tu amiga, Zuuu!
También me puedes encontrar en instagram como: @zu_pasteleria, @tayiitos y en RedBubble en mi tienda de ropas y productos.
Todas las fotos y videos de esta publicación fueron realizadas con mi celular Xiaomi Redmi 10.
Recursos: Aplicación Gifty, Capcut y Deepl Translator.