Hola hivers! espero estén teniendo un maravilloso fin de semana.
Hace tiempo que no entraba a un concurso de Splinterlands, me animé de participar por muchos artes geniales que he visto dentro del concurso los últimos días.
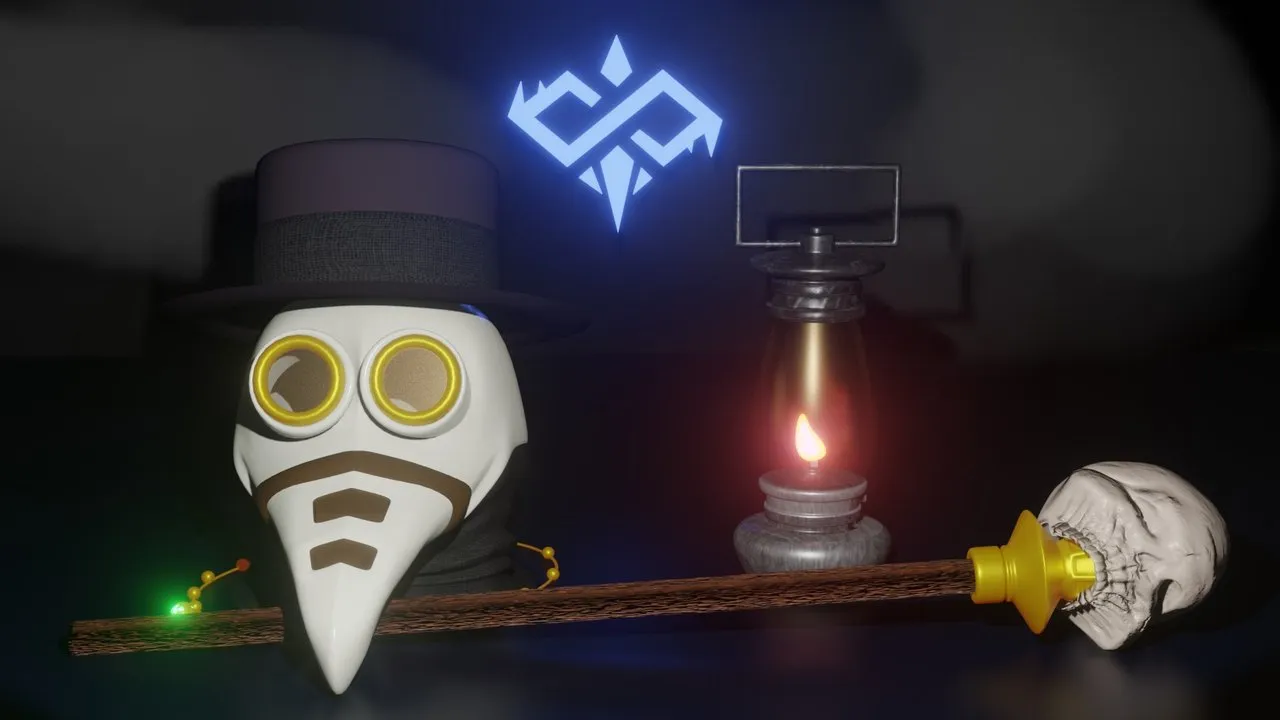
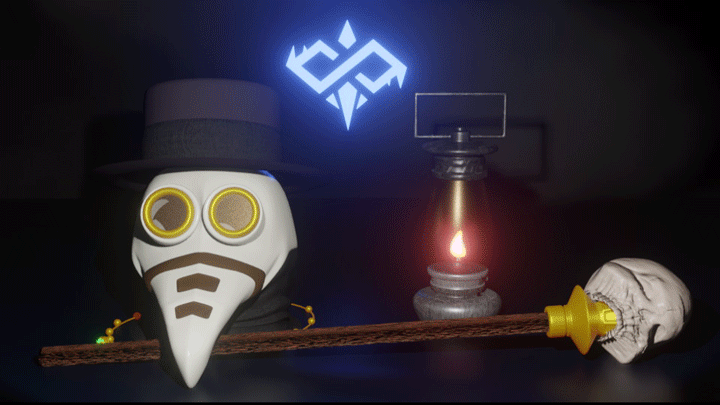
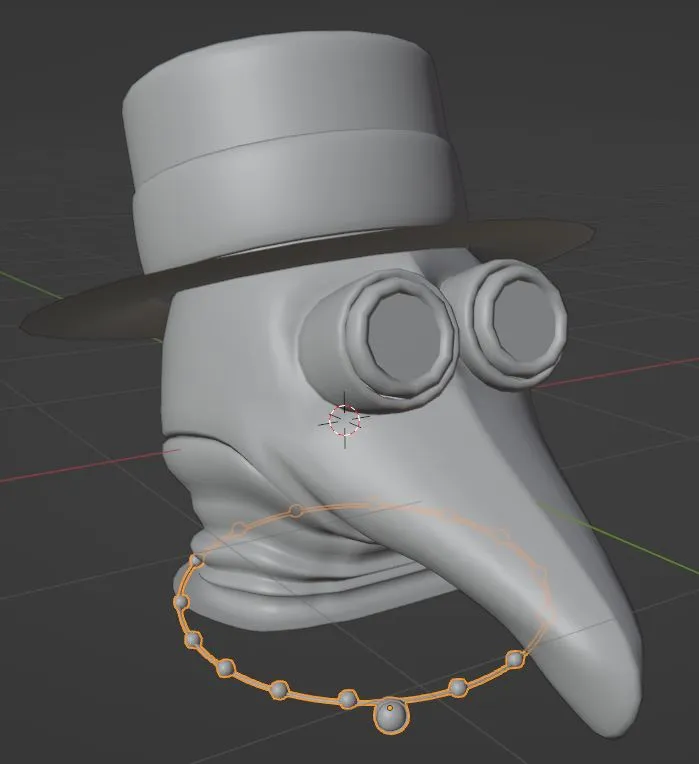
Para este post quería hacer algo relacionado con la expansión nueva de "legión del caos" y me pareció genial los accesorios que lleva el Doctor Blinght.Hi Hivers! I hope you are having a wonderful weekend.
It's been a while since I entered a Splinterlands contest, I was encouraged to participate by many great arts that I've seen within the contest in recent days.
For this post I wanted to do something related to the new "chaos legion" expansion and I thought the accessories that Doctor Blinght wears were great.
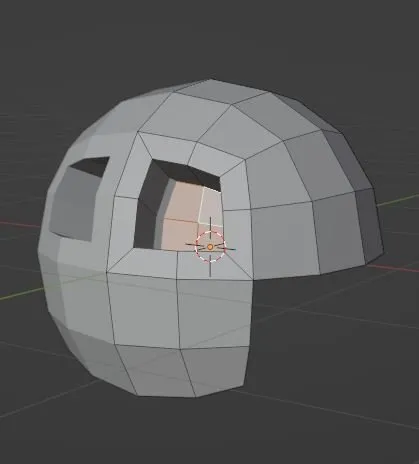
Comencé modelando el sombrero, que me pareció el objeto mas simple.
I began to model the hat, which seemed to me the simplest object.
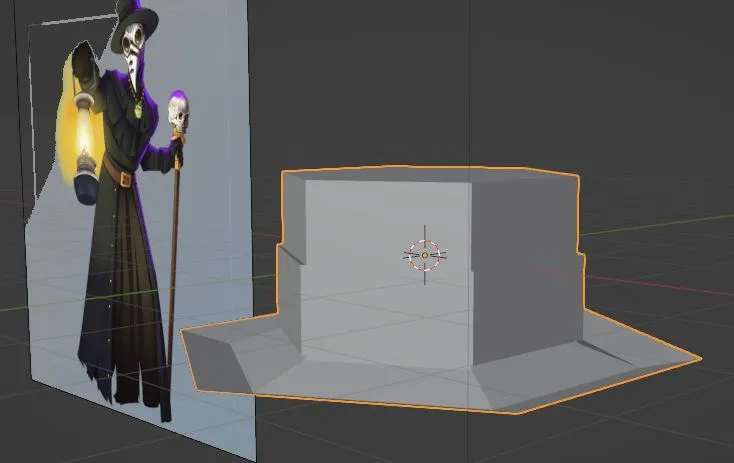
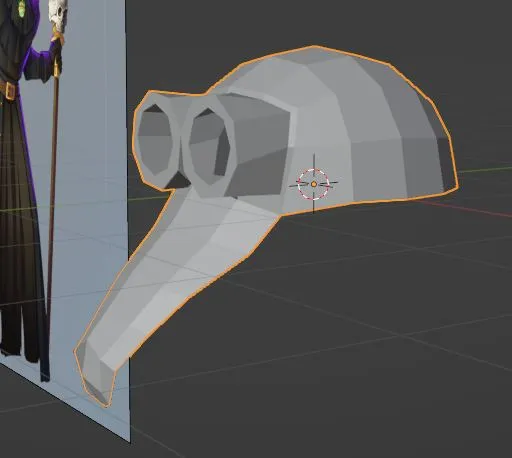
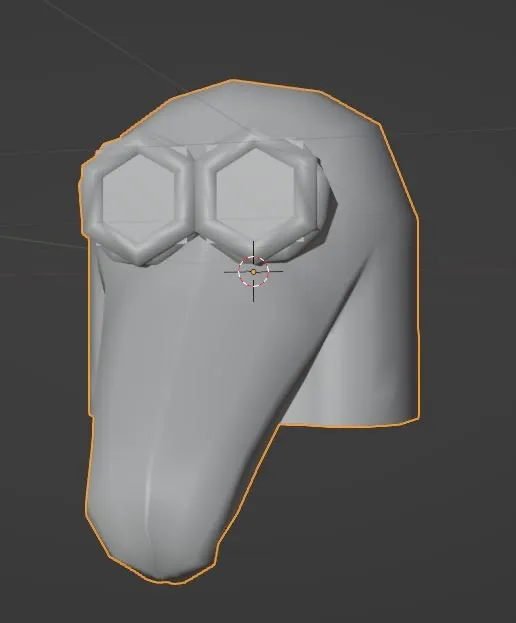
La siguiente pieza fue la mas compleja. apliqué subdivisiones a un cubo, luego lo piqué a la mitad y usé el mirror, entonces usé nuevamente las subdivisiones sin aplicarlas para darle mas suavidad en el render, y fui modelando hasta no necesitar el mirror, entonces lo apliqué para hacer modificaciones como los huecos en el pico de la mascara y para finalizar en esta pieza, me apoyé con la herramienta de escultura para suavizar algunos detalles y hacerlo mas rápido.
The next piece was the most complex. I applied subdivisions to a cube, then I cut it in half and used the mirror, then I used the subdivisions again without applying them to give it more smoothness in the render, and I modeled until I didn't need the mirror, then I applied it to make modifications like the holes at the peak of the mask and to finish on this piece, I used the sculpt tool to soften some details and make it faster.
Lo siguiente que hice fue el colgante, algo bastante simple con una curva que luego convertí en malla para poner algunas esferas alrededor.
The next thing I did was the pendant, something quite simple with a curve that I later turned into a mesh to put some spheres around it.
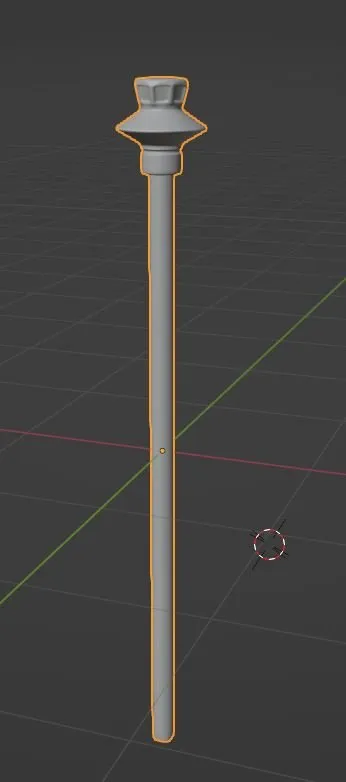
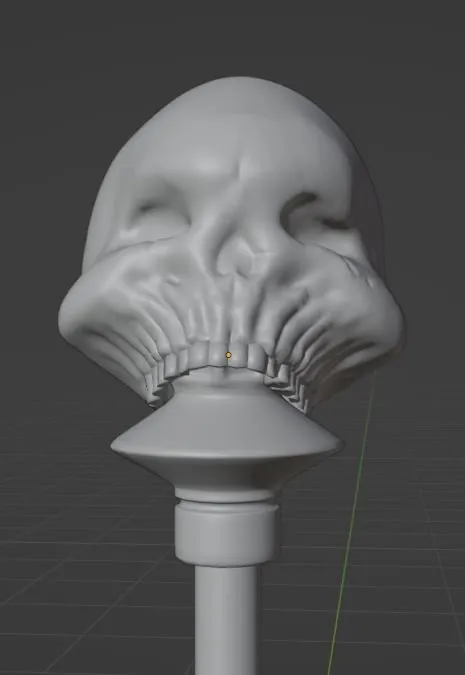
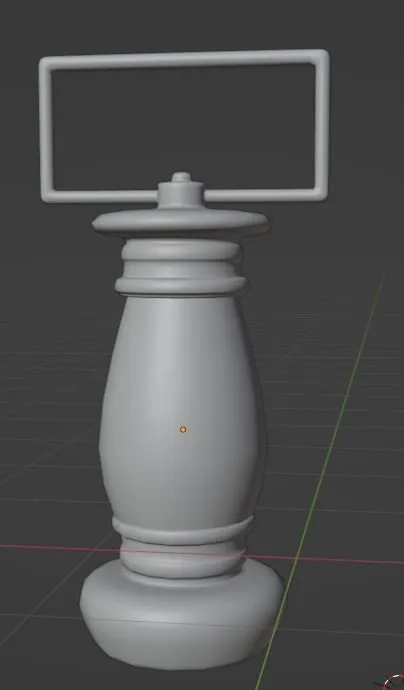
Luego hice el bastón que también es una forma simple, igualmente lo empecé con un cubo con subdivisiones, luego cloné la punta para seguir la pieza de arriba, y para el cráneo utilicé uno que tenia con forma de taza en un modelo que ya había hecho hace tiempo, pero tuve que modificarlo.
Then I made the cane which is also a simple shape, I also started it with a cube with subdivisions, then I cloned the tip to follow the piece above, and for the skull I used one that I had in the shape of a cup in a model that I already had made a long time ago, but had to modify it.
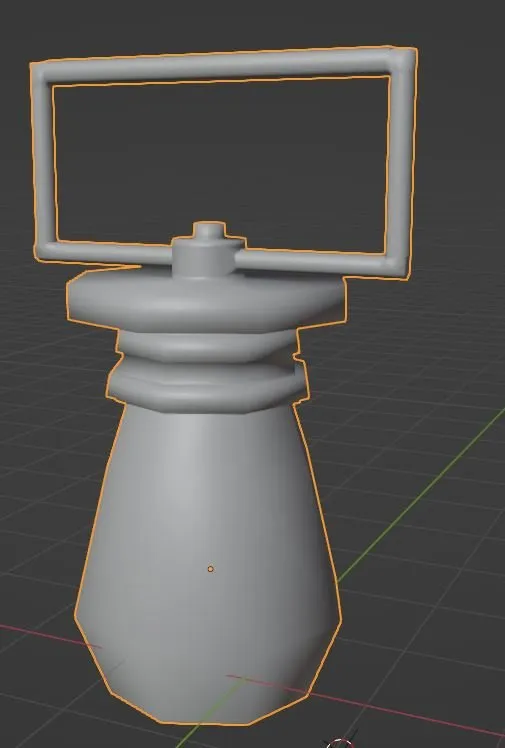
La ultima pieza de modelado, fue la lampara, la cual modifiqué un poco el agarrador al final porque lo había hecho muy grande y se veía un poco raro jejeje. Lo mas interesante de esta pieza para mi, fue hacer el fuego con material plinciple BSDF y un nodo de mixshader para darle un poco de transparencia para poner otra malla igual dentro pero mas pequeña y con otro color de emisión.
The last piece of modeling was the lamp, which I modified the handle a bit at the end because I had made it very big and it looked a bit weird hehehe. The most interesting thing about this piece for me was making the fire with basic BSDF material and a mixshader node to give it a bit of transparency to put another mesh inside the same but smaller and with another emission color.

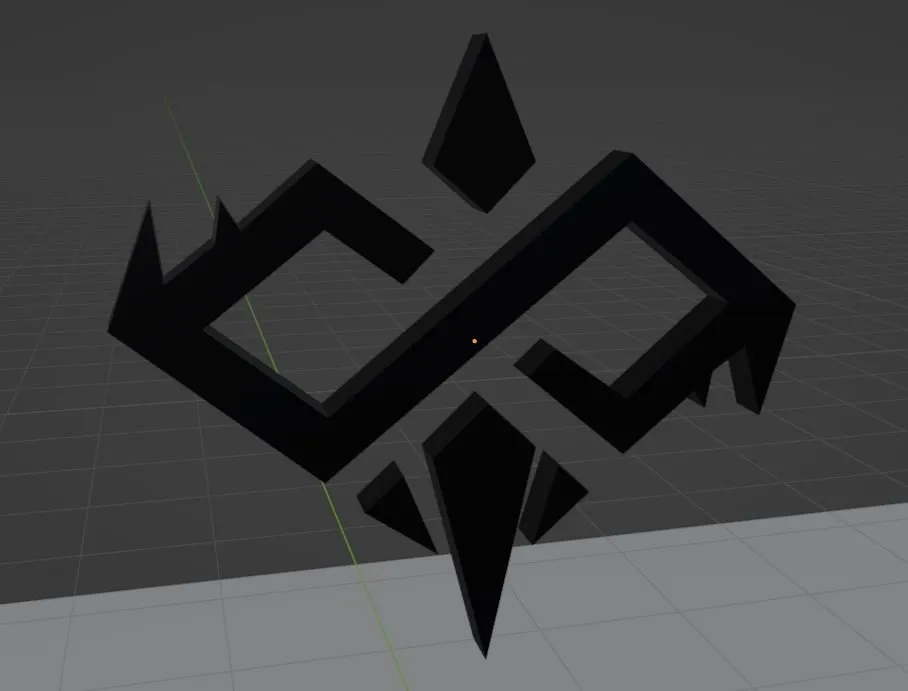
- Ah y casi olvido el logo del chaos que vectoricé y pase a 3D como lo expliqué en el tutorial que hice de "pasar un logo de 2d a 3d"
- Oh and I almost forgot the chaos logo that I vectorized and turned into 3D as I explained in the tutorial I did on "turning a logo from 2d to 3d"
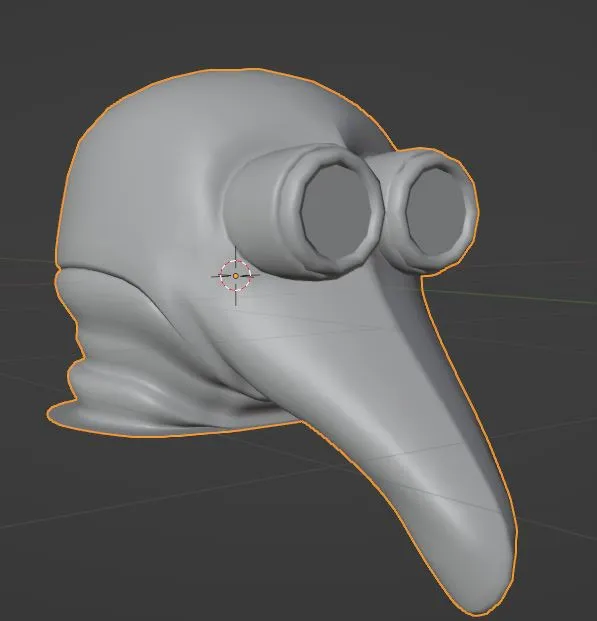
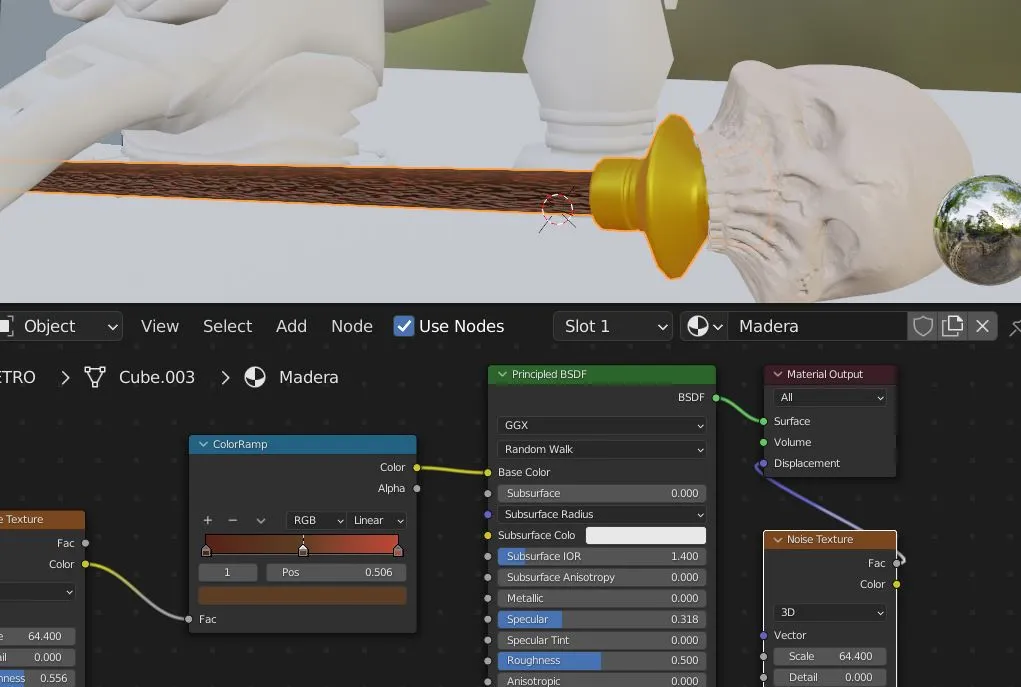
Y para finalizar, trabajé en las texturas y el entorno. En esta parte aprendí hacer la nubes sin simulación, igual que el fuego, me encanta aprender cosas nuevas 😁 Estas se hacen con un solido de la forma que quieras, luego se crea un volumen vacío y se le aplica el modificador "mesh to volume" y con el gotero, marcamos el solido al que queremos aplicarlo, luego quitamos la vista del solido en el render y en viewport, también se le aumenta el valor del voxel amount en el modificador para dar mejor calidad a la nube.
And finally, I worked on the textures and the environment. In this part I learned to make clouds without simulation, just like fire, I love learning new things 😁 These are made with a solid in the way you want, then an empty volume is created and the "mesh to volume" modifier is applied and with the dropper, we mark the solid to which we want to apply it, then we remove the view of the solid in the render and in the viewport, the value of the voxel amount is also increased in the modifier to give better quality to the cloud.
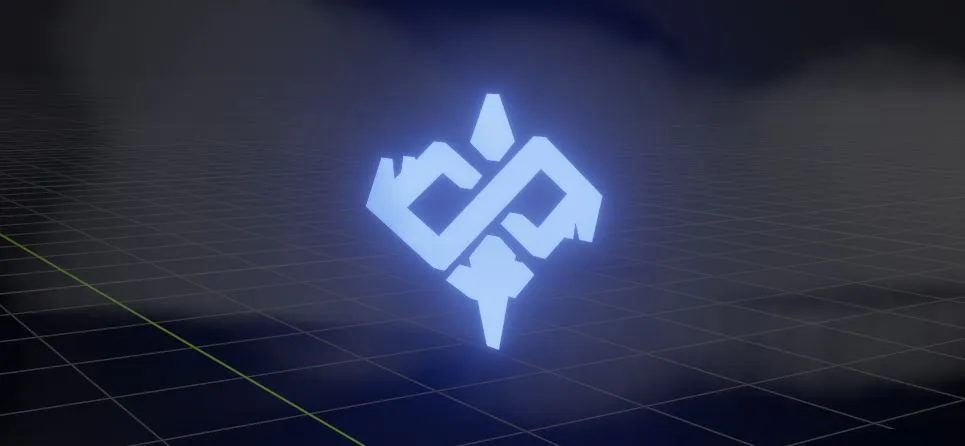
Y bueno amigos este fue mi trabajo para el concurso de arte semanal de Splinterds, espero les haya gustado. Por acá al final les dejo un render estático con mejor calidad, hasta la próxima.
And well, friends, this was my work for the weekly Splinterds art contest, I hope you liked it. Here at the end I leave you a static render with better quality, until next time.