English
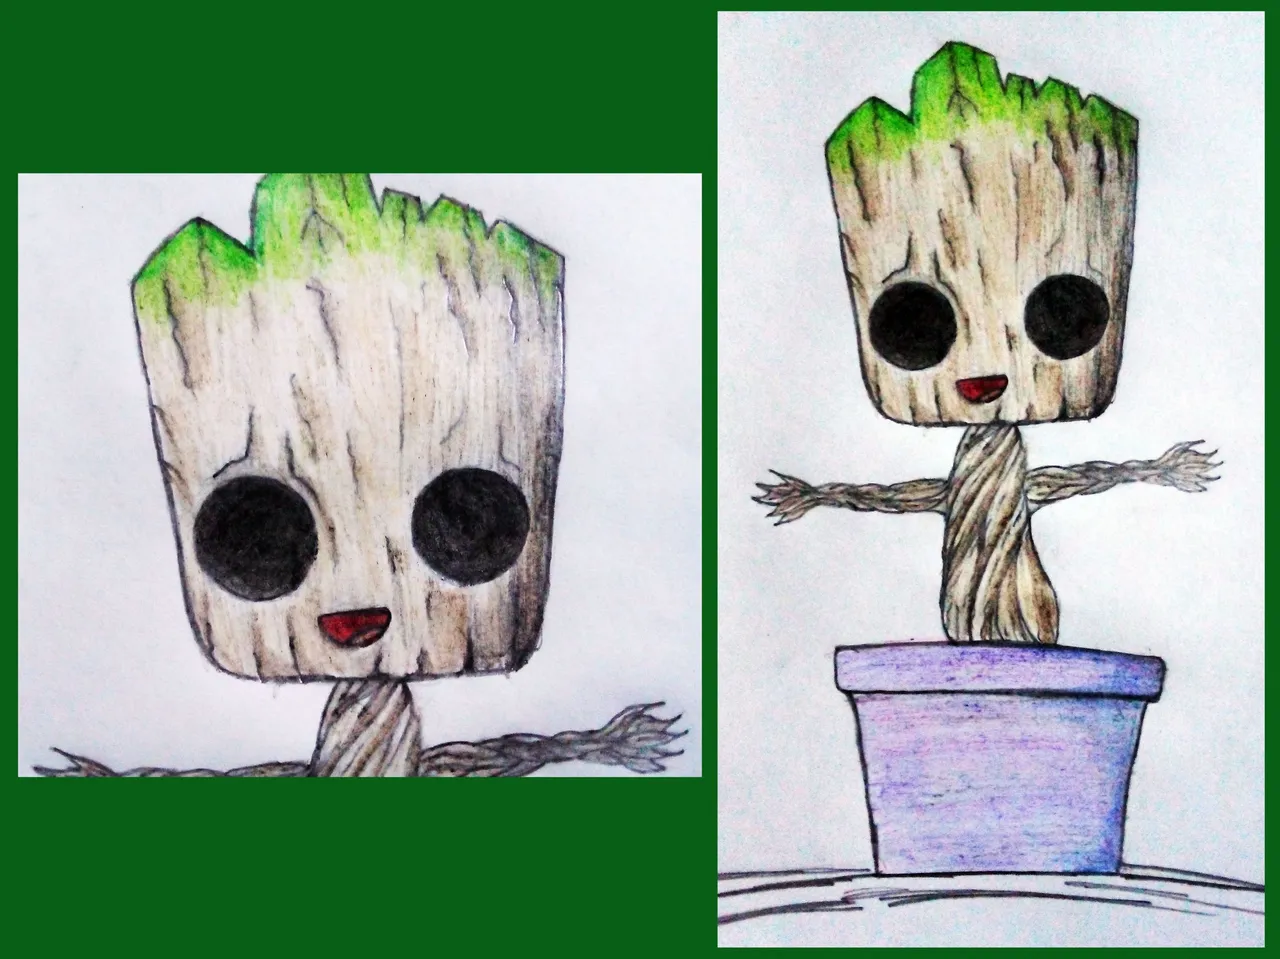
Greetings to all, fellow creatives. It's been a long time since I brought to my blog a drawing, either handmade or digital. The truth is that I had kept myself a little bit away from everything that has to do with my art, because I lacked inspiration, or the desire to simply take a stick of plasticine and mold, or a pencil and sit down to draw.
I feel that the desire to create has been growing again little by little, so I bought a lot of things to make my work, from clay to cardboard and paints. I also bought a box of colors and a couple of graphite pencils, precisely with this is that I made the drawing that I will present below, a drawing of Baby Groot.
Español
Saludos a todos, compañeros creativos. Hace mucho que no traía a mi blog un dibujo, ya fuese hecho a mano o en digital. La verdad me había mantenido un poco alejado de todo lo que tiene que ver con mi arte, por carecer de inspiración, o ganas de simplemente tomar una barra de plastilina y moldear, o un lápiz y sentarme a dibujar.
Siento que esas ganas de crear han ido creciendo de nuevo poco a poco, por eso compré numerosas cosas para hacer mis trabajos, desde plastilinas hasta cartulinas y pinturas. También compré una caja de colores y un par de lápices de grafito, precisamente con esto es que hice el dibujo que les presentaré a continuación, un dibujo de Baby Groot.
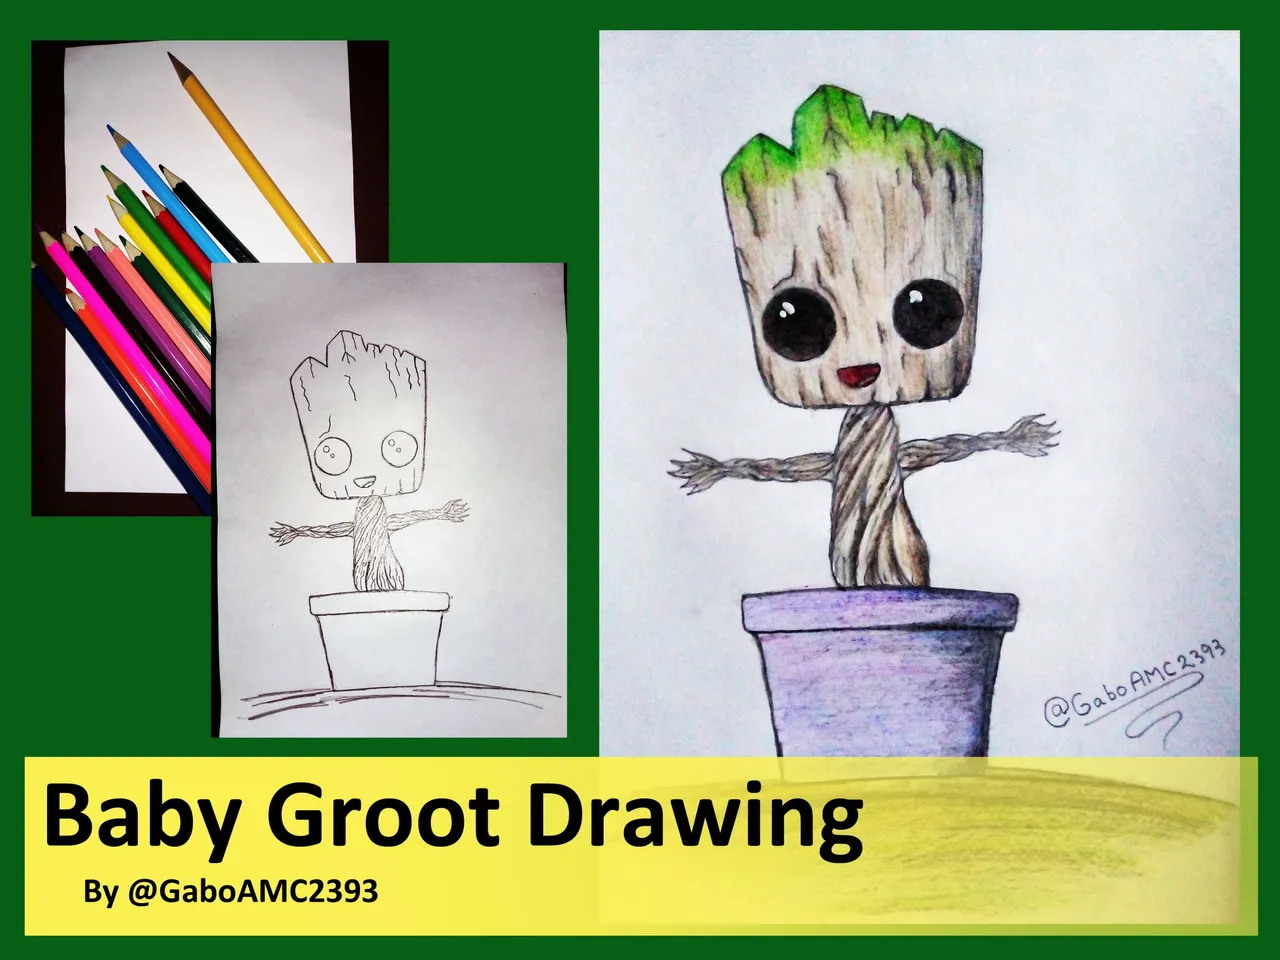
I had previously made a sculpture of Baby Groot, you can find it by searching the hashtag #lwgabo. It's one thing to mold and another to draw; however, I've been getting the hang of this drawing thing and I wanted to see how a drawing of this character would turn out. It was a simple drawing, but for me, being a beginner, it was hard to do.
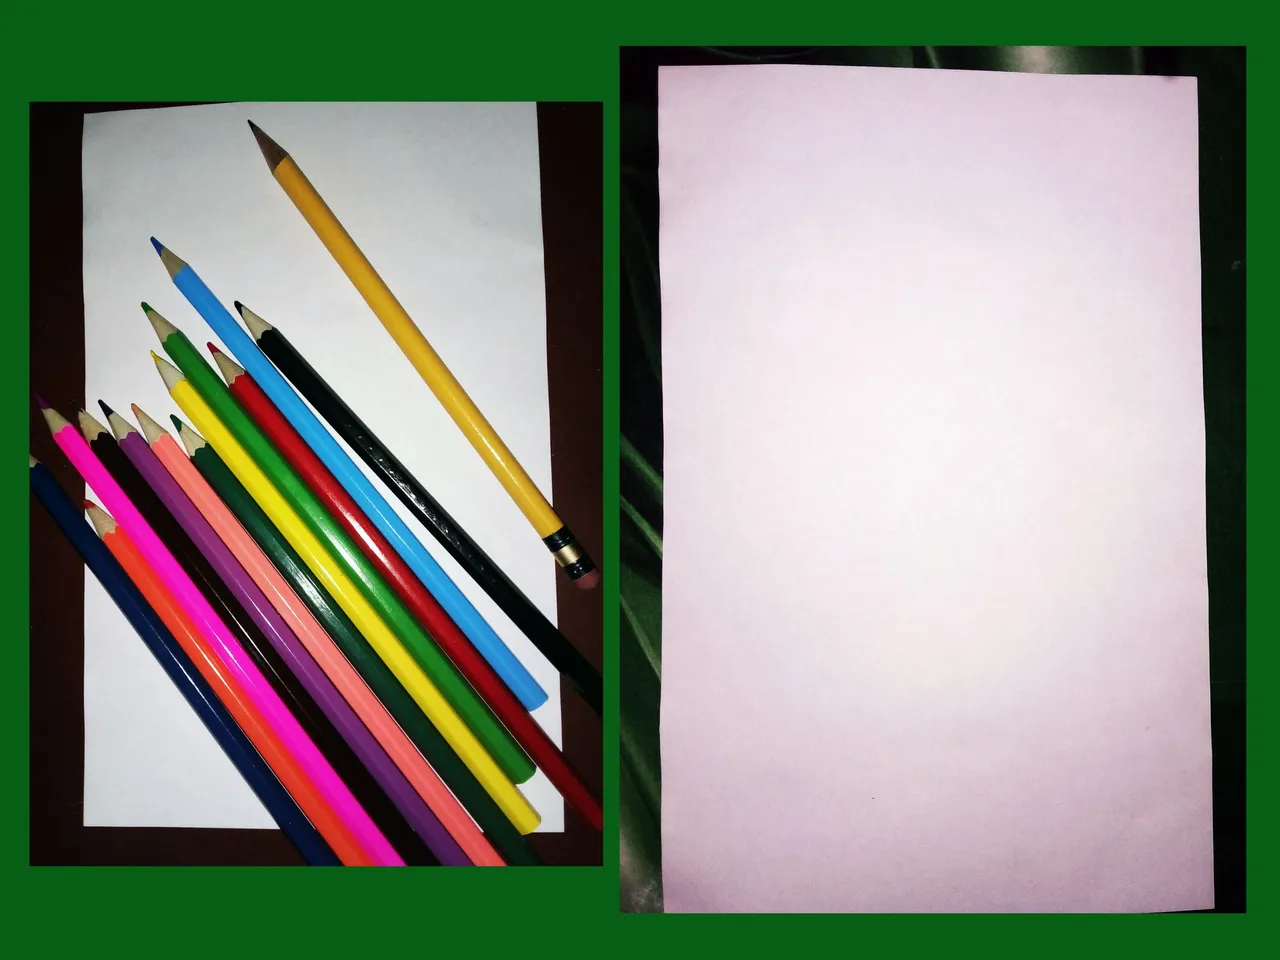
I used, as I mentioned above, a graphite pencil and medium quality colored pencils, nothing professional. For the drawing I used half a sheet of paper, since it is a small drawing.
Anteriormente había hecho una escultura de Baby Groot, pueden encontrarla buscando la etiqueta #lwgabo. Una cosa es moldear y otra dibujar; sin embargo, le he estado tomando el ritmo a esto del dibujo y quise ver que tal me salía un dibujo de este personaje. Fue un dibujo sencillo, pero para mí, que soy un principiante, me costó lograrlo.
Usé, como mencioné más arriba, un lápiz de grafito y lápices de colores se calidad media, nada profesional. Para el dibujo utilicé la mitad de una hoja de papel, pues es un dibujo pequeño.
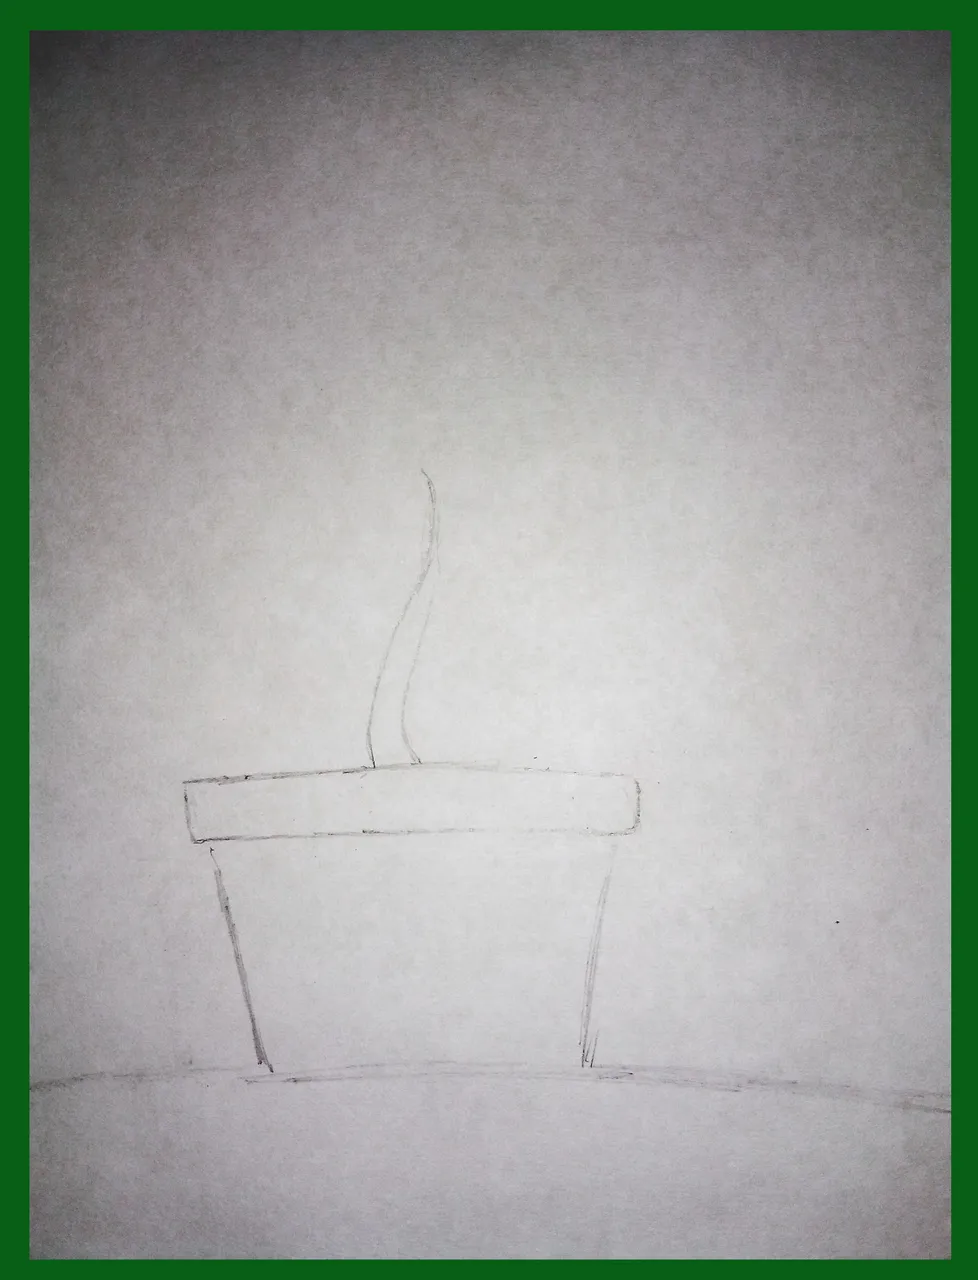
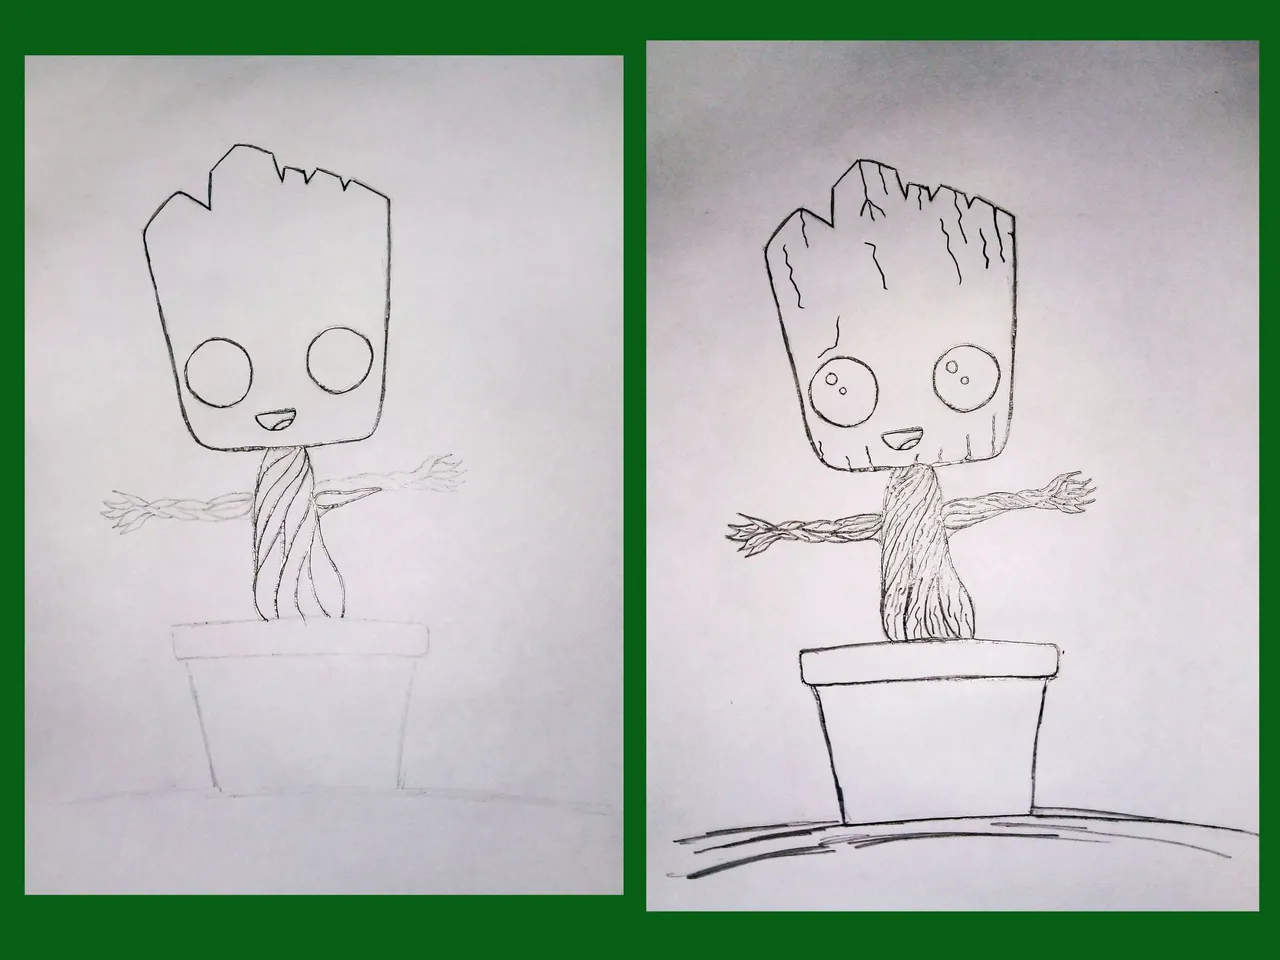
Unlike other drawings I've done, for this one I didn't do any kind of sketch. I wanted to start at once on the sheet where I would show the result and keep drawing no matter how it turned out. That's why I made very clear strokes, without pressing the pencil too much.
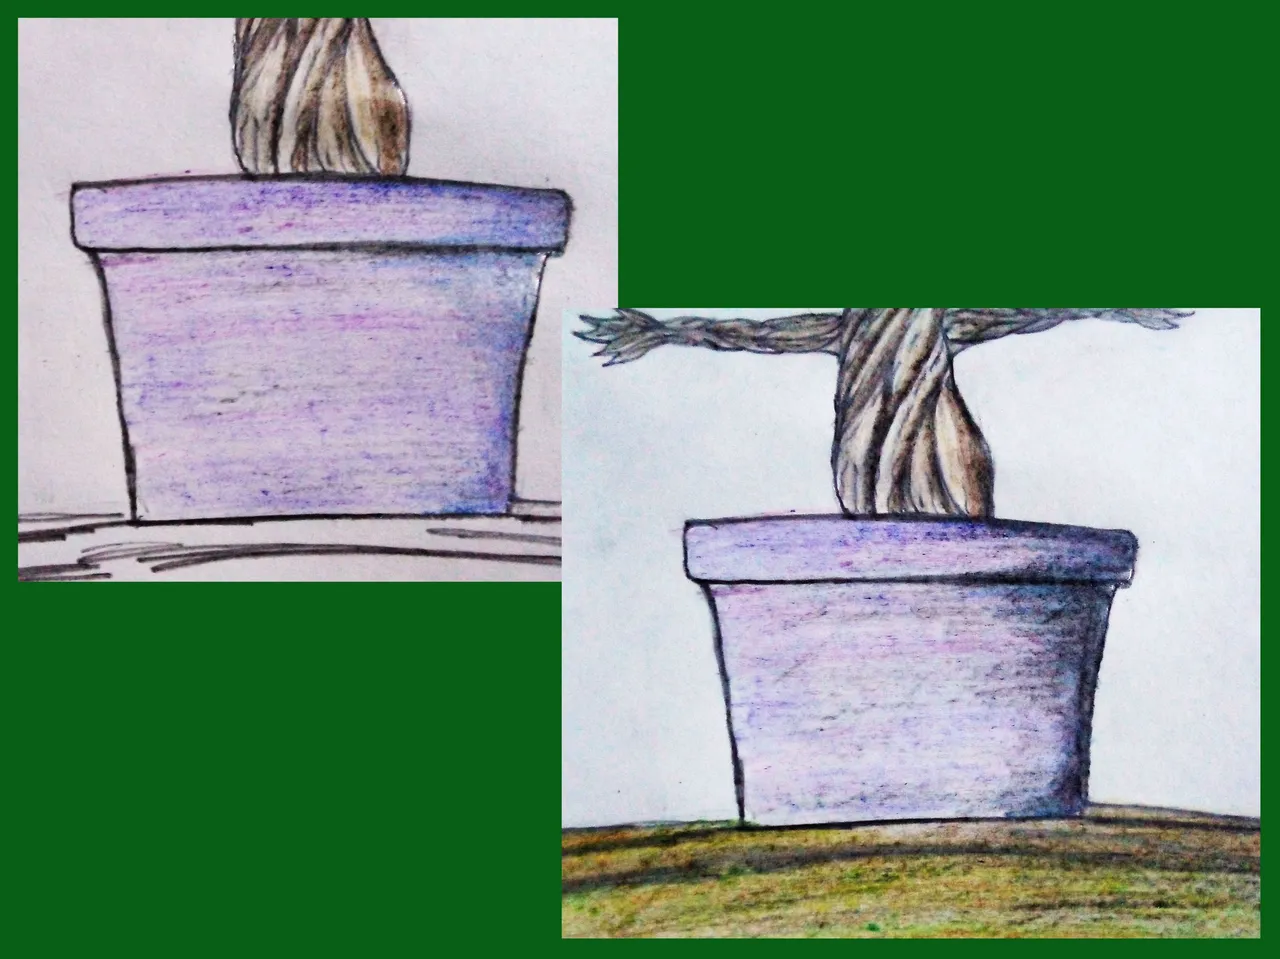
The first thing I did was precisely the base, the vase where Groot is planted. Then I started to make the body, which is something similar to rolled twigs.
A diferencia de otros dibujos que he hecho, para este no hice ninguna clase de boceto. Quise comenzar de una vez en la hoja en donde mostraría el resultado y seguir dibujando sin importar como quedase. Por eso hice trazos muy claros, sin presionar demasiado el lápiz.
Lo primero que hice fue precisamente la base, el jarrón en donde está sembrado Groot. Después comencé a hacer el cuerpo, que es algo similar a ramitas enrolladas.
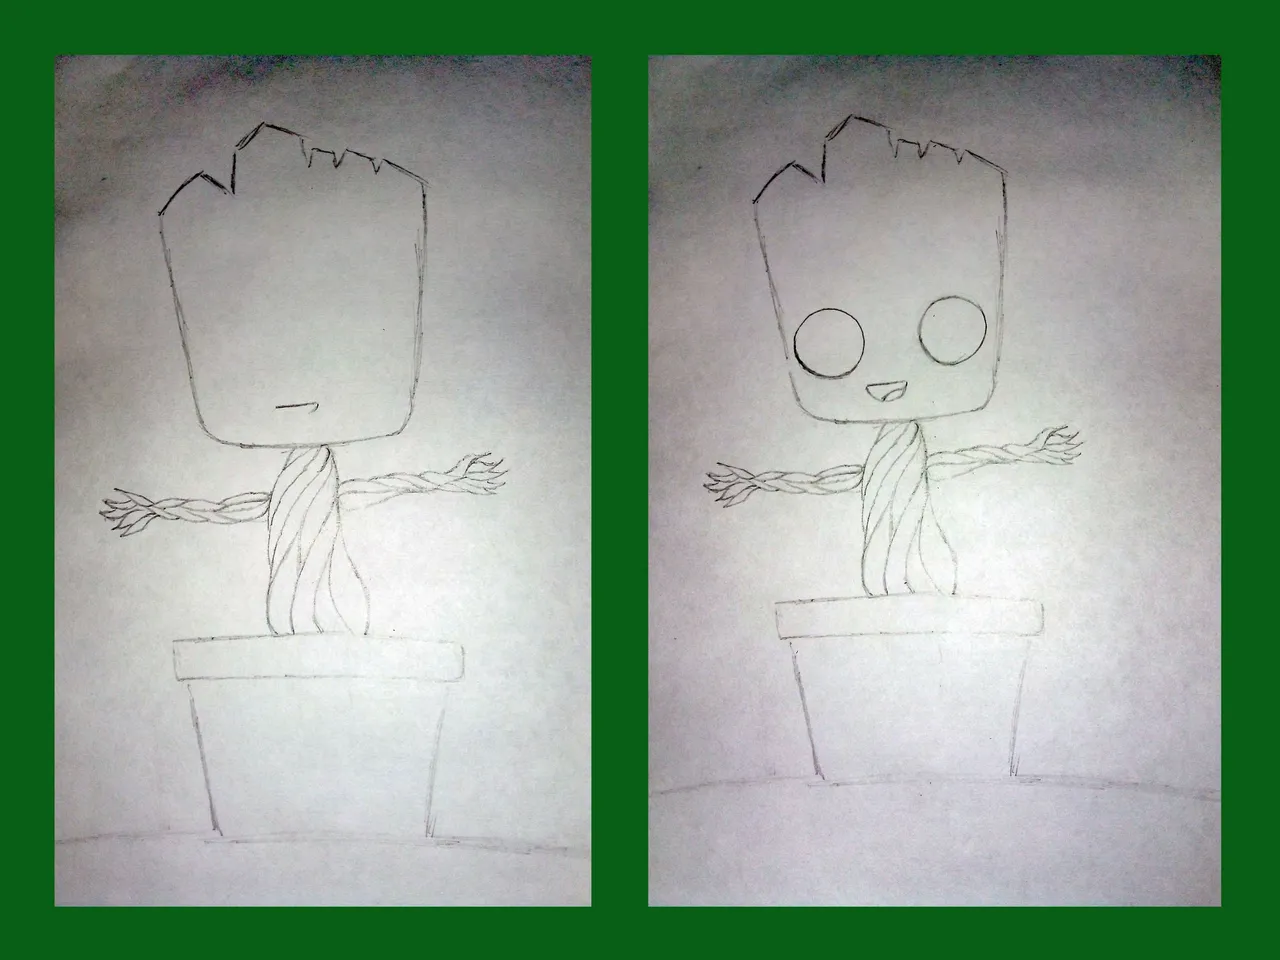
I continued making the same soft and thin strokes until I completed the whole body of the drawing, both the head and the little arms. Once this was done, I continued with the face. I must admit that it took me a lot, emphasis on a lot, to make the eyes the same shape and size.
Even at this point I know that they were not the same and not in the same position, but in these handmade works there are always details and imperfections.
Continué haciendo los mismos trazos suaves y delgados hasta completar todo el cuerpo del dibujo, tanto la cabeza como los bracitos. Una vez hecho esto, continué con la cara. Debo admitir que me costó mucho, énfasis en mucho, hacer los ojos de la misma forma y tamaño.
Incluso en este punto sé que no me quedaron iguales y tampoco en la misma posición, pero en estos trabajos hechos a mano siempre hay detalles e imperfecciones.
Once I finished the primary strokes of the drawing, I started to highlight with the same pencil, putting more pressure on the strokes. I outlined the drawing a couple of times until it was dark enough to be seen in the photo.
Below you can see a couple of pictures where you can see how I outlined the drawing following the initial strokes, barely visible.
Una vez terminado los trazos primarios del dibujo, comencé a remarcar con el mismo lápiz, haciendo más presión sobre los trazos. Remarqué el dibujo un par de veces hasta que quedó lo suficientemente oscuro como para verse en la foto.
A continuación pueden ver un par de fotografías en donde se aprecia cómo remarqué el dibujo siguiendo los trazos iniciales, apenas visibles.
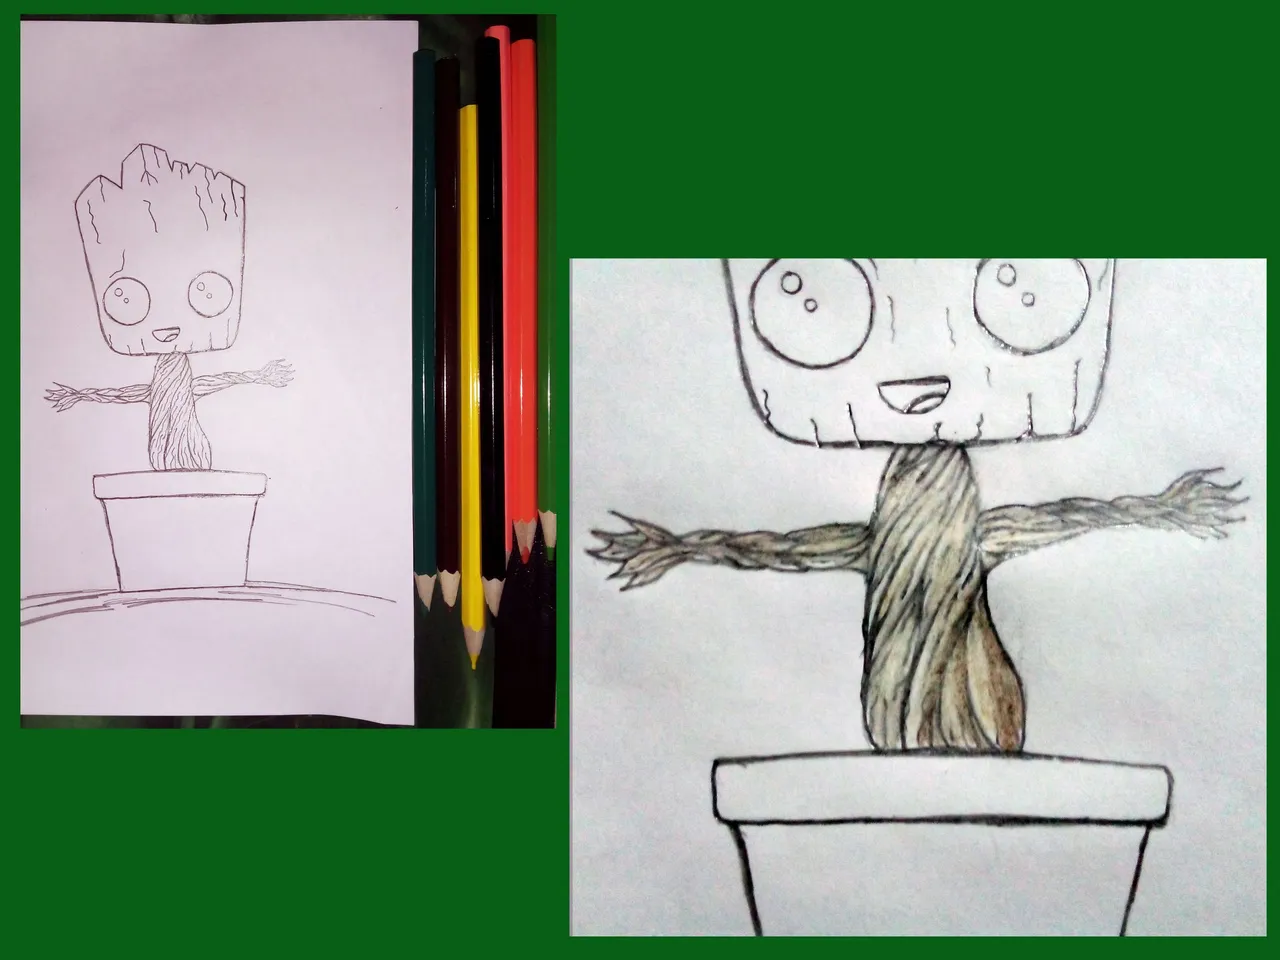
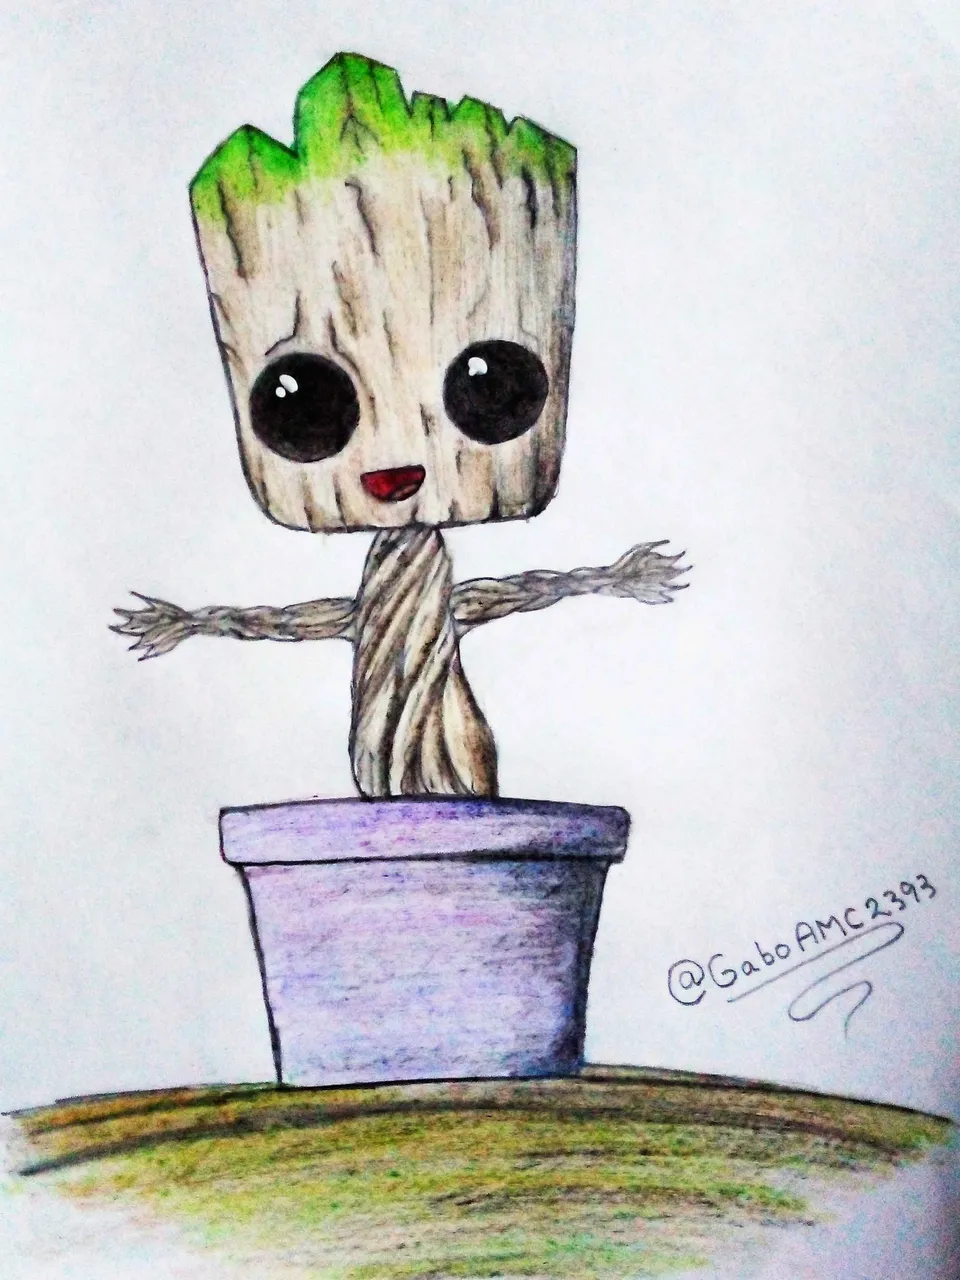
The colors I used to paint were the following: pink, orange, yellow, red, brown, black and two shades of green, one darker than the other; for the pot, purple and dark blue.
The idea was to create a non-linear drawing, with depth and leftovers. With this in mind I started coloring with pink as a base, then orange as an intermediate between the same pink and the shadows, which I painted with brown and black, the latter for the darker areas.
Los colores que usé para pintar fueron los siguientes: rosado, naranja, amarillo, rojo, marrón, negro y dos tonalidades de verde, uno más oscuro que el otro; para la maceta, morado y azul oscuro.
La idea era la de crear un dibujo no lineal, con profundidad y sobras. Con esto en mente comencé a colorear con el rosado como base, luego el naranja como intermedio entre el mismo rosado y las sombras, las cuales pinté con color marrón y negro, este último para las áreas más oscuras.
In the pictures below you can better appreciate the different shades of pink and orange, I even used a bit of yellow barely visible. As I said, for the shadows I used brown and darkened them a bit more with black.
I also used green to create that mold that Groot has on his head. First I applied light green as a base color, it's a green similar to apple green so it looked great. I applied it only on the tips of the character's head.
En las fotografías de abajo se pueden apreciar mejor las distintas tonalidades de rosado y naranja, incluso usé un poco de amarillo apenas visibles. Como dije, para las sombras usé marrón y las oscurecí un poco más con el negro.
También usé el verde para crear ese moho que tiene Groot en la cabeza. Primero apliqué el color verde claro como base, es un verde parecido al verde manzana así que le quedó muy bien. Lo apliqué solo en las puntas que tiene el personaje en la cabeza.
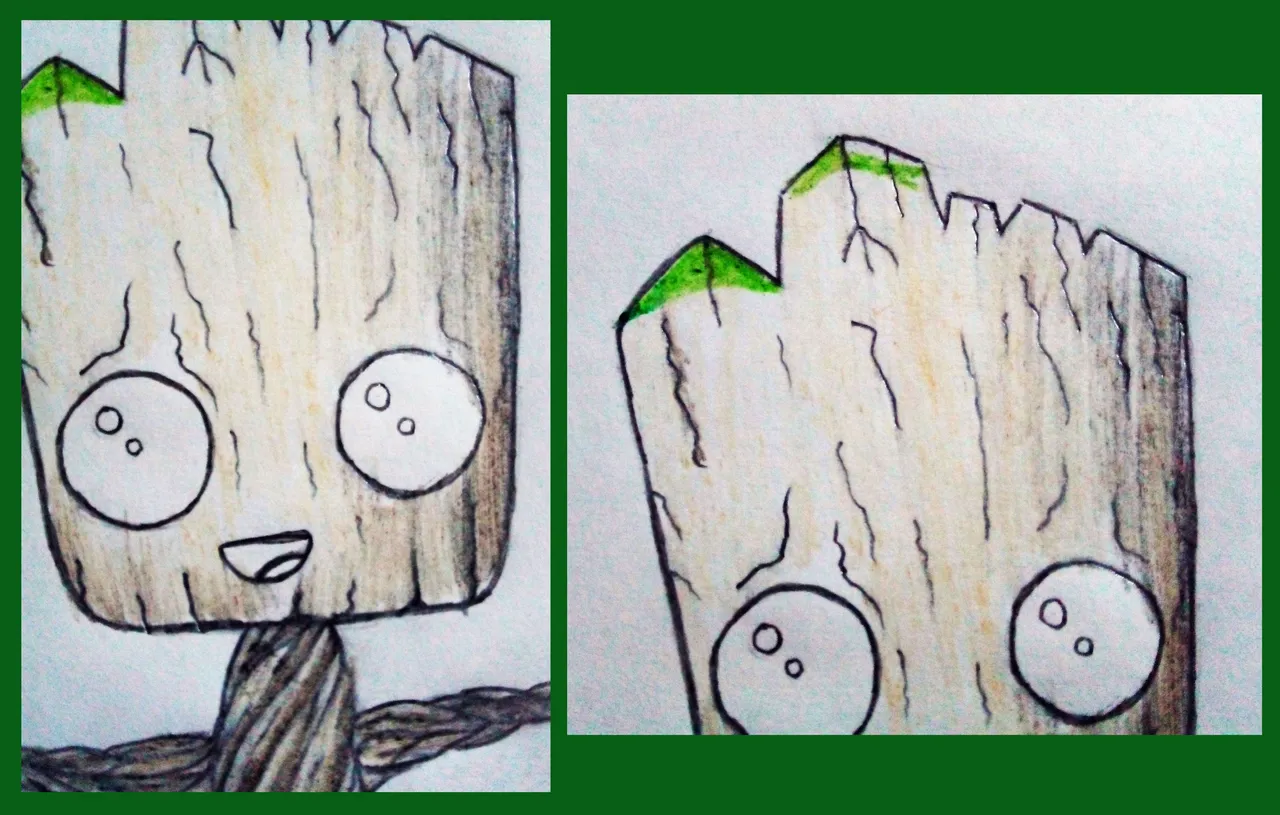
I applied a bit of dark green on the upper edges of the tips and used a bit of yellow to lighten the light green, creating a sort of gradient between the brown and the apple green I used as a base.
Below you can see how the drawing was looking at this point:
Apliqué un poco de verde oscuro en los borde superiores de las puntas y usé un poco de amarillo para aclarar el verde claro, creando una suerte de degradado entre el marrón y el verde manzana que usé como base.
A continuación pueden ver cómo estaba quedando el dibujo en este punto:
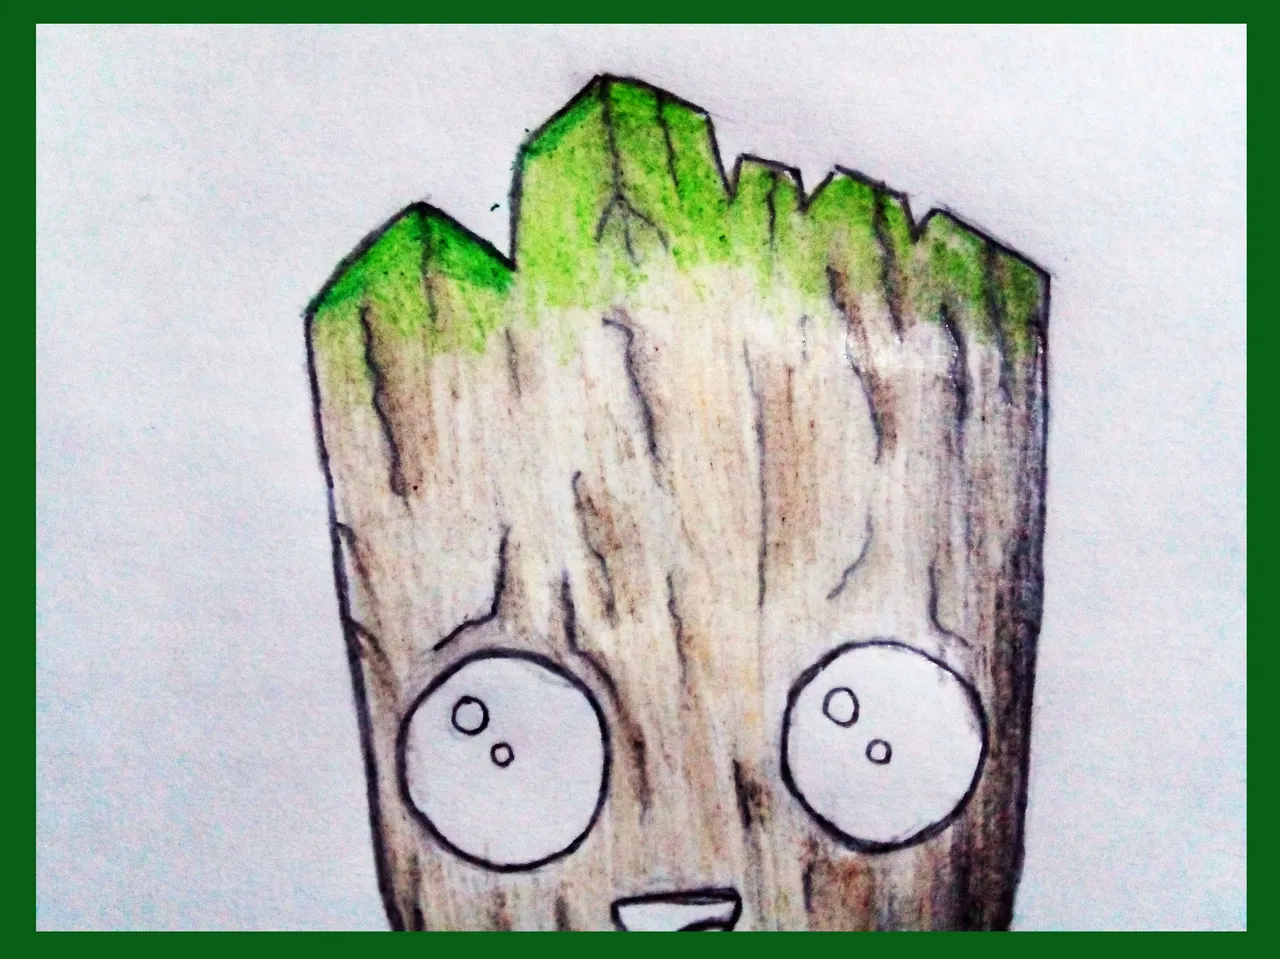
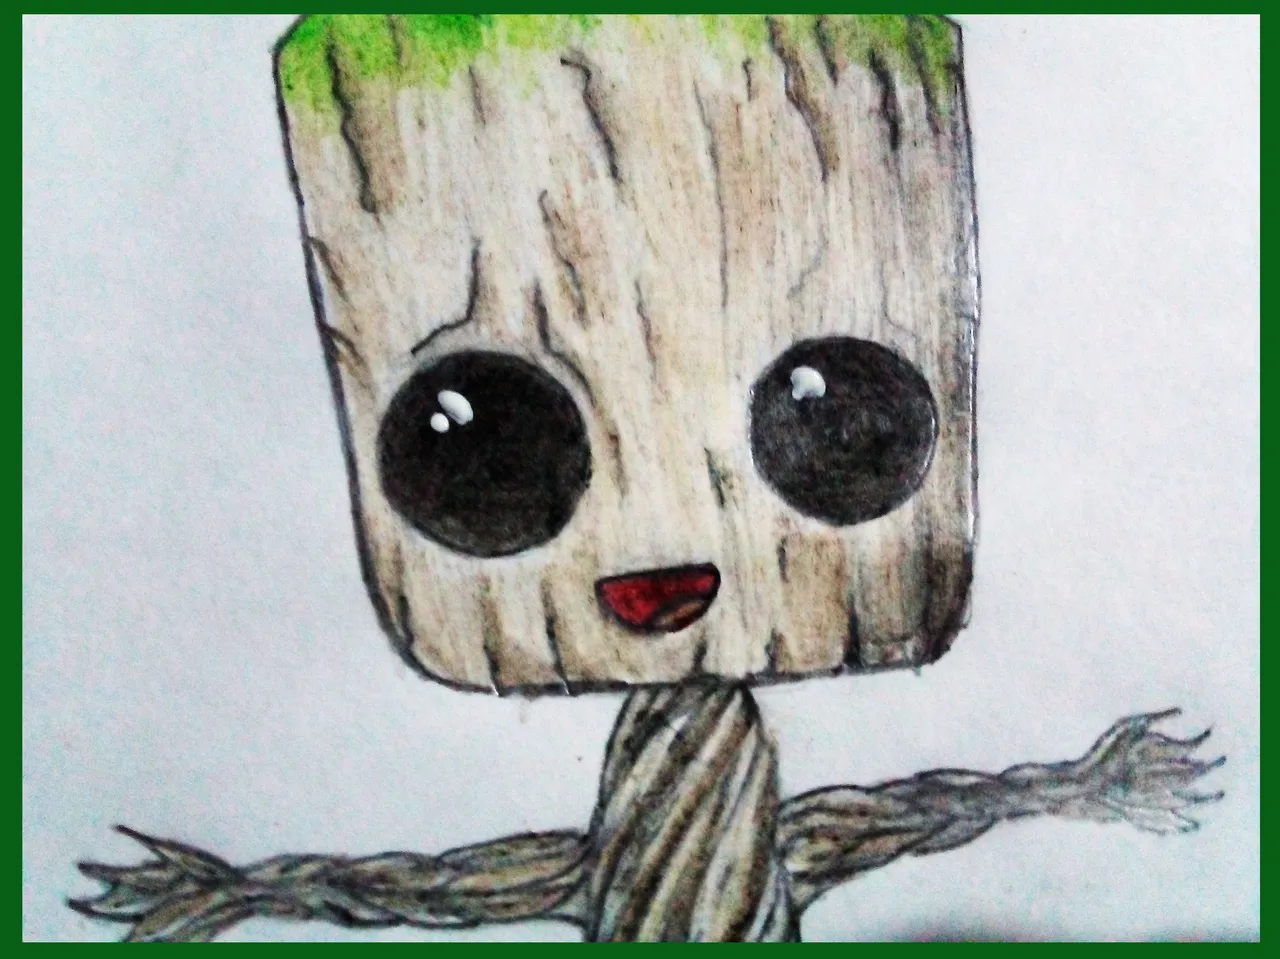
The next thing was to paint the eyes. I noticed a very interesting detail. If painted only black, these eyes don't look like the typical Groot eyes which, in fact, are a brown color with some crimson, I think....
However, I knew how to fix these black eyes that, more than eyes, looked like empty sockets. What's more, they looked like the eyes of some character from some animated Tim Burton movie.
Oh, by the way! I also colored the pot with purple and blue.
Lo siguiente fue pintar los ojos. Me di cuenta de un detalle muy interesante. Si se pintan solo de color negro, estos ojos no se ven como los típicos ojos de Groot que, de hecho, son de un color marrón con algo de carmesí, creo...
Sin embargo, sabía como solucionar estos ojos negros que, más que ojos, parecían cuencas vacías. Es más, parecían los ojos de algún personaje de alguna película animada de Tim Burton.
¡Ah, por cierto! También coloreé la maceta con morado y azul.
Of the latter I will show you a little more. You see, I used purple as the base for the pot, applying a little pink very faintly to give more variety of color.
I used blue to create shadow and black to give more depth to that shadow.
De esto último les mostraré un poco más. Verán, usé morado como base para la maceta, aplicando un poco de rosado de manera muy ténue para dar más variedad de color.
Usé el azul para crear sombra y negro para dar mayor profundidad a esa sombra.
As I told you when I told you about the eyes, I knew how to solve this aspect of empty sockets that they had. The easiest way is to brighten it with some white dots, this gives it a shiny sphere look instead of an empty socket.
For this I did use white paint. I simply applied a few dots, as shown in the following picture:
Como les dije cuando les comenté lo de los ojos, sabía como solucionar este aspecto de cuencas vacías que tenían. La manera más sencilla es darle brillo con algún punto blanco, esto le da un aspecto de esfera brillante en lugar de cuenca vacía.
Para esto sí usé pintura blanca. Simplemente apliqué unos cuantos puntitos, tal como se aprecia en la siguiente fotografía:
With this last detail in the eyes, the drawing was completely finished. I applied a few more shadows and adjusted details, but it was finished.
Below you can see a couple of pictures of the final result:
Con este último detalle en los ojos, el dibujo quedó completamente terminado. Apliqué unas cuántas sombras más y ajusté detalles, pero quedó terminado.
A continuación pueden ver un par de fotografías del resultado final:
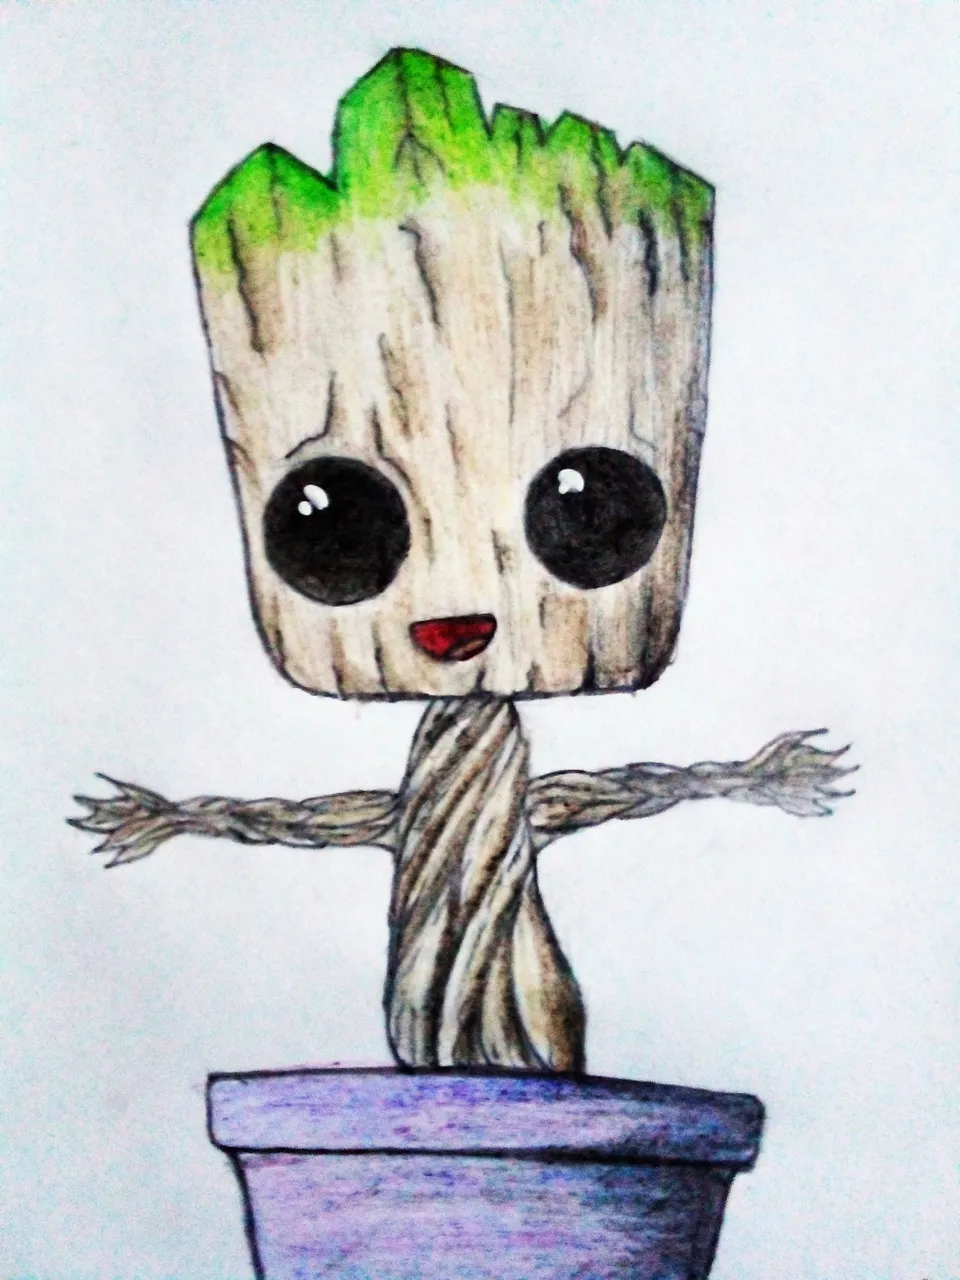
Well folks, that's it, what did you think of the drawing? I loved it, to be honest. I'm a beginner in drawing and it fills me with satisfaction to see that, in a way, I'm improving.
I would like to know your opinions about the drawing, about what I did, how I used the colors and all that. Advice is also welcome, as always I'll be happy to read it in the comments. With nothing more to add, I'll say goodbye then....
See you next time!
Bien amigos, esto ha sido todo. ¿Qué les pareció el dibujo? A mi me encantó, siendo honesto. Soy un principiante en el dibujo y me llena de satisfacción ver que, de cierta forma, estoy mejorando.
Me gustaría saber sus opiniones sobre el dibujo, sobre lo que hice, cómo usé los colores y todo eso. Los consejos también son bienvenidos, como siempre estaré encantado de leerlos en los comentarios. Sin más que agregar, me despido entonces...
¡Hasta la próxima!

Traducido con DeepL
Template Gift Box
WE95 - Children & Vehicles
Cómo usar el nuevo Hive-Engine