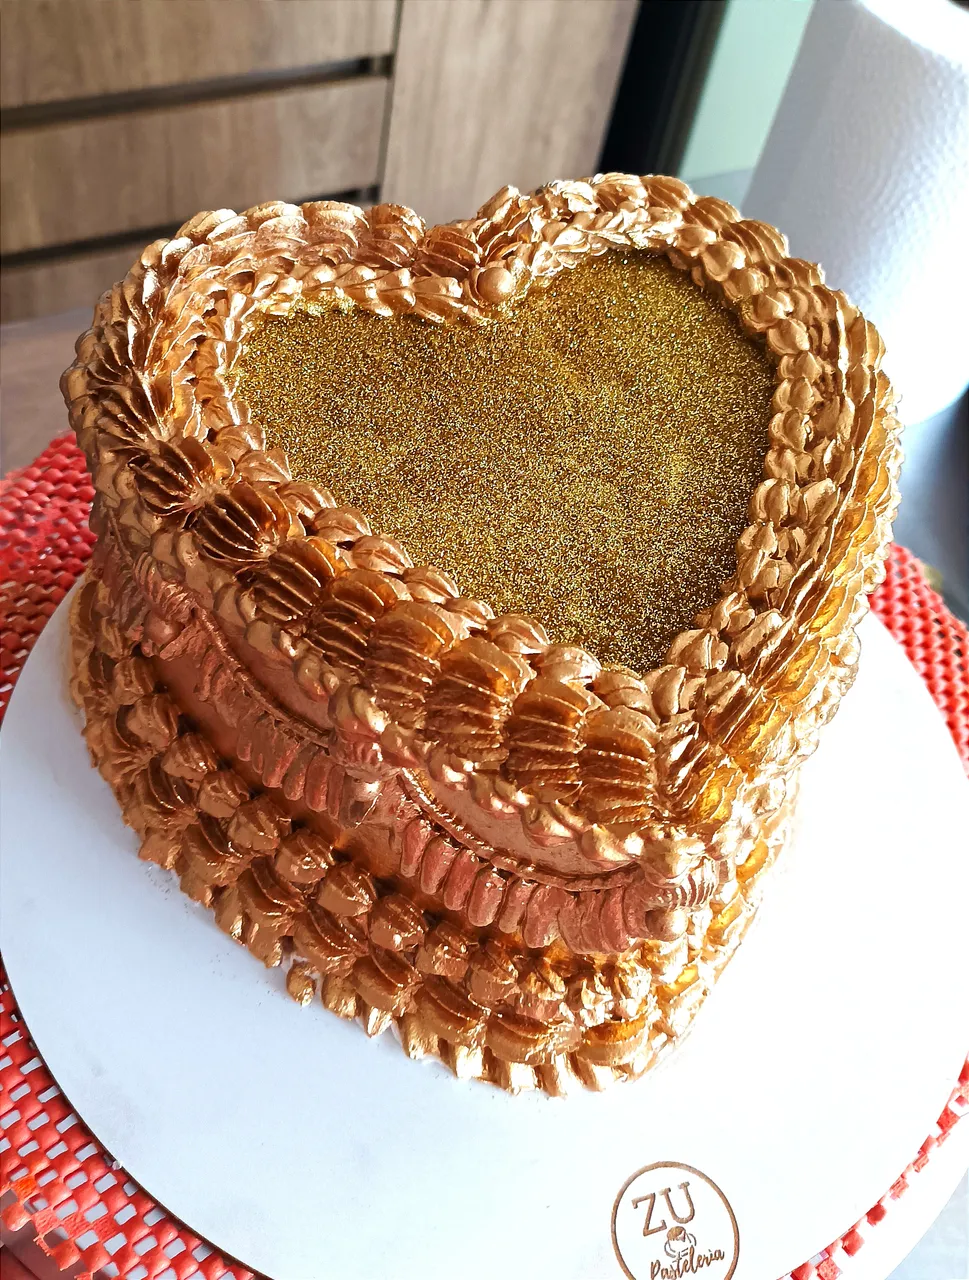
La semana pasada formé parte de una colaboración muy especial para una sesión de fotos que se hizo nuestra querida Hiver, @marvic-1194, pues cumplió un añito más de vida. Para la sesión de fotos ella quería brillar como una estrella, así que me pidió que le hiciera una torta con mucho brillo. Entre las dos estuvimos evaluando varias opciones hasta que dimos con la más adecuada para esta importante ocasión, que fue una torta en forma de corazón, de color dorada con escarchas comestibles y fresas con chocolate negro que también estaban decoradas con escarchas comestibles doradas.
A propósito de tortas en forma de corazón, te dejo el link de un video donde te muestro cómo hacer una Torta en Forma de Corazón Sin Molde.
Cabe destacar que nunca había hecho una torta con este tipo de decorado, así que me sentí muy animada, ya que vi esta colaboración como una oportunidad de aprendizaje y crecimiento profesional.
Para lograr el color dorado en esta torta, se pinta con un aerógrafo de mano del cual dispongo, pero la manguerita por donde pasa el líquido, se me perdió en la mudanza que hice en diciembre del año pasado. Aunque, esto no me detuvo y resolví con un atomizador que de casualidad tenía en casa.
En un principio no estaba muy convencida de usar el atomizador, porque no sabía si iba a servirme. Ante esta duda, busqué varios tutoriales en youtube relacionados con el tema, pero a pesar de haber visto algunos videos, seguía incrédula, por lo que no tenía otra opción que intentarlo y orar para que todo saliera bien. Para mi sorpresa, el atomizador cumplió con el propósito, pero para que esto suceda es importante preparar adecuadamente la pintura dorada.
Ahora, te invito a que me acompañes a mi cocina, "zu cocina" y te cuento cómo lo hice.
Vas a necesitar los siguientes ingredientes para una torta de 15 cm de diámetro.
Pintura dorada comestible:
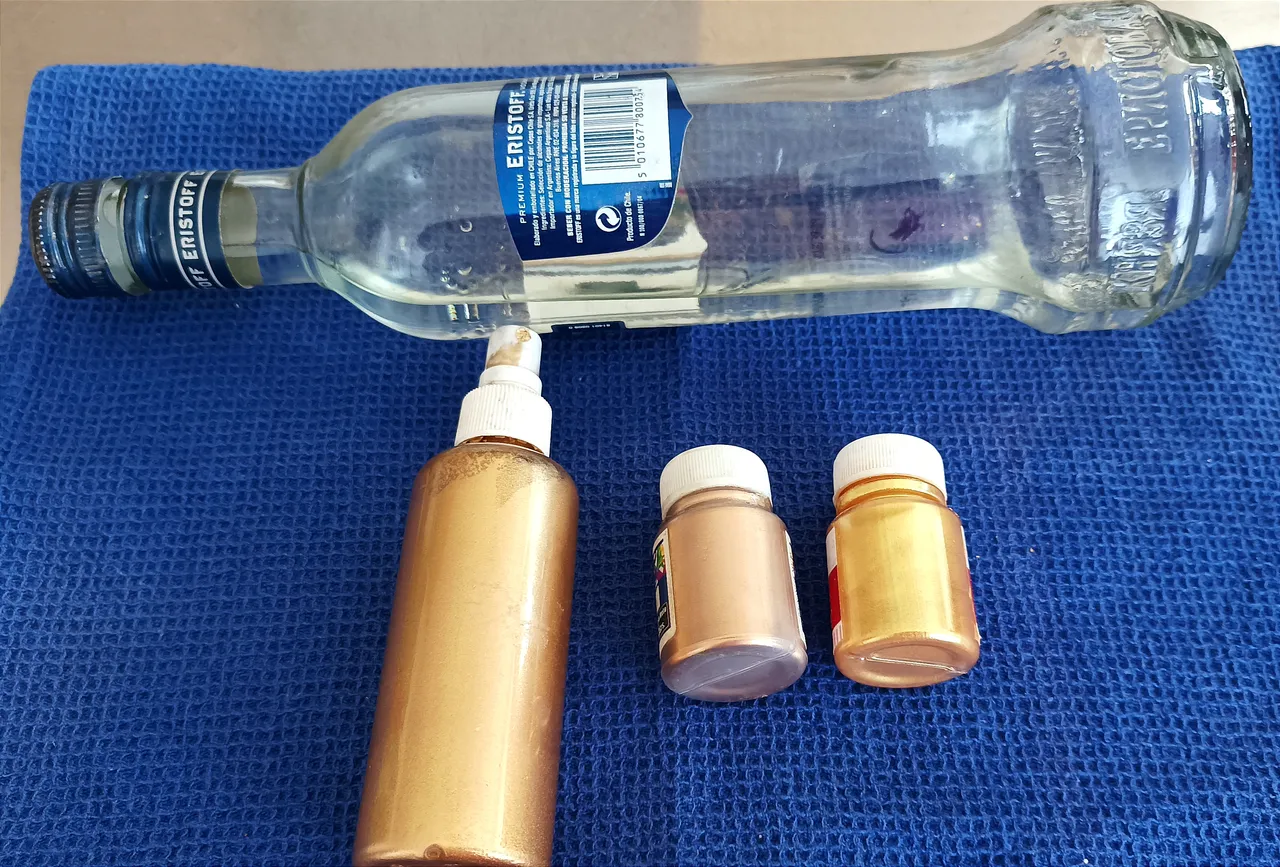
• 1 cdita de matizador dorado o bronce.
• 1 cda de vodka o ron blanco.
• 1 potecito de escarchas doradas comestibles.
Adicionales:
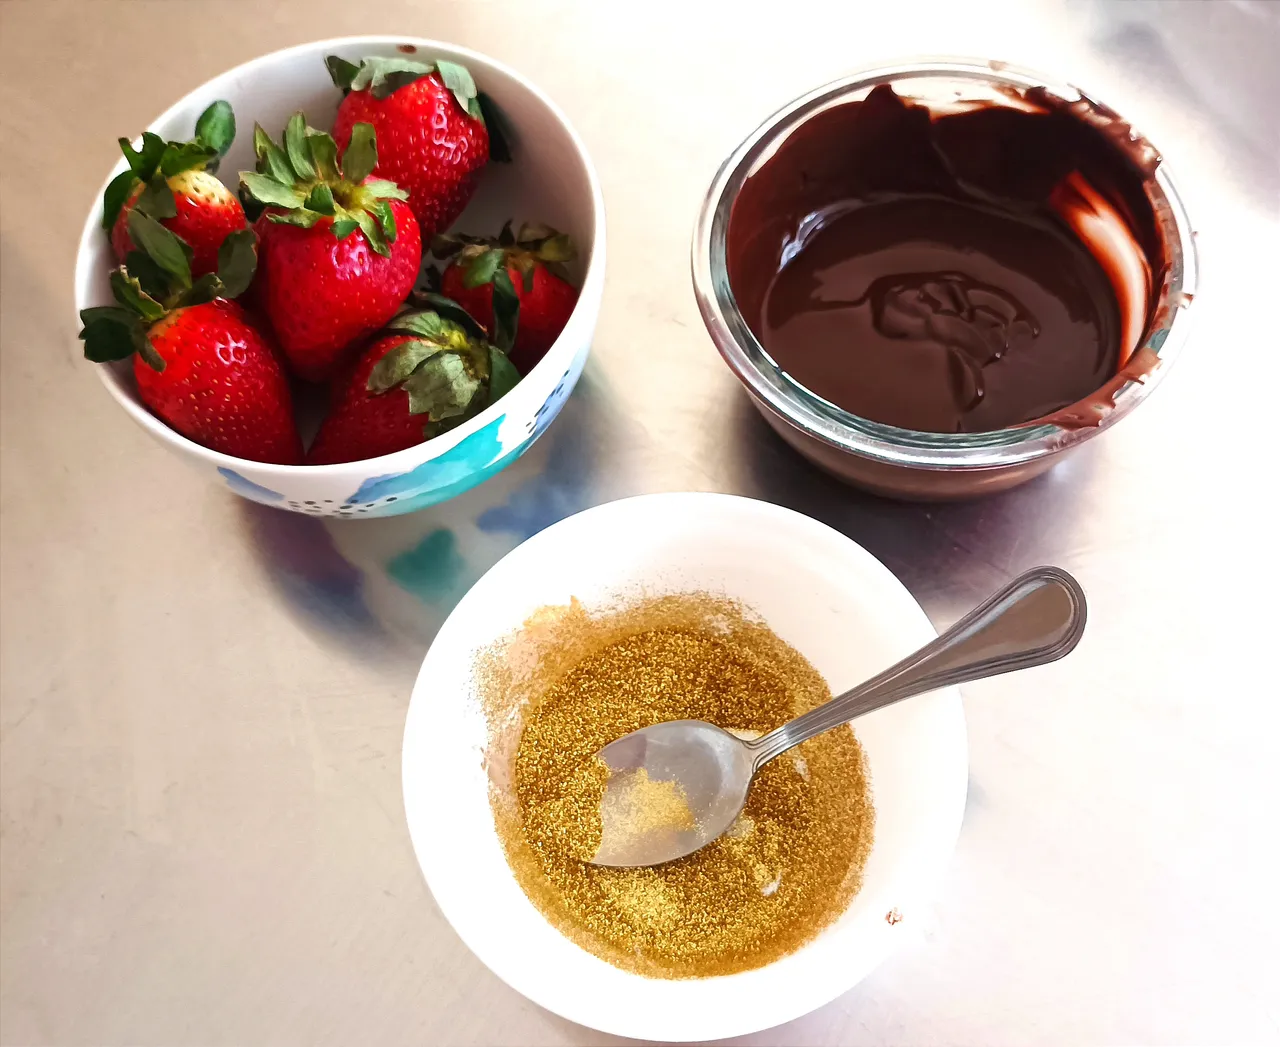
• 5 fresas.
• 150 gms de chocolate cobertura derretido.
Preparación
En un recipiente pequeño, agregar el vodka y el matizador, luego mezclar muy bien. Hecho esto verter el líquido en el atomizador y ahora ya puedes proceder a pintar la torta.


Nota: Lamentablemente, no tomé fotos del momento que estaba pintando la torta, porque estaba demasiado concentrada en lo que estaba haciendo y me olvidé, pero luego hice una pequeña prueba para mostrarles cómo la crema se va cubriendo con la pintura.
Después que hayas terminado de pintar la torta, agregar las escarchas en la parte superior.

Recomendaciones para un mejor resultado
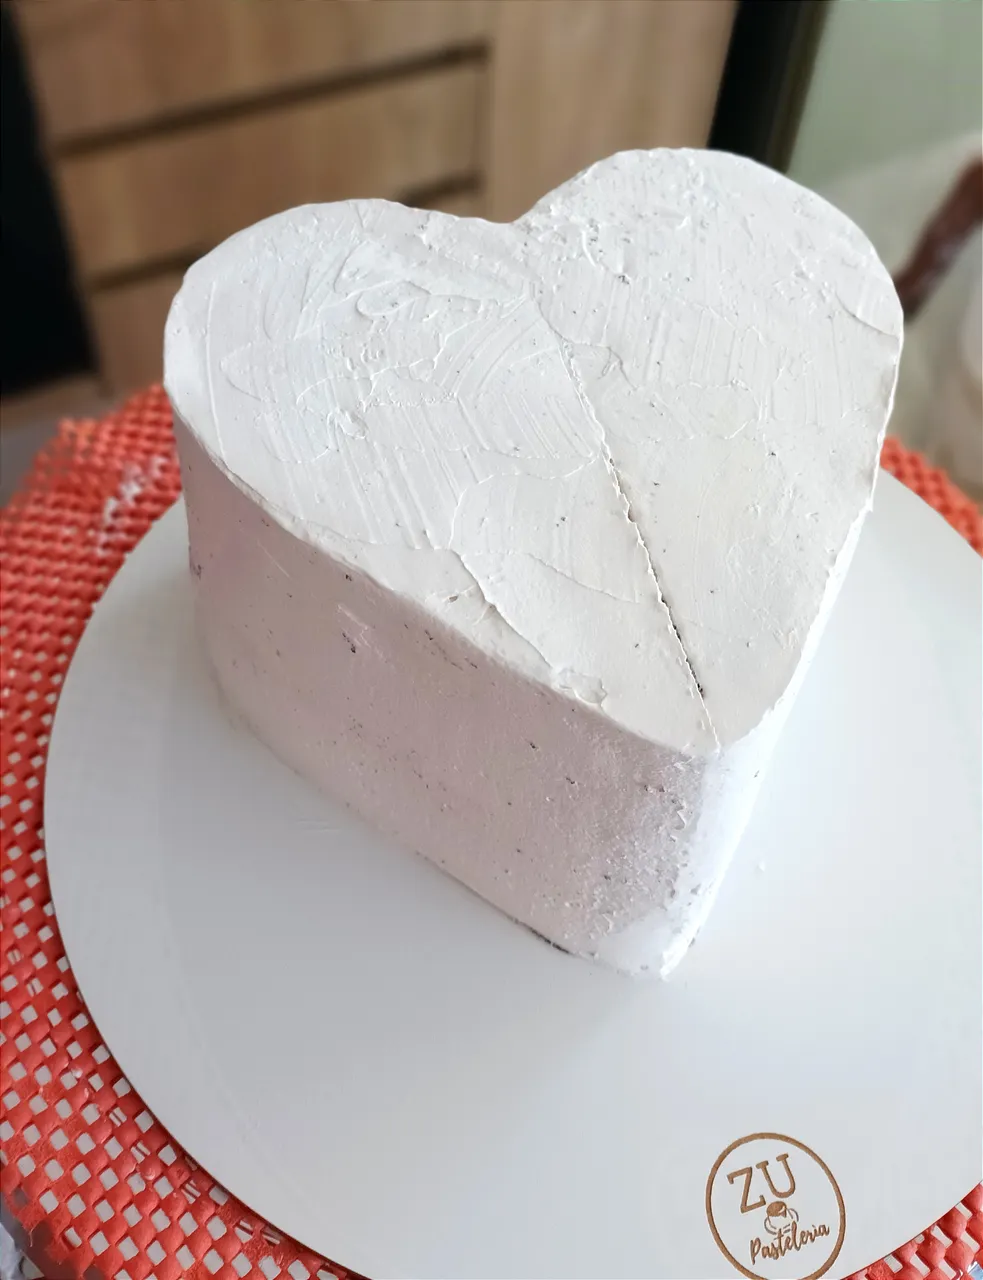
- La cobertura de la torta debe hacerse con chantilly, preferiblemente blanco.
- Cada cierto tiempo limpiar con una servilleta la boquilla del atomizador y remover después de cada aplicación para que el matizador se mantenga integrado con el vodka.
- Usar guantes para que tus manos no queden todas manchadas.
- Ten mucha paciencia y veras que vas amar el resultado final.
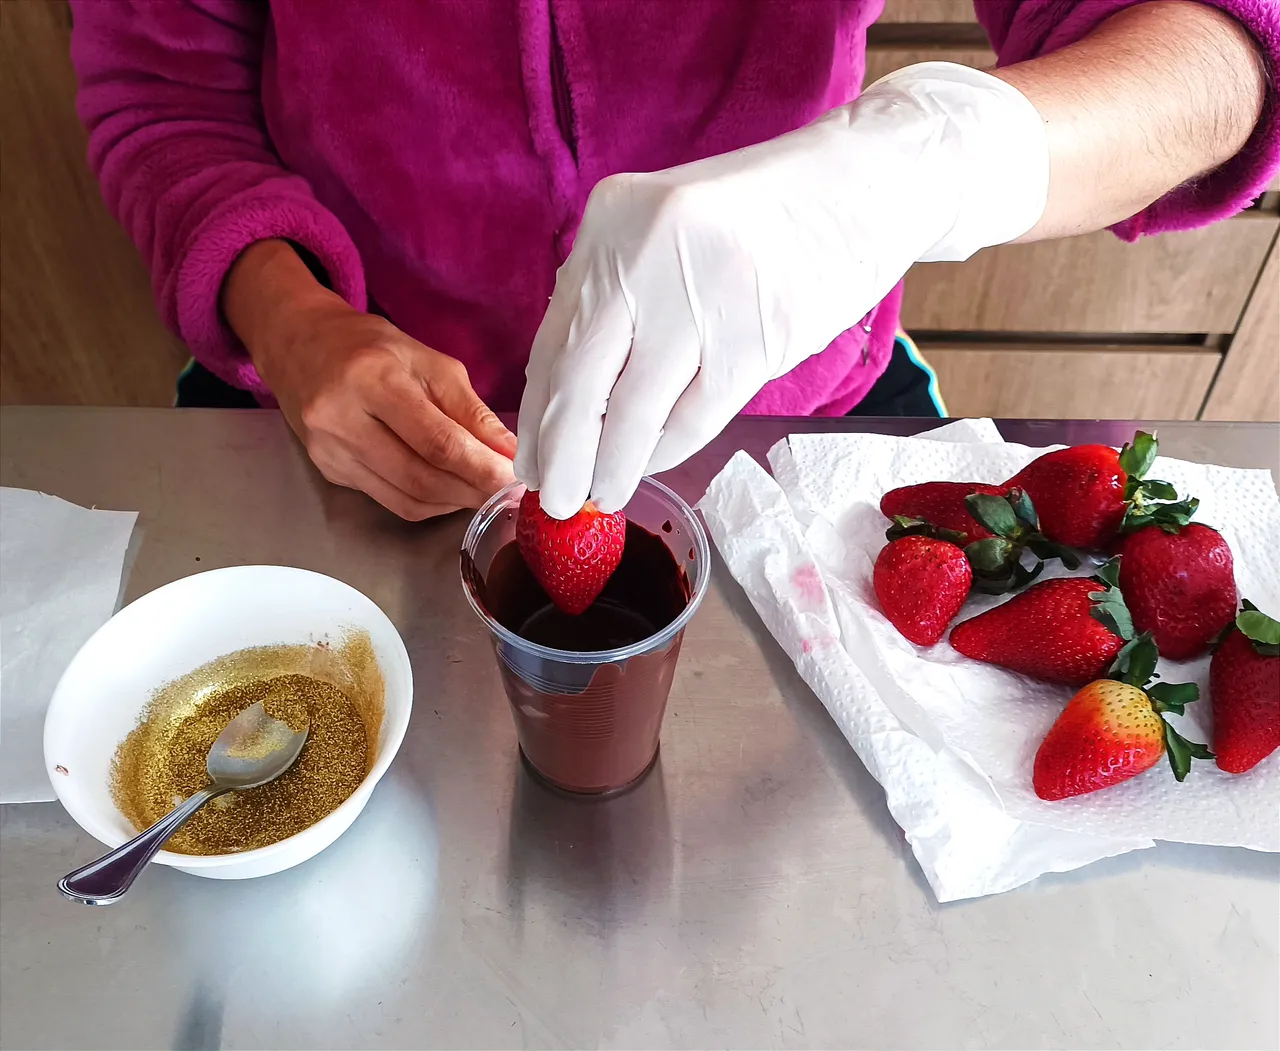
Decoración de las Fresas
Después de derretir el chocolate en el microondas, espera a que enfríe un poco para luego sumergir la fresa, escurrir un poco y agregar, con una cucharadita, las escarchas comestibles.

Dejar que el chocolate se solidifique durante unos 20 minutos sobre un papel de cocina.

Pasado este tiempo, ya puedes terminar de decorar la torta con las fresas. En este sentido, si quieres que las fresas no se muevan en la torta durante el traslado, colócales unos palillos y las fresas que están en la base las puedes pegar con un poquito de chocolate.

Como pudieron apreciar, pintar una torta con matizador dorado usando un atomizador, no es difícil, solo debemos tener un poco de paciencia. Claro que si cuentas con un aerógrafo de mano, el proceso será mucho más rápido.
En el momento que acepté hacer esta torta pensé que sería más complicado, pero la verdad es que fue bastante fácil y me la pasé súper bien en el proceso, pues al ver que iba tomando el color dorado, me sentía muy emocionada de ver el resultado final, una torta que parece un gran lingote de oro.

Espero esta técnica para pintar tortas de color dorado usando un atomizador, te sea de utilidad.
¡Gracias por acompañarme en este proceso y por el apoyo!
¡Tu amiga, Zuuu!

También me puedes encontrar en instagram como: @zu_pasteleria, @tayiitos y en RedBubble en mi tienda de ropas y productos
Todas las fotos y videos de esta publicación fueron realizadas con mi celular Xiaomi Redmi 10.
Recursos: Gifty y DeepL Translator.
ENGLISH
Last week, I was part of a very special collaboration for a photo shoot that our dear Hiver, @marvic-1194, had for her birthday. For the photo shoot she wanted to shine like a star, so she asked me to make her a cake with lots of glitter. Between the two of us we were evaluating several options until we found the most suitable for this important occasion, which was a heart-shaped cake, golden with edible frosting and strawberries with dark chocolate that were also decorated with edible golden frosting.
Speaking of heart-shaped cakes, I leave you the link to a video where I show you how to make a Heart-Shaped Cake Without Mold.
It should be noted that I had never made a cake with this type of decoration, so I felt very encouraged, as I saw this collaboration as an opportunity for learning and professional growth.
To achieve the golden color in this cake, it is painted with a hand airbrush which I have, but the hose through which the liquid passes, was lost in the move I made in December last year. However, this did not stop me and I solved the problem with an atomizer that I happened to have at home.
At first I was not very convinced to use the atomizer, because I did not know if it was going to work for me. Faced with this doubt, I looked for several tutorials on youtube related to the subject, but despite having seen some videos, I was still incredulous, so I had no choice but to try and pray that everything went well. To my surprise, the atomizer fulfilled the purpose, but for this to happen it is important to properly prepare the gold paint.
Now, I invite you to join me in my kitchen, "zu cocina" and I'll tell you how I did it.
You will need the following ingredients for a 15 cm diameter cake.
Edible gold paint:
• 1 teaspoon of gold or bronze shader.
• 1 tablespoon of vodka or white rum.
• 1 small pot of edible gold glitters.
Additional:
• 5 strawberries.
•150 gms of melted couverture chocolate.
Preparation
In a small bowl, add the vodka and the mixer, then mix very well. Pour the liquid into the spray bottle and now you can proceed to paint the cake.
Note: Unfortunately, I did not take pictures of the moment I was painting the cake, because I was too focused on what I was doing and I forgot, but then I made a little test to show you how the cream is being covered with paint.
After you have finished painting the cake, add the glitters on top.
Recommendations for a better result
- The cake should be covered with whipped cream, preferably white.
- Every so often, wipe the spray nozzle with a napkin and remove it after each application so that the blender remains integrated with the vodka.
- Use gloves so that your hands do not get all stained.
- Be patient and you will love the final result.
Strawberry Decoration
After melting the chocolate in the microwave, wait until it cools a little then dip the strawberry, drain a little and then add with a teaspoon the edible glitters.
Let the chocolate solidify for about 20 minutes on a paper towel.
After this time, you can finish decorating the cake with the strawberries. In this sense, if you want the strawberries not to move on the cake during the transfer, place some toothpicks on them and the strawberries that are on the base you can stick them with a little bit of chocolate.
As you can see, painting a cake with golden hue using an atomizer is not difficult, you just need a little patience. Of course, if you have a hand airbrush, the process will be much faster.
At the time I agreed to make this cake I thought it would be more complicated, but the truth is that it was quite easy and I had a great time in the process, because when I saw that it was taking the golden color, I was very excited to see the final result, a cake that looks like a big gold ingot.
I hope you find this technique for painting cakes gold using a spray bottle useful.
Thanks for joining me in this process and for the support!
Your friend, Zuuu!
You can also find me on instagram as: @zu_pasteleria, @tayiitos and on RedBubble in my clothes and products store.
All photos and videos in this post were taken with my Xiaomi Redmi 10 cell phone.
Resources: Gifty and DeepL Translator.