✨🍞☕️¡Hola amigos amantes de la comida! Espero estén pasando un gran día.🍞☕️✨
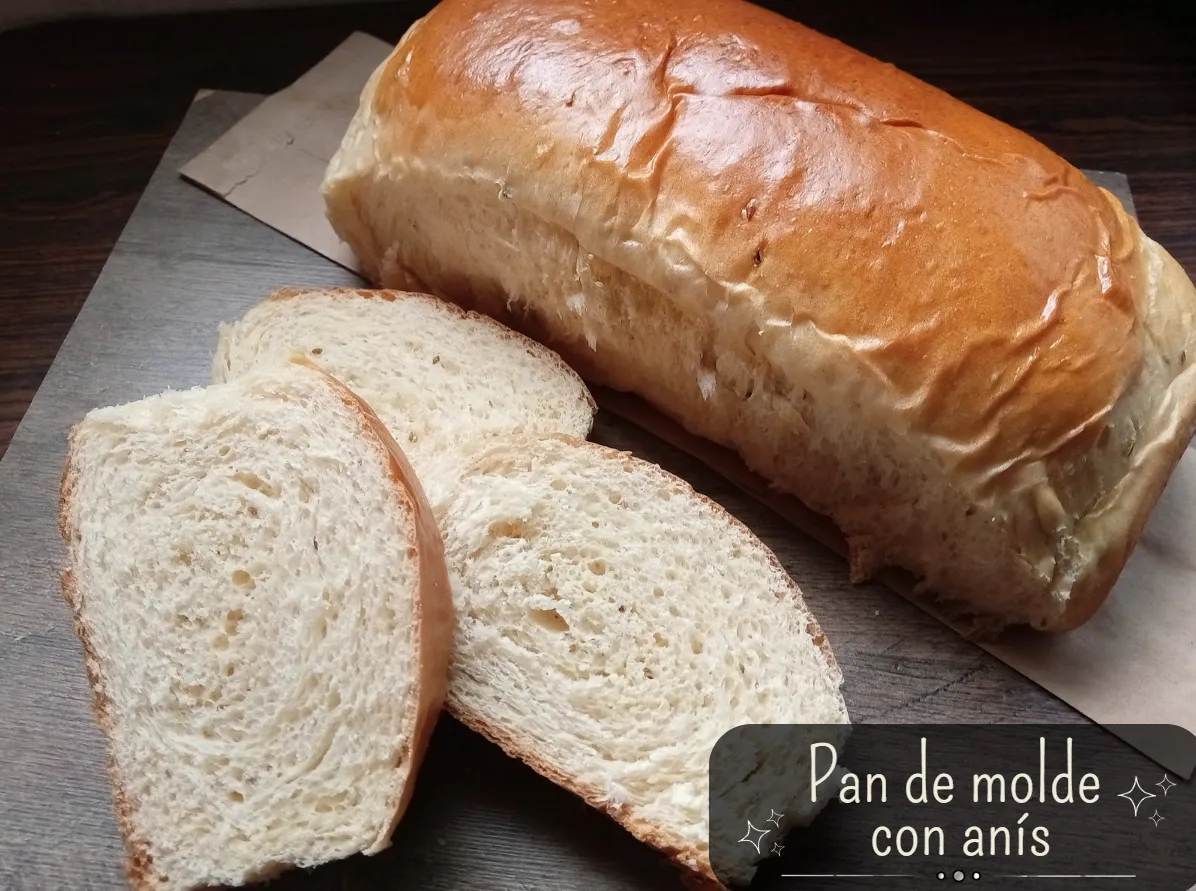
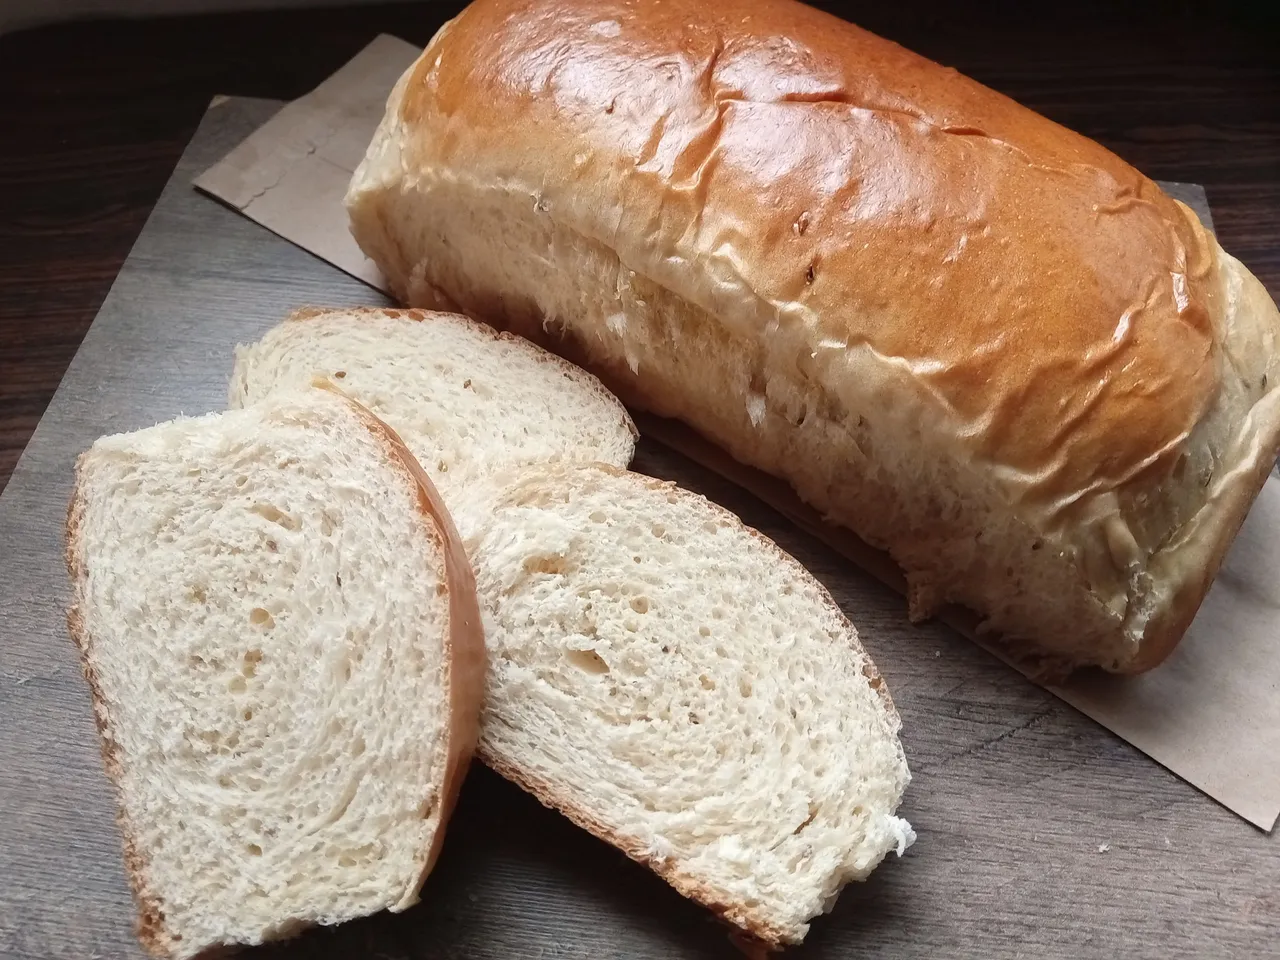
Espero que todos hayan tenido una semana excelente y que tengan un fin de semana muy reparador. En esta ocasión les comparto una deliciosa receta de pan de molde con anís dulce. Este tipo de pan es perfecto para cortar como pan de molde, en finas lonchas, como para untar o para hacer un delicioso sándwich de jamón y queso. Además, es un pan bastante sólido, se siente pesado y con unas pocas rebanadas ya estás lleno. Este es un pan que recomiendo mucho para los que nunca han hecho pan, ya que es muy fácil de preparar y no requiere de mucha experiencia en el tema, pues la primera vez que lo hice quedó igual de perfecto.
🔸A continuación, los dejo con el paso a paso:
✨🍞☕️¡Hello food loving friends! I hope you are super well on this day.🍞☕️✨
I hope everyone has had an excellent week and have a very restful weekend. On this occasion I share with you a delicious recipe for sliced bread with sweet anise. This type of bread is perfect to cut as sandwich bread, into thin slices, as it can be a spread or to make a delicious ham and cheese sandwich. Also, it is a fairly solid bread, it feels heavy and with a few slices you are already full. This is a bread that I highly recommend for those who have never made bread, since it is very easy to prepare and does not require great experience in the subject, because the first time I made it, it was just as perfect.
🔸Next, I leave you with the step by step:
♥️Espero les guste. ¡Comencemos!
♥️I hope you like it. Let's get started!

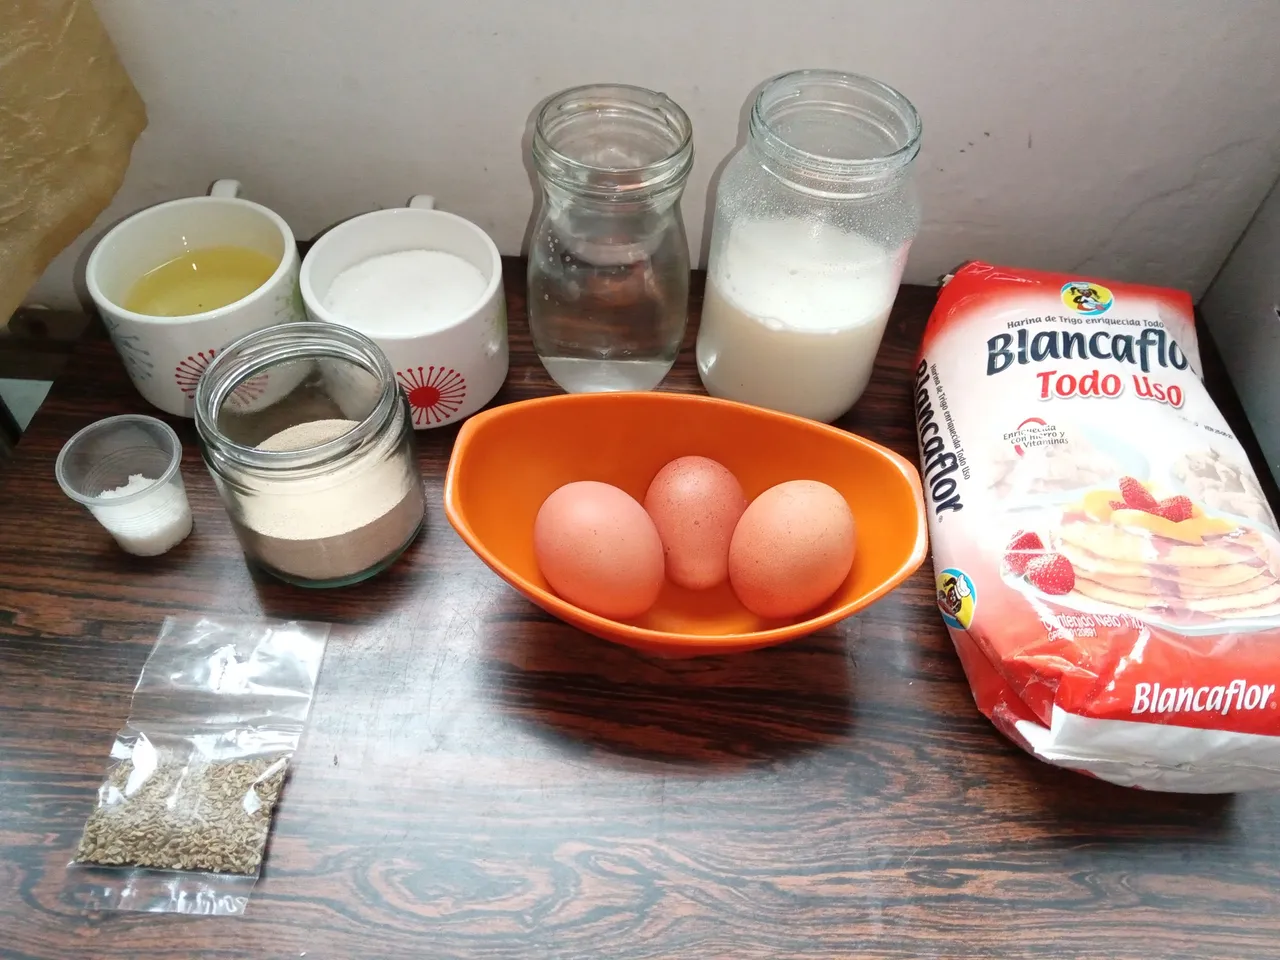
☕️ INGREDIENTES | ☕️ INGREDIENTS
- 1 kg de harina de trigo.
- 250 ml de agua.
- 250 ml de leche.
- 125 gr taza de azúcar.
- 100 ml de aceite.
- 1 cda de semillas de anís dulce.
- 20 gr de levadura seca.
- 1 cda de sal.
- 2 huevos.
🖌Para barnizar:
- 1 yema de huevo.
- 1 kg of wheat flour.
- 250 ml of water.
- 250 ml of milk.
- 125 gr cup of sugar.
- 100 ml of oil.
- 1 tablespoon of sweet anise seeds.
- 20 gr of dry yeast.
- 1 tbsp of salt.
- 2 eggs.
🖌To varnish:
- 1 egg yolk.
🍞 PREPARACIÓN | 🍞 PREPARATION
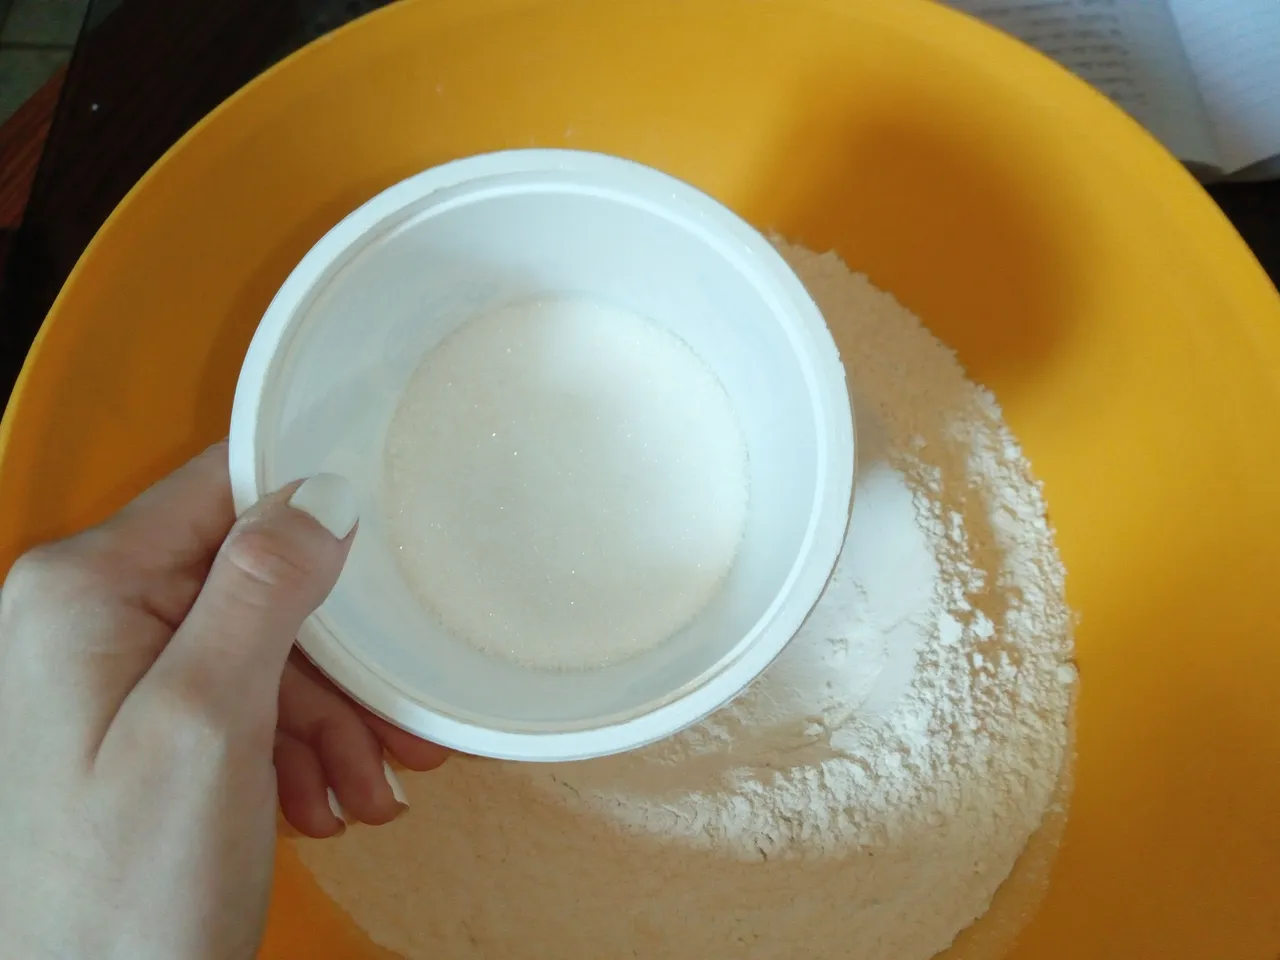
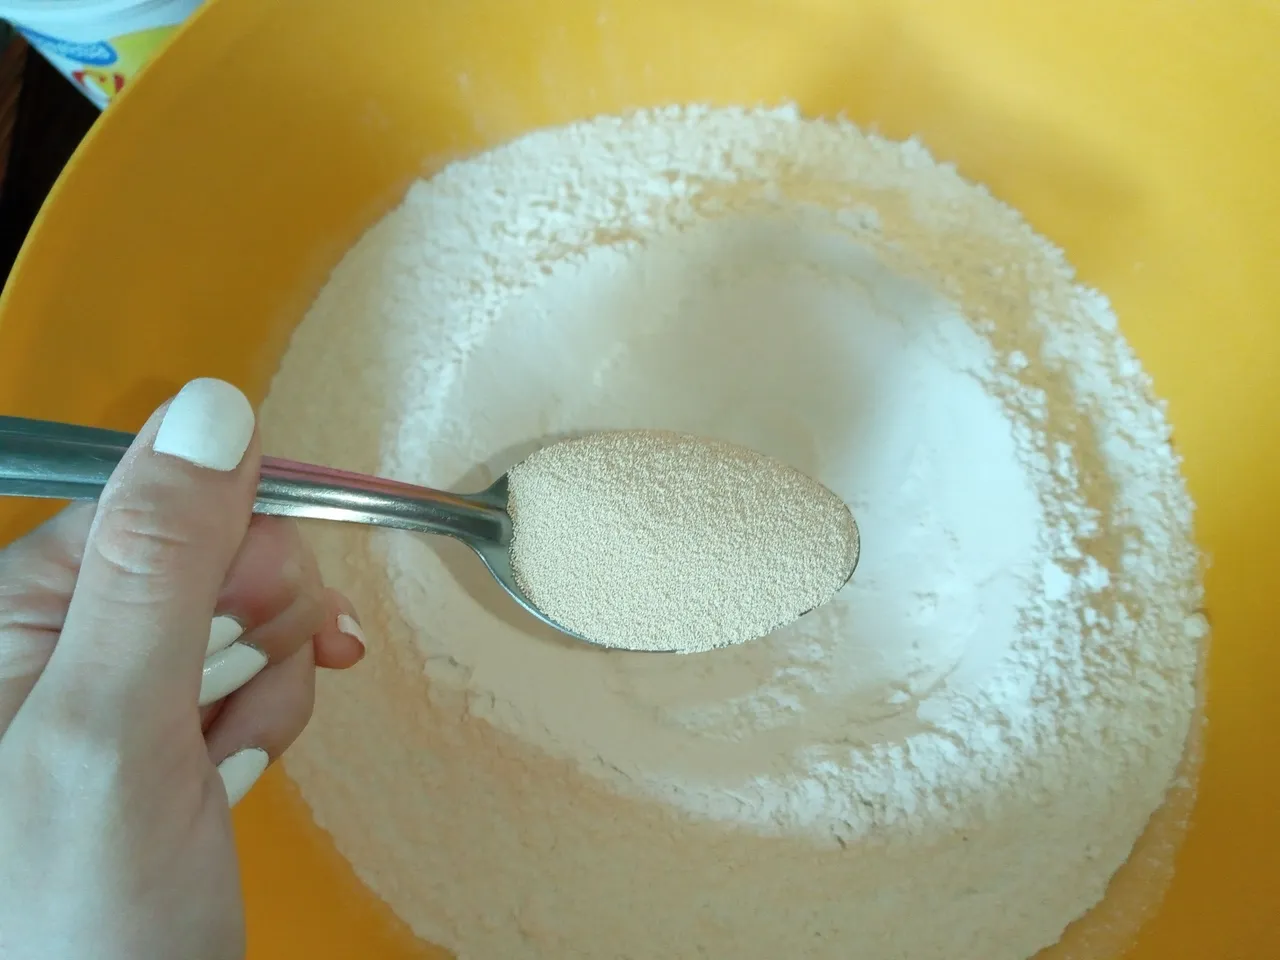
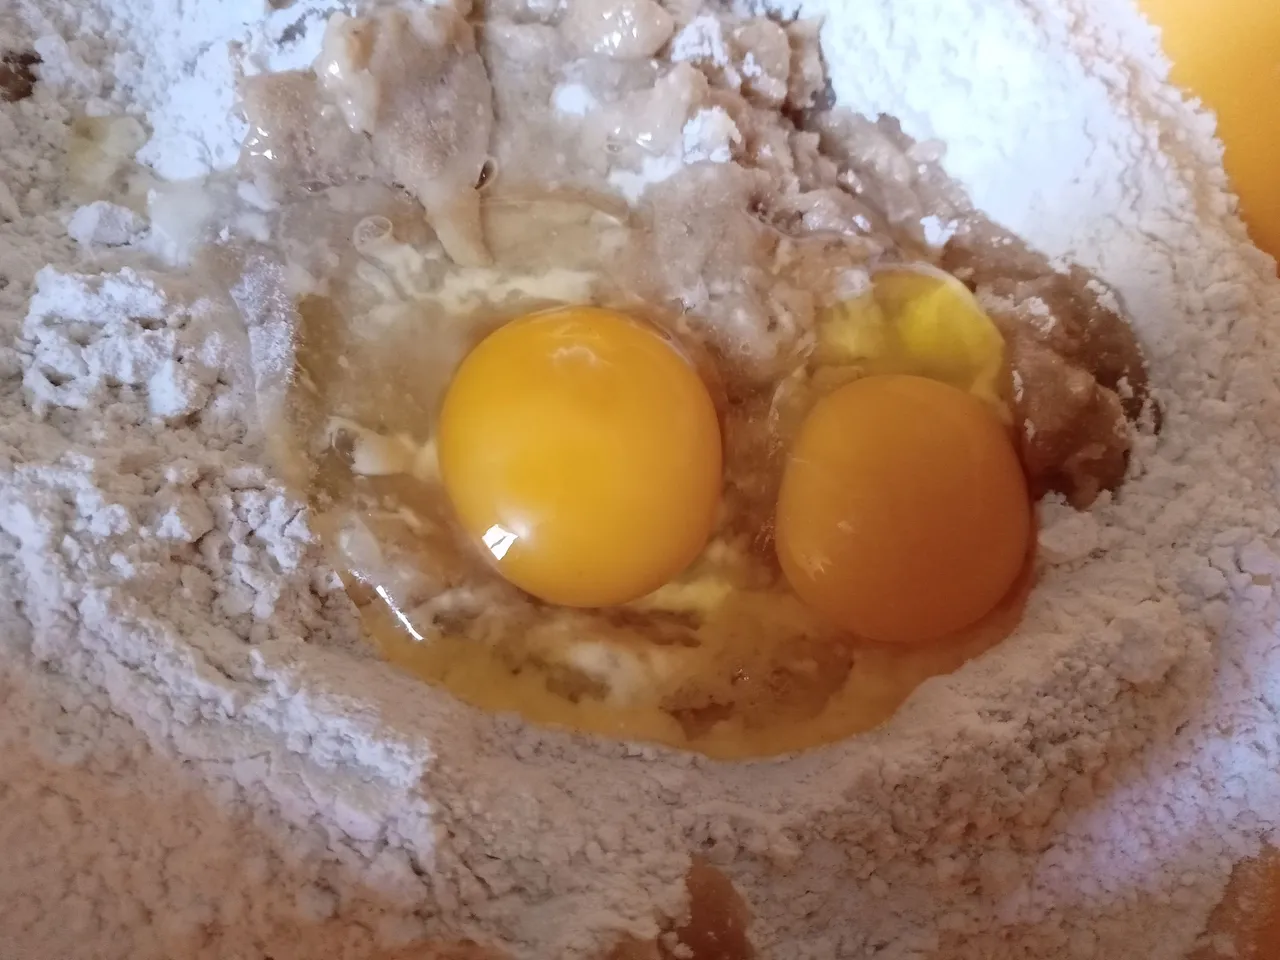
- PASO 1:
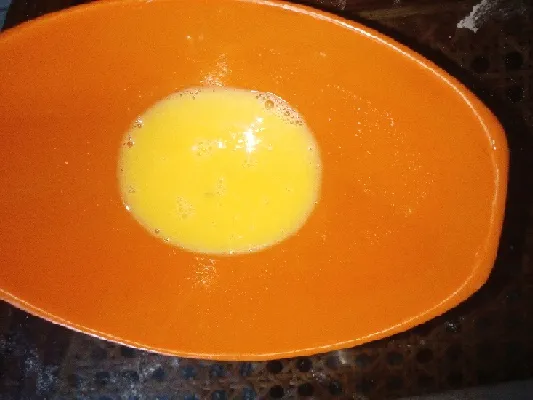
Lo primero que debemos hacer es agregar 1 kg de harina en un recipiente hondo, hacer un hueco en el medio y allí agregar: 125 g de azúcar, 20 g de levadura, 100 ml de aceite y 2 huevos. Unimos solo un poco estos ingredientes.
- 1 STEP:
The first thing we must do is add 1 kg of flour in a deep bowl, make a hole in the middle and there, add: 125 g of sugar, 20 g of yeast, 100 ml of oil and 2 eggs. We unite only a little these ingredients.

- PASO 2:
Llevar al fuego los 250 ml de agua junto con 1 cucharada de semillas de anís dulce, dejar templar y apagar el fuego. Luego agregar a la preparación junto con 250 ml de leche. Mezclar todos los ingredientes con ayuda de una cuchara o paleta. Cuando los ingredientes estén más o menos incorporados, añade 1 cucharada de sal.
📌Templar el agua junto con el anís dulce ayuda a que suelte un poco más su sabor y aroma.
- 2 STEP:
Bring the 250 ml of water together with 1 tablespoon of sweet anise seeds to the heat, let it warm and turn off the heat. Then add to the preparation along with 250 ml of milk. Mix all the ingredients with the help of a spoon or palette. When the ingredients are more or less incorporated, add 1 tablespoon of salt.
📌Tempering the water together with the sweet anise helps it release its flavor and aroma a little more.
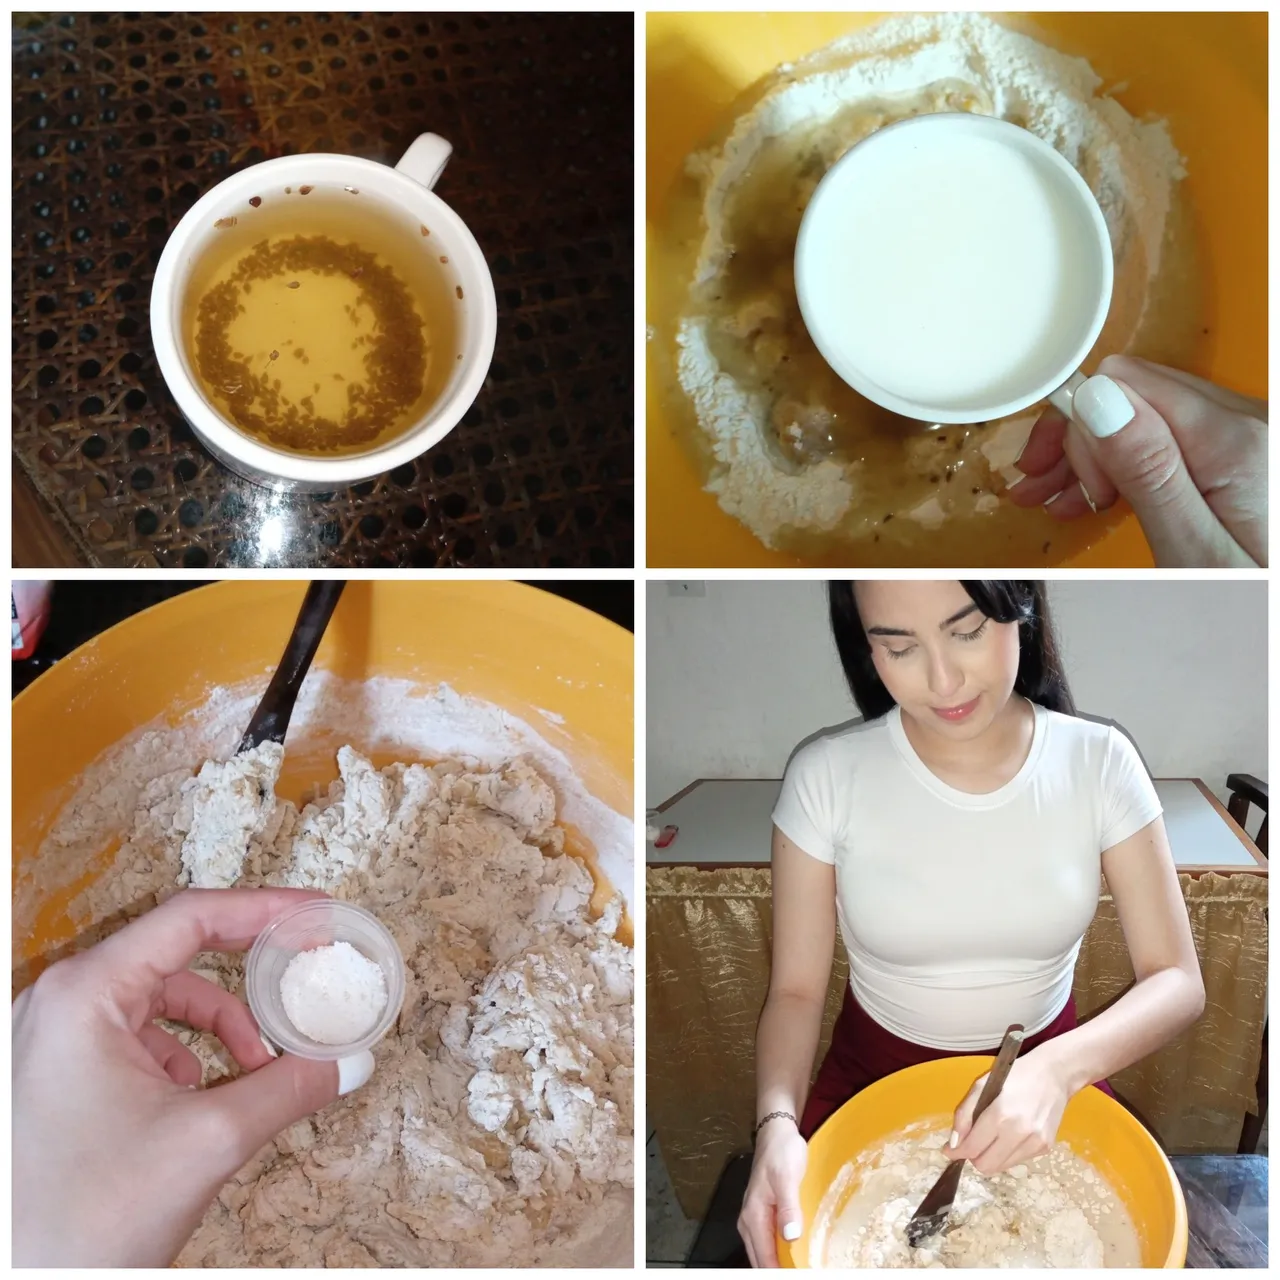
- PASO 3:
Después de incorporar los ingredientes, espolvoreamos un poco de harina sobre la mesa y comenzamos a amasar con las manos muy limpias durante 10 minutos. Con el tiempo, notaremos que la masa es uniforme y bastante esponjada. Luego, formamos un cilindro y con ayuda de un cuchillo, dividir en 3 porciones del mismo tamaño.
- 3 STEP:
After incorporating the ingredients, we sprinkled a little flour on the table and began to knead with very clean hands for 10 minutes. Over time, we will notice that the dough is uniform and quite fluffy. Then, we form a cylinder and with the help of a knife, divide into 3 portions of the same size.
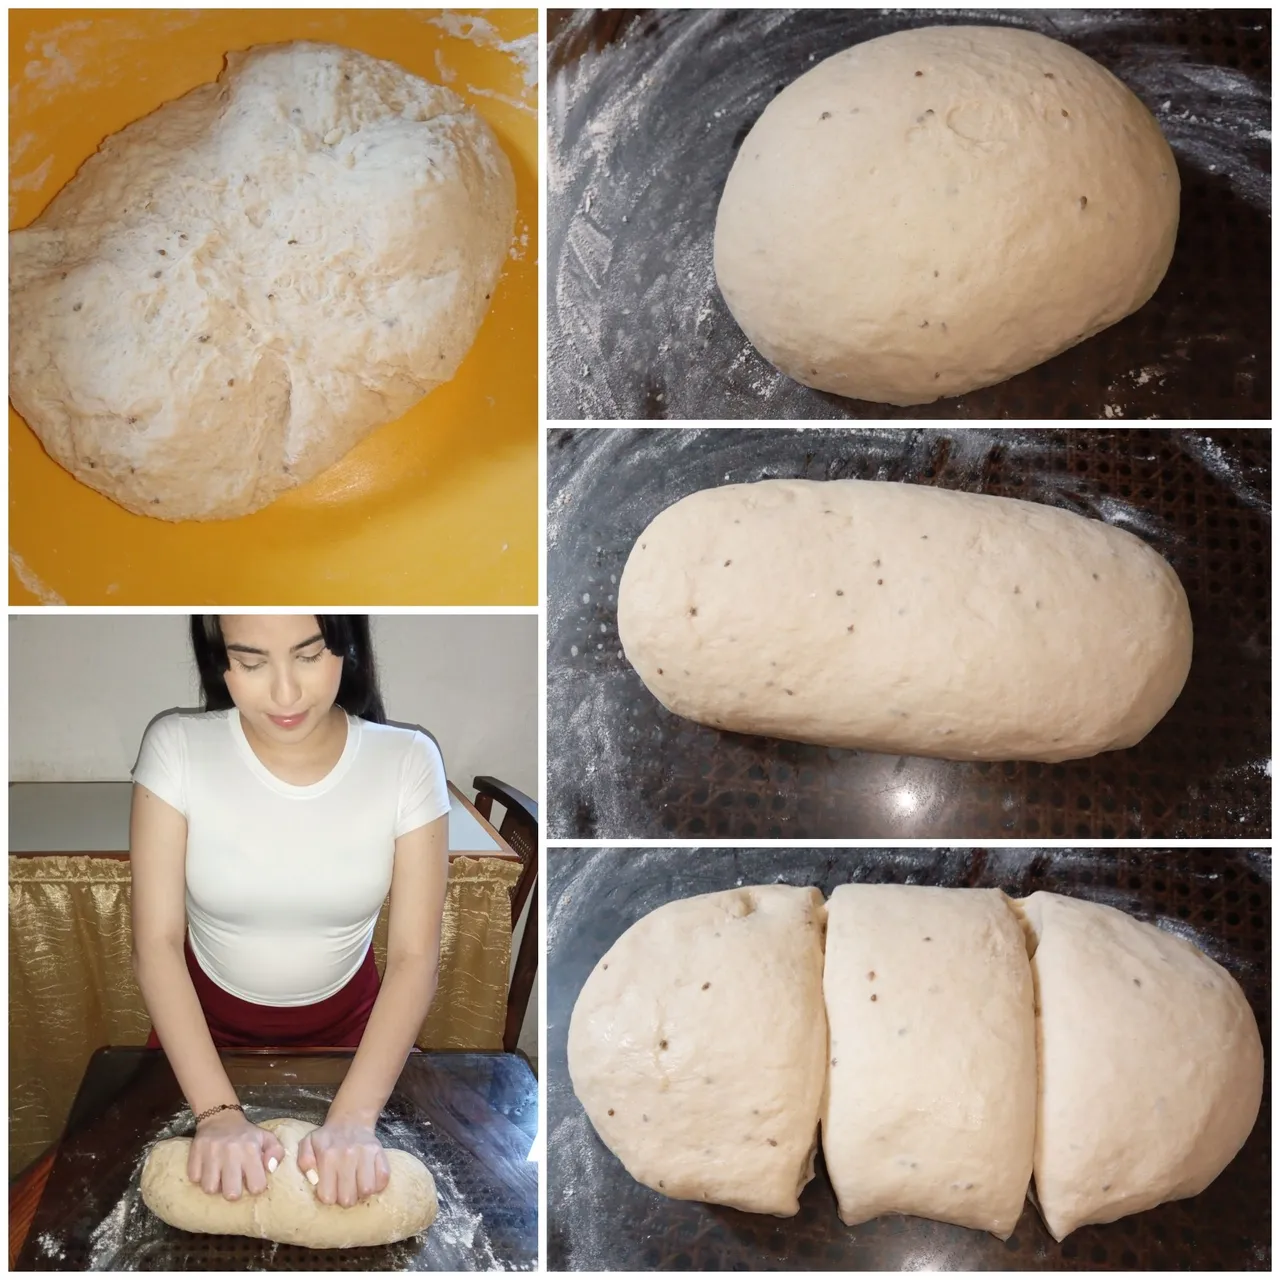
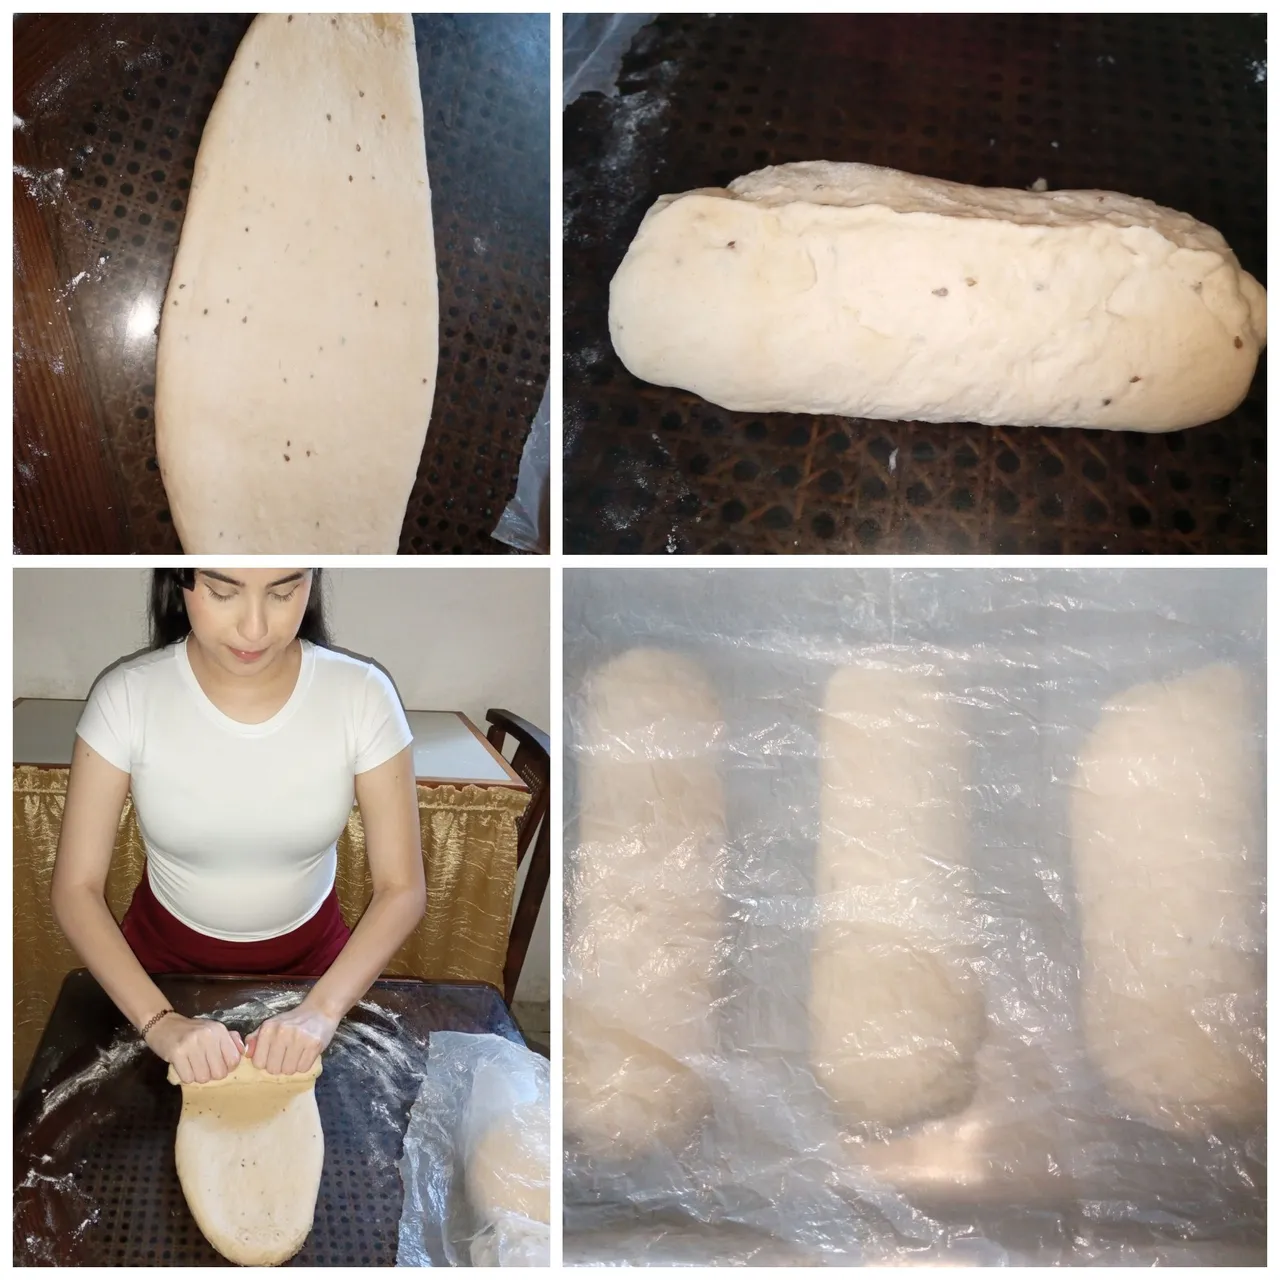
- PASO 4:
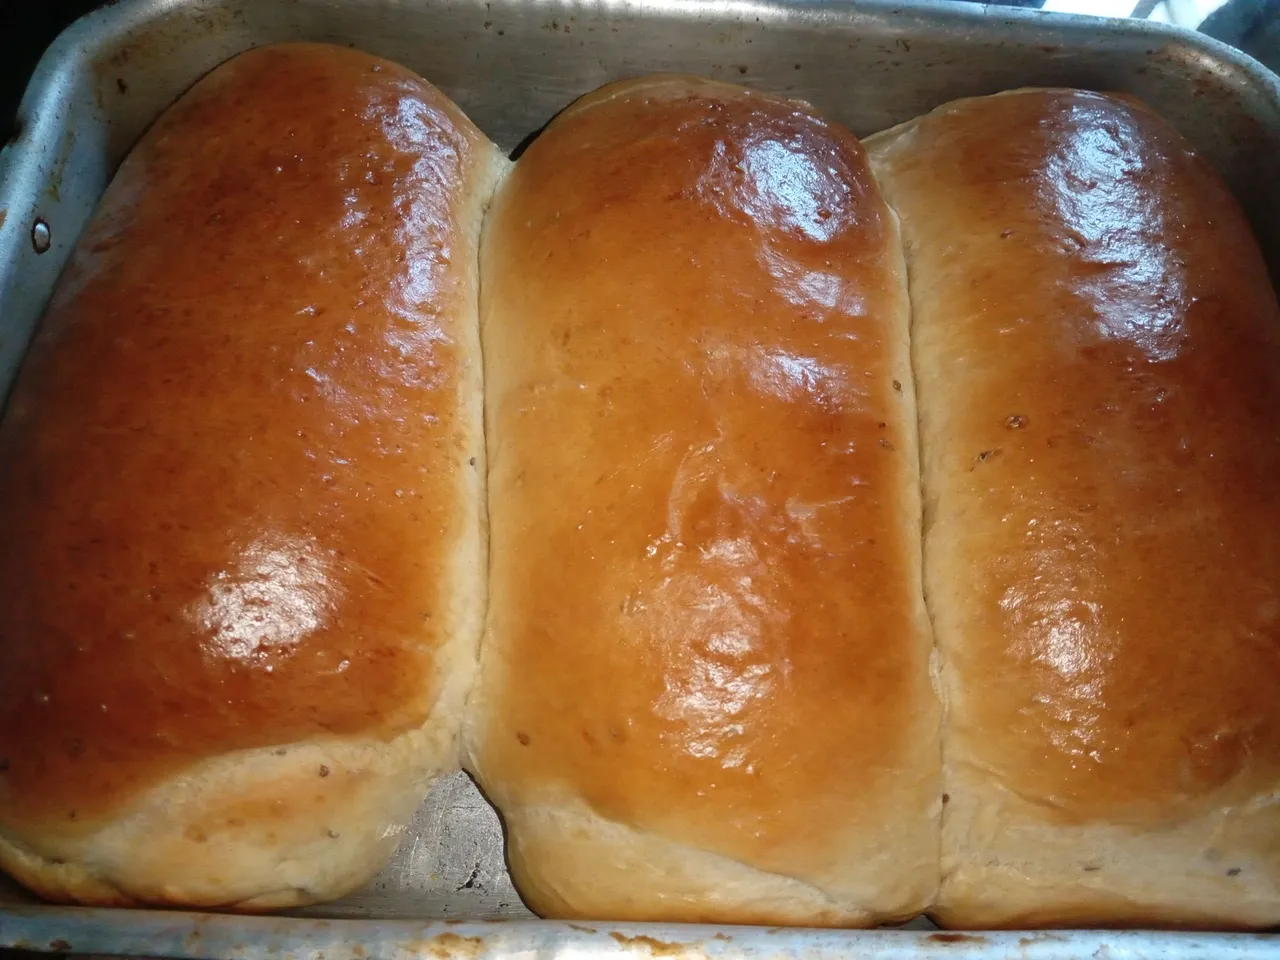
Toma una de las porciones y estira la masa con ayuda de un rodillo, formando un óvalo alargado. Luego enrollamos la masa desde la parte más delgada y al final cerramos muy bien dando pellizcos a la masa. Llevar al molde, repetir el mismo procedimiento con el resto de las porciones, dejando un poco de distancia entre cada una, tapar el molde con una bolsa plástica y dejar leudar por 1 hora.
- 4 STEP:
Take one of the portions and stretch the dough with the help of a roller, forming an elongated oval. Then we roll the dough from the thinnest part and at the end we close very well by pinching the dough. Place in the mold, repeat the same procedure with the rest of the portions, leaving a little distance between each one, cover the mold with a plastic bag and leave to rise for 1 hour.
- PASO 5:
Pasado el tiempo, notaremos que habrán duplicado su tamaño. Pincelar con una yema de huevo y hornear en horno precalentado a 160°C durante 10 minutos y luego a 180°C durante 30 minutos. Retirar del horno y dejar enfriar.
- 5 STEP:
Over time, we will notice that they will have doubled in size. Brush with an egg yolk and bake in a preheated oven at 160°C for 10 minutes and then at 180°C for 30 minutes. Remove from oven and let cool.

✨☕️🍞¡Y listo!🍞☕️✨ Así podemos preparar este delicioso pan de molde, para acompañar tus comidas, desayunos o meriendas. Es un pan que, aunque parezca complicado, es de los más sencillos de preparar y lo puedes hacer en muchos más sabores. Espero que les haya gustado el paso a paso y se animen a prepararlo.
❤️Hasta la próxima publicación.
✨☕️🍞¡And ready!🍞☕️✨ This is how we can prepare this delicious sliced bread, to accompany your meals, breakfasts or snacks. It is a bread that, although it may seem complicated, is one of the simplest to prepare and you can do it in many more flavors. I hope you liked the step by step and are encouraged to prepare it.
❤️Until the next post.
✨RESULTADO: | ✨RESULT:


Todas las fotografías son de mi propiedad.
Separador y Fotos editadas en Canva
All photographs are my property.
Photos edited in Canva