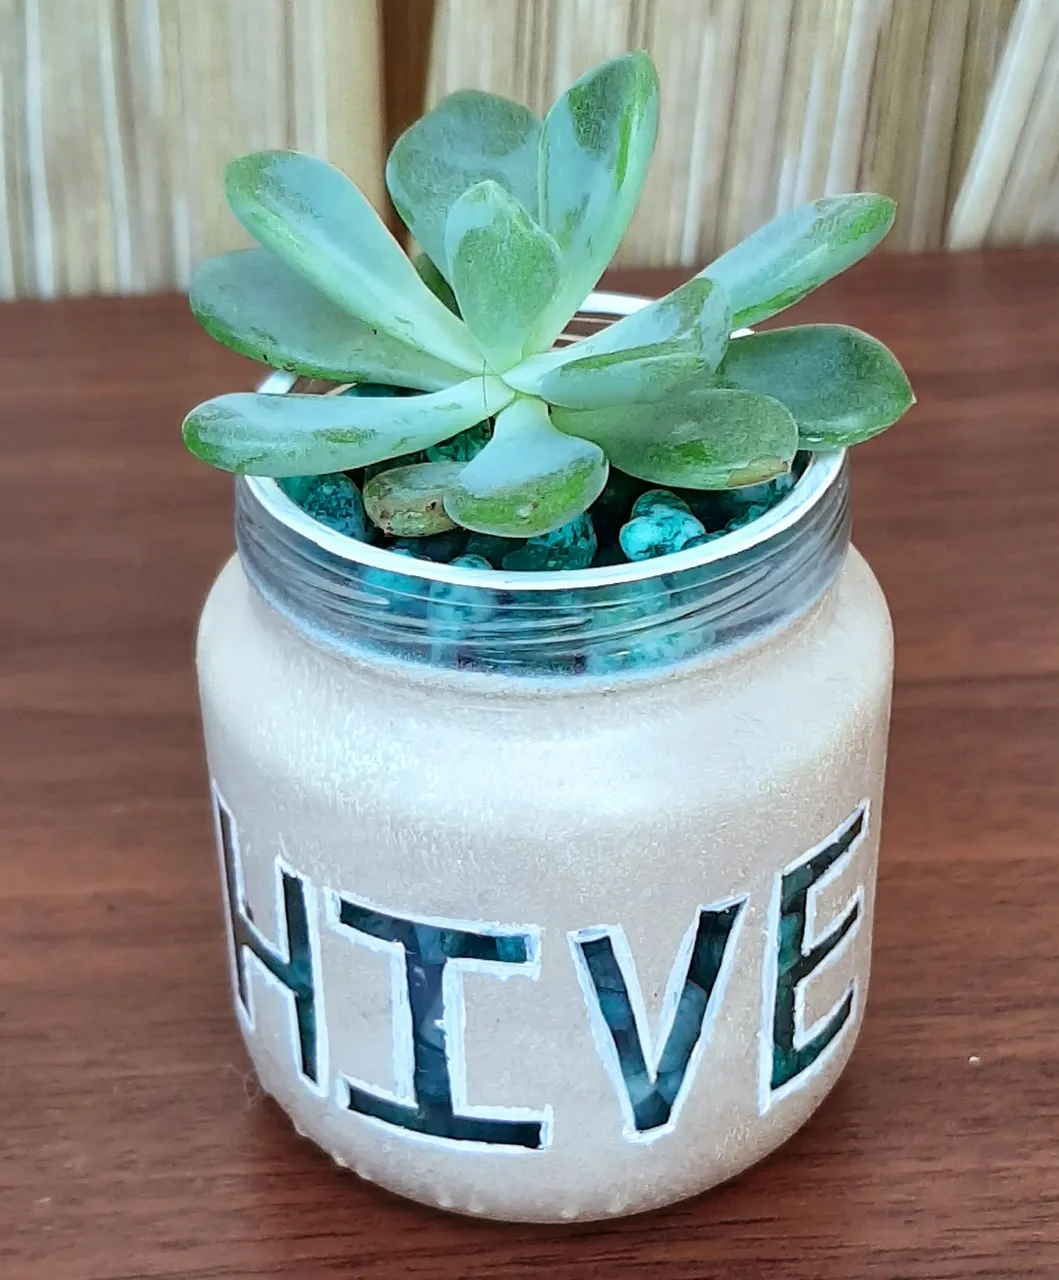

NAMED SUCCULENT

This is a tutorial post to show you how to make this model of the ¨Marine Collection¨ ... inspired by the beaches of the Dominican Republic, using blue colors with variations of shades, earthy colors like sand, incorporating textures and shapes of nature, thus creating compositions with movement.
It is very simple, you only need a glass/plastic container, acrylic paint, tape, stones, soil and a plant.

NAMED SUCCULENT
Este es un post tutorial para mostrarles como hacer este modelo de la ¨Colección marina¨... inspirando en las playas de República Dominicana, utilizando colores azules con variaciones de matices, colores tierra como la arena, incorporando texturas y formas de la naturaleza, creando así composiciones con movimiento.
Es muy simple, solo necesitas un envase de vidrio/plástico, pintura acrílica, tape, piedras, tierra y una plantita.
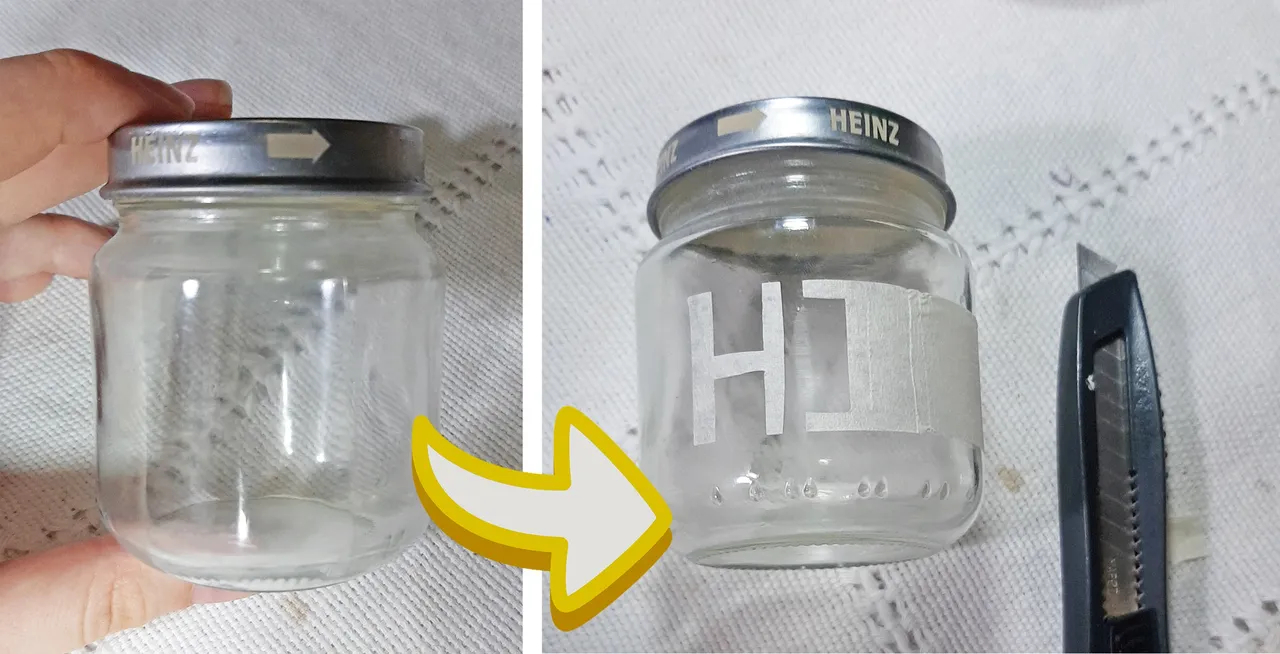
The first step is to boil the container to remove the wrapping paper (Tutorial here).
Then place with masking tape the area that we do not want to get dirty (it is the one that is like paper so that the glue does not adhere), I recommend placing the lid of the container, so that the interior of it does not get dirty. With the blade** we can make the edge of the word or figure that we want to make.
El primer paso es hervir el envase para remover el papel envoltorio ( Tutorial aqui ).
Luego colocar con masking tape la zona que no queremos que se ensucie (es el que es como papel para que el pegamento no se le quede adherido), recomiendo colocarle la tapa del envase, para que no se nos ensucie el interior de la misma. Con la cuchilla podemos hacer el borde de la palabra o figura que queremos hacer.
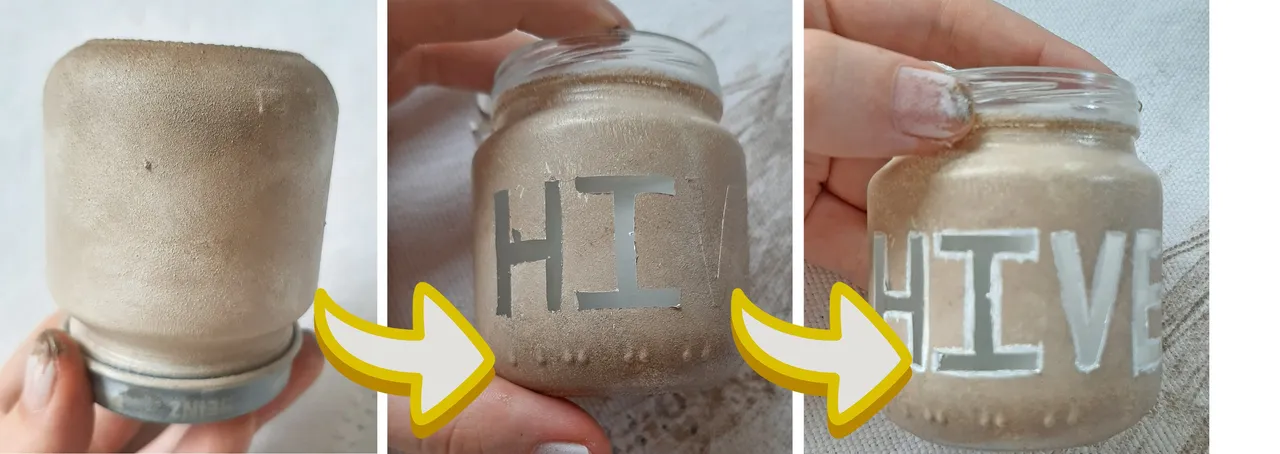
With a spray of white paint we give it a first coat of white, as a base.
To give it a rough texture we use a sponge (it can be any that we find in the house) and with acrylic paint we are painting ... we first paint the darkest part below and then we add white until get the degradation we want.
After it dries, we remove the lid and the tapes, very carefully (a trick is with the blade to pass the contour of the tapes, so that they are removed more easily and not all the paint rises).
As some gaps were gone, I decided to draw the outline with white paint to create an edge and cover the imperfections a bit.
The less complicated the figure we want to put, the better!
Con un spray de pintura blanca le damos una primera capa de blanco, como base.
Para darle una textura rugosa utilizamos una esponja (puede ser cualquiera que encontremos en la casa) y con pintura acrílica vamos pintando... pintamos primero la parte mas oscura de abajo y luego le vamos agregando blanco hasta conseguir la degradación que queremos.
Luego de que seque le quitamos la tapa y los tapes, con mucho cuidado (un truco es con la cuchilla pasarle el contorno de los tape, para que se quiten más fácilmente y no se levante toda la pintura).
Como se me fueron algunos huecos decidí dibujarle el contorno con pintura blanca para generar un borde y cubrir un poco las imperfecciones.
¡Mientras menos complicada sea la figura que queremos poner mejor!
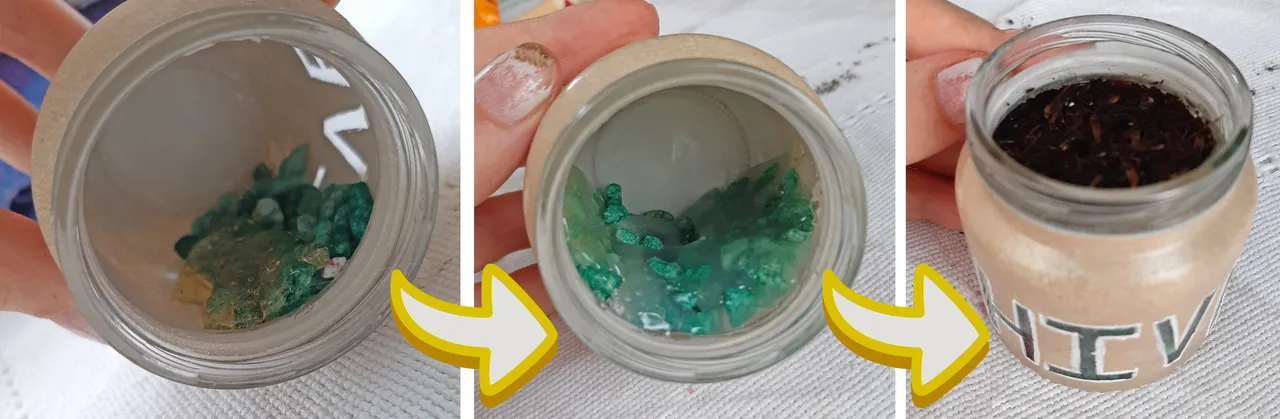
So that a blue detail can be seen through the letters, I placed the stones horizontally, and I poured a layer of hot silicone on top to create a layer so that they adhere to the container.
When it dries we put a few tablespoons of dust for our plant.
Above we put a few stones, these were from an old fish tank ... but if they do not have they can take stones from the garden or the street, wash them and paint them in the way I explain in this post: ¨Sea net¨.
Para que a través de las letras se vea un detalle azul, coloqué las piedras en forma horizontal, y le vacié una capa de silicón caliente arriba para generar una capa y que se adhieran al envase.
Cuando seque le ponemos unas cuantas cucharadas de tierra para nuestra planta.
Arriba le colocamos unas cuantas piedras, estas las tenía de una pecera vieja... pero si no tienen pueden tomar piedras del jardín o de la calle, lavarlas y pintarlas de la forma en que explico en este post: ¨Sea net¨.
Then, I painted the top edge with white paint to give it a more elegant detail.
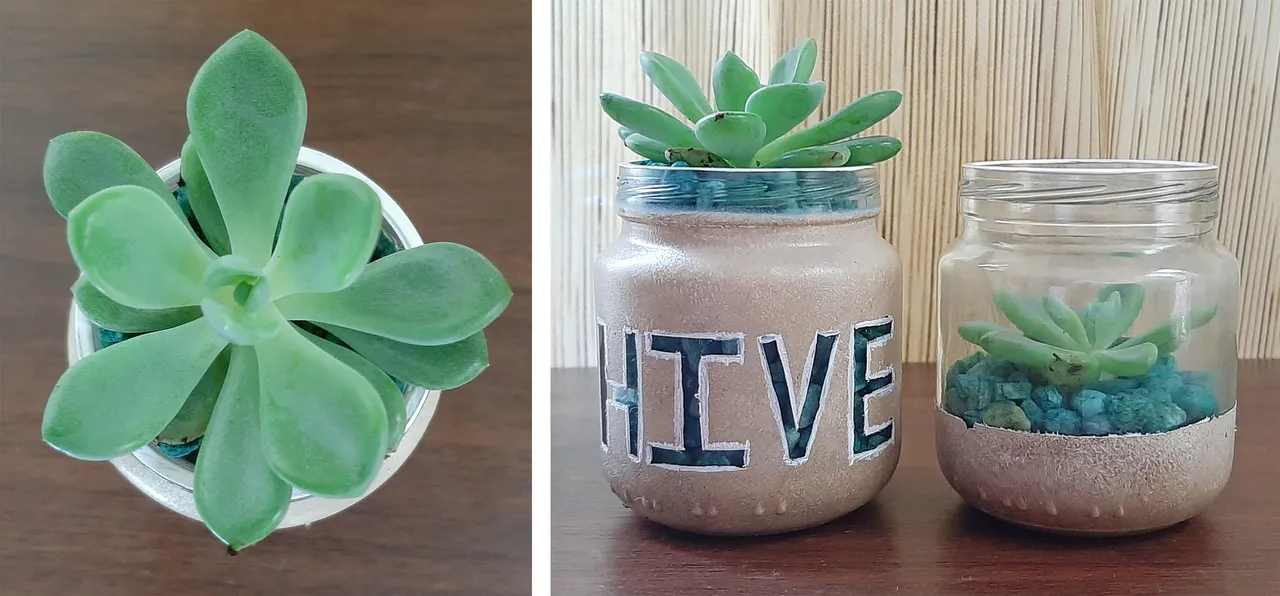
Finally, we transplanted the plant, in my case a succulent because it can be placed indoors and I personally love them ... we spray it with a little water (my recommendation is to get a spray, since it is a glass container, it is not easy for the pot to transpire ... and you know that if we add too much water the plant will drown.)
And voila! We already have a beautiful planter to add to our home decor or to use as a personalized gift for any of our acquaintances. Only combining it with ¨Deco succulent¨ generates a very pleasant composition, and gives movement to the levels and heights of the plants.
Here I will leave you the links of the other works of the ¨Marine collection¨, I invite you to see them:
Luego, le pinte el borde de arriba con pintura blanca para darle un detalle mas elegante.
Por ultimo, trasplantamos la planta, en mi caso una suculenta porque se puede colocar en interior y personalmente me encantan... le rociamos con un poco de agua (mi recomendación es conseguir un spray para rociarla, ya que es un envase de cristal, no es fácil para la maceta transpirar... y ya sabes que si le echamos demasiada agua se nos ahoga la plantita.)
Y Voilá! Ya tenemos un hermoso macetero para agregarlo a nuestra decoración para la casa o para usarlo como regalo personalizado para cualquiera de nuestros conocidos. Solo combinándola con ¨Deco succulent¨ genera una composición muy agradable, y le da movimiento los niveles y alturas de las plantas.
Aquí les dejaré los links de las demás obras de la ¨Colección marina¨, te invito a verlas:
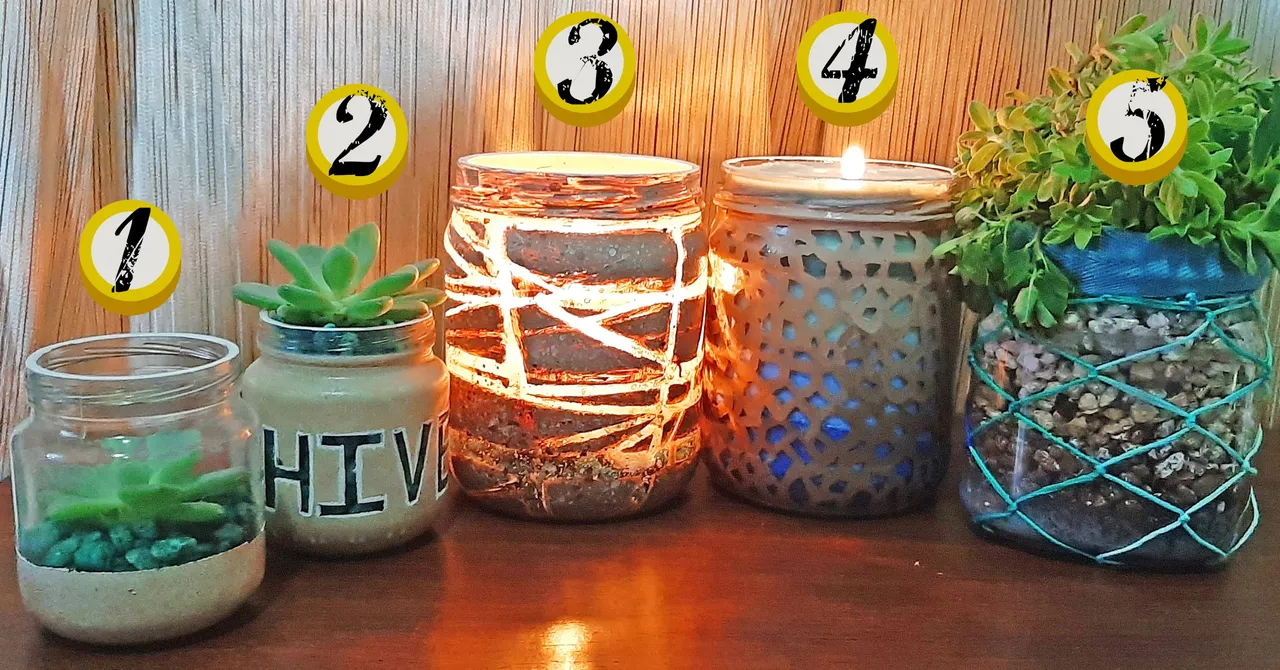
4. Peacefull waves --- 5. Sea net
Until next time.
Have a nice day!
Hasta la próxima.
Que tengas un buen día!
