No te quedes sin participar, este es el enlace de la publicación de convocatoria:
This is my participation for the new initiative of our #hivefood community, which will undoubtedly sweeten the hearts of all the hivers on this platform and beyond😜.
Don't stay without participating, this is the link to the call publication:
Todas mis recetas tienen una historia, debido a que en su mayoria son herencia de mi madre, quien era una estupenda creativa en la cocina.
Su libro de recetas que fue titulado por sus tres hijas como "El Libro de Recetas de la Tata" ha sido mi guia para todas mis creaciones, que al pasar de los años les he incorporado modificaciones acordes a los resultados obtenidos en la elaboración de las mismas.
En esta oportunidad mas allá de una receta quiero compartir con ustedes algunos tips que me han ayudado para perfeccionar la decoración de mis tortas asi como por supuesto su sabor, ambos fundamentales para lograr esa sonrisa de satisfacción con quien la compartimos.
All my recipes have a story, because most of them are inherited from my mother, who was a great creative in the kitchen.
Her recipe book, which was titled by her three daughters as "El Libro de Recetas de la Tata" (Tata's Recipe Book) has been my guide for all my creations, which over the years I have incorporated modifications according to the results obtained in the elaboration of them.
In this opportunity beyond a recipe I want to share with you some tips that have helped me to perfect the decoration of my cakes as well as of course their taste, both fundamental to achieve that smile of satisfaction with whom we share it.
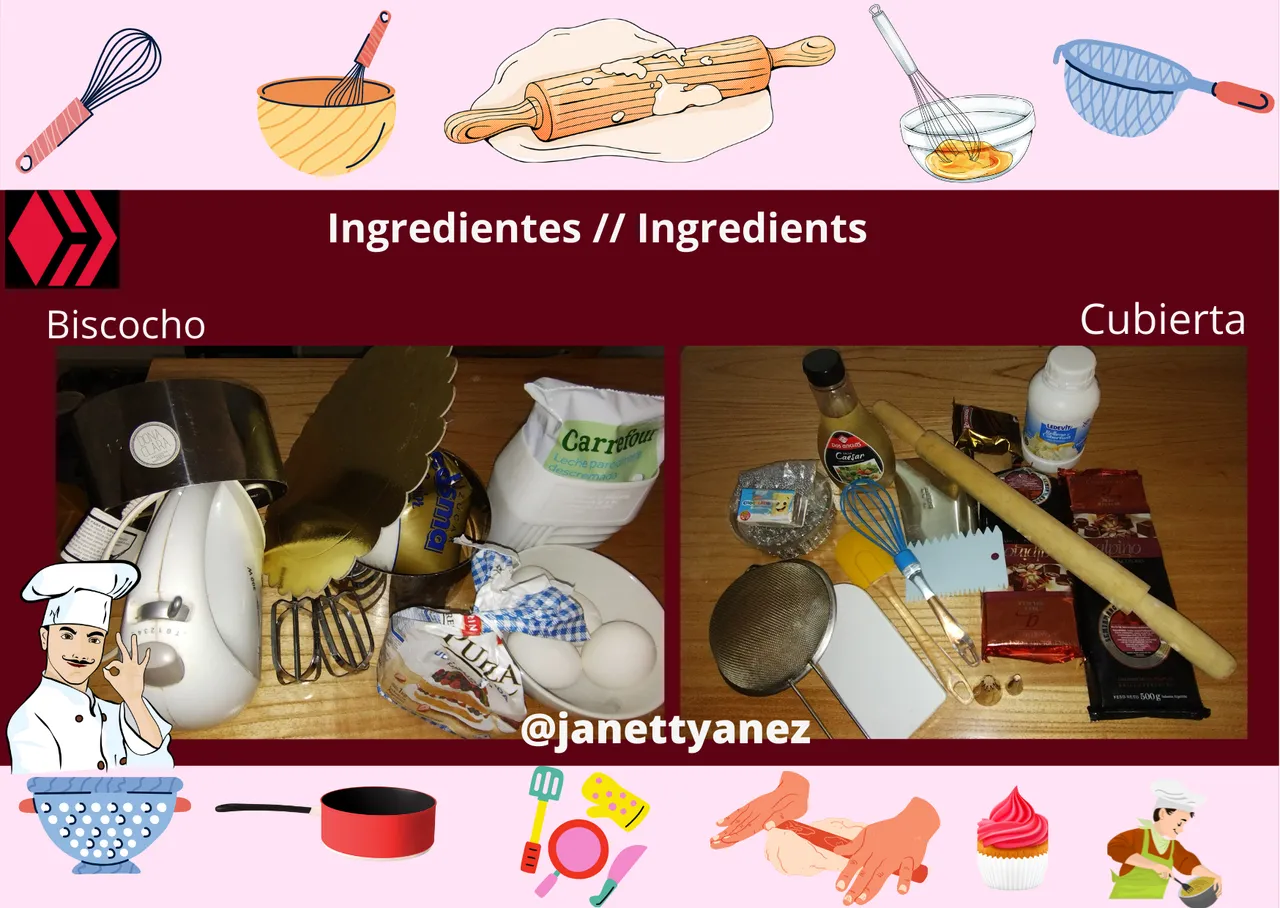
Para el Biscocho:
3 tazas de Harina de Trigo leudante
1 taza de mantequilla
2 tazas de azucar
4 huevos
1 taza de leche
2 cucharaditas de polvo de hornear
Una pizca de sal
2 cucharadas de escencia de vainilla
Para el relleno:
6 Oreos grandes
Crema Chantilly
Chocolate Blanco (Para el Ganache de Chocolate)
Para la decoración:
Mousse de Chocolate
Chocolate Amargo (Para el Ganache de Chocolate)
Bombones, perlas, etc.
For the biscuit:
3 cups Leavened Wheat Flour
1 cup butter
2 cups sugar
4 eggs
1 cup milk
2 teaspoons baking powder
Pinch of salt
2 tablespoons vanilla essence
For the filling
6 large Oreos
Chantilly cream
White Chocolate (For Chocolate Ganache)
For the decoration:
Chocolate Mousse
Bitter Chocolate (For the Chocolate Ganache)
Chocolates, pearls, etc.
Preparación // Process
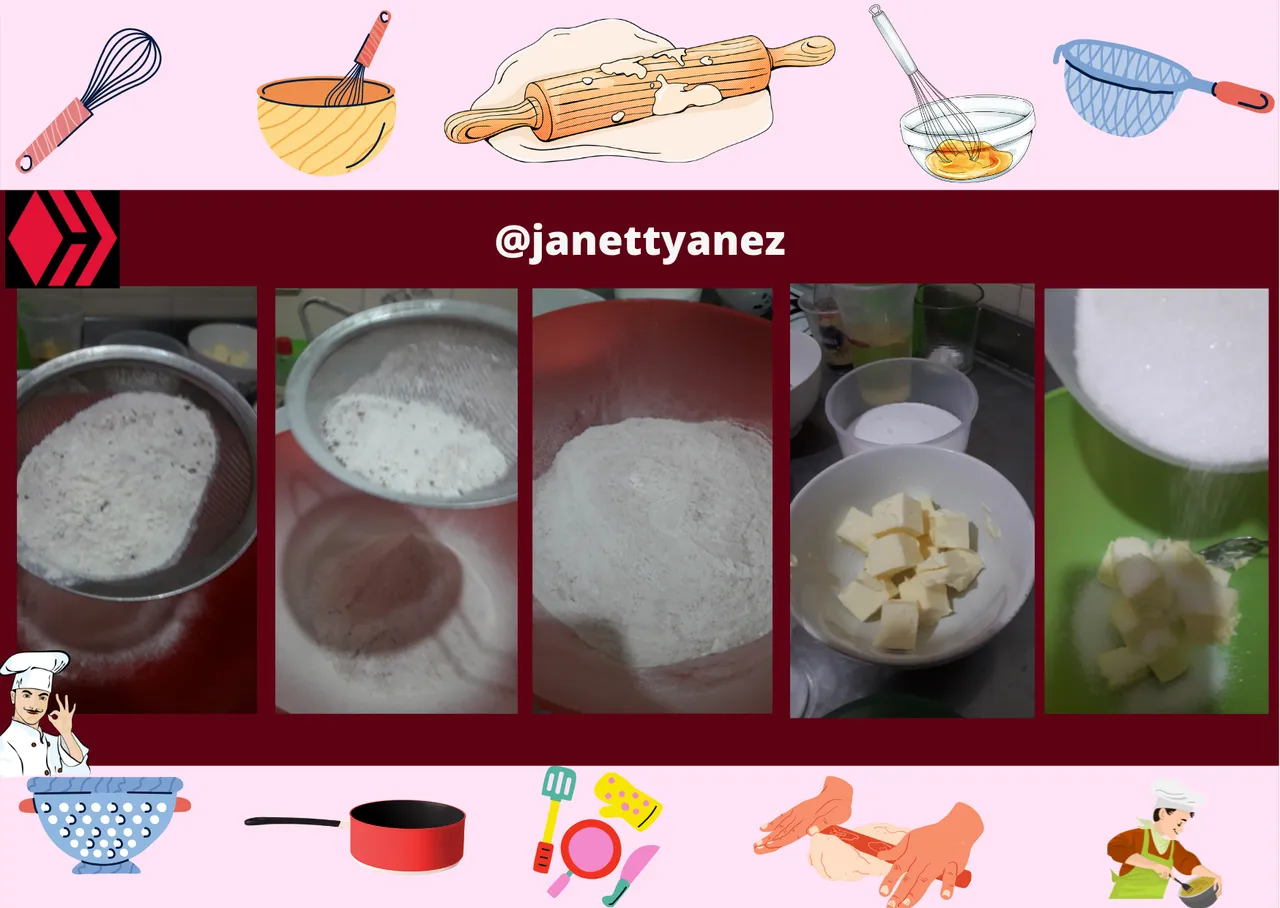
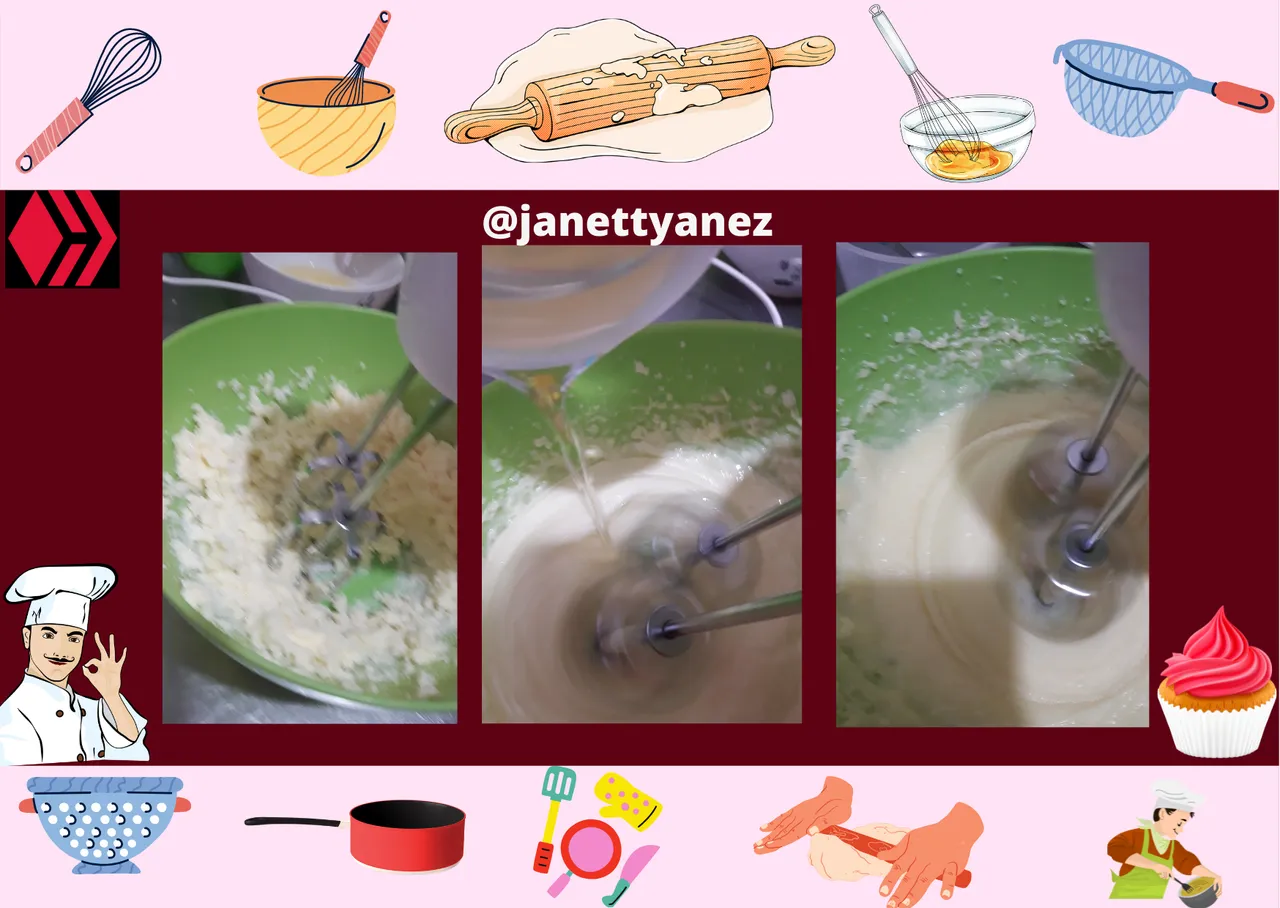
Para la preparación del biscocho se sigue la rutina acostumbrada de las muchisimas recetas que existen en la web.
Sin embargo, particularmente tengo especial cuidado al batir la mezcla final, para no sobrepasarme de tiempo y quitarle el aire que requiere el biscocho para que los resultados finales sea un biscocho suave y esponjoso.
Asi como, tamizar la harina, mezclar los ingredientes solidos primeros y luego los liquidos, asi como el batido inicial con paleta en forma envolvente.
For the preparation of the biscocho, follow the usual routine of the many recipes available on the web.
However, I particularly take special care when beating the final mixture, so that I don't overbeat it and take away the air that the cake requires for the final results to be a soft and fluffy cake.
As well as, sifting the flour, mixing the solid ingredients first and then the liquid ingredients, as well as the initial beating with paddle in an encircling manner.
Se introducen en el horno precalentado a 180°C por10 minutos. La cocción de los biscocho duran aproximadamente 20-30 minutos, pero es importante verificar su cocción con sumo cuidado con un palillo de madera largo, el cual debe salir totalmente seco como indicador de que esta listo.
Once our mixture is ready, we place it in our 16cm pans, in this case the ones I used, previously prepared with butter and flour.
Put them in a preheated oven at 180°C for 10 minutes. The baking time is approximately 20-30 minutes, but it is important to check the baking time carefully with a long wooden toothpick, which should come out completely dry as an indicator that it is ready.

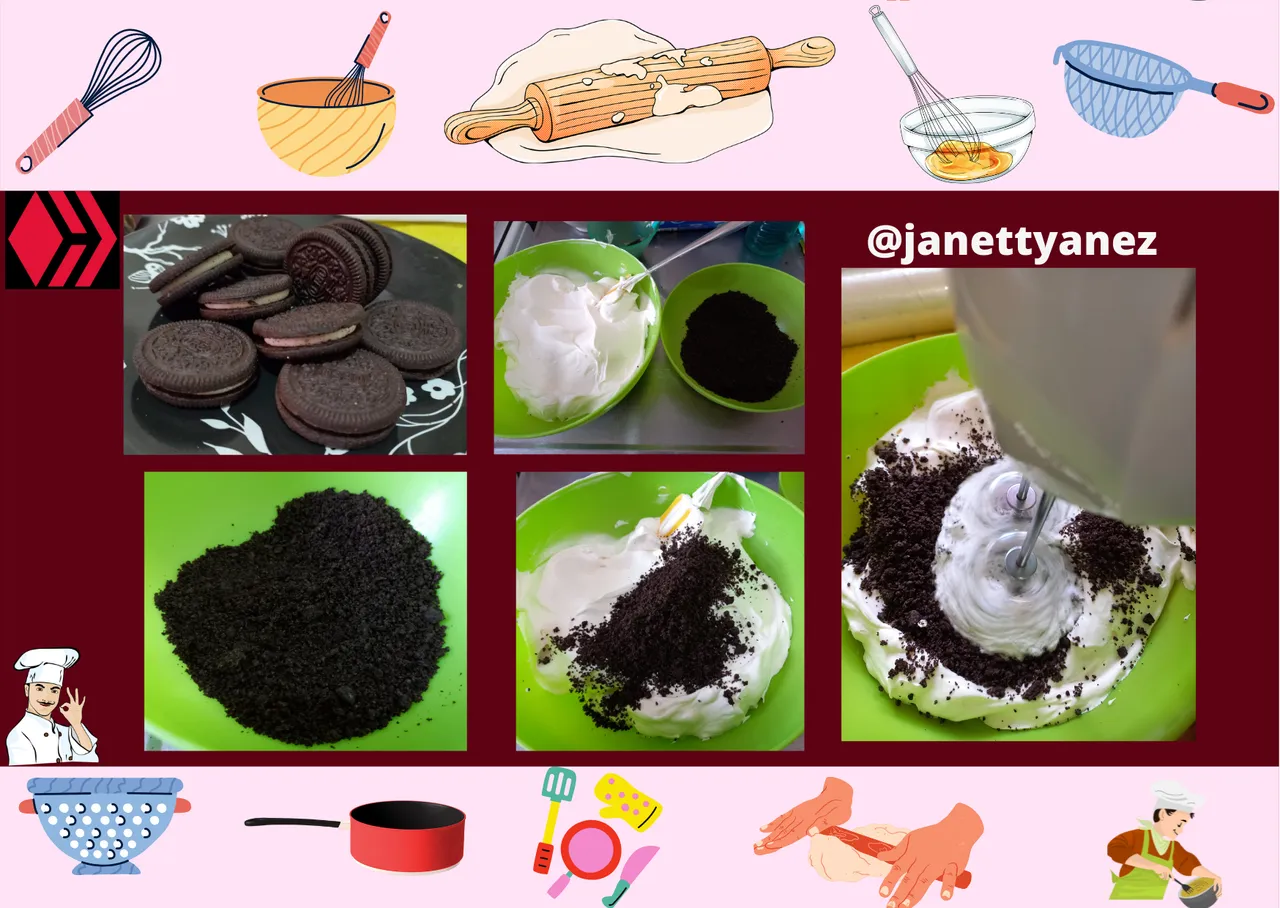
Para el Relleno: Tips
En esta ocasión utilicé crema chantilly con oreo, para preparar una deliciosa crema de oreo para el relleno.
Y para la barrera utilicé ganache de chocola blanco para combinar ambos sabores.
Es importante tener en cuenta que para el momento del relleno de nuestra torta, primero debemos humedecer los biscochos con almibar, luego se dejan en reposo por 5-10 minutos y luego es que se empieza el relleno.
Finalmente para el relleno se coloca primero la barrera de ganache de chocolate blanco y luego en el centro la crema de oreo; se lleva a la nevera por 30 minutos y luego se coloca la segunda capa de biscoho y la nueva capa de relleno.
Es importante respetar los plazos entre capa y capa para que esta este firme y tenga mayor consistencia para la decoración.
For the filling : Tips
This time I used whipped cream with oreo, to prepare a delicious oreo cream for the filling.
And for the barrier I used white chocolate ganache to combine both flavours.
It is important to bear in mind that when it comes to the filling of our cake, we must first moisten the biscuits with syrup, then leave them to rest for 5-10 minutes and then start the filling.
Finally for the filling, first place the barrier of white chocolate ganache and then in the centre the oreo cream; put it in the fridge for 30 minutes and then place the second layer of biscoho and the new layer of filling.
It is important to respect the time between each layer so that it is firm and has more consistency for decoration.
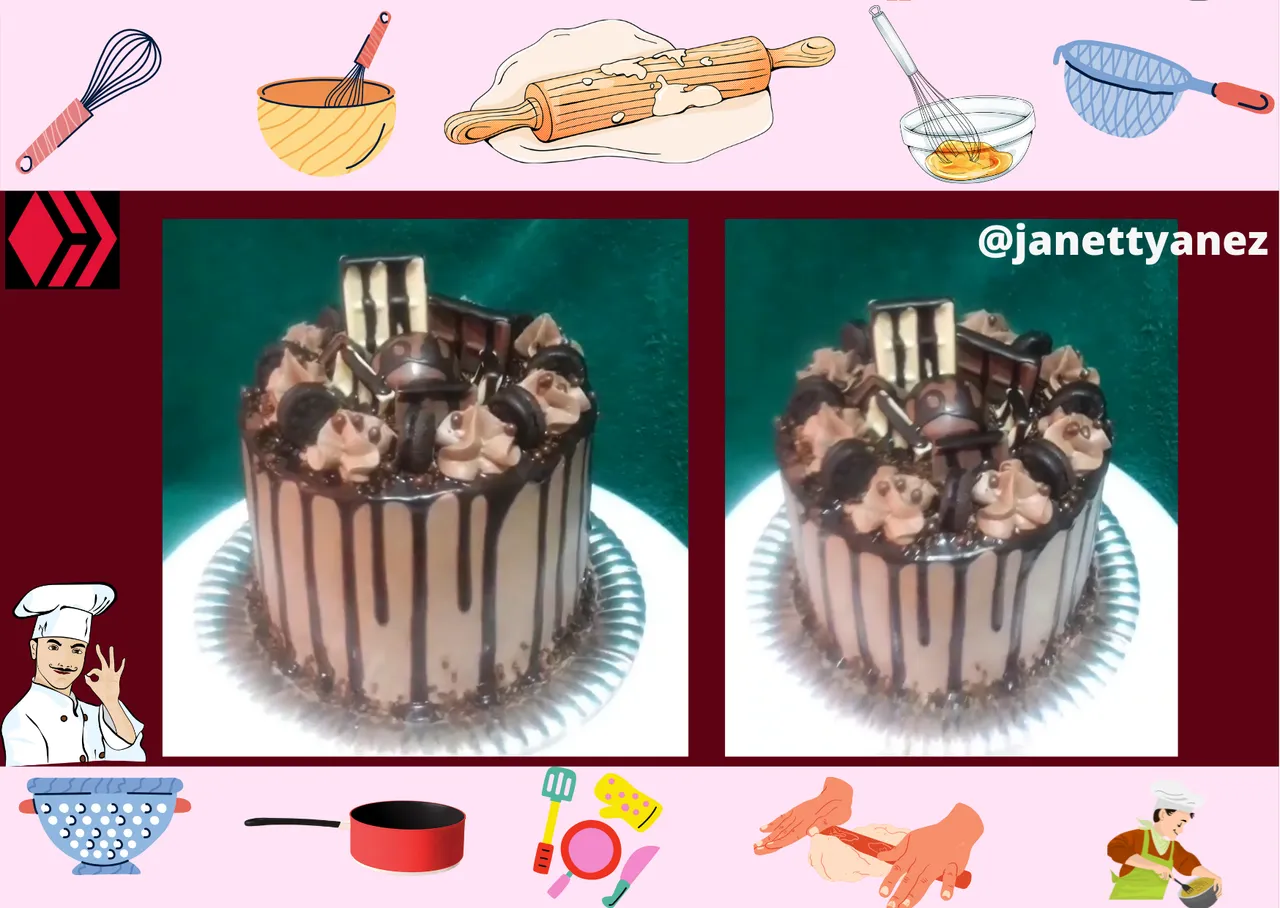
Para la decoración:
Una vez terminado el relleno de la torta , se coloca dos capas de la crema de oreo, dejando de 20-30 minutos entre una y otra.
Una vez colocado ambas capas, se lleva a la nevera por 4-8 horas y luego se procede a la decoración.
For decoration:
Once the cake filling is finished, place two layers of the oreo cream, leaving 20-30 minutes between each other.
Once both layers are in place, place in the fridge for 4-8 hours and then proceed to decorate.
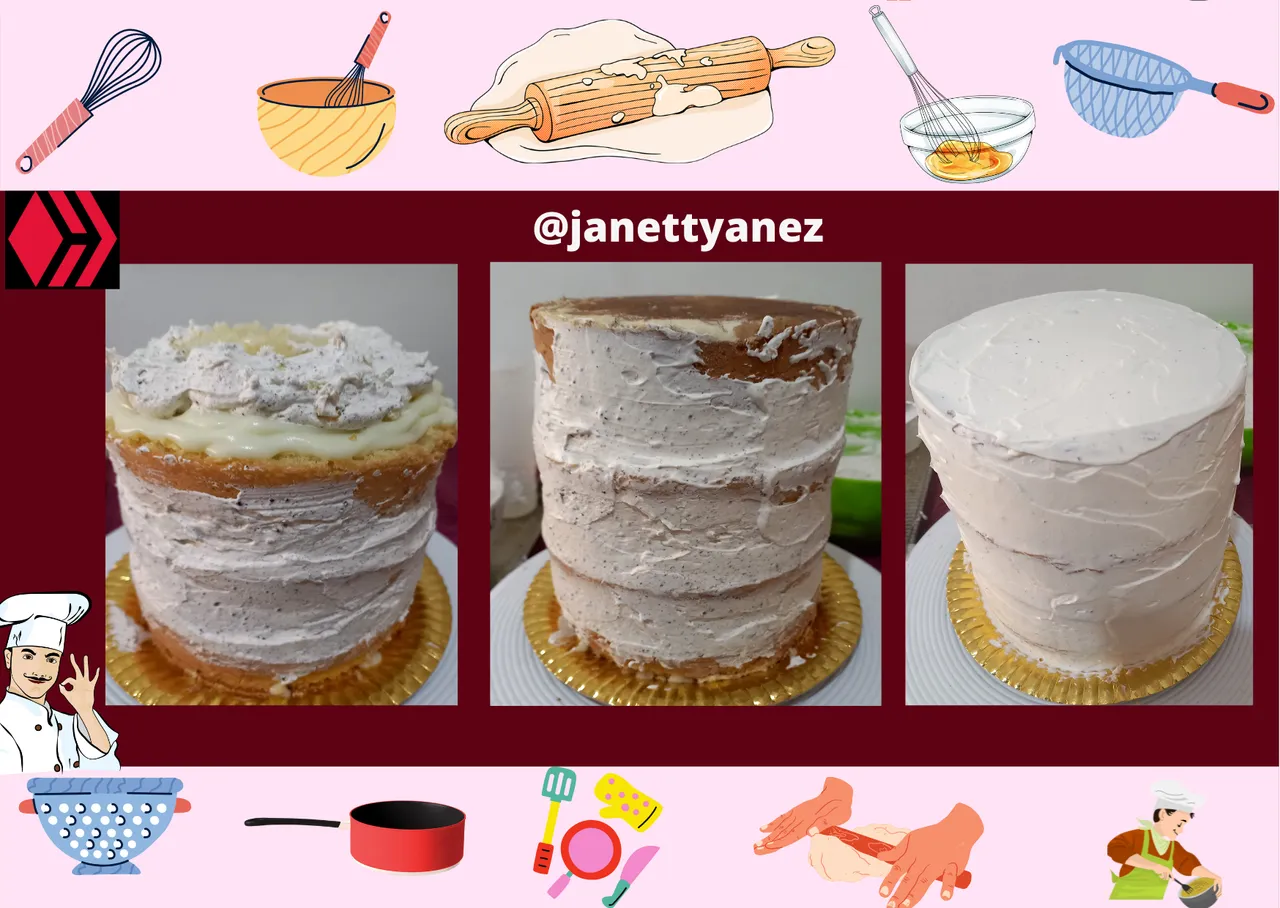
Tips
1.- Nunca escatimes en la cantidad de crema que vas usara para la base, particularmente soy bastante bondadosa en esta parte.
2.-Respeta los plazo de tiempo en la nevera, una vez que coloques la capa de base lleva la torta a la nevera por 30-40 minutos.
3.-El gananche de chocolate que utilice para el decorado superior lo realicé durante el tiempo en que la torta estuvo en la nevera, respetando que este estuviera totalmente a temperatura ambiente para el momento de su uso.
4.-Siempre realiza una prueba de la consistencia con la manga antes de empezar a decorar.
Espero que les guste esta receta y les sea de ayuda los tips que les comento.
Tips
1.- Never skimp on the amount of cream you use for the base, I'm particularly good-natured about this part.
Respect the time limits in the fridge, once you place the base layer take the cake to the fridge for 30-40 minutes.
3.-The chocolate ganache I used for the top decoration was made during the time the cake was in the fridge, making sure it was at room temperature by the time it was ready to use.
4.-Always test the consistency with the piping bag before you start decorating.
I hope you like this recipe and I hope you find the tips I have given you helpful.


Fuente de la Imagen: Publicación de Convocatoria
Invito a participar en esta iniciativa a mis amigas @aurodivys, @zhanavic69 y @sacra97, vamos a endulzar a #hive.
I invite my friends @aurodivys, @zhanavic69 and @sacra97 to participate in this initiative, let's sweeten #hive.