This is the first of a series of quick, simple, healthy and, most of all, delicious recipes I’ve created and that I’ll be sharing with the Steem Community - a vegan, almost totally raw, “cheesecake” that you can adapt to any flavor/fruit you prefer or have available.
Here are the ingredients you’ll need:
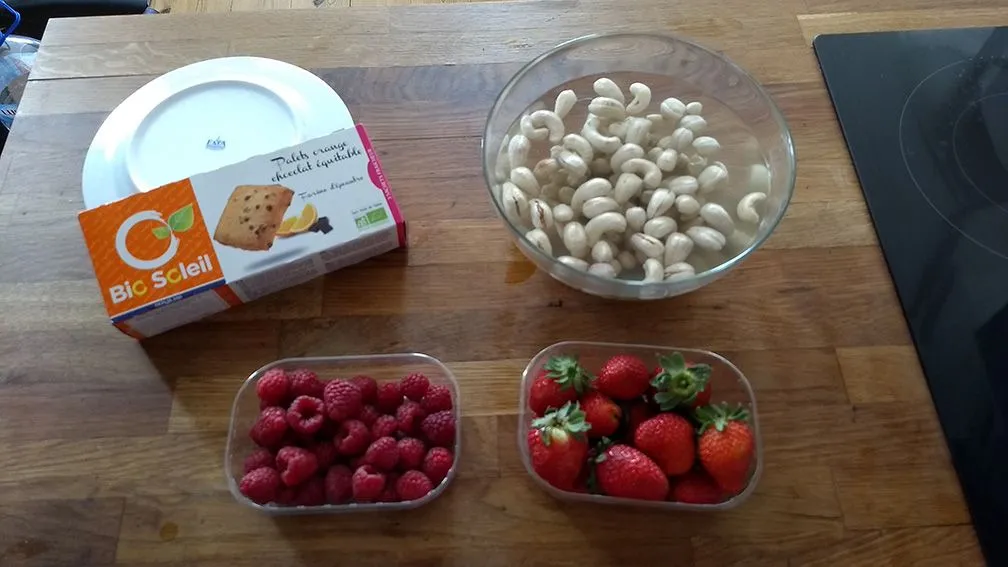
- 200 g of Raw Caju ( not toasted )
- 150 g of fruit
- 150 g of your favourite biscuits
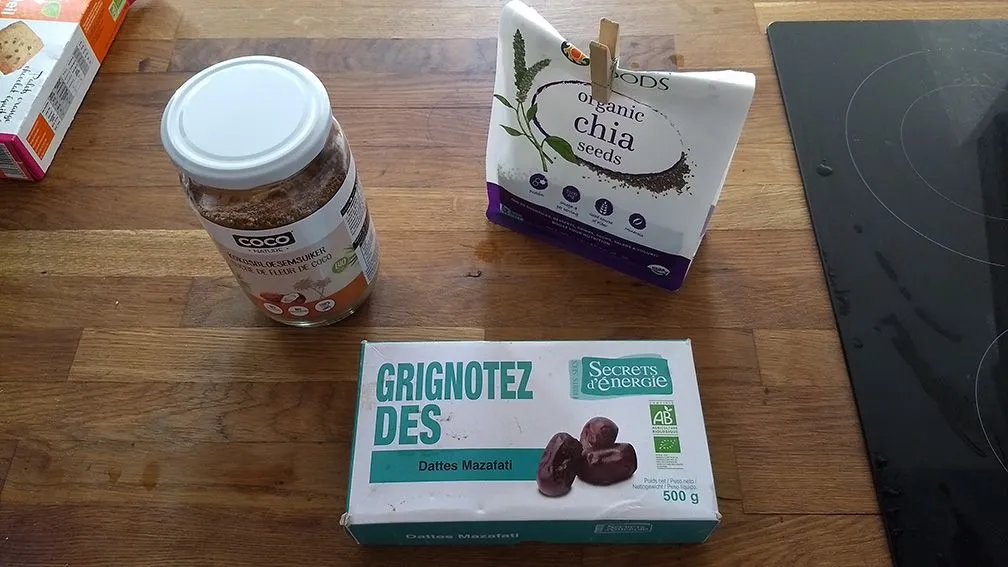
Optional ingredients for extra deliciousness and nutrition:
- 2 tablespoons of Chia Seeds
- 2 tablespoons of coconut sugar or agave nectar
- 4 dates
Special utensils
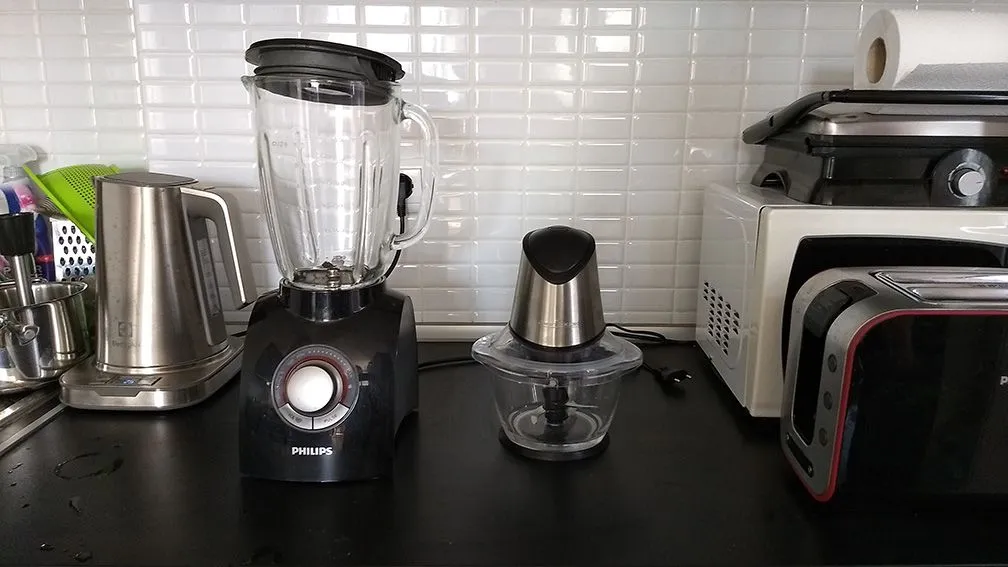
- A blender and/or food processor
Step 01 - Put the cajus in cold water and let them soak for at least 6 hours.
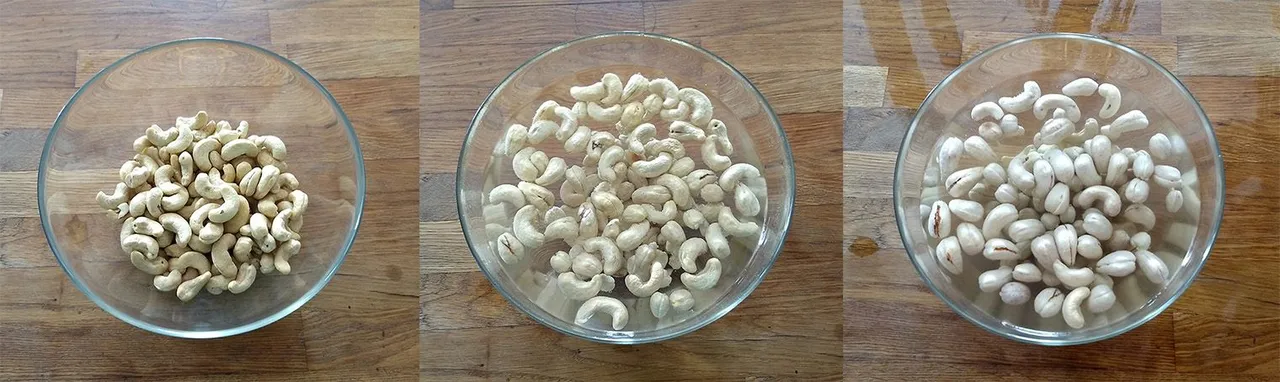
I usually leave them the whole night and do the “cheesecake” just before cooking lunch.
Step 02 - Process the biscuits.
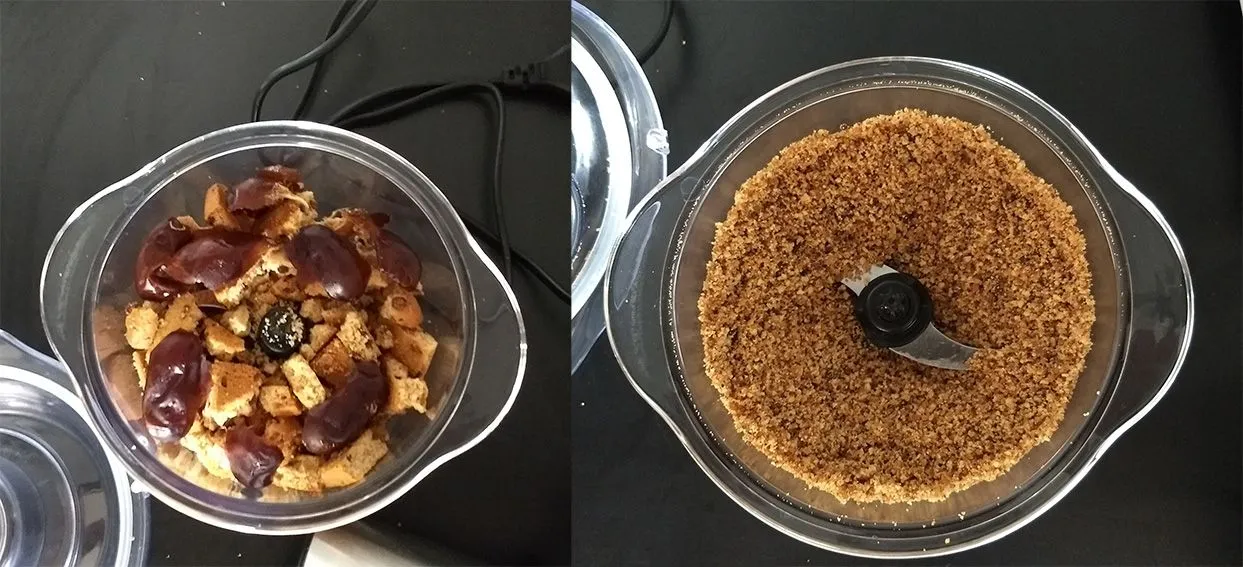
If you add the dates to the biscuits, when you process it all together you’ll get a more sticky mix and the base will be more consistent, besides the extra sweetness full of minerals.
Step 03 - Prepare the final recipient.
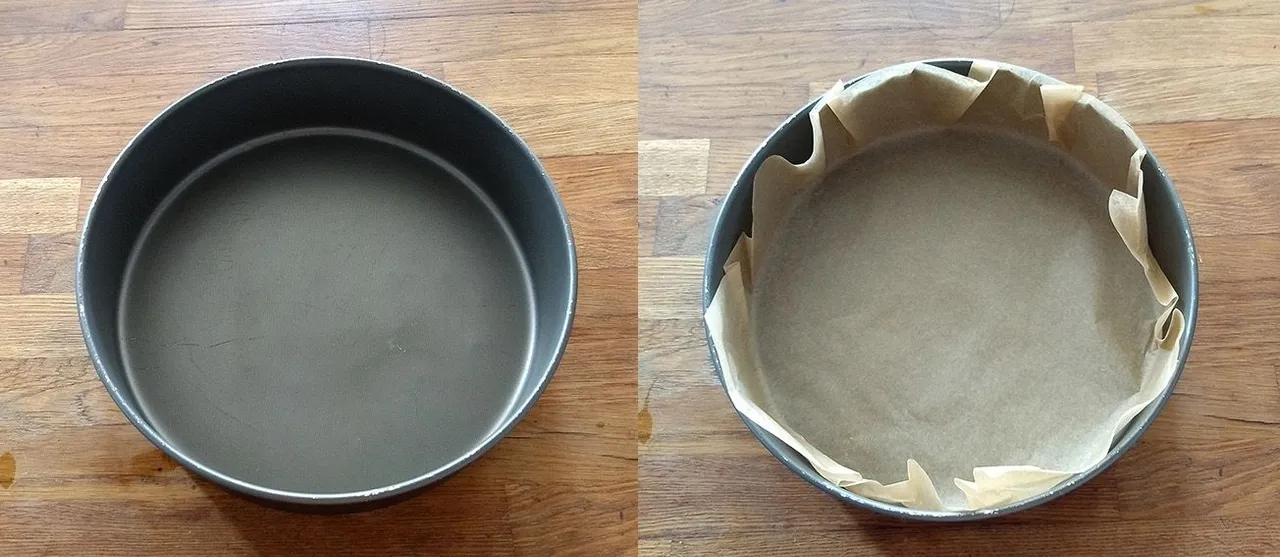
In my case I’m using a circular cake pan that I envelop with parchment cooking paper. This is totally optional and I just do it because it makes it easier to take the “cheesecake” from the cake pan.
Step 04 - Make the base.
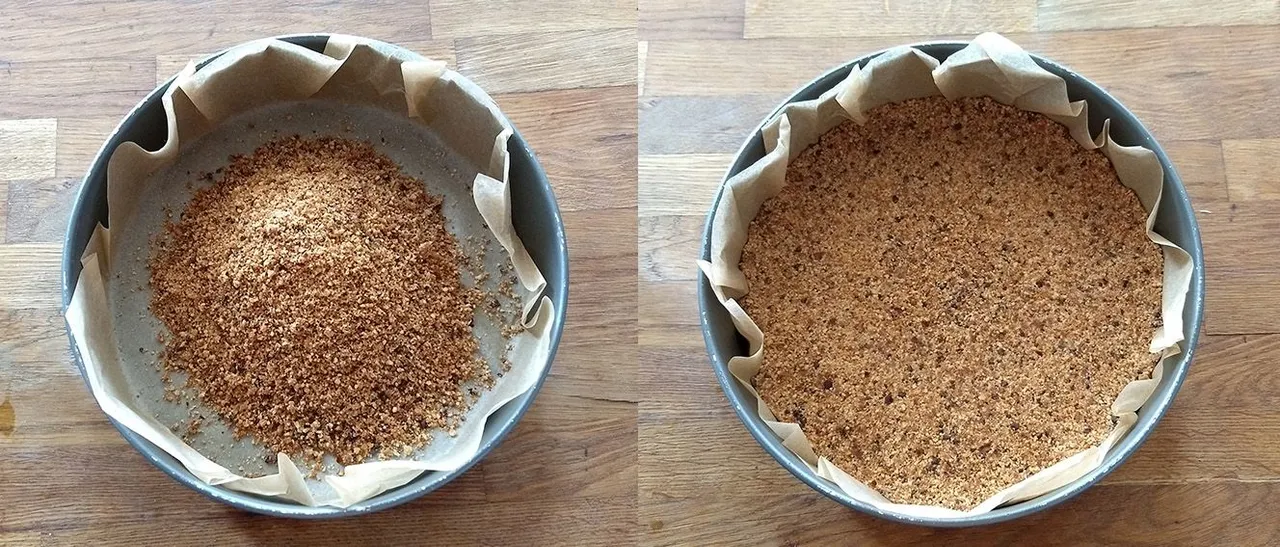
Take the mix of biscuits and dates you just processed and dump it in the cake pan. Then scatter it uniformly and gently press it with your hands until you get a nice even solid base.
Put it in the fridge to further “solidify” while you finish the top layer.
Step 05 - The top layer.
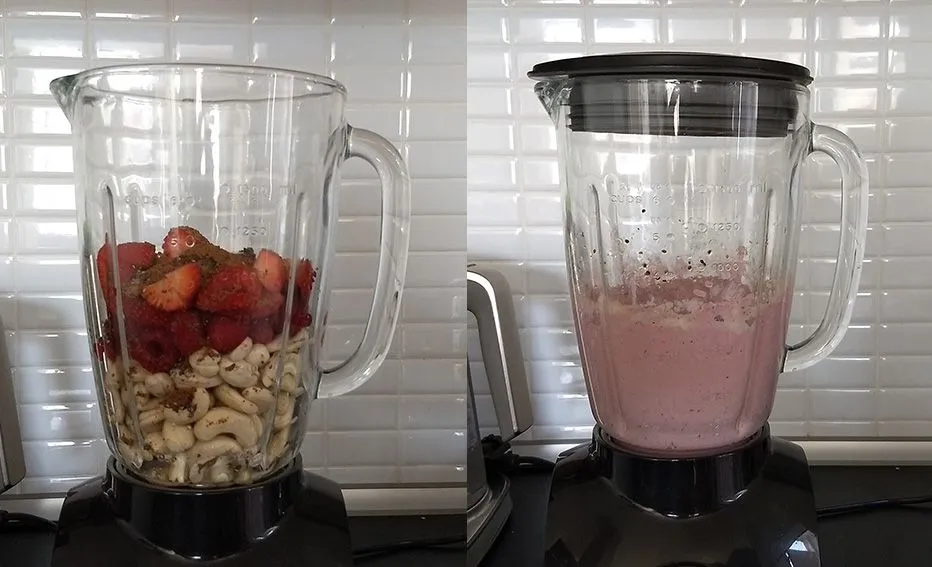
Rinse the cajus and place them in the blender, adding the fruit, the chia seeds and the optional sweetener ( be it the coconut sugar, the agave nectar or something else ). Blend.
You might need to help the blender by pressing the ingredients down with a spoon and/or adding a bit of your favourite vegetarian “milk”. You should get a nice and creamy consistency.
Step 06 - Apply the creamy layer
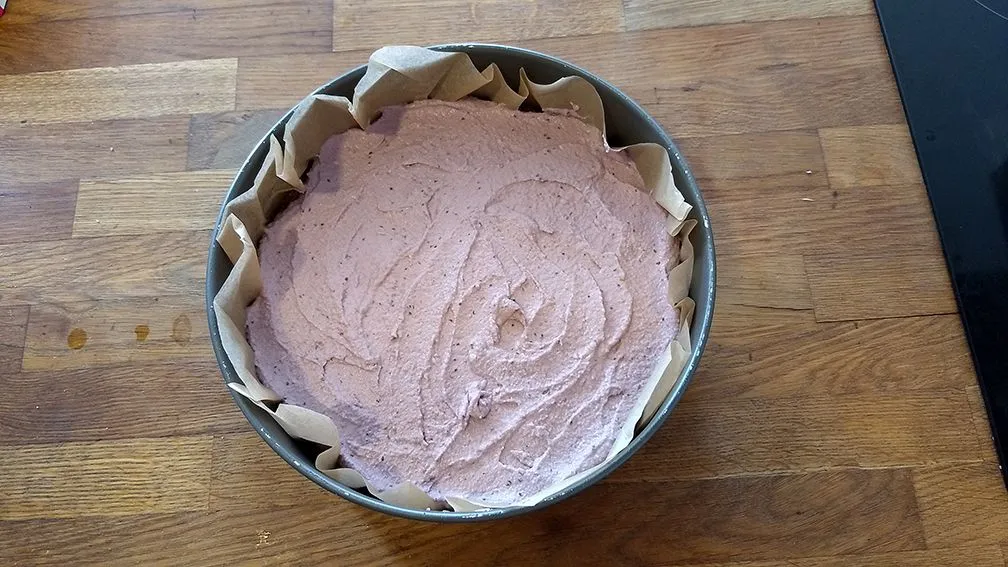
To finish just take base from the fridge and pour the creamy result from the previous step on the cake pan and spread it uniformly with the help of a spoon.
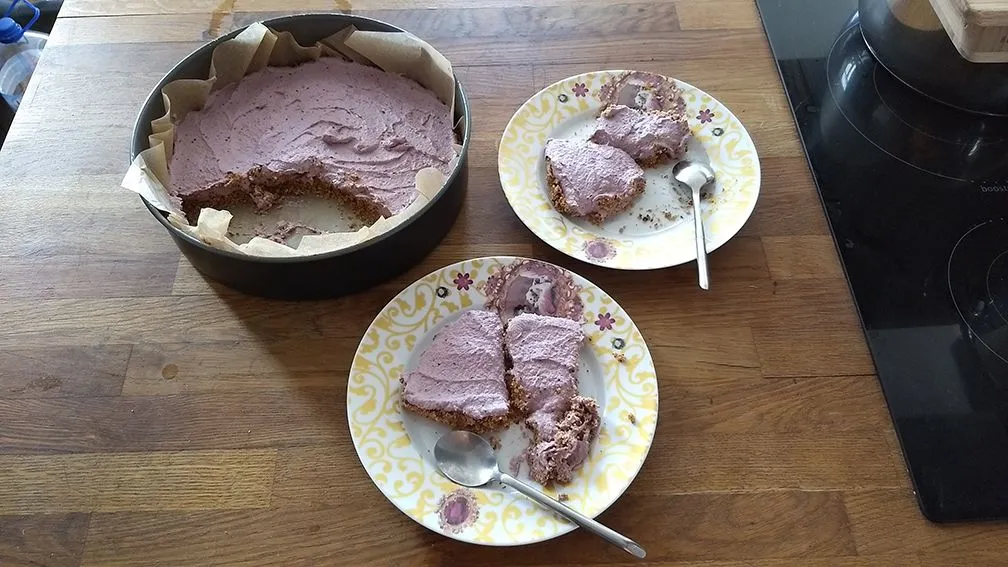
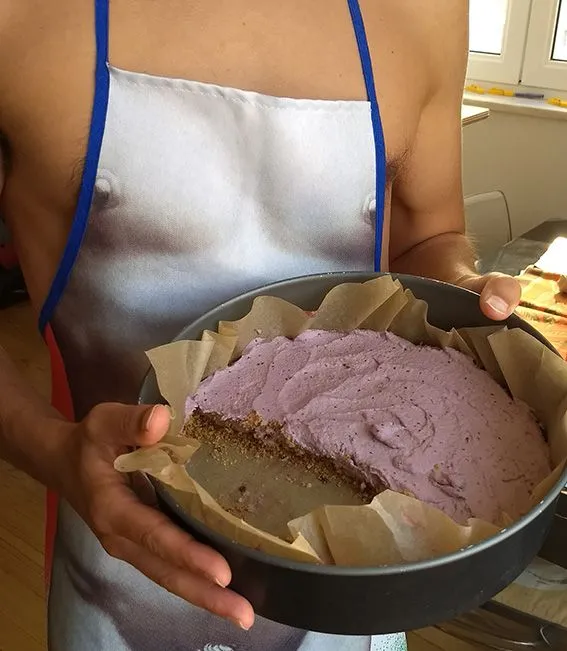
It’s done!
You can eat it right away but you might want to leave it in the fridge to get a more consistent result.
This “cheesecake” is high on proteins and has a lot of vitamins and minerals, as well as a good amount of fiber and some monounsaturated fats.
You can easily customize it for your preference playing with the choice of biscuits for the base and the selection of fruit for the creamy layer.
Hope you like it.