Since celebrating my parents rawnniversary at the raw organic vegan Green Wave Cafe, my family has been into eating raw and enjoying it way more!
So I've been inspired to create a bunch of delicious raw foods every day now, and I will start by sharing the first thing I made and "miss" the most since being raw vegan; which is CHEESE!!!!
(Weirdly, even though I "miss" it... real cheese doesn't even smell nearly as appetizing as it use to 2 months ago!)
Almond Cheese Ball!
I haven't had much experience making any kind of cheese in the past and usually only really ever used coconut to try and make a sort of "grated cheese" with the left overs from the pulp when I made coconut milk. However this is the first time I made a RAW nut cheese!
The cheese I made for this post is made with an almond base!
So the first step (if not obvious already!) is to soak almonds for 8 hours!
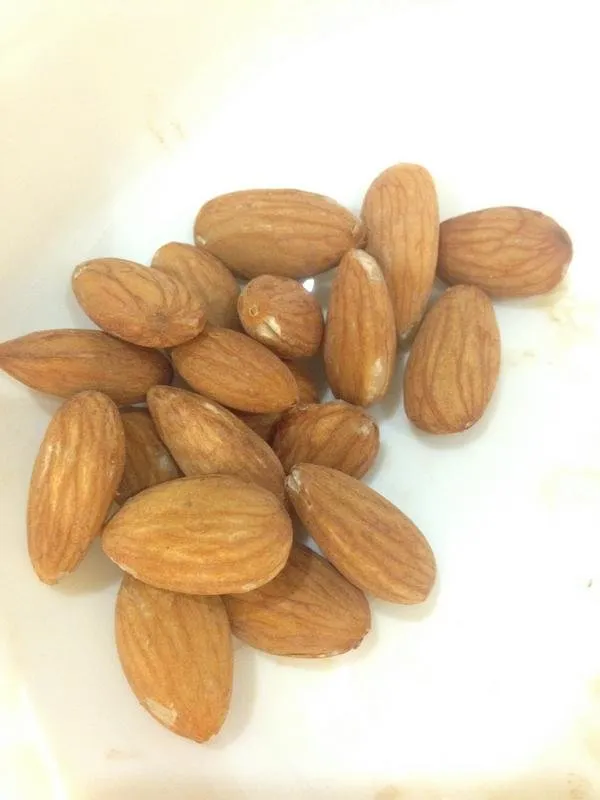
Quality almonds make a difference! If possible, pesticide free, and optimally harvest your own or get some locally!
Once the almonds have finished soaking, you want to rinse them off and drain the water. Then you're going to peel the almonds which should be easy after soaking as the skins should pop right off, this will give the final product a more delicious texture and cheesy look!

For this recipe (to make one "ball of cheese") you will only need 1 cup of peeled almonds!

You can use a blender or food processor, depending on preference, I used a blender this time!
The recipe I was following looks pretty good though I didn't want to copy something and like to spice things up my own way; so I'll write the original here and then my version as I continue with the post!
- 1 cup almonds, soaked, drained, and peeled!
- 3/4 cup water
- 2 tablespoons olive oil
- 3 tablespoons lemon juice
- 1 clover garlic
- And a pinch of himalayan salt
Very simple, with infinite room for switching it up to any flavor you like!
Once all the ingredients are ready, blend/process all the ingredients together until smooth; no need to rush it!!! ;)
Then you place the mixture into a nut-milk/cheesecloth bag or a colander lined with cheese cloth, give it a tight squeeze to drain the liquids a bit and leave it in the refrigerator over night. (Though you can skip this step with the way I did it! :)
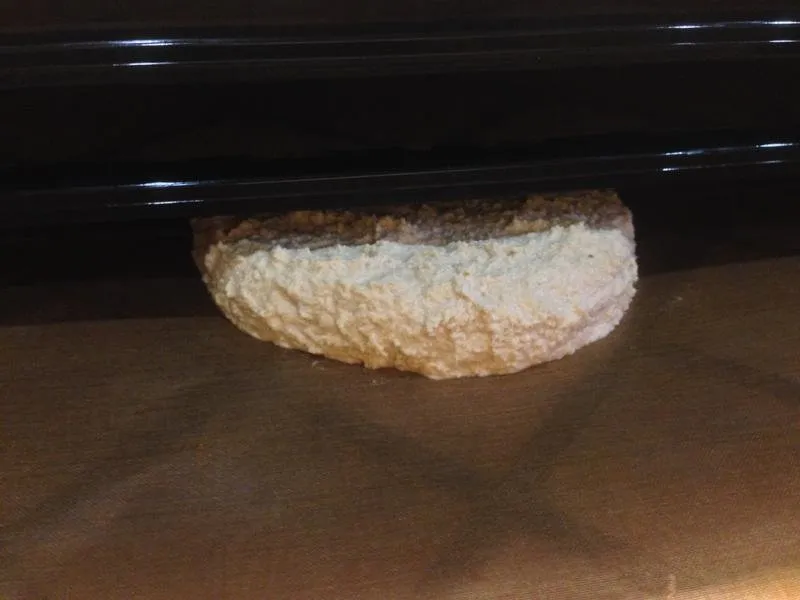
That's it! Although if you'd like a more firm consistency you can dehydrate it for 6+ hours at 115º (to your preference, I use 105º to keep it more raw!) in order to form that delicious outer rind! Giving it a more firm cheese like appearance and making it less of a cream cheese!
You can flip it over after 6-10 hours if you want to make the rind all around the entire cheese, or leave it unturned so that it can have a soft side, infinite possibilities and variations! <3

This is a coconut water vinegar I made back when I was hardcore processing coconuts! <3
Since I'm not a big fan of dead filtered plain water, I decided to switch up the recipe and used about 1/2 cup of coconut water vinegar and a bit over 2 table spoons of lemon water! I diluted the lemon juice with water because the vinegar already had enough tanginess that pure lemon juice might've been too intense. Plus I love drinking lemon water so it was an more efficient way to do both, prepare the ingredient and a drink! ;)
Instead of plain olive oil I used 2 tablespoons of mildly infused truffle olive oil, though not everyone is a fan of the truffle taste, I think it really adds a lot of great flavor!
I added one garlic clove as the original recipe did, but instead of salt I used 1 teaspoon of organic brown miso, and 5 teaspoons of nutritional yeast!

Make sure you empty out ALL of the blender the best you can to not waste any valuable ingredients! <3
The steps I used are relatively similar though (even simpler!) because since I used significantly less liquids, I was able to actually skip the cheese cloth draining as it was totally unnecessary!
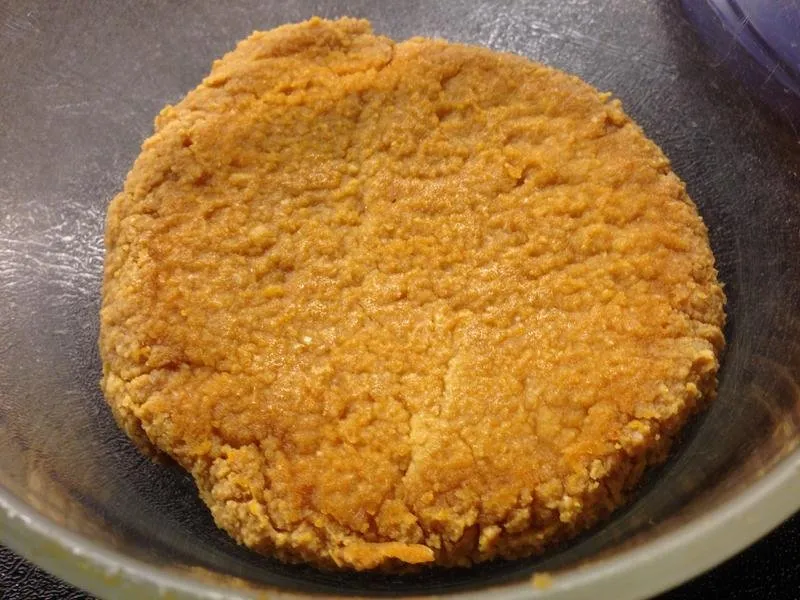
However, as I did not want just a cream cheese and was seeking that more firm texture with the rind texture, I poured the whole blob straight onto a dehydrator tray sheet!
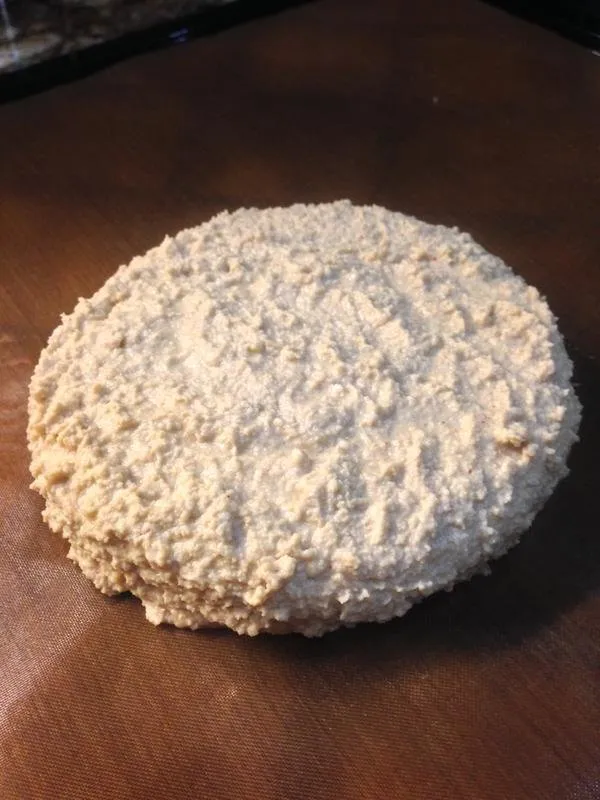
Just like that, this "cream cheese" was ready to dehydrate into a "cheddar" haha!
In the dehydrator for 6 hours!

Then I flipped it over to dehydrate for another 10 hours!
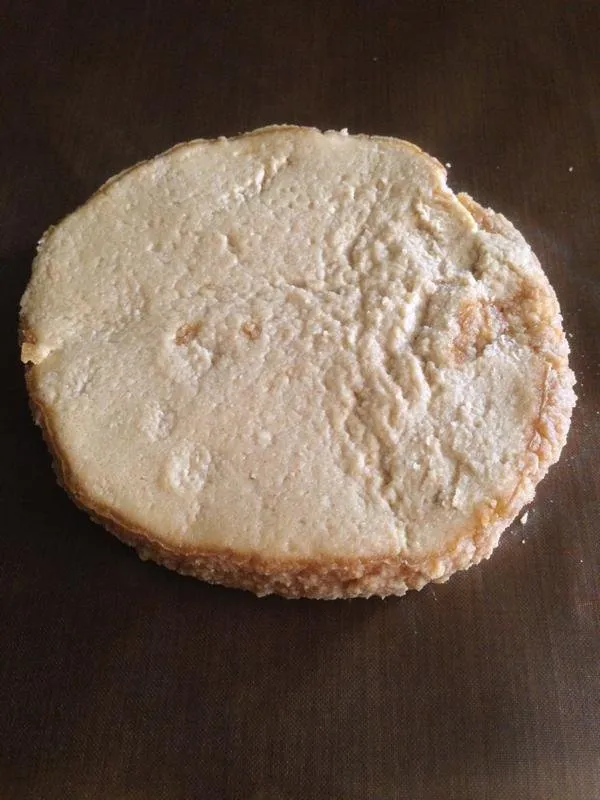
You can already see the rind formed around the border, and since it's flipped you can see the creamy insides before finishing forming the rind all around!
And wa-la! It's ready! Though I chose to refrigerate it for a day in order for it to be even more firm and cheese-like! :)
Here is proof of me holding it so you know I made it. So you don't think I copied it off the internet! xD
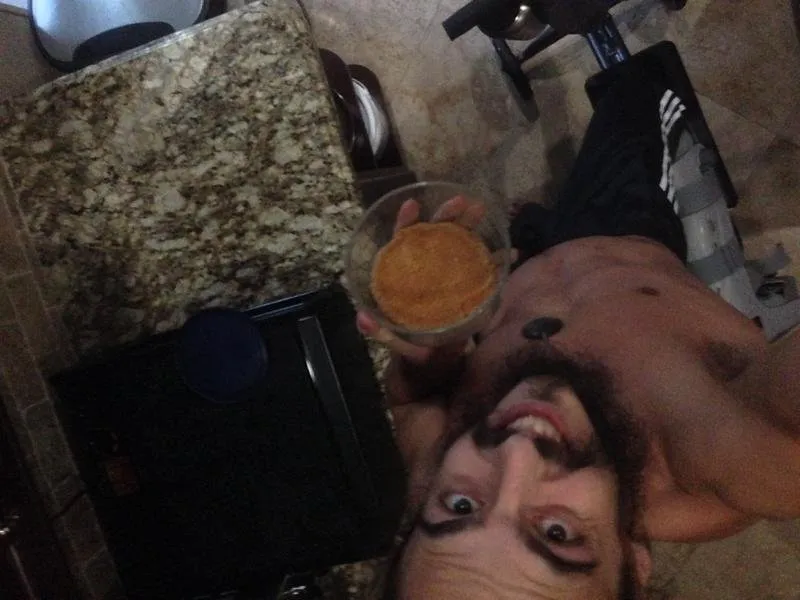
Even wearing my boot leg ankle protector, while riding my scooter, haha!
This is only my second recipe I've shared on steemit so far, so tune in as there's many more to come as I explore and experiment with the dankness of raw vegan cuisine!!
•–•∞§∞§•§∞§∞•–•–•∞§∞§•§∞§∞•–•–•∞§∞§•§∞§∞•–•
I hope you loved this as much as we did and follow us for more epic adventures, healing, and recipes!!
Much LOVE, THRIVAL, HAPPINESS, HEALING, APPRECIATION, FREEDOM, ABUNDANCE, HEALTH, GRATITUDE, and $TEEMING for ALL!!
💗💗😄💗💗
Thank you and STEEMON!!
💗💗😄💗💗
