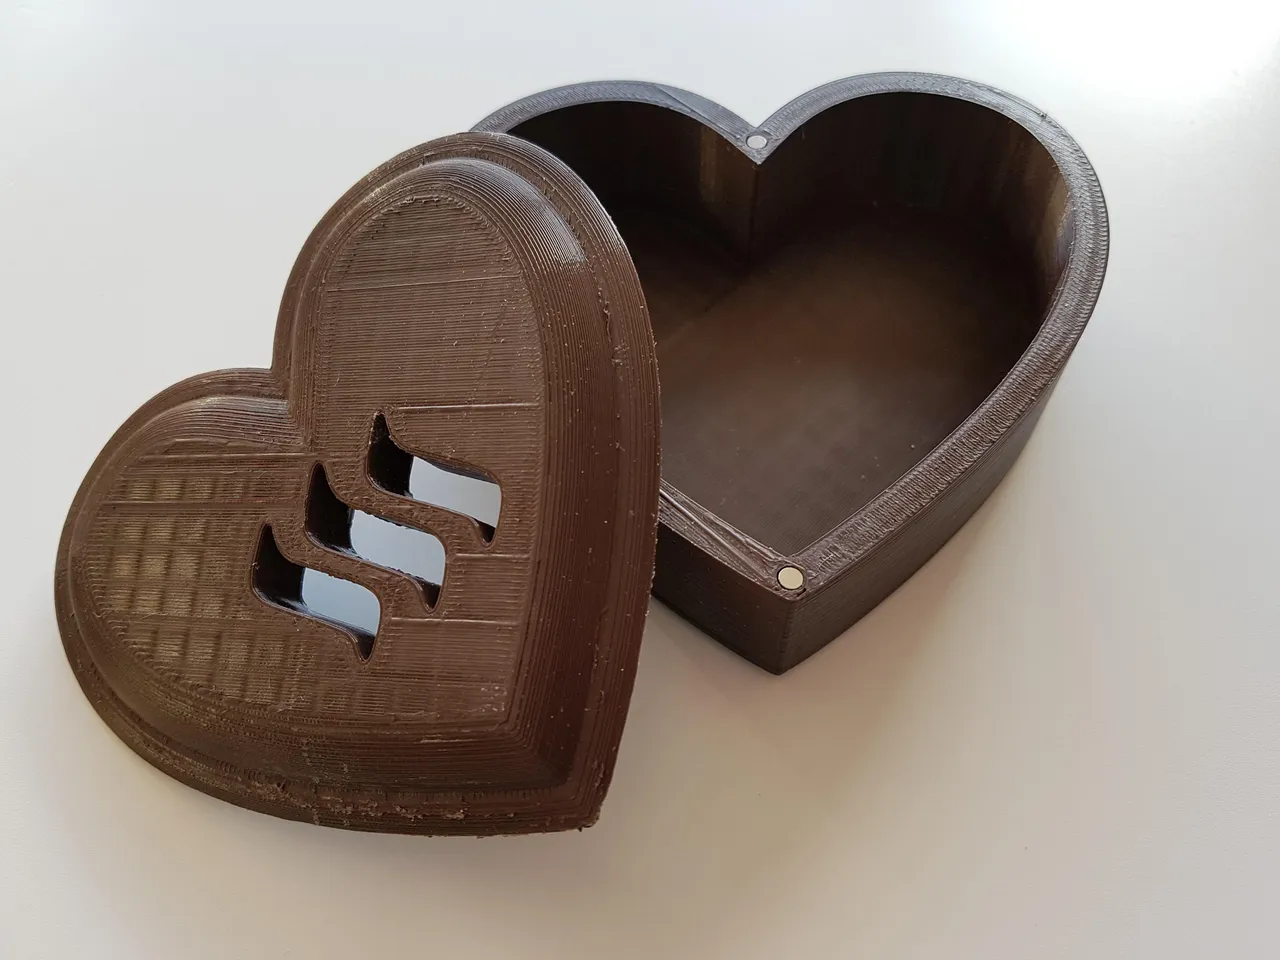
It took me a week until I could finally print out this Steemit chocolate box. I needed to order brown fillament and magnets for the box. I also really wanted to make Steemit chocolate. So, I was checking online what I needed. A mould, chocolate fondue and ofcourse chocolate.
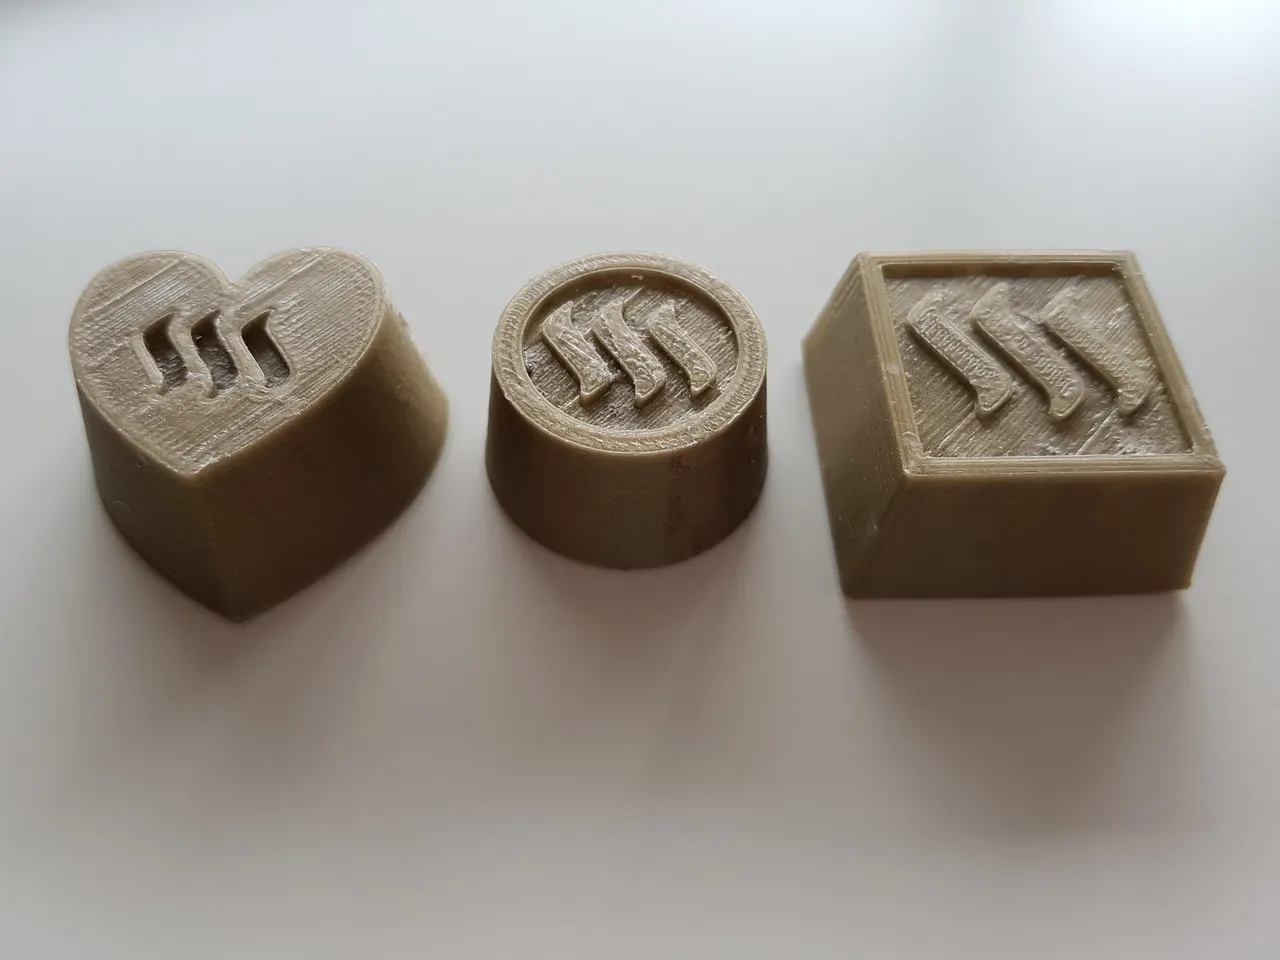
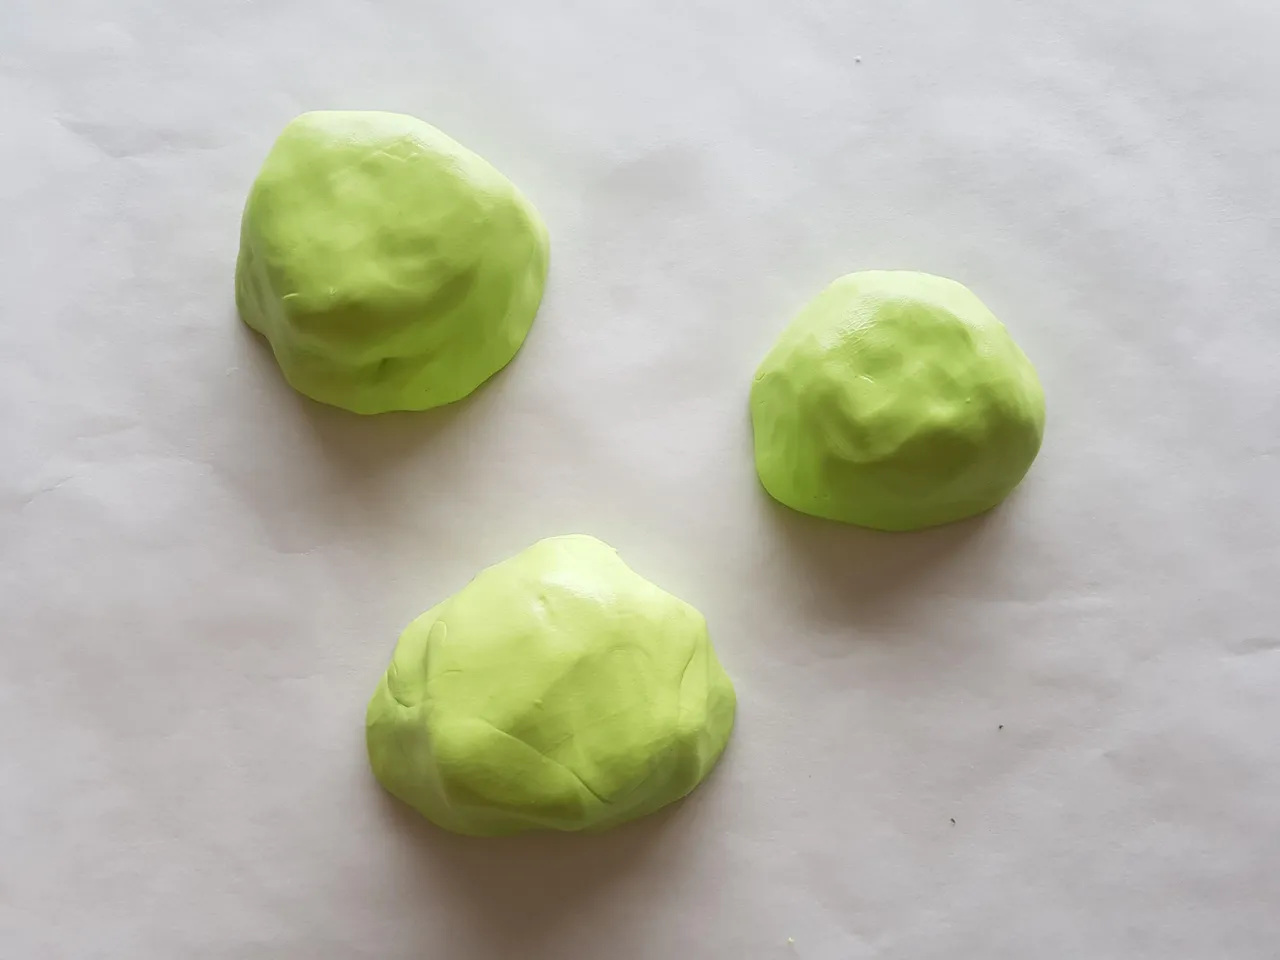
First I made the chocolate samples:
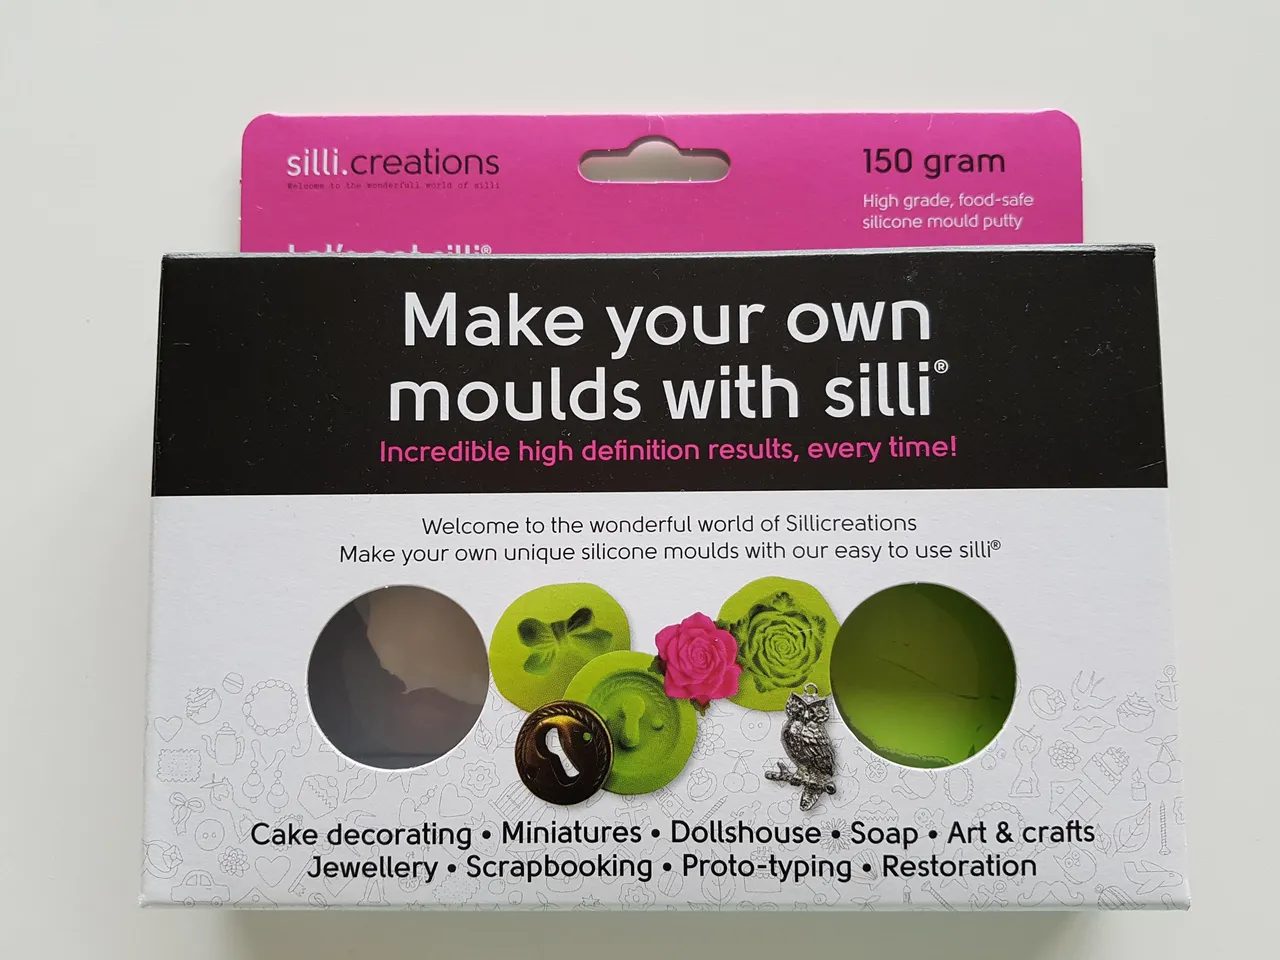
I ordered silicone by SilliCreations. It is actually not meant for chocolate, but I wanted to give it a try anyway.
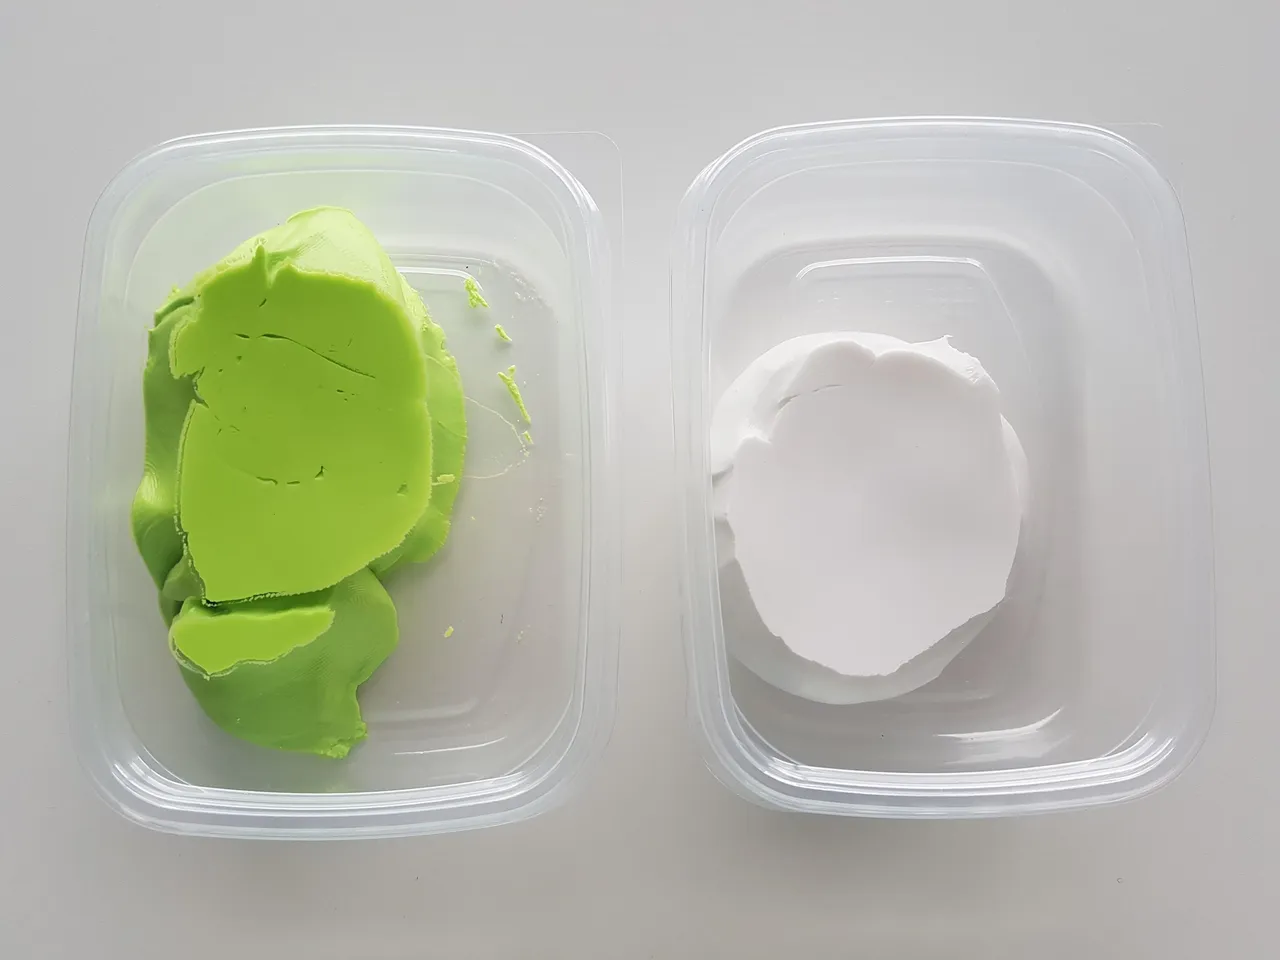
Mixing the two components.
Covering the chocolate samples with silicone and leave it for 3 hours.
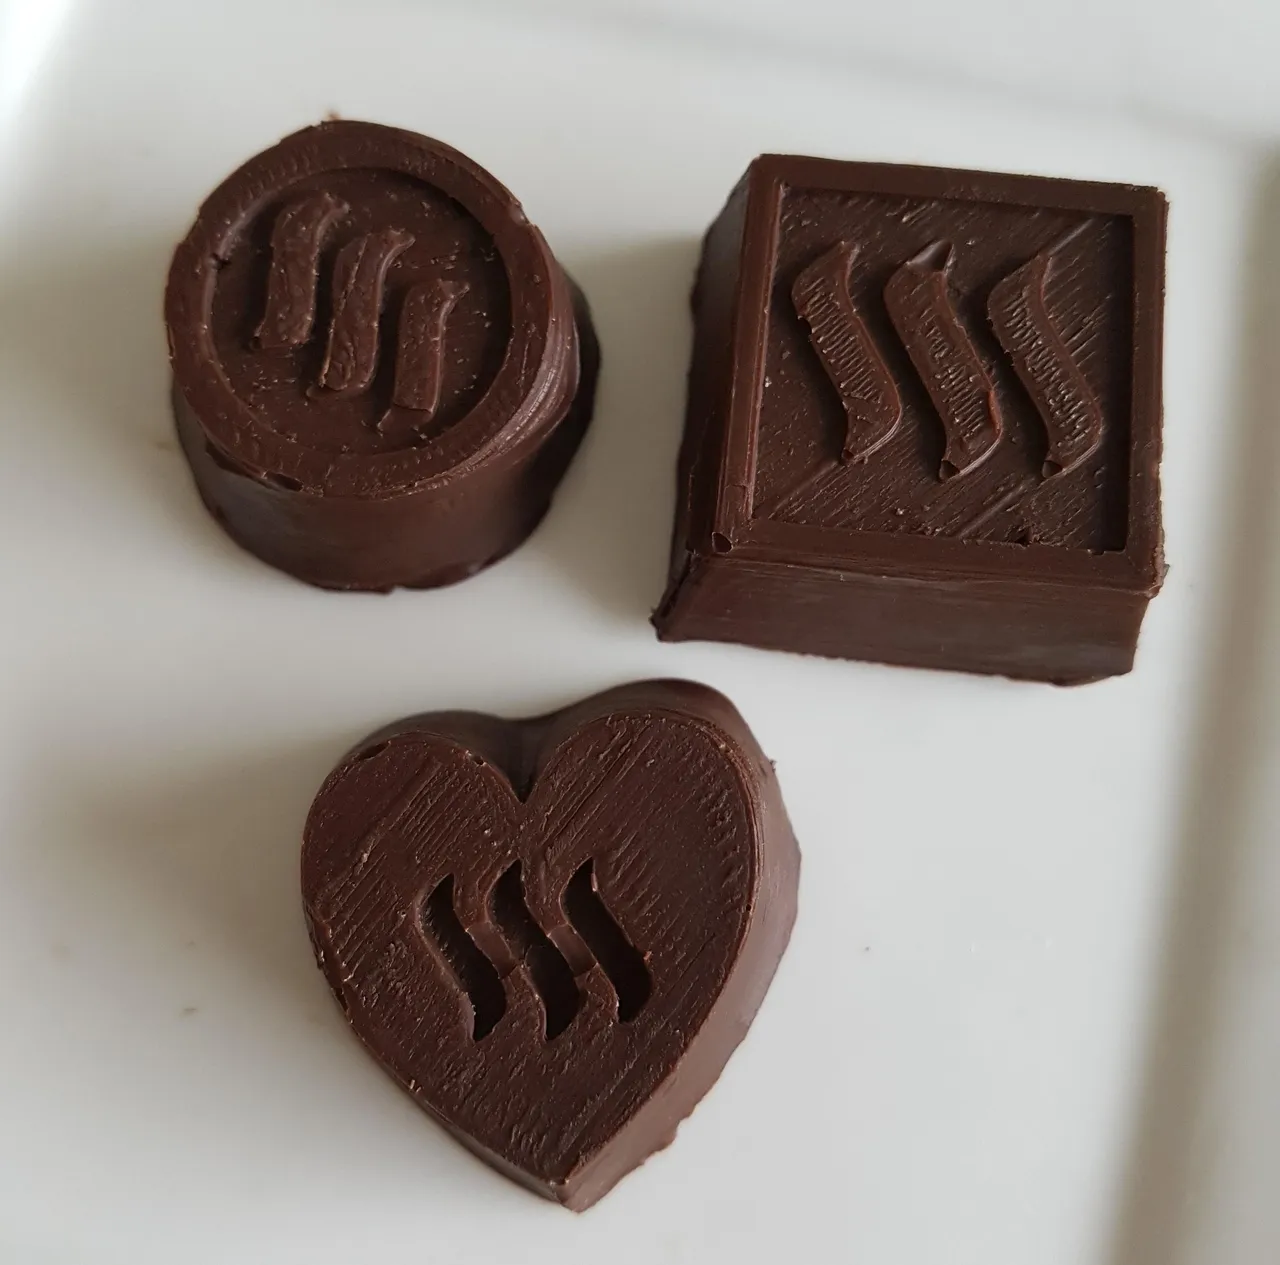
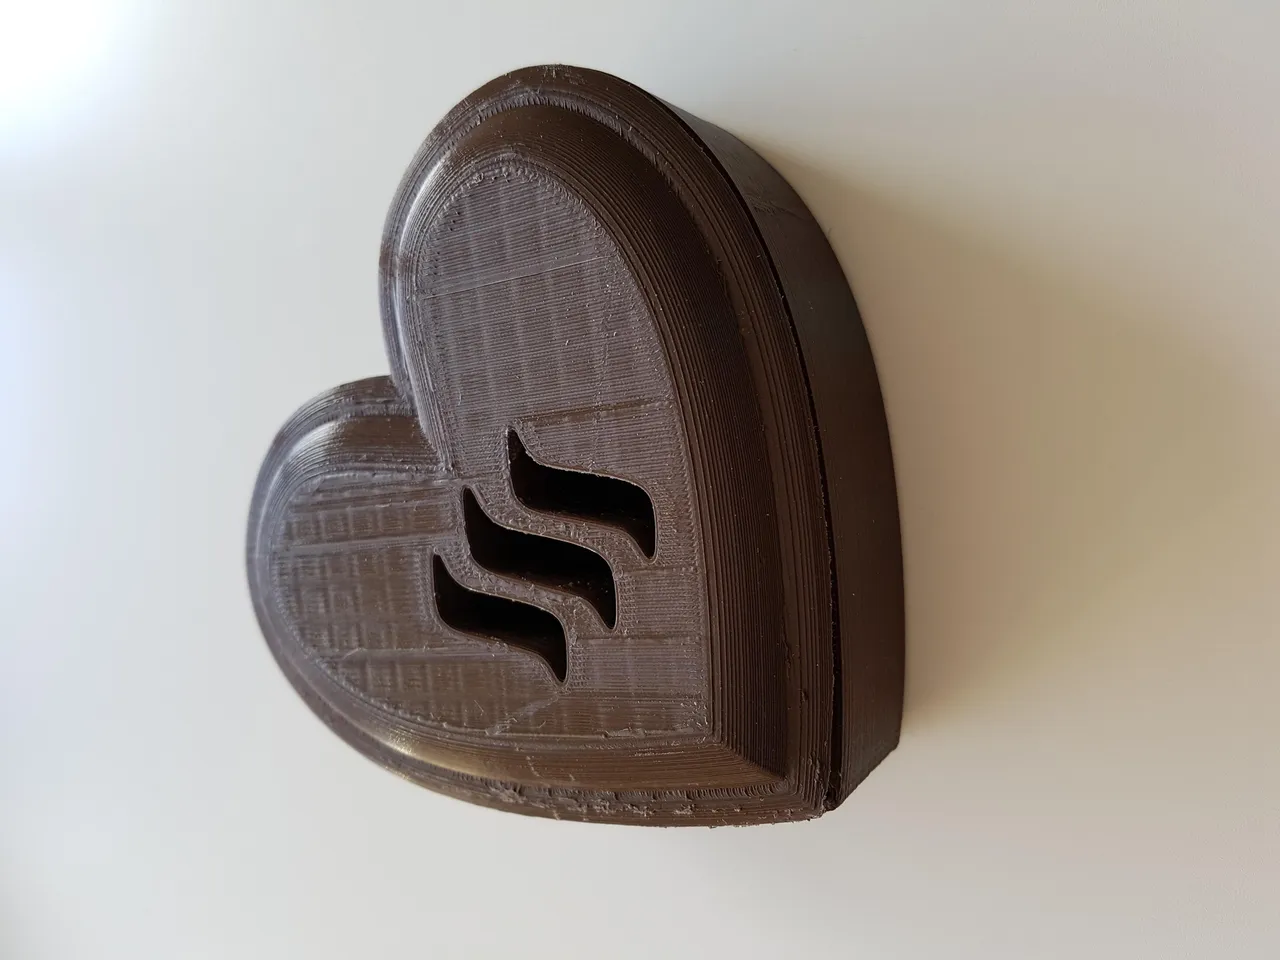
After 3 hours, they look like this. Not perfect, but the heart shaped one looks the best.

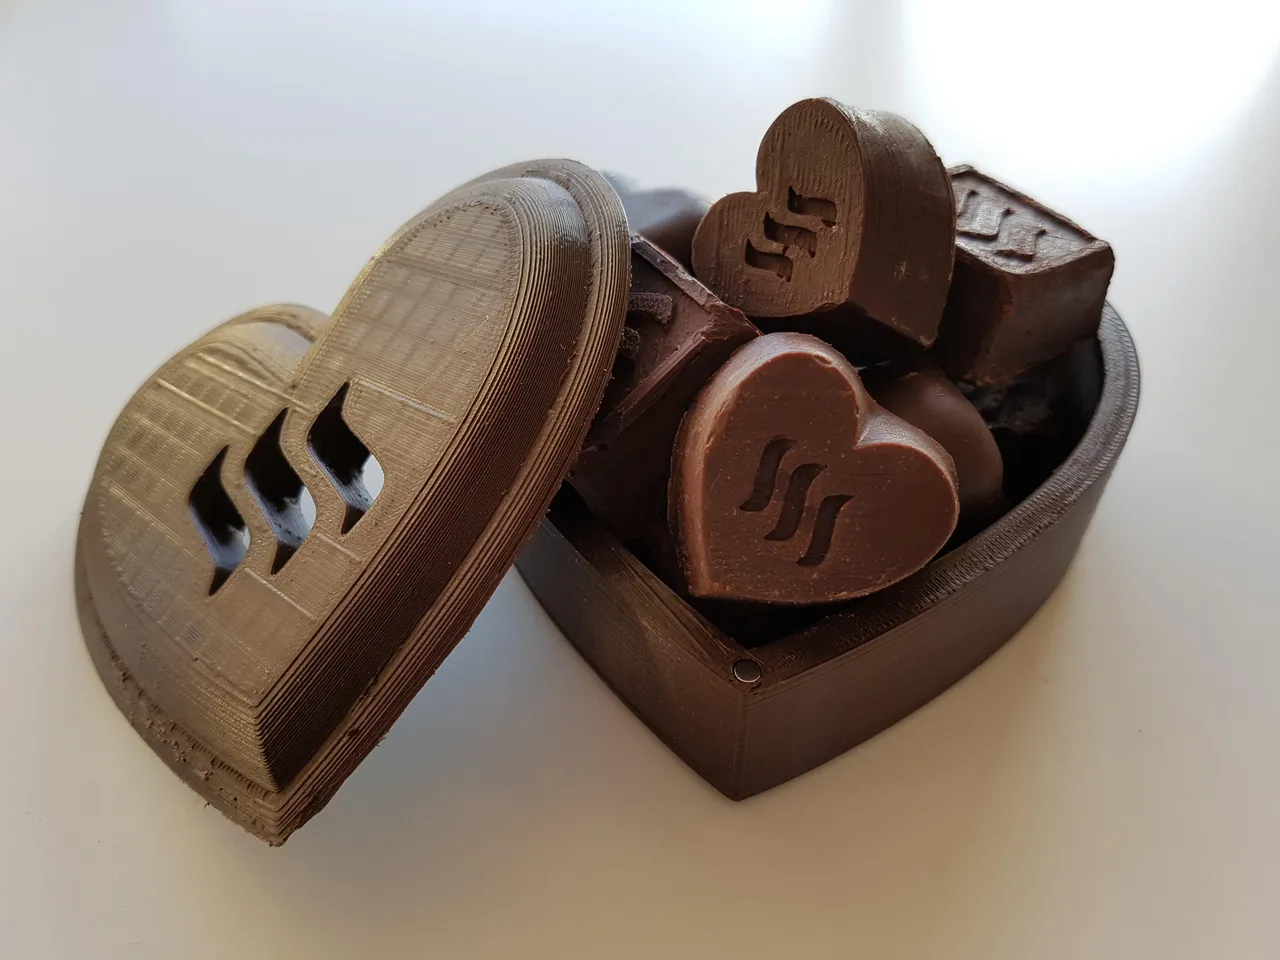
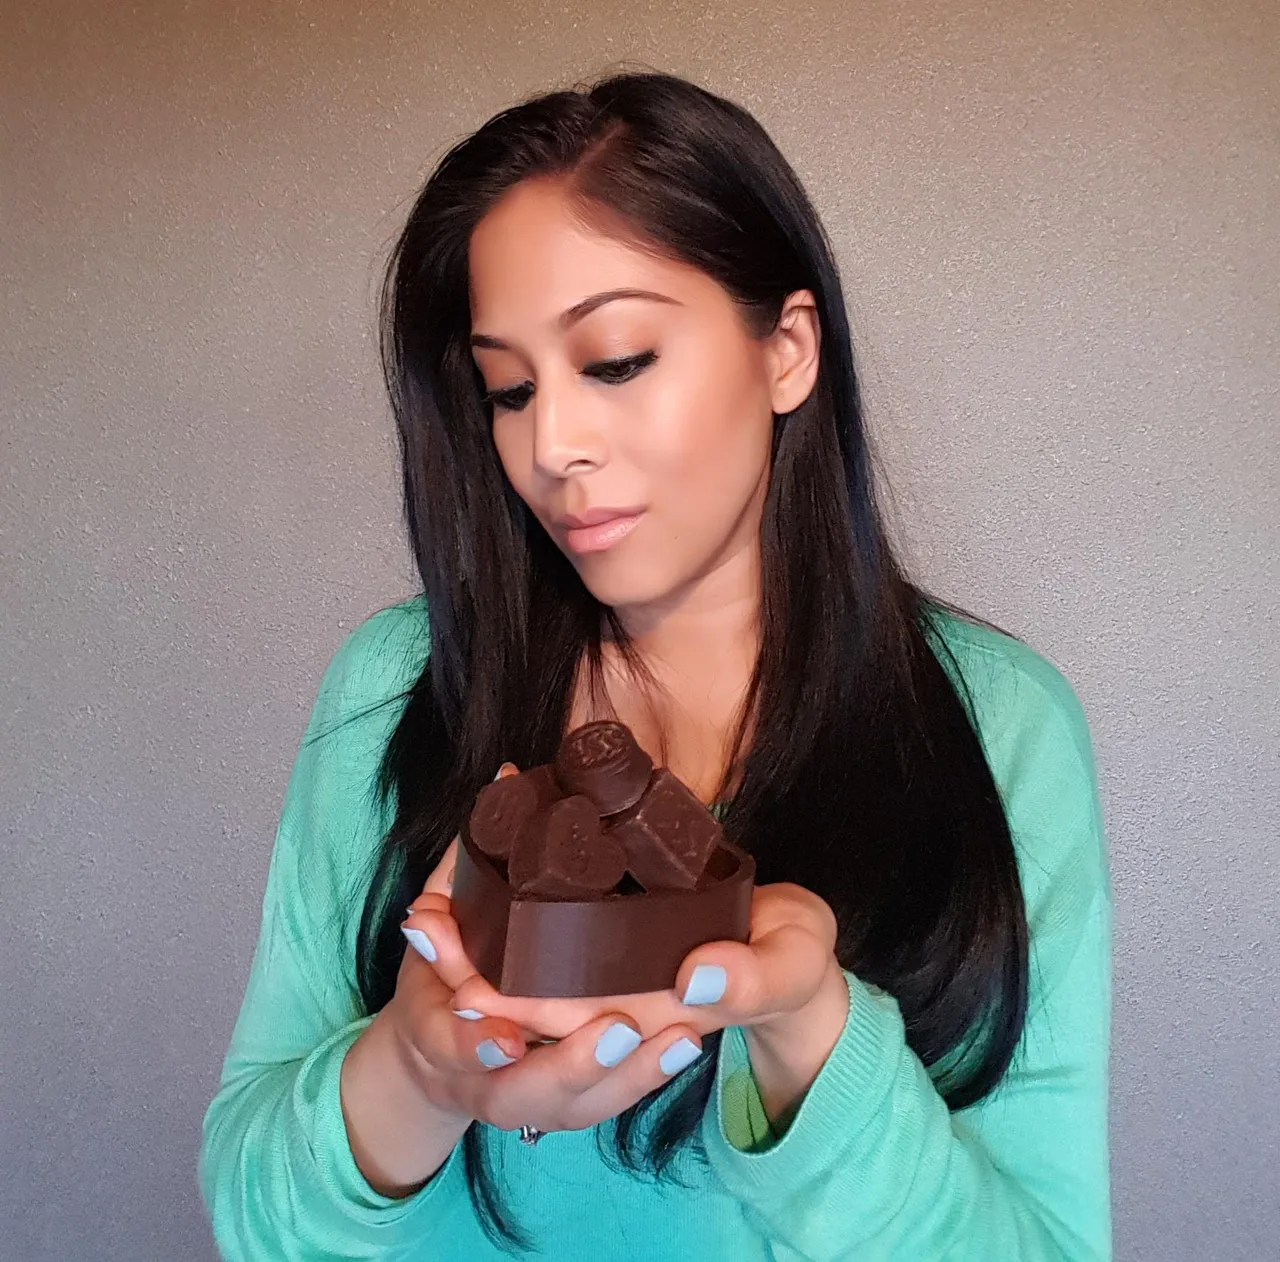
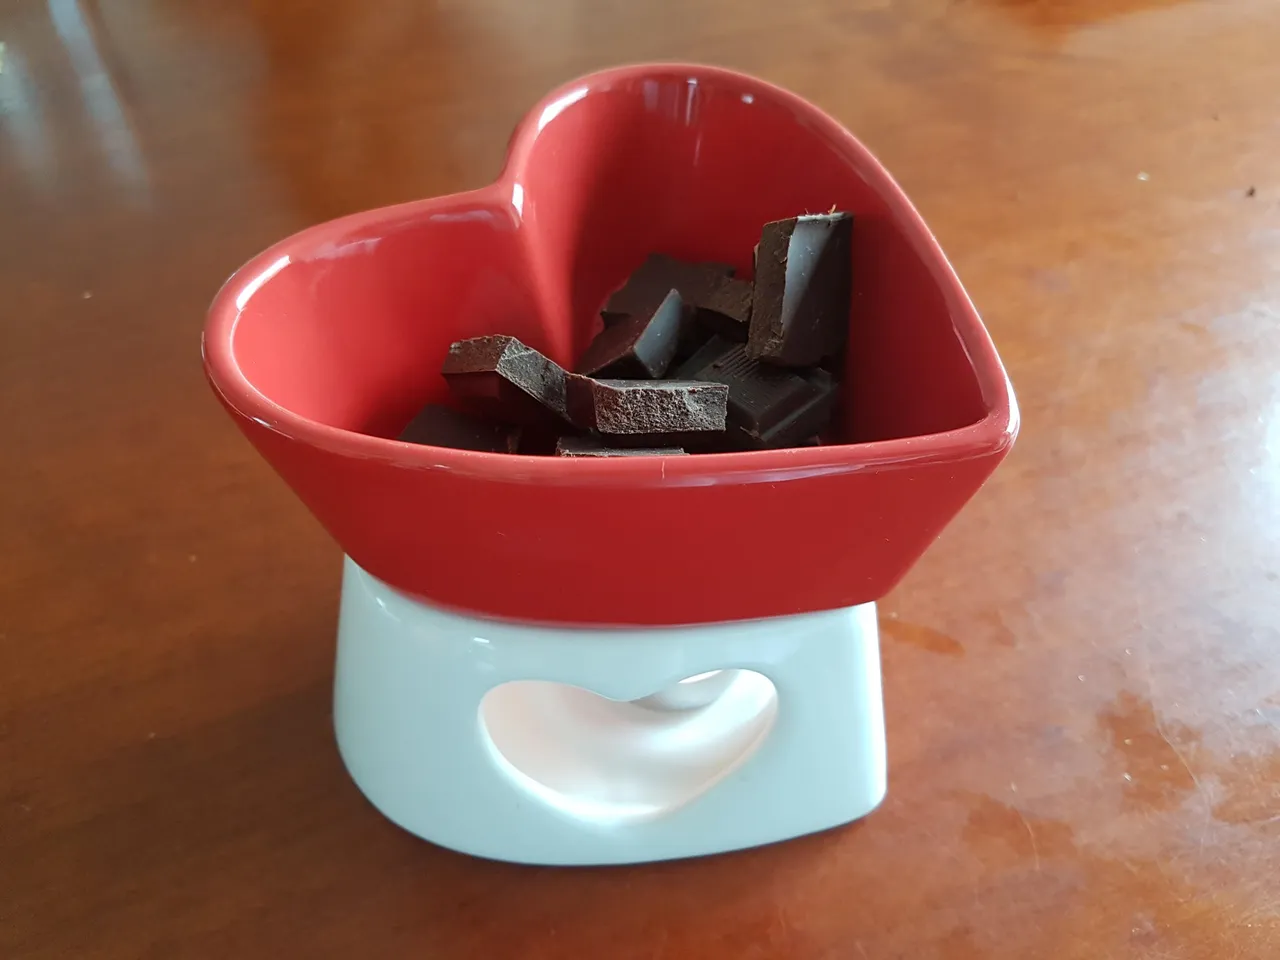
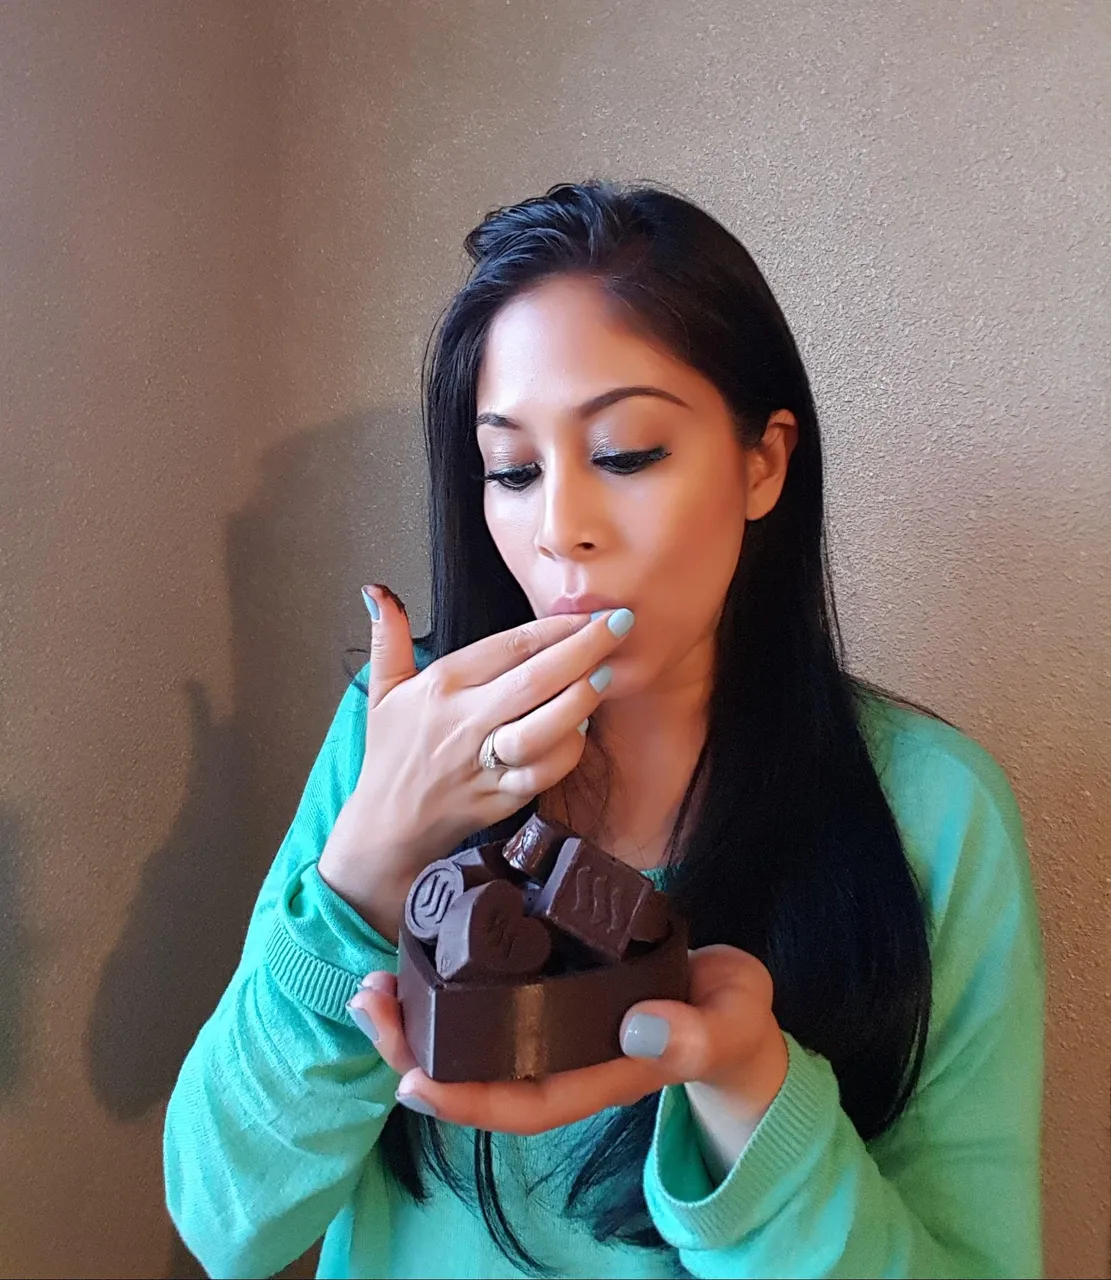
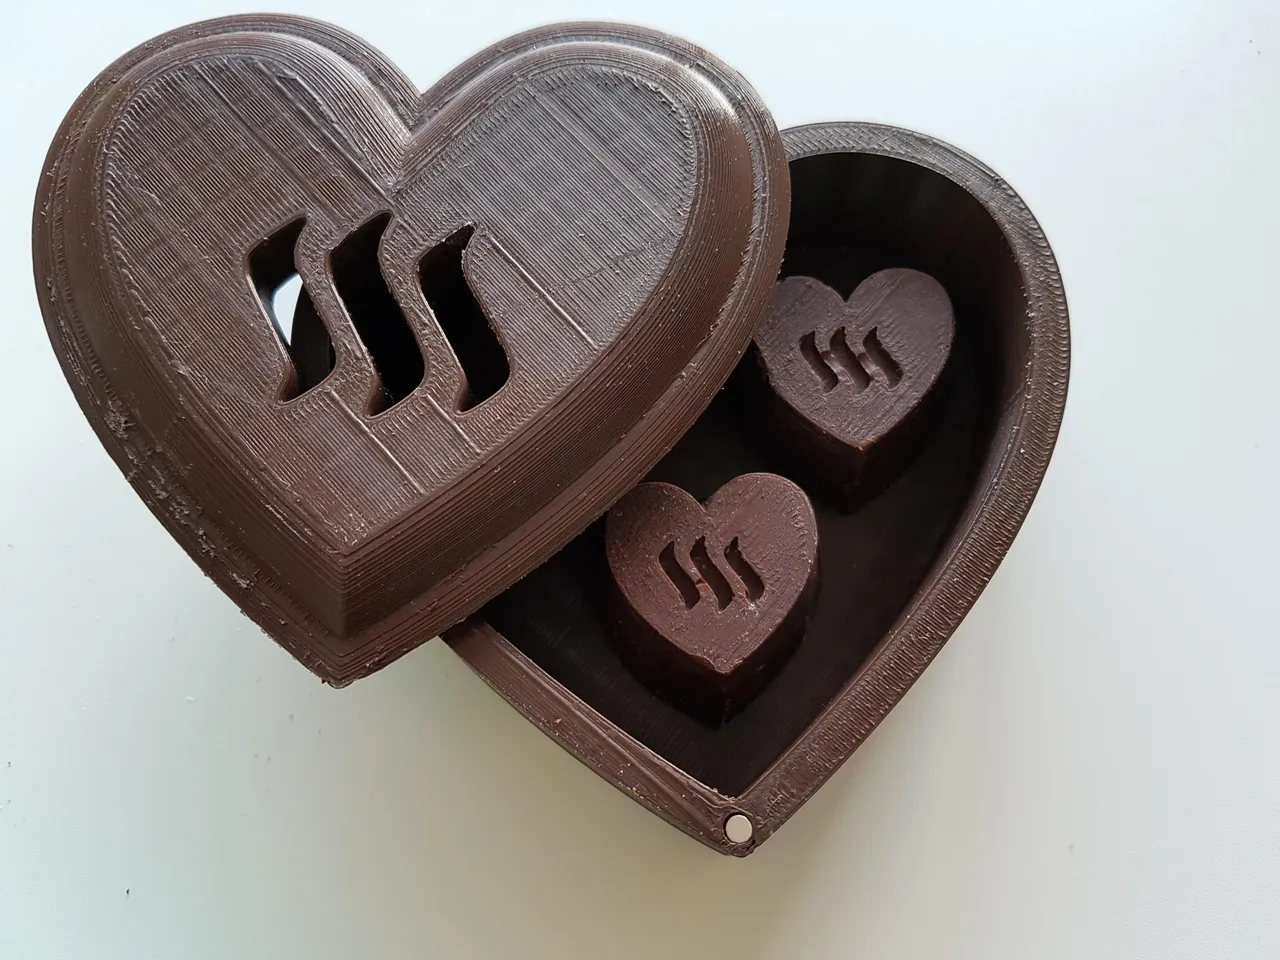
Now I'm ready to make Steemit chocolate! I melted a chocolate bar first using this chocolate fondue.
I added pieces of caramel fudge.
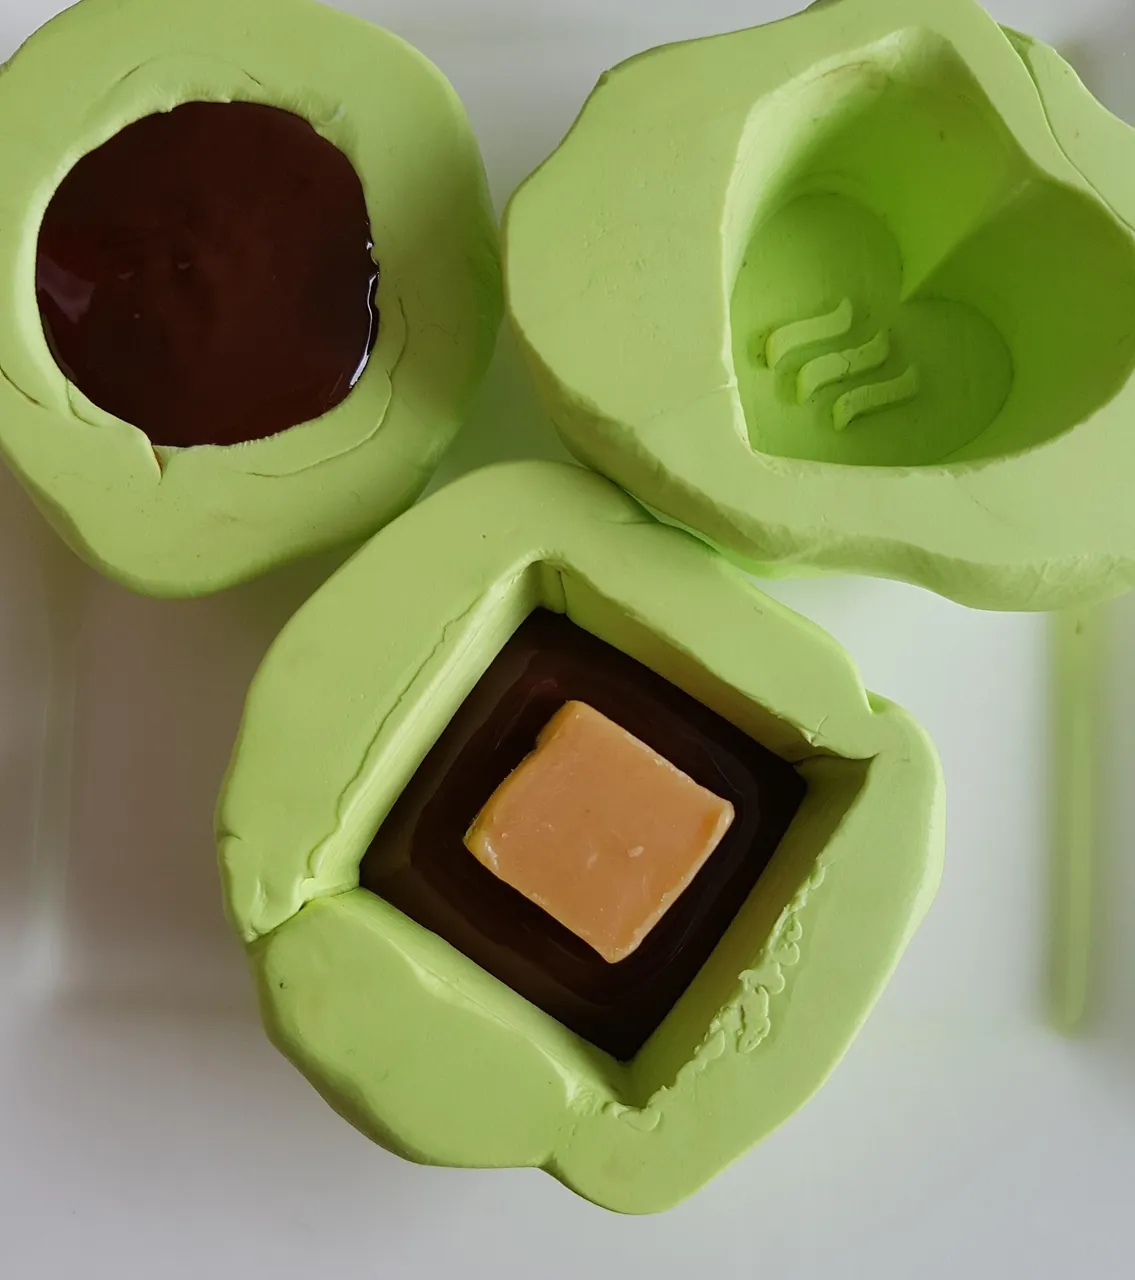
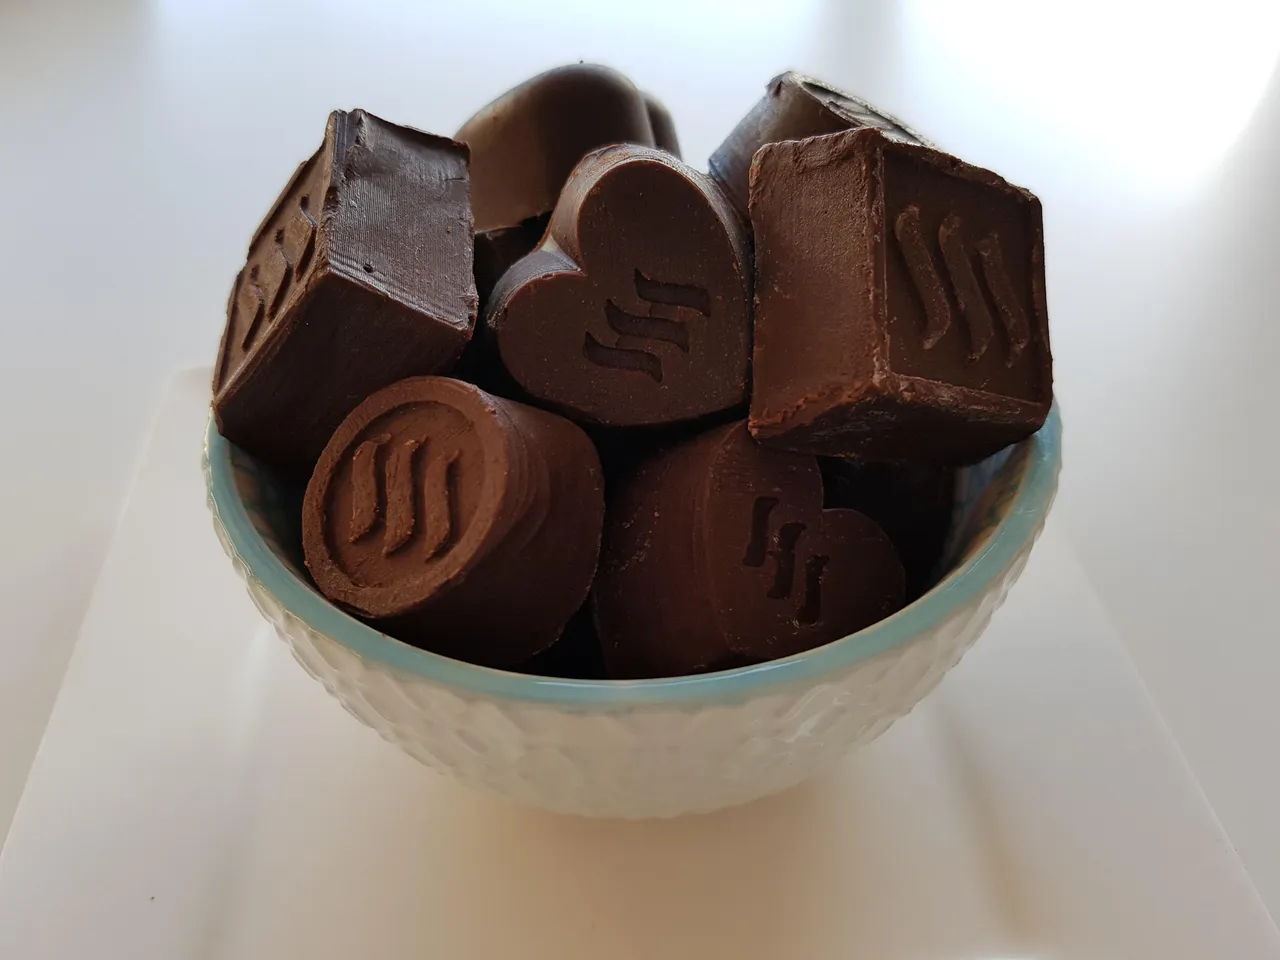
I was happy to see the result. But after the first round, the chocolate did not look good as the chocolate of the first round.
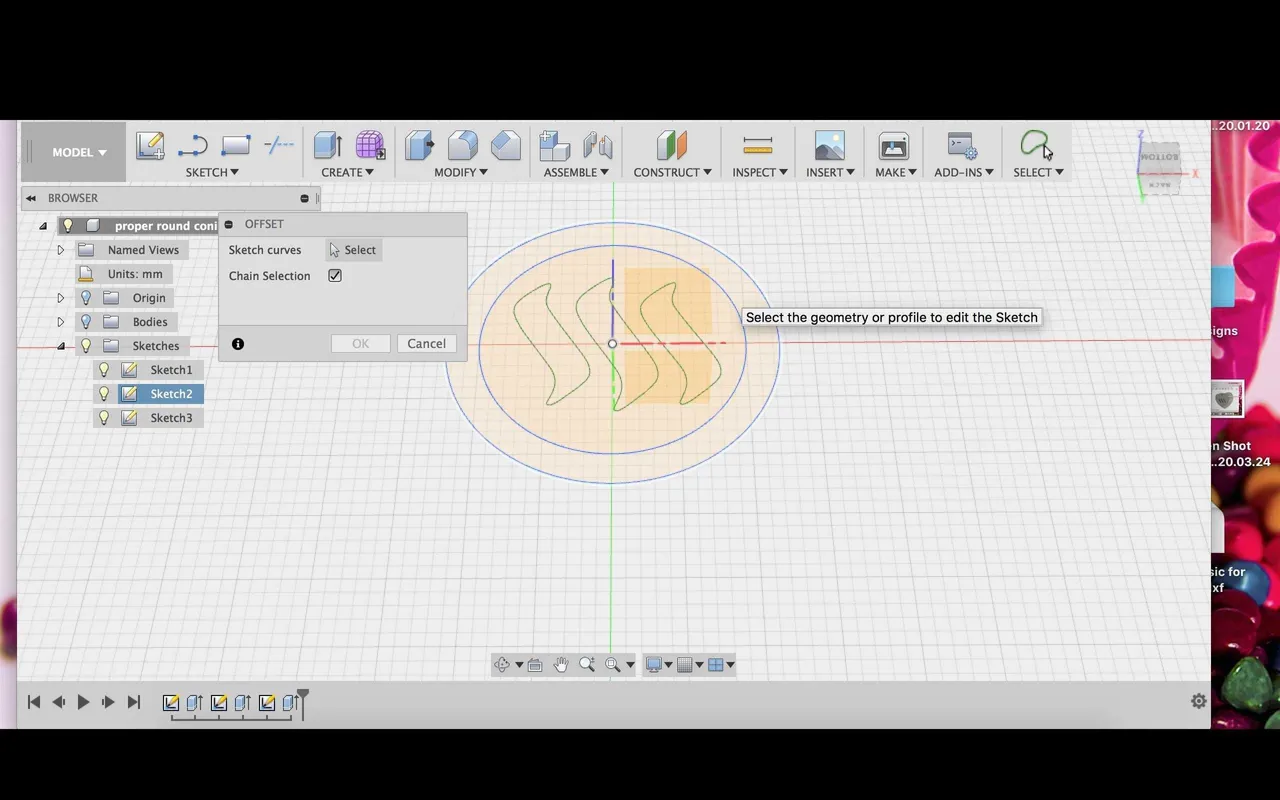
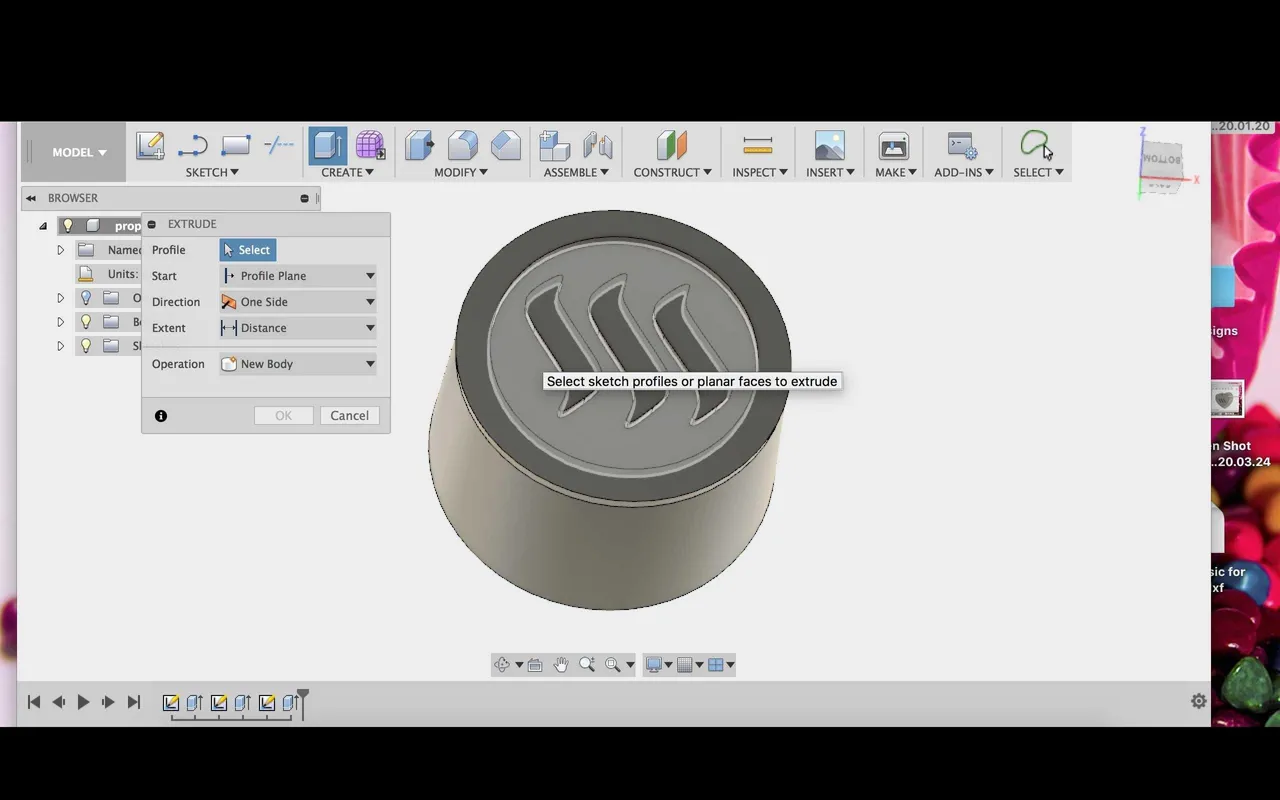
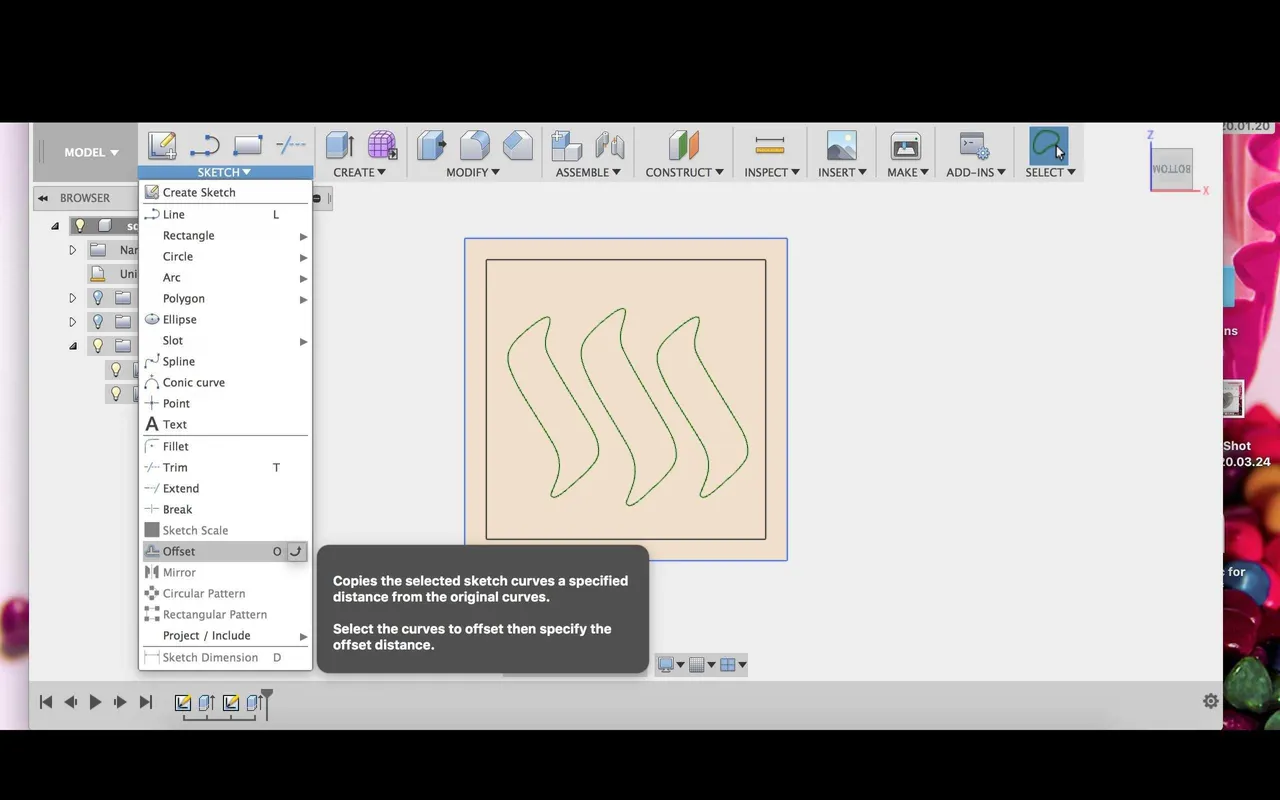
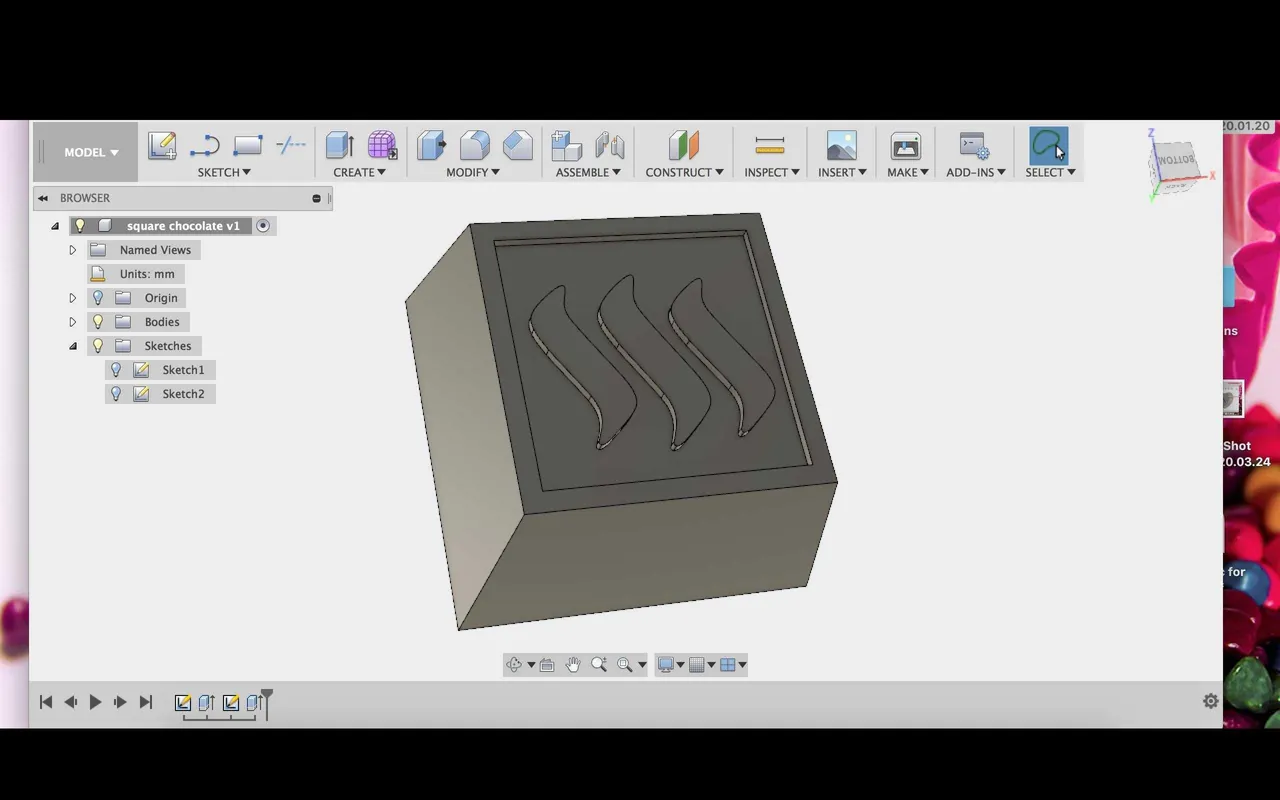
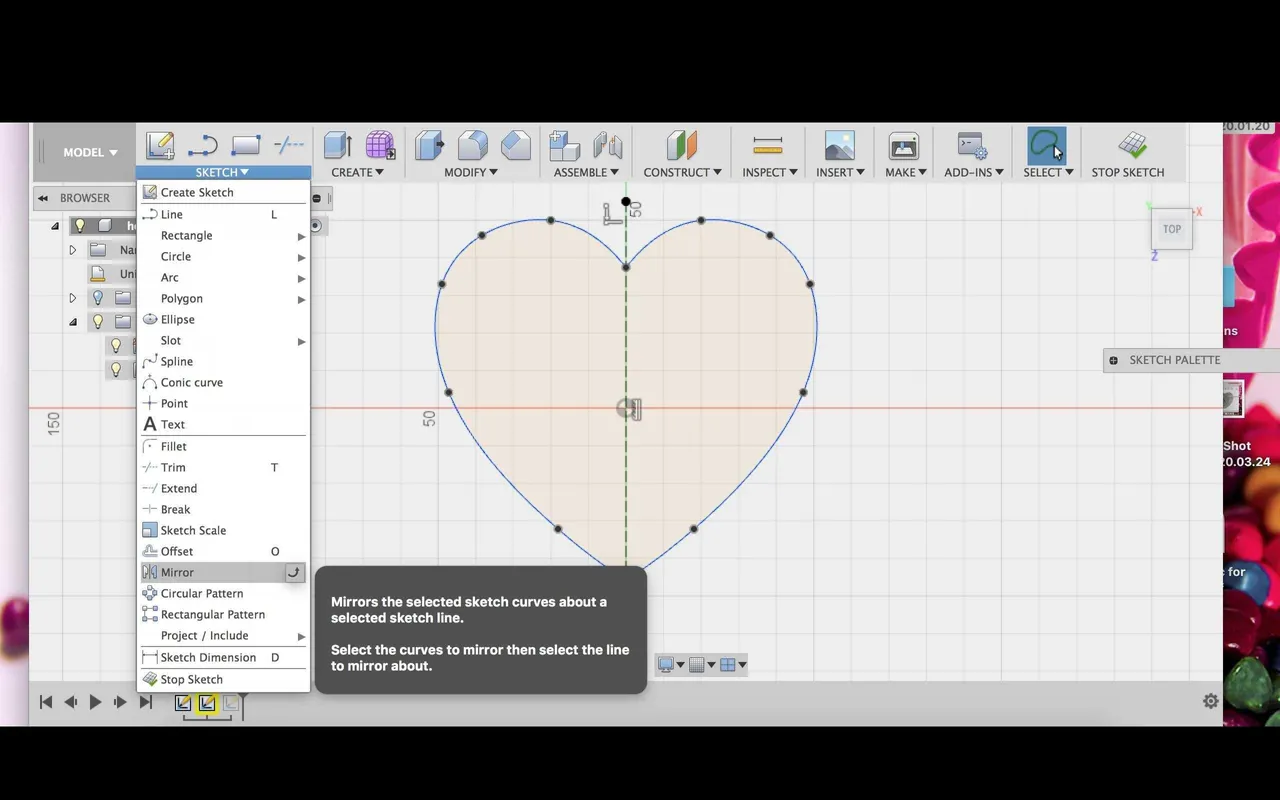
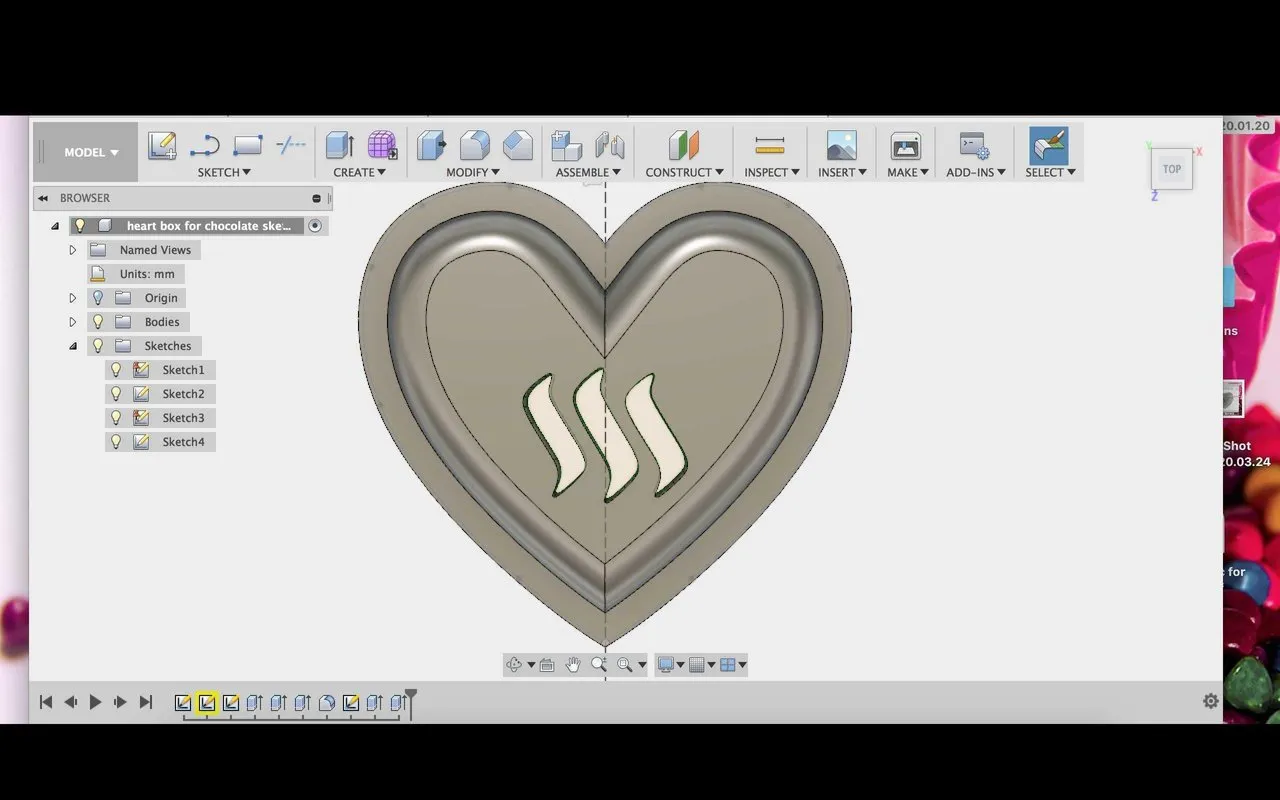
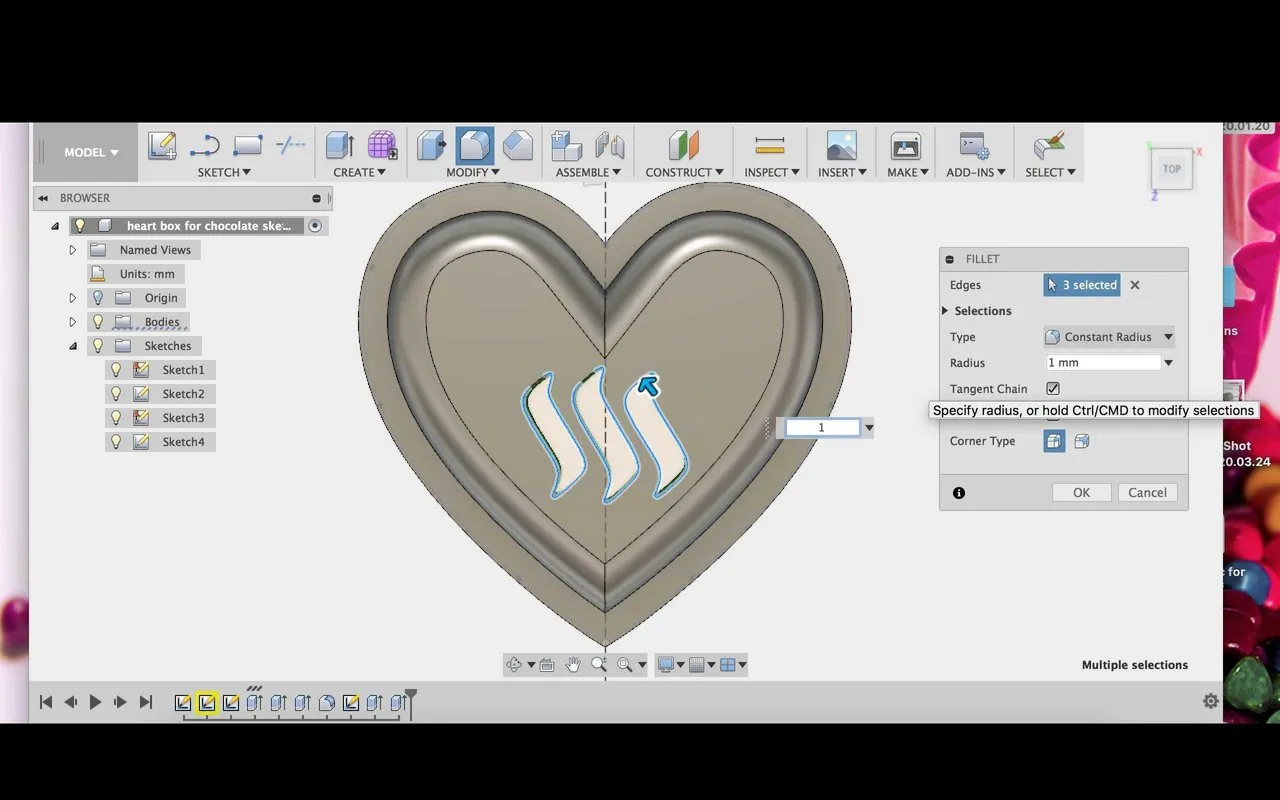
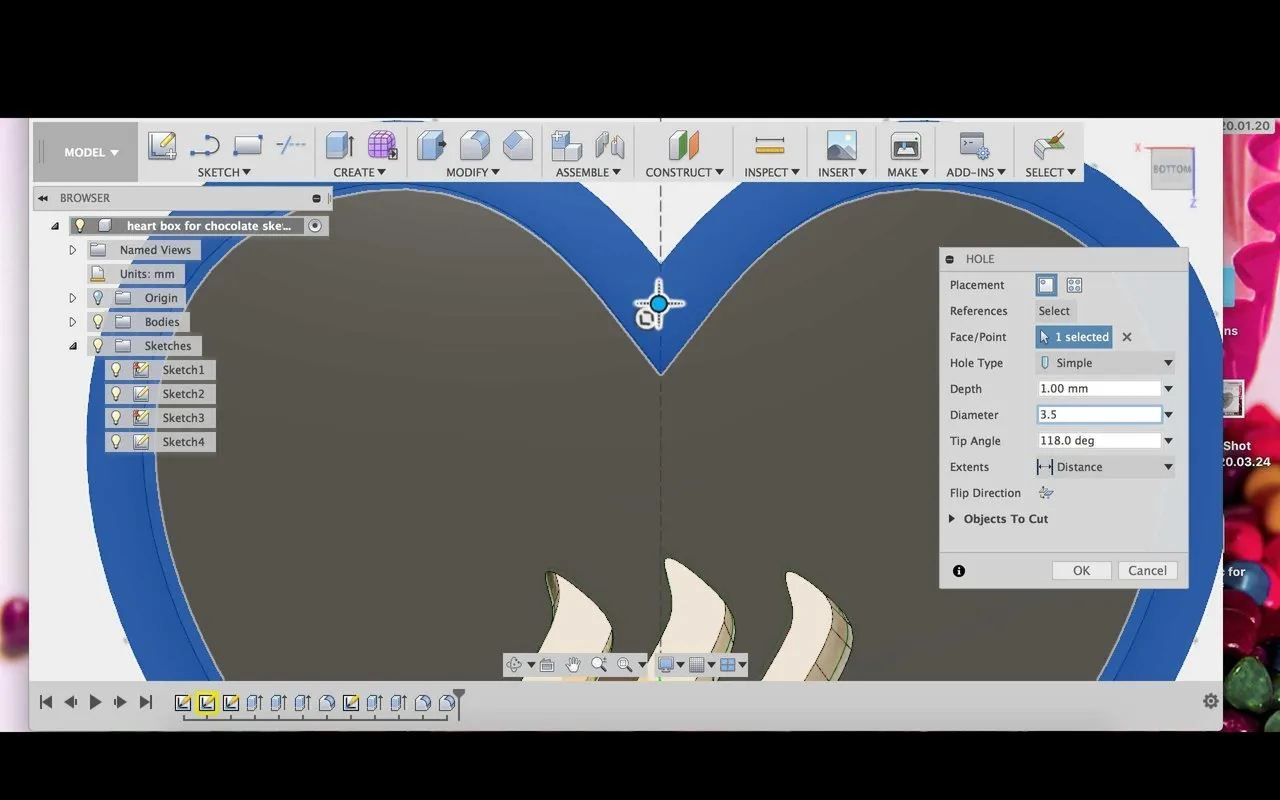
Below the tutorial of the Steemit chocolate box.
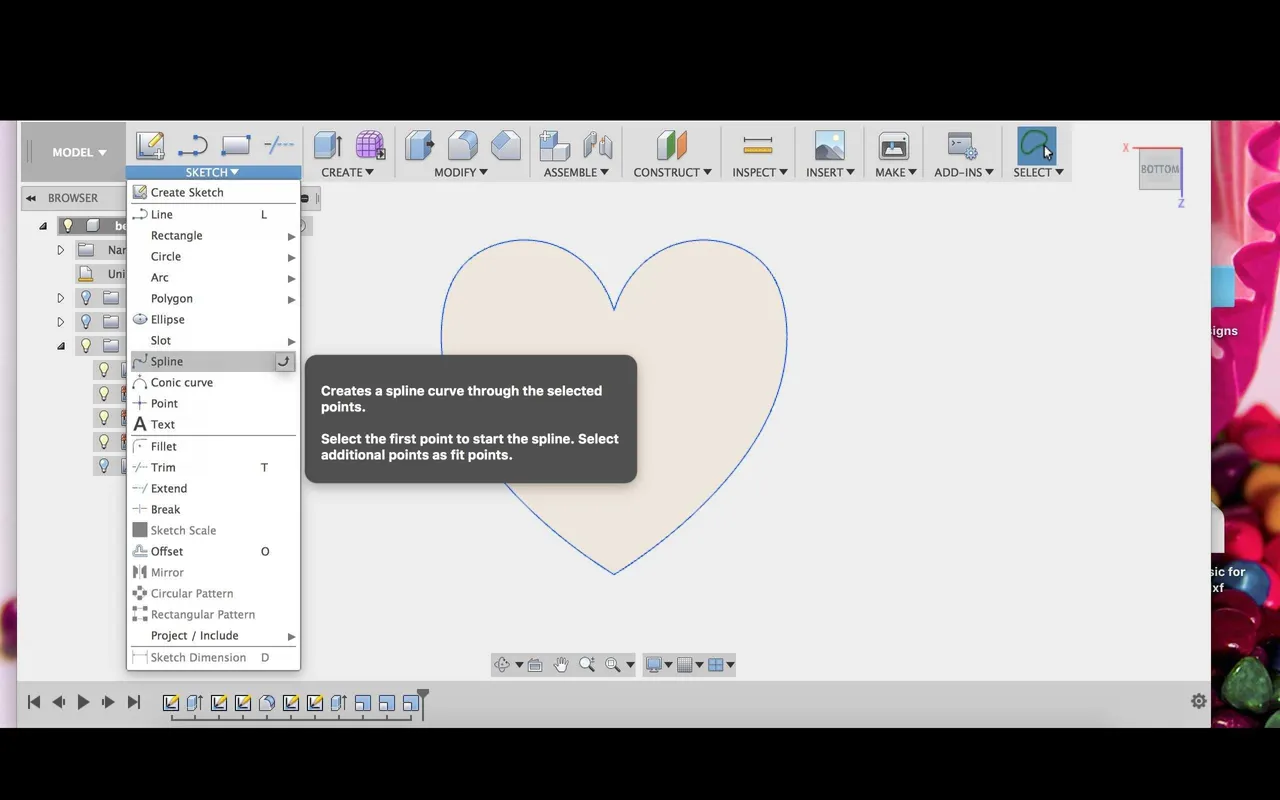
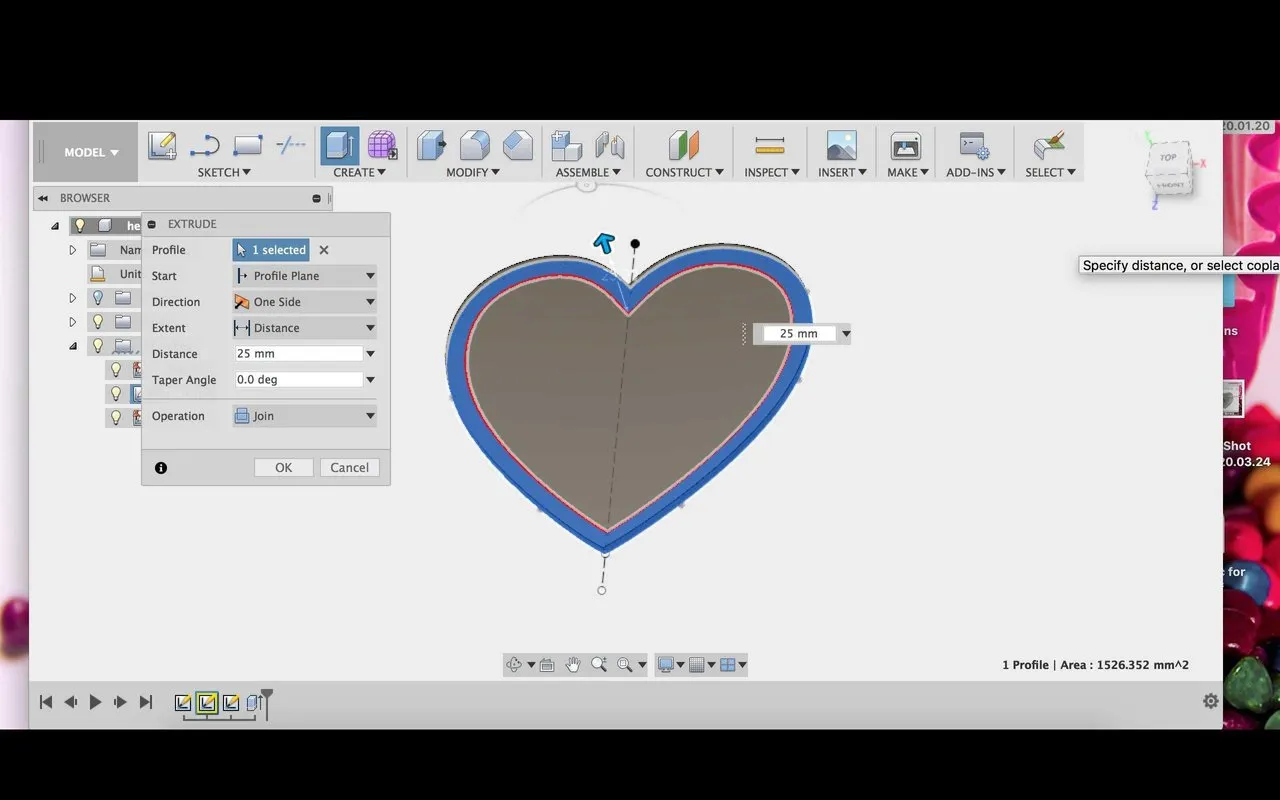
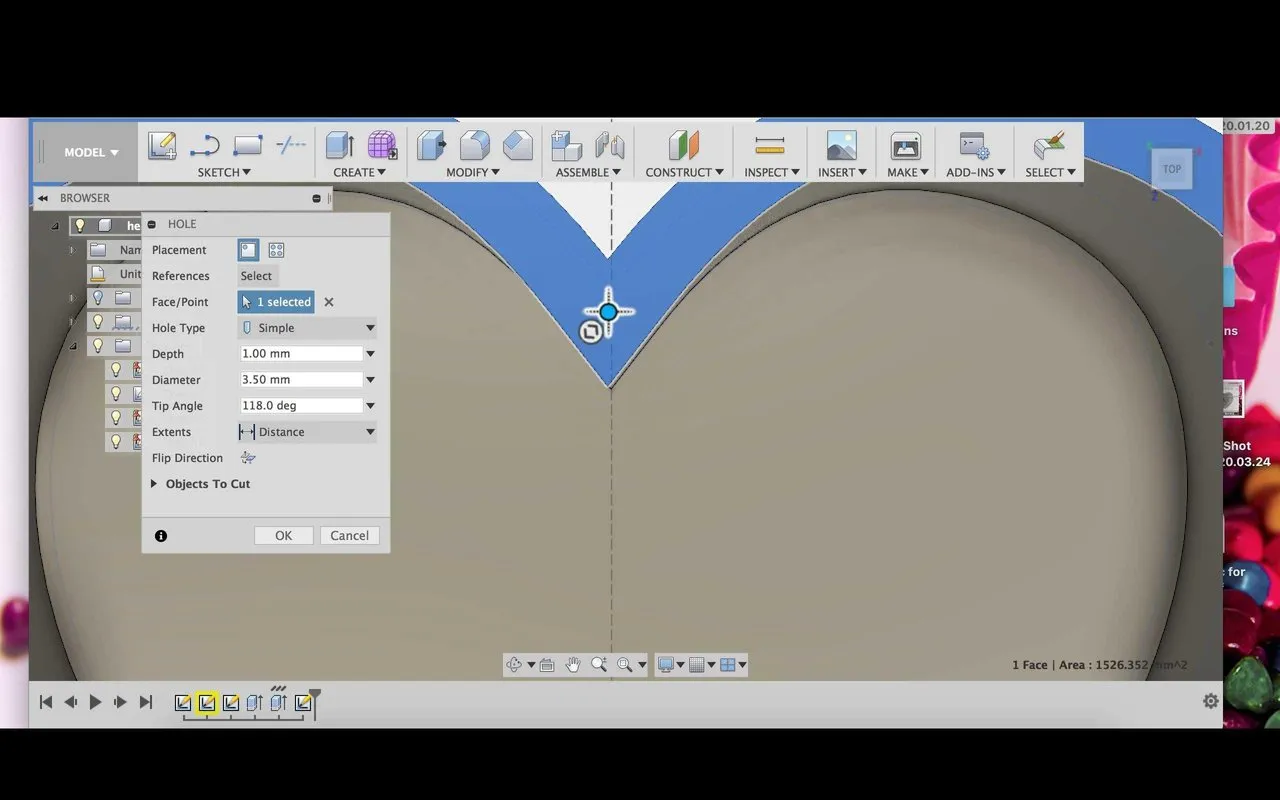
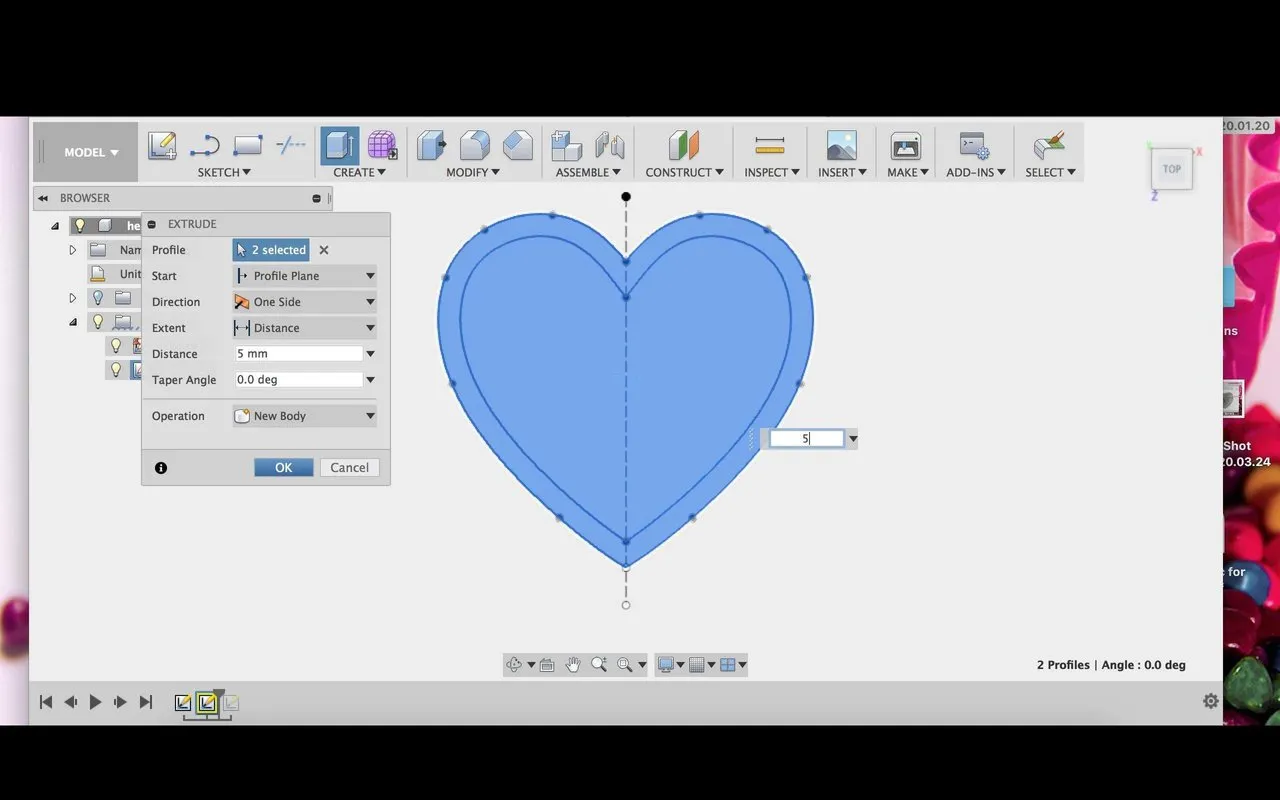
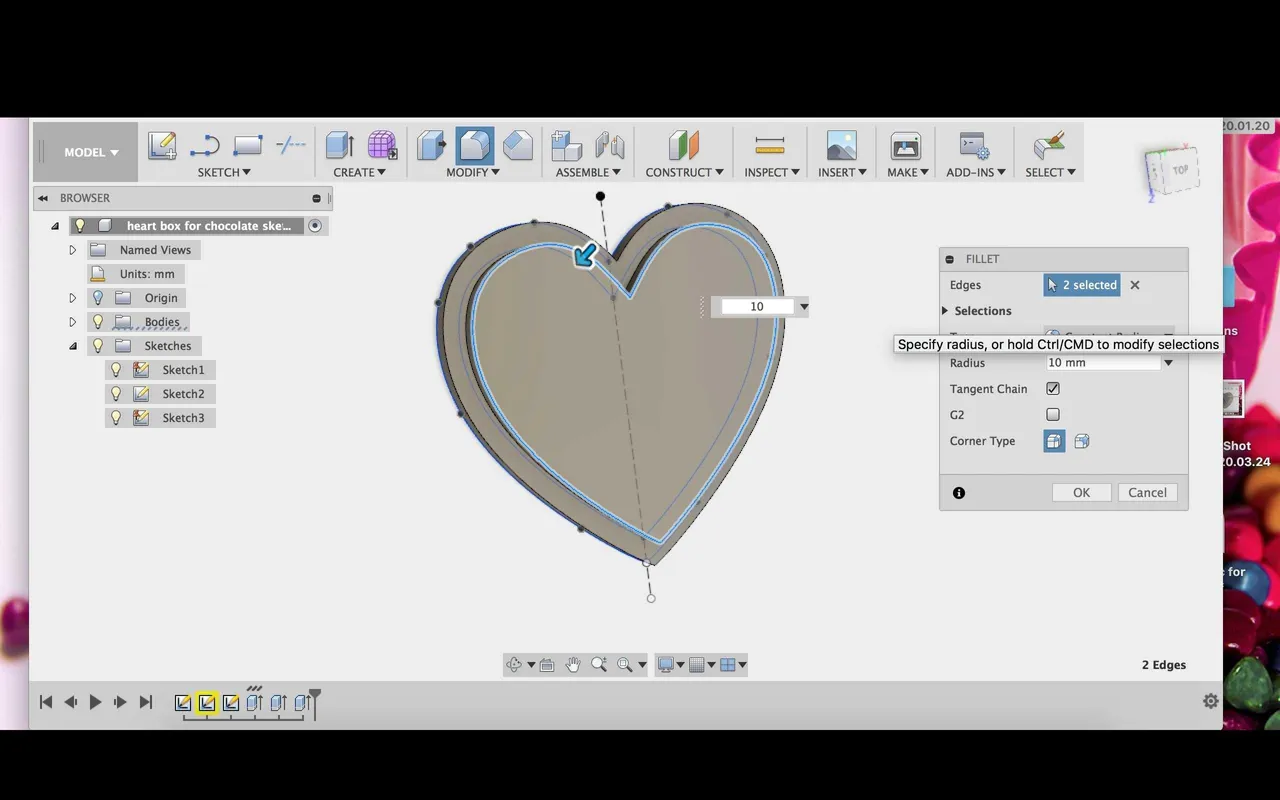
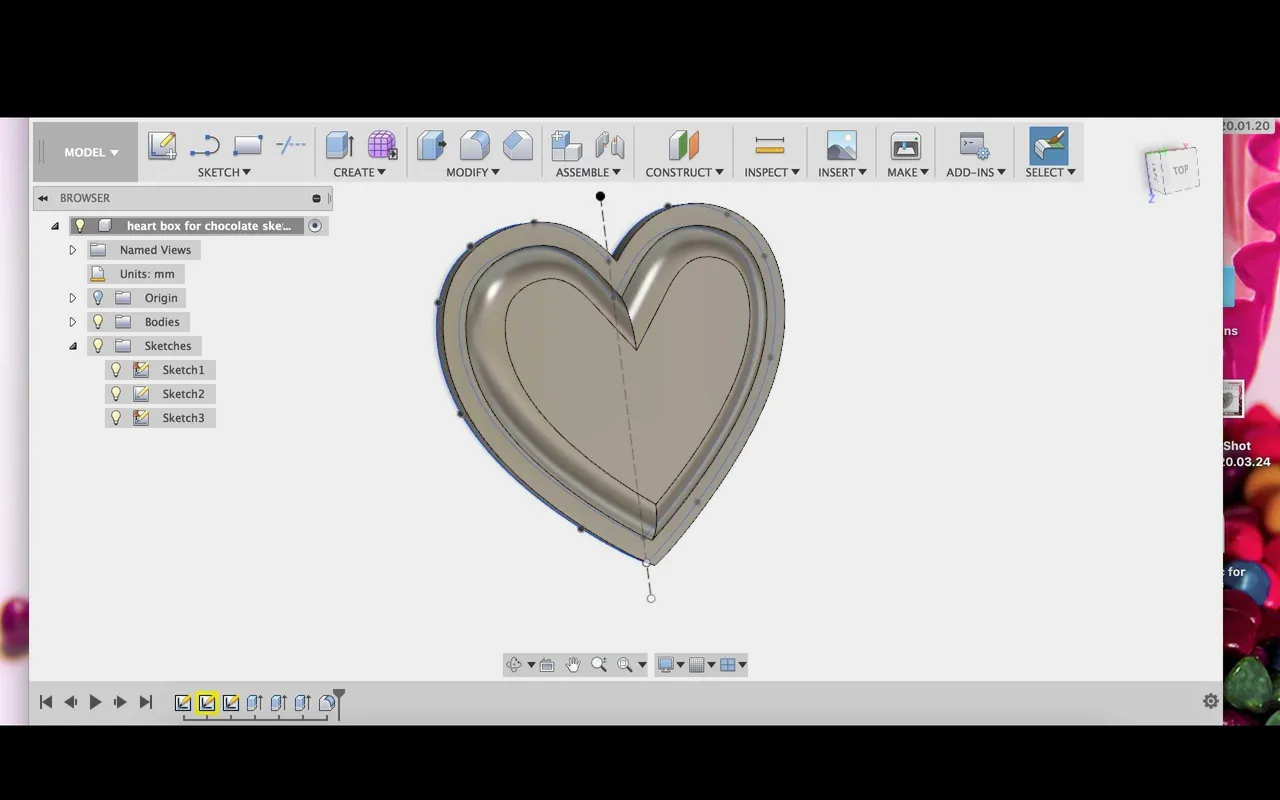
First, the lower part:

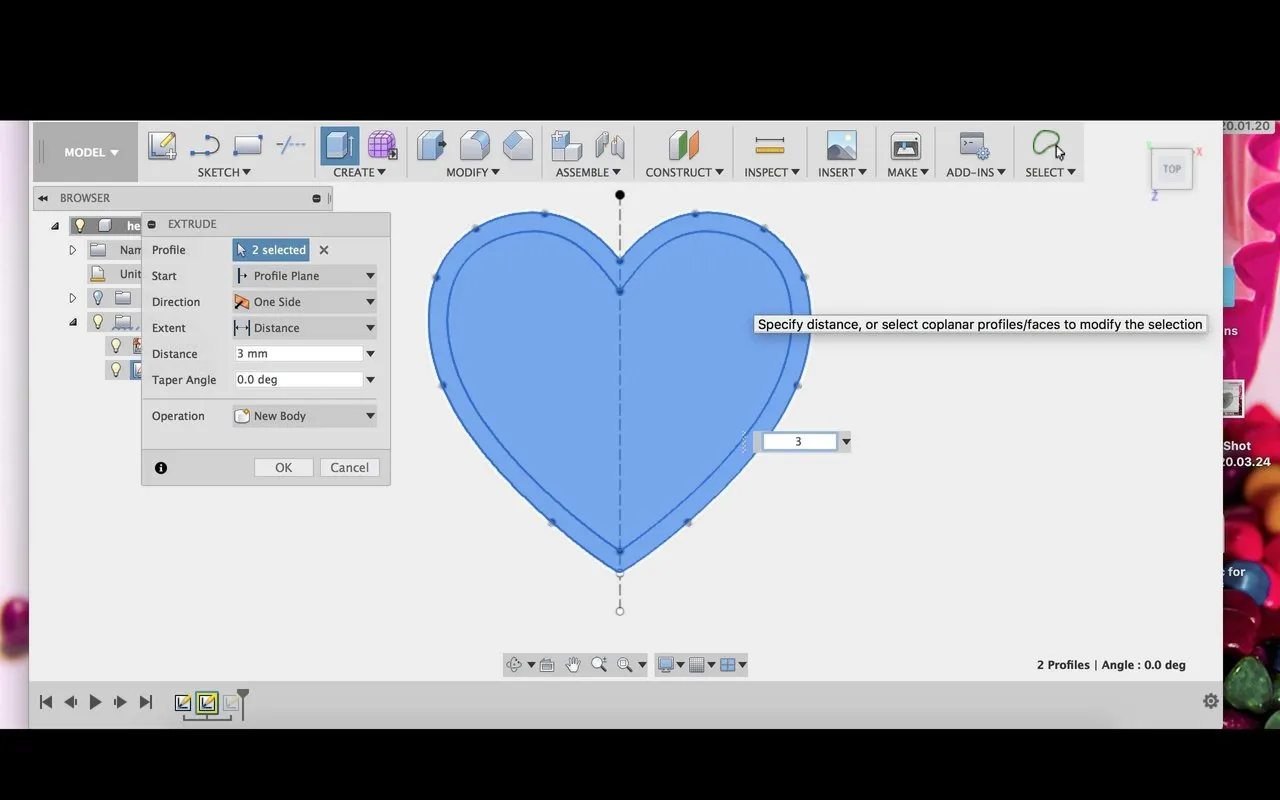
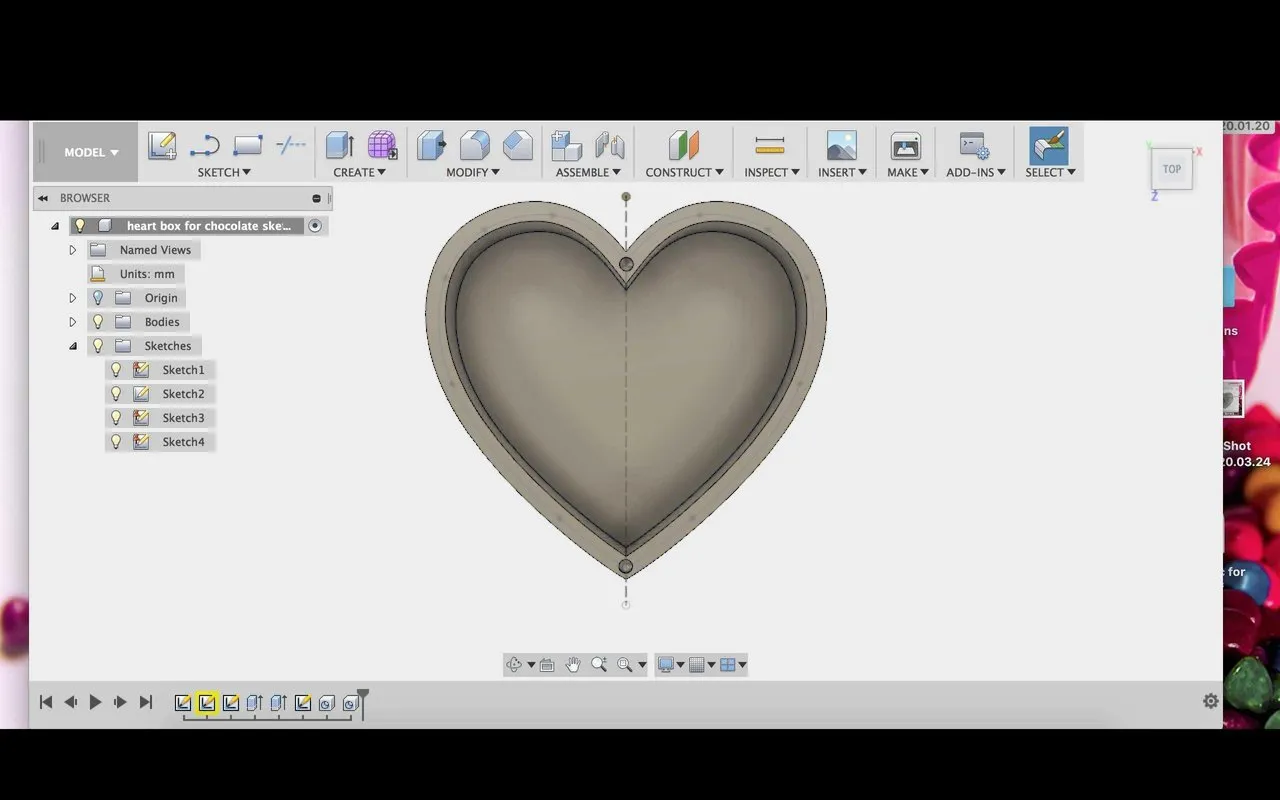
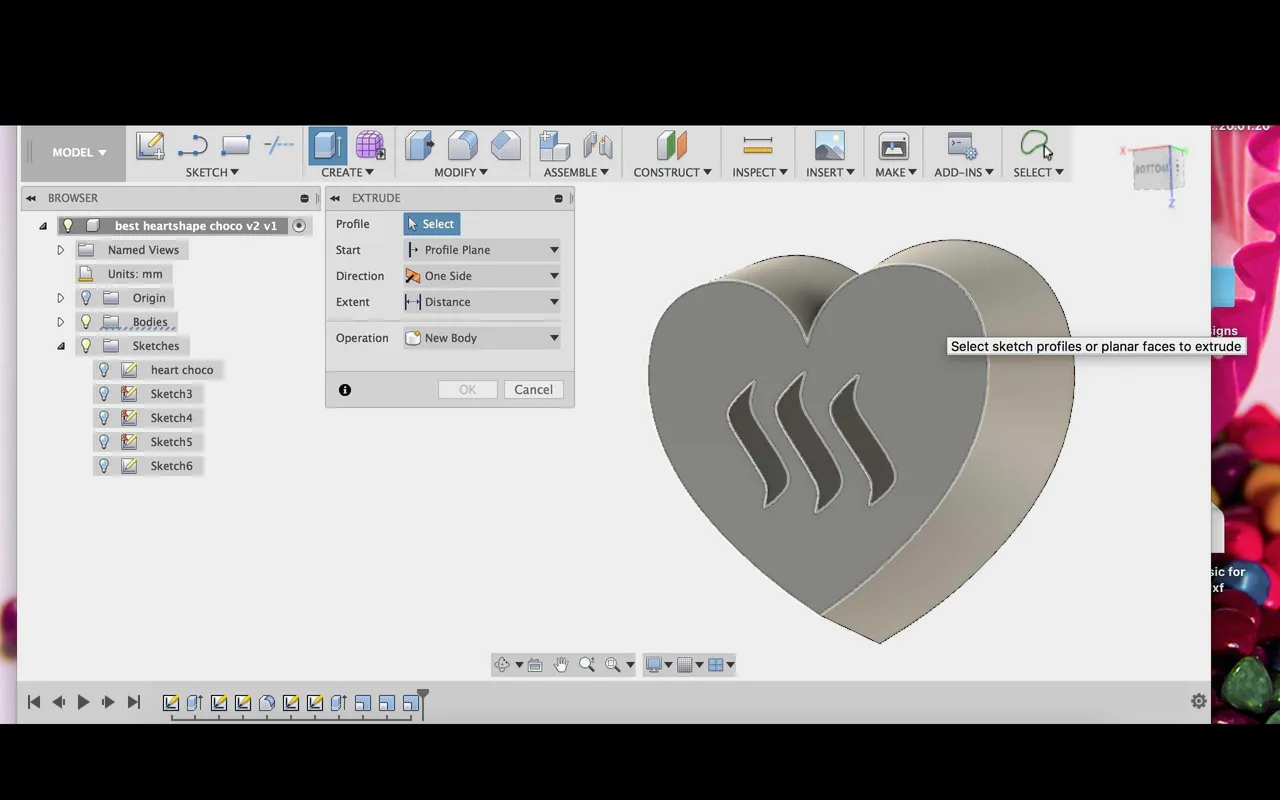
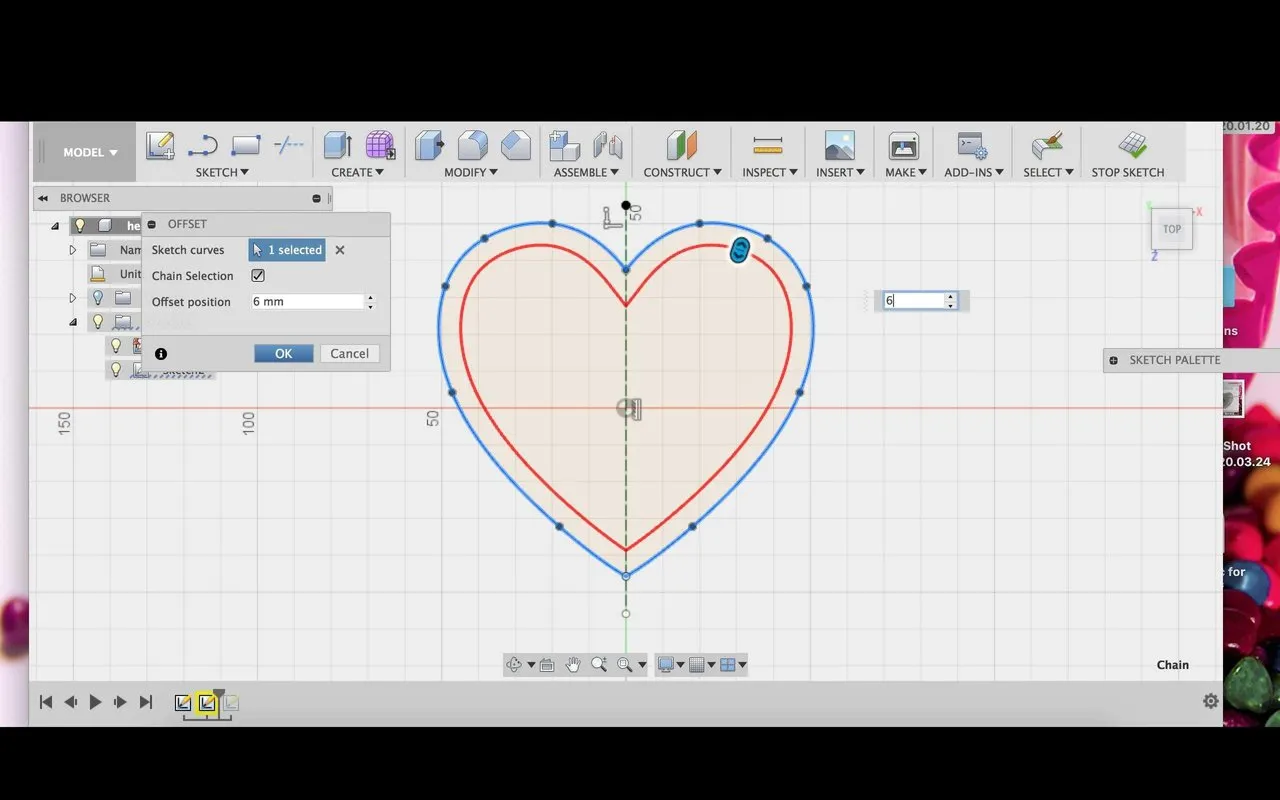
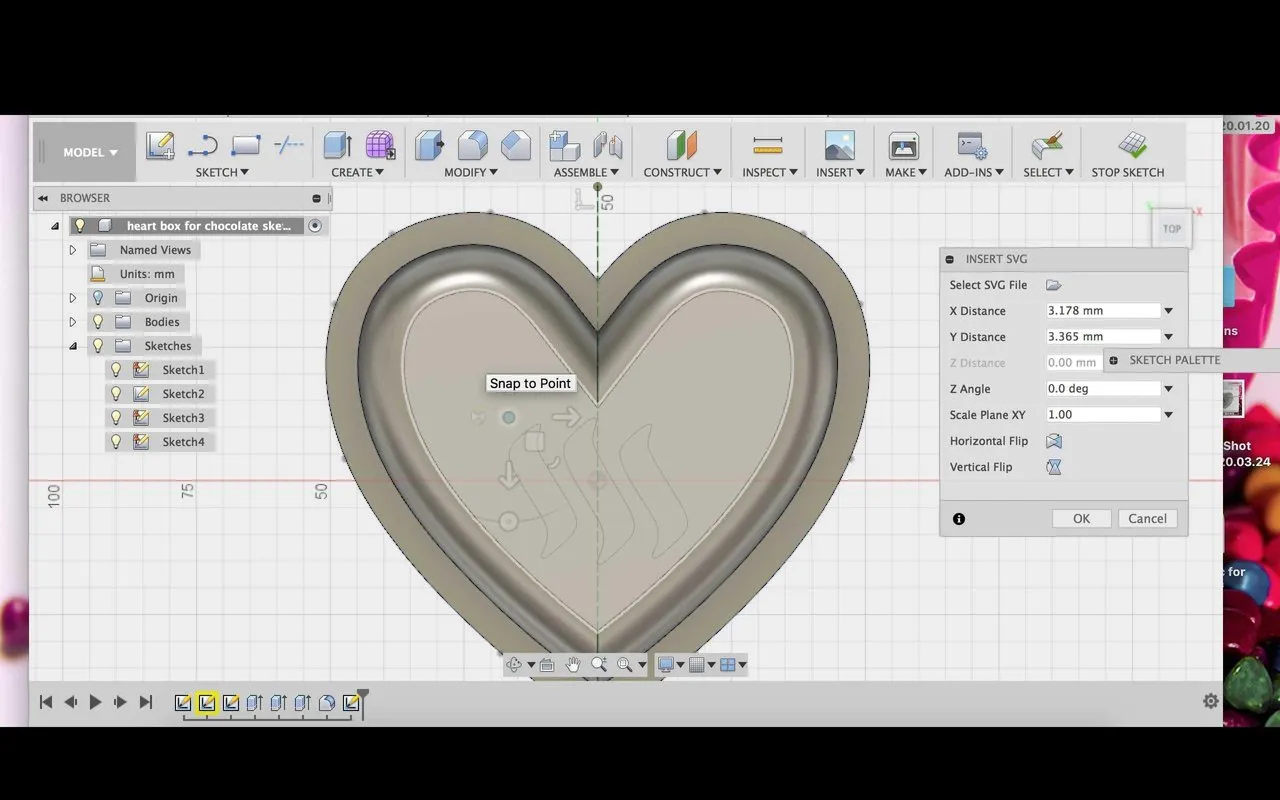
Second, the upper part:
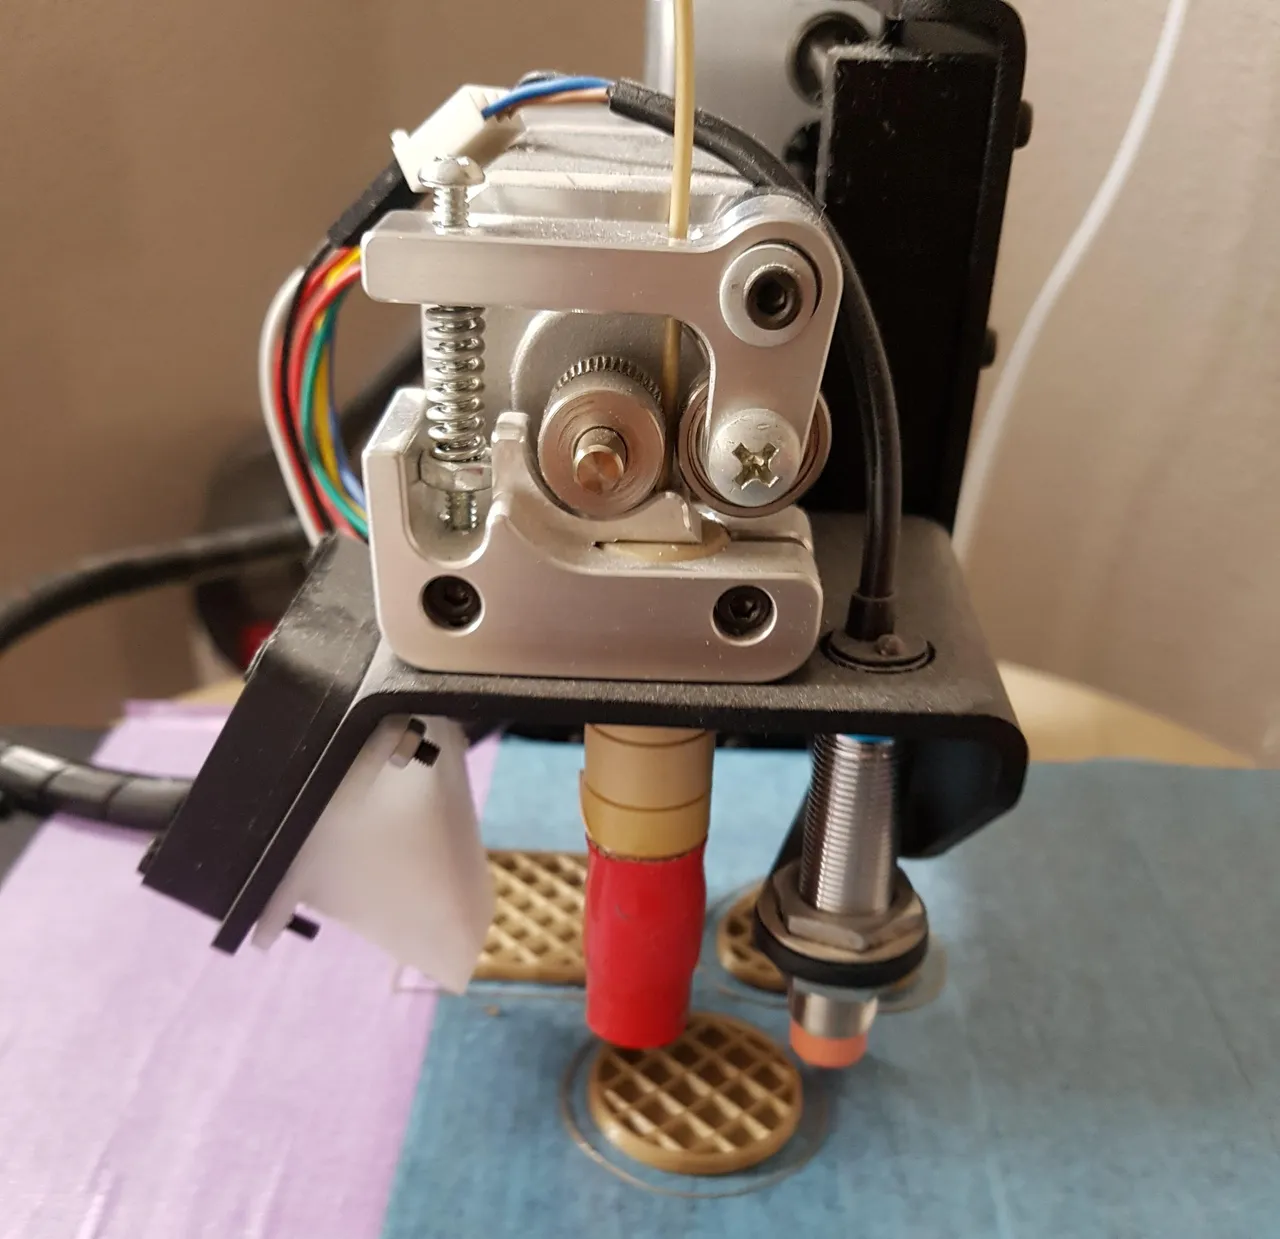
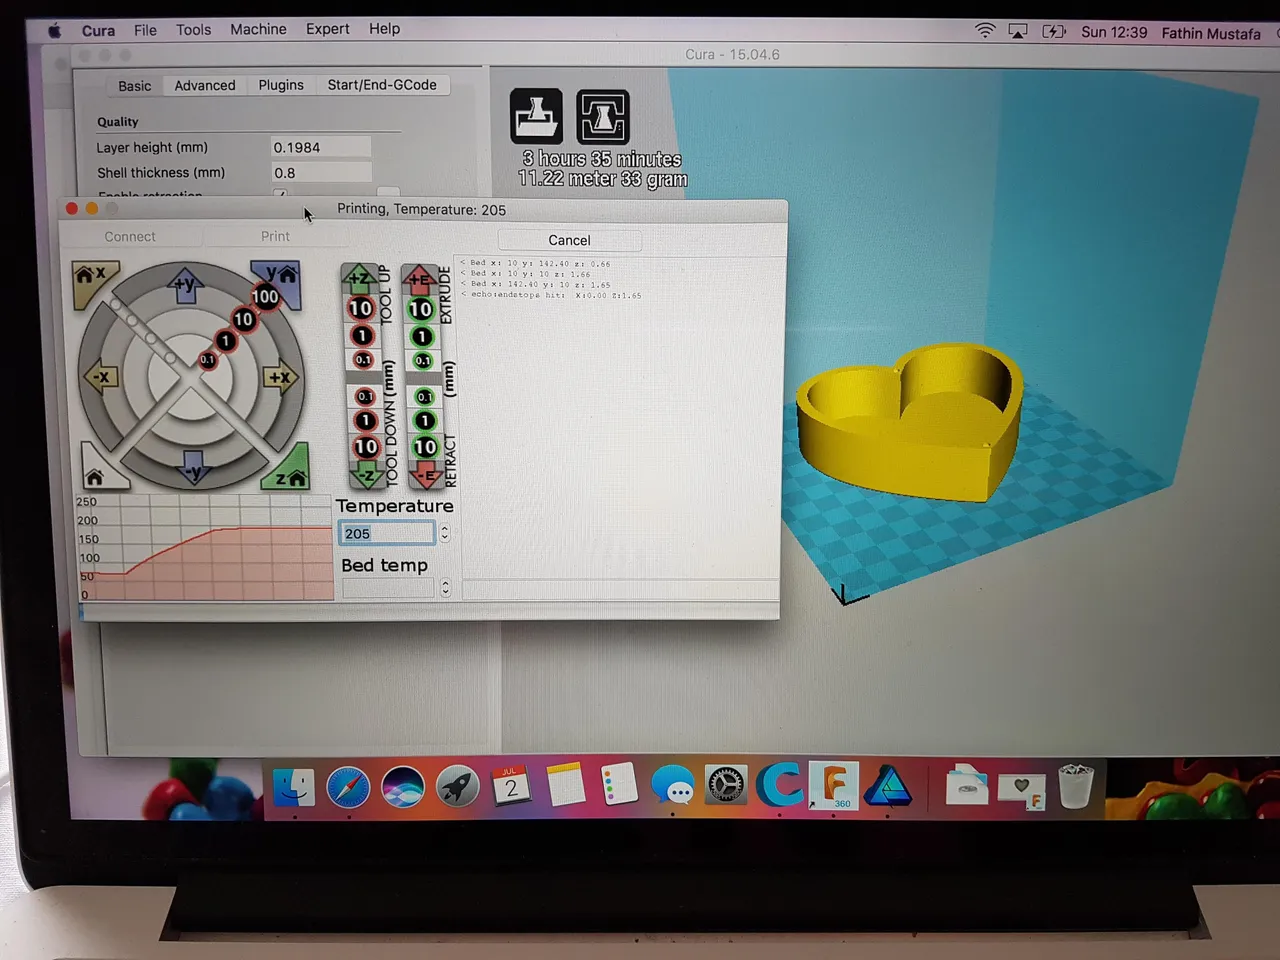
Printing time of the chocolate box and chocolate samples were in total: 7.5 hours!!! Moreover, it failed couple of times during printing. You can imagine how frustrated I was! :-).
I hope this post is not too long:-). I just wanted to show you all the steps in details and if you have questions regarding 3D designing this chocolate box, you can always ask me. 👇