Saludos comunidad 🙋🌈🚛.Hace unos días tuve la oportunidad de apreciar el orgullo y el grado de admiración que sienten los hijos pequeños por sus padres y la influencia que pueden generar en su vocación futura.¡Quiero ser cuando sea grande chofer de un enorme camión como tú, padre!. Esas fueron las palabras de uno de mis primitos pequeños antes de ser alzado en brazos por su padre, quién estallando en sentimientos sonrojaba sus cachetes. Esta escena me conmovió por lo que decidí darle de obsequio en su cumpleaños número siete un camión, como juguete.
Hoy amigos, les traigo un tutorial sencillo con la técnica de papel maché, que lo pueden aplicar para realizar camiones o carros de diversos modelos, que sirven de juguetes y para decorativo de los cuartos de pequeños.

Materiales
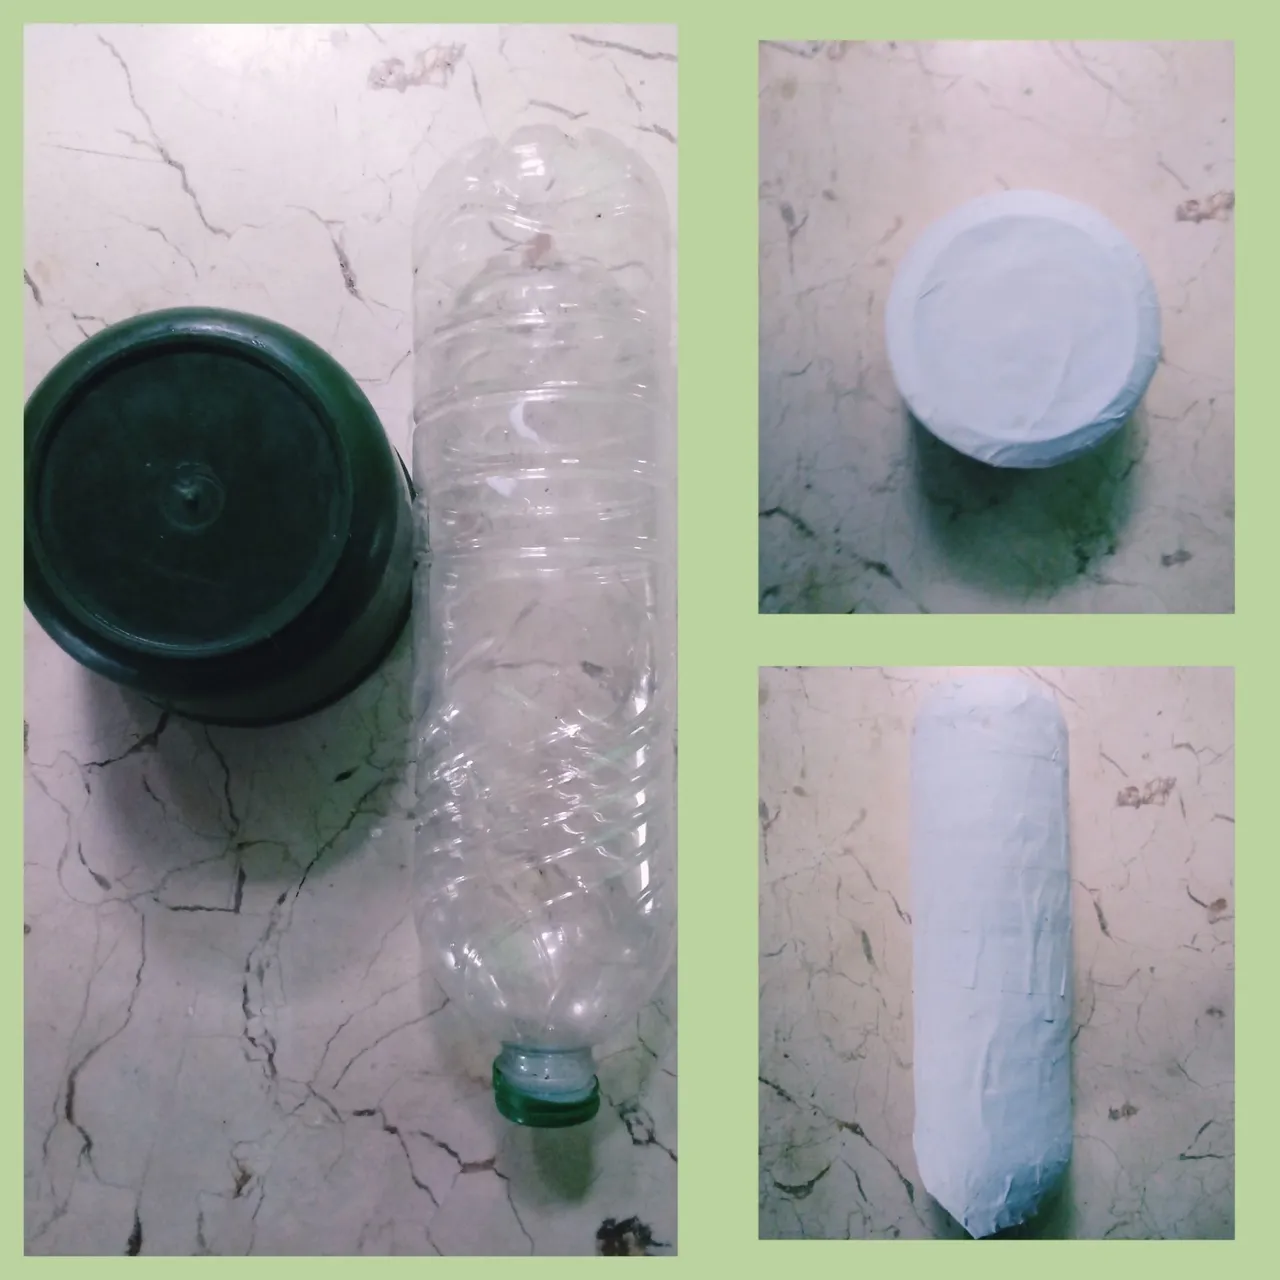
.Moldes:Pomo y vasija plástica
.Cartulina
.Tiras de papel blanco
.Tijera
.Pega elaborada de harina
.Pegamento
.Temperas
.Acuarelas
.Barníz
Modo de confección
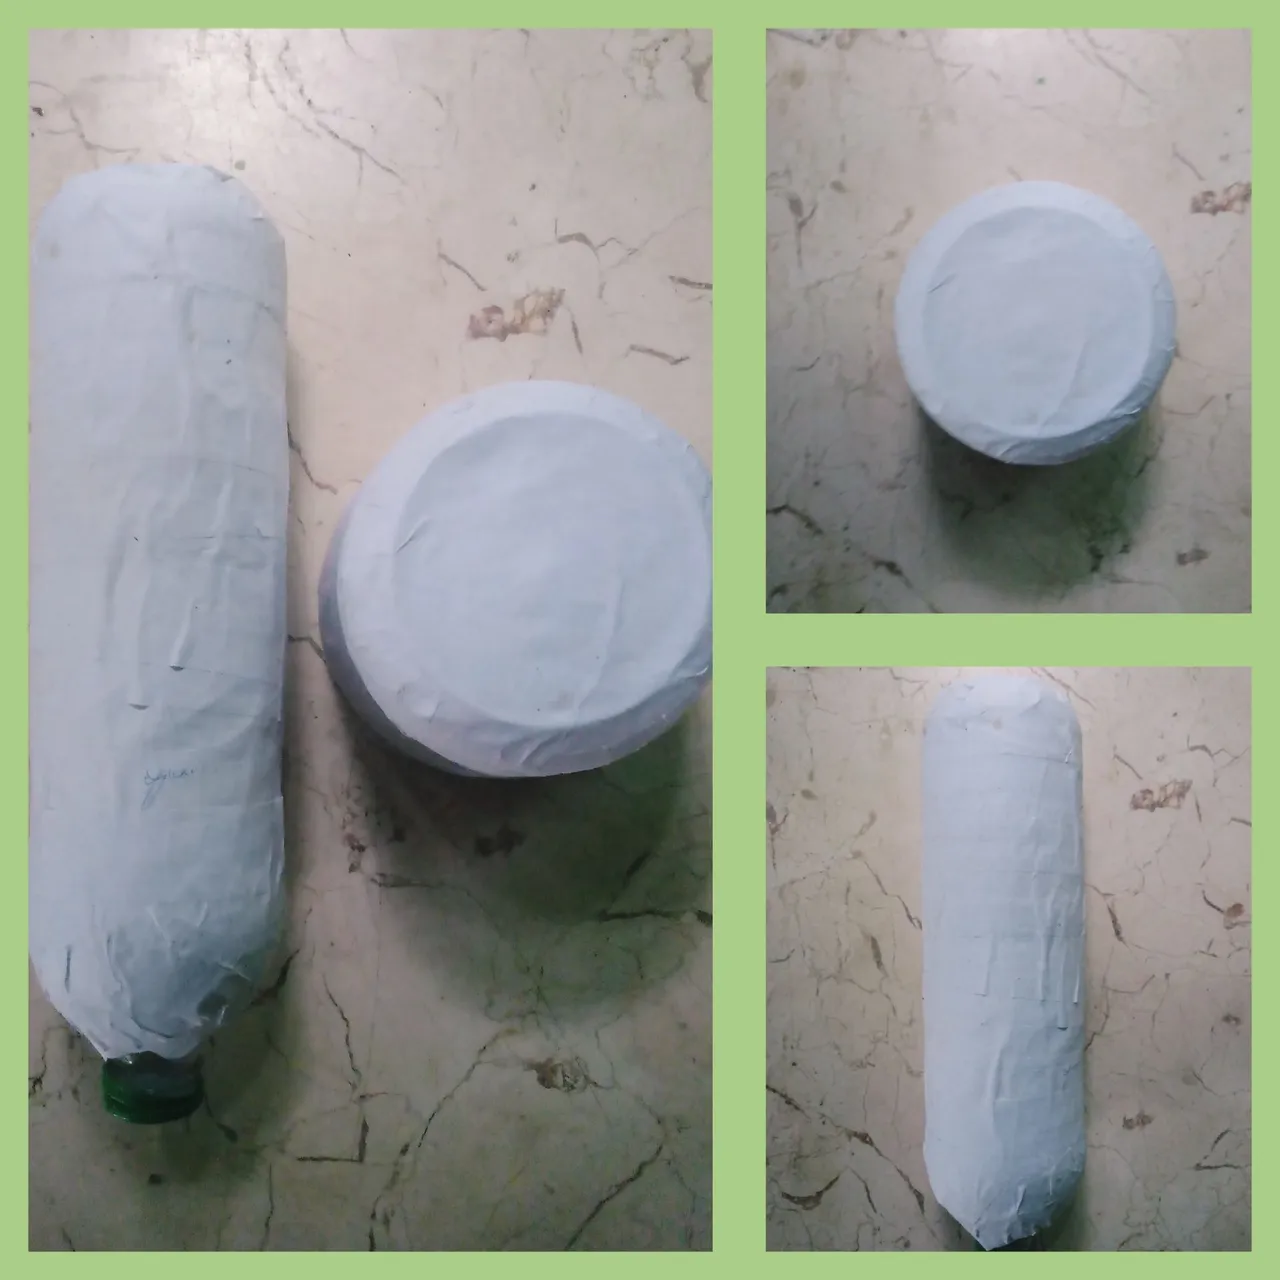
Para el chasis (armazón que sostiene los carros)y cabina:
1-Humedecer ambos moldes en aguas.
2-Cubrir con las tiras de papel blanco previamente humedecidas en agua ambos moldes, dándole una primera capa de empapelado.
3-Realizando la técnica de papel maché, con las tiras blancas y la pega elaborada de harina, darle dos capas de empapelado a ambos moldes. Dejarlos secar por doce horas.
4-Con las tijeras cuidadosamente realizar delgadas grietas en los moldes posibilitando su desmoldado.
5-Corregir las grietas con tiras blancas de papel y la pega elaborada de harina.
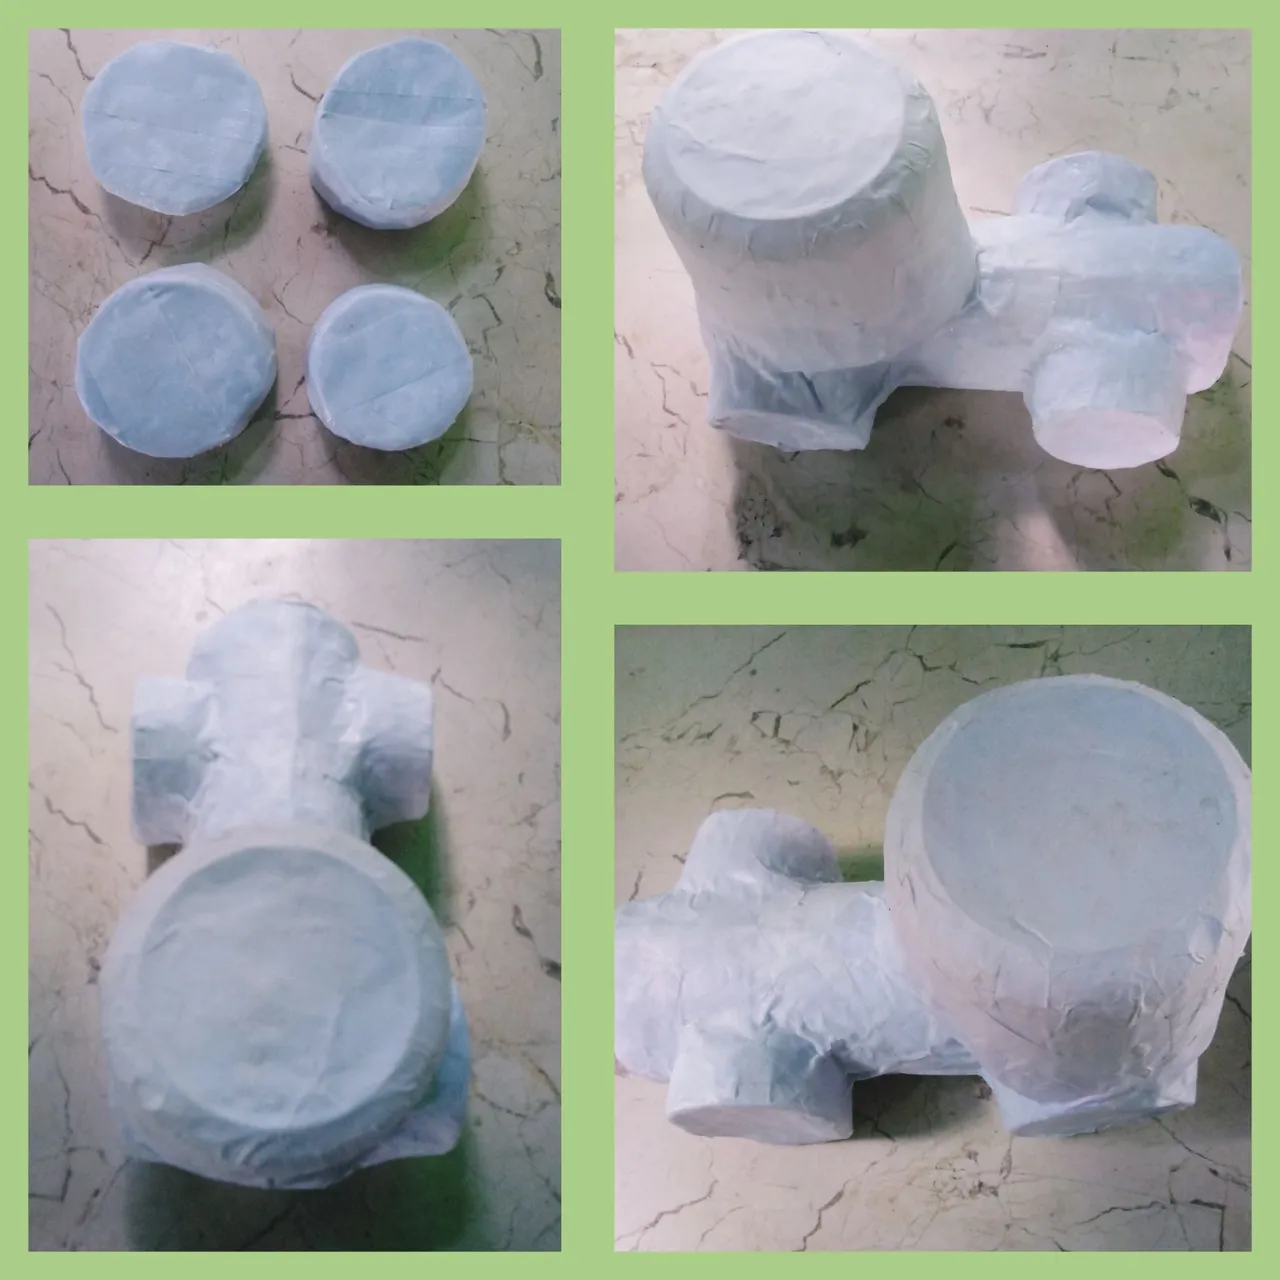
Ruedas
1-Cortar cuatro tiras de cartulina de igual largo y ancho.
2-Enrollarlas conformando un círculo cóncavo en su centro.
3-Mantener esta estructura circular con el pegamento.
4-Cubrir una de sus caras, con tiras de papel blanco y la pega elaborada de harina, manteniendo la estructura redonda.

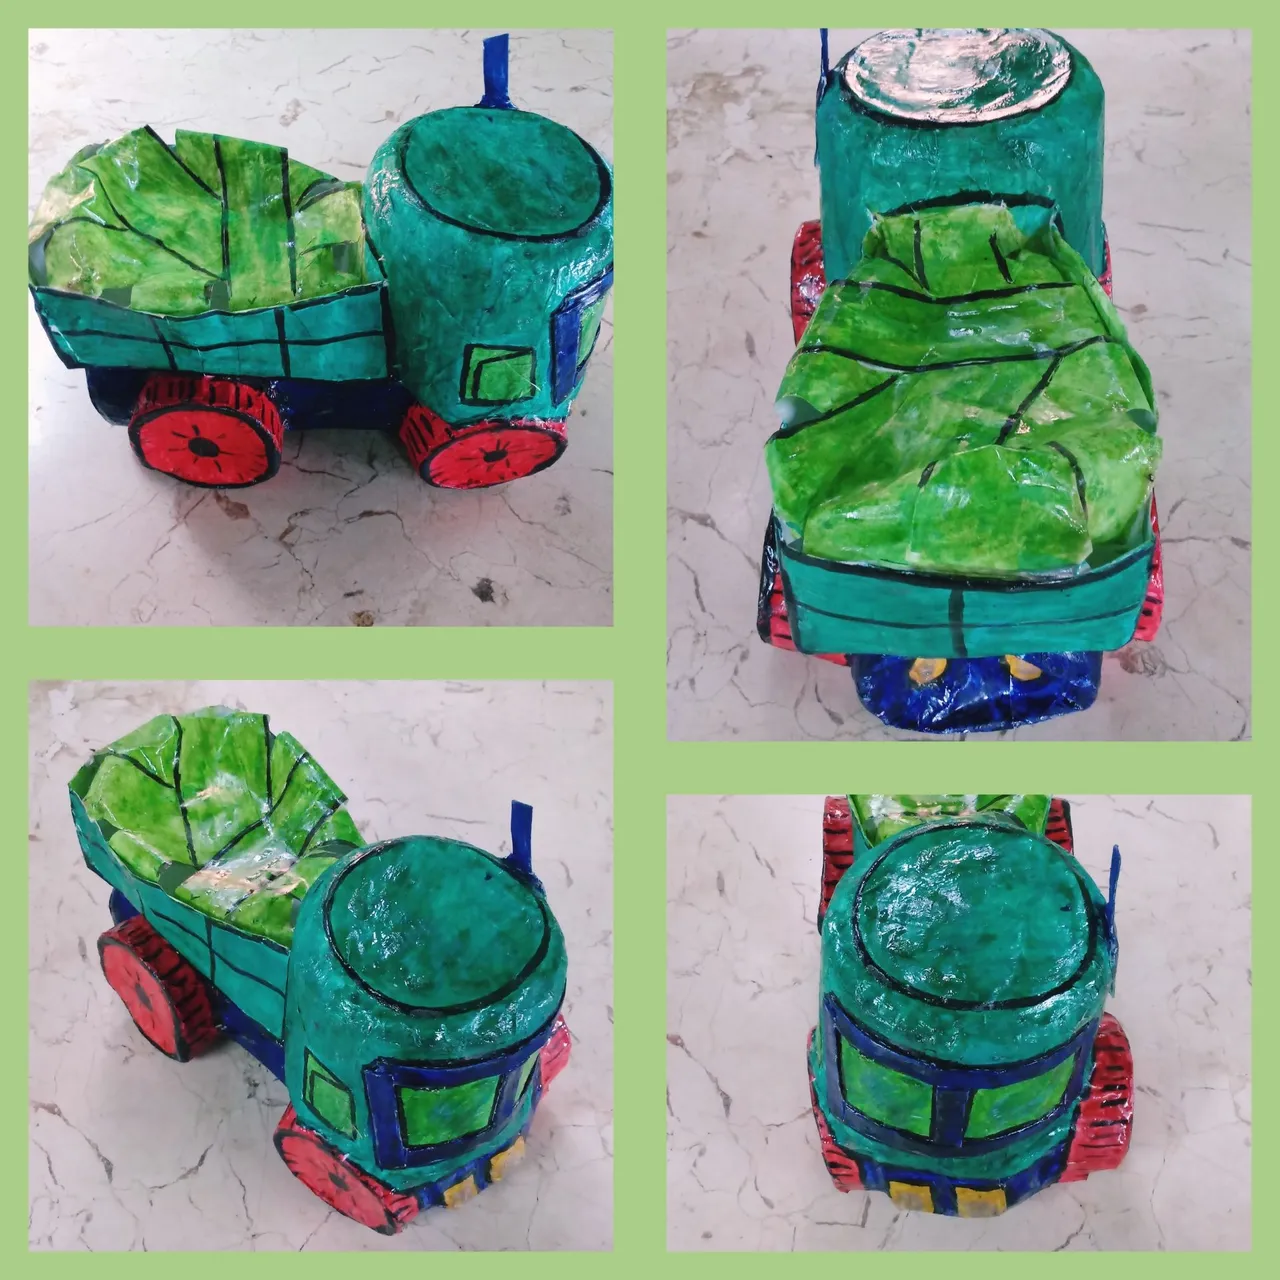
Ya teniendo nuestro partes de nuestro camión confeccionadas, pasamos a unificarlas utilizando el pegamento y luego, para generarle dureza y firmeza, empapelamos completamente utilizado la técnica de papel maché.
Amigos, hasta aquí, como pueden observar tenemos la base para confeccionar diferentes modelos de carros al asimilarse también a un tractor y locomotora. El resultado final, ustedes serán los que decidirán .Yo quise que fuese un camión de carga, pues es el que maneja mi familiar y por el que se inclina el pequeño.
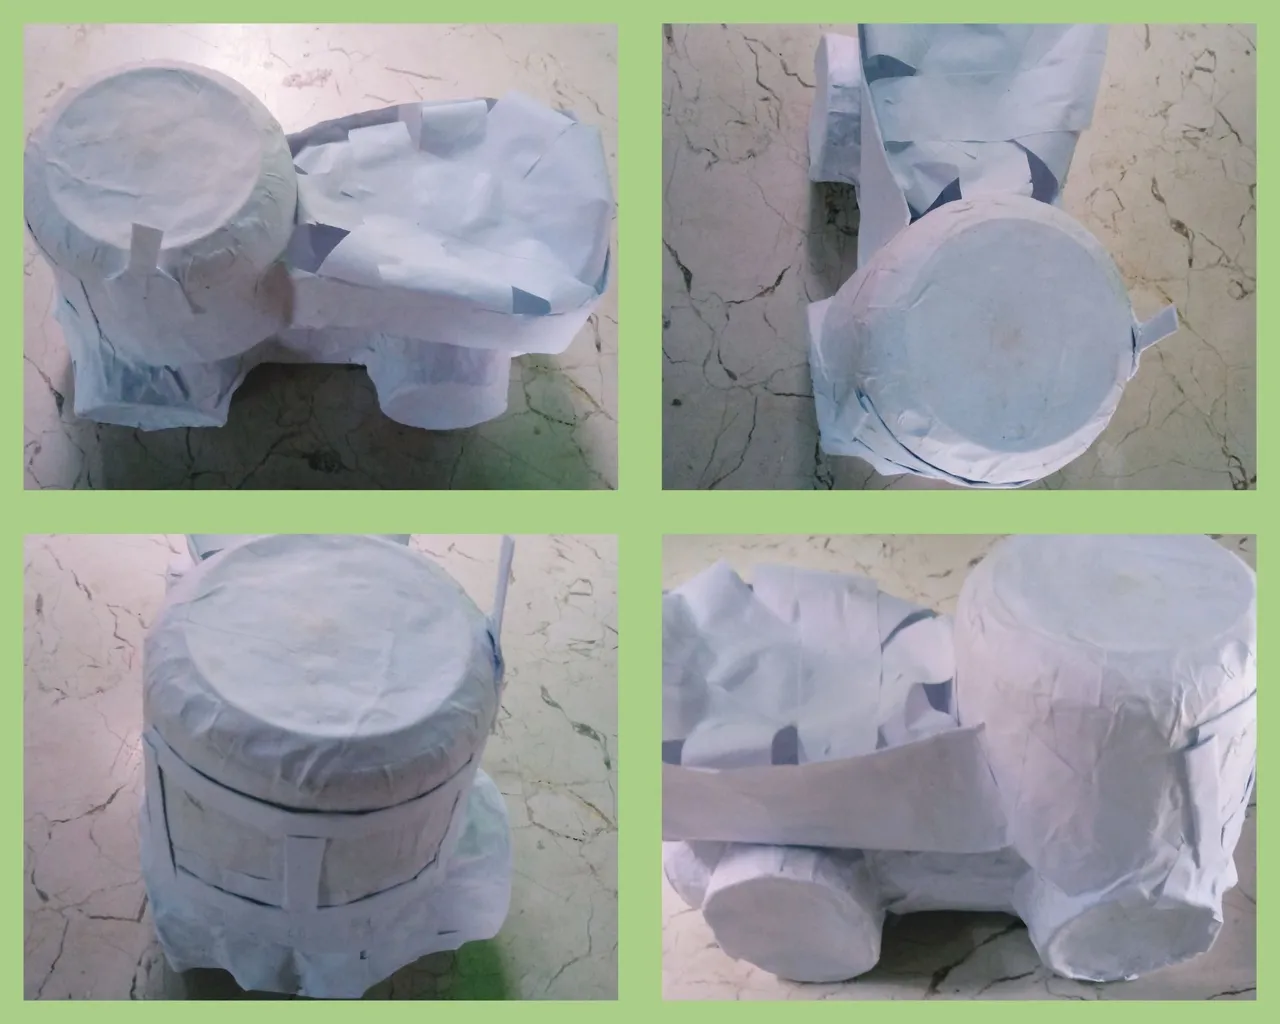
Para realizar el departamento de carga:
1-Utilizando la tijera, cortar un rectángulo en la cartulina.
2-Doblar seis centímetros por cada lado hacia su centro.
3-Abrirlo nuevamente y cortar los cuatro vértices marcados con las tijeras.
4-Doblar nuevamente y mantener la estructura rectangular con pegamento.
5-Realizar una capa de empapelado con tiras blancas y pega elaborada de harina para generarle dureza.
6-Adherir la estructura a la parte trasera del camión con pegamento .
7-Simular la carga adhiriendo tiras de papel con pegamento, dándole un propio estilo.
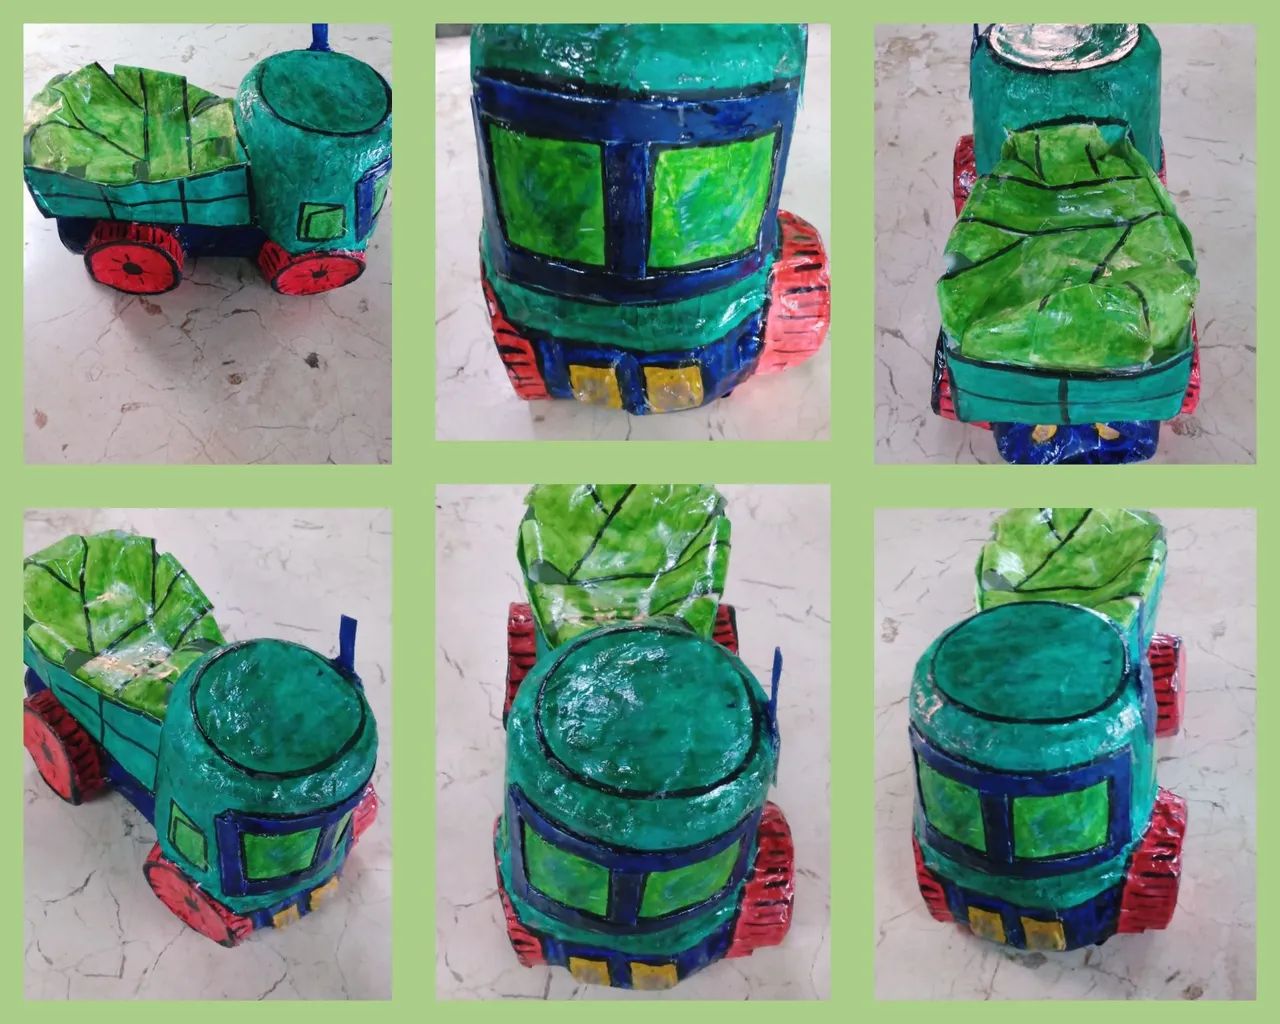
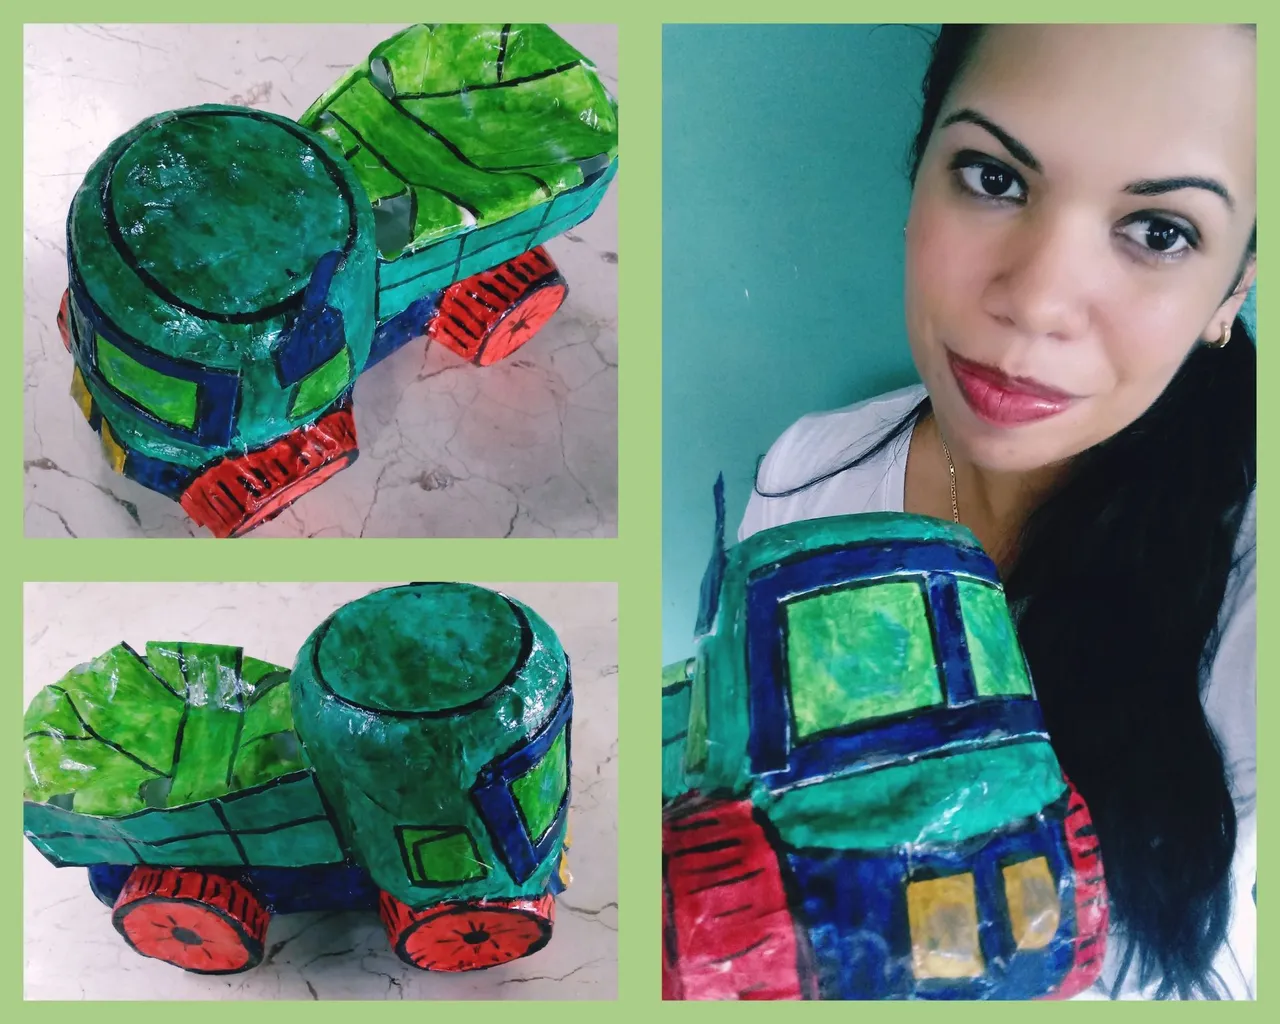
Nuestro pequeño camión, se encuentra listo amigos para que lo decoremos con pinceles y temperas sacando nuestros dotes de pintores. El rojo, verde, violeta, fueron algunos de los colores que escogí. Para darle su acabado brilloso, utilicé barníz.

El obsequio fue recibido por mi pequeño primito con un :-¡prima gracias!, enorme, acompañado de sonrisas de aprobación de mis otros familiares.

Los exhorto a que realicen estos pequeños camiones o carros, que generan tanta alegría a estos pequeños que gustan de ellos.
Excelente días y buenas vibras a todos.🙋🚚☀
English
Greetings community 🙋🌈🚛.A few days ago I had the opportunity to appreciate the pride and the degree of admiration that young children feel for their parents and the influence that they can generate in their future vocation.I want to be a big truck driver like you when I grow up, Father!. Those were the words of one of my little cousins before being lifted up in his arms by his father, who, bursting into feelings, blushed his cheeks. This scene moved me so I decided to give him as a gift on his seventh birthday a truck, as a toy.
Today friends, I bring you a simple tutorial with the papier mache technique, which you can apply to make trucks or cars of various models, which serve as toys and for decorative of children's rooms.
Materials
.Molds:Knob and plastic vessel
.Cardboard
.White paper strips
.Scissor
.Paste made of flour
.Glue
.Temperas
.Watercolors
.Varnish
Mode of preparation
For the chassis (frame that holds the carts) and cab:
1-Moisten both molds in water.
2-Cover both molds with the strips of white paper previously moistened in water, giving it a first layer of wallpaper.
3-Using the papier-mâché technique, with the white strips and the paste made of flour, give two layers of wallpaper to both molds. Let them dry for twelve hours.

4-With the scissors carefully make thin cracks in the molds making it possible to unmold them.
5-Correct the cracks with white strips of paper and the glue made of flour.
Wheels
1-Cut four strips of cardboard of equal length and width.
2-Roll them forming a concave circle in their center.
3-Keep this circular structure with the glue.
4-Cover one of its faces with strips of white paper and glue it made of flour, keeping the round structure.
Already having our parts of our truck made, we went on to unify them using the glue and then, to generate hardness and firmness, we completely papered using the papier mache technique.

Friends, so far, as you can see we have the basis for making different models of cars by also assimilating to a tractor and locomotive. The final result, you will be the ones who will decide.I wanted it to be a cargo truck, because it's the one my family member drives and the little one leans towards.
To carry out the cargo department:
1-Using the scissors, cut a rectangle on the cardstock.
2-Fold six centimeters on each side towards its center.
3-Open it again and cut the four marked vertices with the scissors.
4-Fold again and keep the rectangular structure with glue.
5-Make a layer of wallpaper with white strips and paste made of flour to generate hardness.
6-Adhere the structure to the back of the truck with glue.
7-Simulate the load by adhering strips of paper with glue, giving it its own style.

Our little truck, friends, is ready for us to decorate it with brushes and tempera taking out our skills as painters. Red, green, violet, were some of the colors I chose. To give it its shiny finish, I used varnish.
The gift was received by my little cousin with a:-cousin thank you!, huge, accompanied by approving smiles from my other relatives.
I urge you to make these little trucks or cars, which generate so much joy to these little ones who like them.
Excellent days and good vibes to everyone.🙋🚚☀