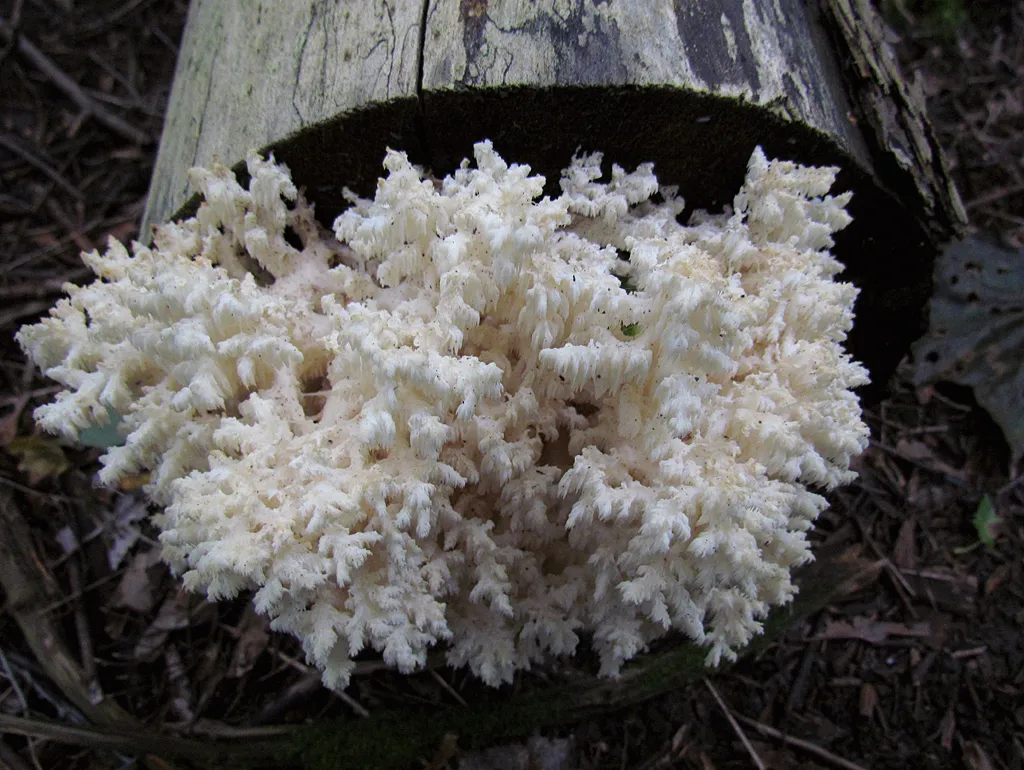
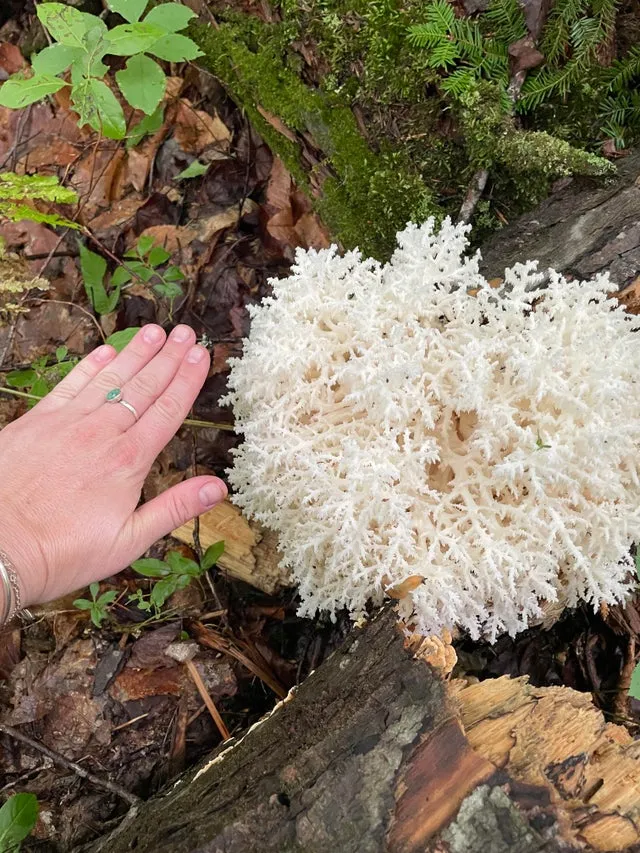
Hericium coralloides better known as the coral tooth fungus, once you see it you will understand why its common name is called coral tooth, it strongly resembles the appearance of a coral reef on the side of a fallen over tree or decaying wood, they prefer to grow on dead hardwood or injured trees, it also has been spotted on some conifers. This fungus fruits very often up to 5 times per year. Normally if seen on a tree means there's underlying decay.
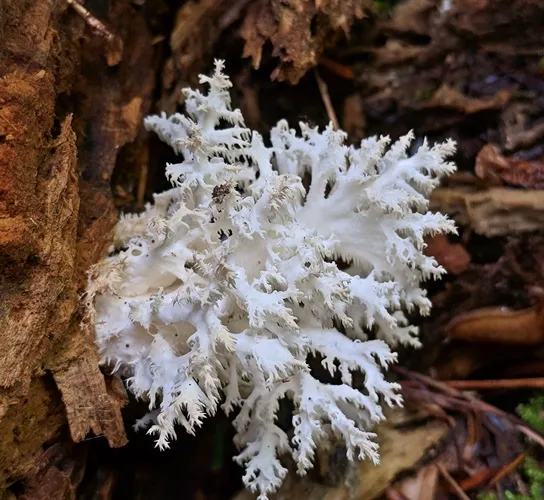
They do not have gills as they are toothed mushrooms which means they have long thin "teeth' that hang downwards and produce spores just like gilled fungi. The fungi can grow 10-40cm wide and 10-20cm tall, and the teeth are about 1cm long. It is white to creamy in color, the flesh is soft but brittle at the same time, the stalk is an indistinct stub and has little hairs on it.
Their season is late August to late October, they can grow over the winter and in the spring as well. Besides Ontario, they also grow in China, India, Russia, and Japan.
They are edible when they are still young, you'll have to be sure it is white and must cook before eating it. If the fungi are discolored or have a yellowish tone to them, it is old and will taste sour and gross after it is cooked, when cooked it should have a slightly nutty taste.
The best way to forage the fruit is to cut it at its base, close to the wood as it will fall apart very easily. Once you are home before cooking make sure to clean and shake out as they often are homes to little wood beetles.
Crispy fried coral mushrooms with a chive aioli

Ingredients
-1/2 lb Coral Mushrooms
Chive Aioli recipe follows (make sure you make the day before)
-Kosher salt and fresh ground pepper
-1/2 cup flavorless oil for frying like grapeseed or canola
-1 recipe chive aioli follows
-Chive Blossoms to garnish
-All-purpose flour as needed for dredging
-2 large eggs beaten with 2 tbsp water
Instructions
- Separate the coral mushrooms into pieces about the size of a chicken egg.
Clean the coral mushrooms with a brush and if needed dip and swish in water. - Dust your coral mushrooms lightly in flour, dip in the egg, then in the flour again.
- Heat a saute pan on medium-low with cooking oil. Test the heat of the oil by sprinkling some flour in it, when it sizzles, turn the heat to low, then add the coral mushrooms and fry 3-4 minutes on each side, or until golden.
- Remove the corals from the pan sprinkle with kosher salt, and allow to drain on a paper towel for a few seconds to remove excess oil. Serve immediately with the chive aioli on the side.
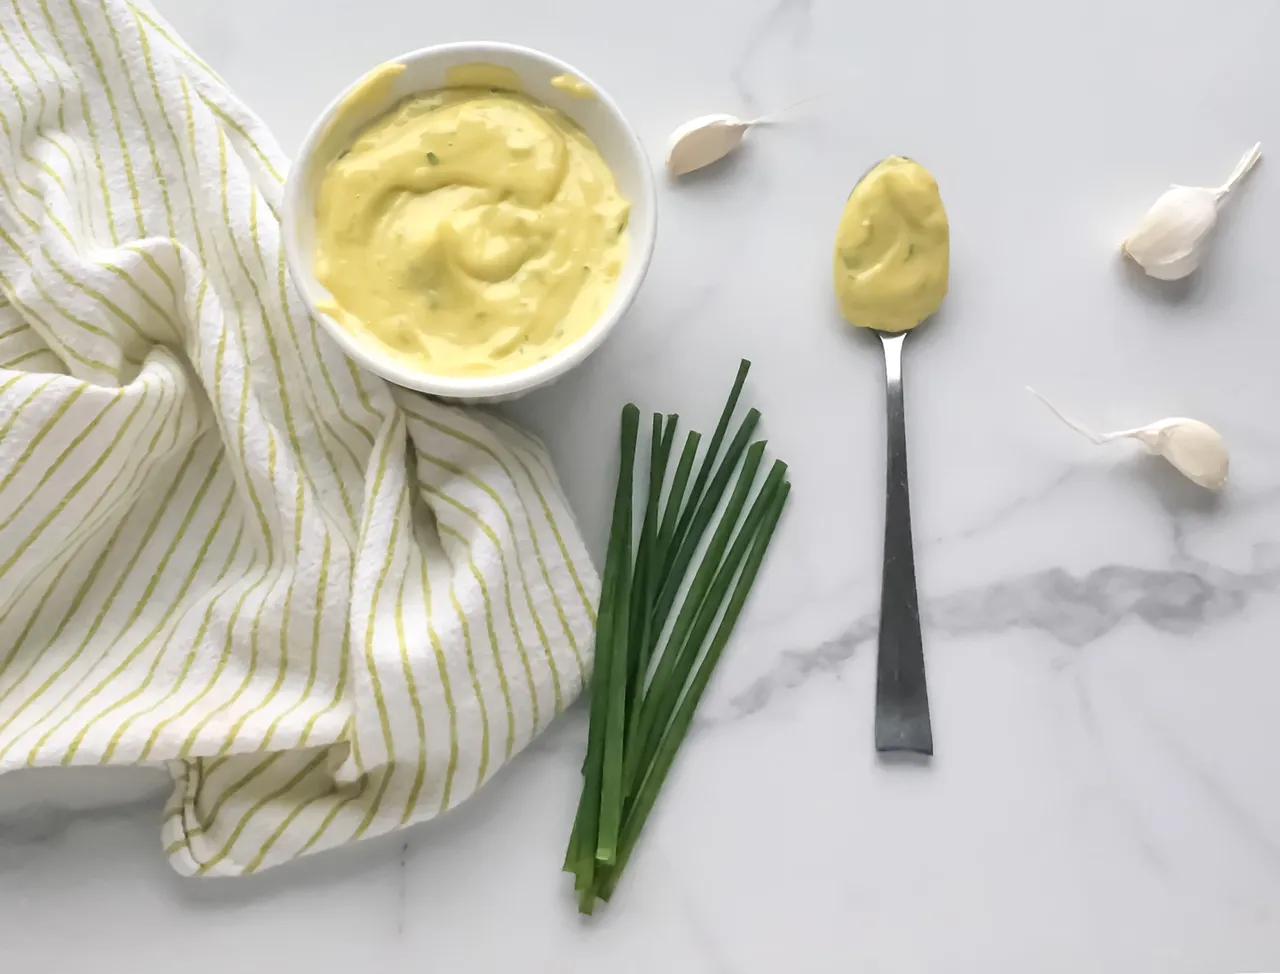
Chive Aioli
-Makes a 1/2 cup chive aioli-
-A handful of chives, about 1/4 cup
-1/8 cup flavorless oil
-1 cup mayonnaise
-2 tsp of champagne
I would also add garlic if making this recipe but that's really up to your taste, I would add 2-4 cloves
- Blanch the chives in boiling salted water for 2 seconds, then remove and chill in an ice bath. Remove the chives from the ice water and wring dry. Mince the chives finely.
- Puree the chives in a blender or small food processor until they are well pureed, be careful not to puree them too long in the food processor or blender though, since this will heat them and turn their color brown and ugly, as well as making it bitter.
- Pour the pureed chives and oil into a small container like a bowl or custard dish and refrigerate overnight.
- The next day, pour the pureed chives and oil into a fine small strainer, allow the oil to drip through without pressing on it for a few hours. This will yield a tablespoon or two of deep green, strongly flavored oil.
- Stir the chive oil into the mayonnaise, then season to taste with salt. The aioli can be refrigerated and held for days at this point.
- Before serving, lightly stir in 2 teaspoons of champagne vinegar, which will give it acid. Don’t put the vinegar in days before you use the aioli though, since the vinegar will turn the color brown and destroy the chlorophyll.
This recipe is from Foragerchef.com, this blog has a lot of great recipes and