Desde hace tiempo me ha llamado la atención de hacer una pieza de joyería con un logo de alguna moneda o blockchain famosa y decidí comenzar con el logo de Hive, ya que estamos aquí y hay una comunidad bastante grande que la adora a esta red...
Lo primero que pensé es iba a hacer el logo, se me ocurrió meterlo dentro de un círculo que se ve más elegante y la figura de Hive iría hueca, todo el proceso de diseño lo hice en Inkscape, allí escale el dibujo de la pieza a 2,5 cm para imprimir.
A continuación una lista de lo que use para poder elaborar la pieza:
- Arco de segueta para joyería.
- Pelo de Segueta de joyería 2/0.
- Lámina de bronce 0.5 mm. y alambre de bronce de 1 mm
- Dremel.
- Fresa de 0.75 mm para abrir hueco.
- Lija 3M número 220, 360 y 400, con su porta lija para ser usado en el Dremel.
- Motor de banco, cera de pulir y mopa
Ahora les dejo con el proceso de fabricación detallado, para que lo disfruten y conozcan...
PROCESO

Pegue la impresión sobre la lámina de bronce de 0,5 mm utilizando pega de barra. Yo lije la superficie con lija 220 para que pegara mejor.
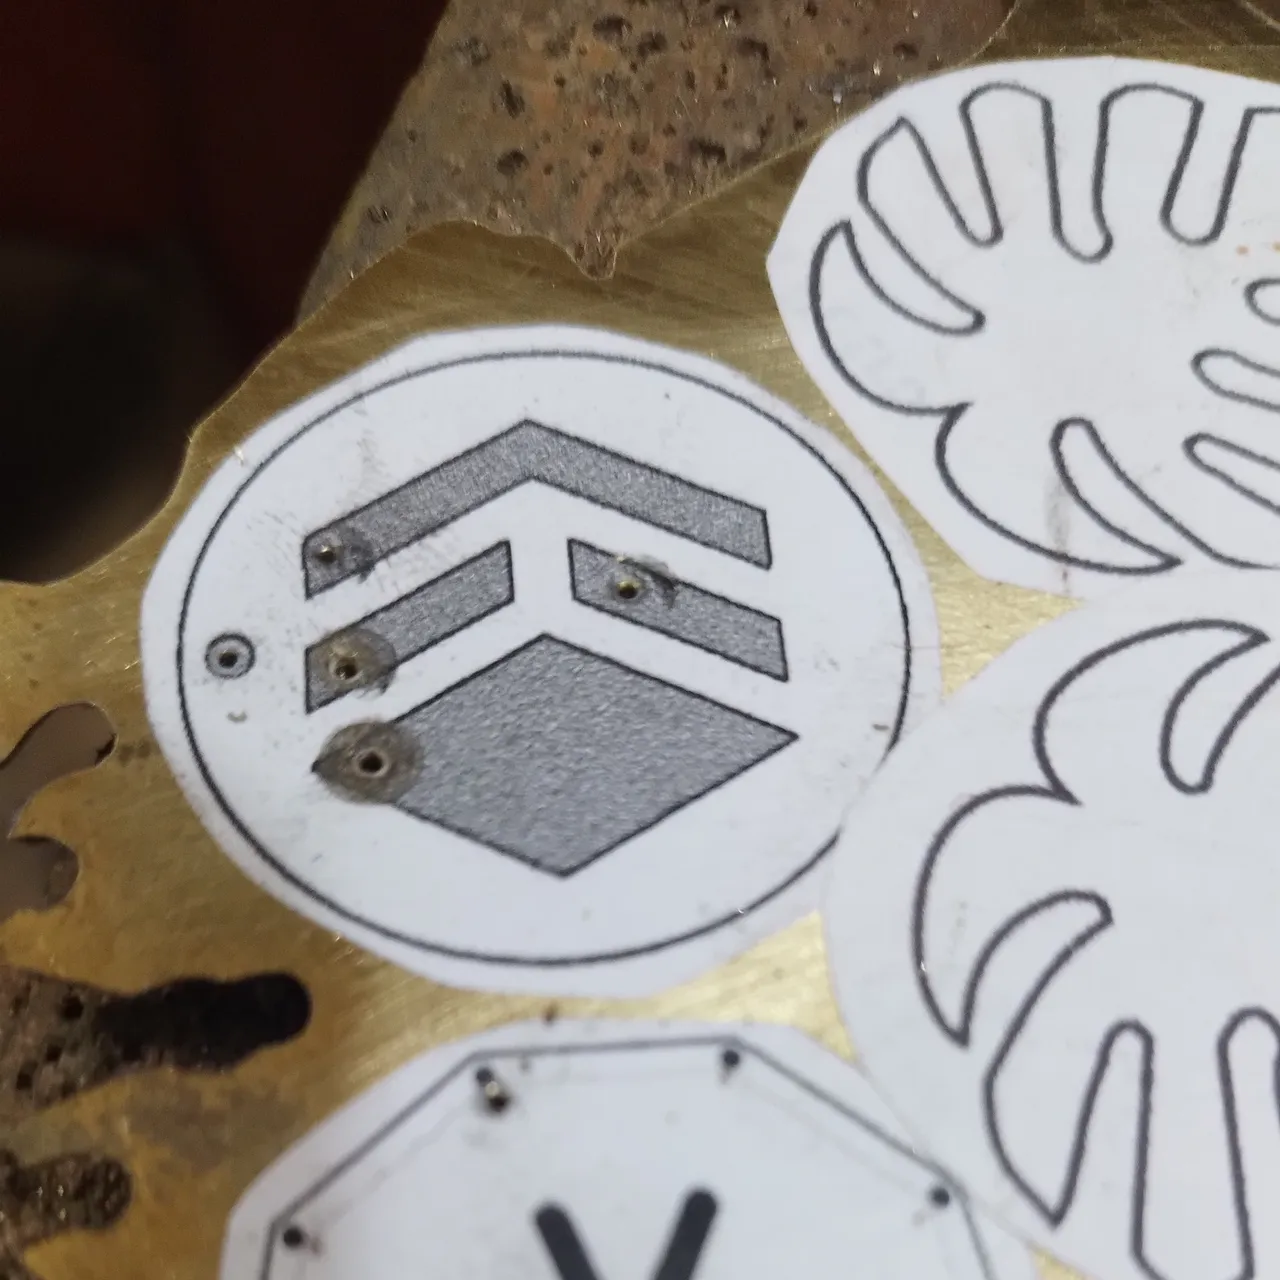
Abrí los huecos del interior de la pieza con la fresa 0.75 mm empleando el Dremel.
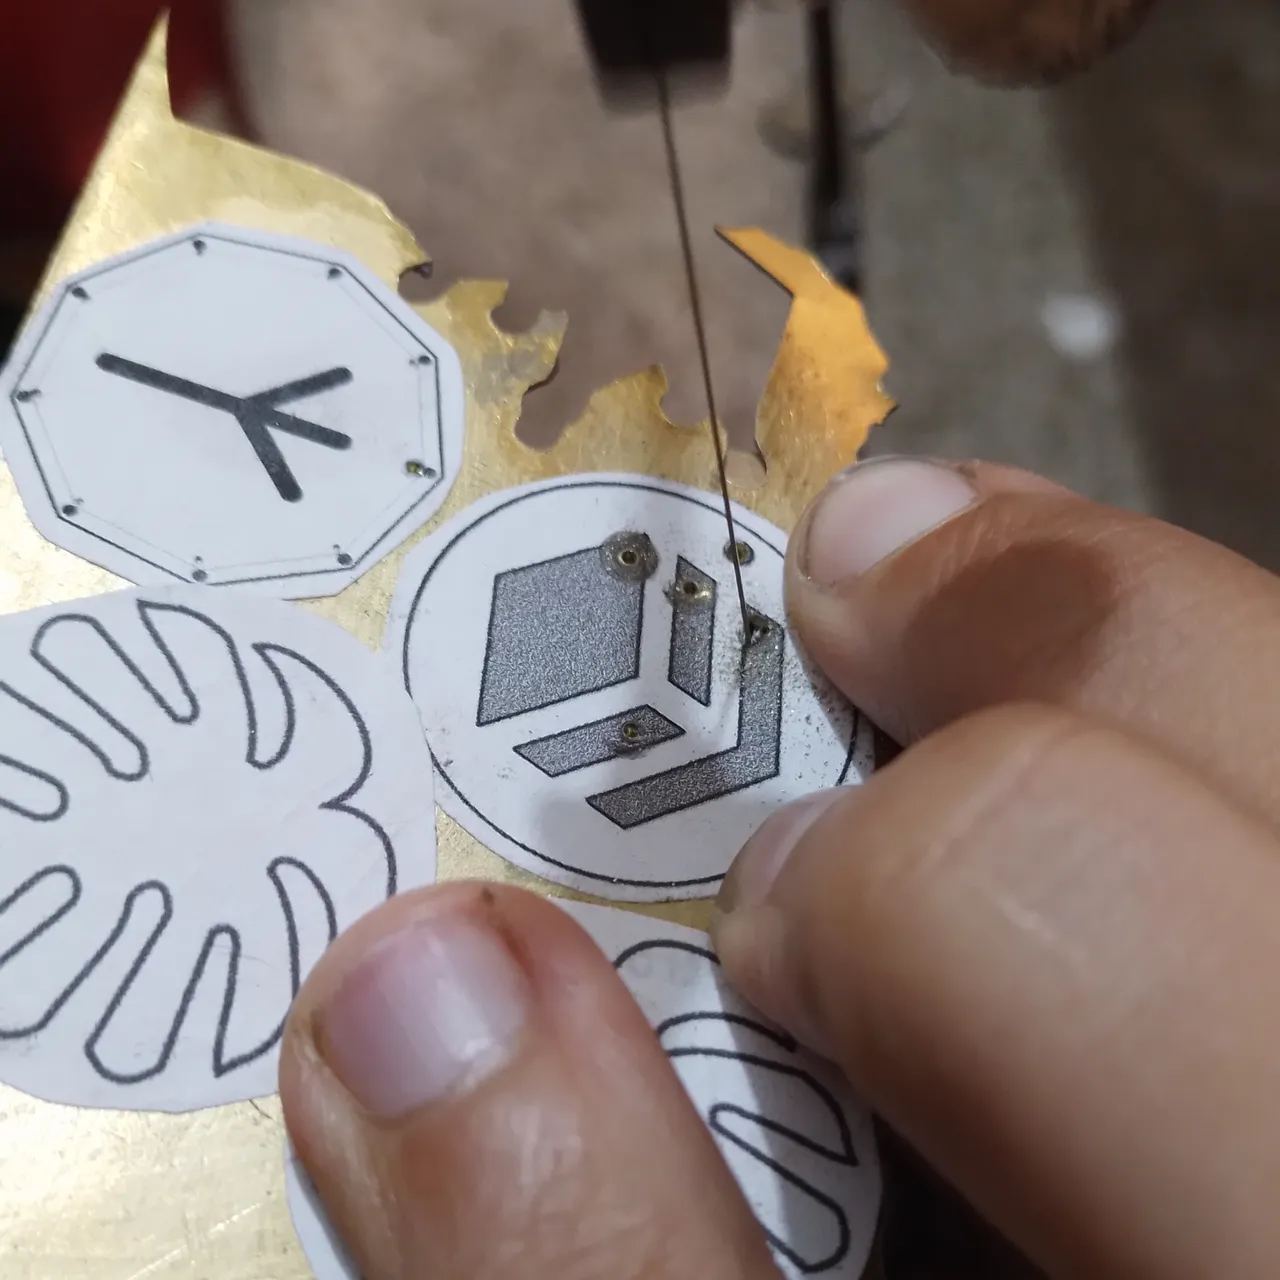
Con el arco de segueta y la sierra 2/0 empece a cortar los espacios internos que irán huecos en la pieza. El corte interno siempre se hace primero, ya que hay más espacios para maniobrar la lámina con los dedos y se aprovecha mejor el soporte que da el sargento de madera.
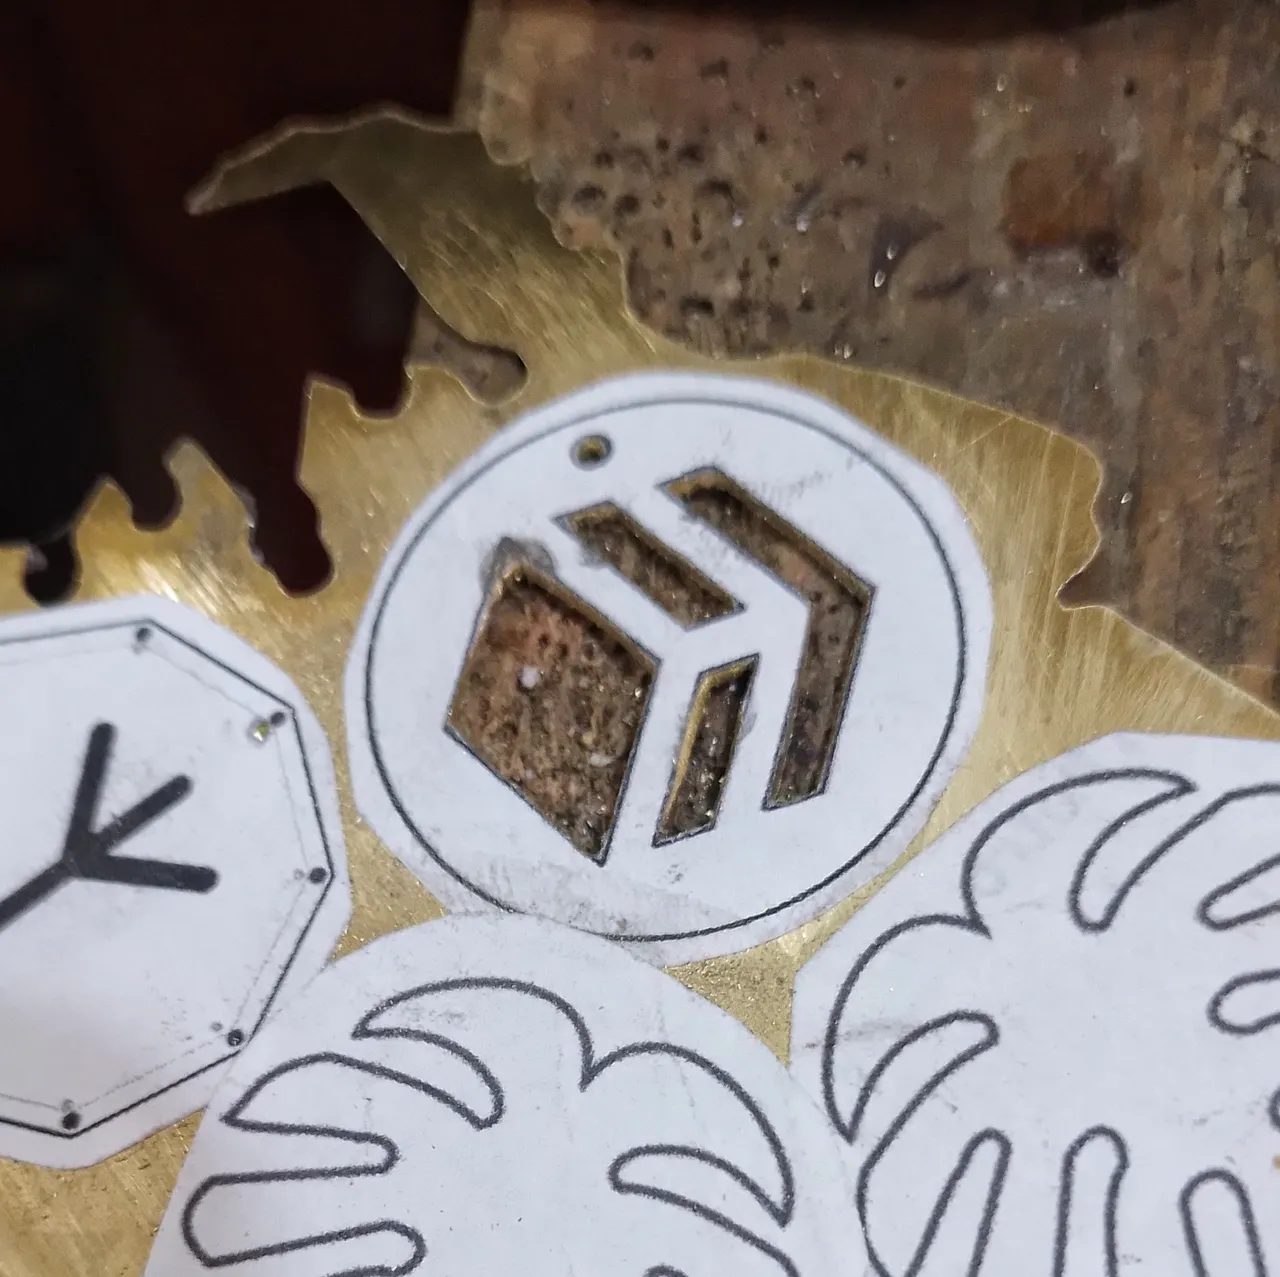
Así queda una vez cortado los espacios internos.
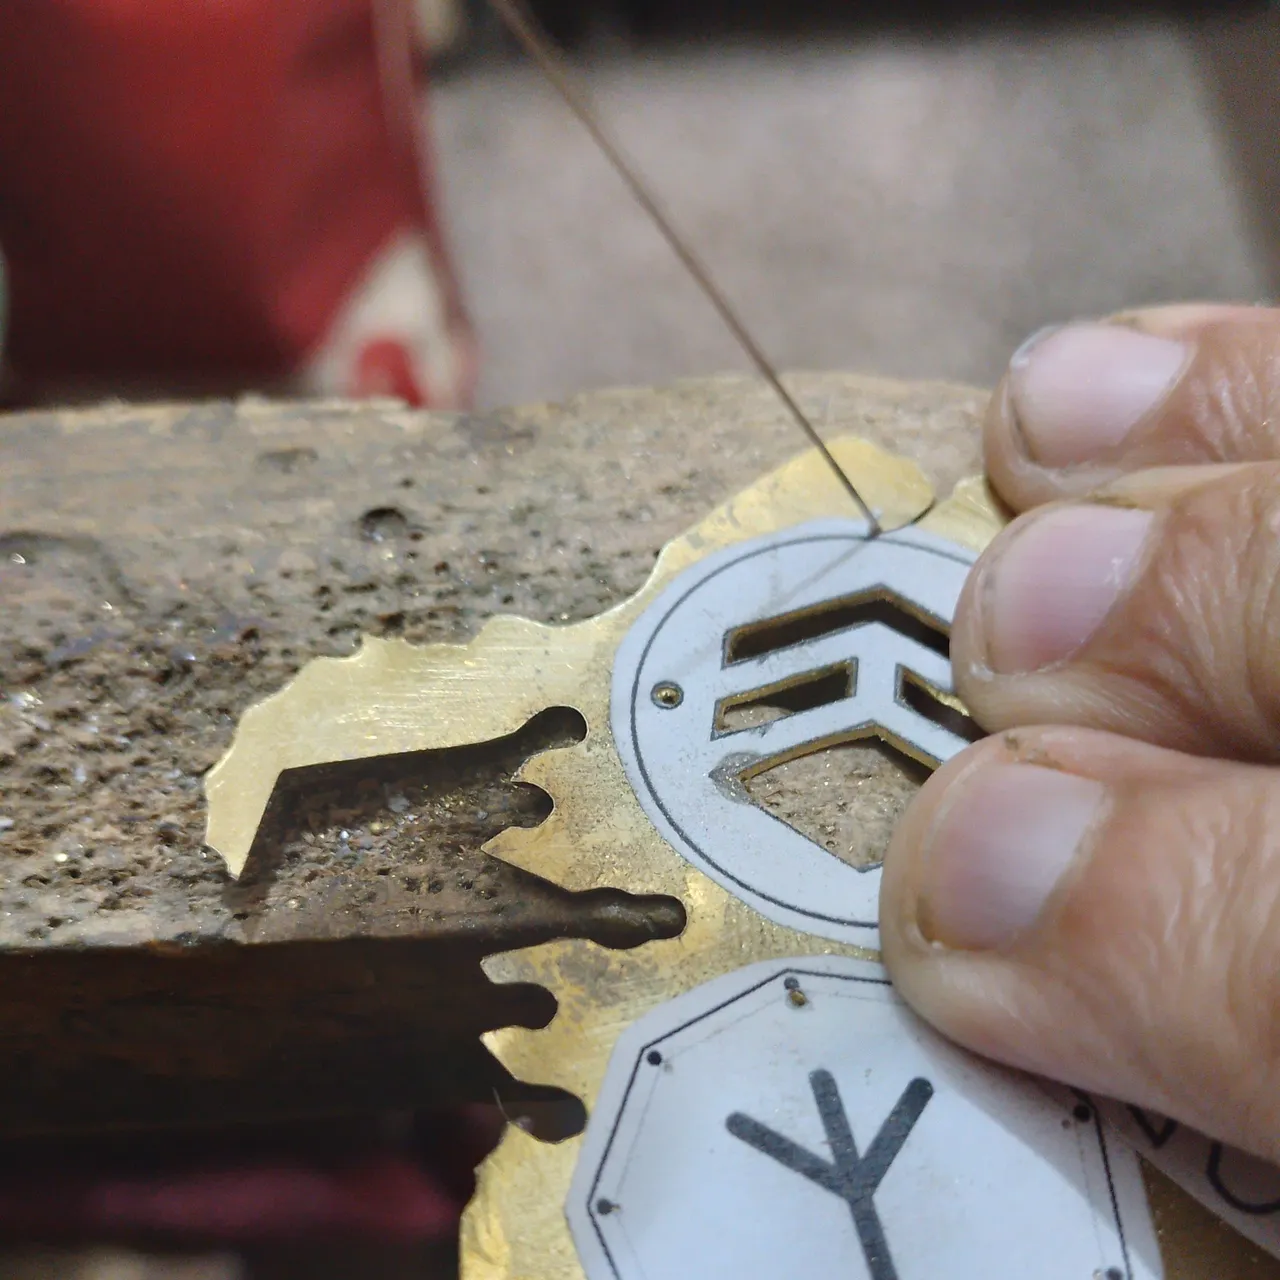
Ahora si se realiza el corte de la silueta externa de la figura del logo que queremos, igualmente con la segueta y la sierra 2/0

Aquí vemos el corte que se hizo del círculo en cámara rápida, este proceso de corte se hace a una velocidad moderada, prestando atención a por donde se pasa la segueta, para evitar errores, que significarían mayor trabajo luego. Lo bueno es que las líneas son delgadas y esto facilita el guiarse por donde va a pasar la segueta.
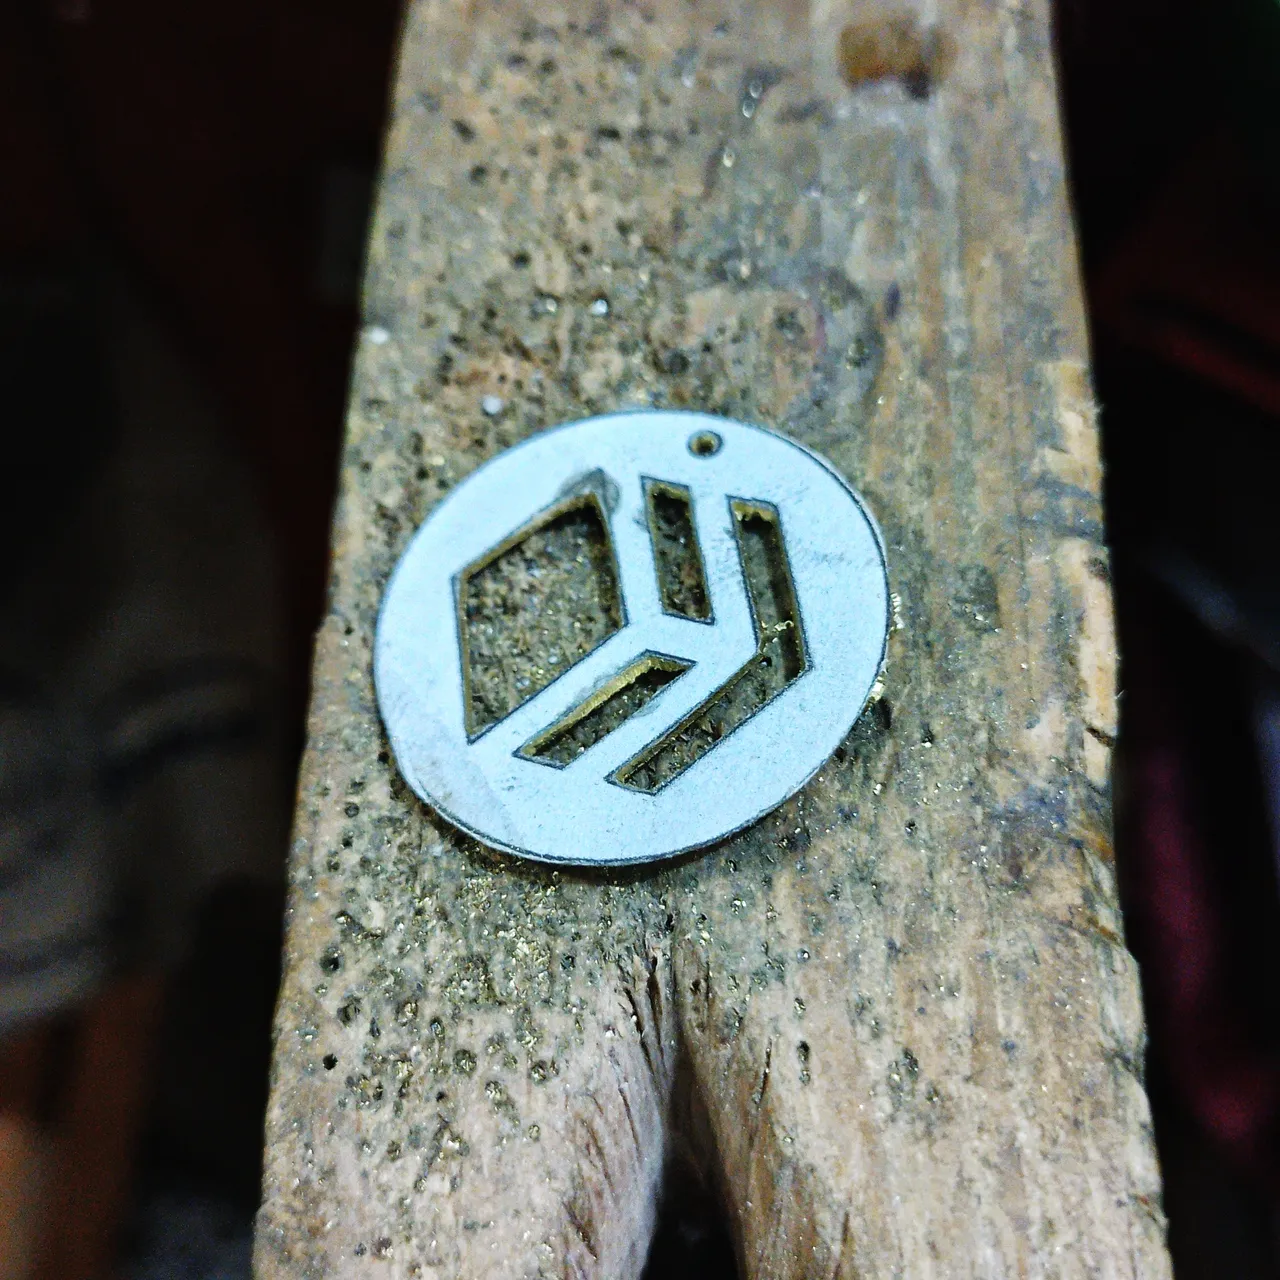
Así queda al finalizar el corte.
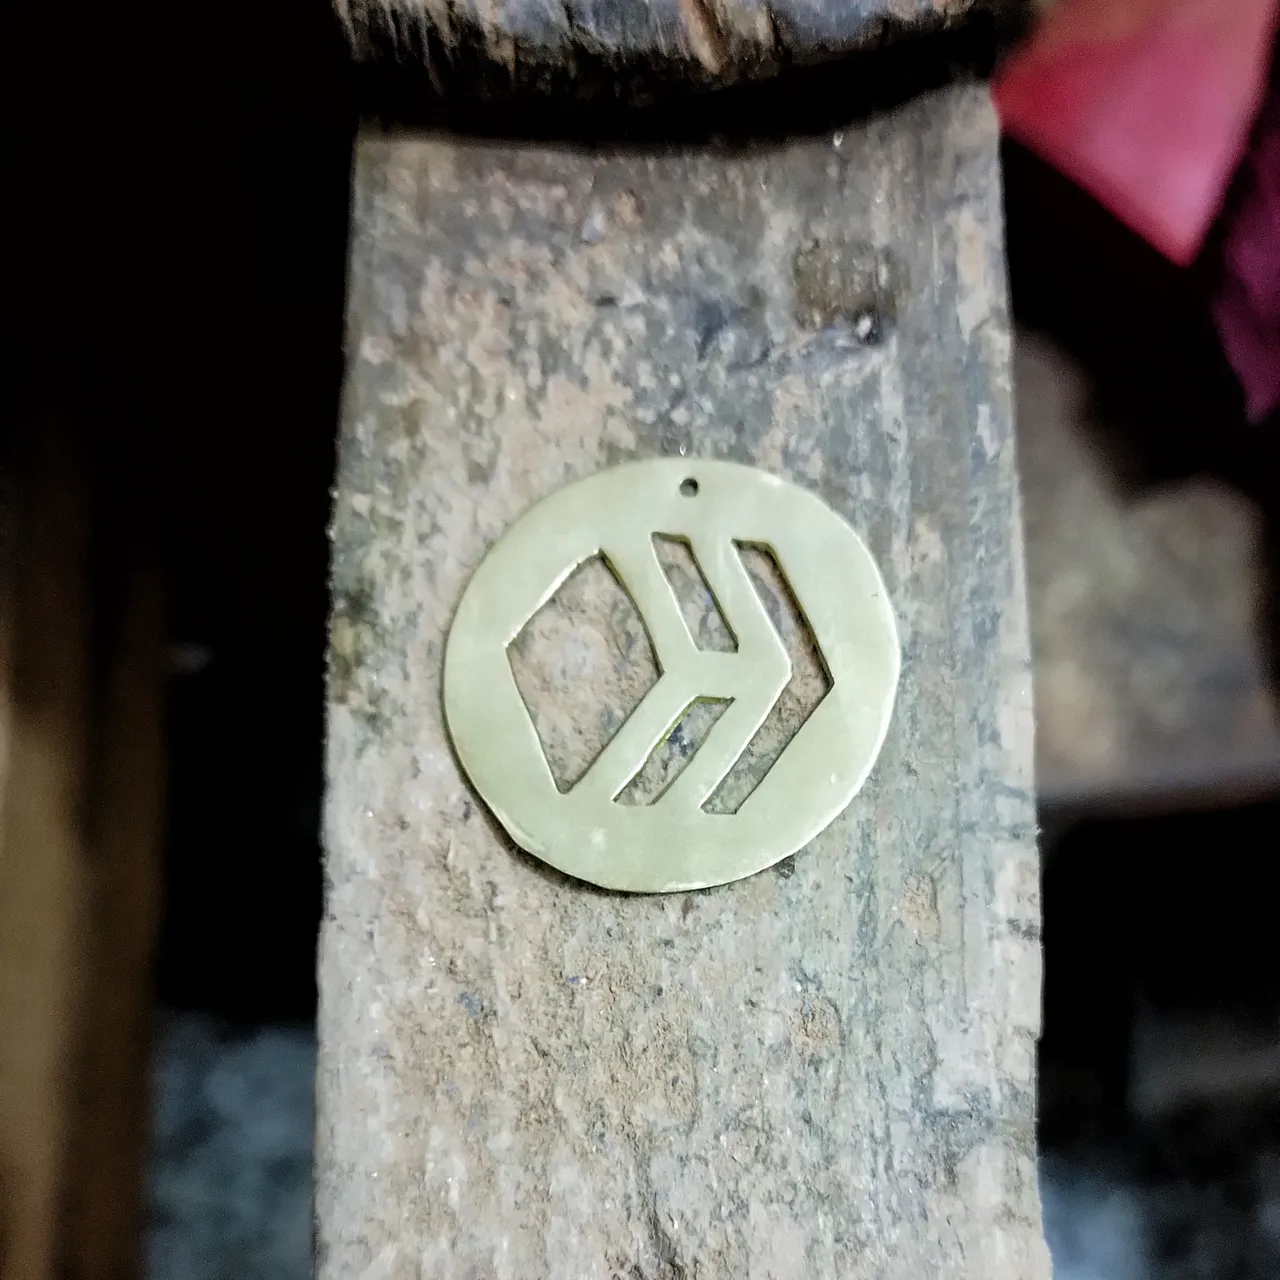
Se desprende la impresión y luego se le pasa las lijas 220, 360 y 400, de ser necesario con la segueta se corrigen algunos cortes o también se usa la lima para arreglar algunos detalles como la redondez del círculo.
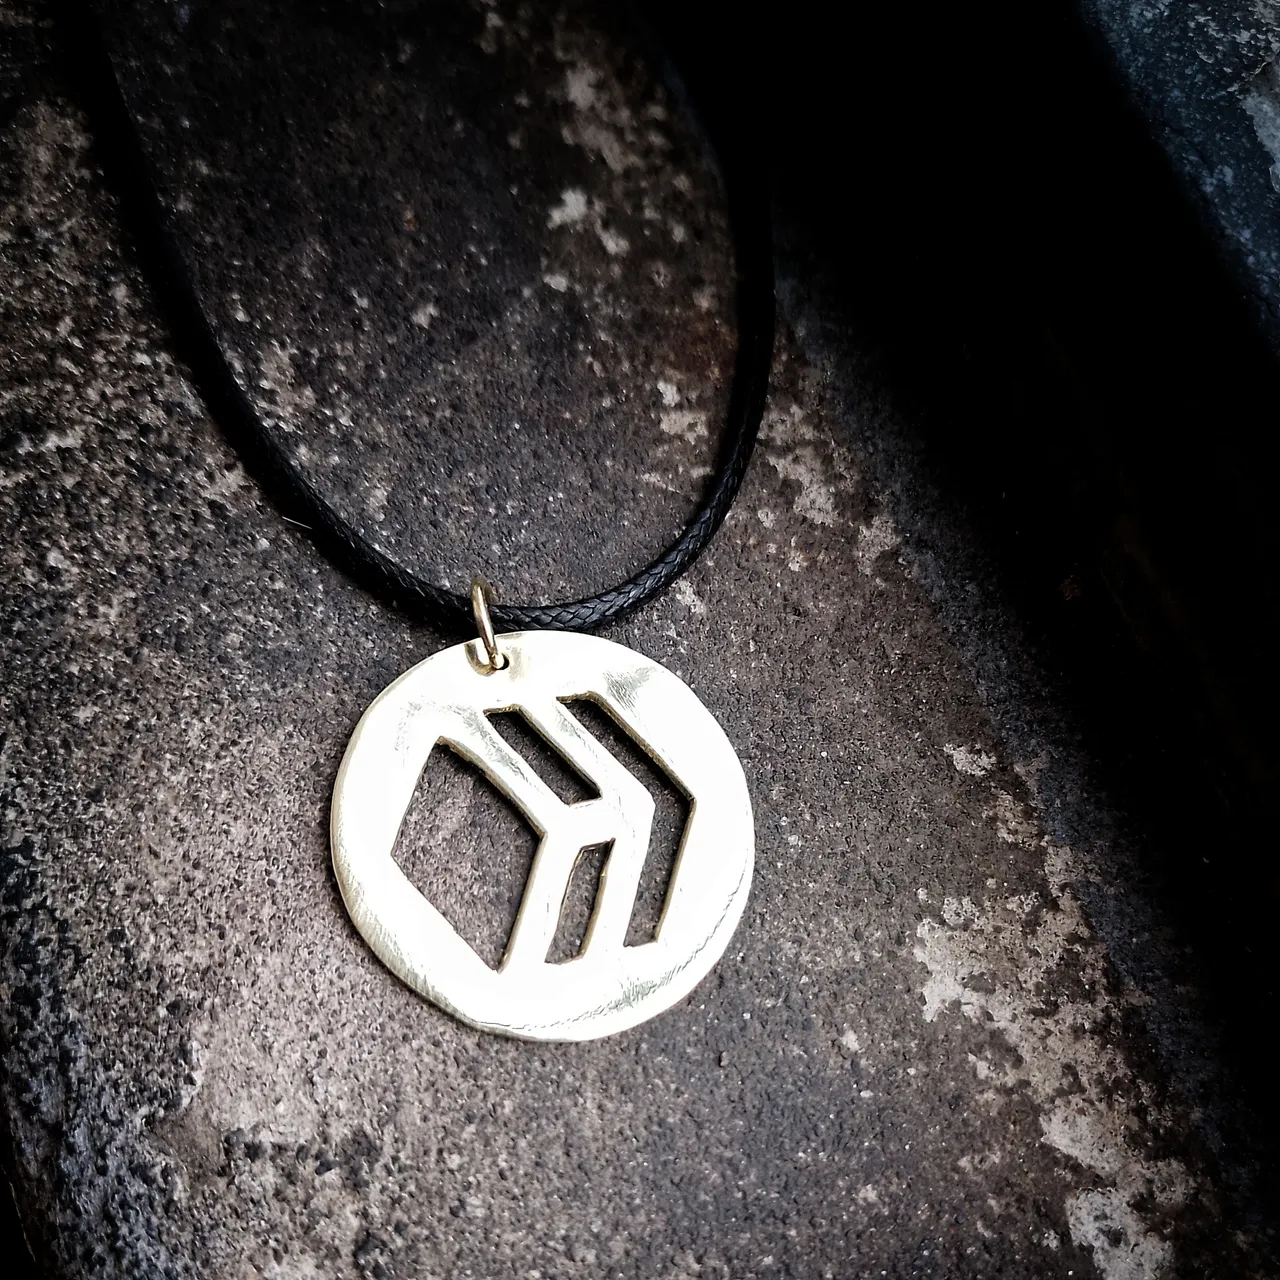
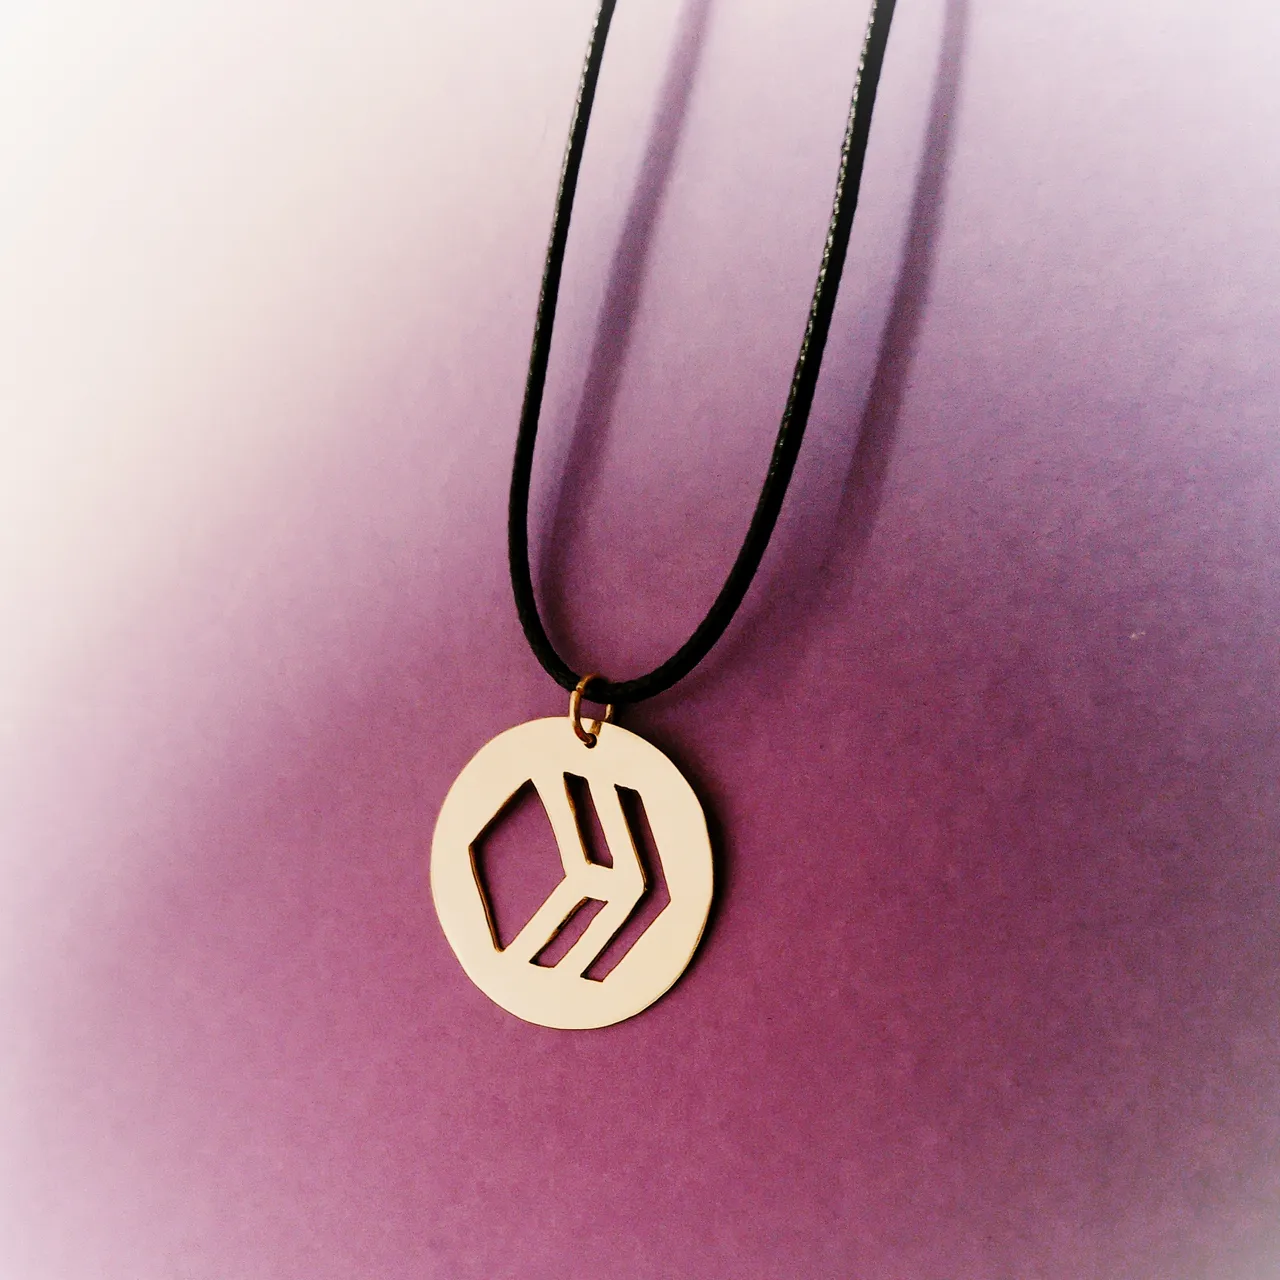
Posteriormente, se pule en el motor de banco, con la mopa correspondiente y con la cera de pulir, se limpia luego con agua y jabón desengrasante, se seca y se le pone la argolla de bronce de 1 mm que es por donde pasa el cordón como en la foto o una cadena si así se desea.
Este es el resultado final de la pieza, les comento que @erilej la vio en mis estados de Whatsaap y le encanto, espero a ustedes también les haya gustado y que hayan aprendido un poco de como hago mi trabajo; espero leer sus apreciaciones en los comentarios.
¡Gracias por su tiempo y apoyo!
Por último si deseas puedes conocer o ver más de mi trabajo en Instagram.
https://www.instagram.com/m16ueljoyas/
English / Google translate
It's been a while since I've been interested in making a piece of jewelry with a logo of some famous coin or blockchain and I decided to start with the Hive logo, since we're here and there's a pretty big community that loves this network. .
The first thing I thought was I was going to make the logo, it occurred to me to put it inside a circle that looks more elegant and the Hive figure would go hollow, I did the entire design process in Inkscape, there I scaled the drawing of the piece to 2.5 cm to print.
Here is a list of what I used to make the piece:
- Bow saw for jewelry.
- Jewelry Saw Hair 2/0.
- Bronze sheet 0.5 mm. and 1 mm bronze wire
- Dremel.
- 0.75 mm drill to open a hole.
- 3M sandpaper number 220, 360 and 400, with its sandpaper holder to be used in the Dremel.
- Bench motor, polishing wax and mop
Now I leave you with the detailed manufacturing process, so that you can enjoy it and get to know...
PROCESS
Glue the print onto the 0.5mm brass sheet using a glue stick. I sanded the surface with 220 sandpaper to make it stick better.
I opened the holes inside the piece with the 0.75 mm cutter using the Dremel.
With the hacksaw and the 2/0 saw, I began to cut the internal spaces that will go holes in the piece. The inside cut is always done first, as there is more space for the blade to be maneuvered with your fingers and the support provided by the wooden clamp is better utilized.
This is how it looks once the internal spaces have been cut.
Now if the external silhouette of the figure of the logo we want is cut, also with the hacksaw and the saw 2/0
Here we see the cut that was made of the circle in fast motion, this cutting process is done at a moderate speed, paying attention to where the blade passes, to avoid mistakes, which would mean more work later. The good thing is that the lines are thin and this makes it easier to guide where the blade will pass.
This is how it looks at the end of the cut.
The impression is detached and then the 220, 360 and 400 sandpaper is passed to it, if necessary with the saw blade some cuts are corrected or the file is also used to fix some details such as the roundness of the circle.
Subsequently, it is polished in the bench motor, with the corresponding mop and with the polishing wax, it is then cleaned with water and degreasing soap, it is dried and the 1 mm bronze ring is put on it, which is where the cord passes through. as in the photo or a chain if desired.
This is the final result of the piece, I tell you that @erilej saw it in my WhatsApp statuses and he loved it, I hope you liked it too and that you have learned a little about how I do my job; I hope to read your appreciations in the comments.
Thanks for your time and support!
Finally, if you want you can know or see more of my work on Instagram.