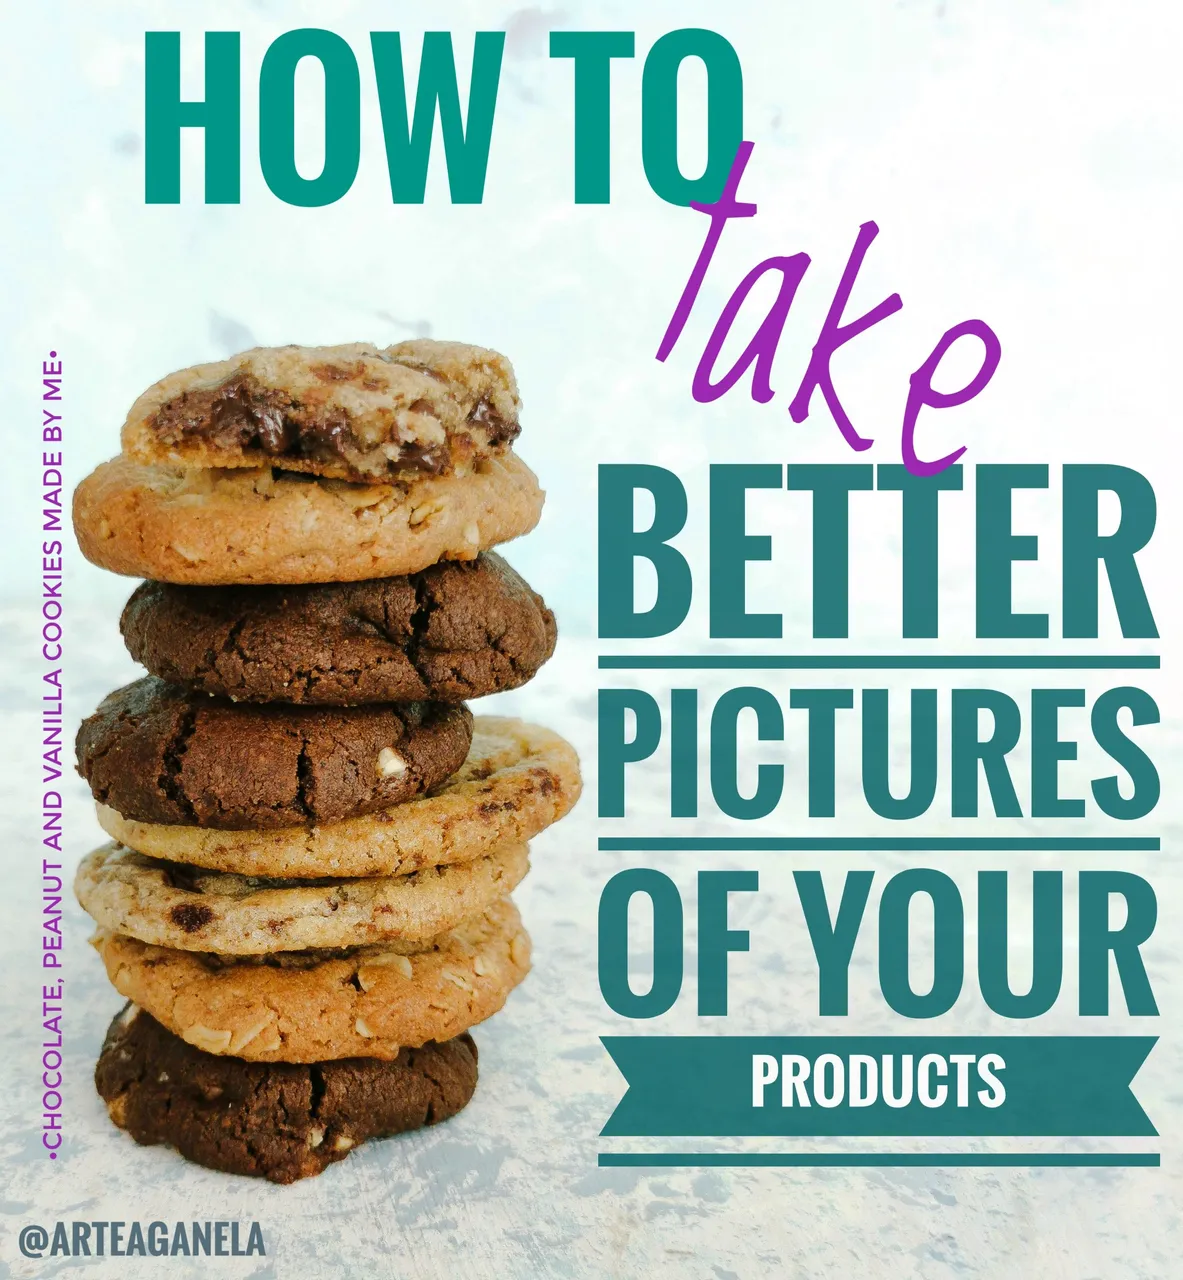
¡Hi everyone!
Hoy les quiero contar algunos de los trucos que he aprendido para tomar mejores fotos, enfocado a la fotografía de producto.
Antes que nada les quiero decir que estos son trucos para "no expertos", personas con poco o sin conocimiento en fotografía y que están tomando fotos a sus propios productos con la cámara de su móvil, si tu eres fotógrafo este post no te va a enseñar nada nuevo e incluso quizás te ofenda un poco 😁 lo siento.
I split this post in two parts because after writing it I realize it's too much information and I don't want your finger to die and fall off trying to scroll down chasing the info you need.
Revisa la configuración: escoge la mayor resolución, elije una relación de aspecto adecuada para la plataforma donde vas a publicar tus productos (por ejemplo para publicar en plataformas que se ven principalmente desde el telefono como Instagram es preferible que escojas una relación de aspecto vertical, de manera que la foto de tu producto ocupe la mayor parte de la pantalla de quien lo ve), activa la cuadrícula de tu cámara para que te ayude a posicionar tus productos en puntos de interés (las intersecciones de la cuadricula) y a que tus fotos queden derechas.
Asegúrate de estar utilizando la mejor opción para tomar tus fotos: hoy en día la mayoría de los móviles tienen presets en la app de la cámara, pero además tienen un modo manual donde puedes sacar el mayor provecho de la cámara de tu móvil ajustandola al máximo a tus condiciones.
En el modo manual o profesional podremos configurar de manera más completa:
- ISO (el nivel de sensibilidad, a menor sensibilidad más luz necesitas que entre para lograr una buena exposición o iluminación de tu escena. A mayor sensibilidad necesitarás que entre menor luz pero la foto estará propensa a tener grano o pequeños puntitos)
Check the configuration: choose the bigger resolution, peak an aspect relation that fits the platform where you going to publish your photos (for example to publish on a platform that is mostly seeing on the phone aka Instagram, its best to pek a vertical aspect relation, and the bigger the better, that way your photo fill the most part of the screen), turn on the grid so you can use it like a guide to place your product on interest points (the intersections of the grid) and to take your photo straight
Make sure you're using the best option to shoot on your camera: Now days the most of mobiles have presets on the app, but they also have a manual mode where you can take advantage of the cam, changing the setting to suit your conditions.
On manual mode (or professional mode) we can configure in a more wholesome way:
- ISO (the sensitivity level, to minor sensitivity the more light you will need to enter in order to get a good exposure of lightning in your scene). To higher levels of sensitivity you will need less light to enter but the photo can become grainy
- Velocidad del obturador: la rapidez con la que se cierra el obturador, mientras más tiempo pase abierto el obturador, más luz entra en tu foto, pero cualquier movimiento (como el pequeño temblor de tu dedi cuando presionas el disparador) y tu foto quedara movida y sin claridad
-
Shutter speed: the speed with your shutter close, while the shutter stays open more time, more lights enter in your shoot, but any tiny movement (like a little shake when you press the shoot button) and your photo will be blurry and with no clarity
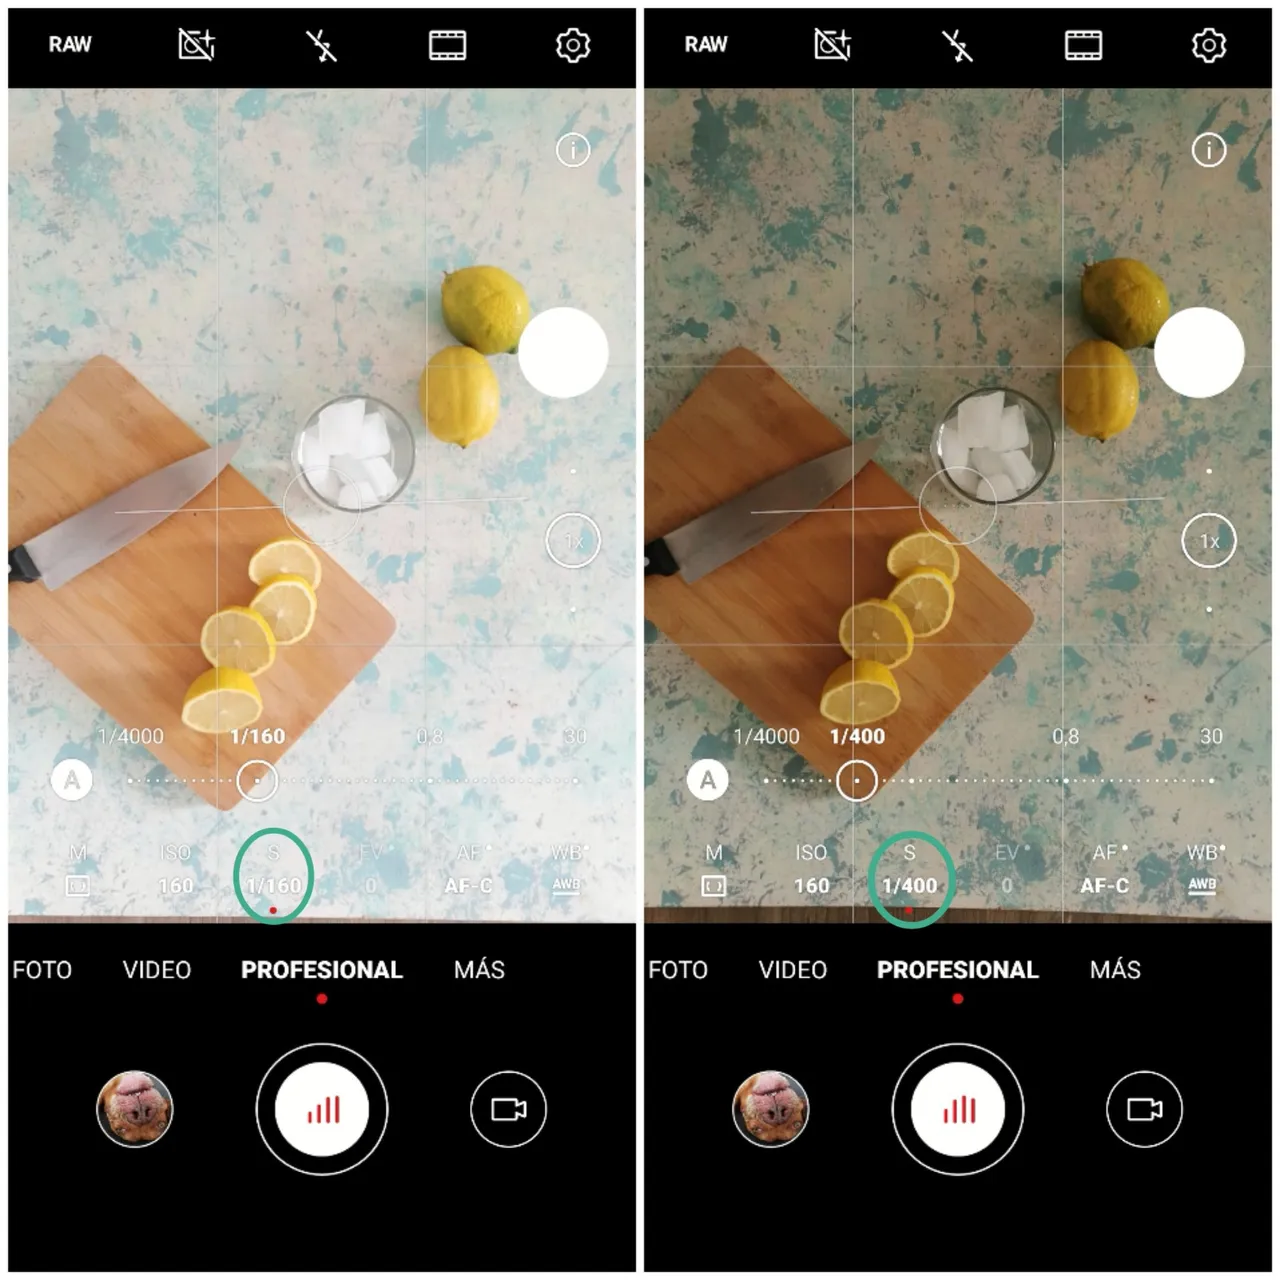
Setea el ISO en 160 o 200 y juega con el shutter speed para que entiendas como se ilumina la escena
/Set the ISO on 160 or 200 and play with the shutter speed to understand how it lightens the escene
- Balance de blancos (permite equilibrar los niveles de color que influyen en la fotografia de manera que representen de la mejor manera la realidad, aqui lo que estas buscando es mover este control hasta que los puntos blancos de tu foto se vean realmente blancos, sin tonos rojizos ni azulados)
-
White balance: allows you to equilibrate the color levels that affect your photo to represent the best way in reality. What you are looking for here is to change your white balance control until the withe spots on your photo become really white, with no red or blue tones. If it's not easy to locate a withe spot on your scene, you can focus on your subject and change until you see in your camera the closer color to reality
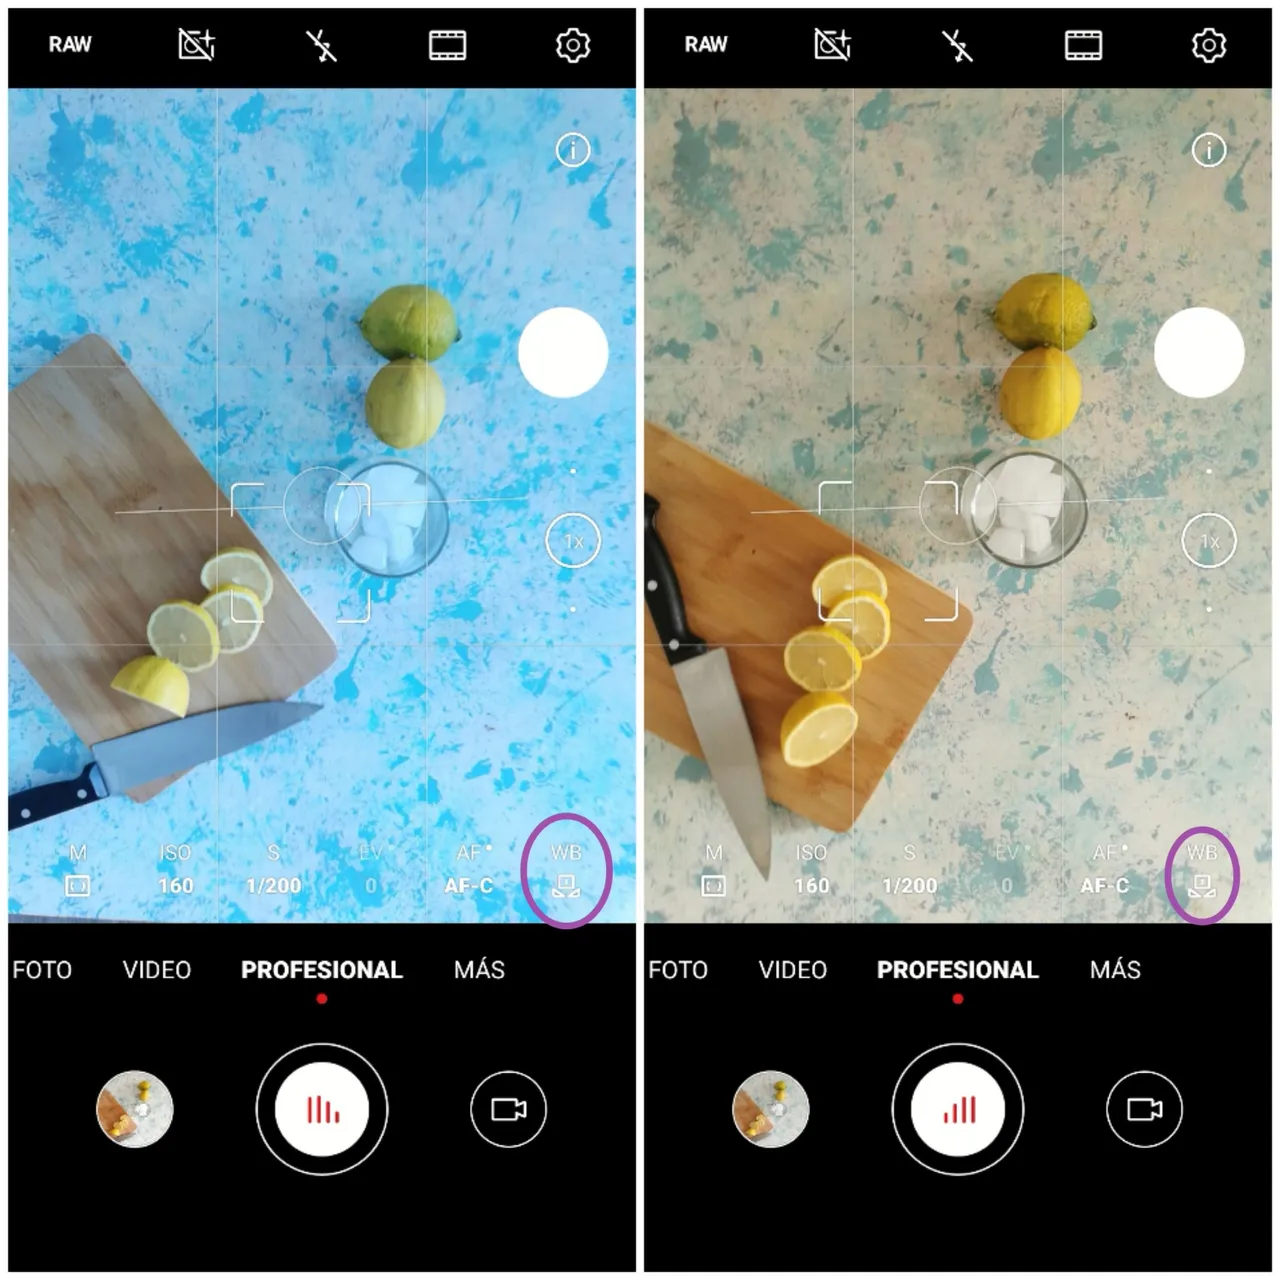
La idea de modificar el balance de blancos es conseguir colores lo mas parecidos posible a la realidad // The idea with changing the white balance is to achieve colors closer to reality
- Algunos teléfonos permiten guardar las fotos en formato crudo, lo cual nos permite "guardar" toda la información de la escena y más adelante en un programa de edición revelar la foto con la cantidad de luz, sombra, color, enfoque y muchos otros parámetros, que nos guste más, sin que nuestra foto pierda calidad (te has dado cuenta que después de editar tus fotos se notan con grano o pixeladas, esto pasa cuando editamos una foto ya revelada, no en formato raw)
- Some phones allow you to save photos on raw format, wich let us "keep" all the information on the scene and later on with a editing app we can process the photo and choose how much light, shadow, saturation of color, focus, and many other aspects to suit our taste, without compromising the quality of our picture (you notest that after you edit a picture it become grainy? that's because we edit an already processed photo, not raw)
Por ahora conoce un poco más la cámara de tu móvil, en el próximo post aprenderemos acerca del aspecto fotográfico (básico pero muy importante)For now you can get to know a little better your mobile’s cam, in the next post we’ll learn about photography (basic but life changing)
See you in the next post!! I leave you with a beautiful lemon, let's think that's my product 🍋
 All pictures on this post are my own. Taked with a Huawei P30