Being a student, it was compulsory to participate in the Industrial training program, else one would have a carryover in that particular course. The internship was to last from September- November. With me studying Visual Arts, my intention was to pick textiles as an area of specialization (there are 5 in total: Graphic design, Sculpture, Ceramics, Painting & Textile). In line with what I had in mind, I went in search of a place to work as an intern…
Job Hunting
I had a dream place in mind and I went there with the letters I was given. I went through a lot and nearly burst into tears at a point during the process of trying to apply. Deep down, I knew if I worked there, I would’nt be happy and considering the fact that I might not get paid, that would make things even worse as transportation costs were high.
So I went somewhere else and I’d never been happier. The company deals with the more traditional aspect of textile design, which is ‘Adire’/ ‘tie-dye’ and batik. The coolest part was how they engaged in other crafts such as ceramics, metal casting, jewelry and many other things. I knew I was bound to learn a whole lot working there, and I did!
Working With Ceramics
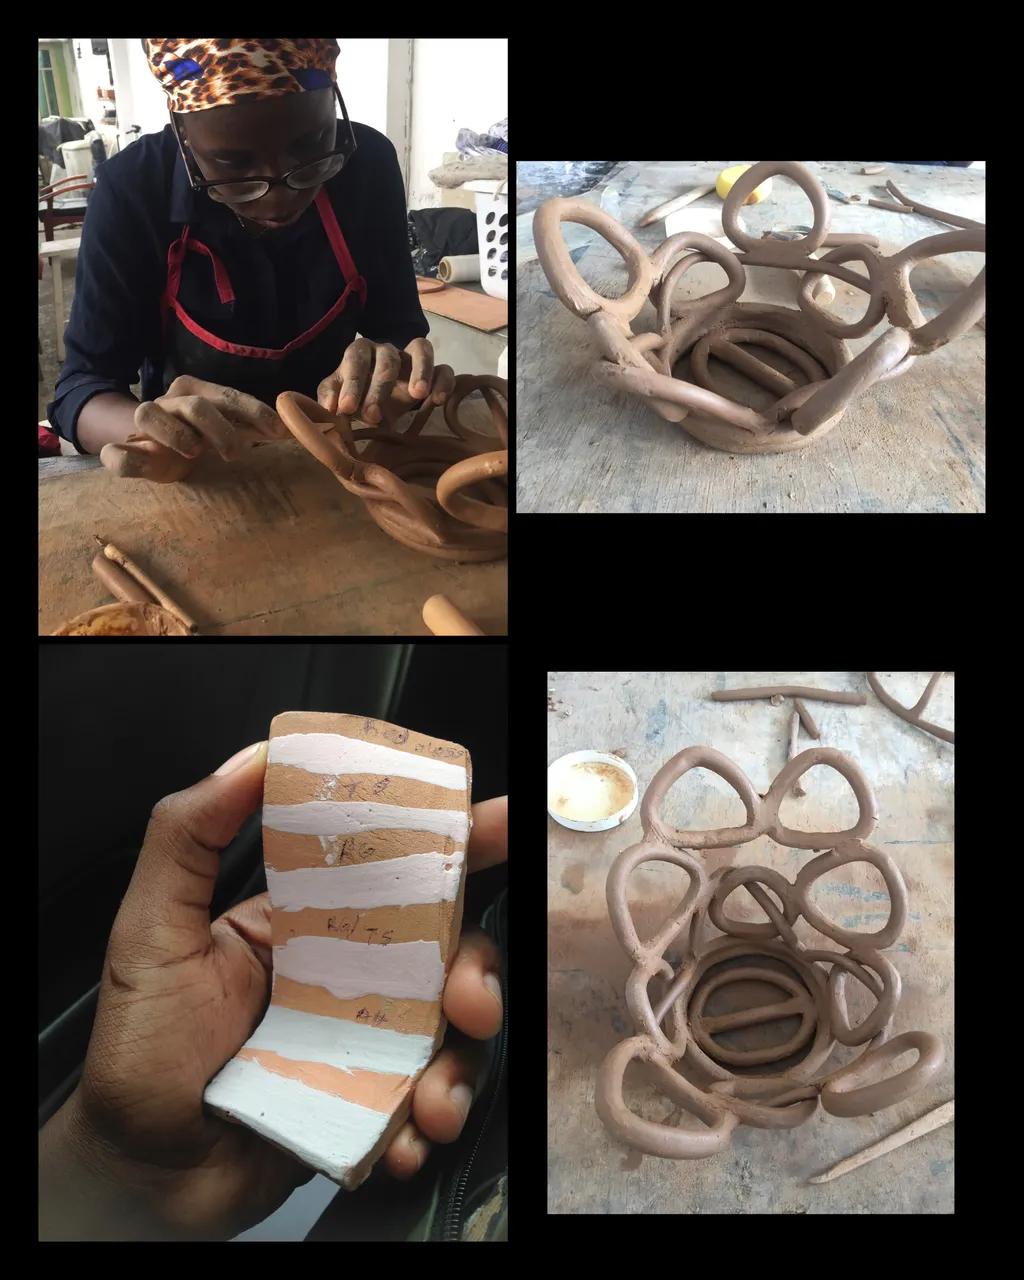
The company had a large stock of kaolin (a type of clay), glazes, an electric potters wheel, clay tools, and a lot of kilns. I and my fellow interns had a great time working with the clay, although at a point, only those with genuine interest for ceramics continued working with it.
Here’s an abstract vase I worked on using the coil method. I started by rolling clay into long strips before bending them to form a rounded triangle. I attached them to one another using clay slip. One issue I encountered was how brittle the clay was. I’d gotten to a stage at first before it broke while drying, then I had to start all over again and the same thing happened.
The reason might be because the kaolin wasn’t mixed with the red clay. I might be wrong, but from my experience working with the red clay, I’d never encountered an isssue like this.
I might give it a go sometime in the future.
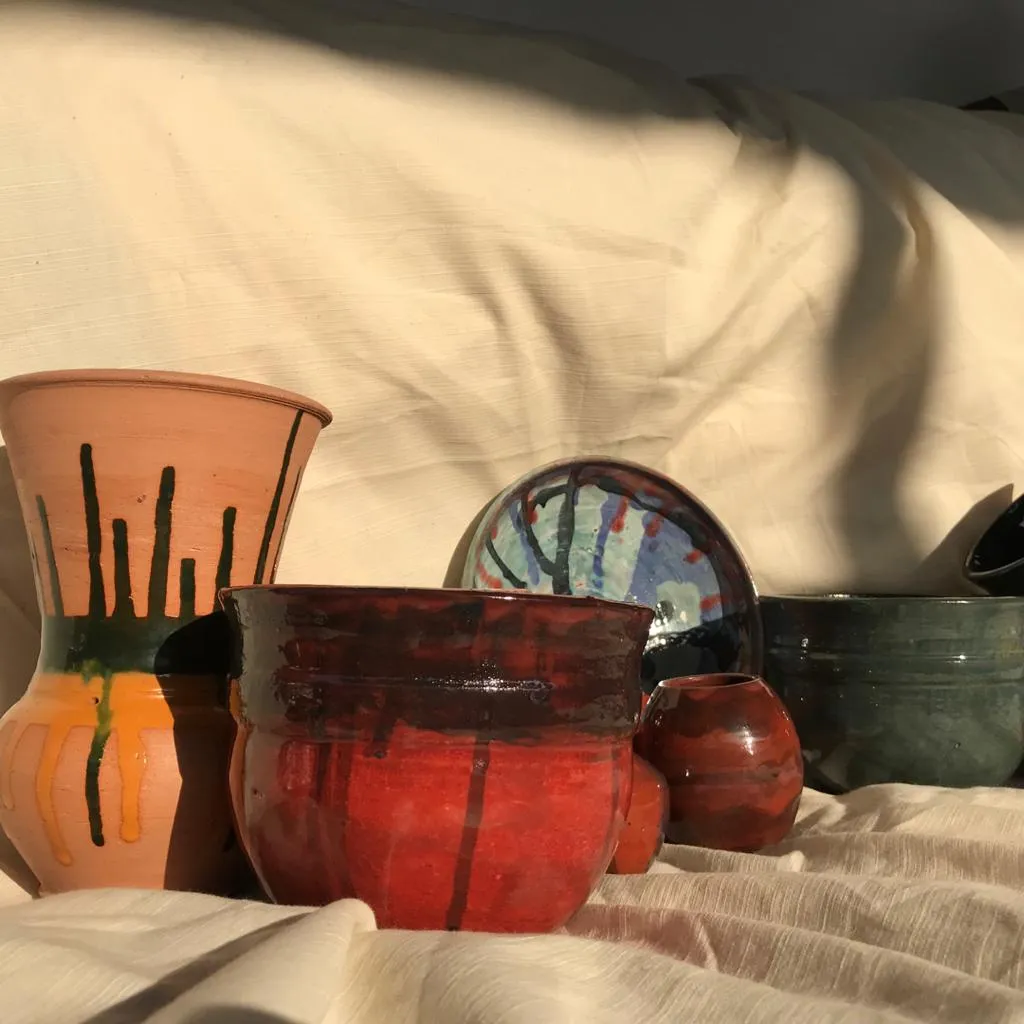
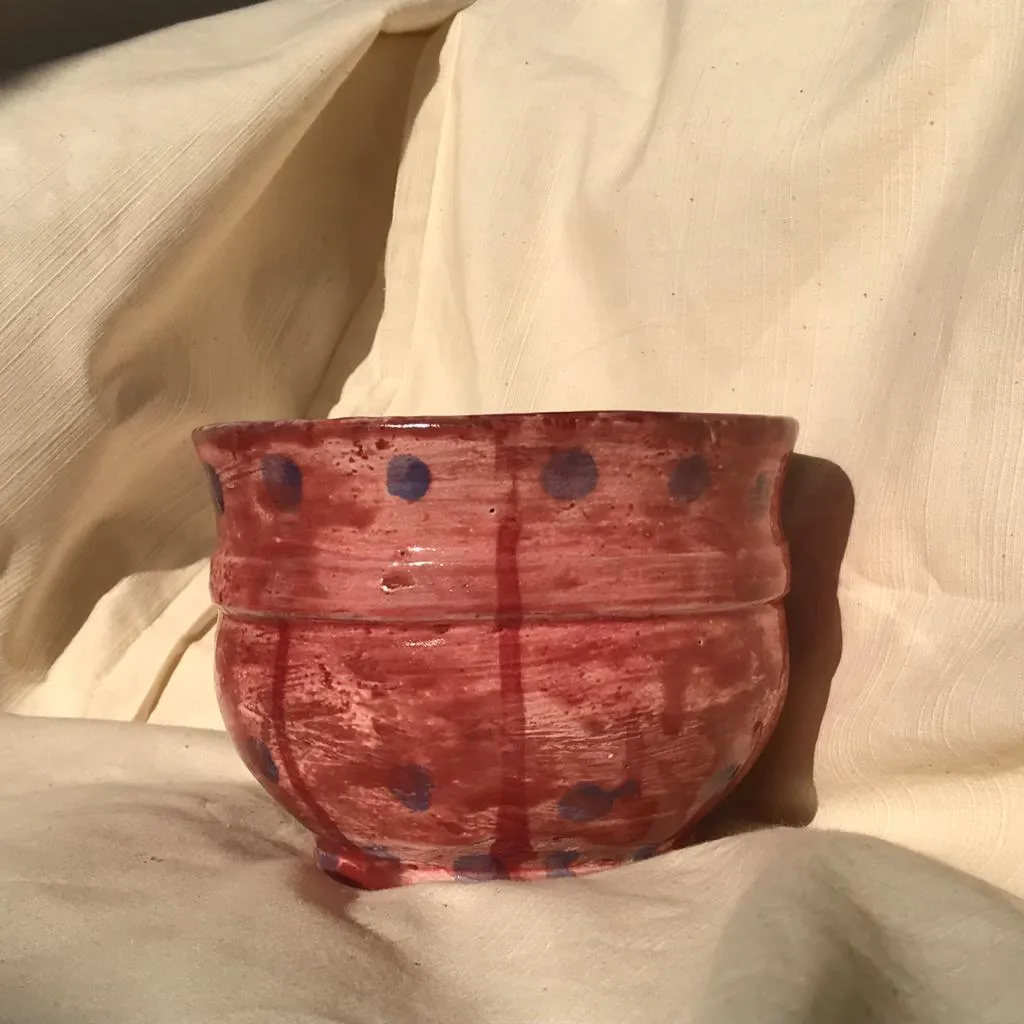
I also learnt about glazes and firing glazed pots. My course mates who were also interns glazed the pots while I was given the task of watching the glazed pots in the kiln, which were fired at 1030 degrees. This took hours. When the pots had cooled down, I was given the task of photographing them, which was fun!
Working With Fabric
One of first assignments I was given was to sketch 2 mask designs which were to be recreated on fabric using the batik method.
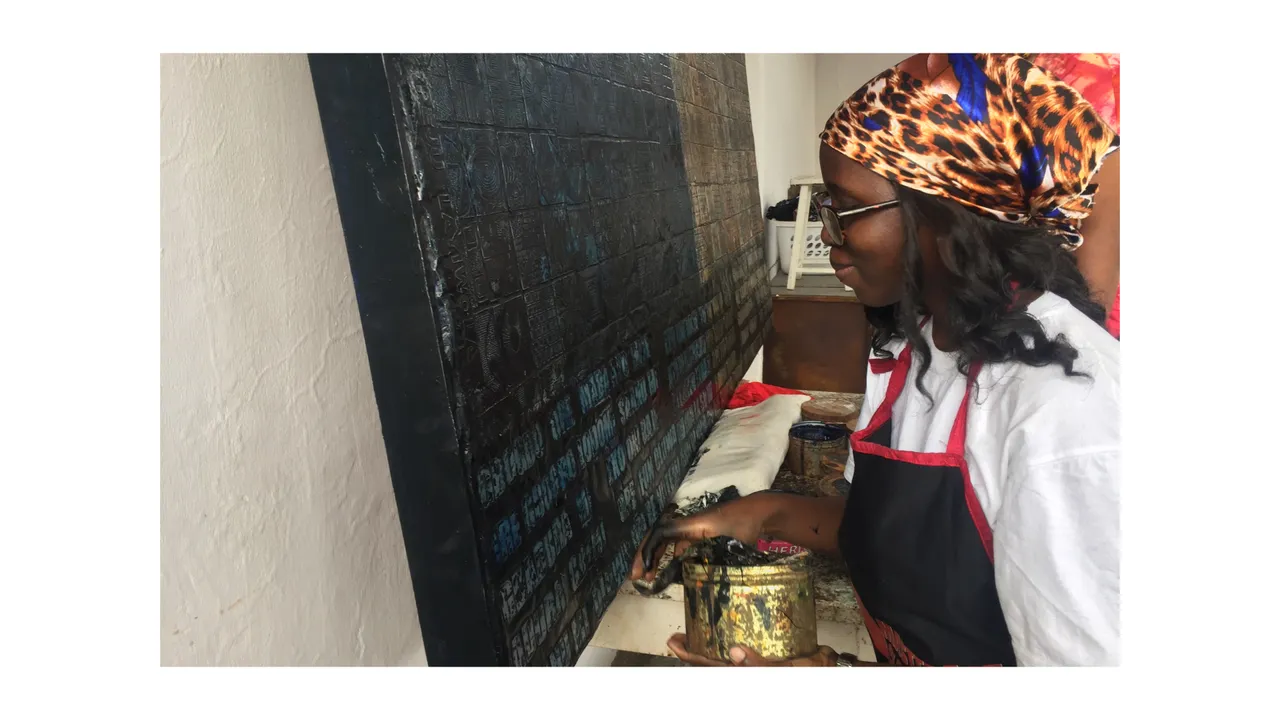
Batik involves the application of hot wax on fabric to create interesting designs.
I drew the masks on the fabric before proceeding to draw over the lines with a pencil like foam dipped in wax. I finished it up, but after inspection by the teacher, I was told to wax over it again. Apparently, I applied the wax when it was too hot. The appropriate wax temperature is 75 degrees. I finished re-waxing and moved to the next stage, which was applying dyes.
The teacher mentioned that I was apply the dye with a brush. This was to make the fabric more interesting as each mask would have its own color.
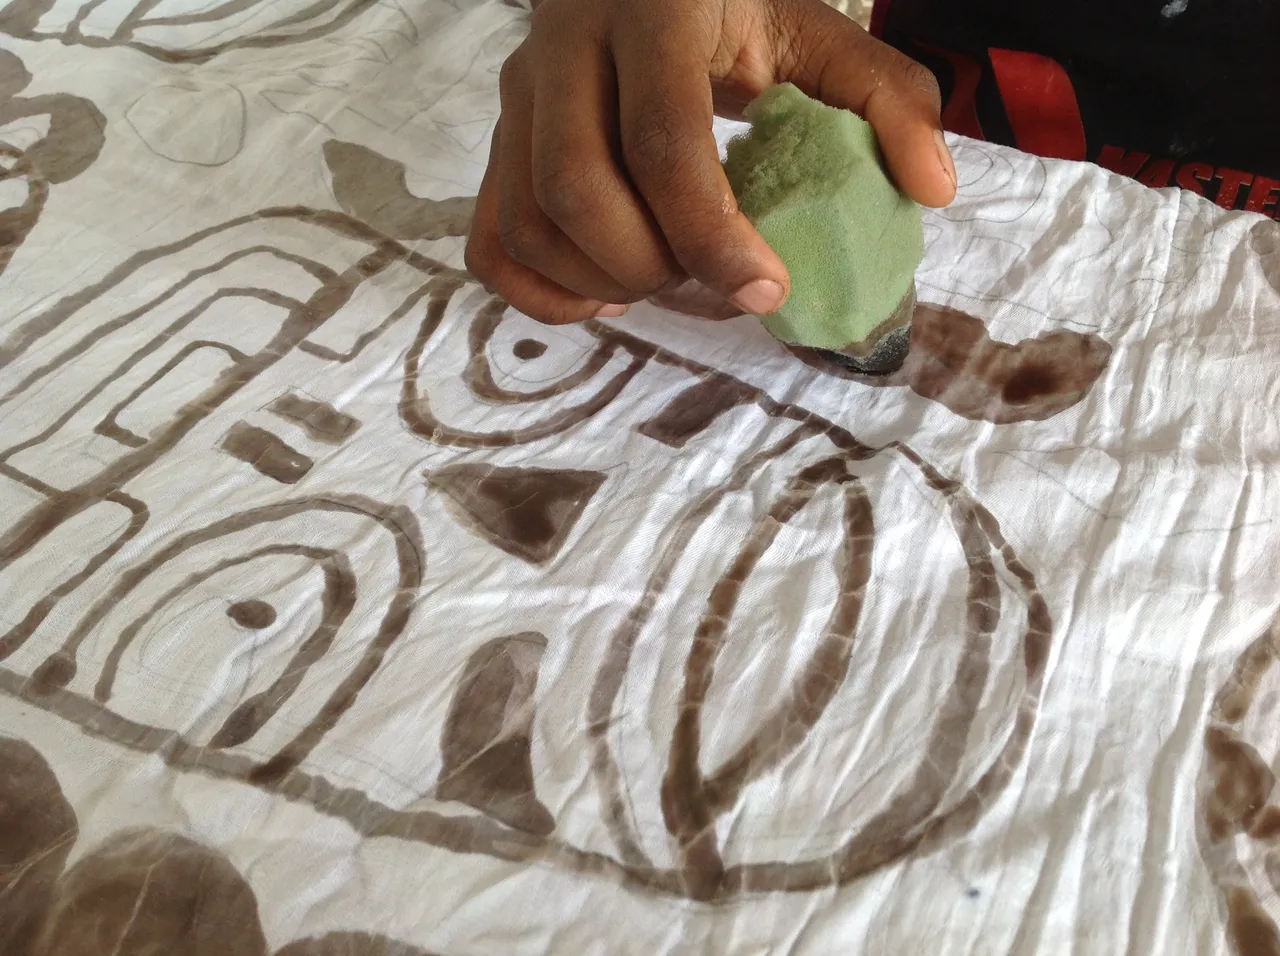
After the dye was rinsed off, I re-waxed the dyed areas. The fabric was going to be dipped in a darker color, to preserve the lighter colors, they had to be waxed over.

More Batik Practice
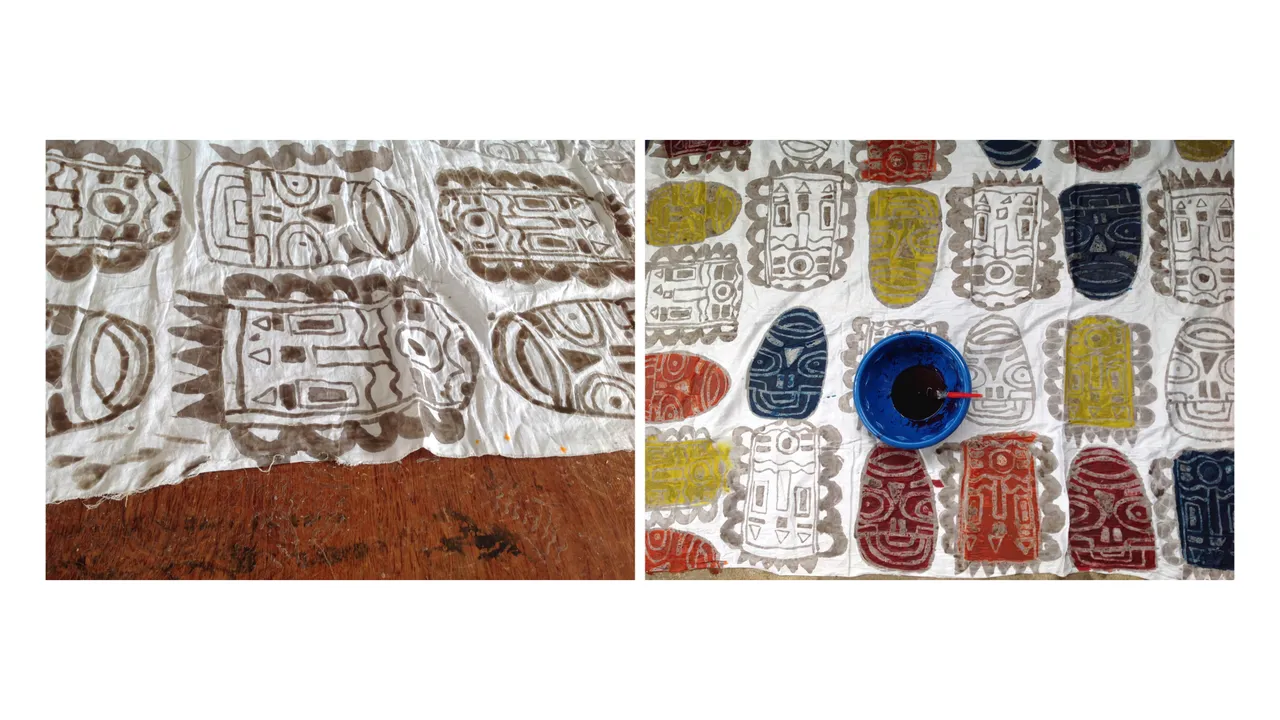
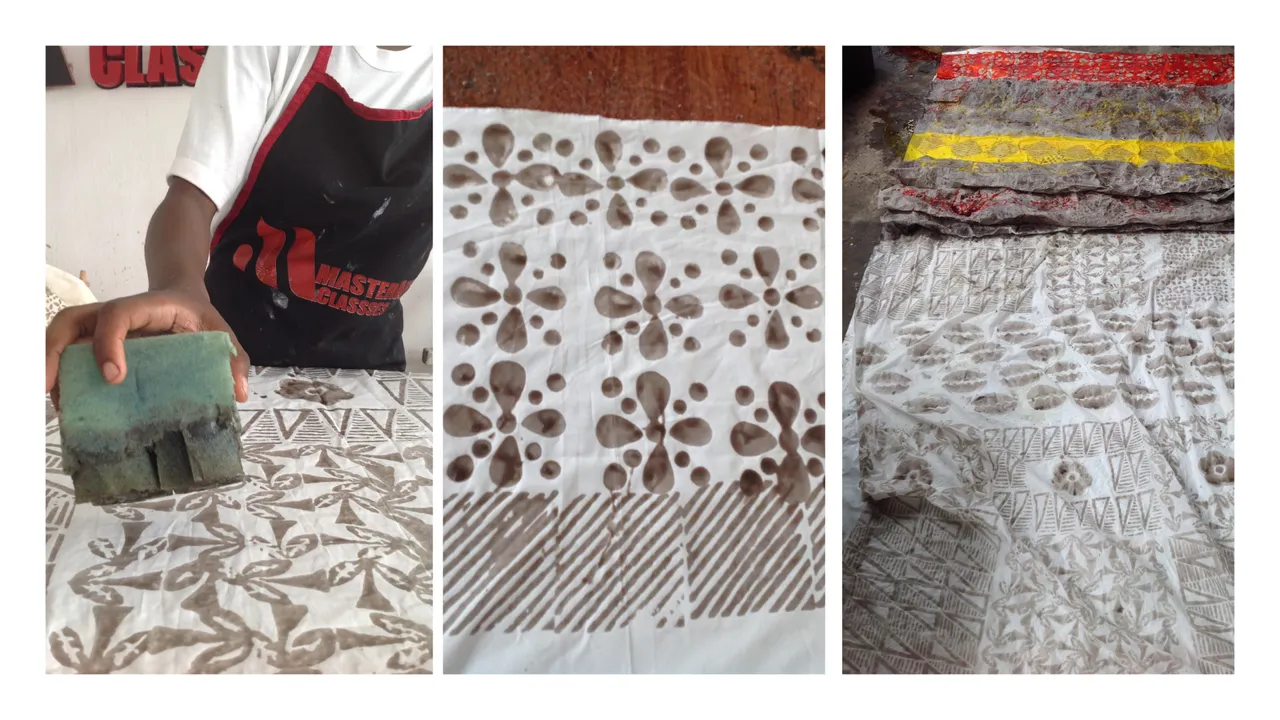
Asides free hand waxing, one could also use foam stamps to create interesting designs. One thing that made learning easy here, was the availability of materials and the teachers were open to new ideas, and we were also encouraged a lot to try out new things and experiment.
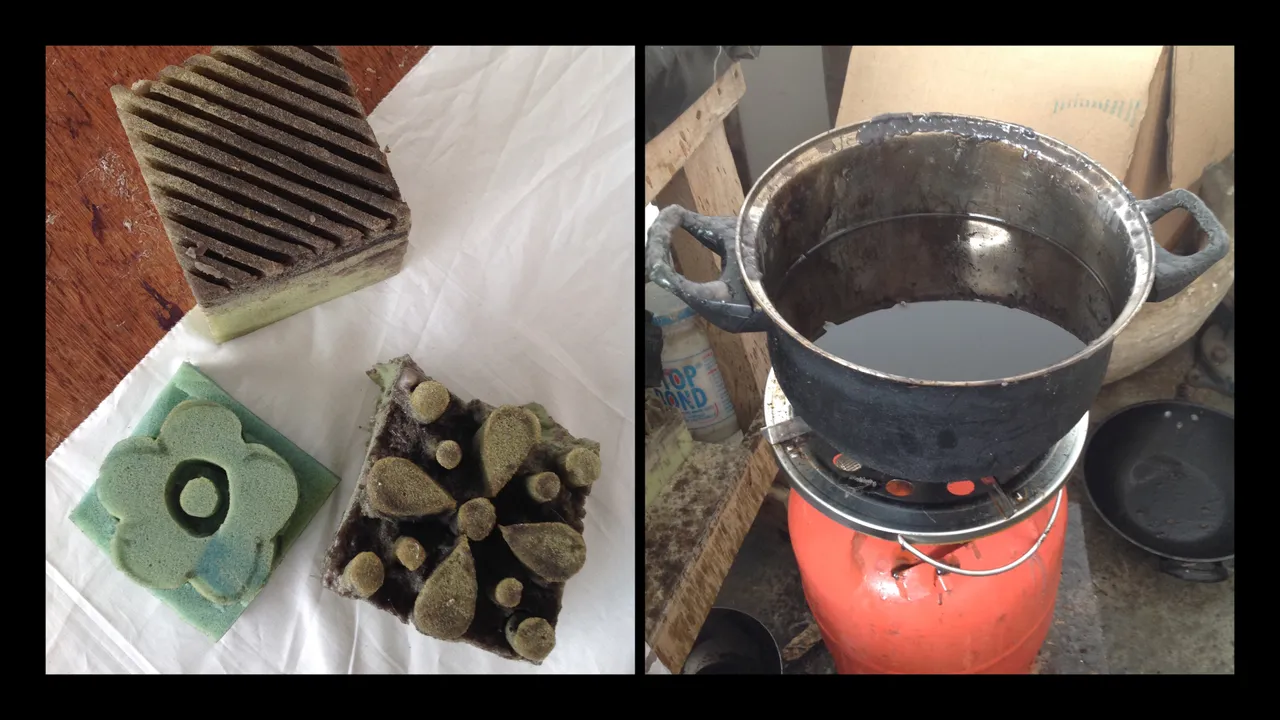
Here I practiced waxing with a diagonal stamp on a cotton linen fabric. I dyed it using three colors.
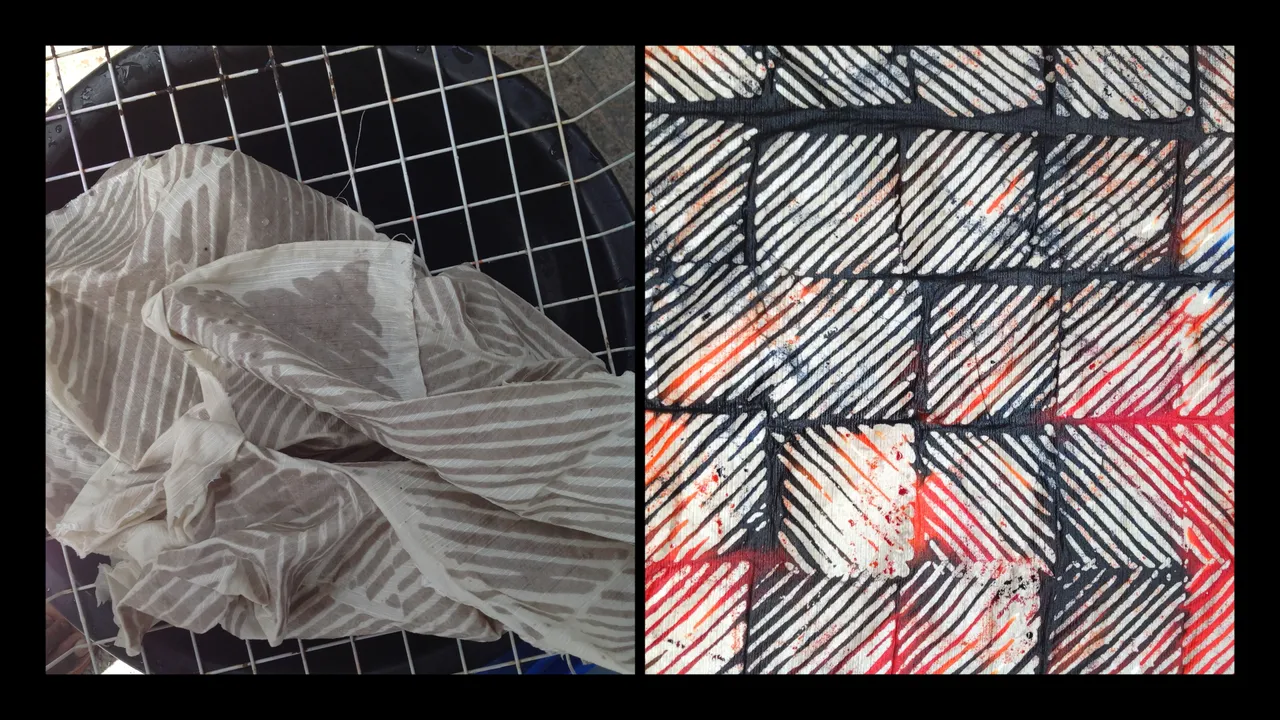
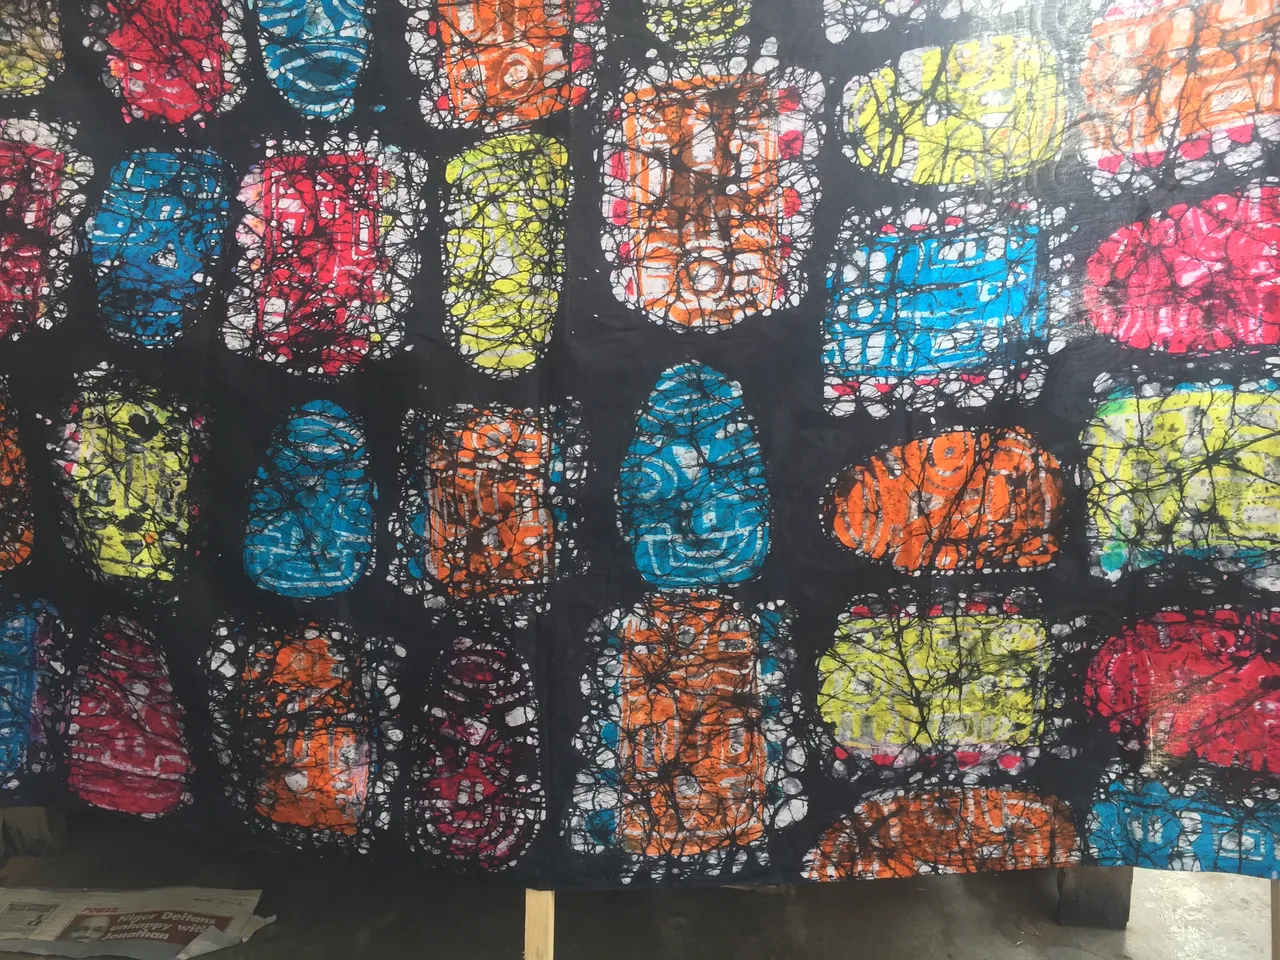
I was given 5 yards of cotton satin fabric to practice with. I made a number of mistakes but with correction and practice I improved. The areas in which the mistakes were too obvious , it was waxed over. These waxed areas were to be crackled (squeezing the fabric to form cracks/interesting designs) .
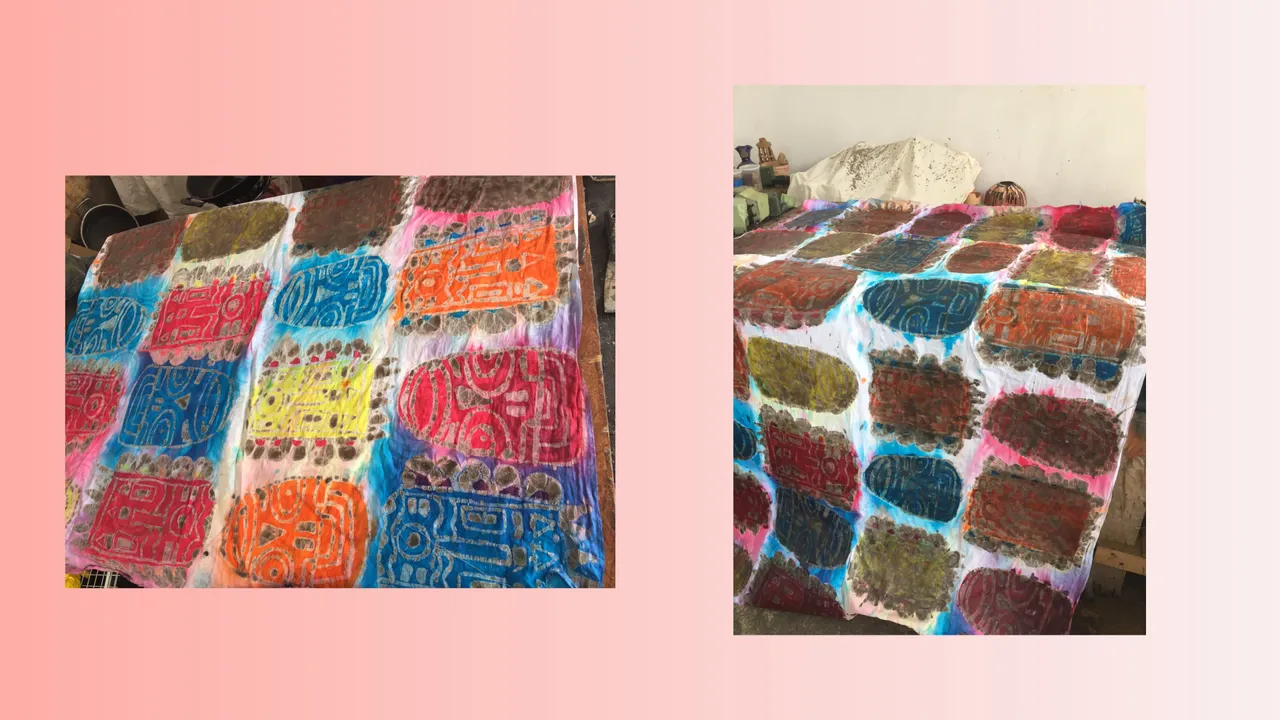
I dyed the fabric using many colors. After the dyeing process, I waxed some areas again and dipped the fabric in a black dye.
This is my favorite part of the fabric : )
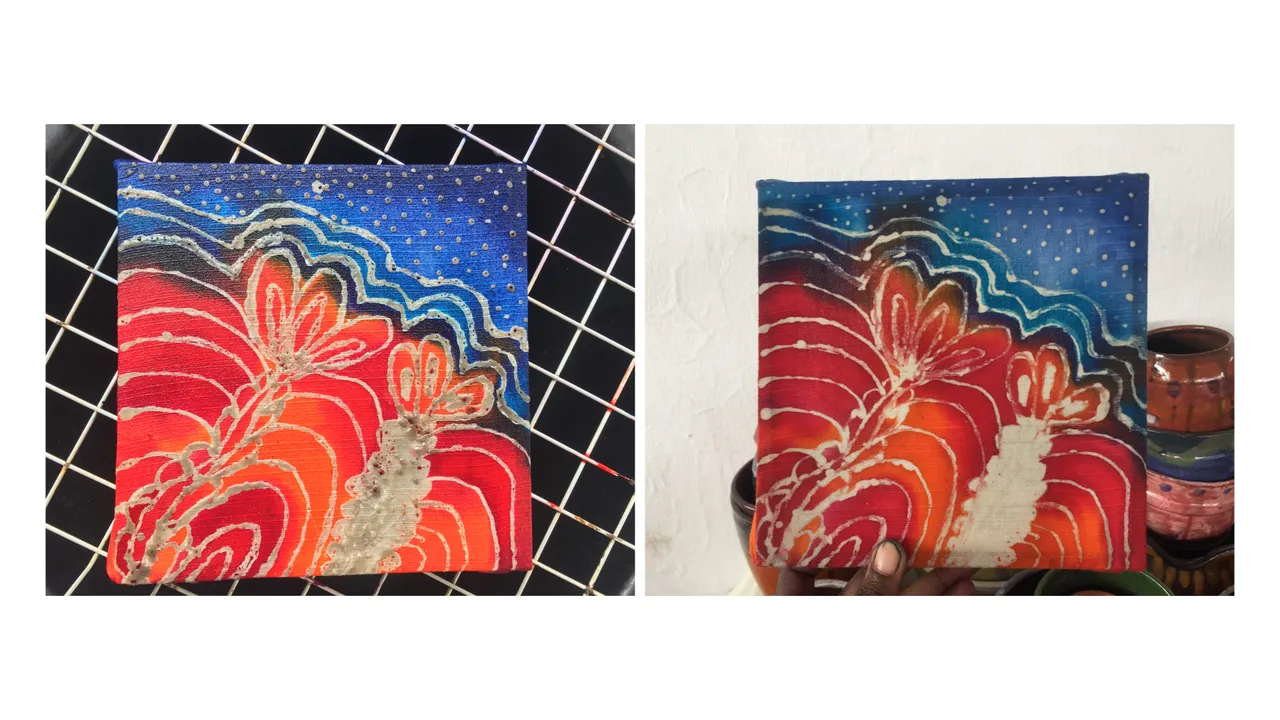
Next, I got inspired by a book on batik that I was given to read. The idea was similar to the mask design. But this time around, the lines would be more intricate. I made use of a tjanting tool. I drew with wax on a small canvas then I applied the dye to specific areas with a brush.
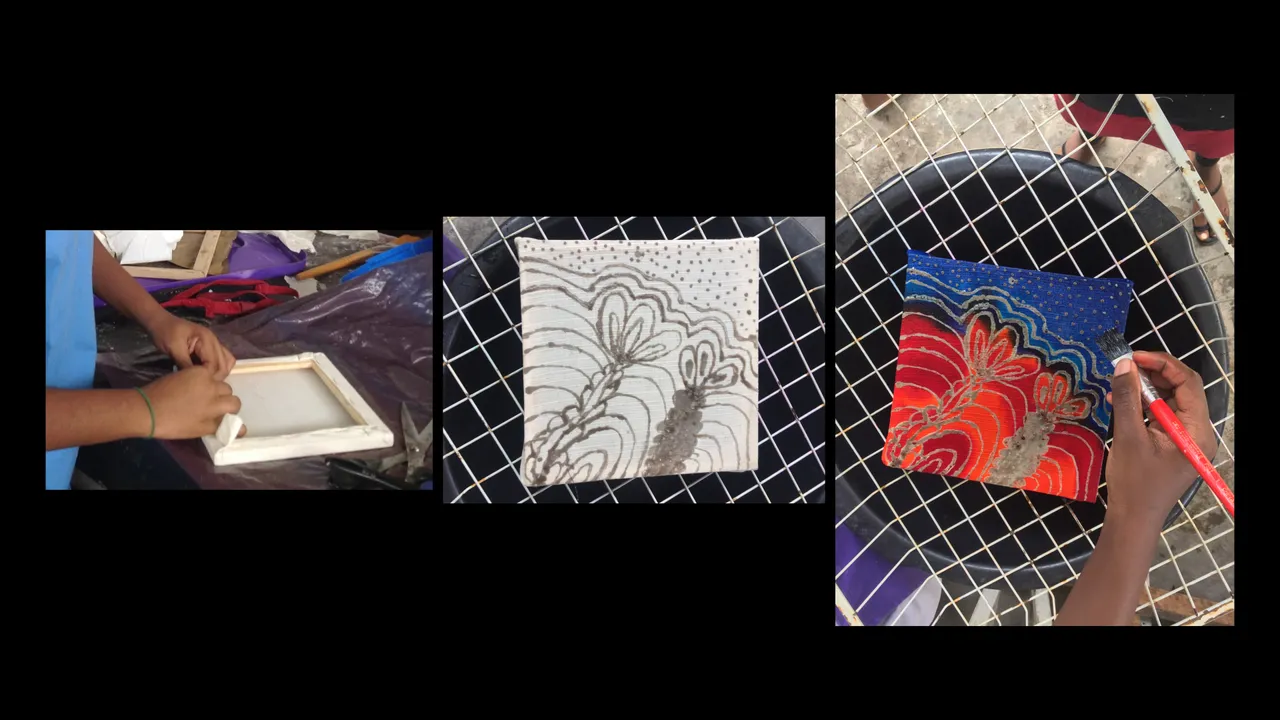
I rinsed off the dye and dewaxed the fabric. One issue I noticed was how light the colors turned out. The reason being that the dyes were not made to my country’s weather condition. It was a cold water dye imported from America. The dyes popularly used here are hot water dyes( Vat dye). In order to retain the bright colors for subsequent designs, the dyed fabrics are kept in a cool area and sheltered away from the sun.
It’s really really hot here, even right now, even though it’s December : (
I’ll definitely try dyeing a canvas again!
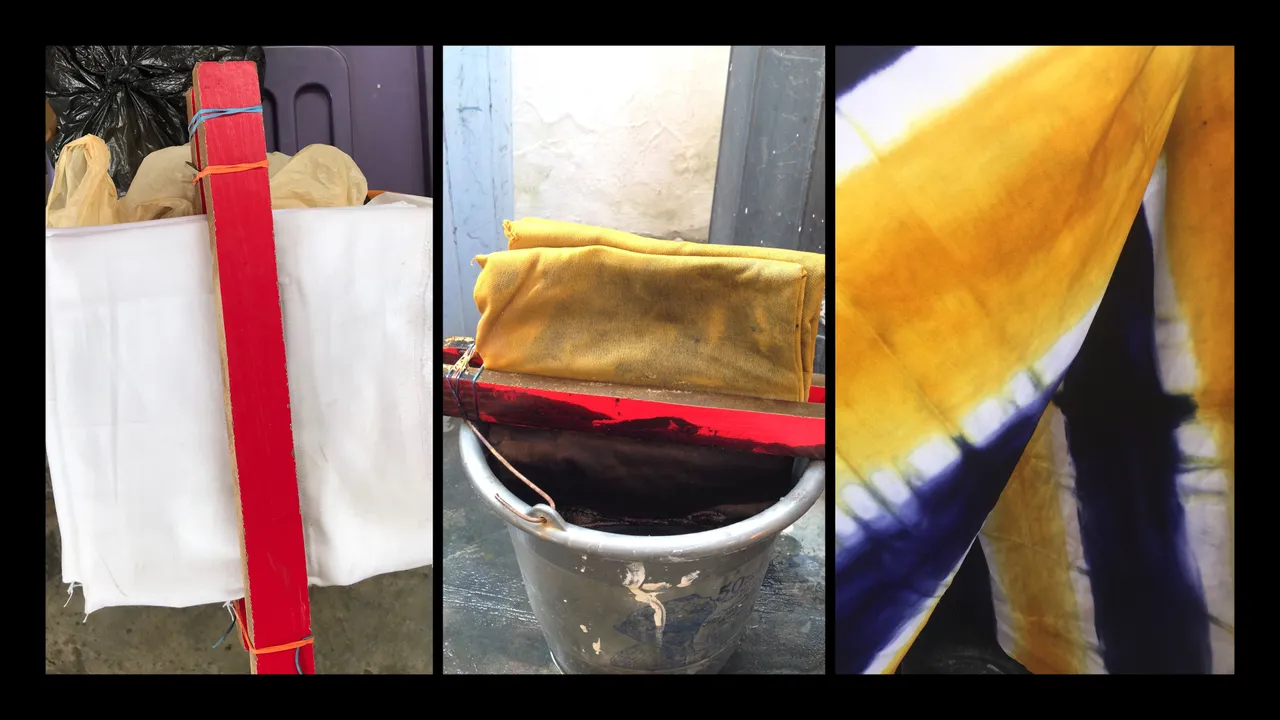
Tie-dye design
I worked on dyeing a few shirts which were tied at different areas with raffia. The tying method is know as the circular tying. Each time the fabric was dyed, it was left to sit for about 18 hrs before it was rinsed.
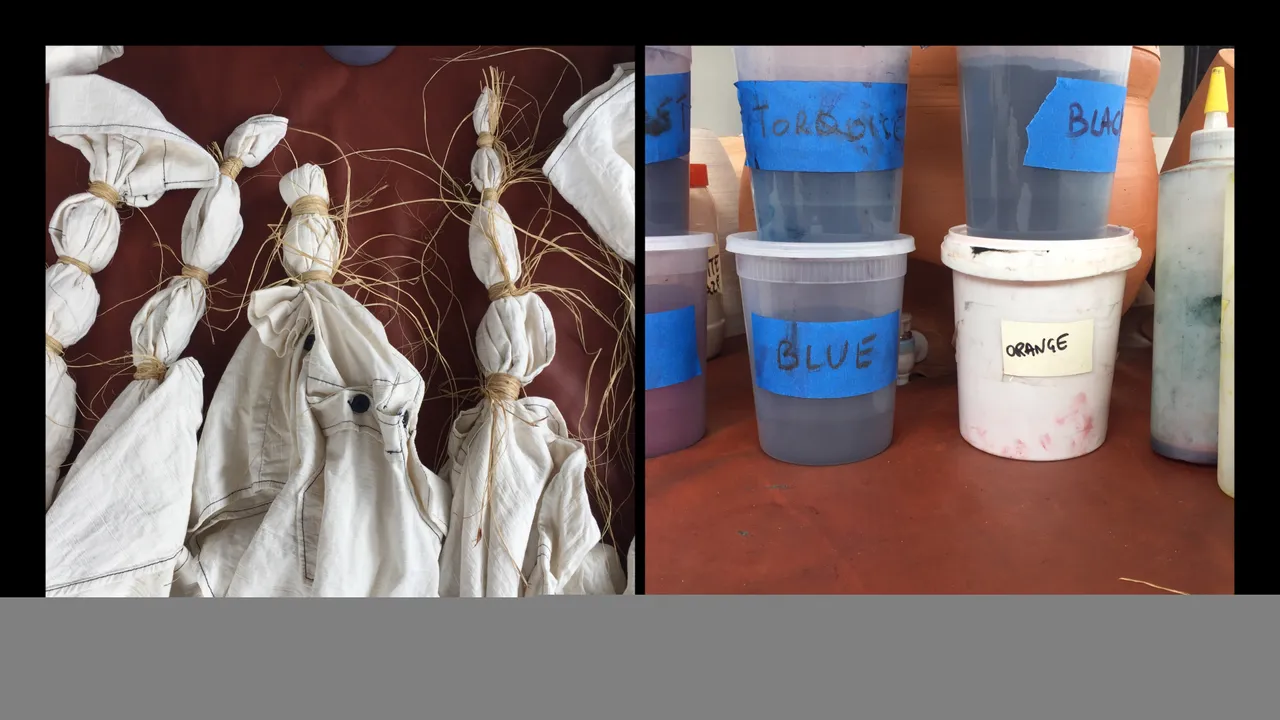
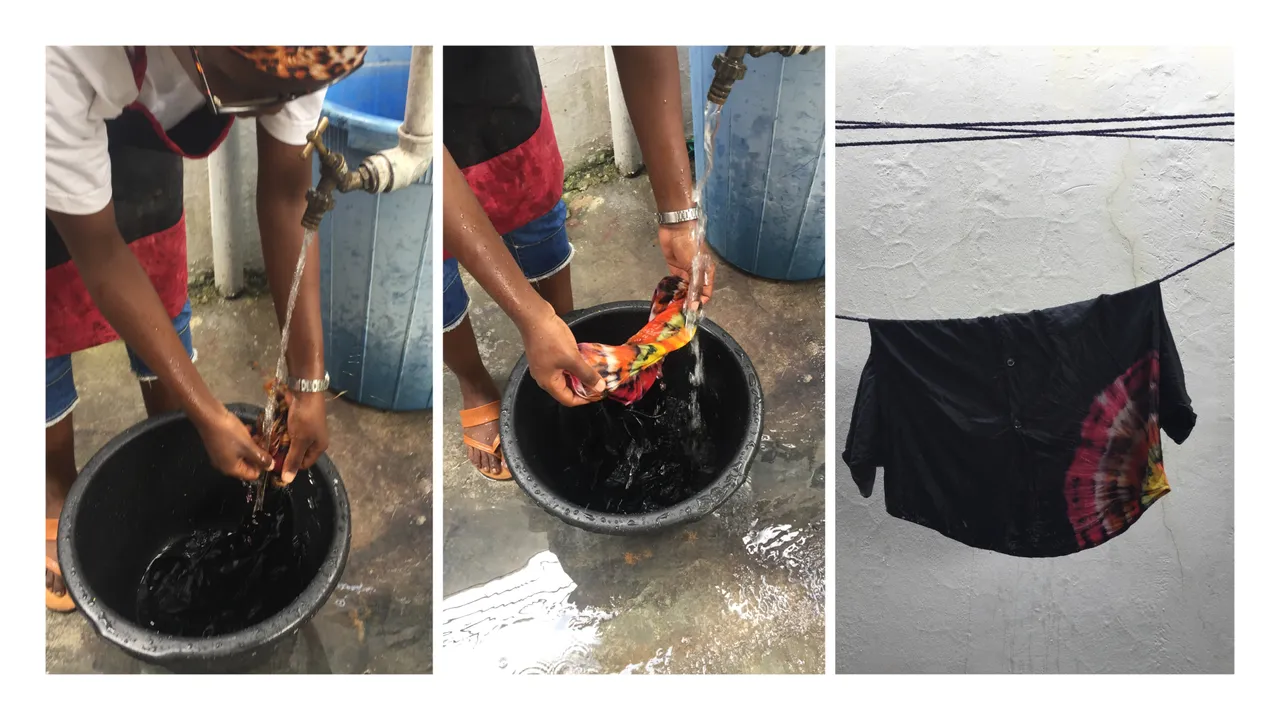
The design here is know as the ‘Wig-Wag’ but we nicknamed it the ‘Fish design’. It took trial and error before we got the results we wanted. It was either the dye was too much, or the rubber bands were too tight.
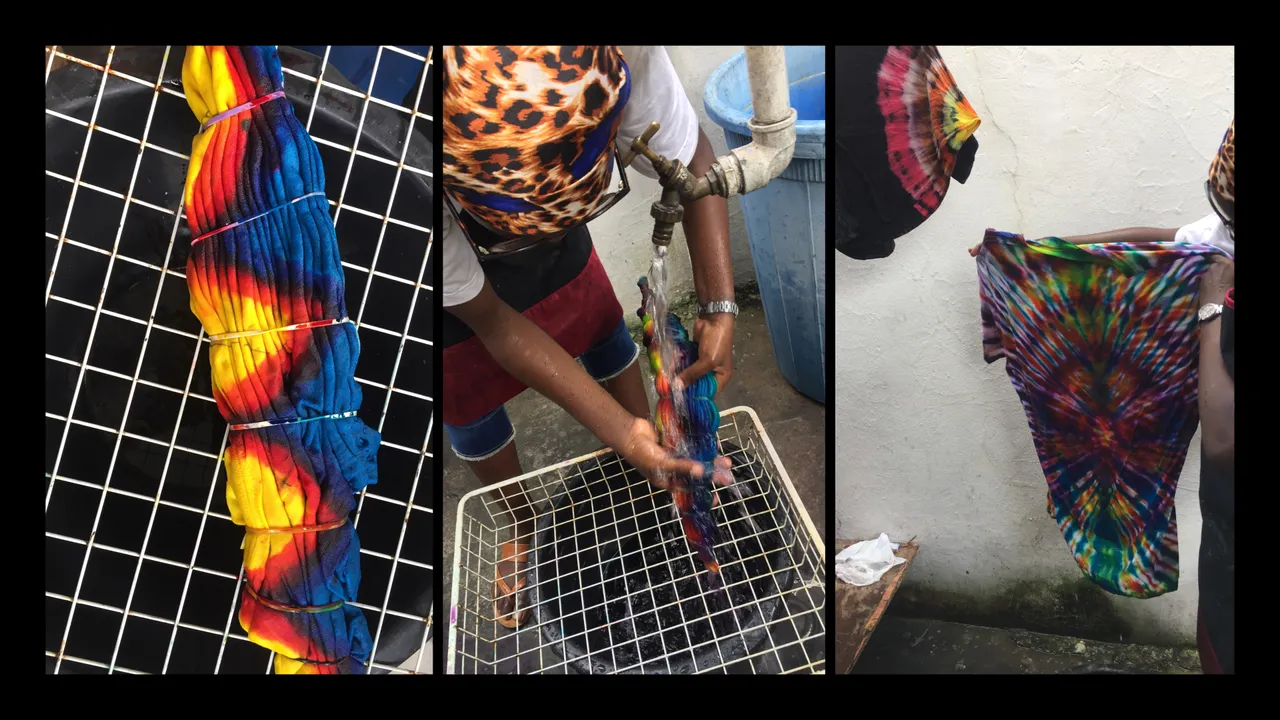
But at last, it came out right!
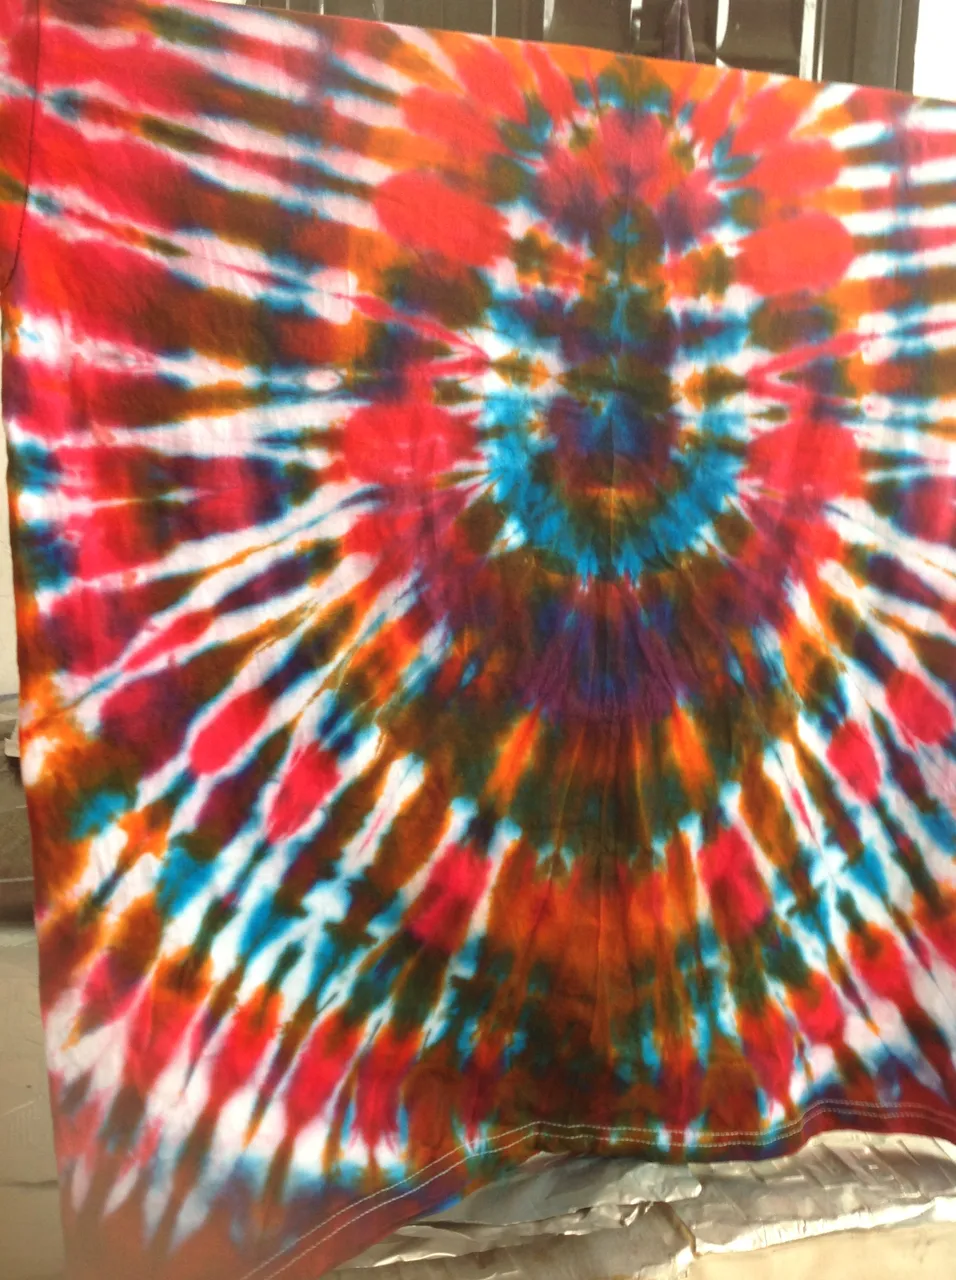
The Ending
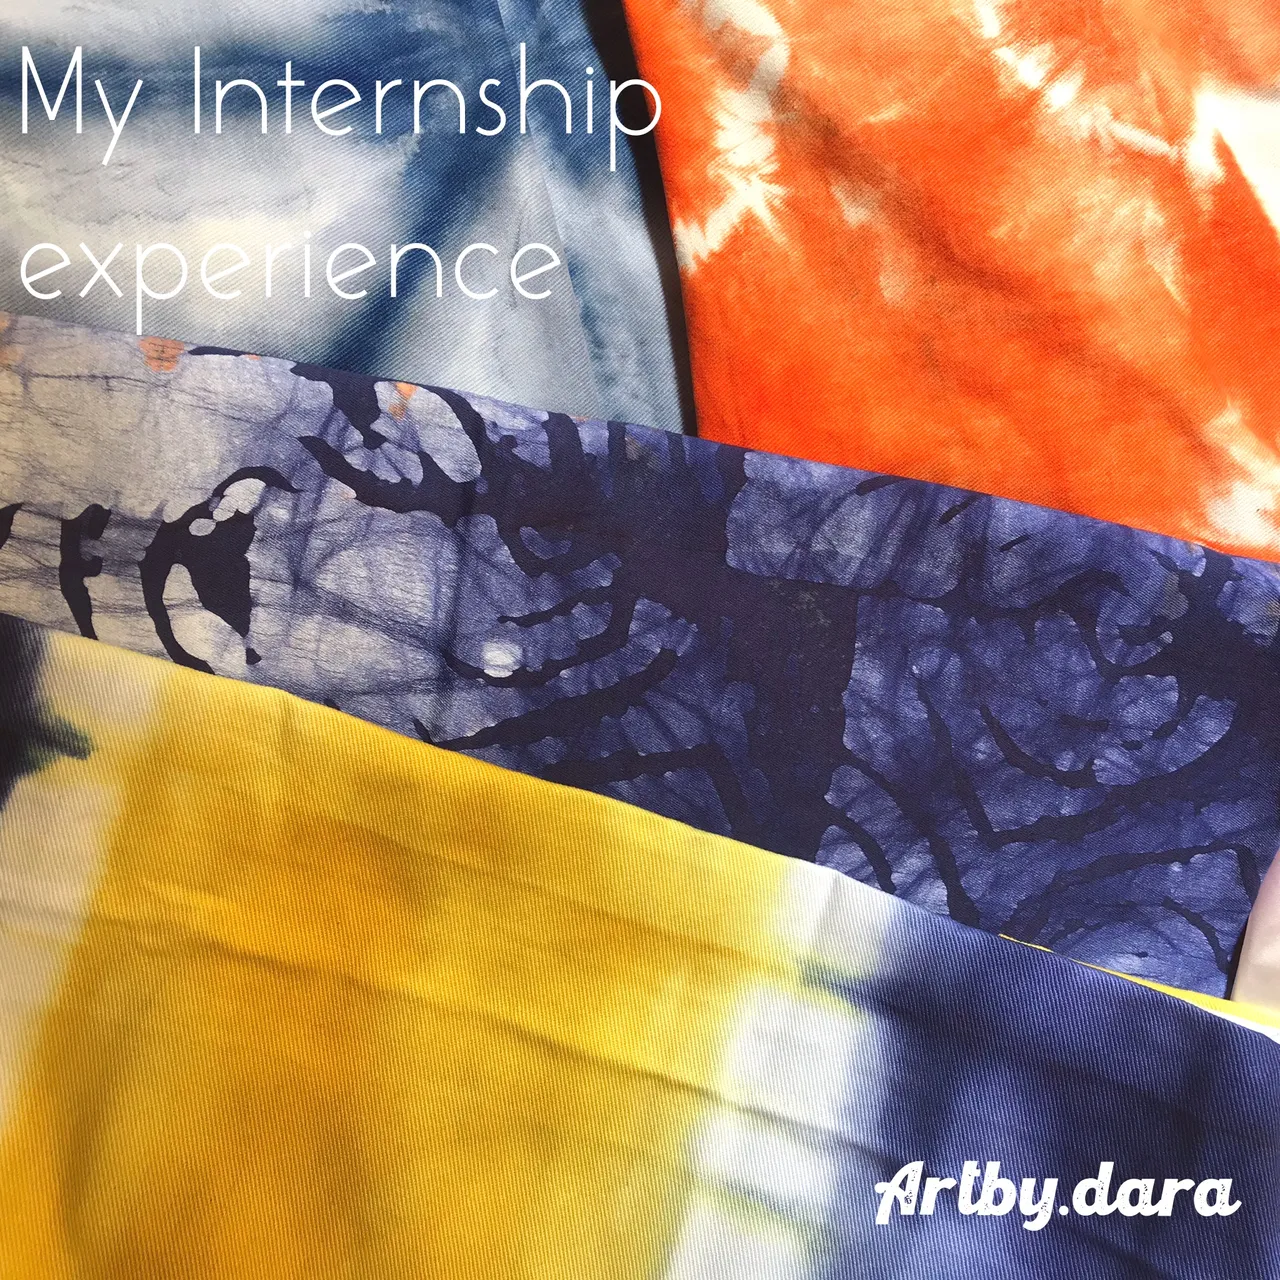
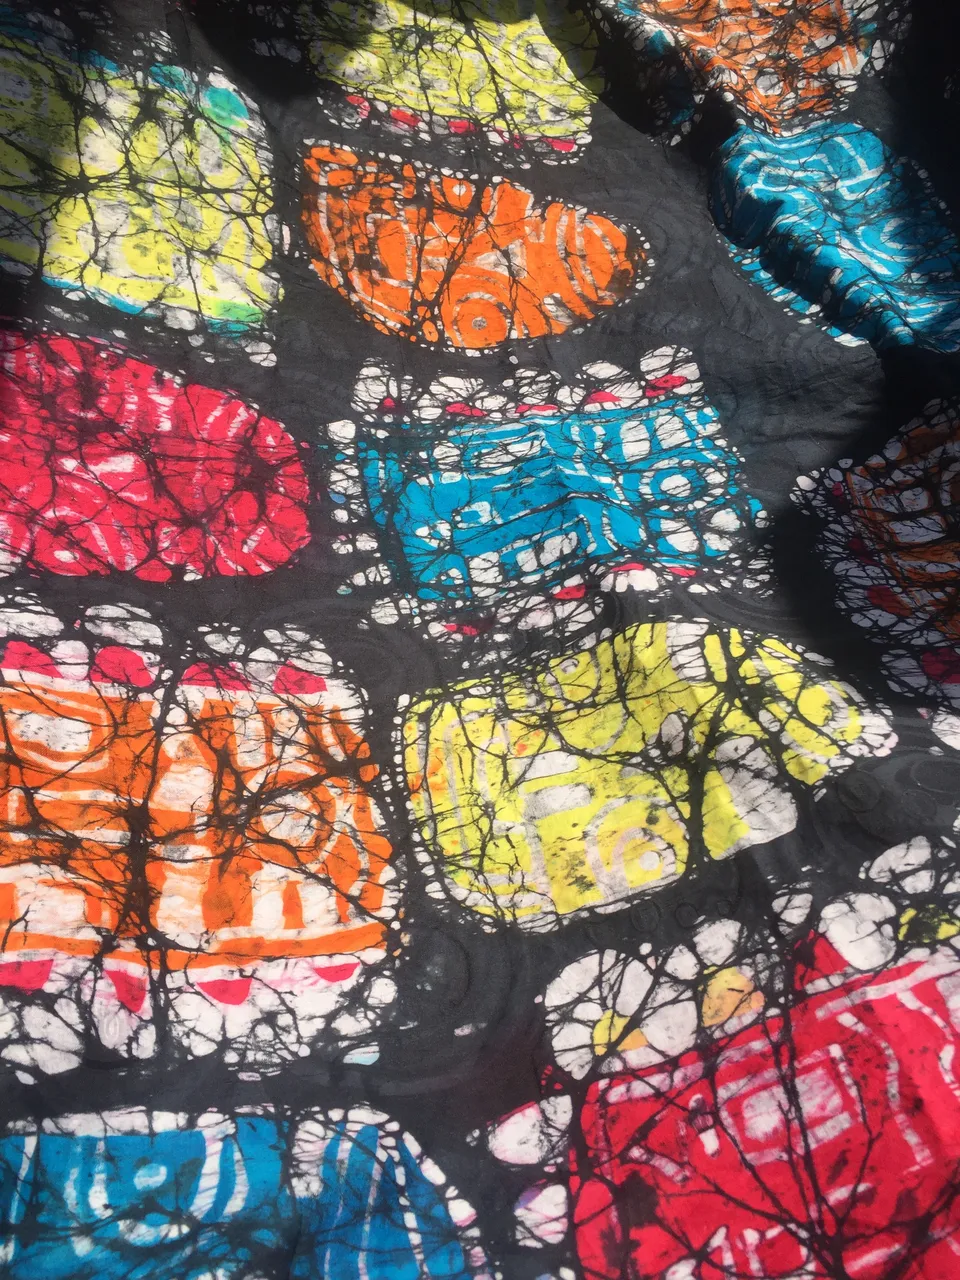
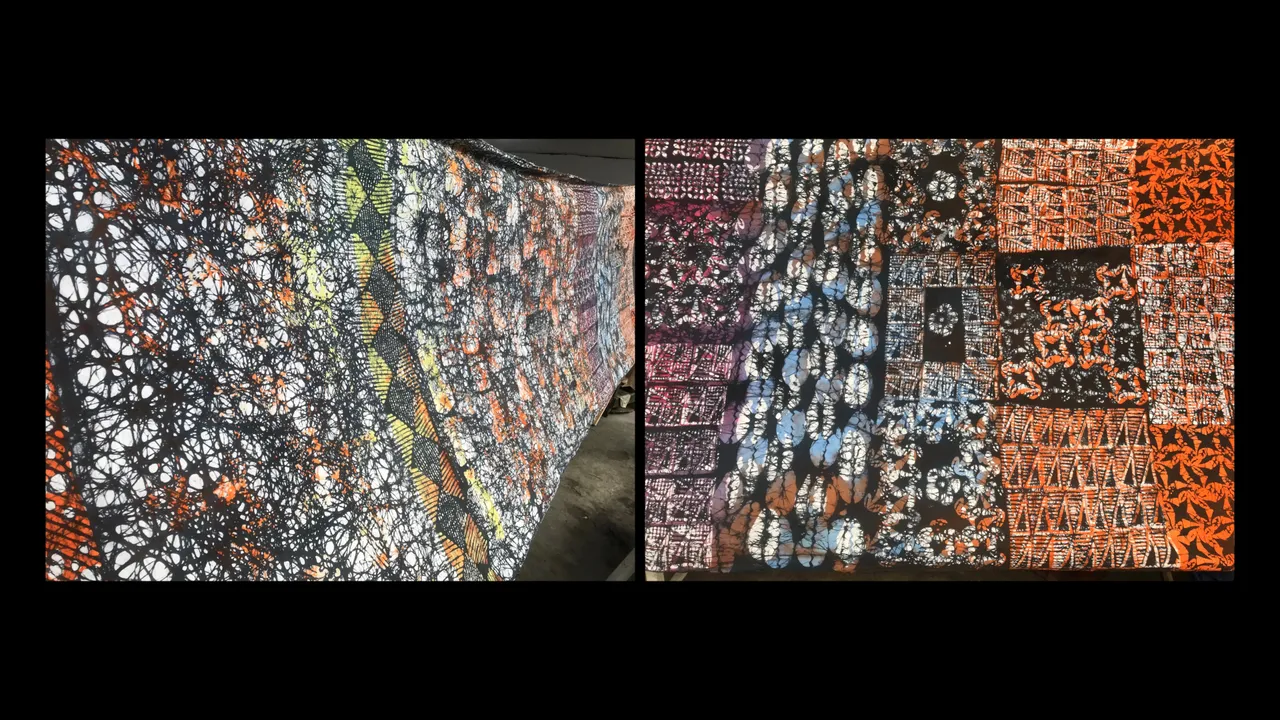
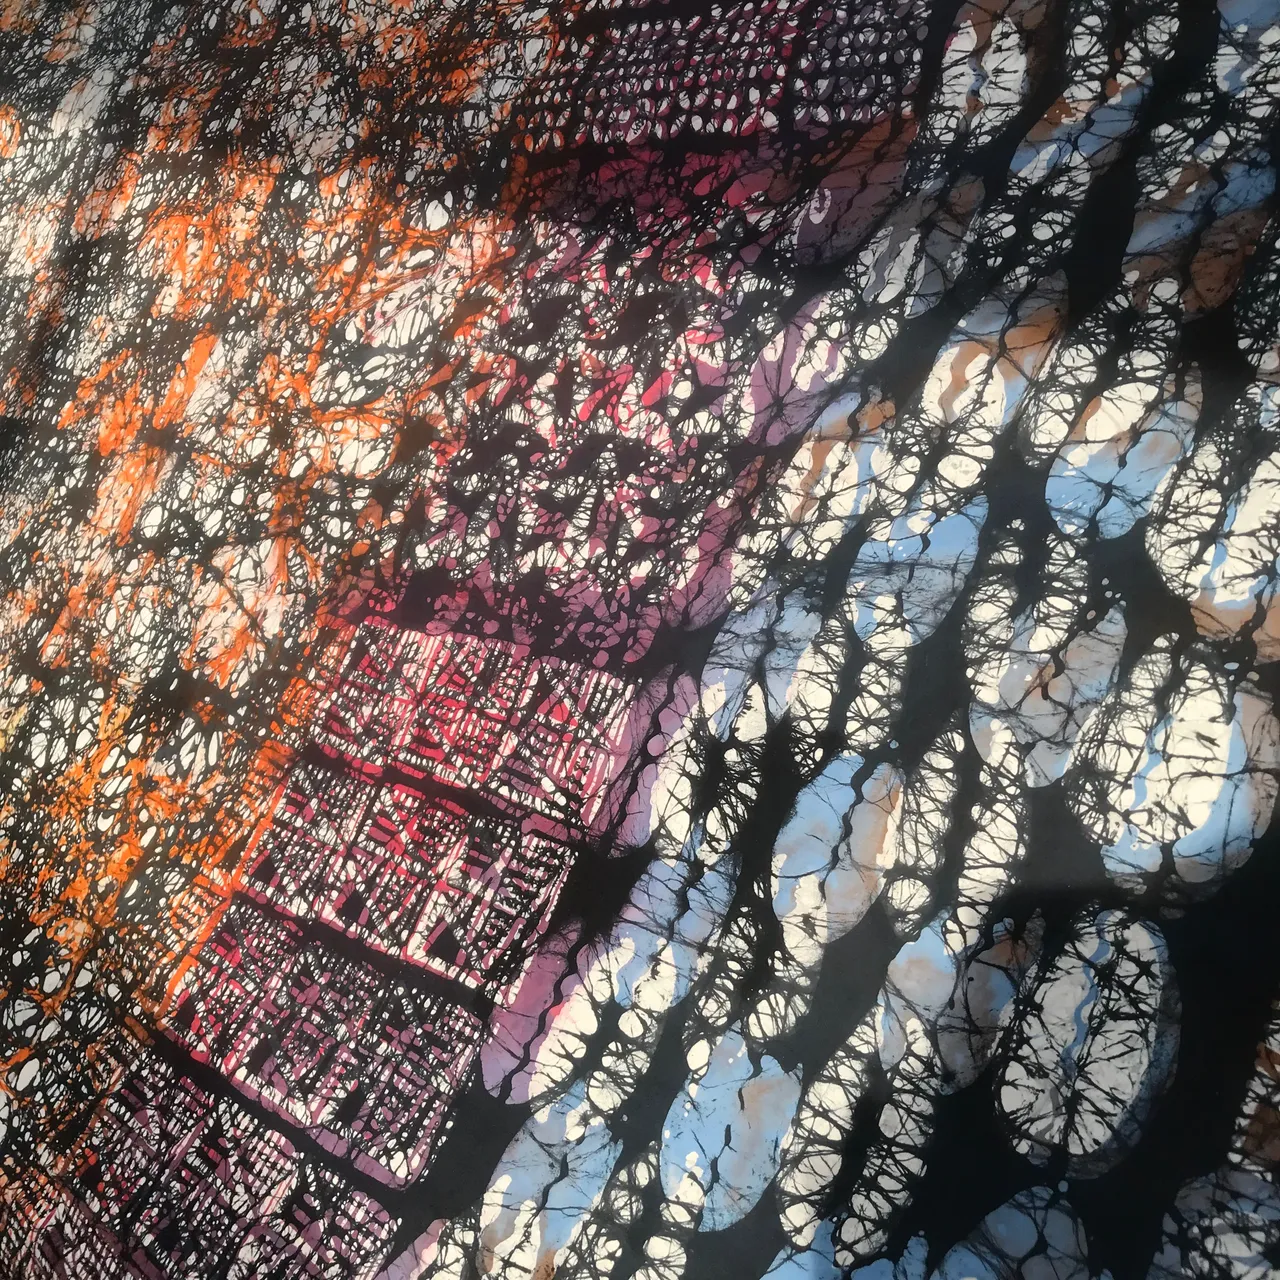
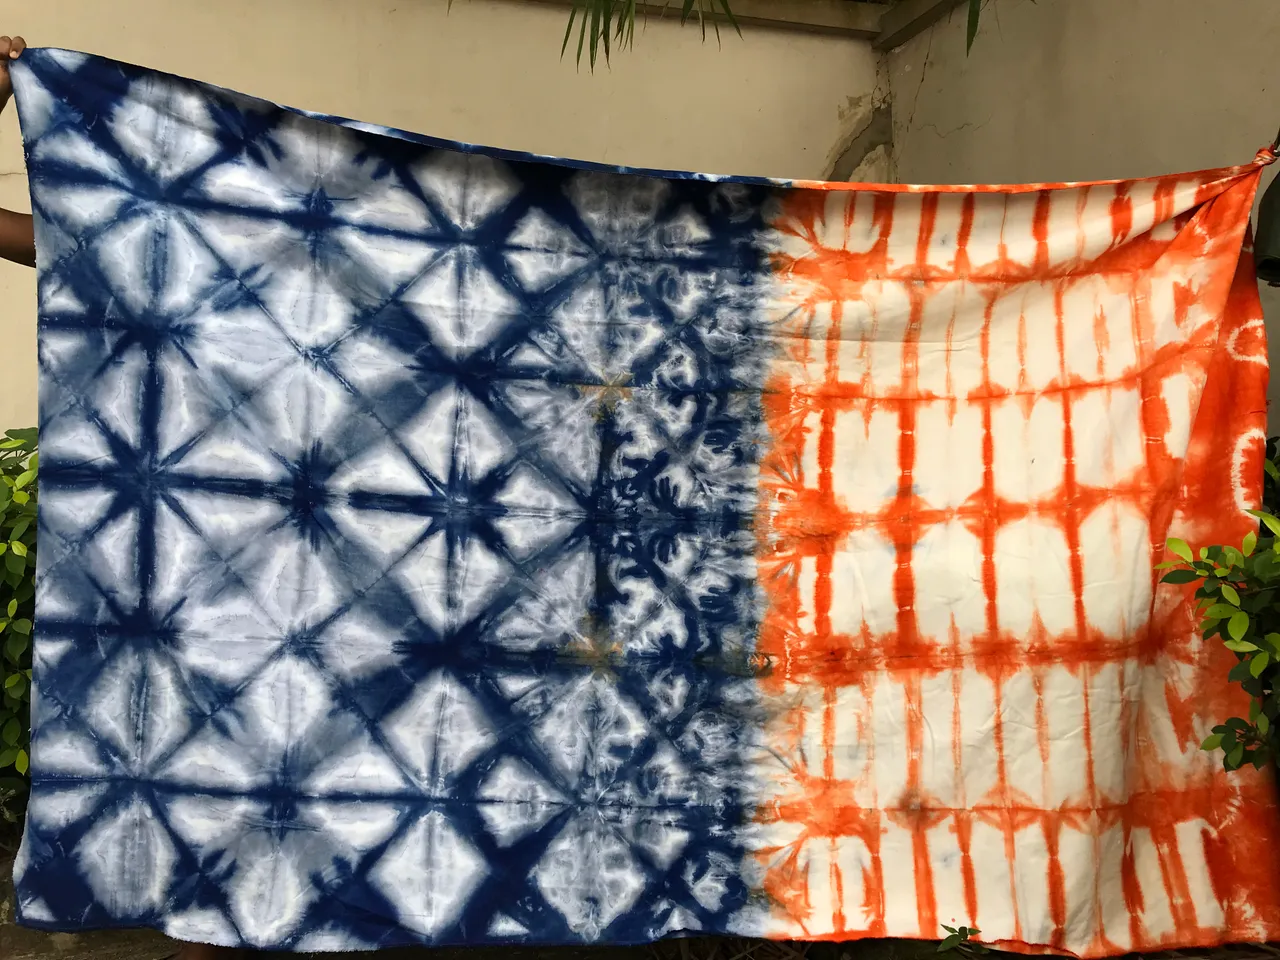
During the last few days of the internship, I began to practice on my own fabrics and also the designs I had in mind, it was like the peak of all I’d learnt during the past months. It felt good! Here’s some of the fabric I designed recently which would be up for sale at a textile trade fair this month!
There’s a whole lot more I’d like to share, but this post is already long enough as it is, I hope you enjoyed reading through my experience as an intern ; )
Thank You For Viewing!
I recently created some NFTs, check them out! : https://nftshowroom.com/artby.dara/gallery
For more art and merch : https://linktr.ee/artby.dara