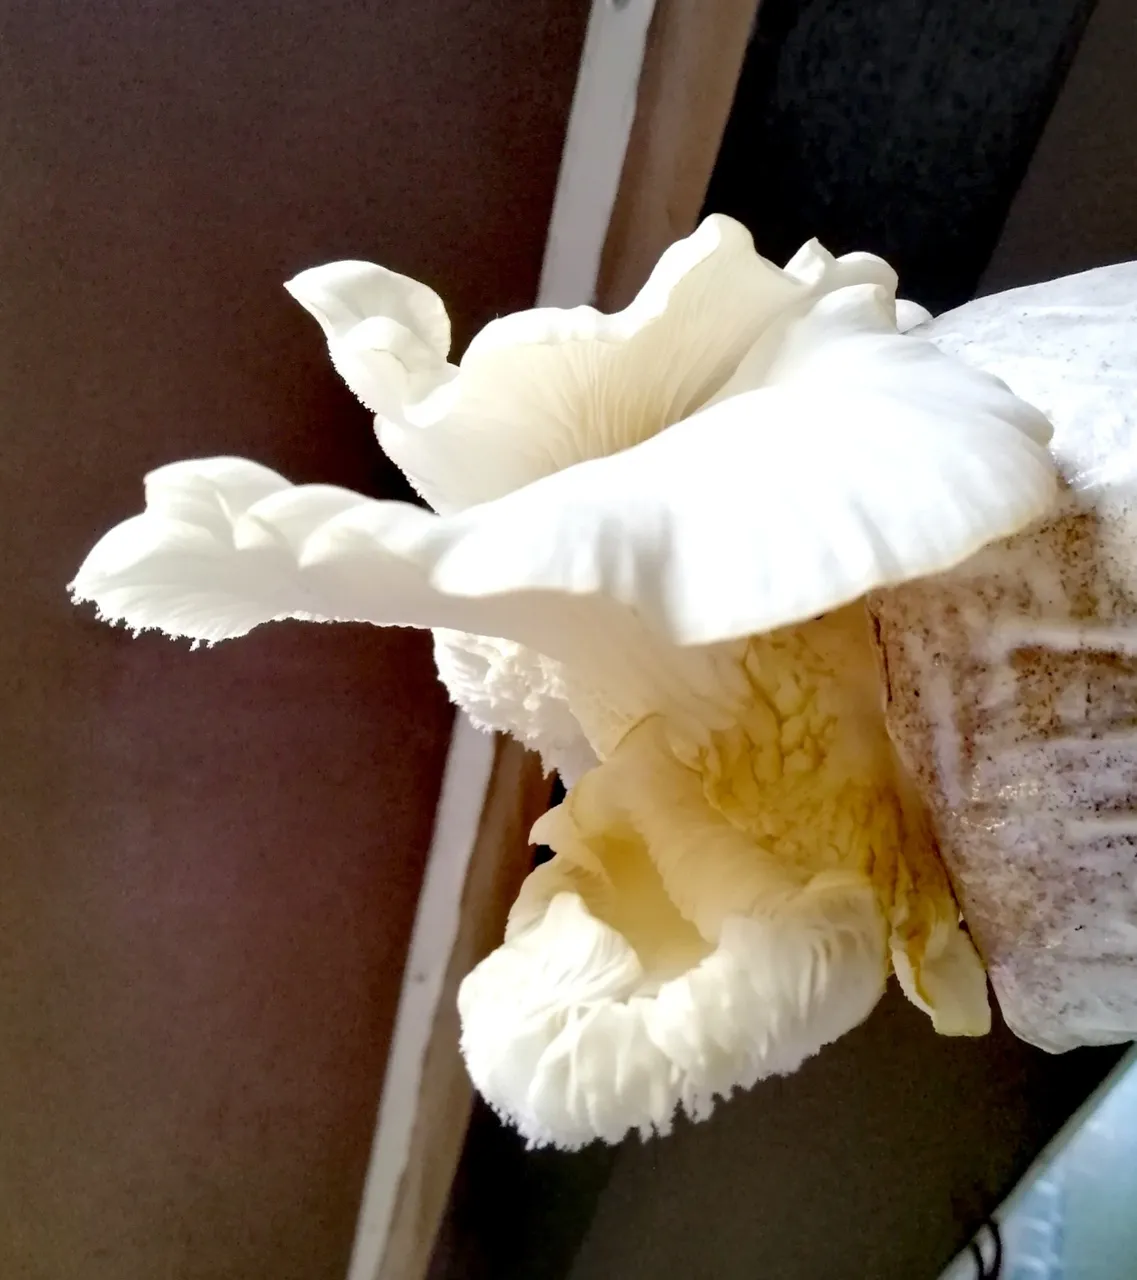
Hello Fungi lovers! On this post, I will share with you an idea on how I grow white oyster mushrooms which is an edible variety of Fungi.
Mushrooms are expensive due to scarcity of supply. In the Philippines, most of the mushrooms sold in the supermarkets are either imported or not locally grown. In our city, only a few grow and produce these mushrooms.
So why not grow your own, in the comfort of your backyard or a small space in your home. Is it possible? Yes it is!
A college friend of mine is a certified mushroom grower and trainor. She gladly shared her expertise to me and my husband. As she gives hands-on trainings but due to today's restrictions, she instead visited us in our house and gave a special training session. (She currently lives 6 hours drive away from us). But what are friends for? 😁
Here's a peek of our training session:
1. Preparation of Fruiting Bags
This is where the mushrooms grow.
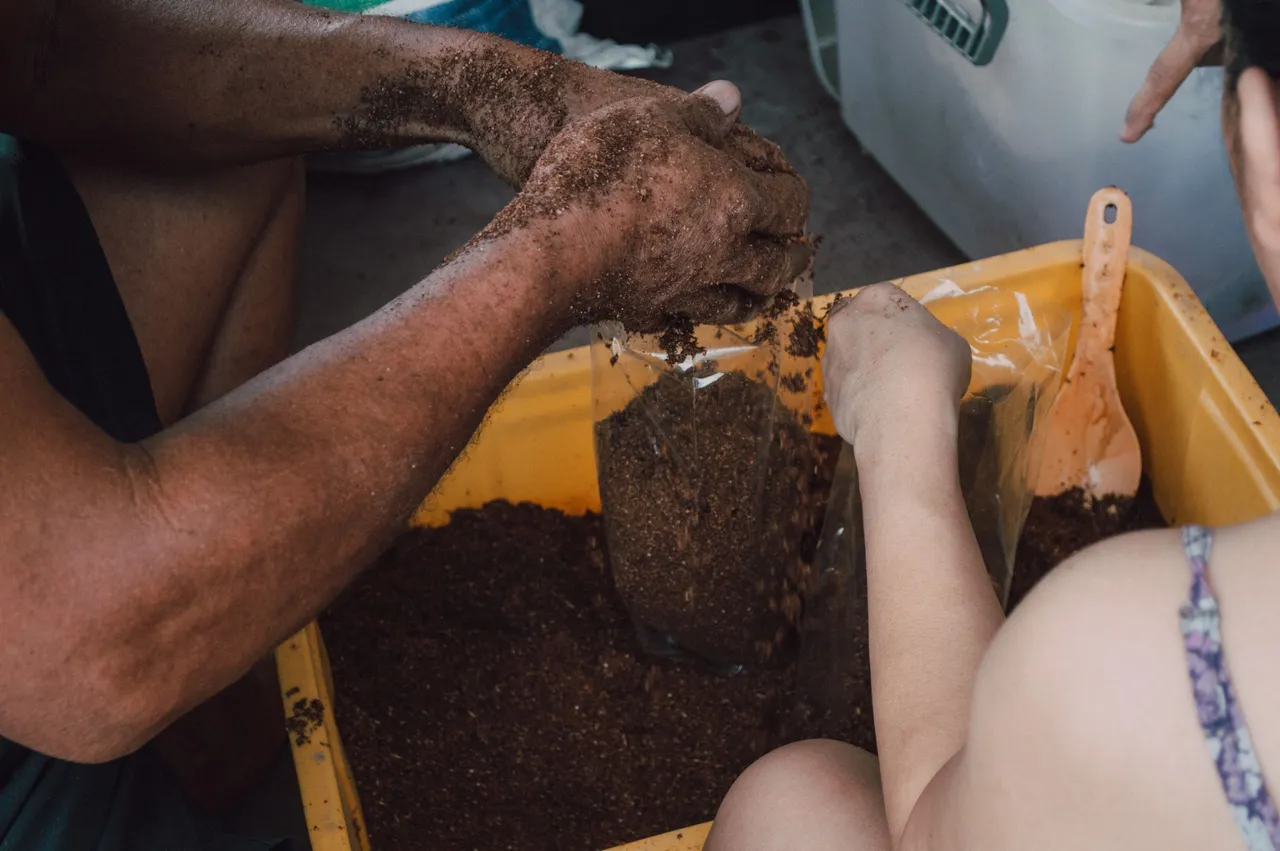
We use sawdust, as the main component, a little of molasses and lime. Mix all ingredients and add water for hydration.
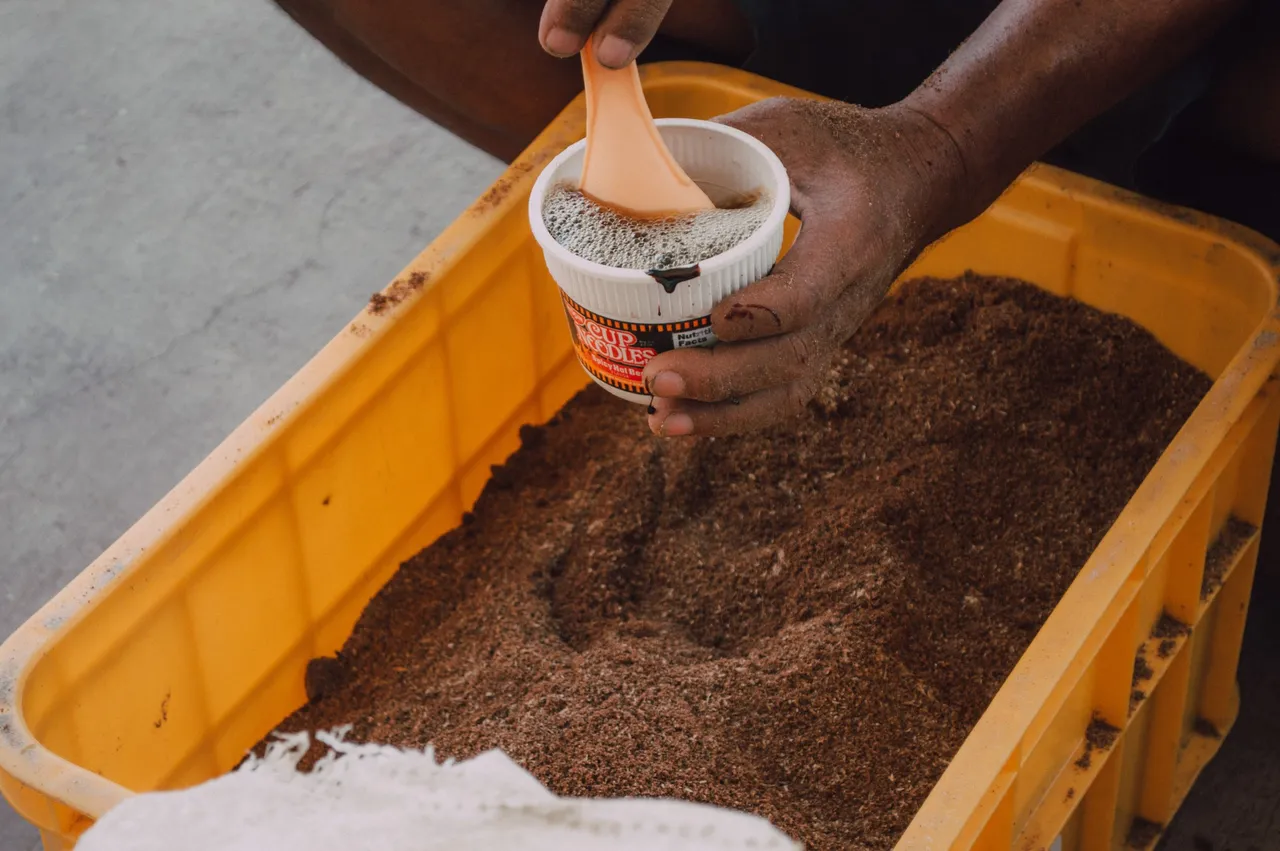
sawdust and lime
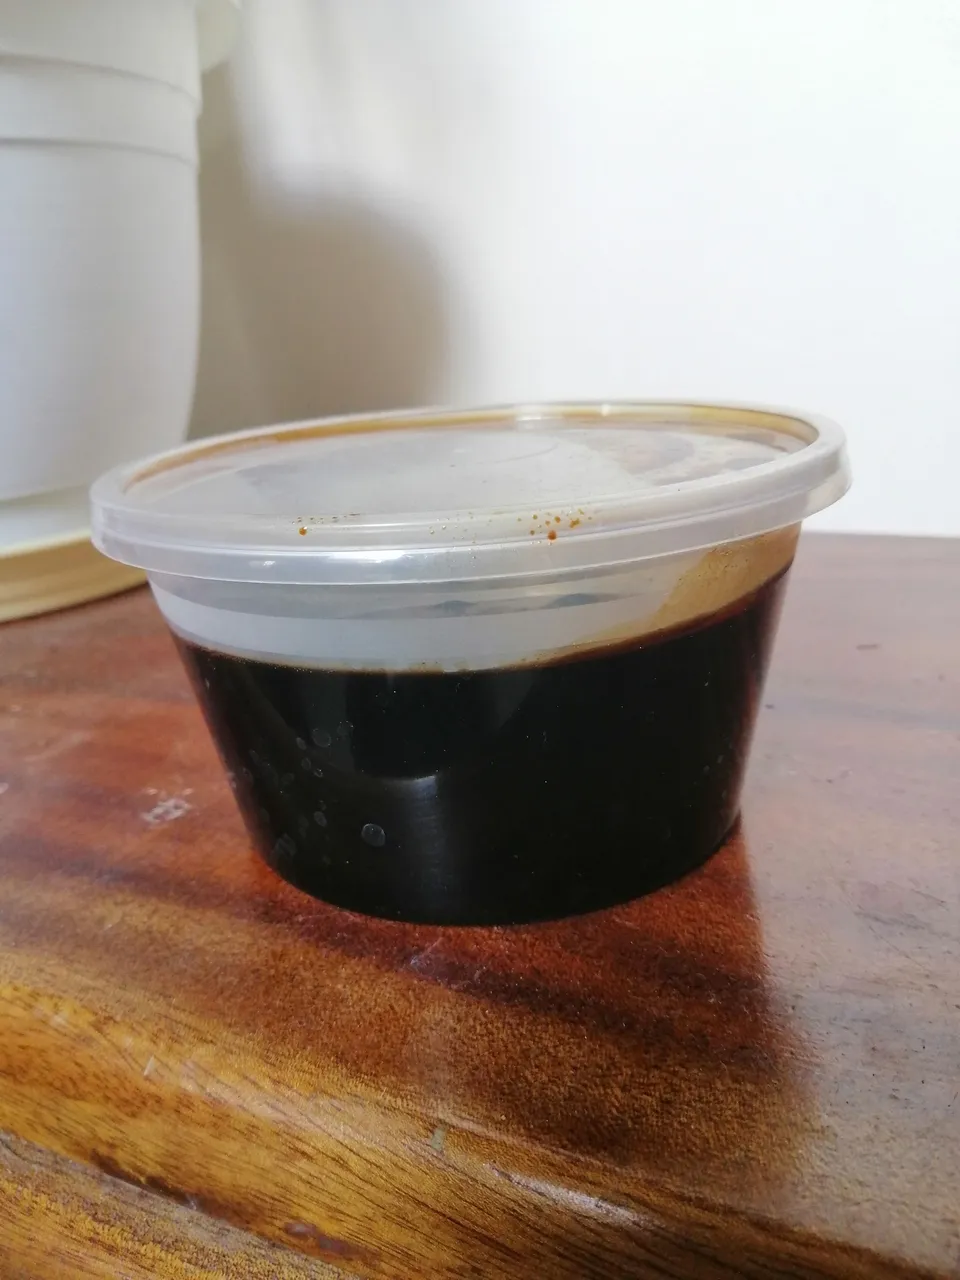
molasses
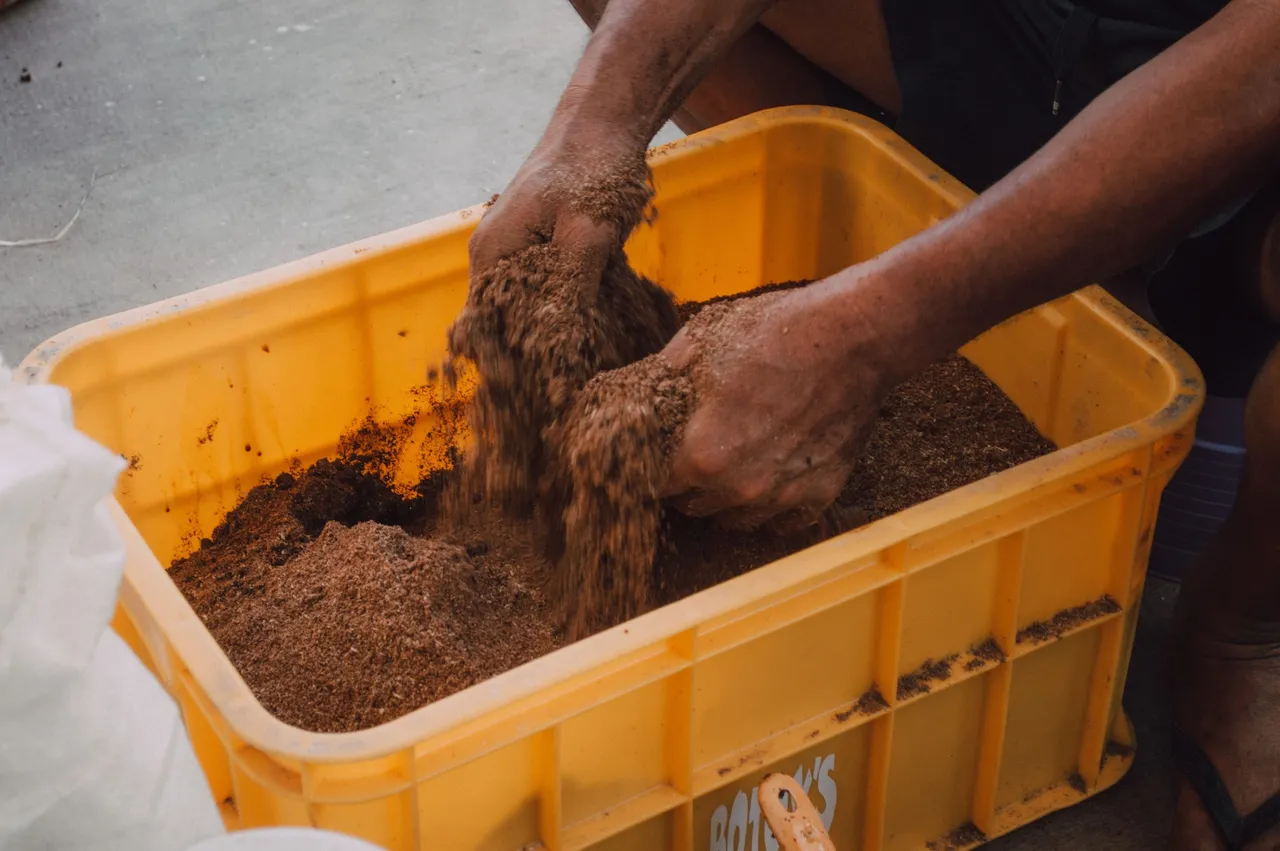
Once the ingredients are fully mixed, place them in the plastic bag, make sure it's compacted.
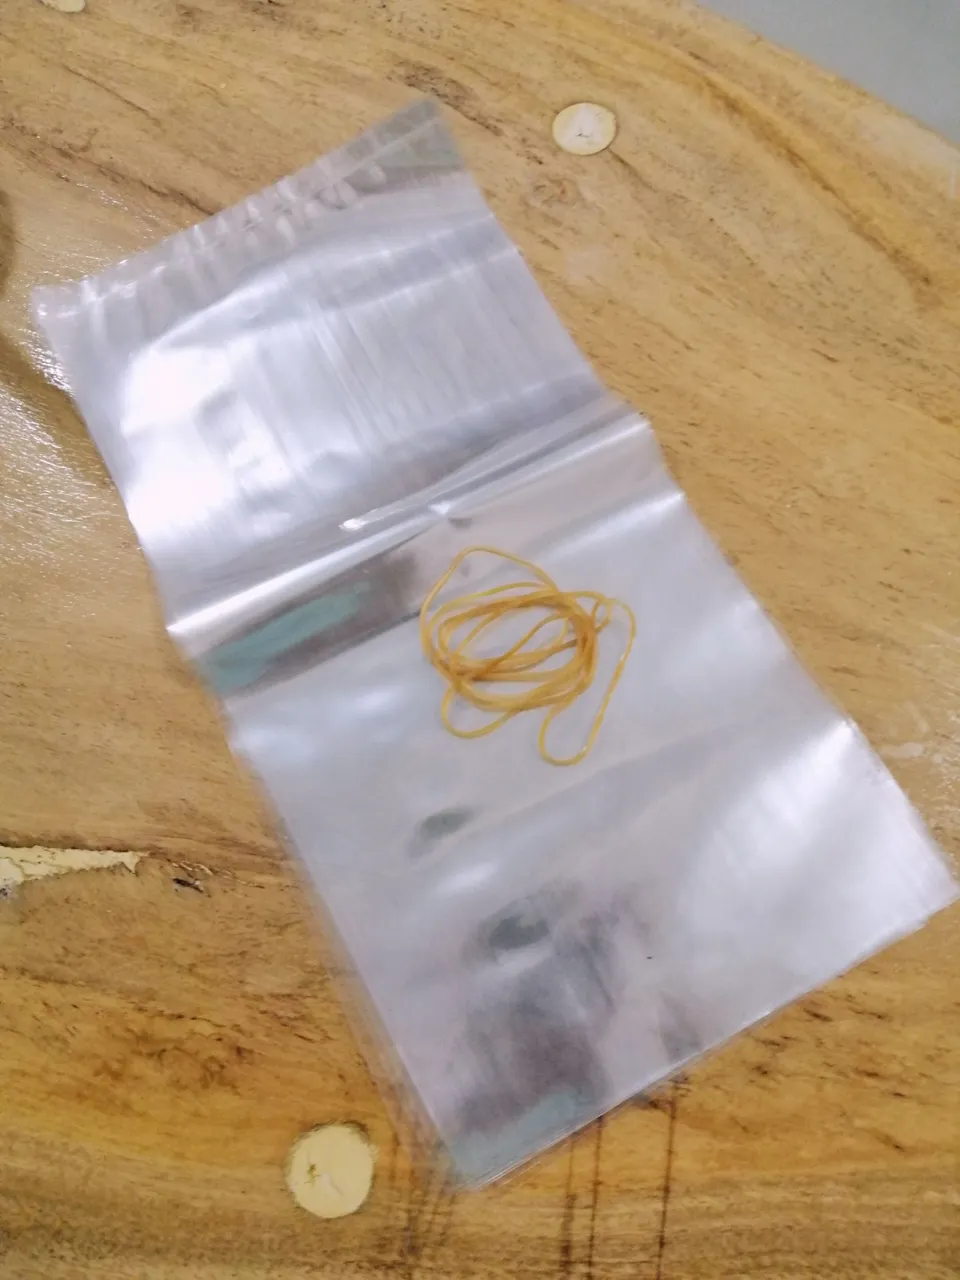
plastic bag and rubber bands
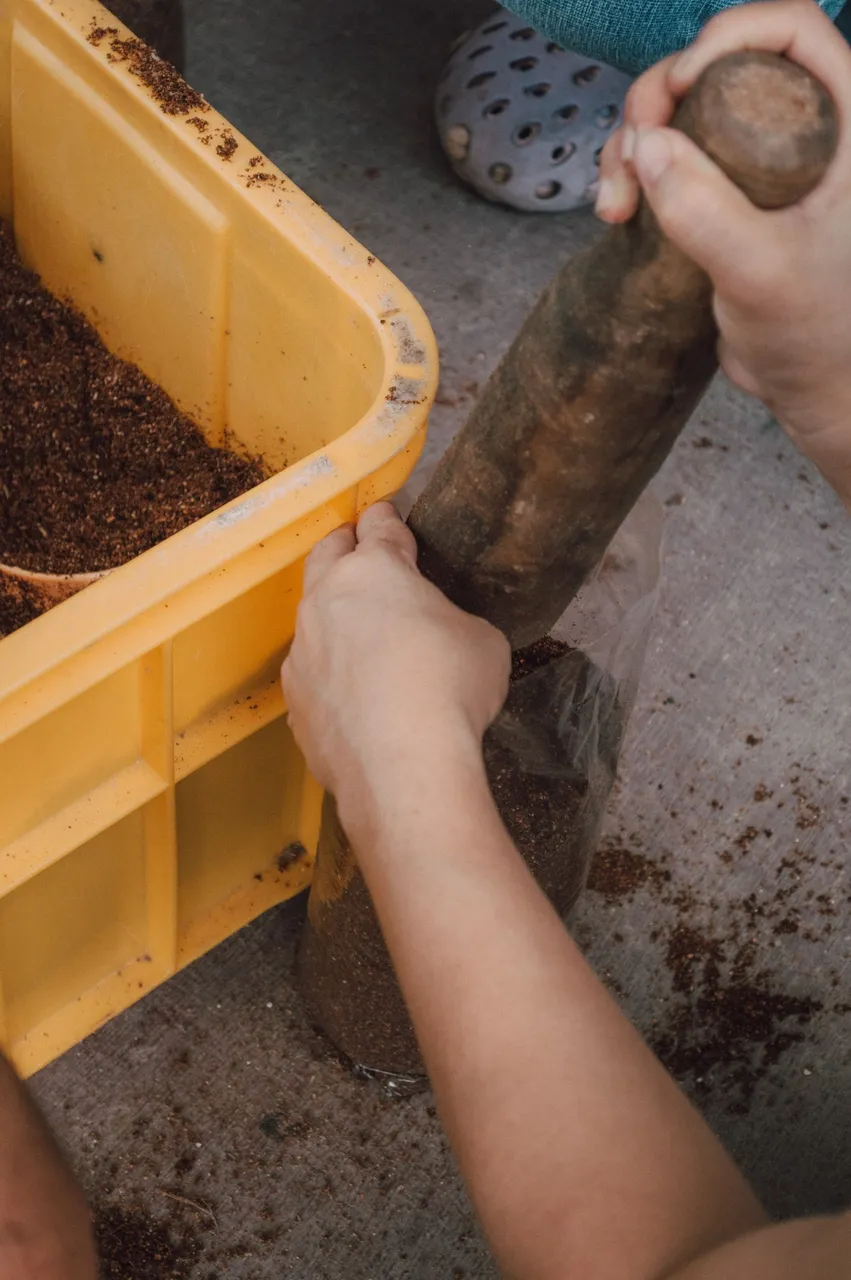
Tie the end of the plastic with rubber bands.

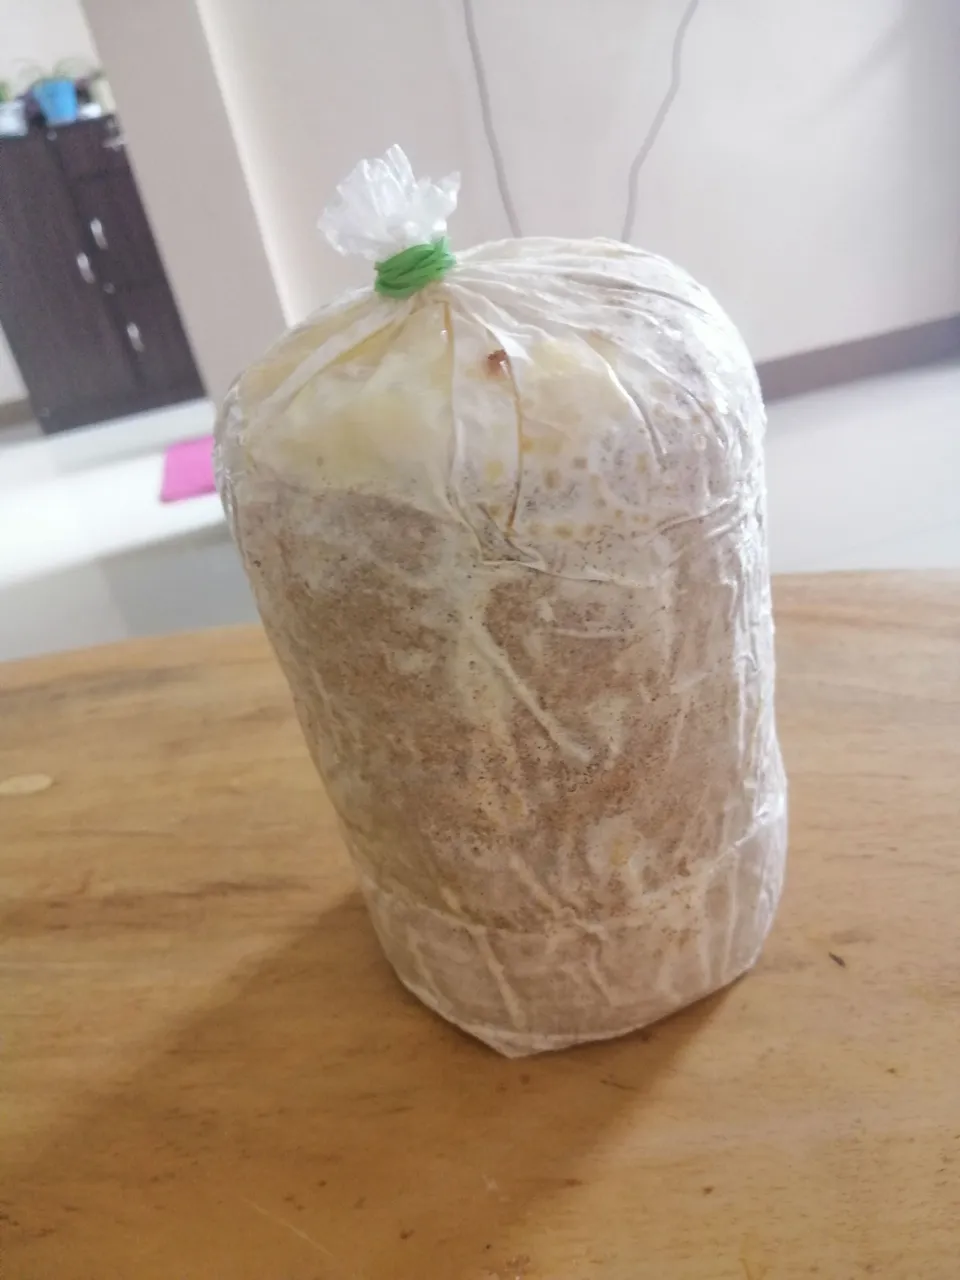
This is how a fruiting bag looks like:
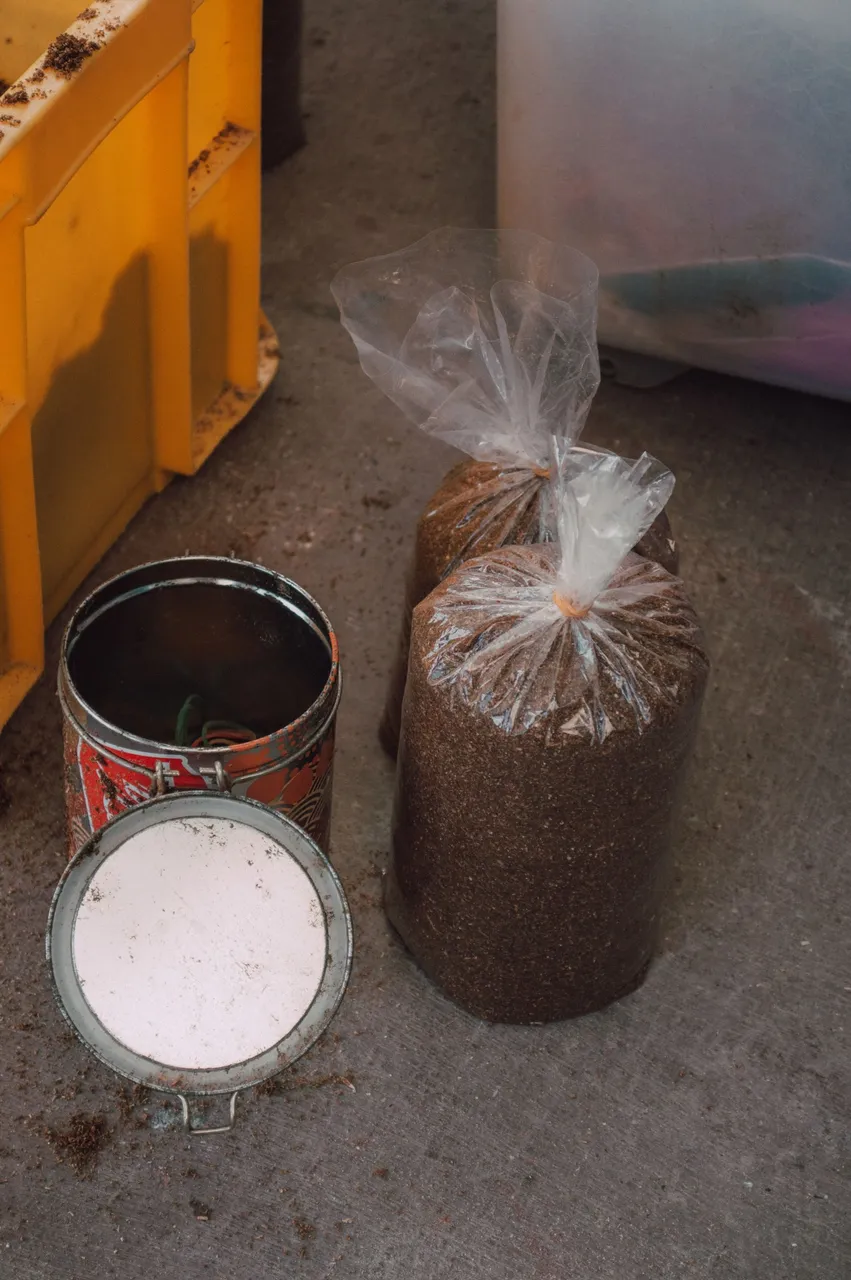
Pasteurize or sterilize the fruiting bag using large pot/metal container with water in medium heat for 8 hours.
Cool the pasteurized bag for 2 days.
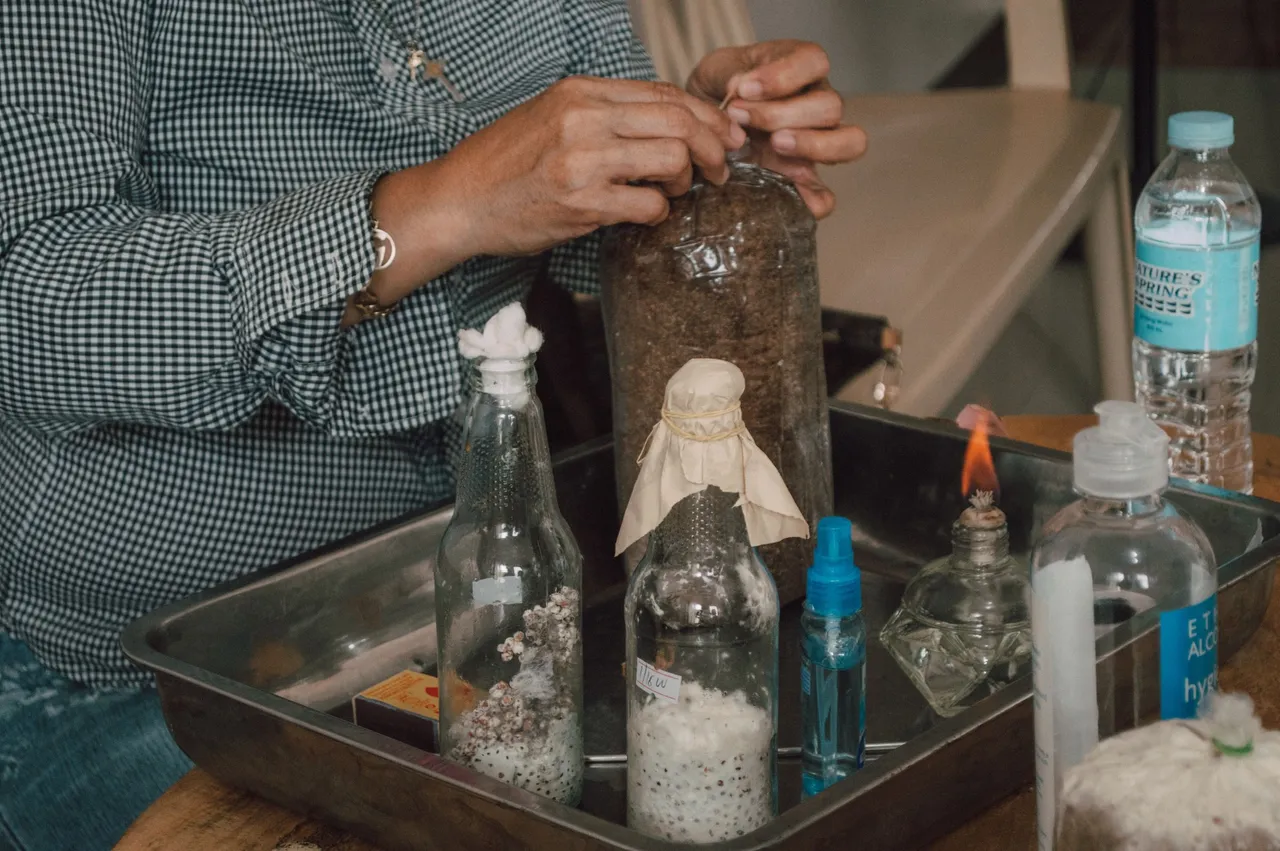
2. Preparation of Spawn
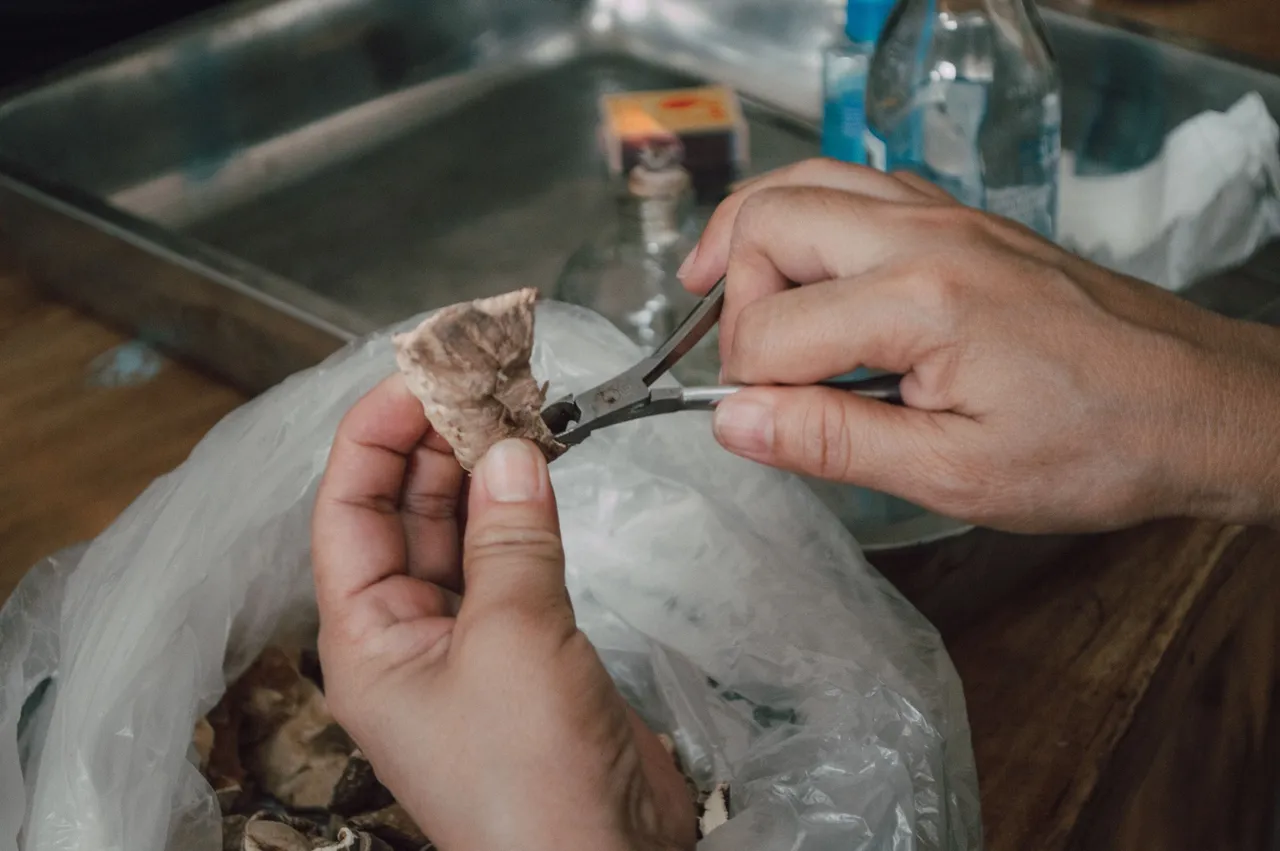
Spawns are the living fungus or the seedlings that will soon become the mushrooms. Materials used is sorghum seeds and tissue from a fresh Mushroom. It is also called tissue culture.
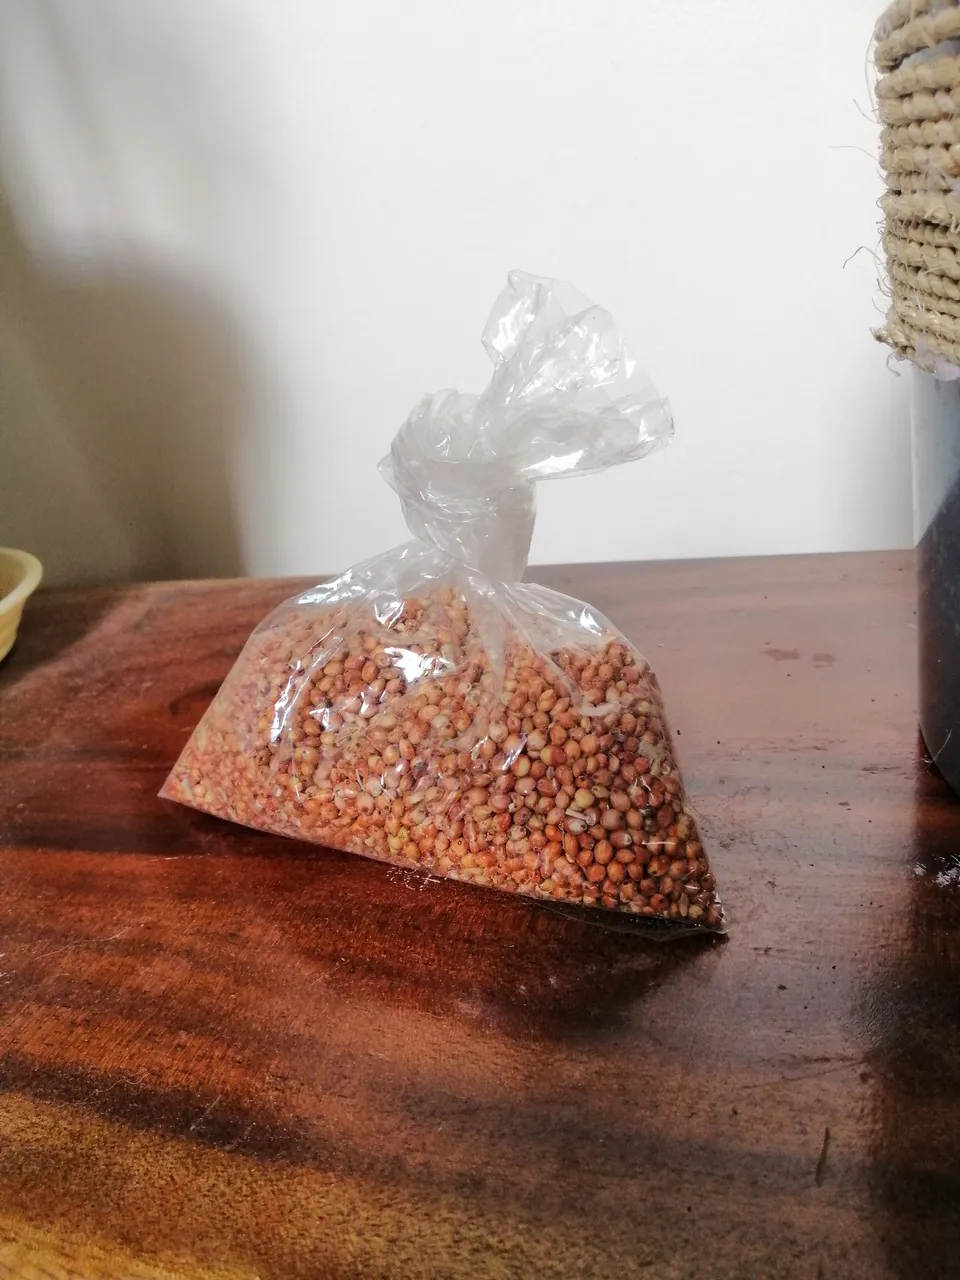
sorghum seeds
Place sorghum seeds in an sterilized bottle. Get a tissue sample in a Mushroom using sterilized nipper and also place inside the bottle.
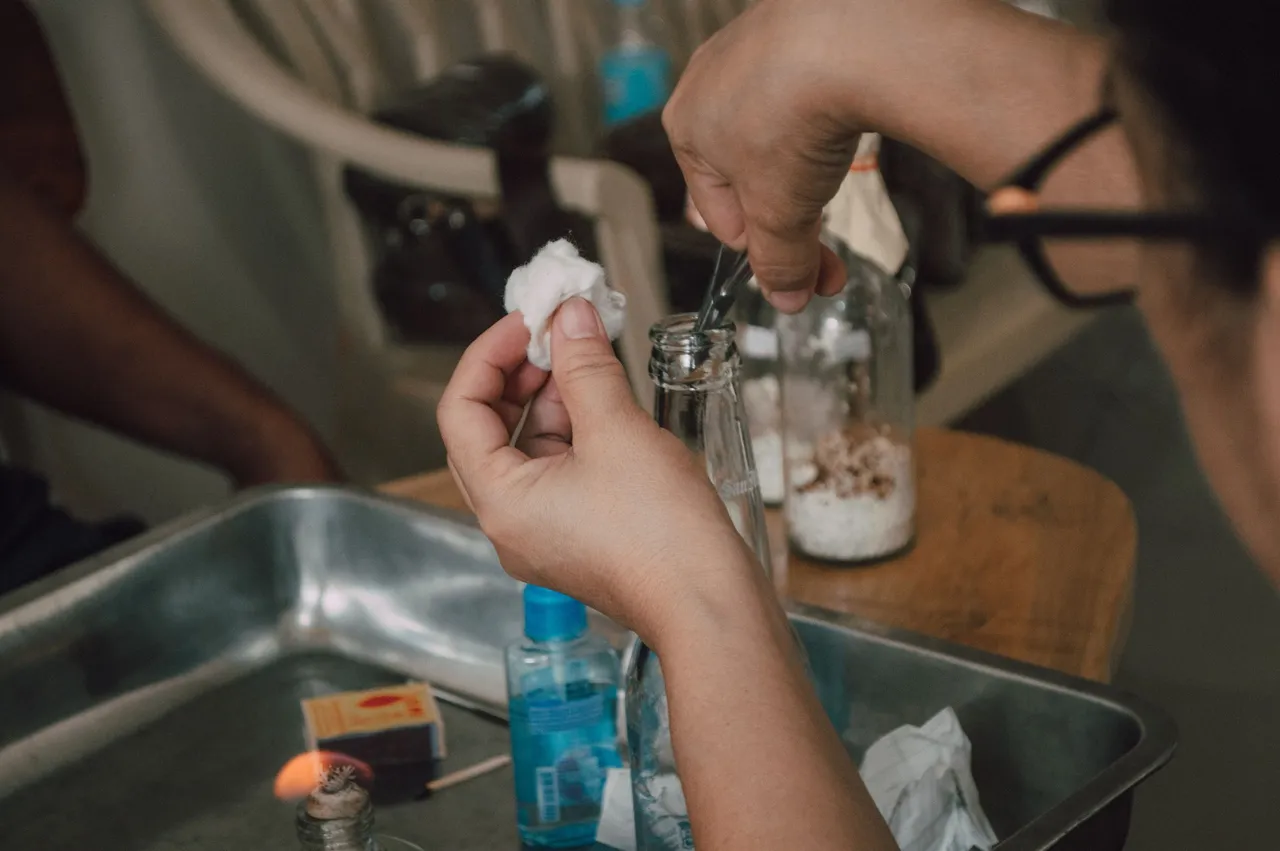
Close the lid of the bottle using cotton and paper.
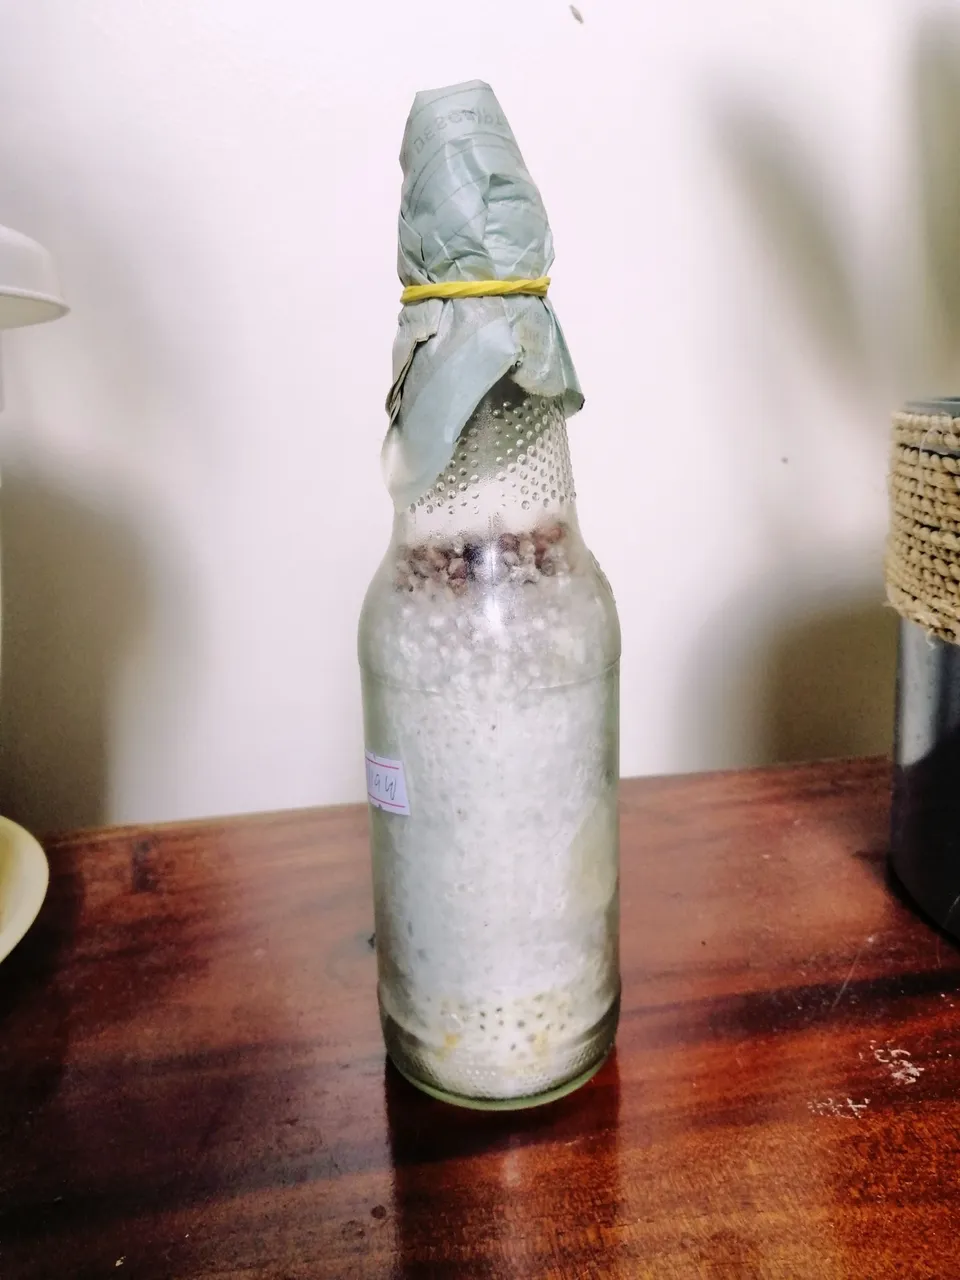
white oyster mushrooms spawn
It is critical to be hygienic in this process so there will be no bacteria in the Spawn.
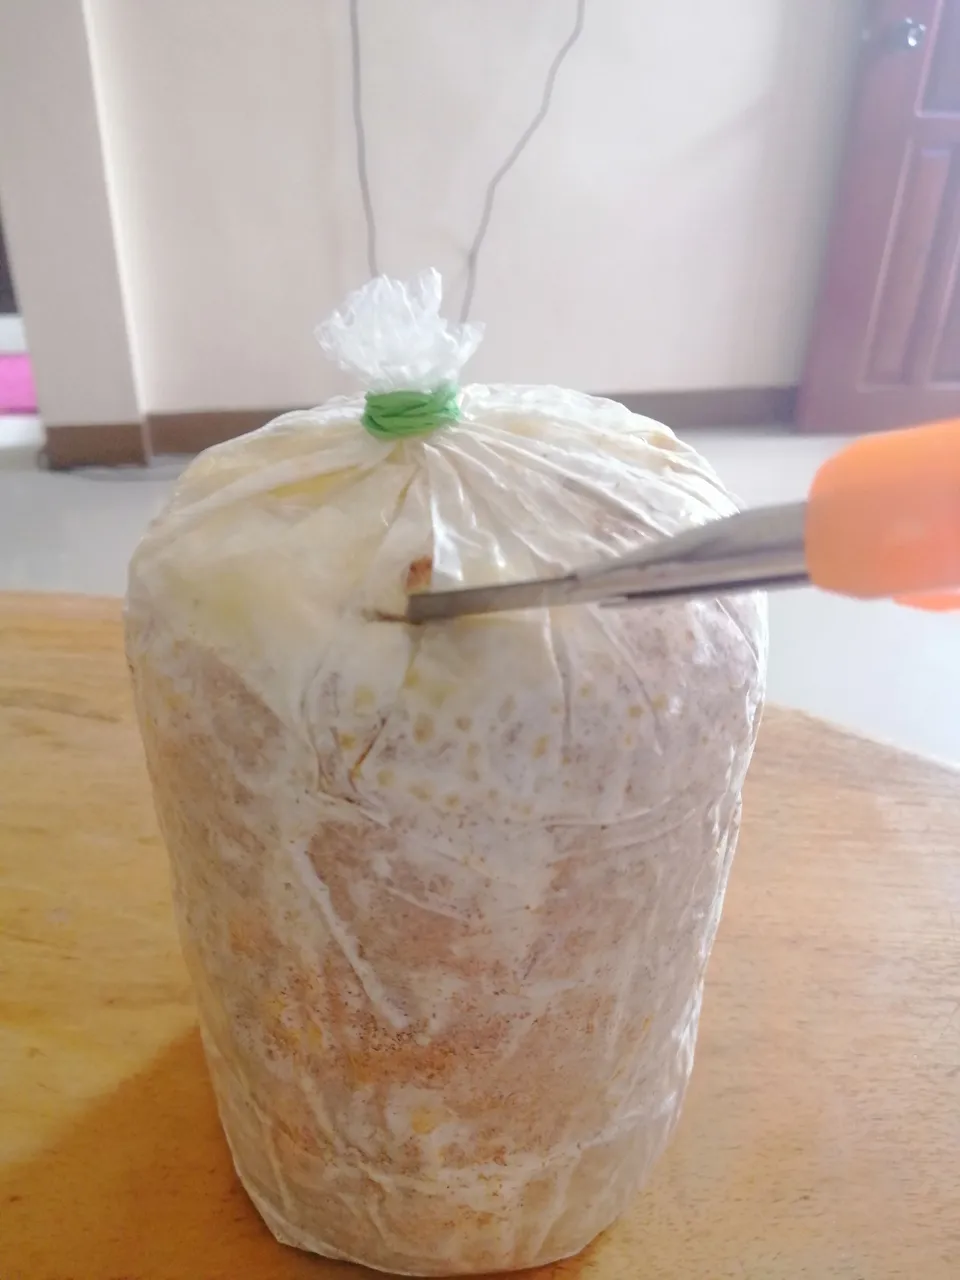
3. Planting spawn in the fruiting bags
Get the pasteurized fruiting bag and untie it.
Get the Spawn bottle, make sure the seedlings are loose by poking a sterilized metal stick.
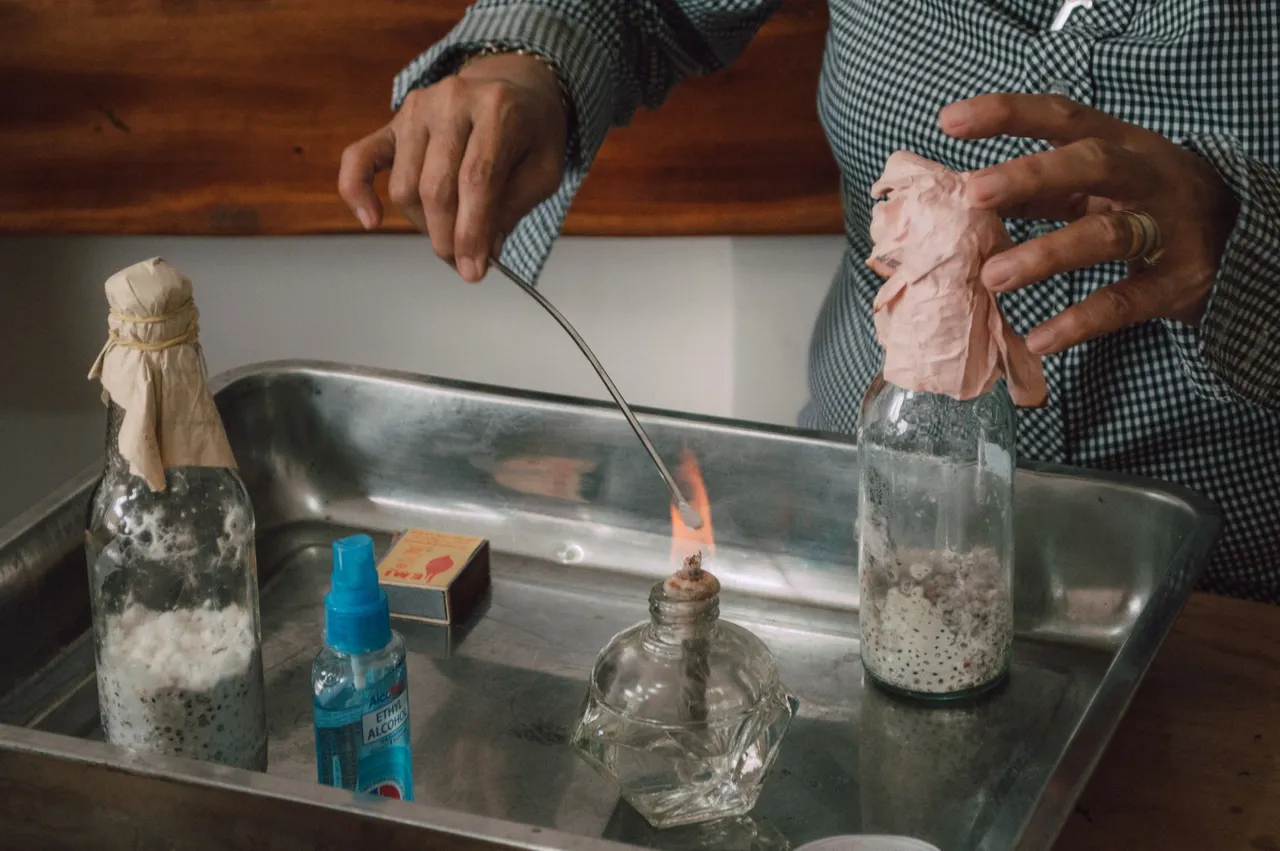
Open the lid and sterilize first in a fire and pour a minimal amount of Spawn inside the fruiting bag.
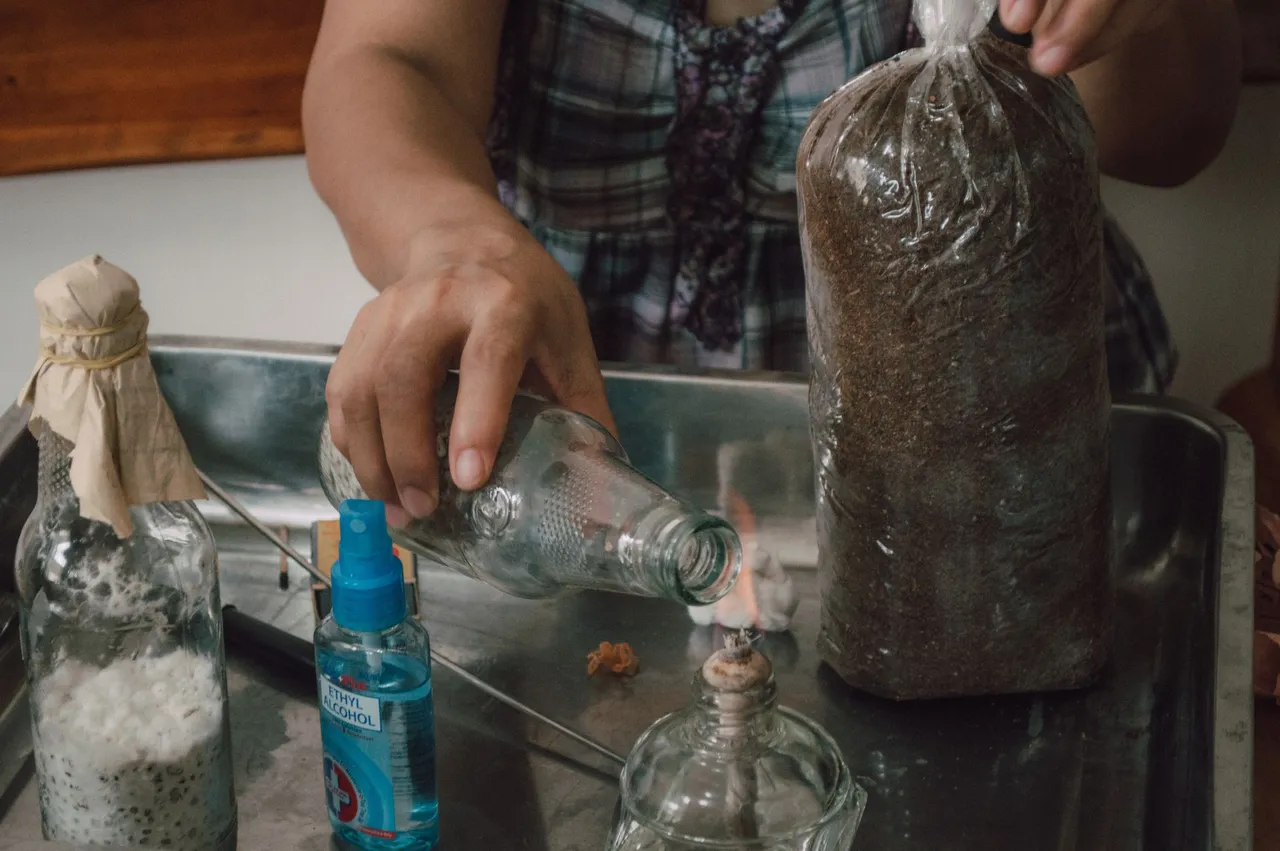

Close the cap. Tie the fruiting bag again, by the use of rubber bands.
4. Incubation period
Place the fruiting bags in room temperature and allow the Spawn to fully ramify or colonize the whole of the fruiting bag. Fully ramified fruiting bag is called spore.
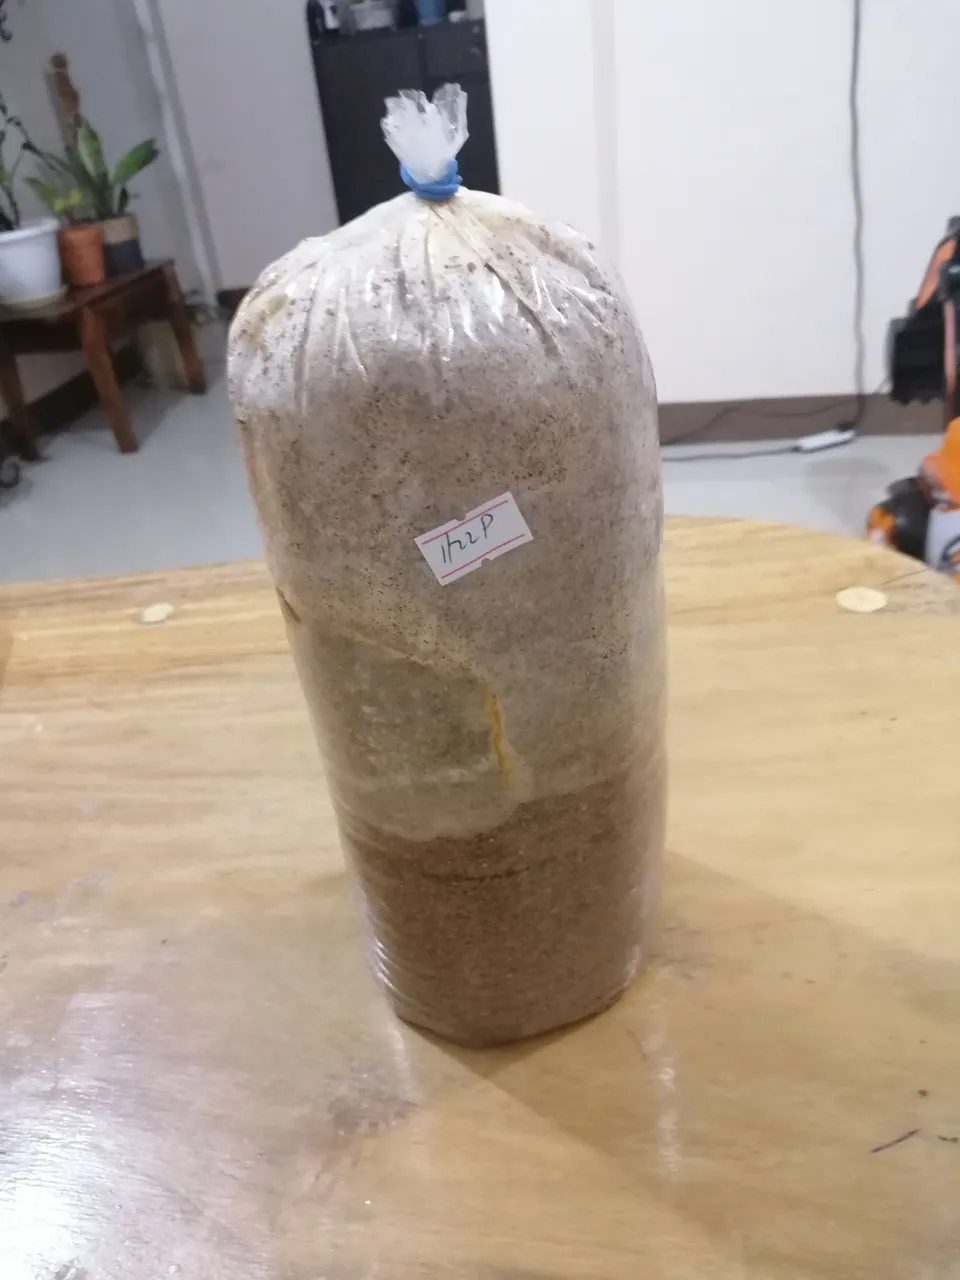
fruiting bag ramified for one month
Incubation period is around 2 months or more to fully ramify a fruiting bag.
a fully ramified fruiting bag also called a spore
5. Growing
Once the fruiting bag is fully ramified or colonized, place it in greenhouse. Make sure there is high humidity and not directly exposed to sun, or exposed to a very cool environment.
Ramified or colonized means all of the sawdust in fruiting bag turned to white, like clouds.
Poke or cut holes in the ramified fruiting bag, to give way to the spores to fully grow.
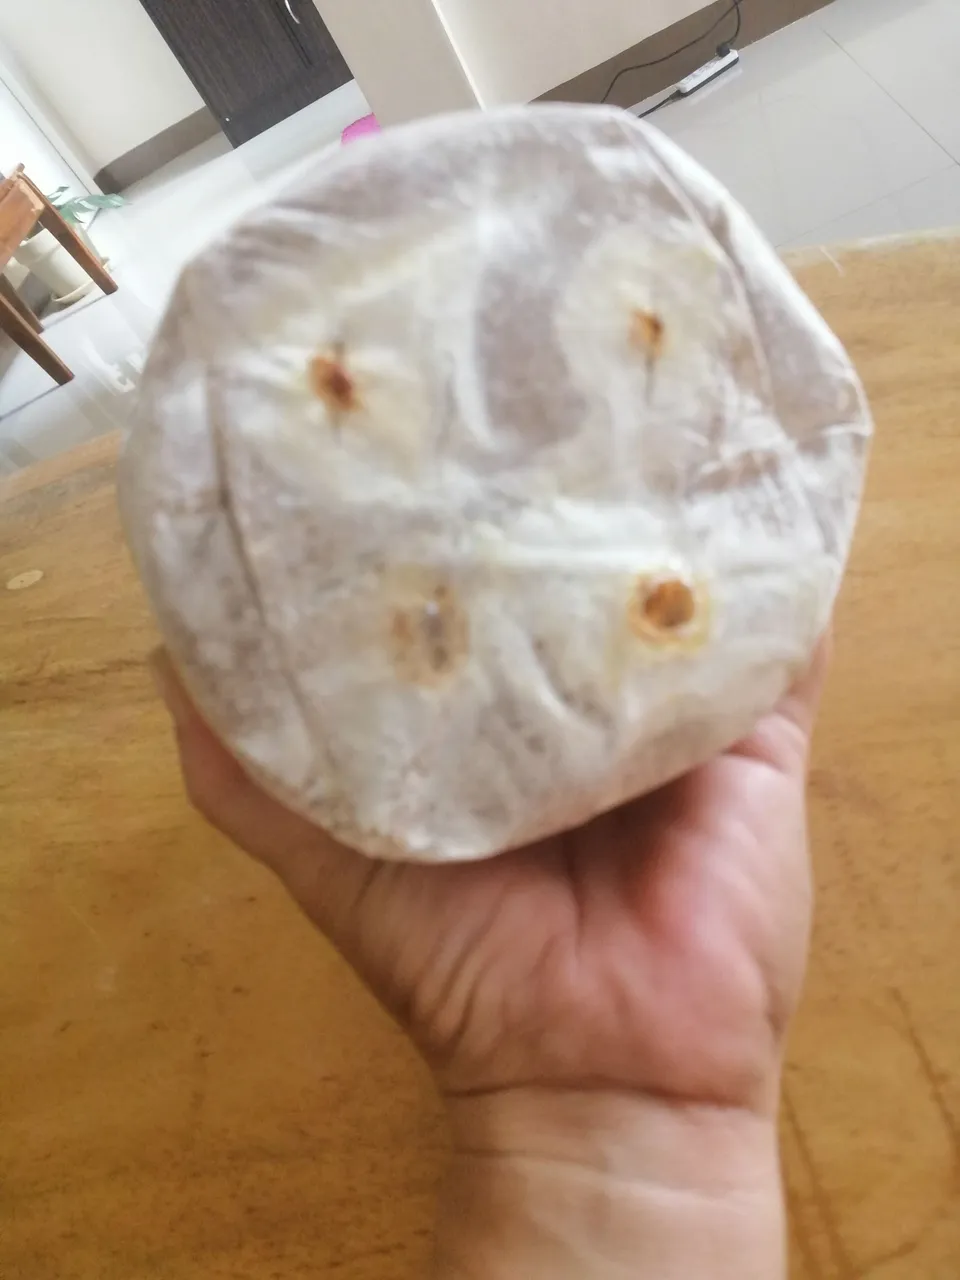
Spray the spore with water every day to maintain humidity of around 60-65%.
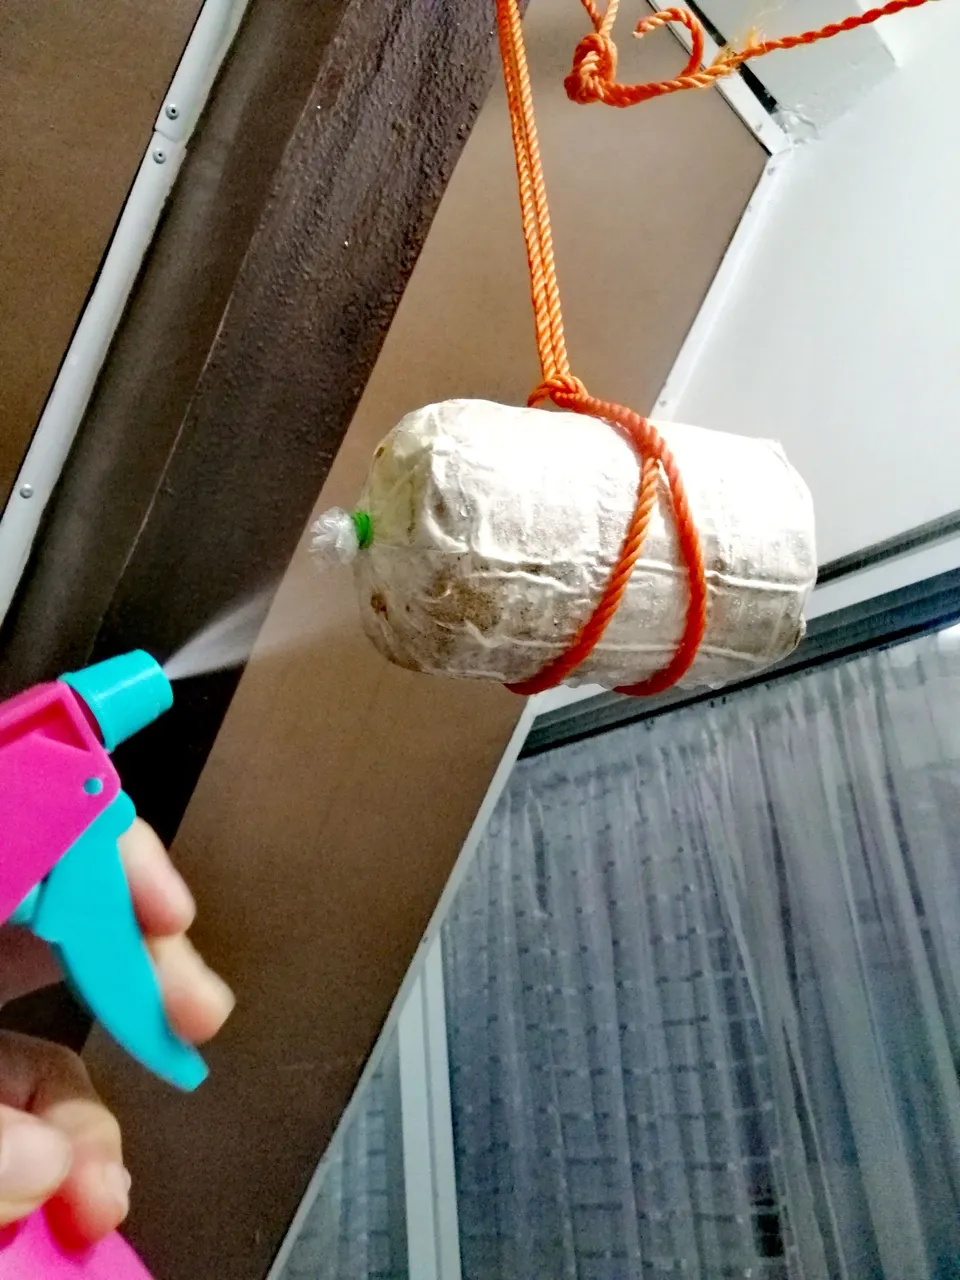
This spore is now ready to fruit anytime.
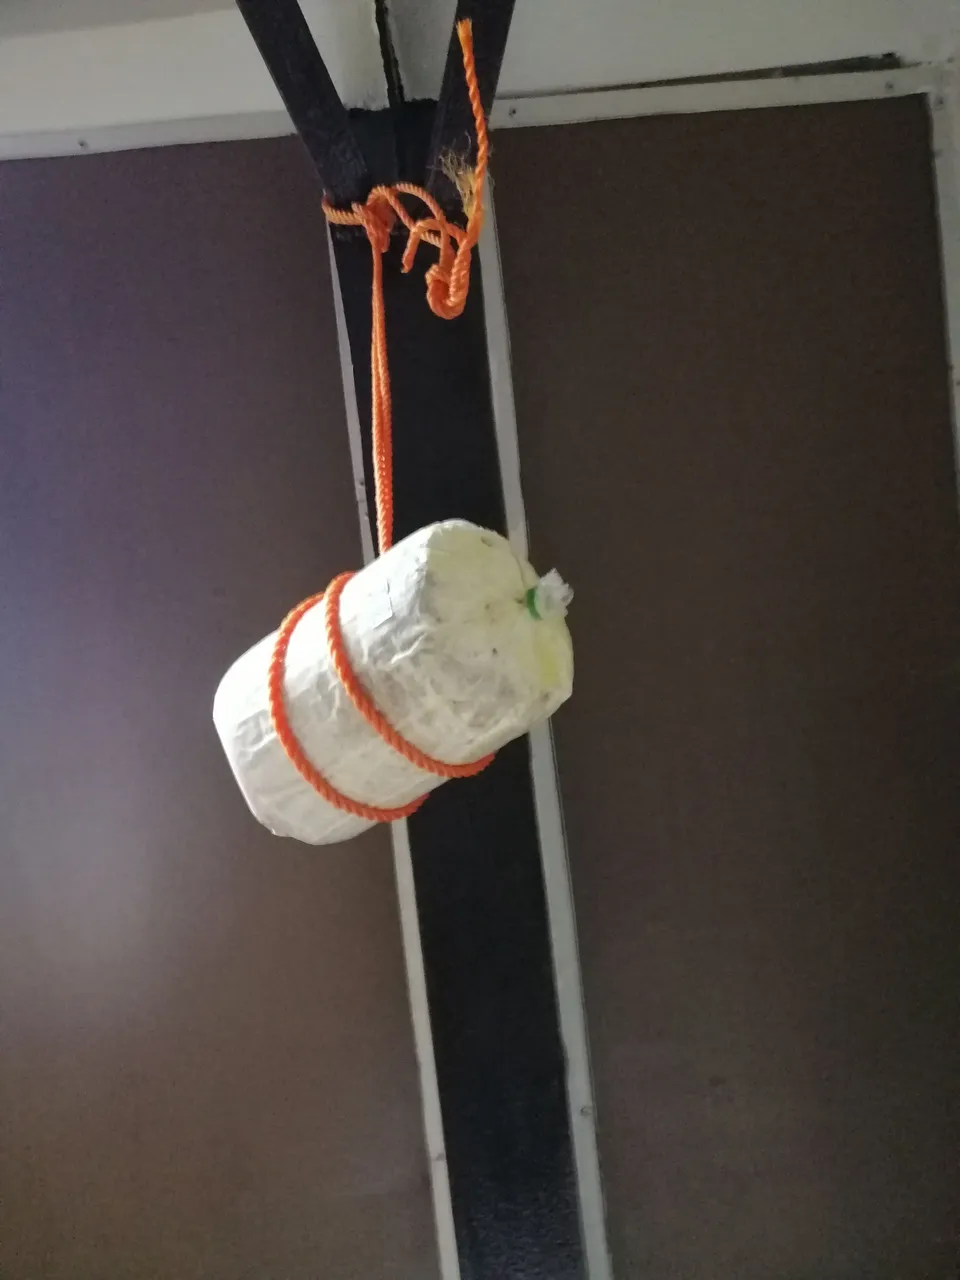
Our first fully ramified spore was just hung in our laundry area.
Will our spore successfully fruit? Did we do the right things? Do we have the right environment?
I'm quite excited and a little afraid at the same time.
In my succeeding post, we will find out if we became successful in our Mushroom Cultivation and what our first harvest will look like.
Stay tuned!