Greetings my dear Hive community!!!
Good night, my dear Hivers!!!
Once again, the long awaited weekend has arrived and I hope you enjoy it to the fullest!!!! This time, I ventured to experiment with this amazing software. Although I usually use #Photoshop, I decided to try my luck with #CorelPainter. A few years ago, I had the joy of winning this software in a contest, but until today I had not dared to dust it off and put it to use. 🎨🖌️
After so many years in my possession, I finally decided to start trying it out more extensively. Corel Painter has captivated me, since it manages to simulate in an exceptional way the essence of traditional painting. In addition, it has a wide range of brushes and phenomenal textures. However, it is worth mentioning that, being the 2019 version, it has some drawbacks, such as closing unexpectedly and without warning, as well as lacking #Photoshop auto-save feature. This implies that, if you don't perform backups on a constant basis, you could lose all your work in the blink of an eye. 😵😱
Of course, I imagine that the new versions must have fixed all those problems with my version. I could upgrade my software to the latest version, paying only 50% of its real cost. However, I must admit that it is a bit expensive software, at least for my budget. Although, honestly, I consider it a worthwhile investment, as it allows you to create digital art with an aesthetic closer to the traditional one, something that fascinates me. 😍😍😍
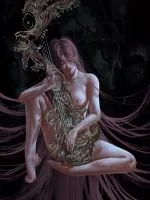
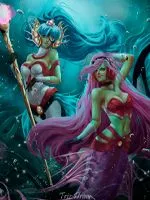
For this reason, I was pleased to make this particular portrait. It took me over 12 hours of work, but every minute was a delight as I tried out the different brushes and textures available. Also, I was trying different styles until I was left with something a little more "impasto" you could say. 🤔😋
I hope you love the final result!!!! Below you can see all the strokes I made during this fascinating experiment using the amazing software known as Corel Painter!!! 💕💕💕

𝕾𝖔𝖒𝖊 𝖎𝖒𝖆𝖌𝖊𝖘 𝖔𝖋 𝖙𝖍𝖊 𝖕𝖗𝖔𝖈𝖊𝖘𝖘 💖😋

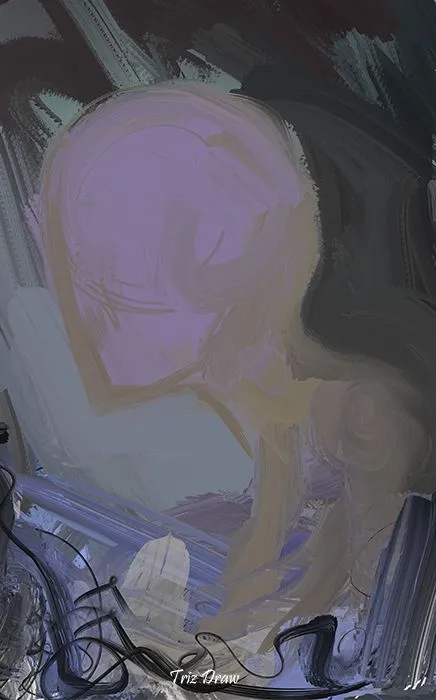
That's how it all started... No sketches, just a lot of more abstract strokes. That's how I started to shape my portrait.
-.-
For the skin, I switched to a less textured brush. I'm sorry I don't remember the names of the brushes used, but I promise to learn them as I continue to explore this wonderful software. I will share them with you all in the near future. lol
-.-
And at this stage, I started to mold the face, relying solely on my eyesight. I didn't have a sketch to guide me, so I improvised and created from my own perspective.
-.-
Then, I added more details to my abstract painting and at this point, I decided to add hair to my portrait.
-.-
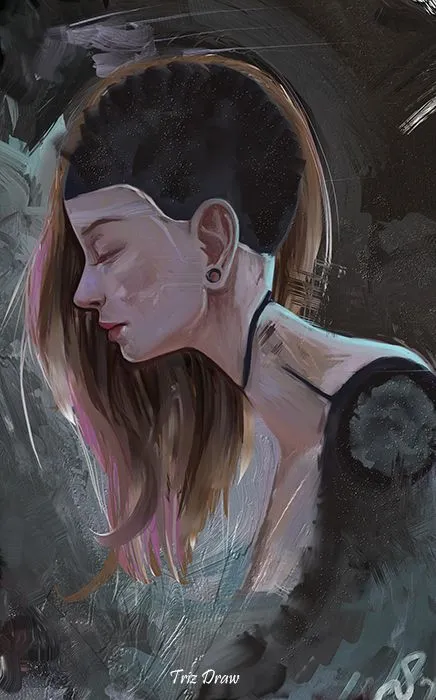
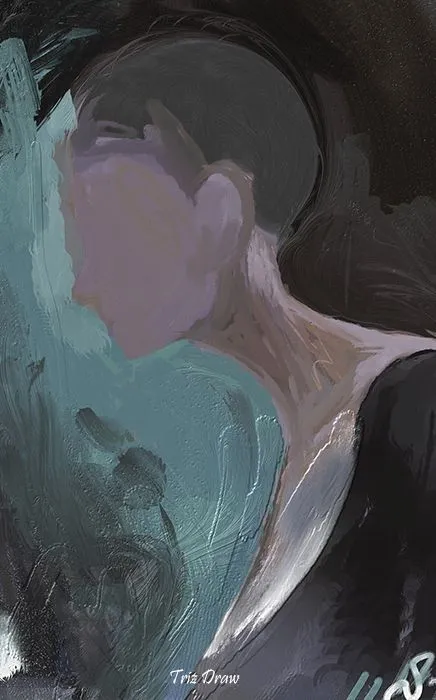
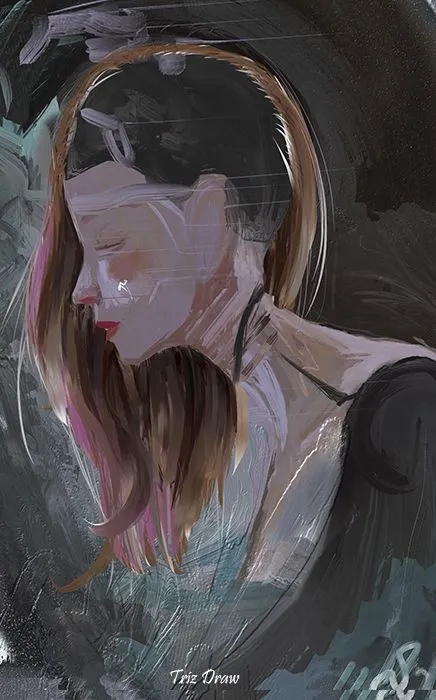
I could have continued with the abstract style I was wearing, but I felt it didn't quite represent me. So at this point, I spent time refining the skin. Although it retains a texture, it is not as prominent as it was at first, as I worked more on the features.
-.-
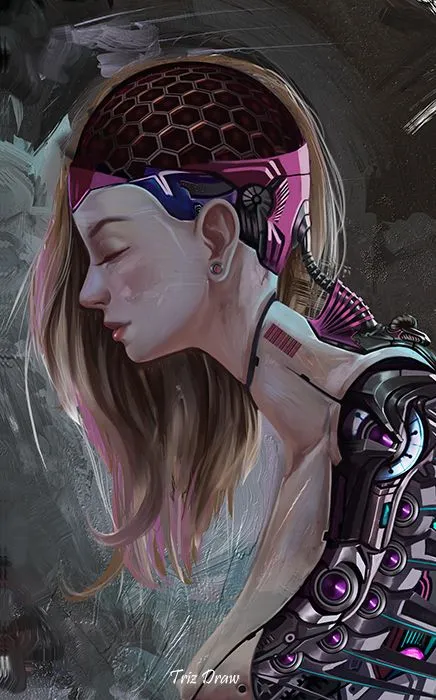
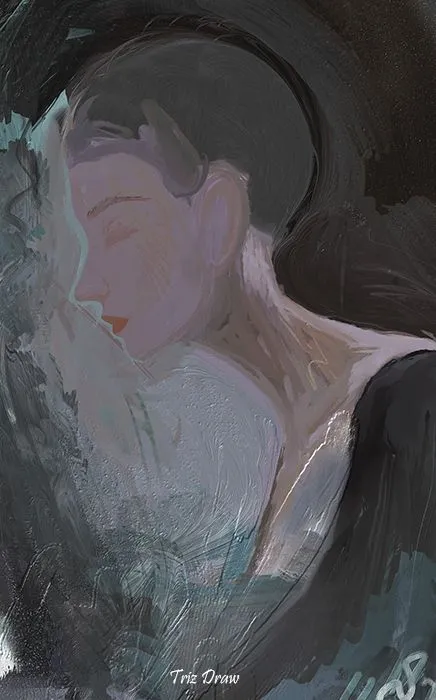
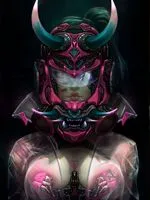
Here I continued to further clean up the skin and made improvements to the body. It wasn't just about creating a portrait, but infusing it with that #CyberPunk touch I had envisioned from the beginning. It was at this point that I started to apply that aesthetic, adding details like a beehive-like protection on the head and other interesting elements.
-.-
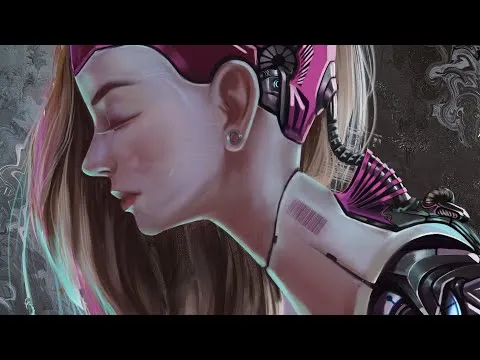
𝕾𝖕𝖊𝖊𝖉 𝕻𝖆𝖎𝖓𝖙𝖎𝖓𝖌
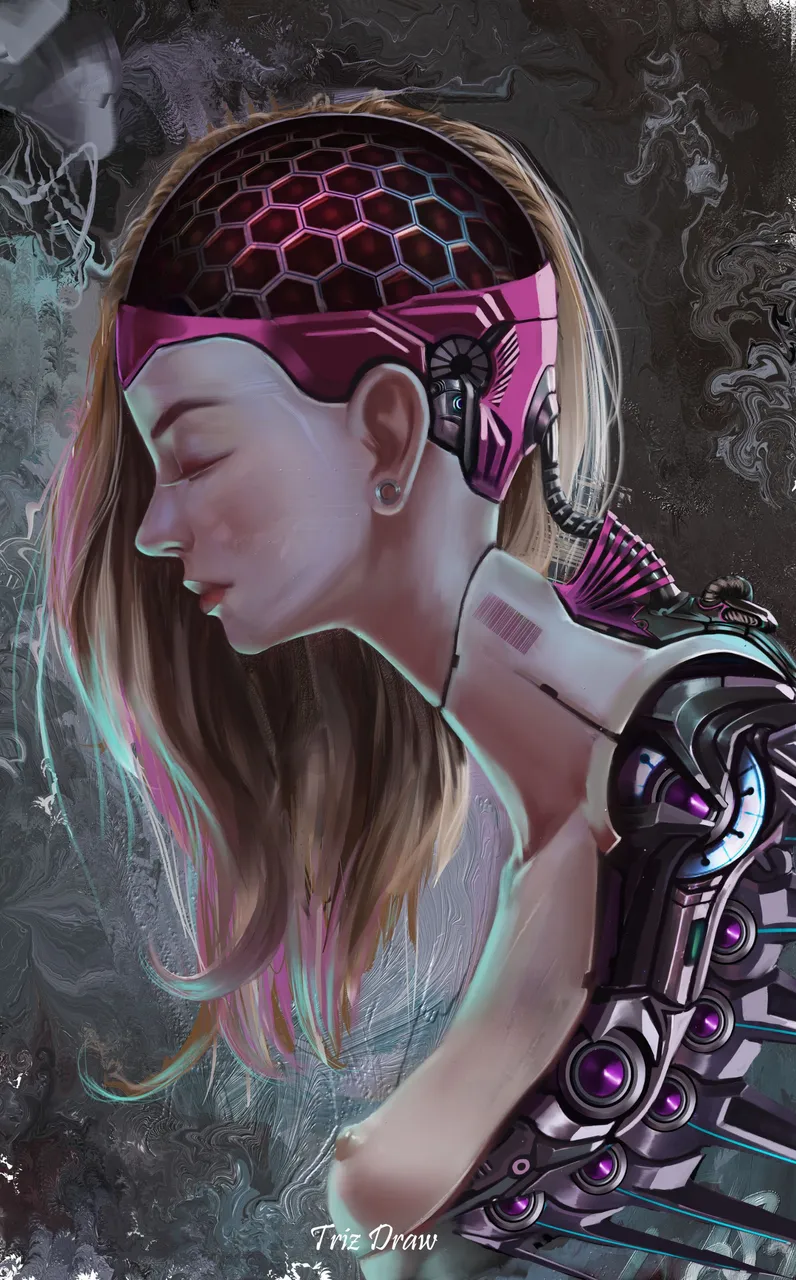
𝕱𝖎𝖓𝖆𝖑 𝕽𝖊𝖘𝖚𝖑𝖙

For the finale, I made further adjustments to the skin, phasing out the initial texture. Also, I added a backlight and basically, I was done. I hope you liked my experiment and I look forward to continuing to create art with this amazing tool. If my finances allow me in the future, I will upgrade to the latest version. I hope that happens!!!
I thank everyone for checking out my work and see you all very soon with a new #DigitalArt. 🤗💖😘😴😴😴
𝕿𝖍𝖊𝖘𝖊 𝖆𝖗𝖊 𝖙𝖍𝖊 𝖑𝖆𝖘𝖙 𝖉𝖗𝖆𝖜𝖎𝖓𝖌𝖘 👉🏼😘👈🏼
𝖂𝖍𝖆𝖙 𝖉𝖎𝖉 𝖞𝖔𝖚 𝖙𝖍𝖎𝖓𝖐 𝖔𝖋 𝖆𝖑𝖑 𝖙𝖍𝖎𝖘?
𝕴 𝖜𝖔𝖚𝖑𝖉 𝖑𝖔𝖛𝖊 𝖙𝖔 𝖐𝖓𝖔𝖜 𝖞𝖔𝖚𝖗 𝖔𝖕𝖎𝖓𝖎𝖔𝖓

𝕺𝖍𝖍𝖍 𝕭𝕿𝖂
𝕴 𝖙𝖍𝖆𝖓𝖐𝖘 𝖋𝖔𝖗 𝖗𝖊𝖆𝖉𝖎𝖓𝖌 𝖙𝖍𝖎𝖘
𝕱𝖔𝖑𝖑𝖔𝖜 𝖒𝖊 𝖎𝖋 𝖞𝖔𝖚 𝖜𝖆𝖓𝖙
🤗🥰😉😘😘
𝕾𝖊𝖊 𝖞𝖔𝖚 𝖘𝖔𝖔𝖓 𝕳𝖎𝖛𝖊!
🤭🤐🥹😍😍😍💖💖💖😋🤭🤣🤫🍾✨🥹🖨️😍🫣😍🥰