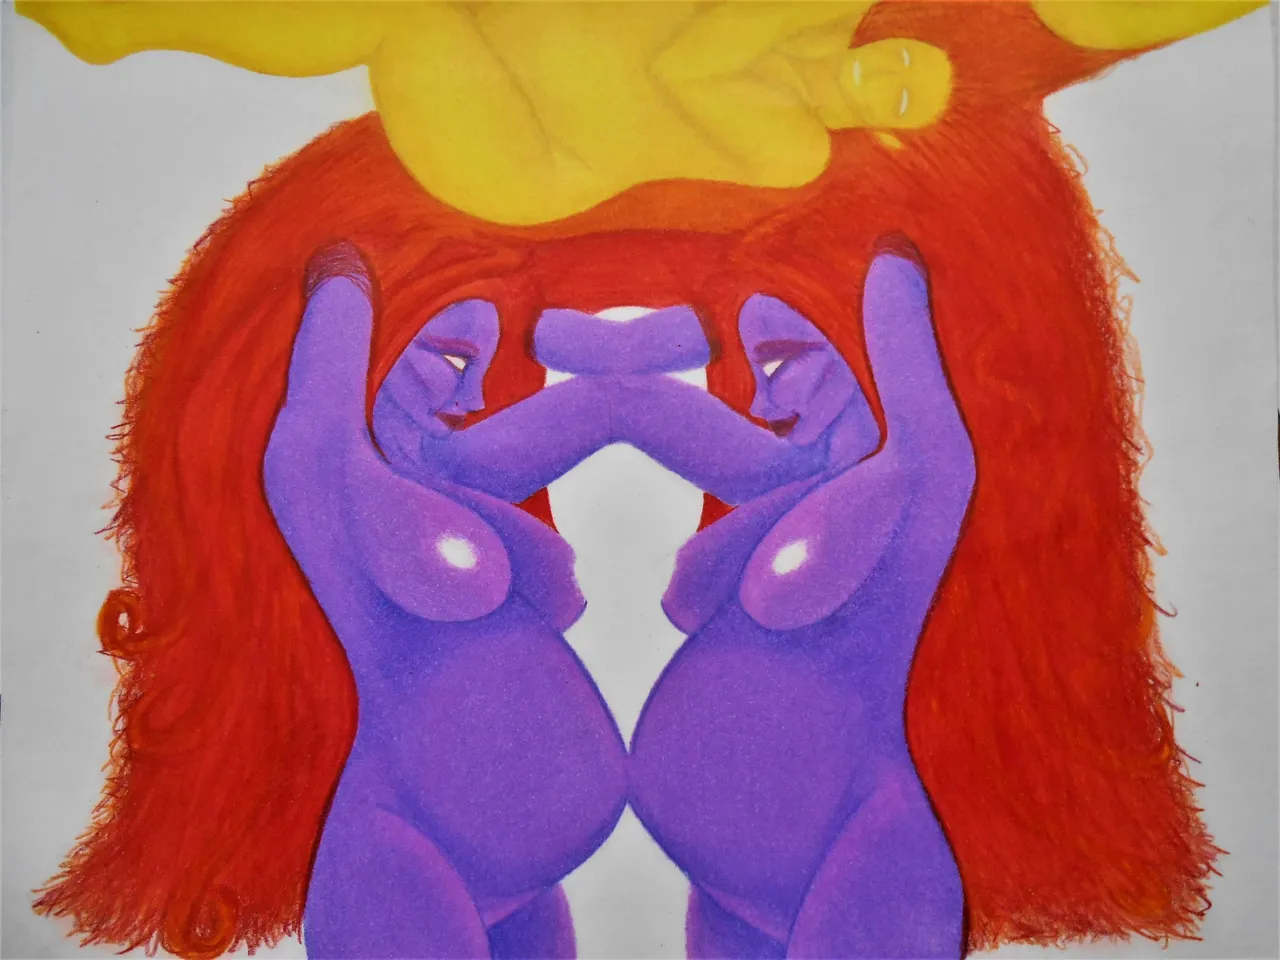
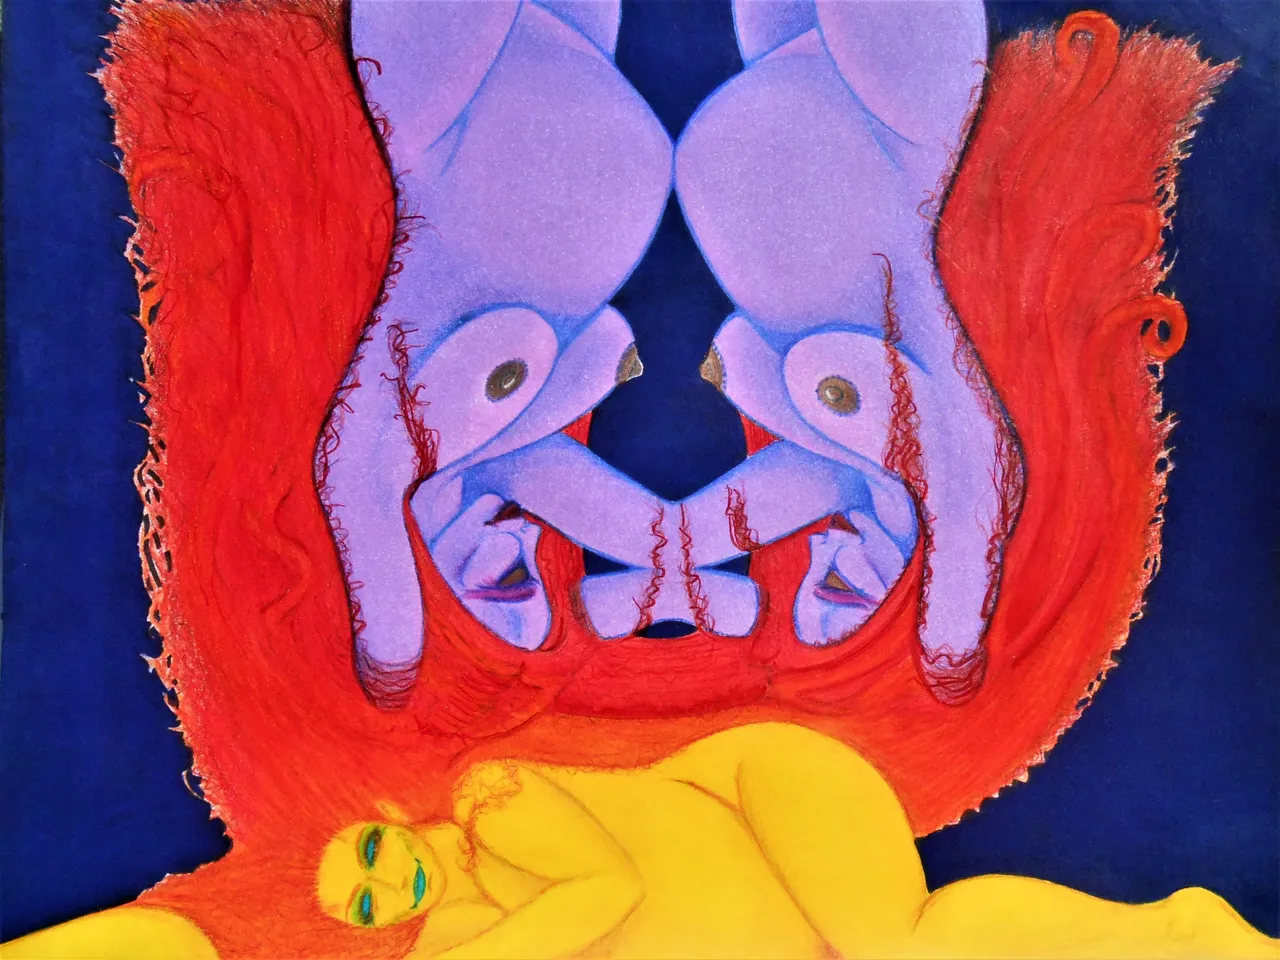
~ Trifectant ~
So, this is the last post in this series about this particular artwork in progress. I have been working on and off on this piece for many weeks. I would suggest that if you don't want to read then just scroll through the images. However, i cant/won't be held accountable for any damages done to you for scrolling so much.

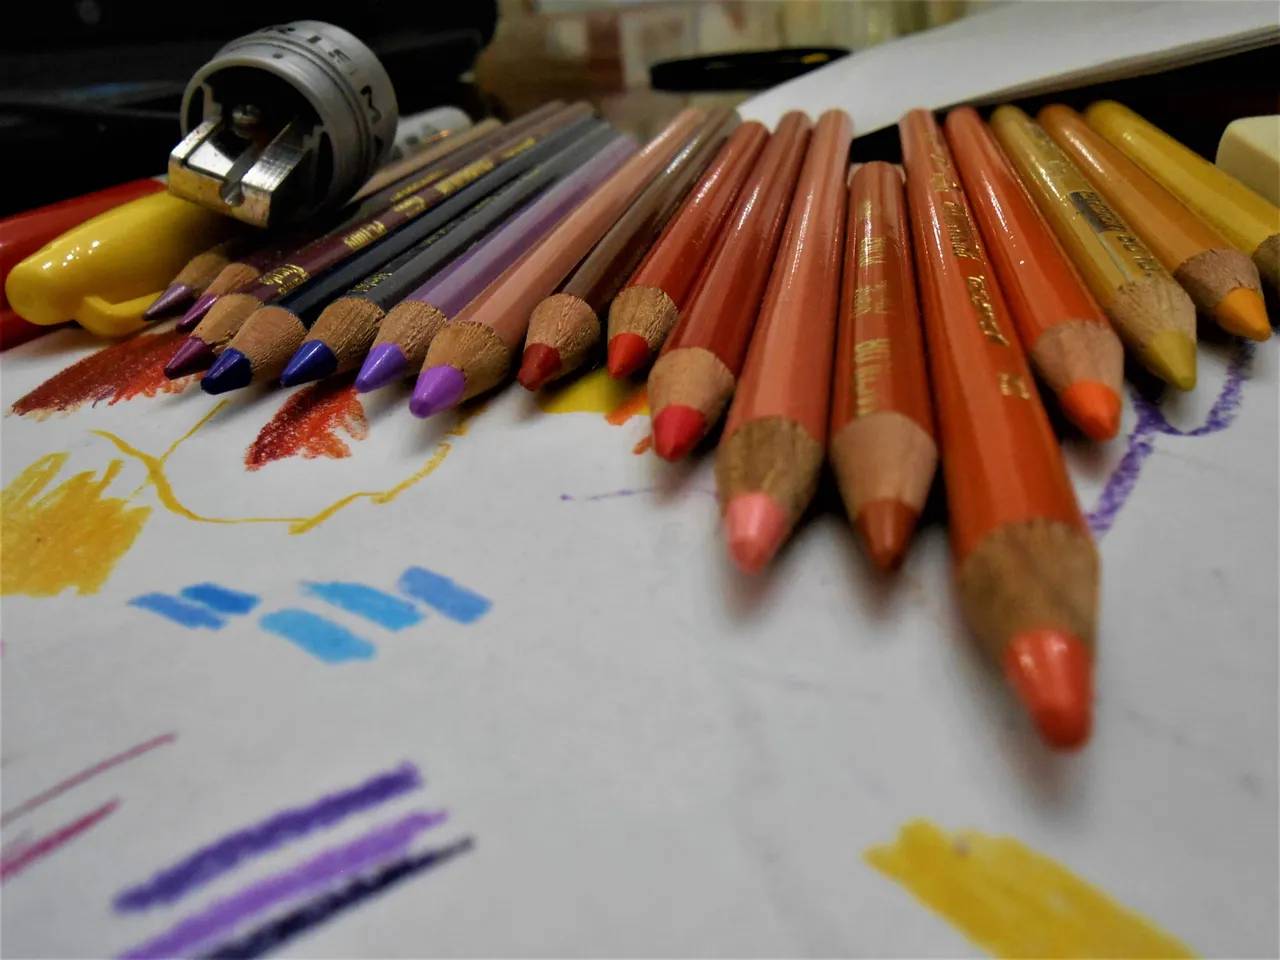
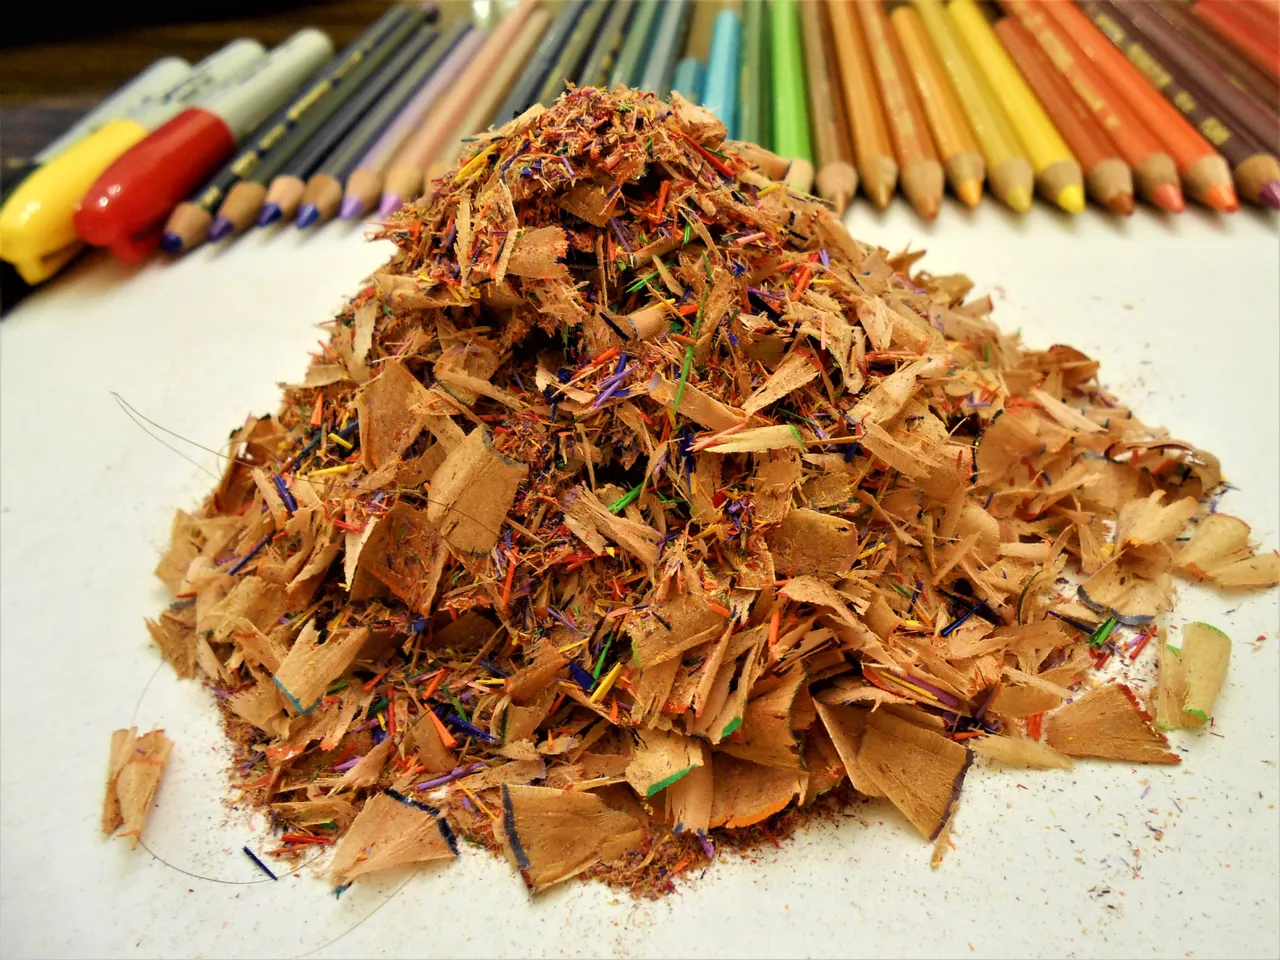
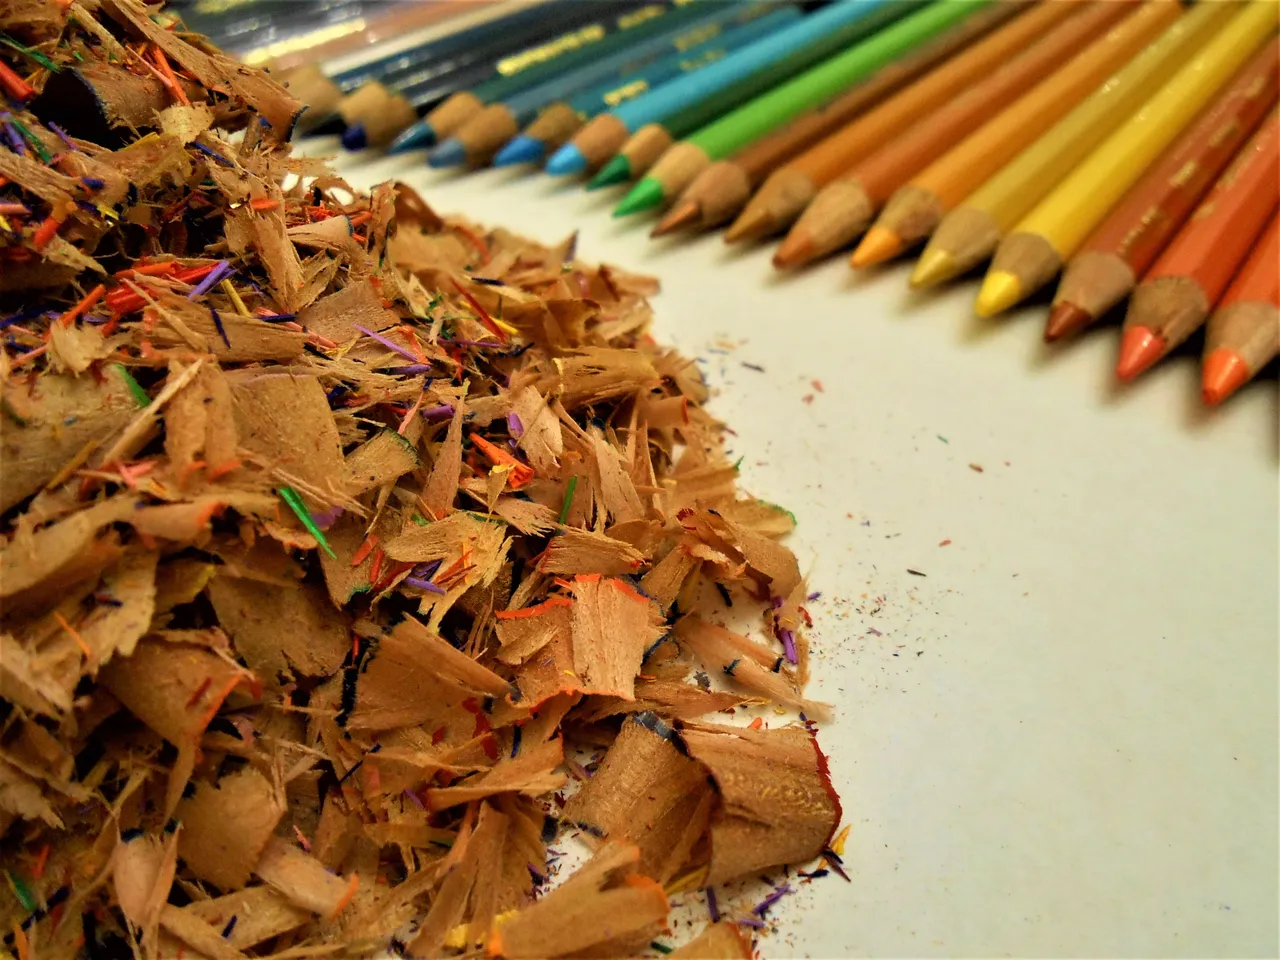
I usually like to give the tools of the trade a cameo appearance in order for them to be fully appreciated. I used all the pencils shown in this post at some point... some much more than others.
So, this is going to be a long ass post. That's the disclaimer so if you go any further you can't complain. Well, you can but you can't say i didn't warn you!
Many Colored Pencils Were Harmed In The Making Of This Artwork and Post...
So, we are picking up where we left off in the last two posts. You don't need to see and read them to get the picture... but if you want to, then click on the blue letter links here below....
Expectant - NFT Showroom Collection - W.I.P.
NFT Showroom Collection - W.I.P. part 2
Otherwise... we are going to get into the art! I hope you enjoy this process and artwork to the fullest.

Chill is the way to be....
~ I Love Luci ~
Actually, before we get to the art NFT and the finished product of those previous posts and the process to get there... i wanted to share with you the video proof of me and Luci, my squirrel friend, eating from my hand. I know that if there isn't a video or picture it didn't happen. Hahaha so this is my record of what did happen. I said i would try to get some video and i came through in the clutch!

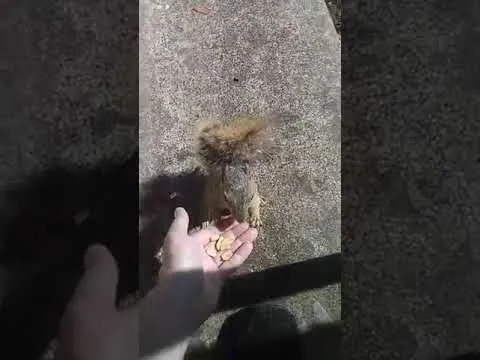
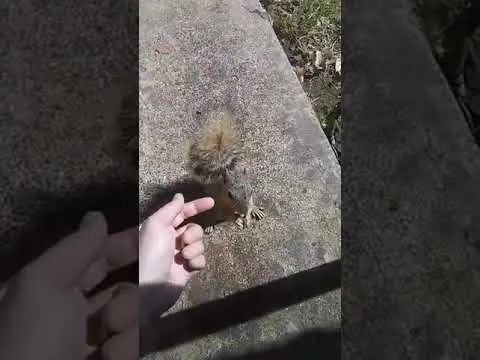
This was happening almost every day. She would just show up while i would be working on something. It was funny because i would just look down sometimes and she would be looking at me. I was pleasantly startled on more than one occasion. I'm surprised she just didn't come tug my pants to get my attention like a little kid. I usually save the extra stuff for the end but i thought it might be best to show the squirrel stuff before we get down to business.
I Love Luci
~ Back to Black ~
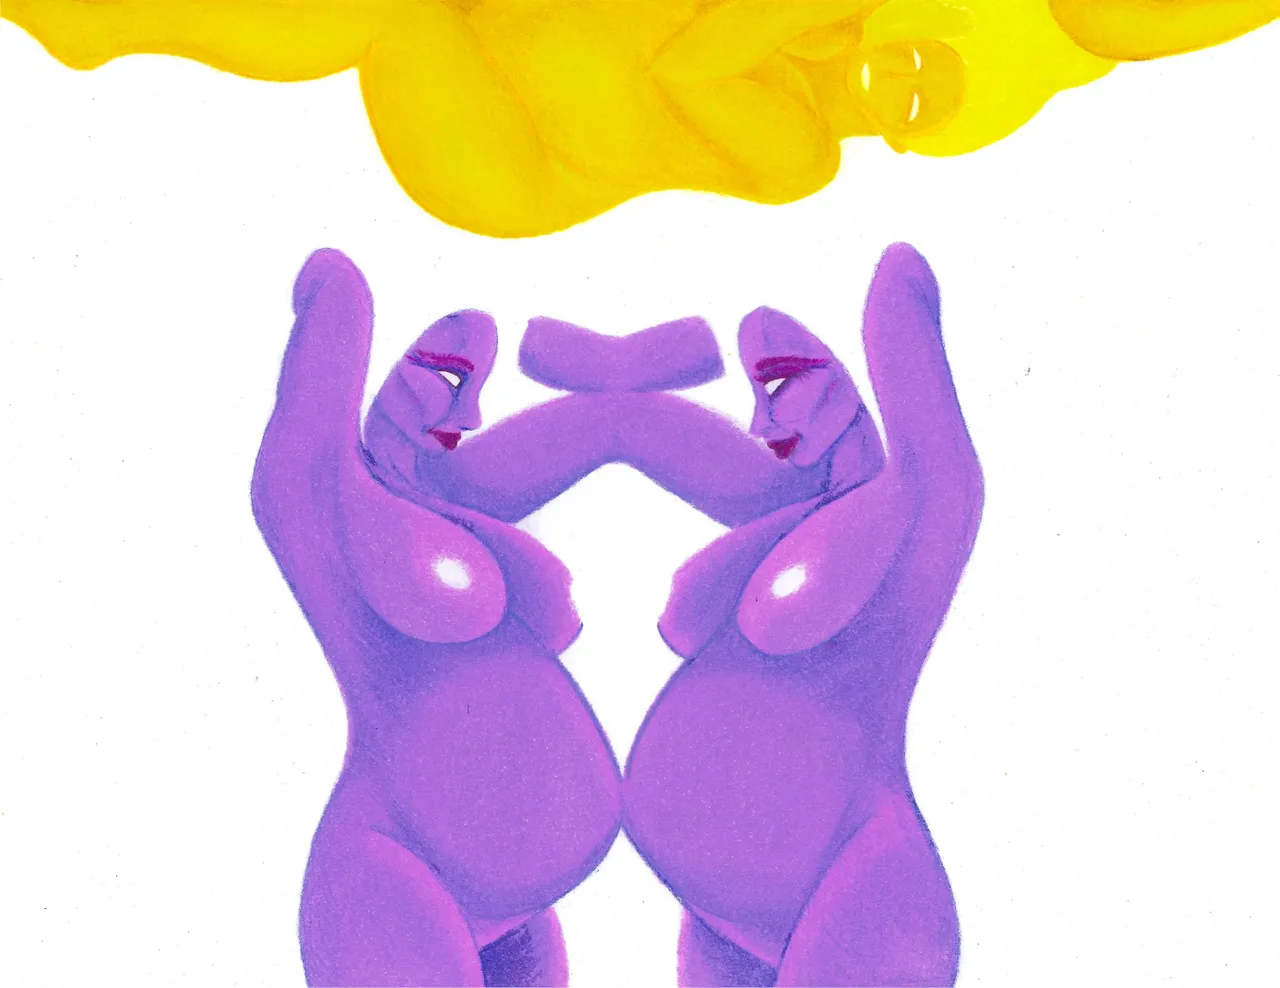
If you look at the art images above you will notice the white background. So, here below you can see that i started to color the background with the black Sharpie marker. I did two passes over the paper to give a more even black. One pass was vertical and the other was horizontal. This gave maximum bleed to eliminate any absorbtion streaks. I usually do slightly overlapping strokes to minimize that anyways... but nothing works better than this two step process that i'm aware of.
Ironically, i was listening to King Crimson's song called Starless. Great soundtrack for the layers of black. Click the blue link if you want to jam the song while you check out this post.
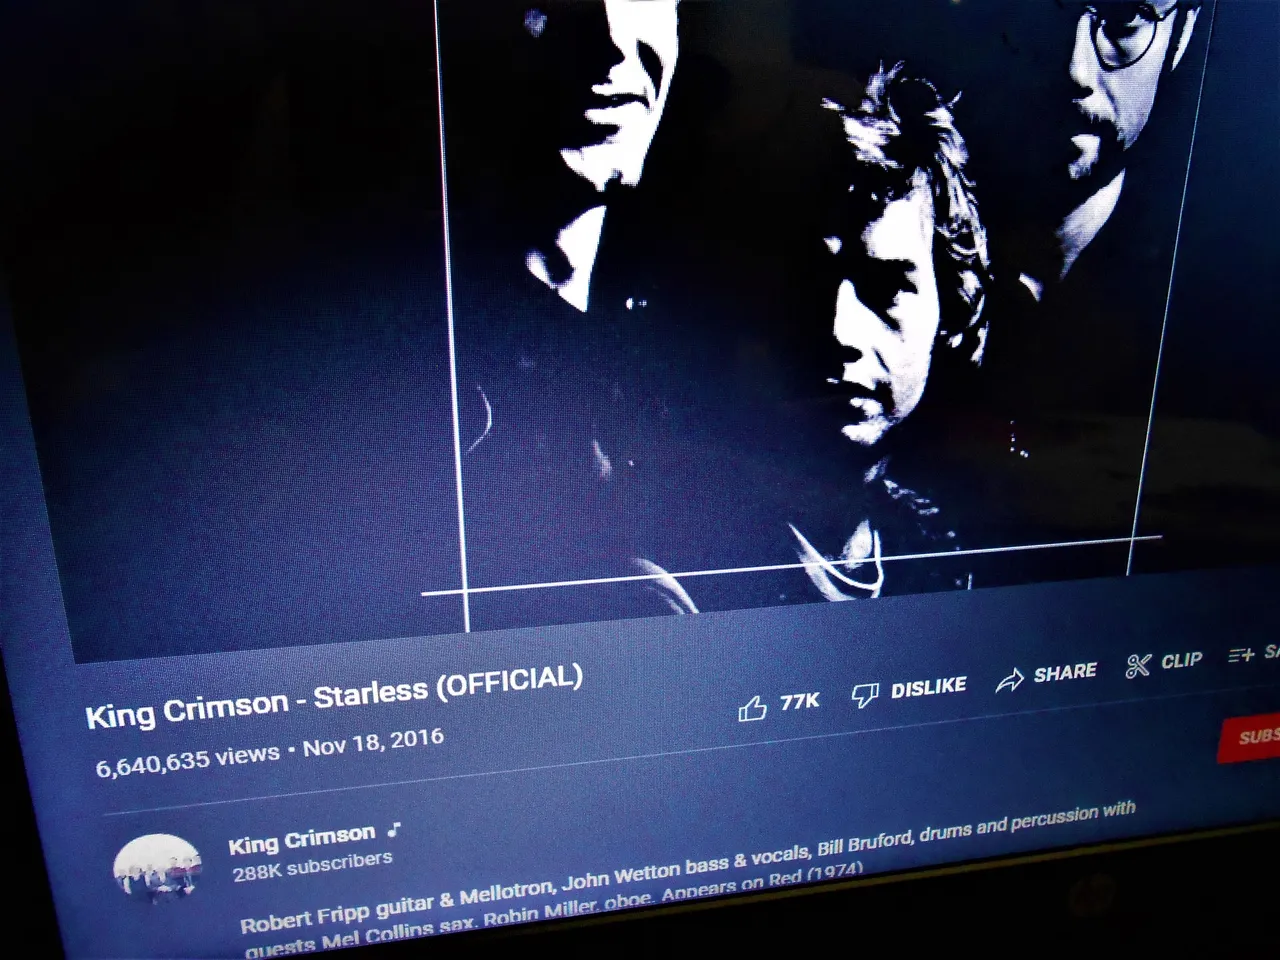
Click Here To Listen To Starless by King Crimson
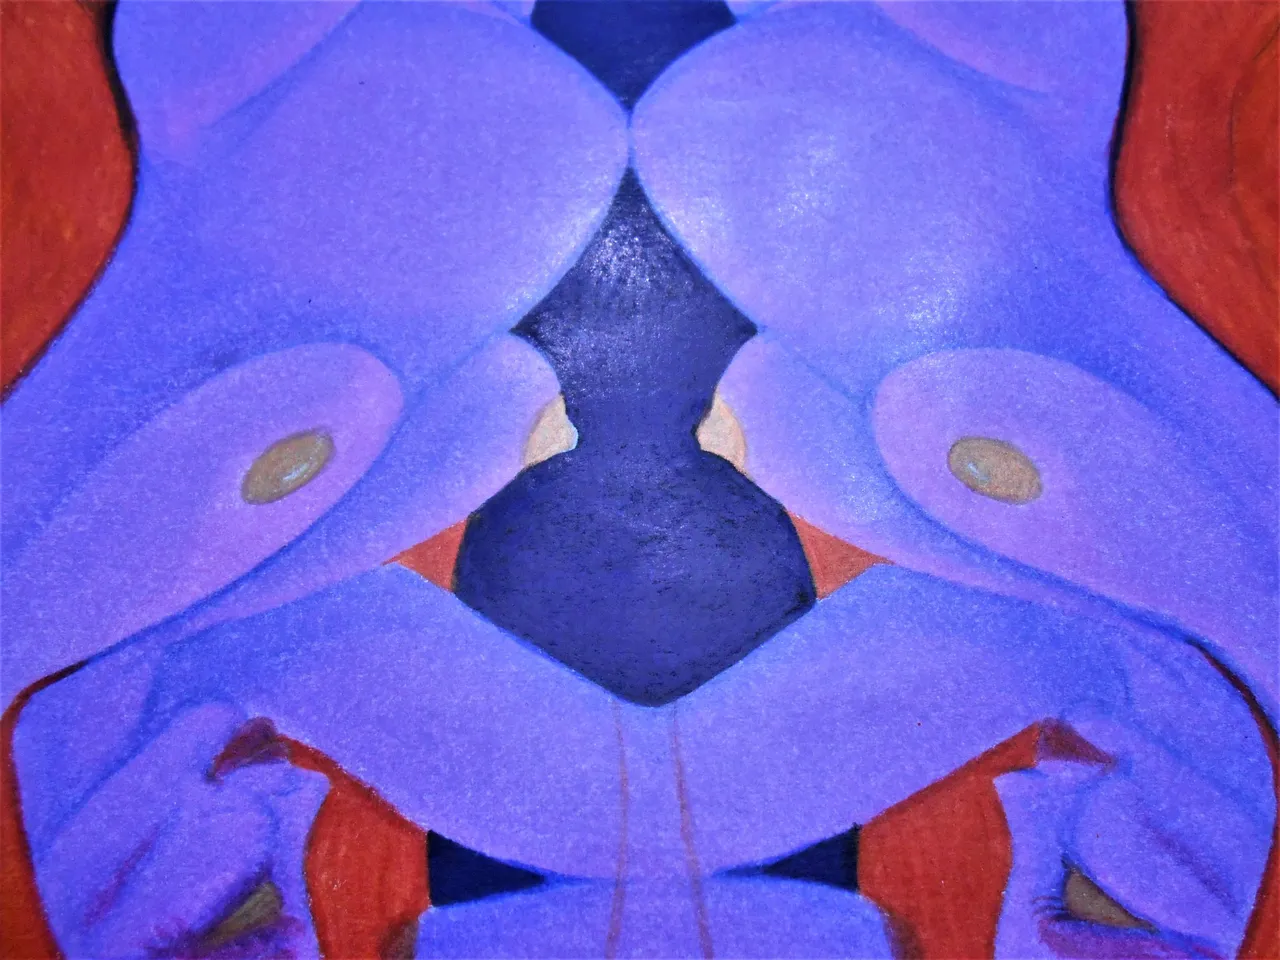
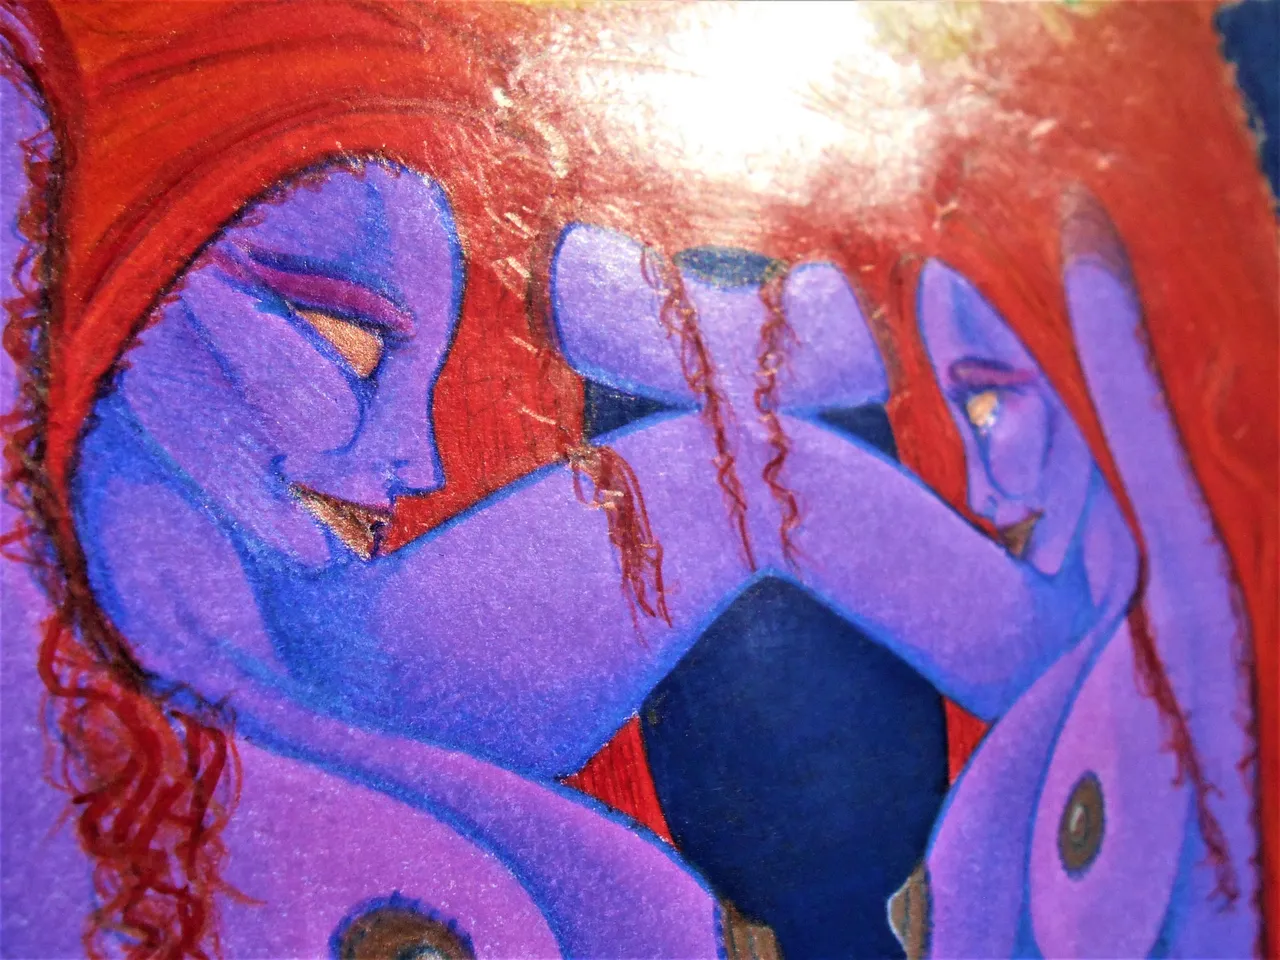
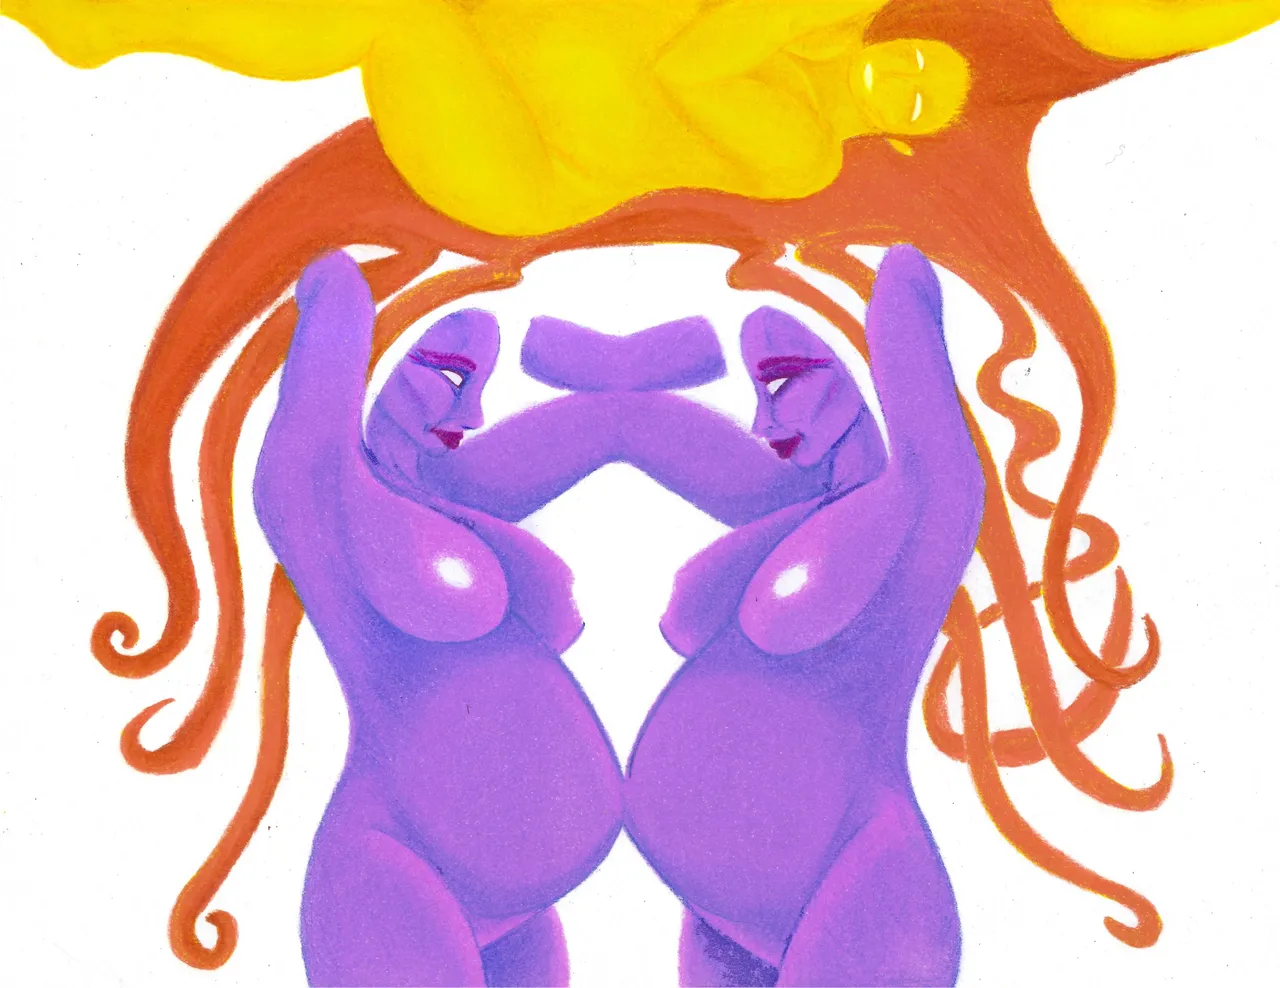
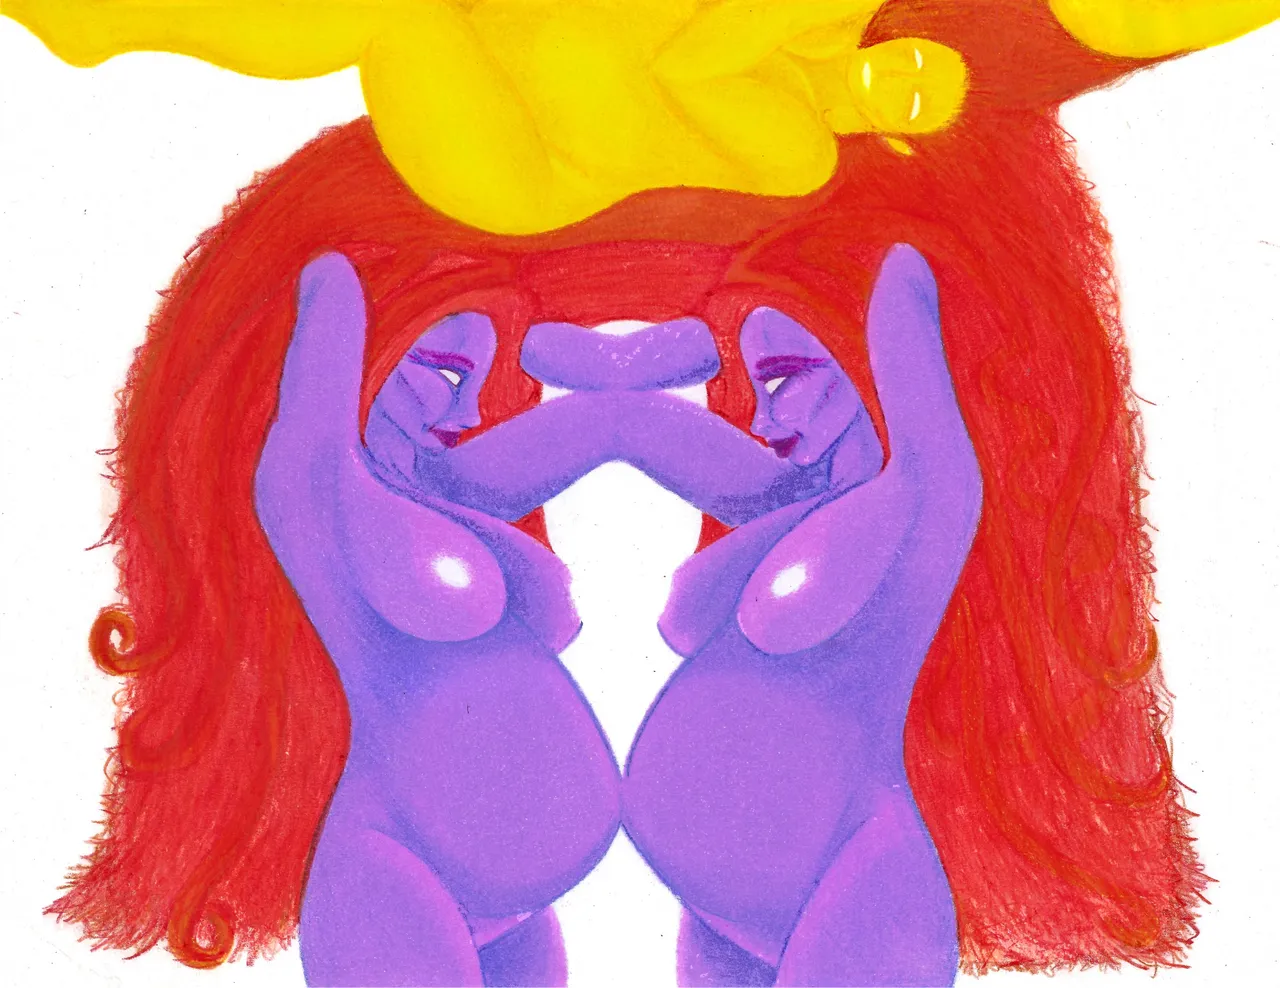
Now, i moved to the right side of the background filling it in one stroke at a time and one pass after the other. If you compare the right side to the left you can see the difference between one pass and two.
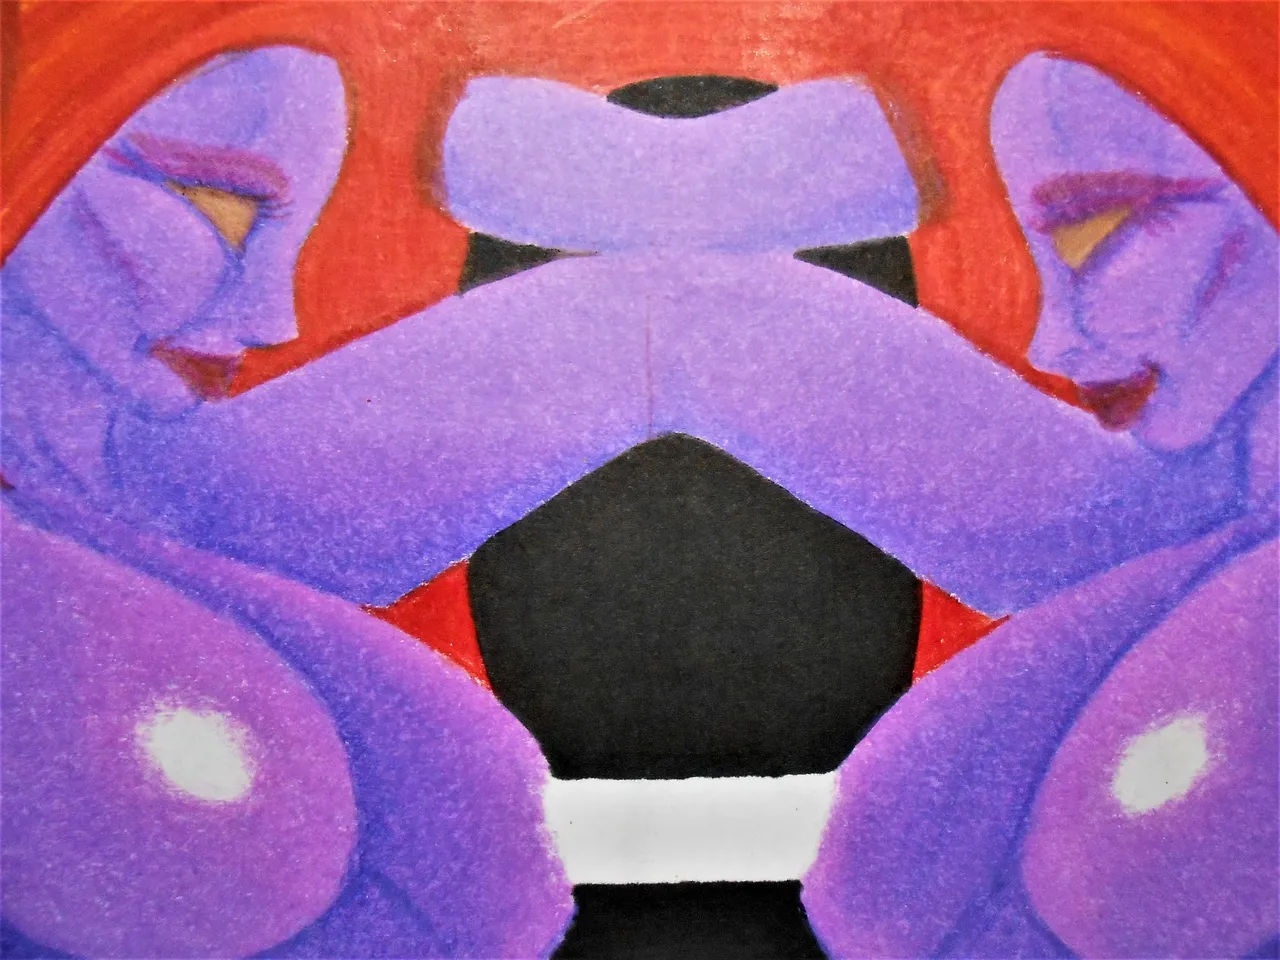
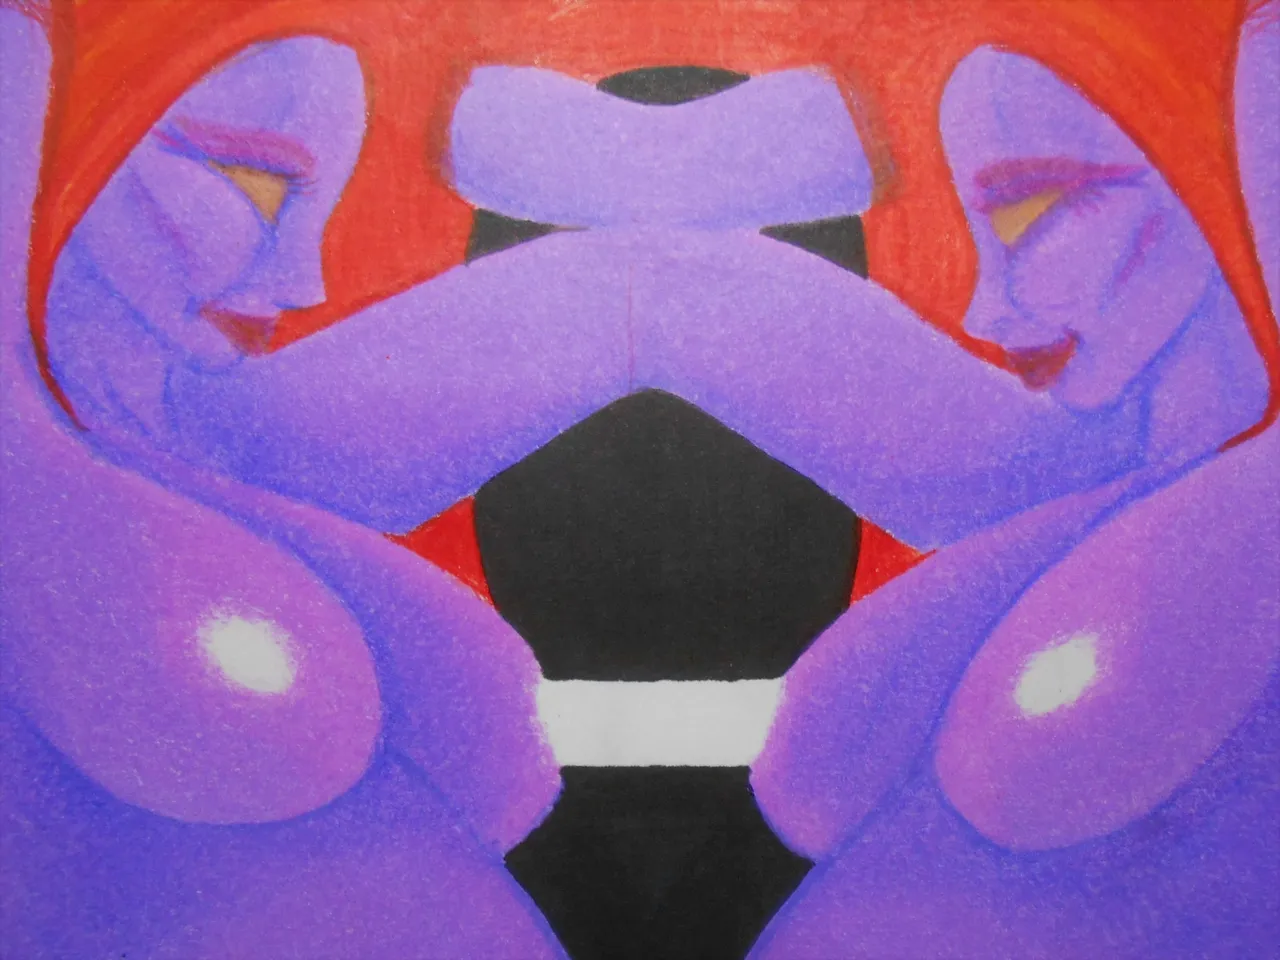
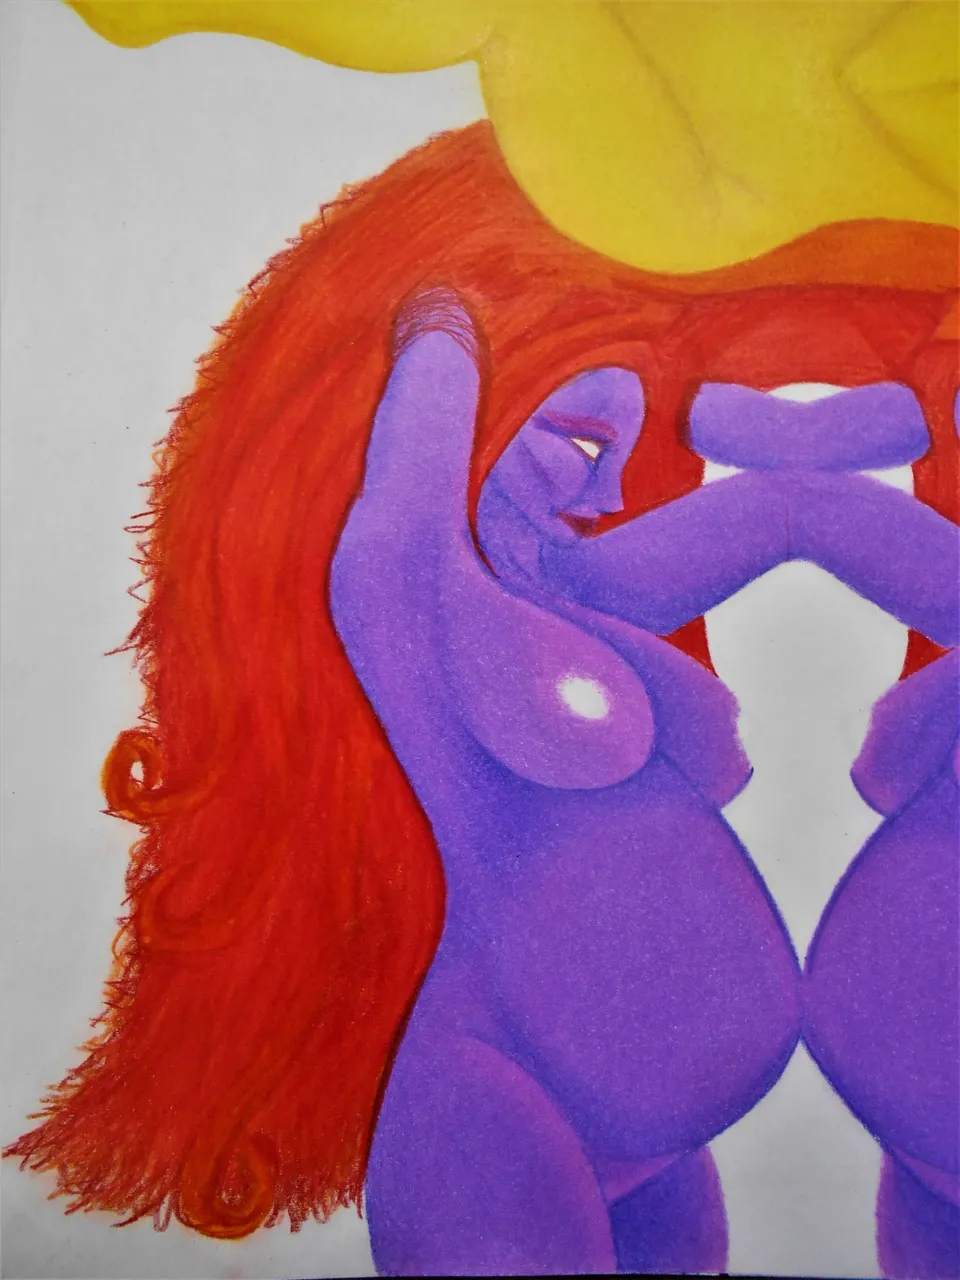
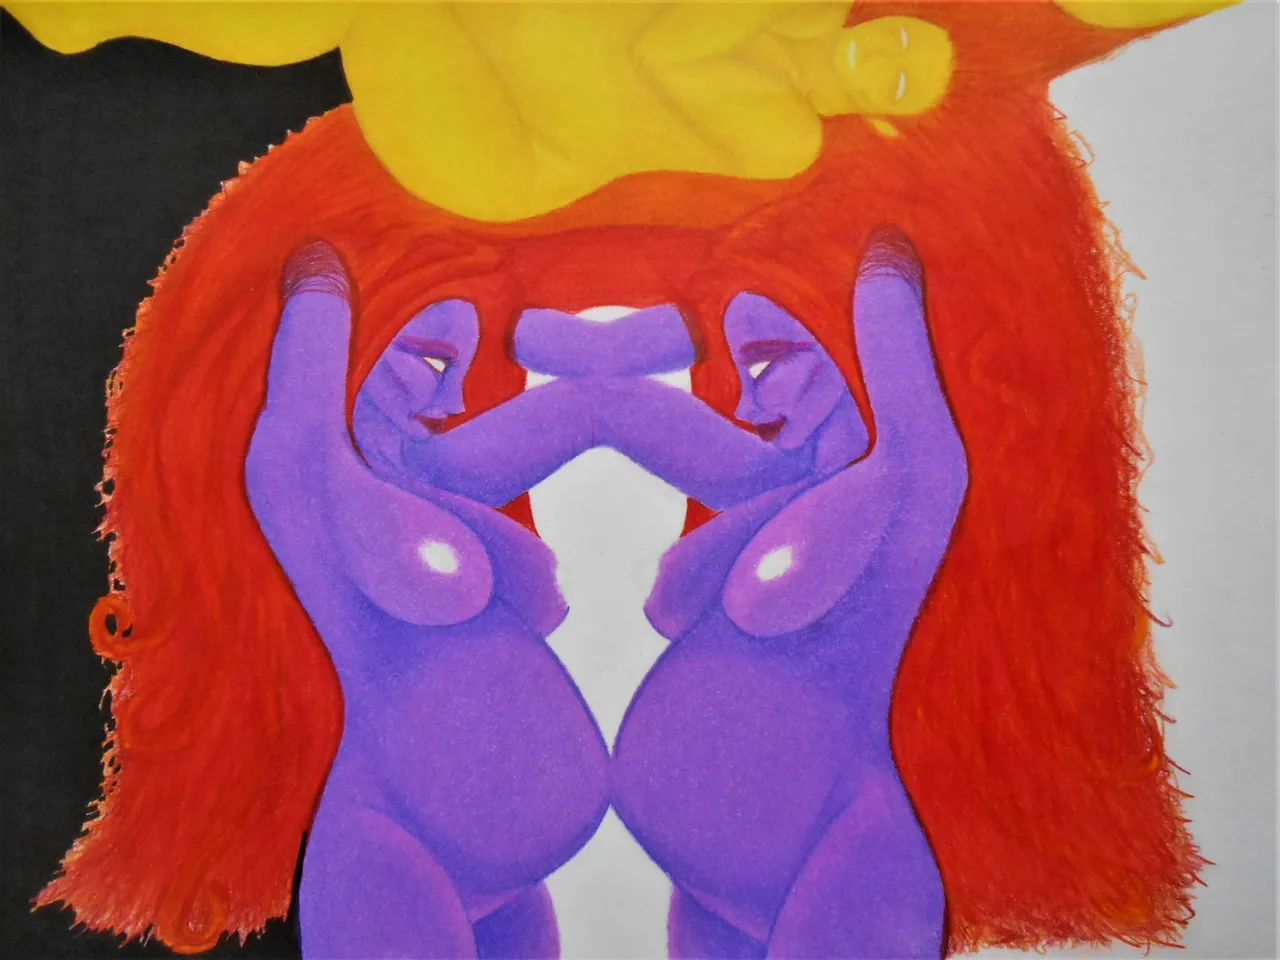
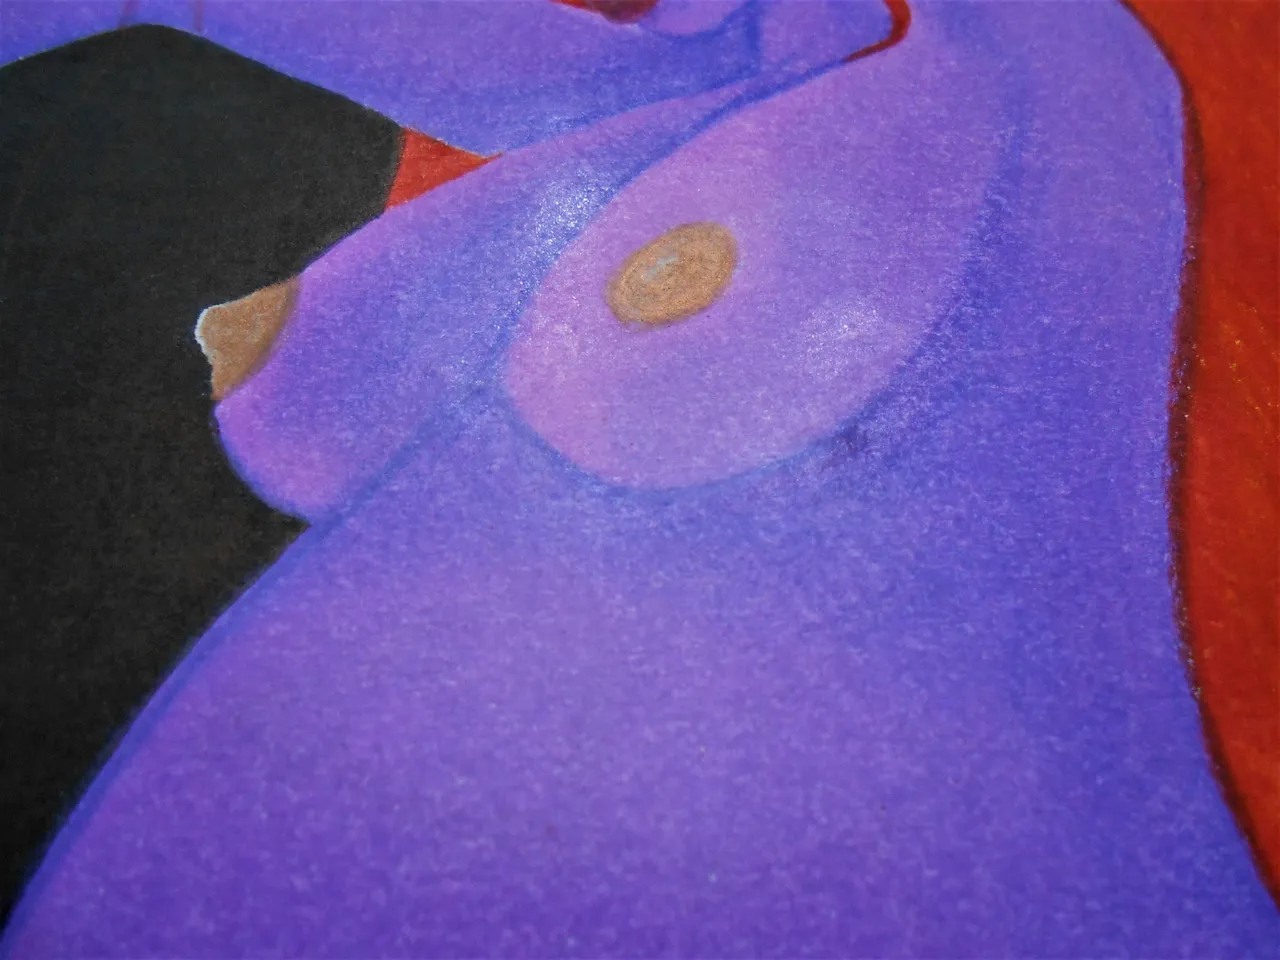
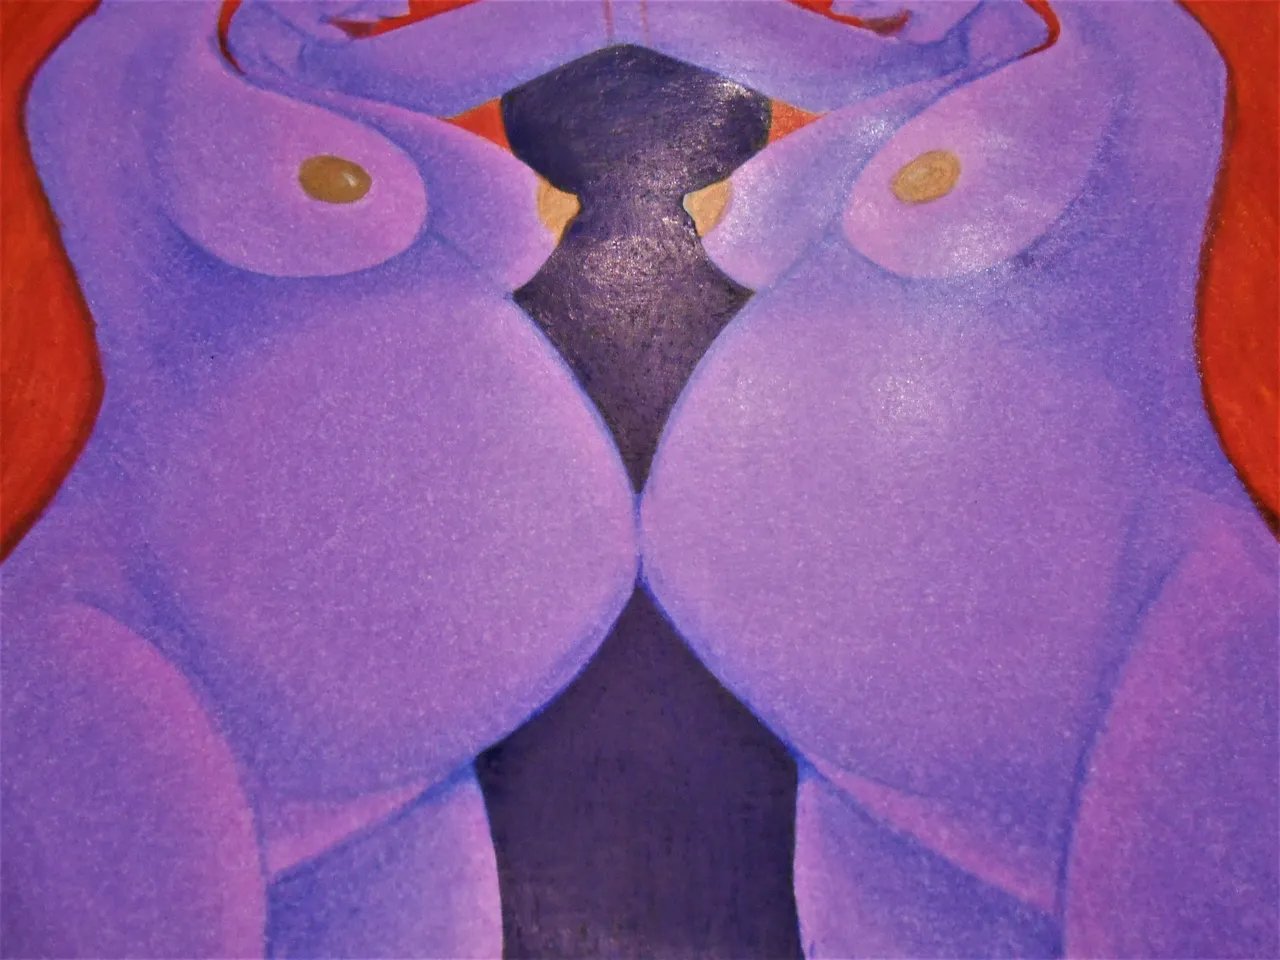
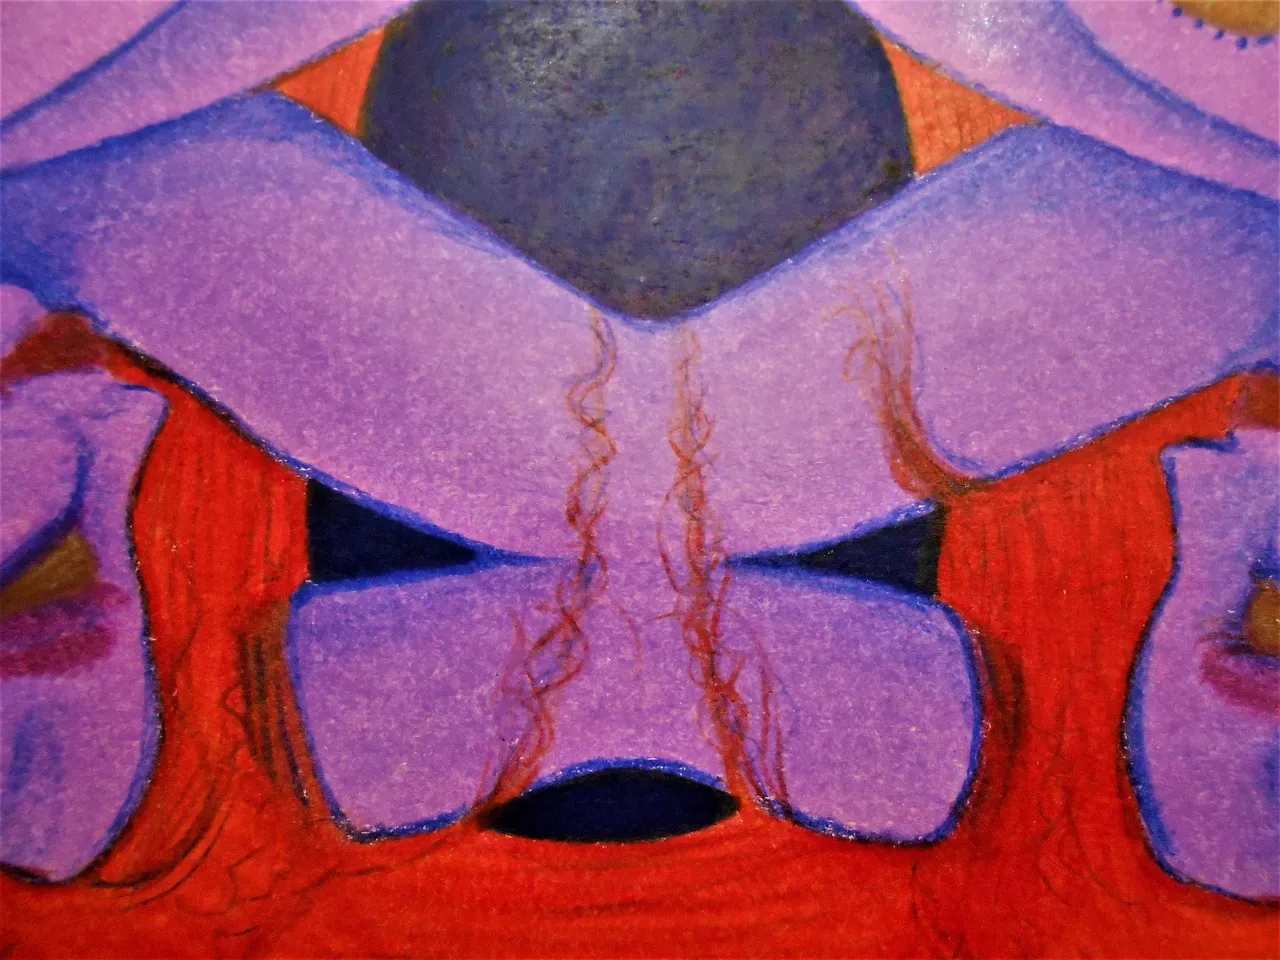
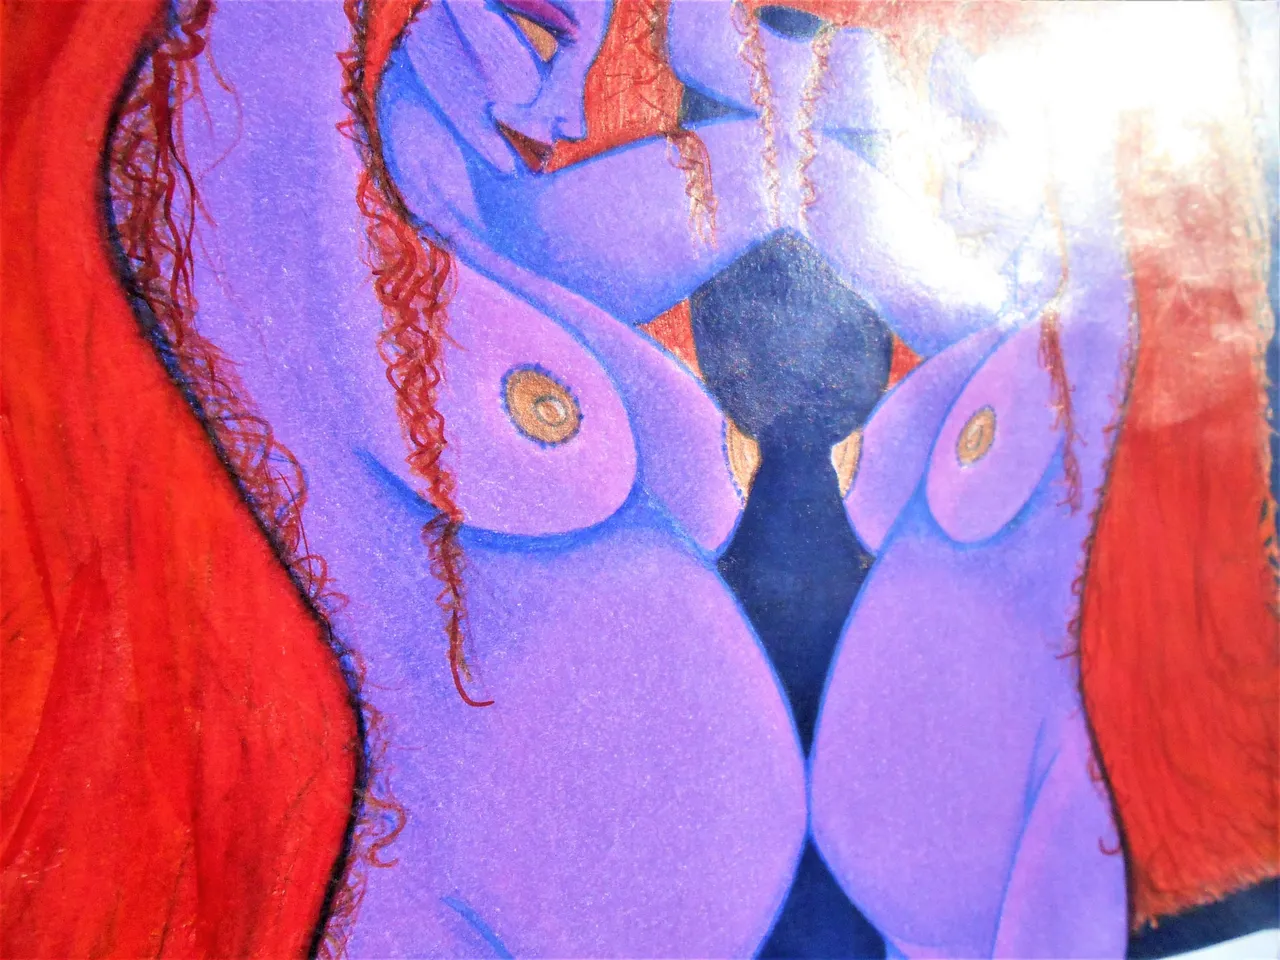
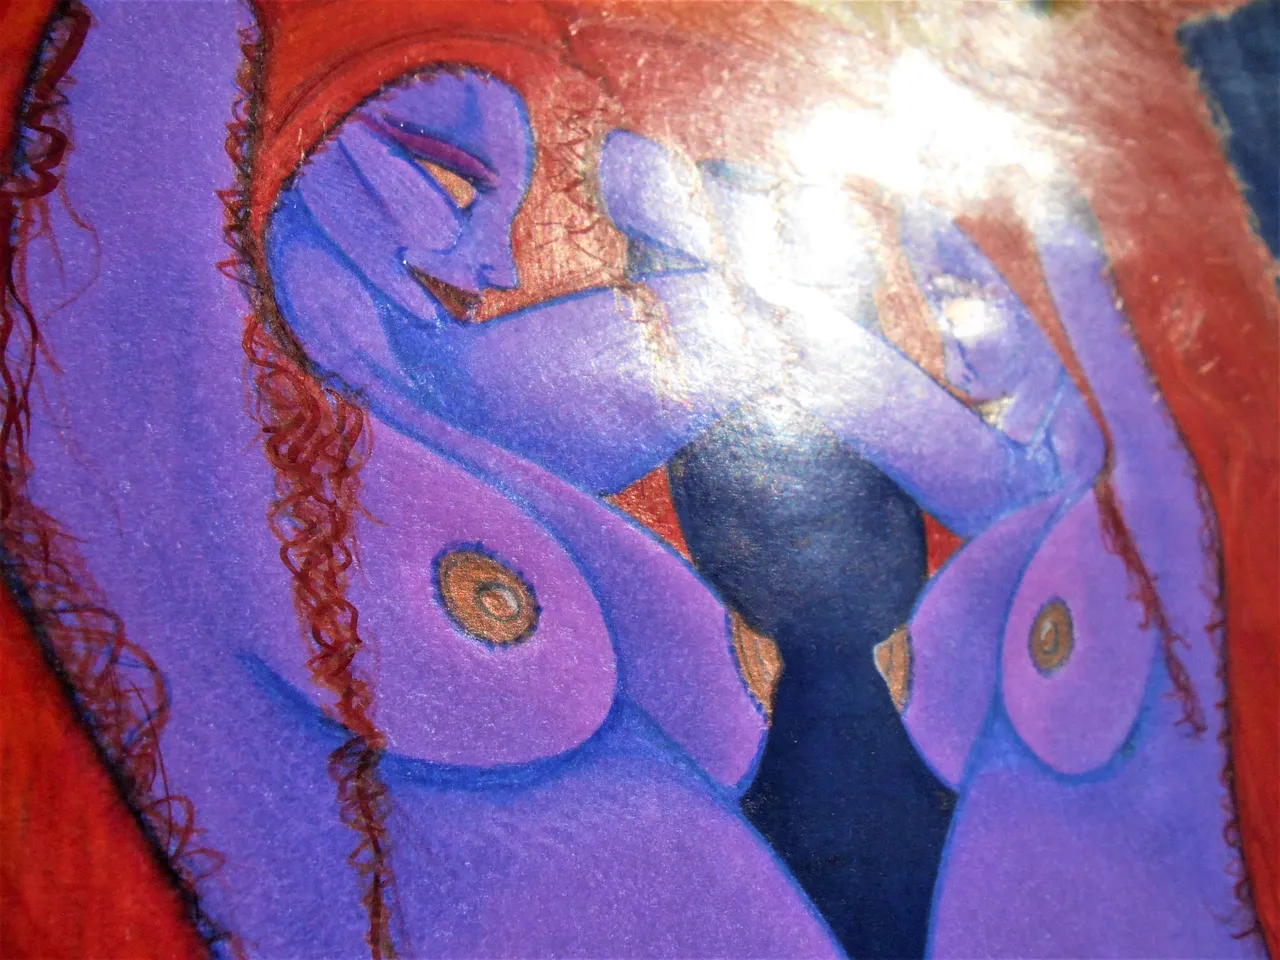
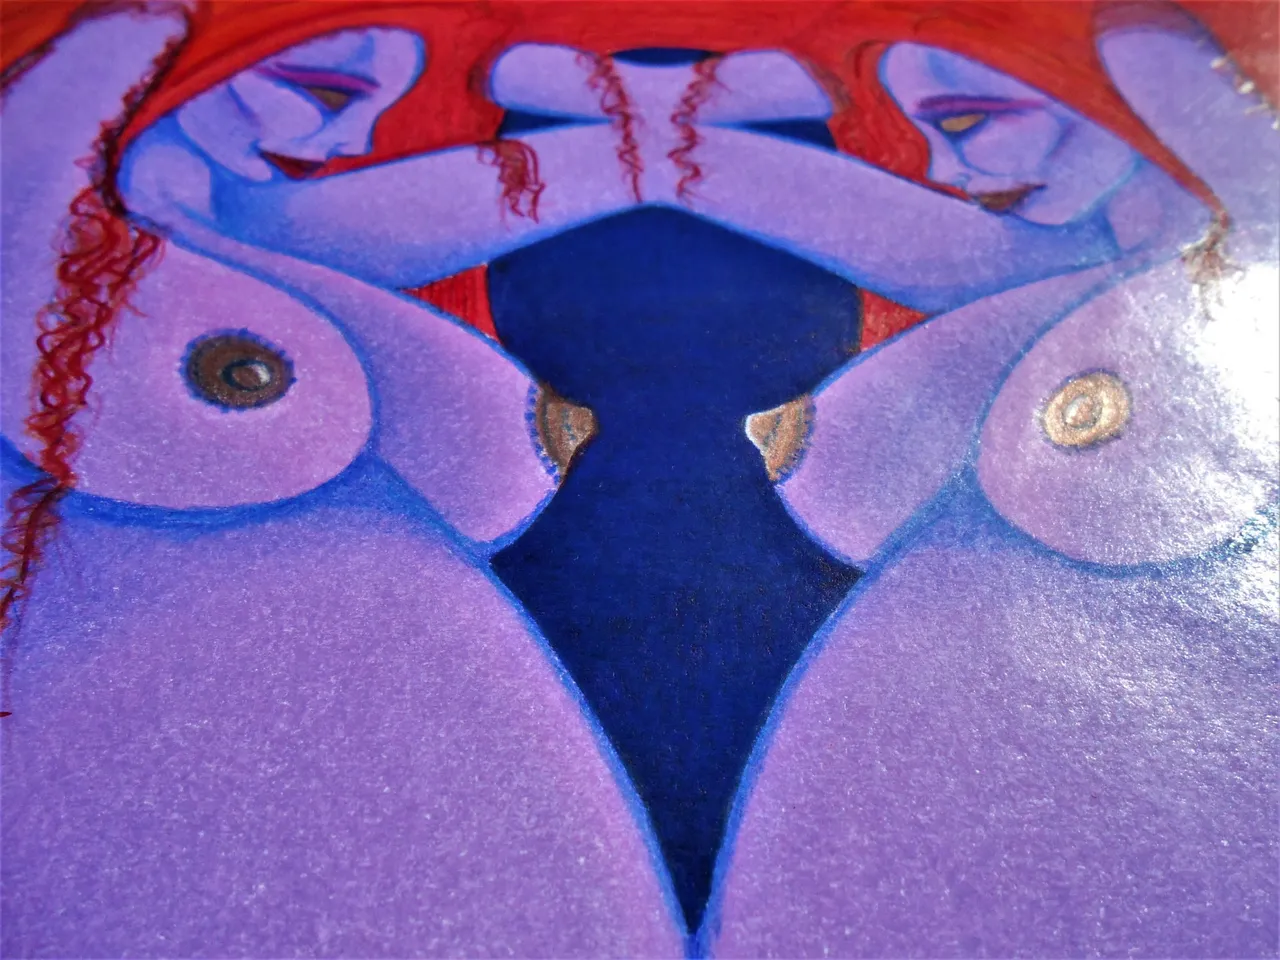
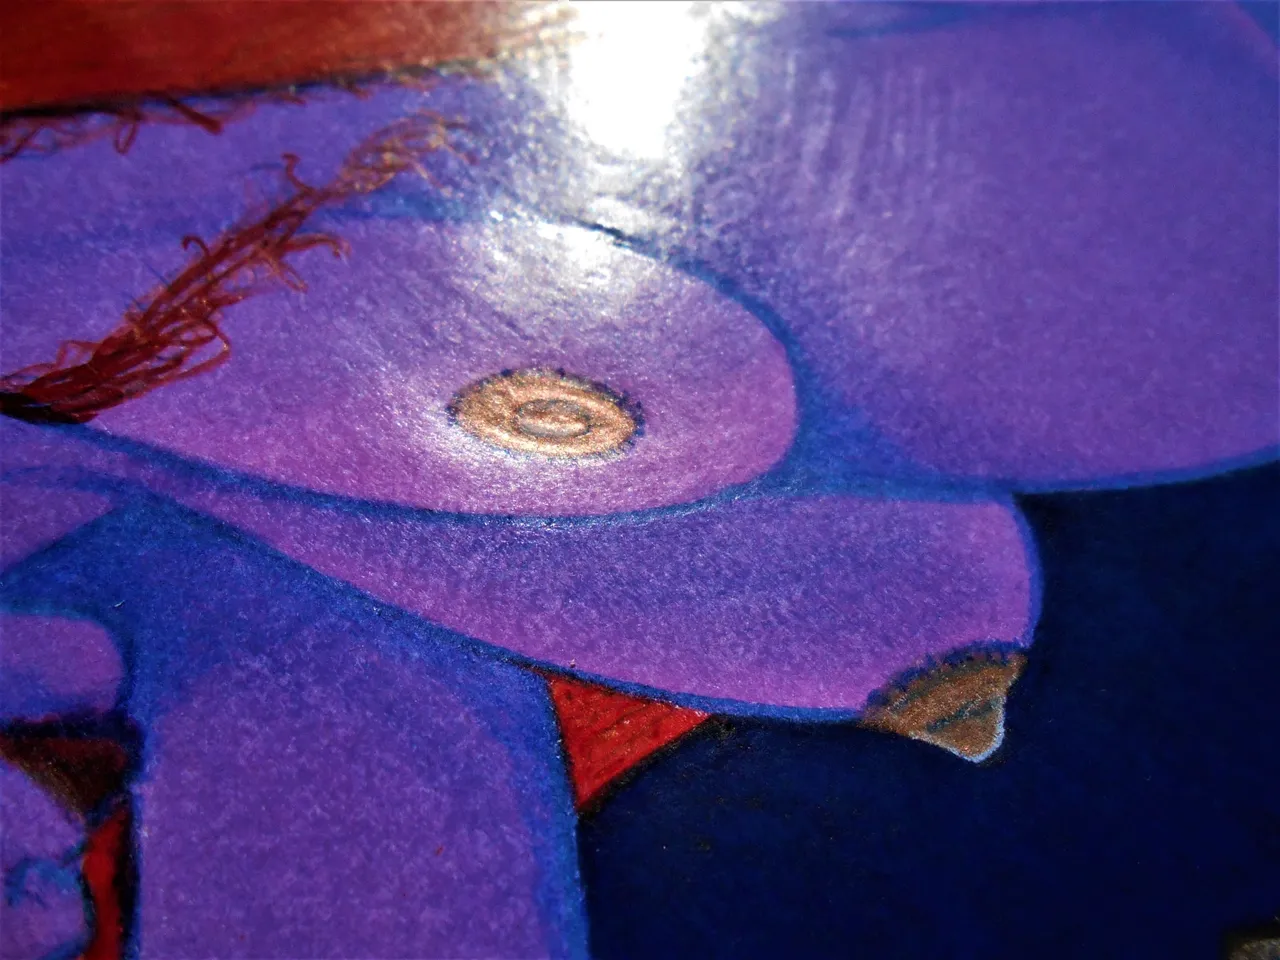
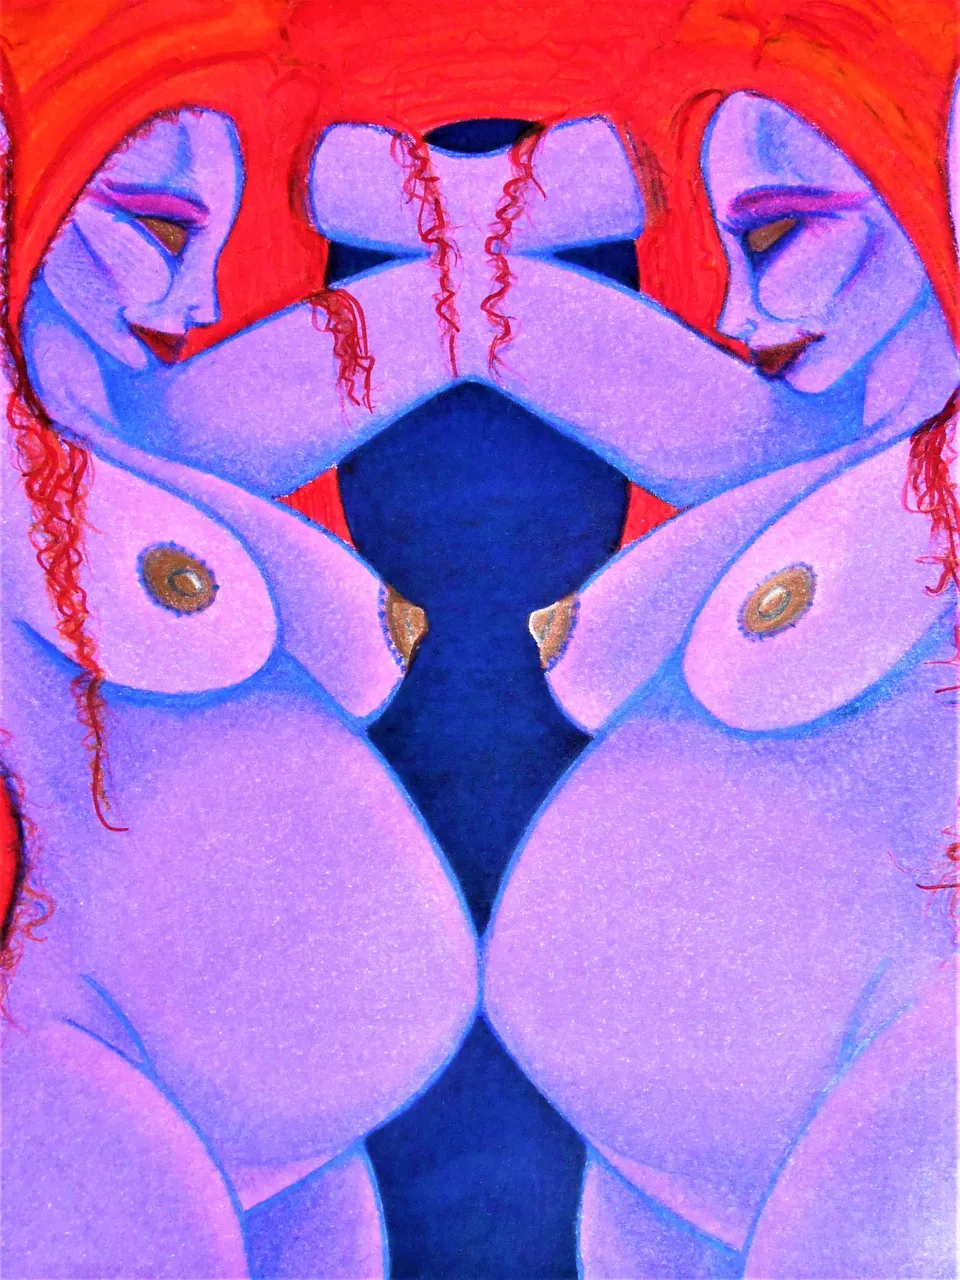
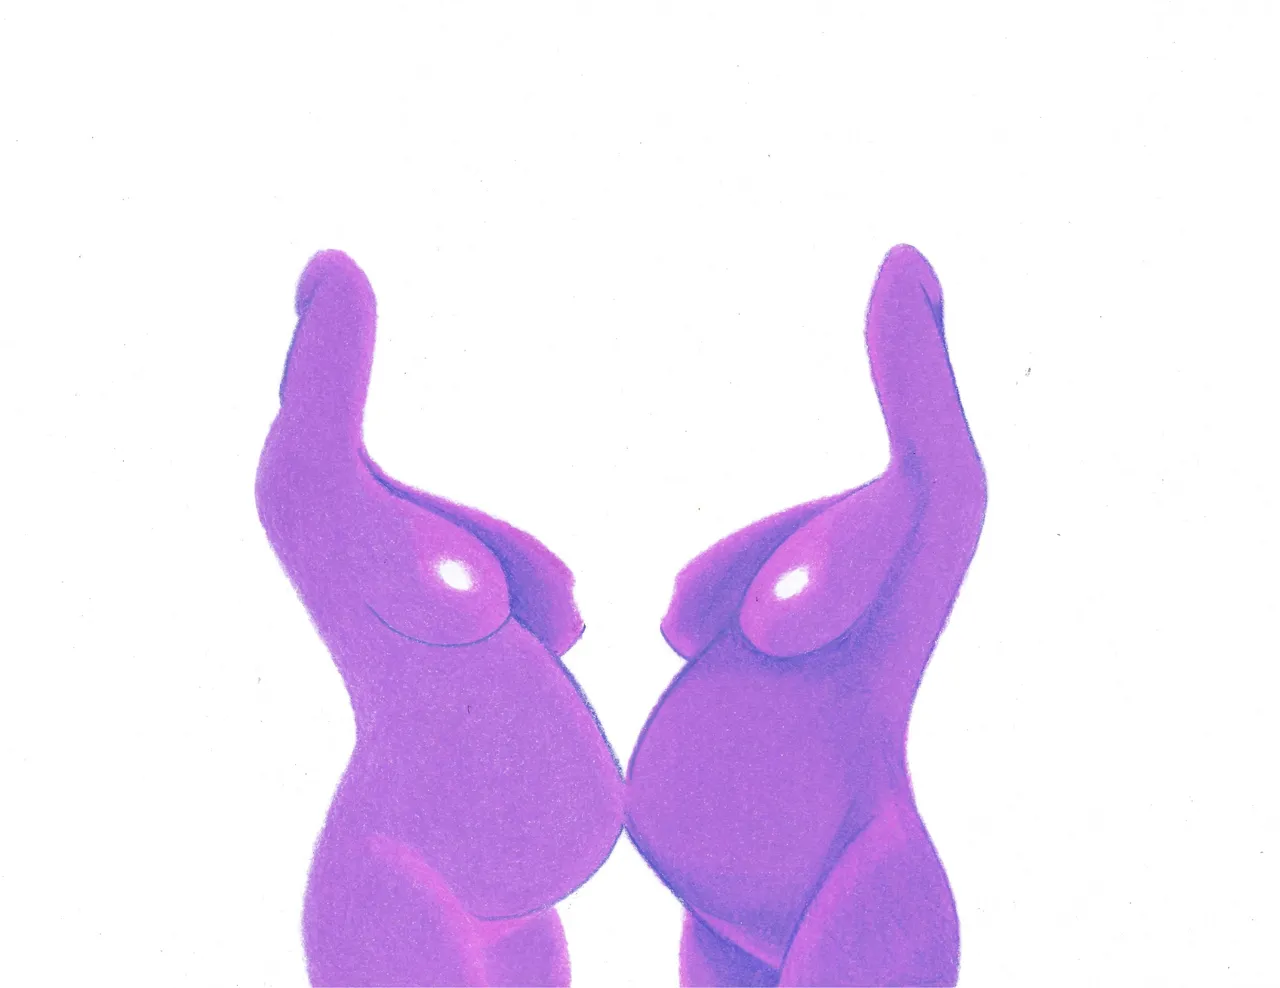
So, i did a thing. Before finishing the black inbetween the breasts, (which was a mistake to not do it all at once in the run) i decided to go ahead and color the nipples.
I had originally thought about connecting the two ladies with streams of milk kind of like how the hair connects them but decided to abandon that idea.
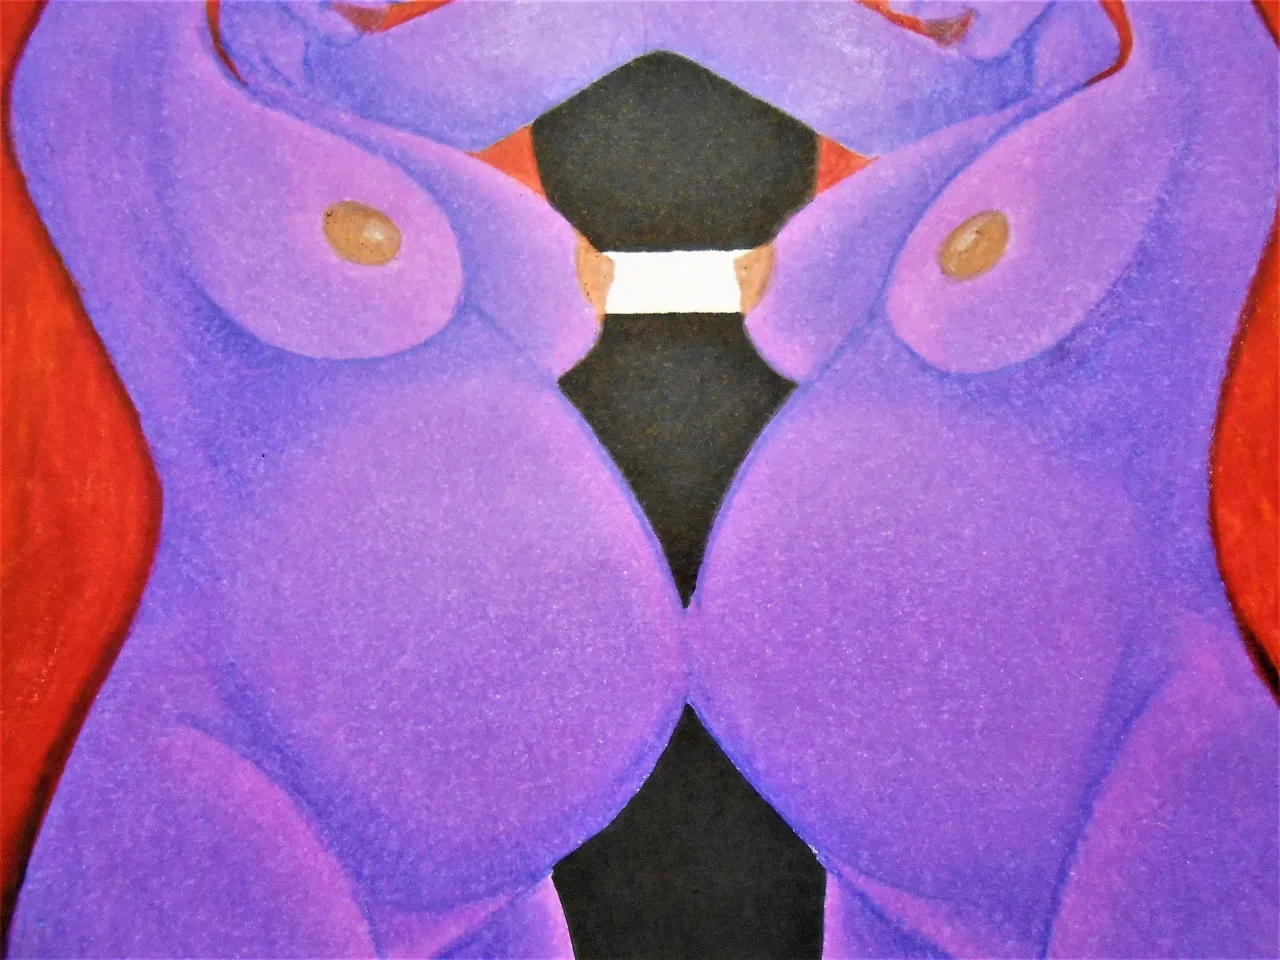
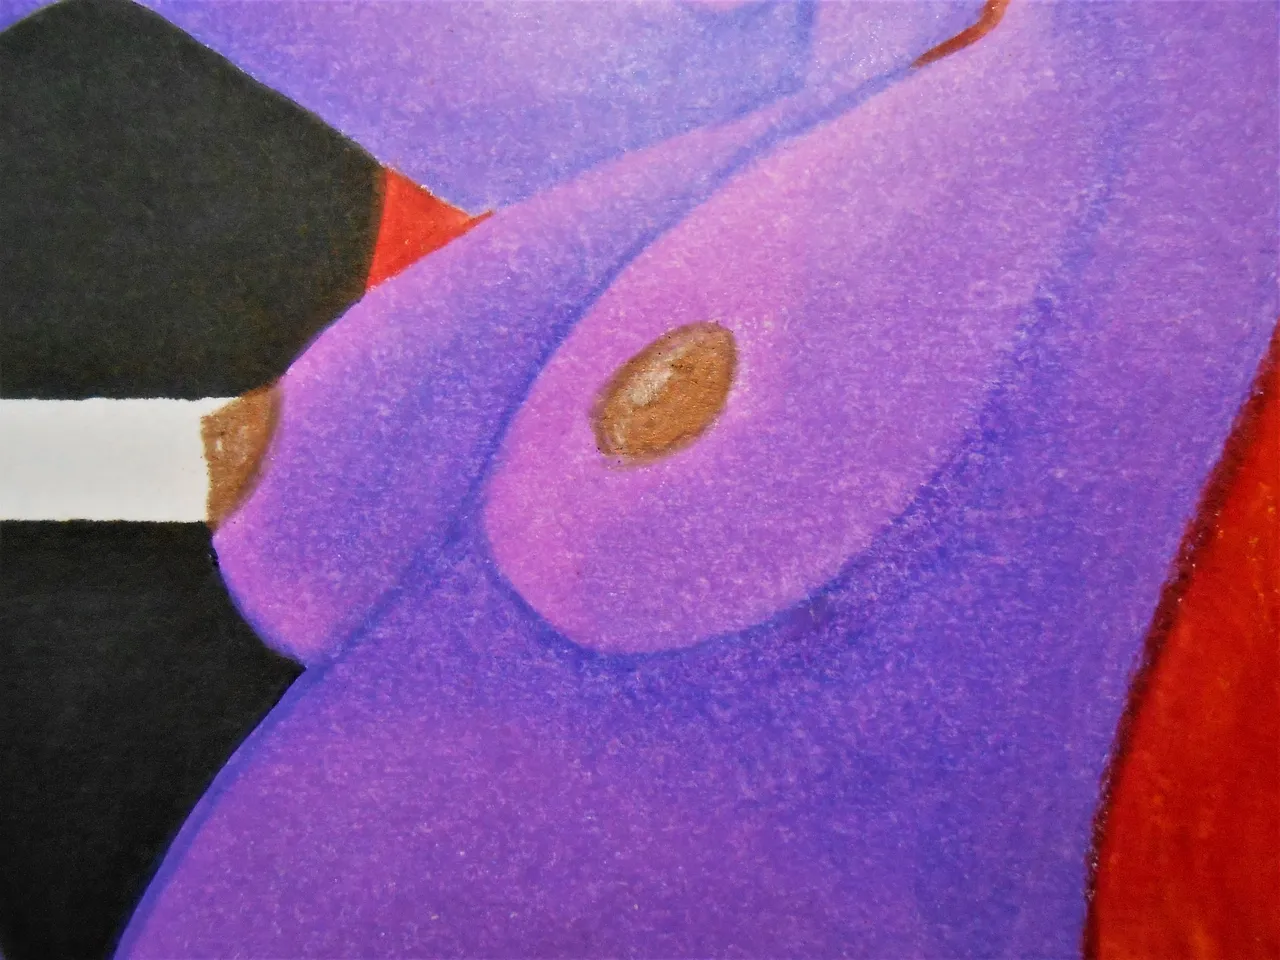
I used a metallic copper pencil just to get the idea down and i end up refining the nipples a few times before the final version.
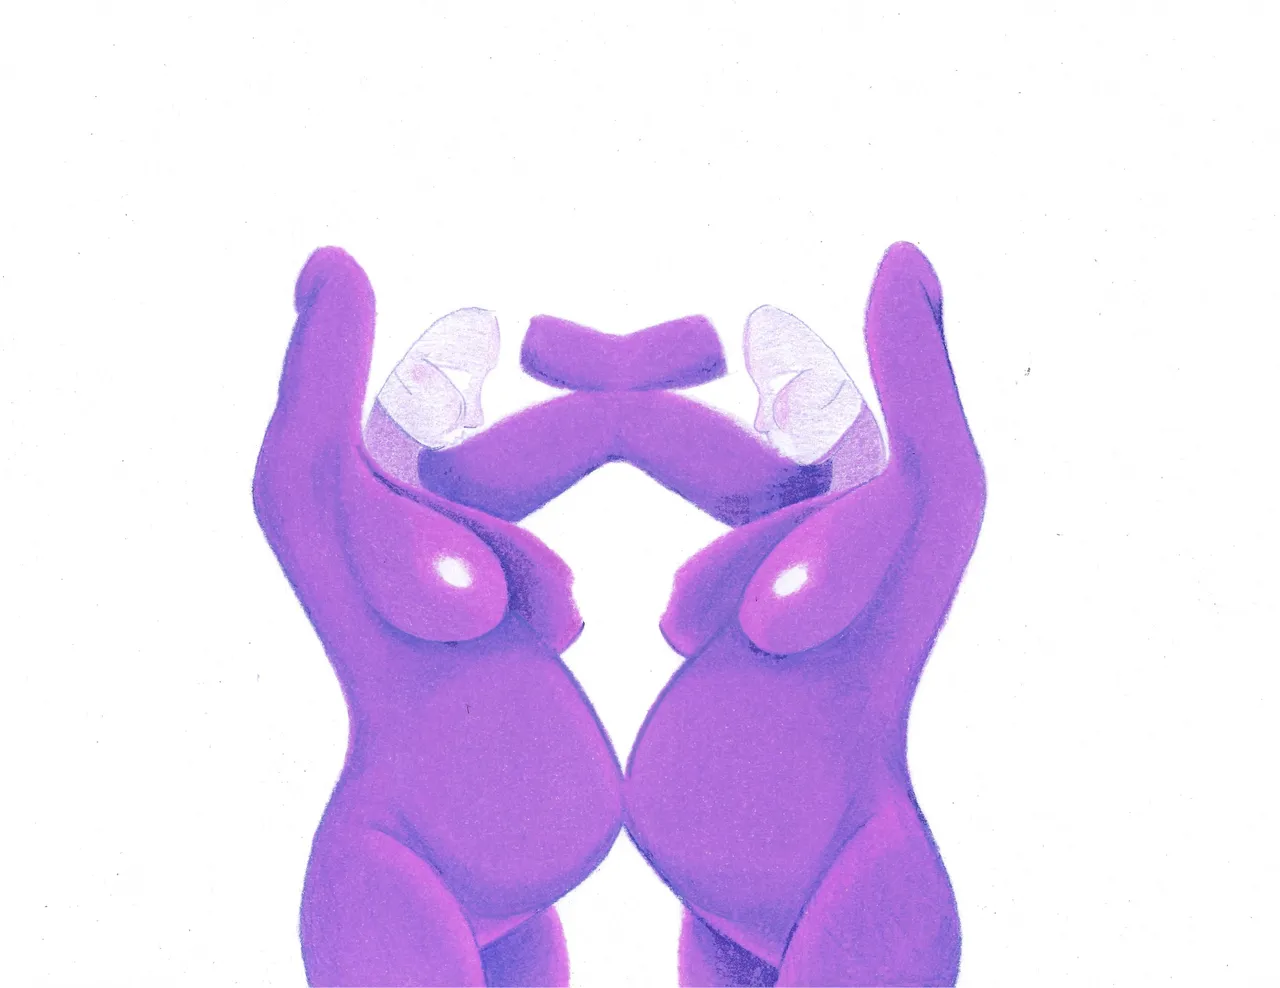
I've never done the justify pull left and right but i thought it might help get through some of the images a bit faster. If you want to see them in a higher resolution... you can always click on any of these individual images to get a zoomed view. I didn't feel i needed to explain much more than i already did about filling in the black.
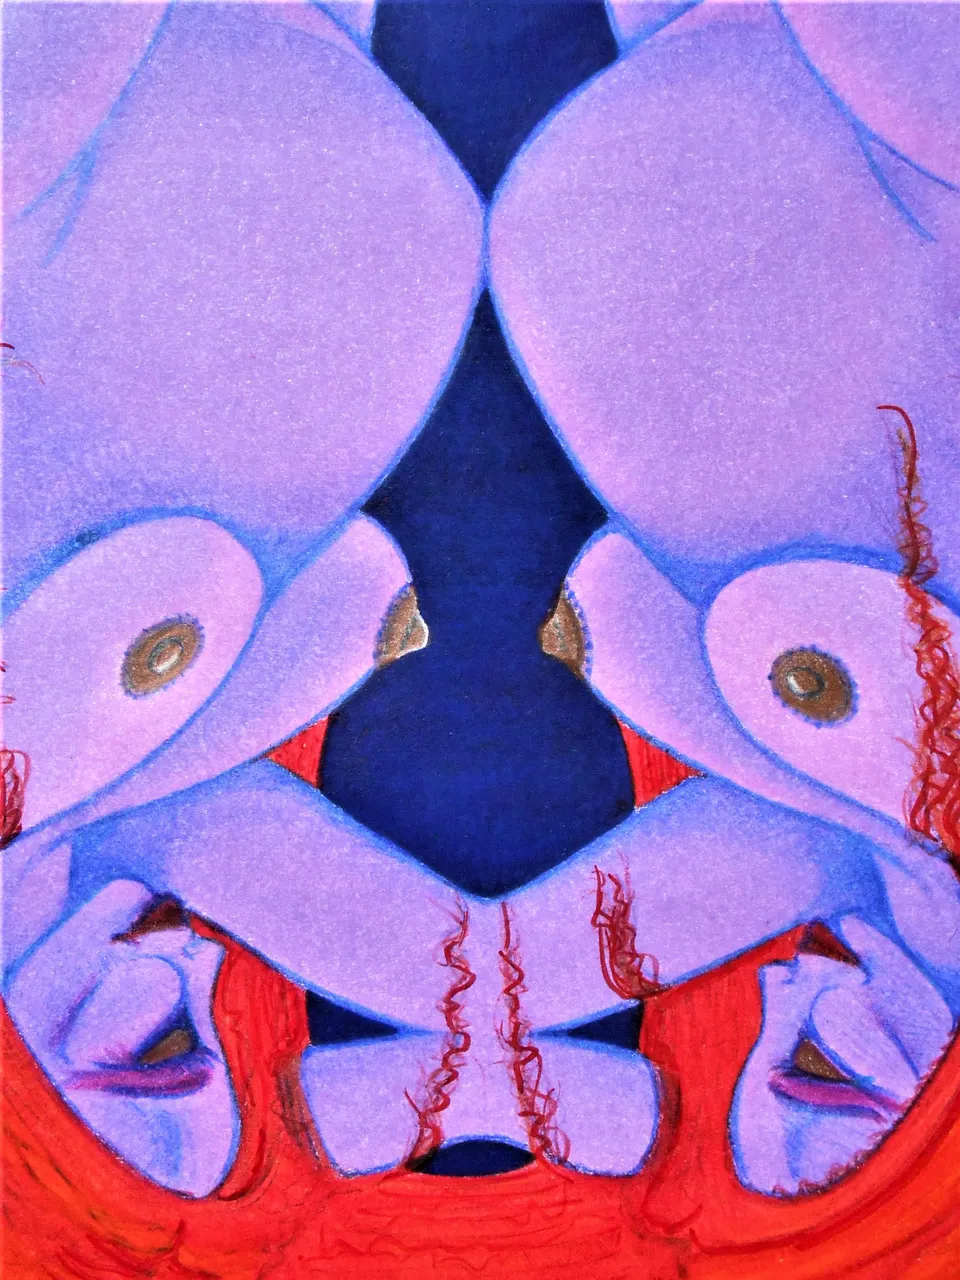
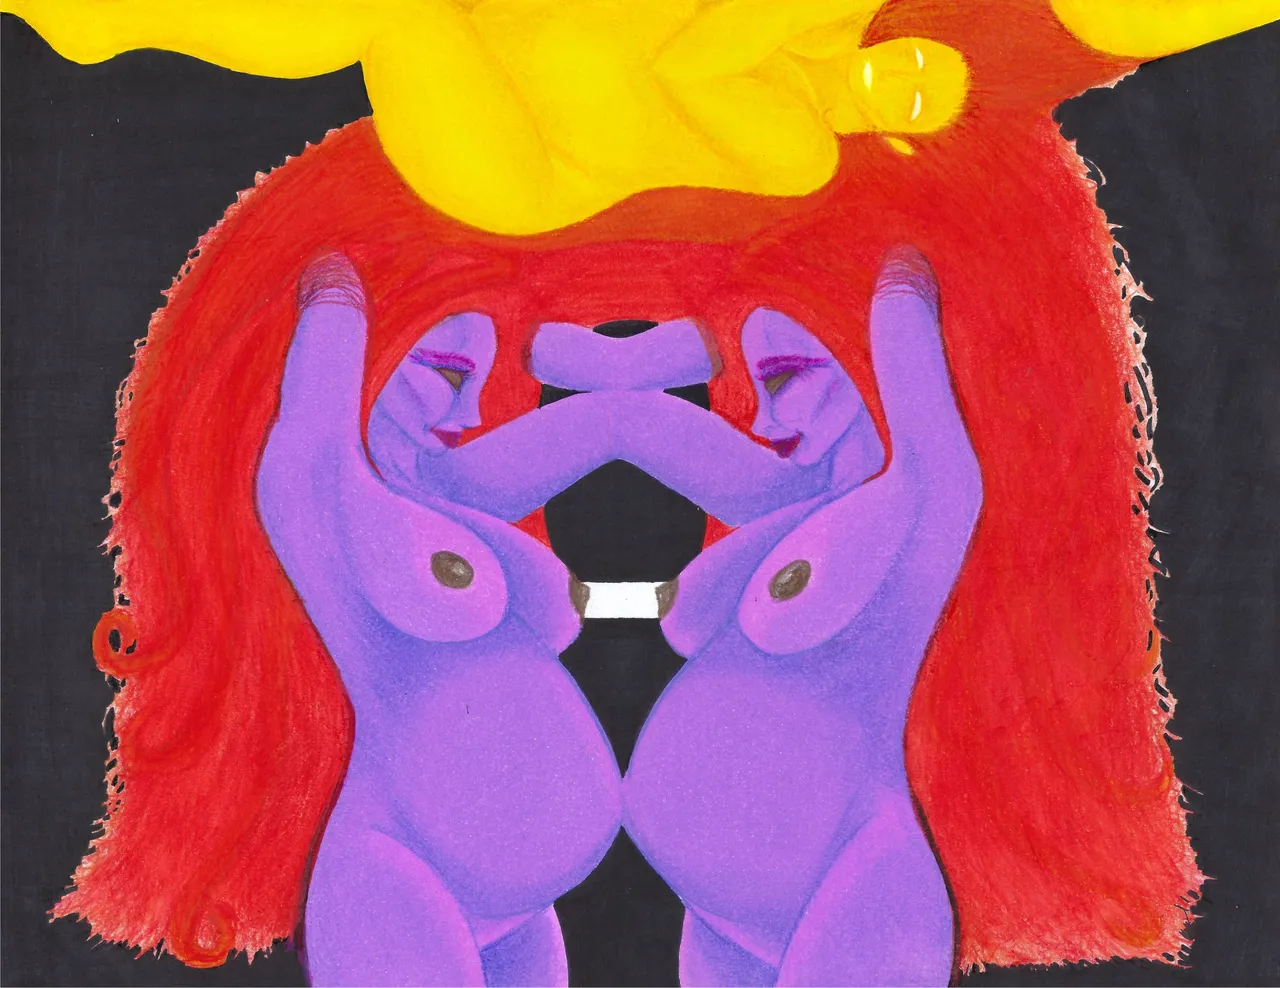
~ Black & Blue ~
Now that black is covering the whole background i could use and build the pencil layers up without already having a layer of texture to construct on top of. This helped get more out of my pencils and helped the paper hold out longer as i explained in the previous posts. Using the black also eliminated those pesky white specs that never seem to take the pencil coating all the way! hahaha
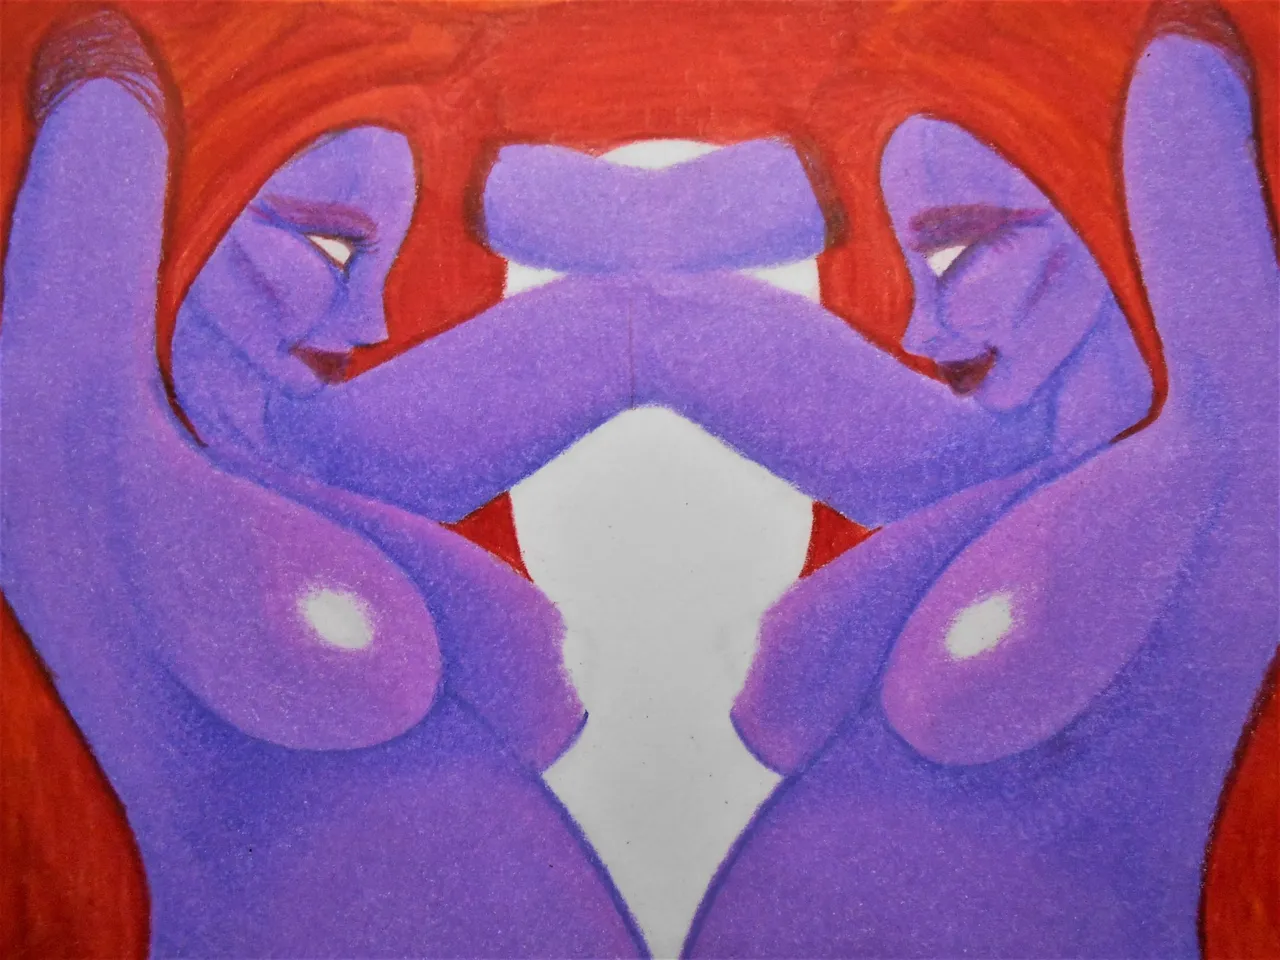
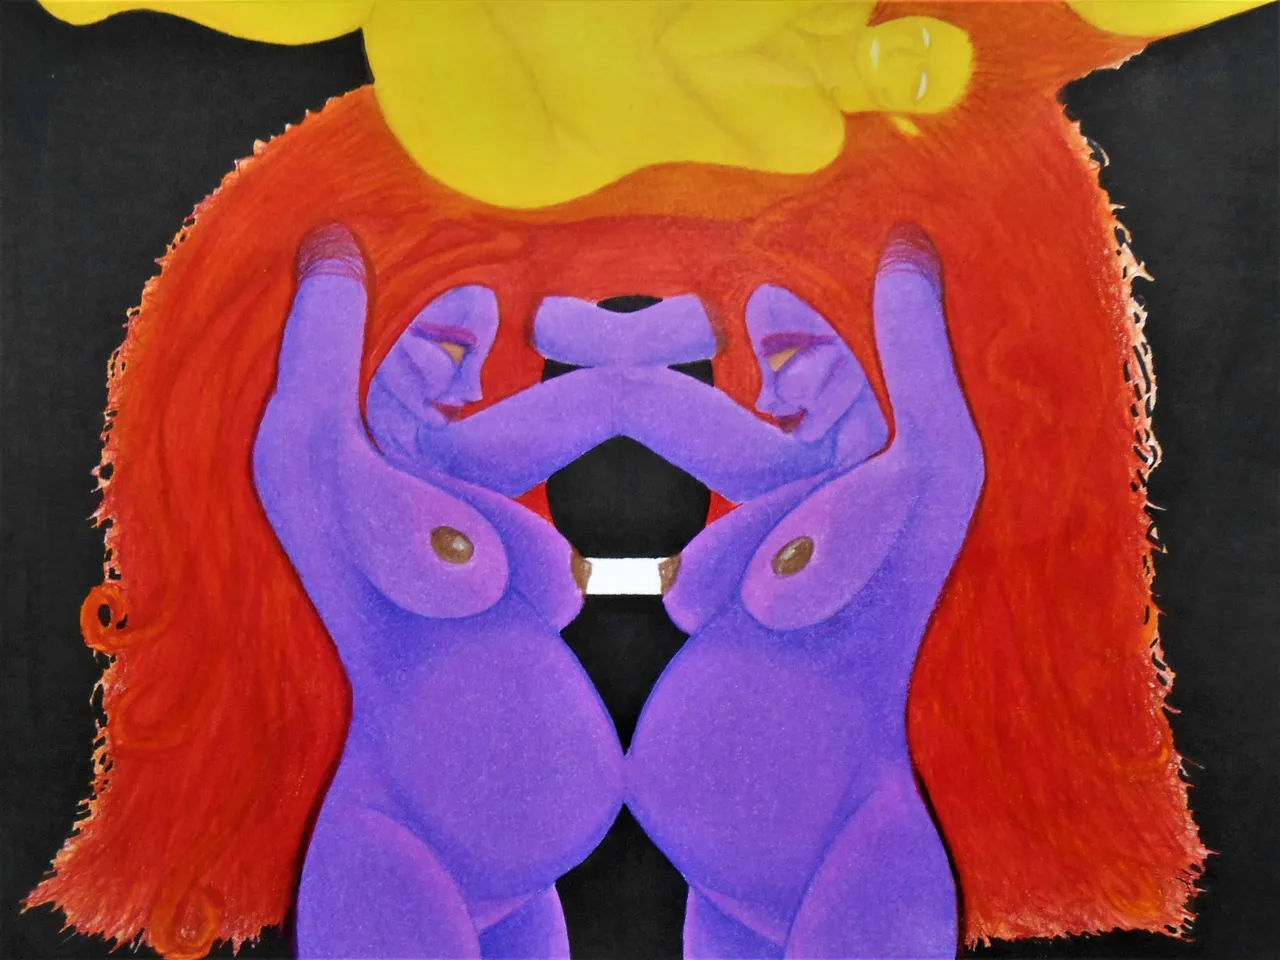
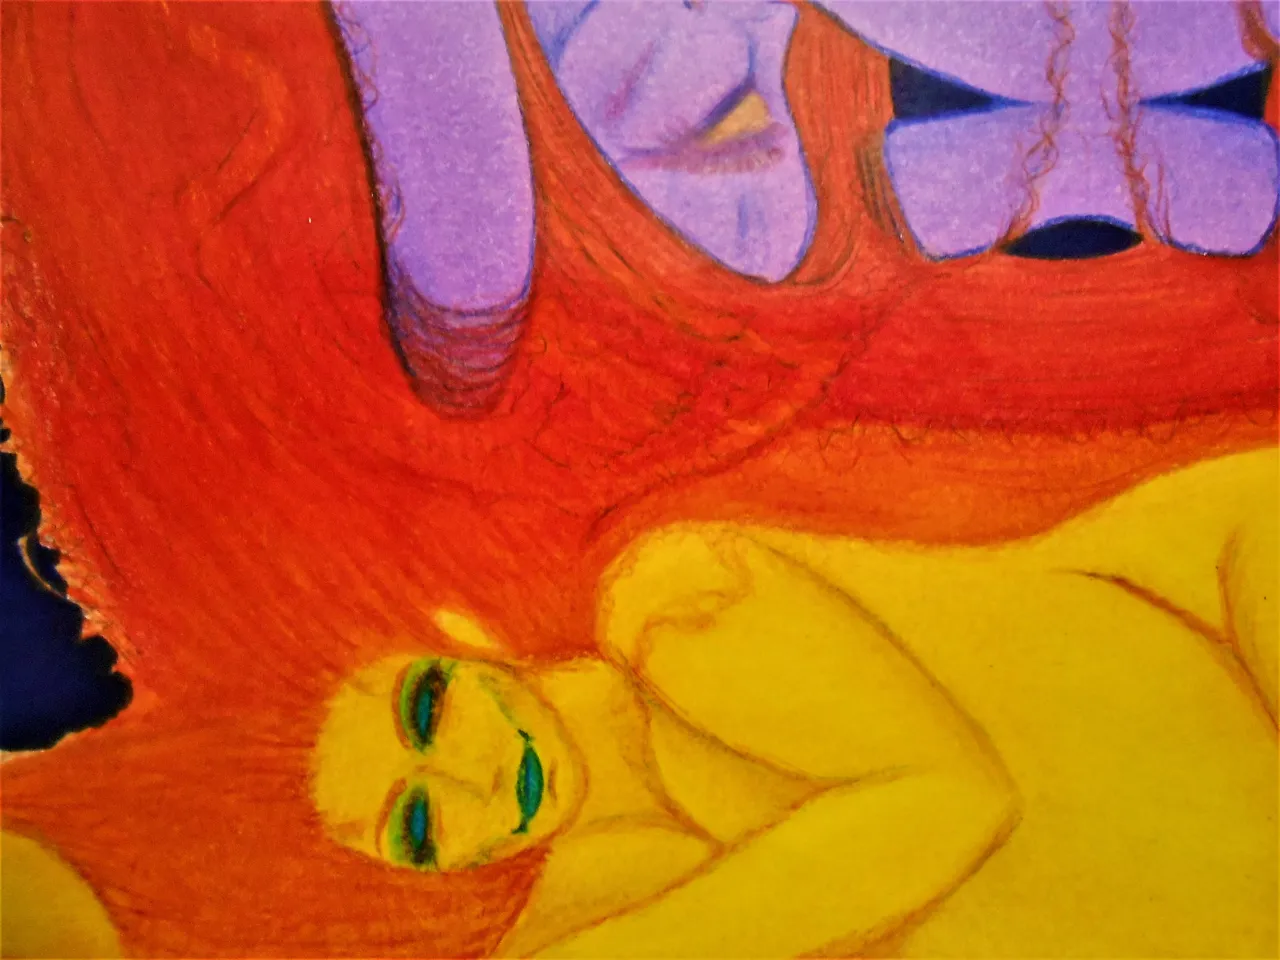
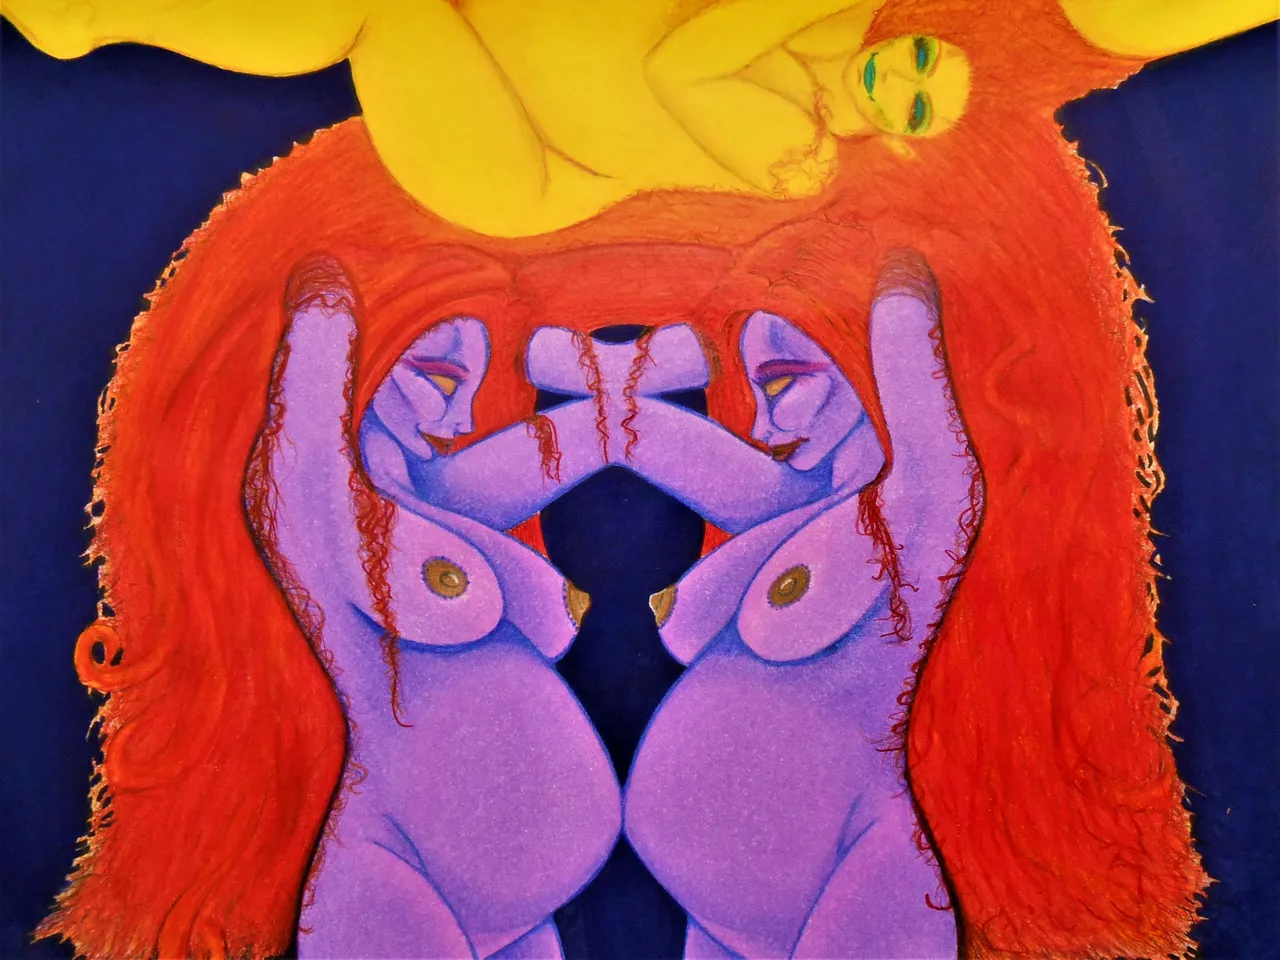
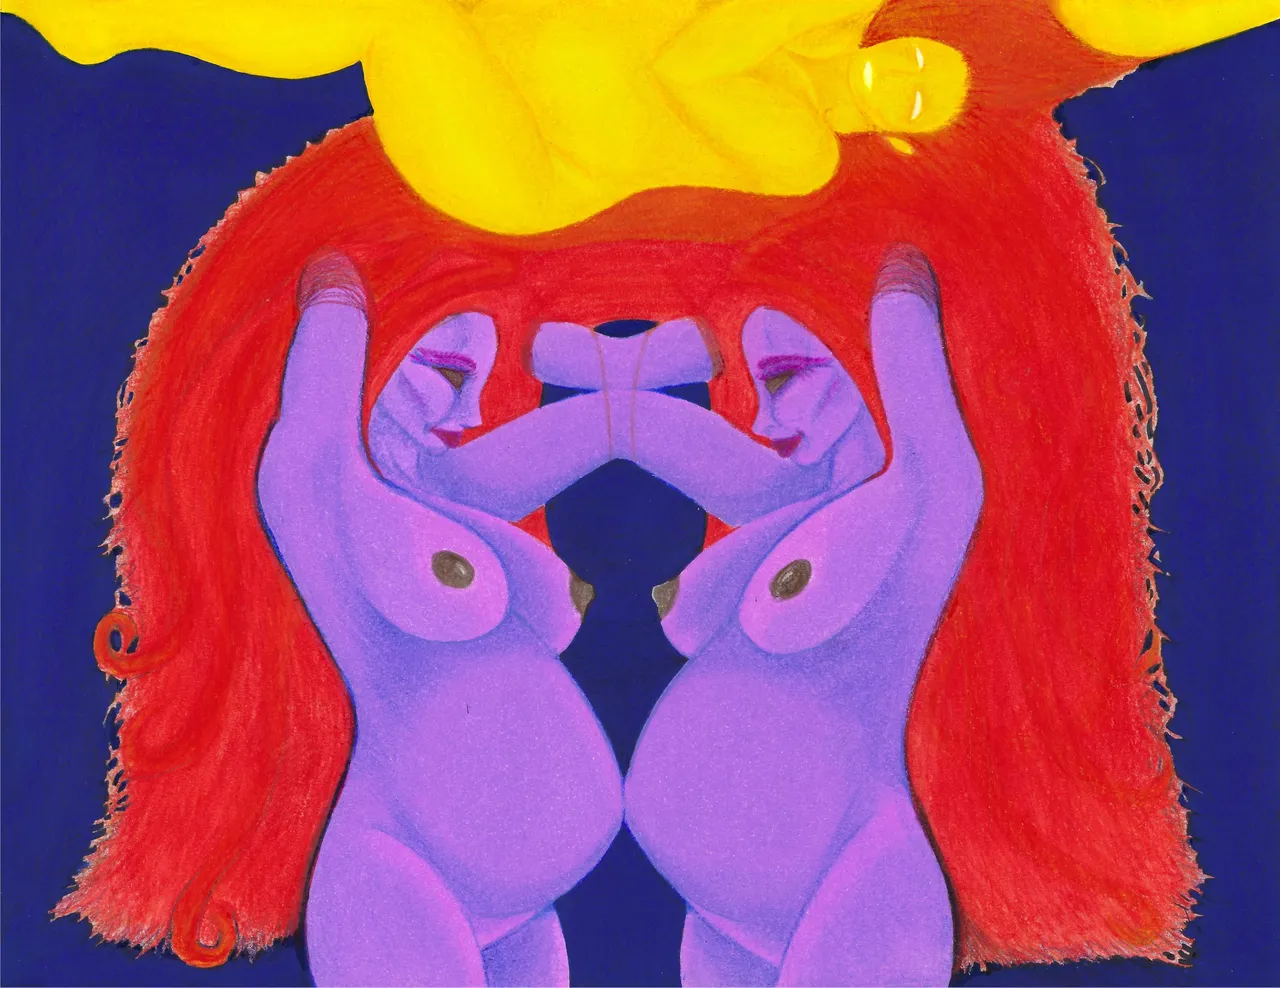
I really liked the tone of the blue once it was overlayed onto the black. Depending on the angles, it had a purple feel to it which coordinated with the purple skin tones. It also had a deep blue which shone through that went well with the yellow lady. At other angles it took on a black tone. It's something that can really only be fully appreciated in person.
Generally, the darker the color and the richer the tones the softer the lead is on the pencil. This creates a lot more color dust and requires a softer touch as well as a lot of careful sharpenings. If you sharpen too fast or too hard you lose your lead. If you don't get it sharp enough it doesn't spread the same.
So, it becomes a tight-rope balancing act to get these darker colors to behave. You can see in the image below the layered texture left behind after it builds up enough. This needed to later be smoothed out with a soft kleenex tissue but while being mindful not to sweep it onto the yellow lady and cross-contaminate the yellow.

~ Long Nights ~
I did some experimental long-exposure photography at this stage. It was night and i brought my artwork outside. It was noticible that the weird artificial lighting created some interesting tones that i thought to capture. I will make a seperate post with all those shots so i don't clog up this post with a tangent.
Light Painting Counts Too
There will be more to come of this selection of shots in a future photography post. It was my first time experimenting with the long exposure technique.
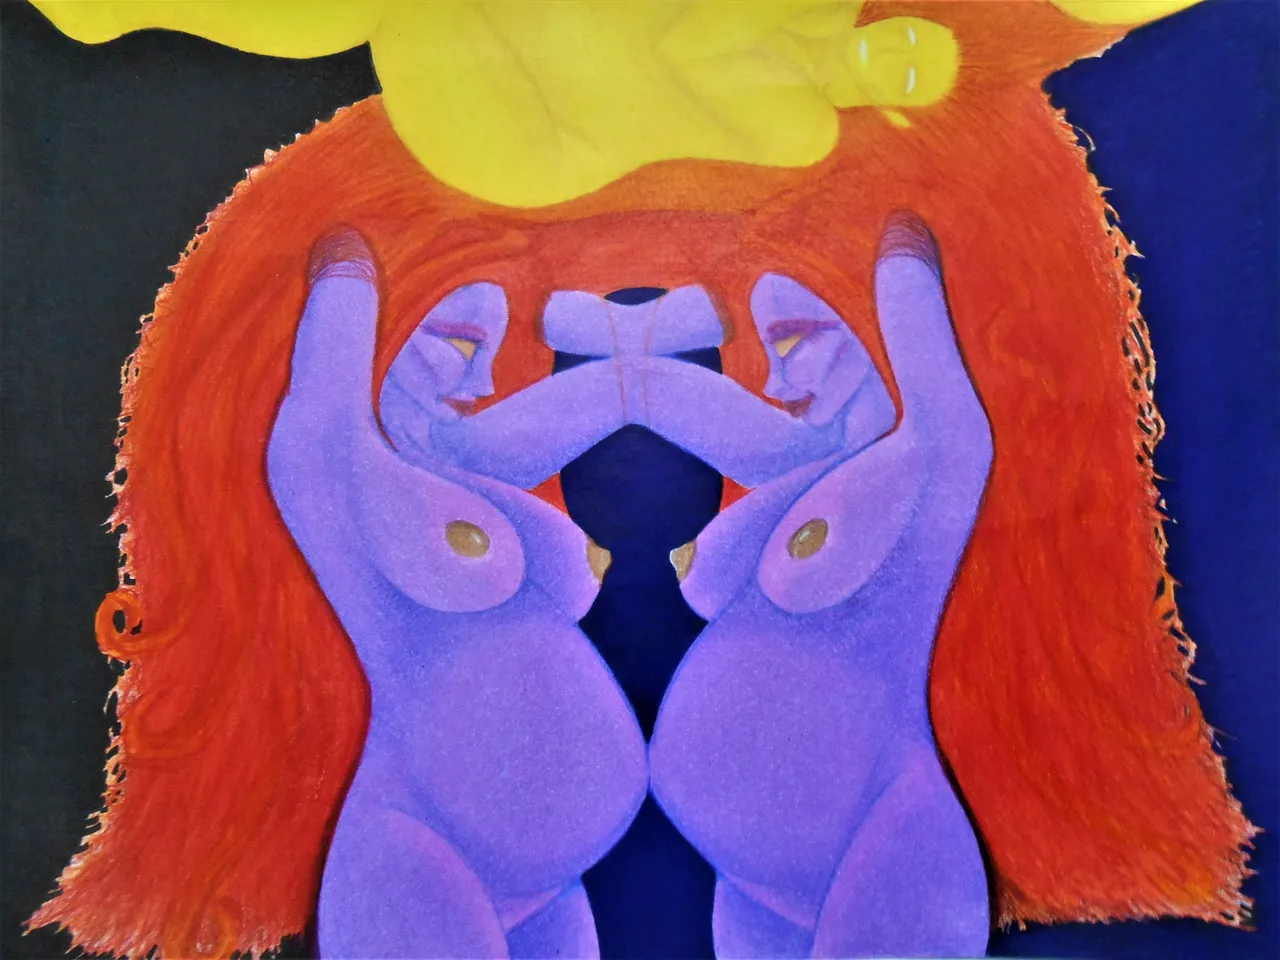
~ Getting Close To Finishing ~
Of course, close is a relative term. But, once the background was getting finished up, all i could think about was getting the details addressed.
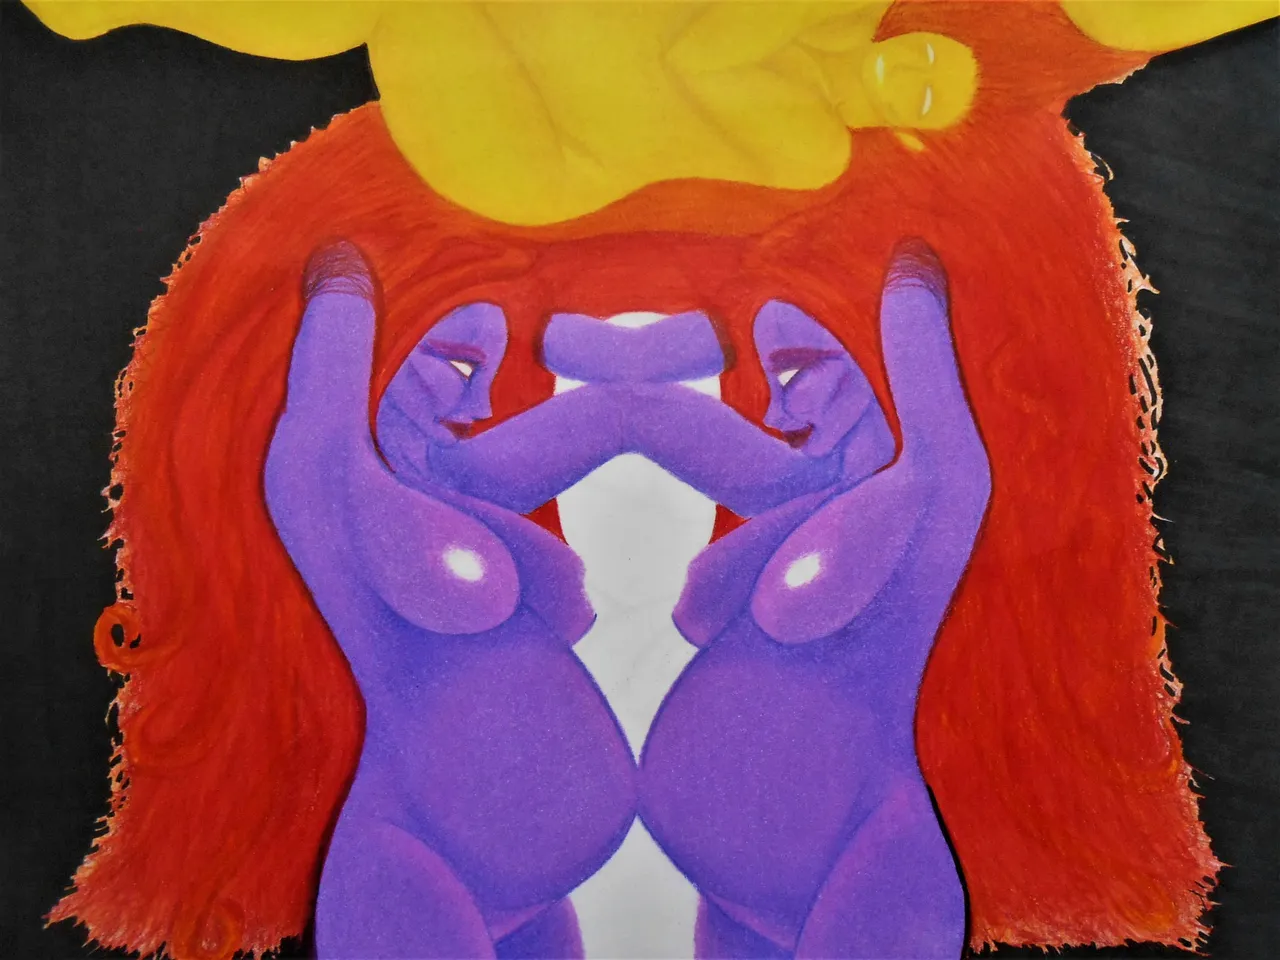
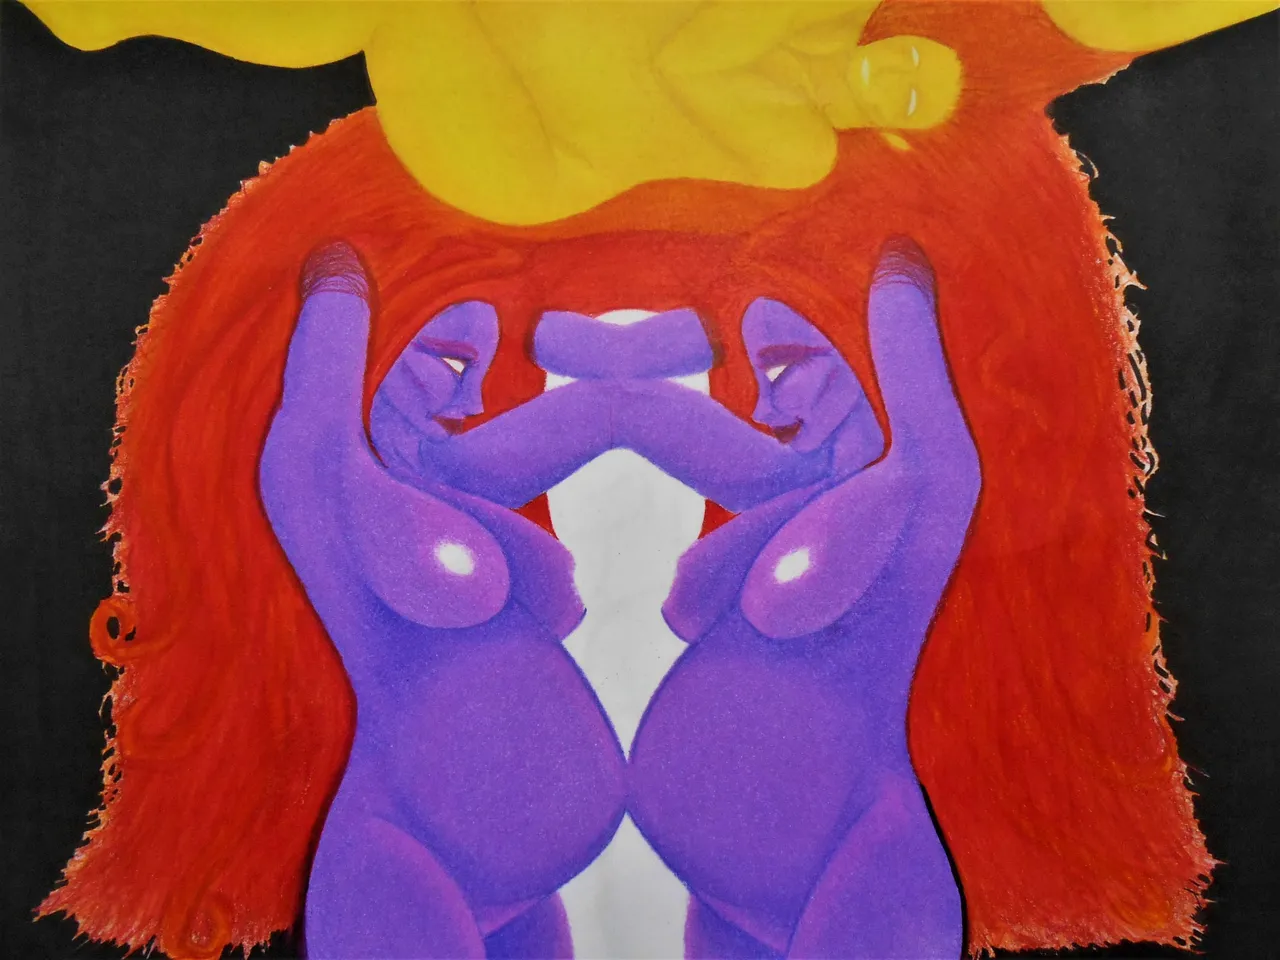
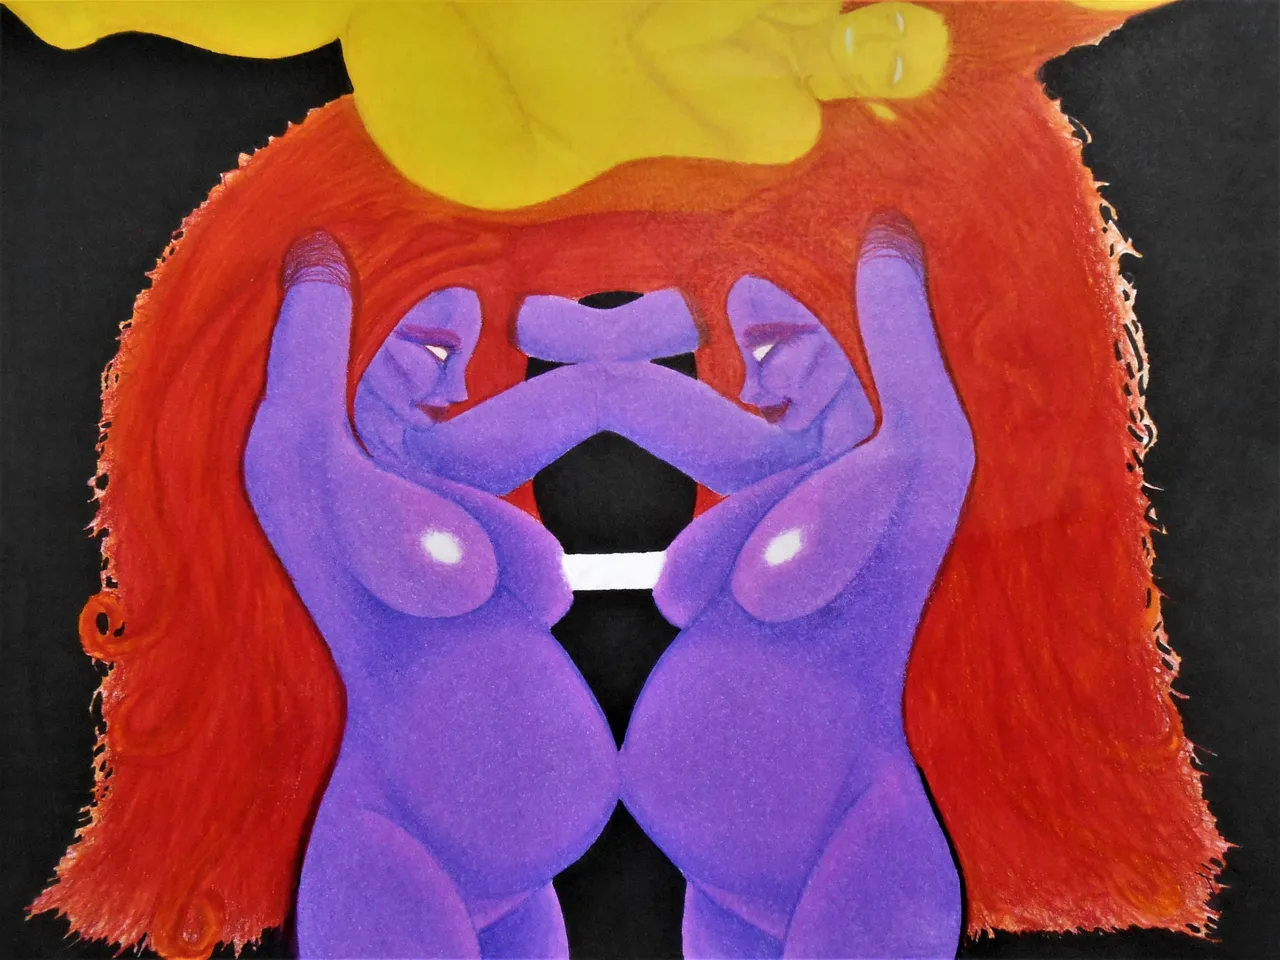
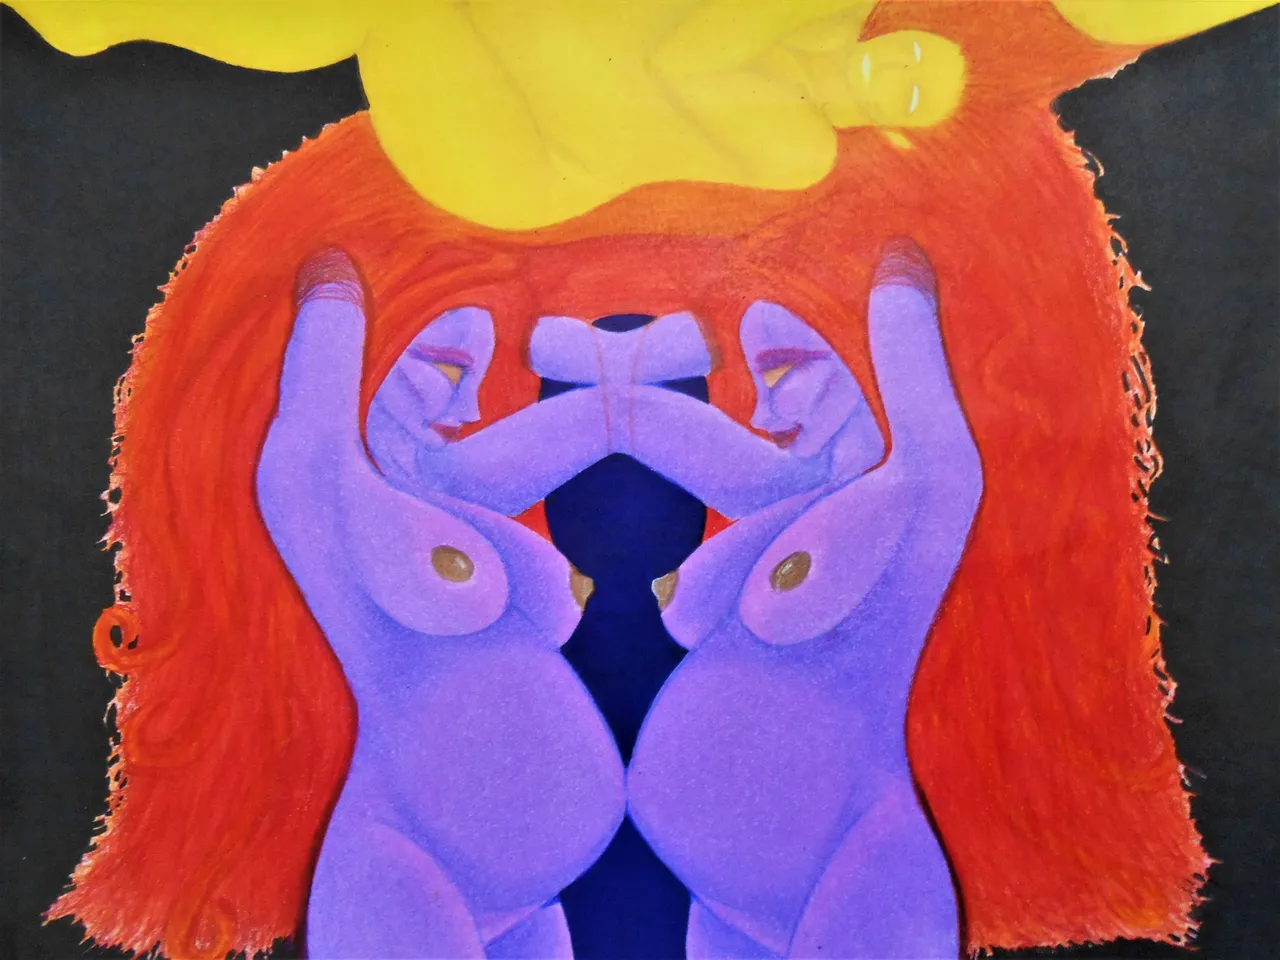
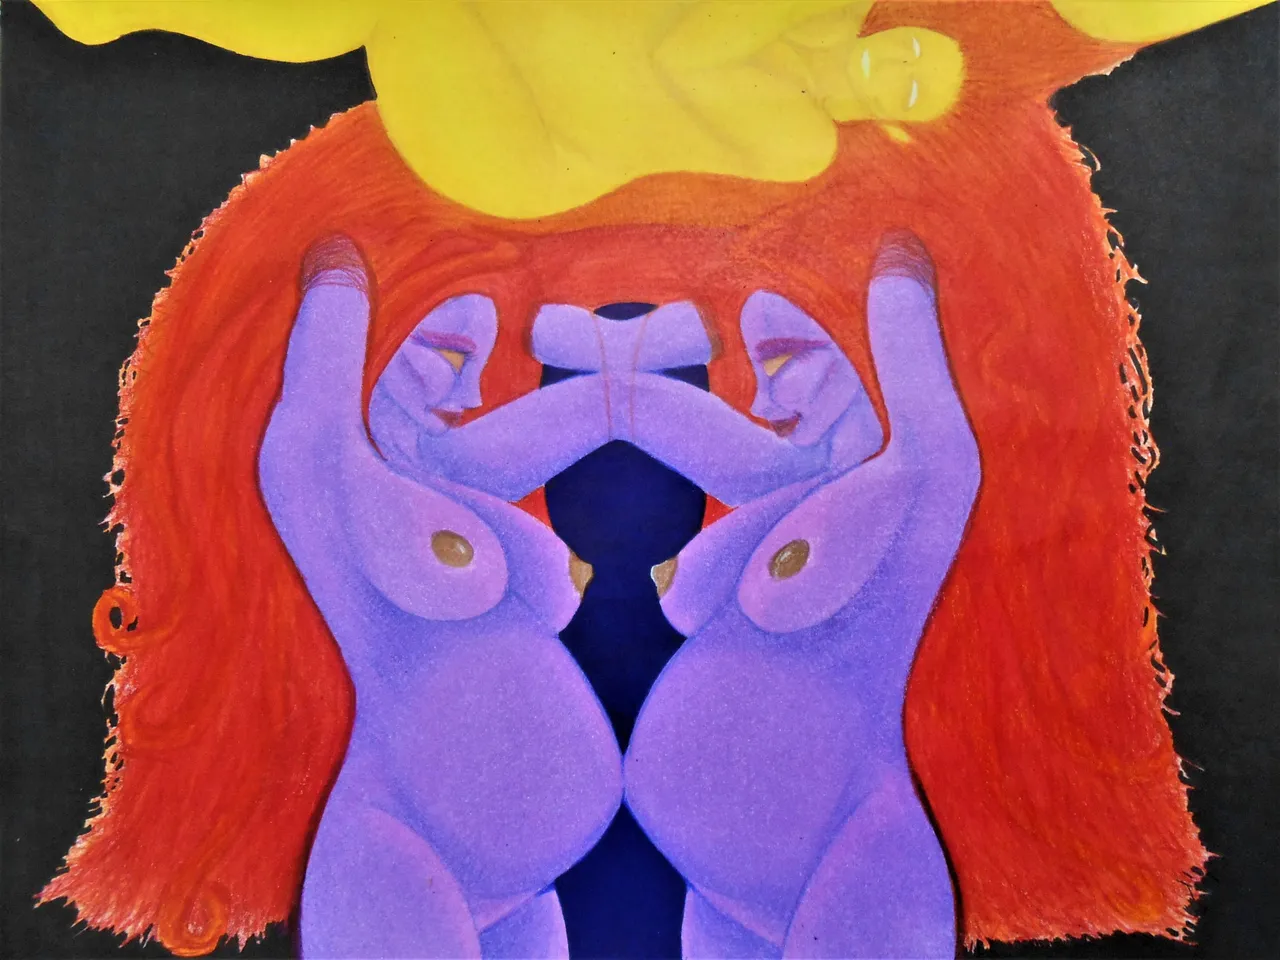
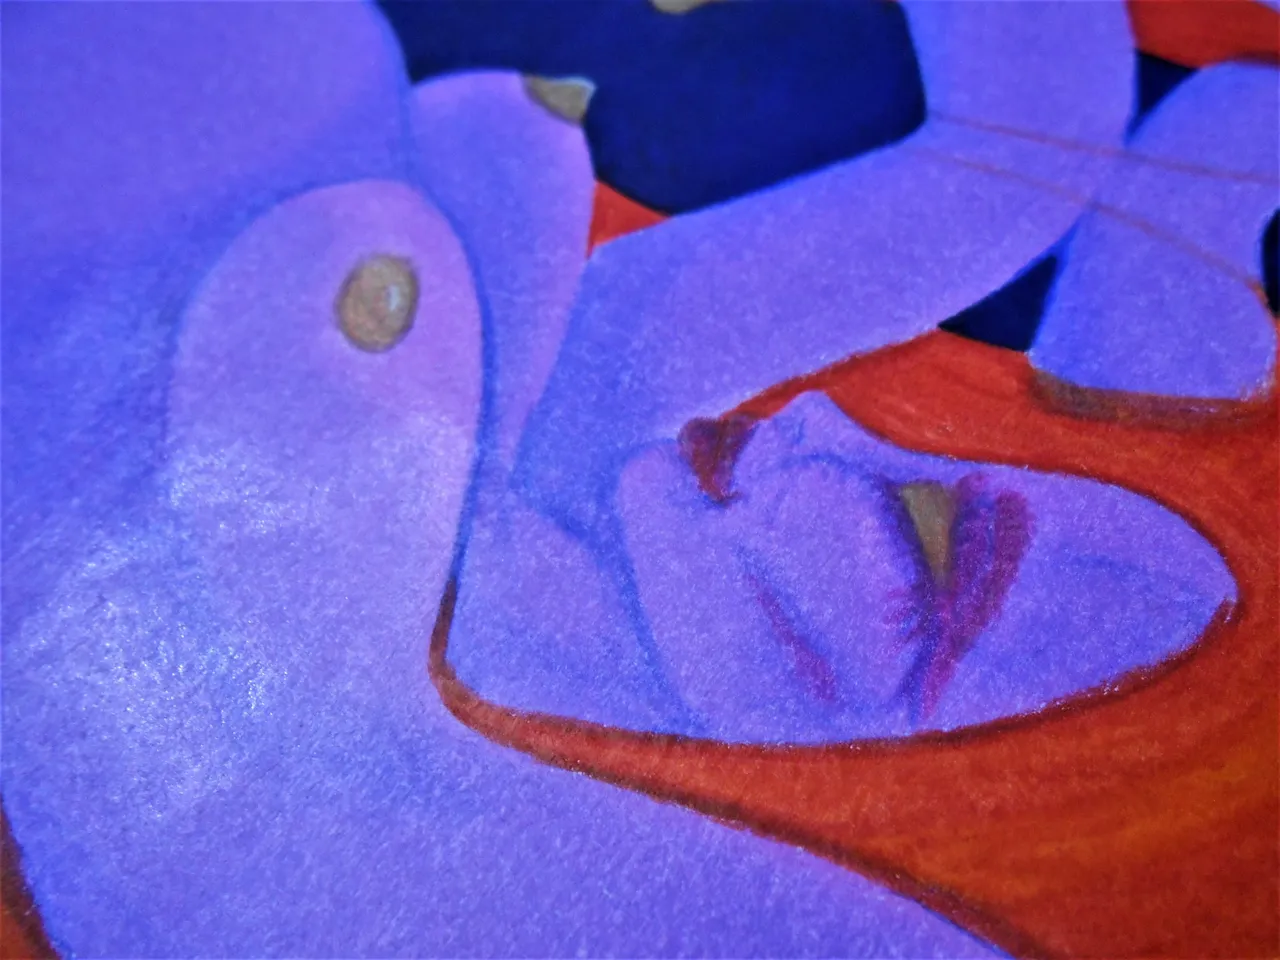
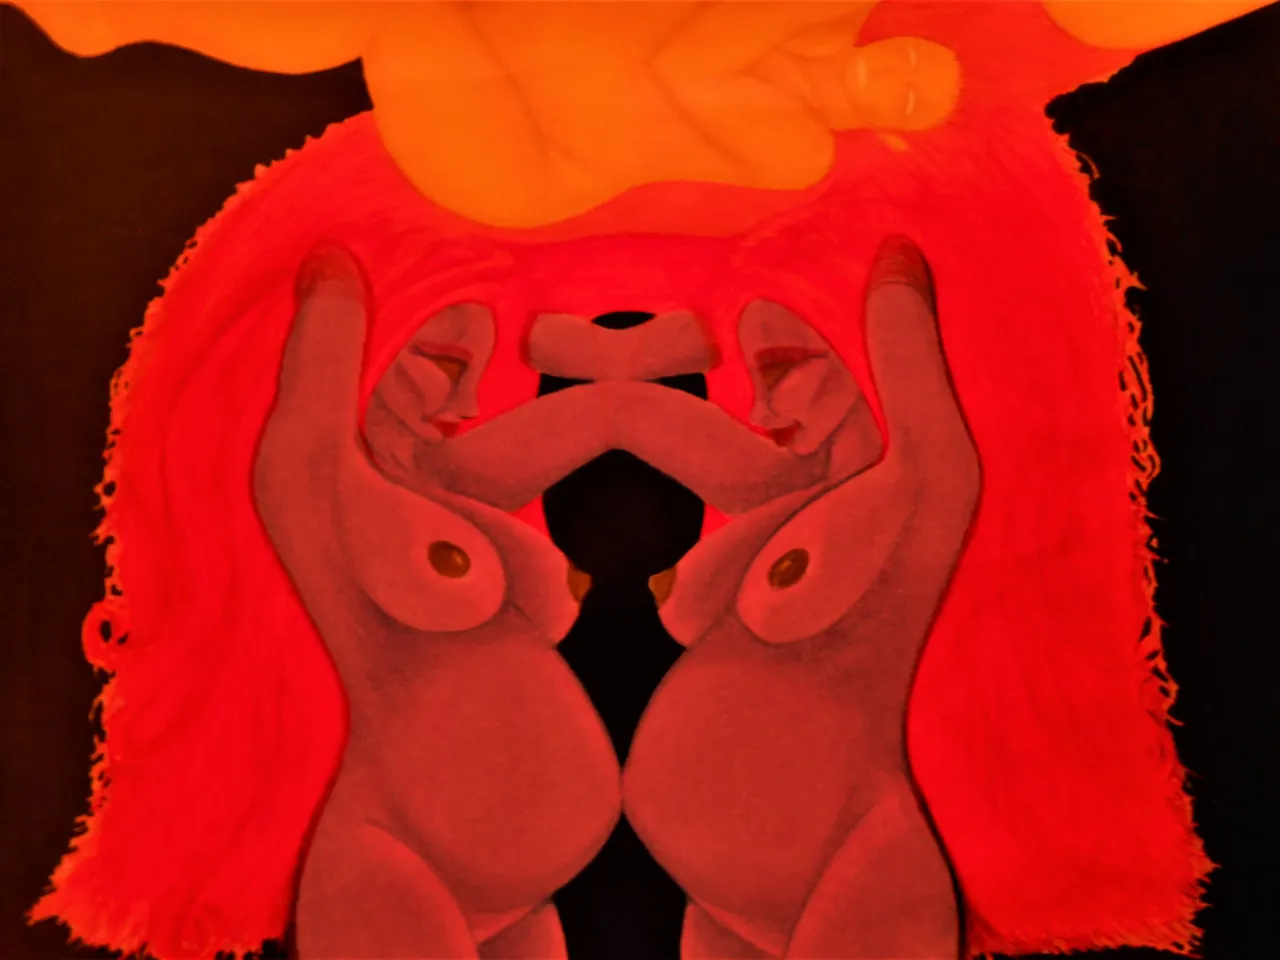
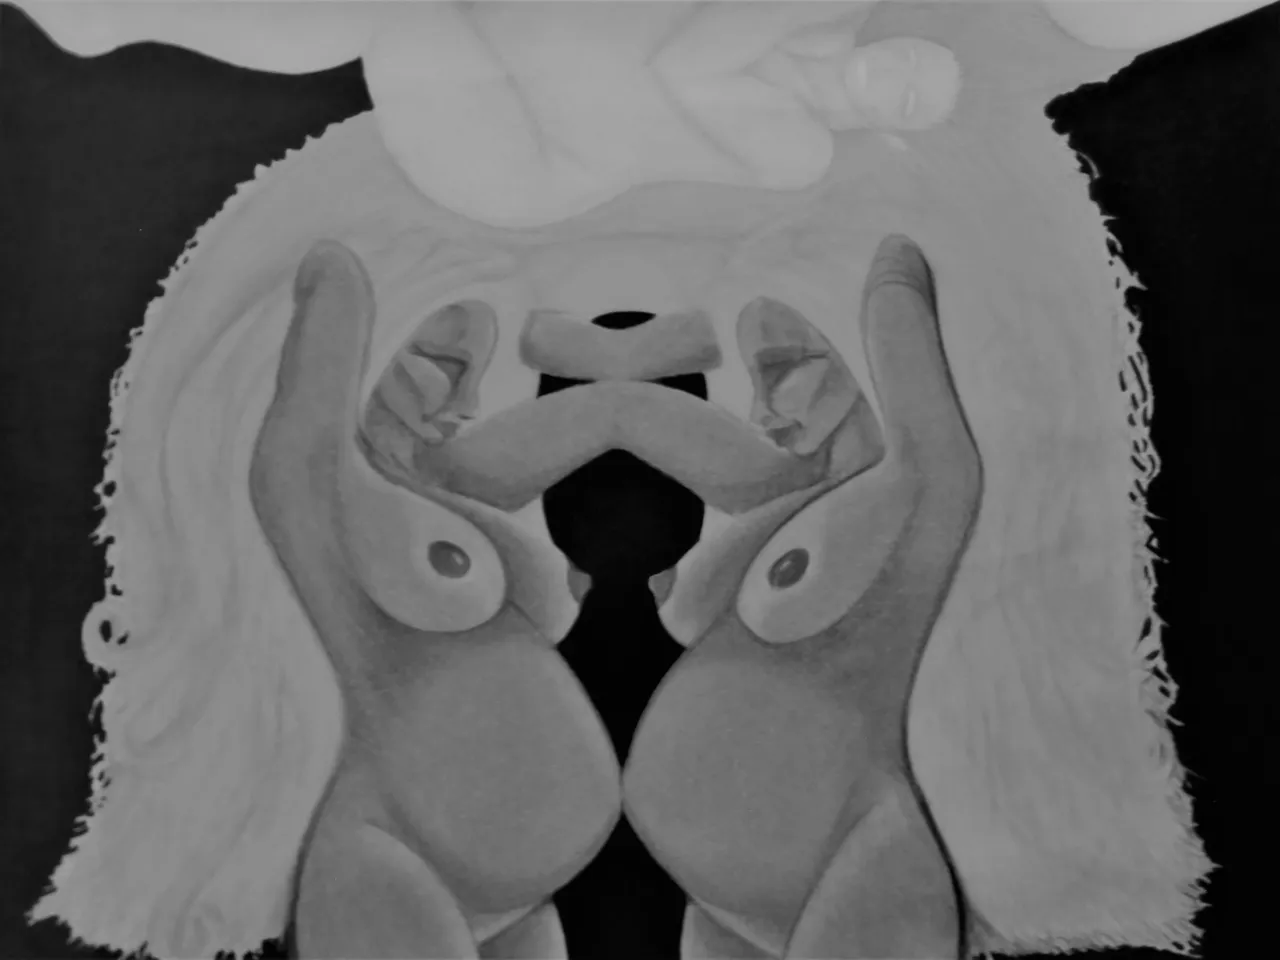
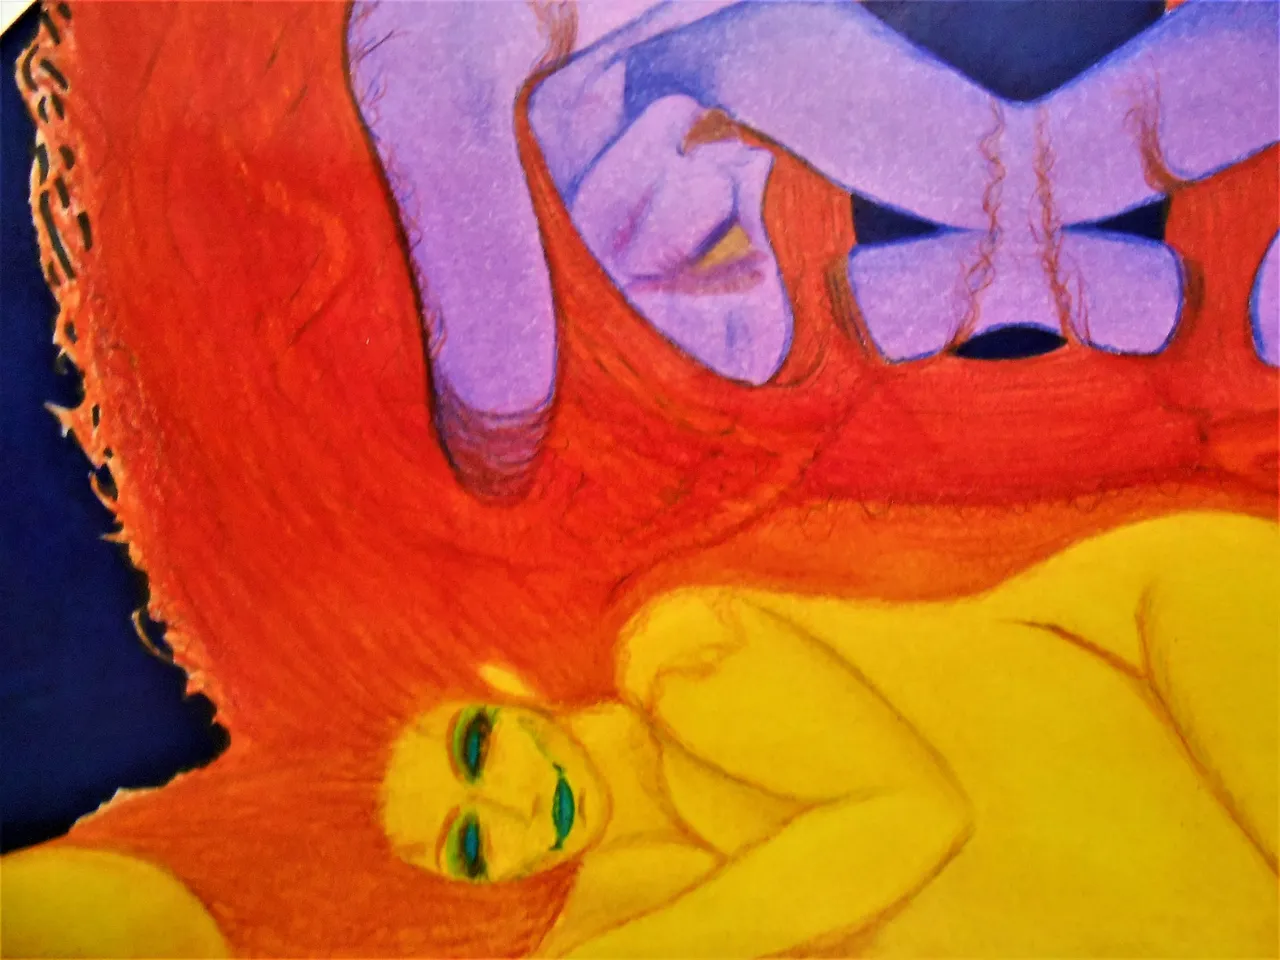
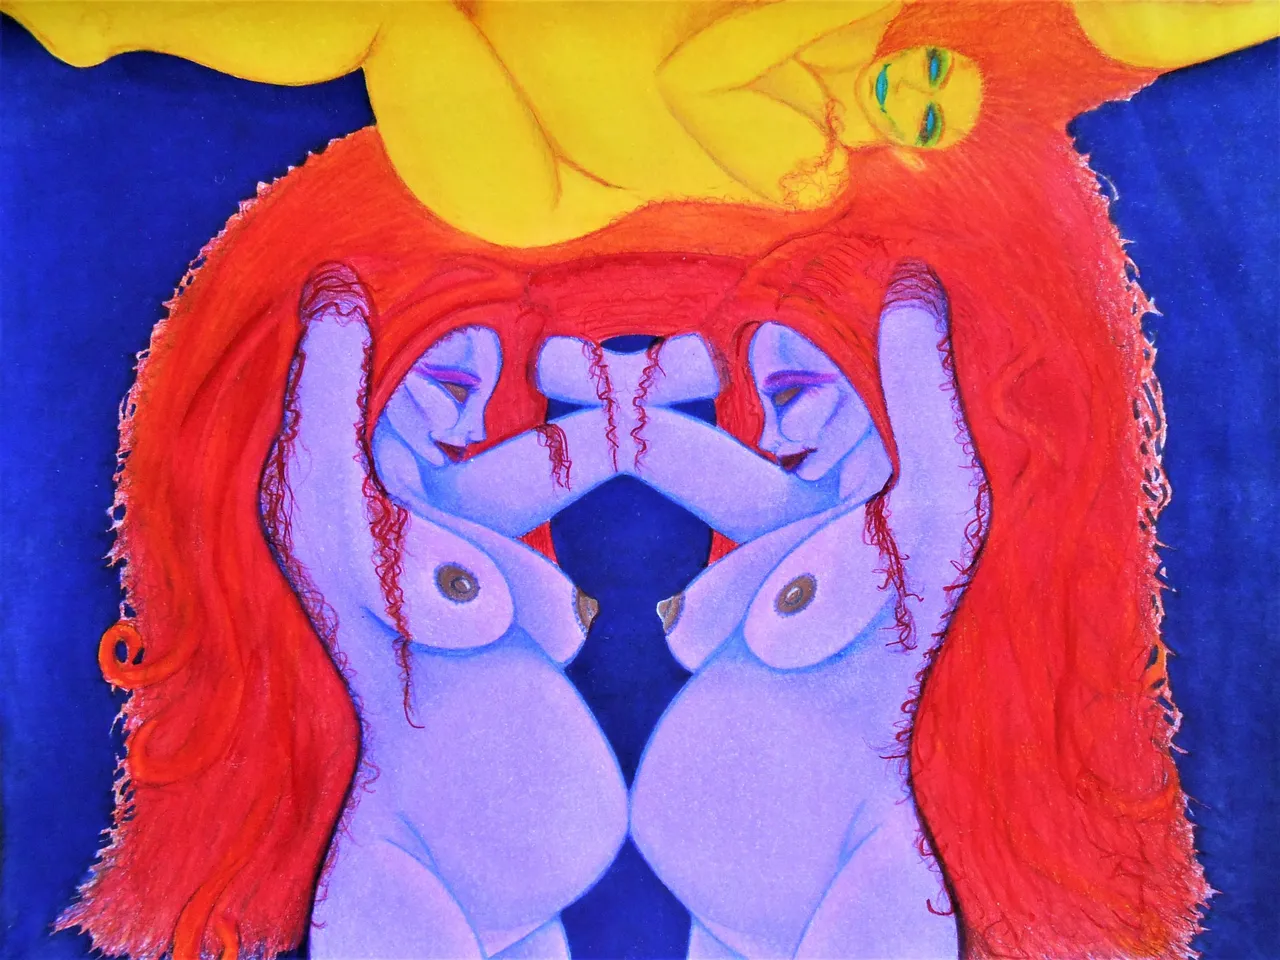
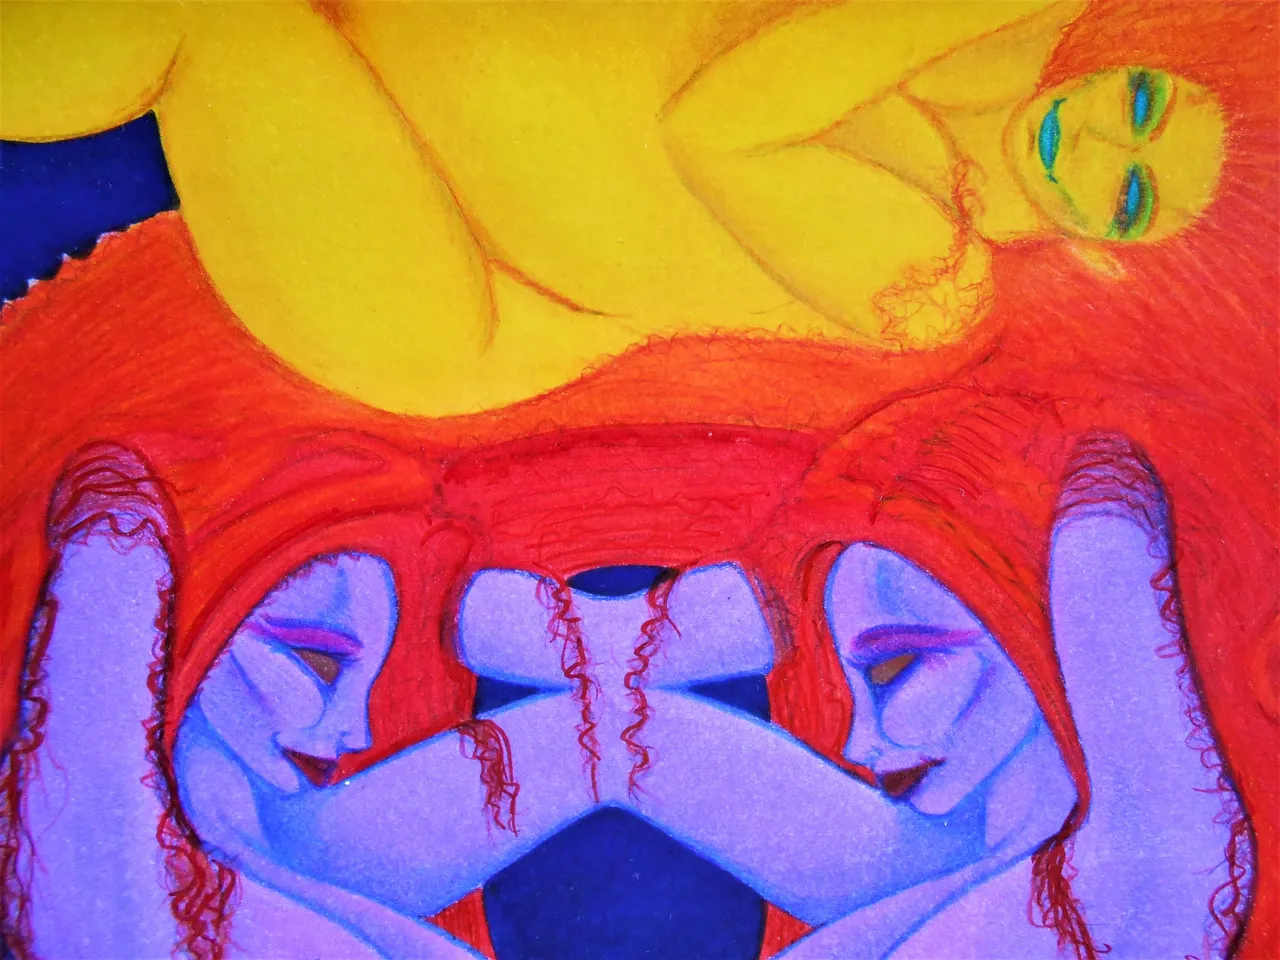
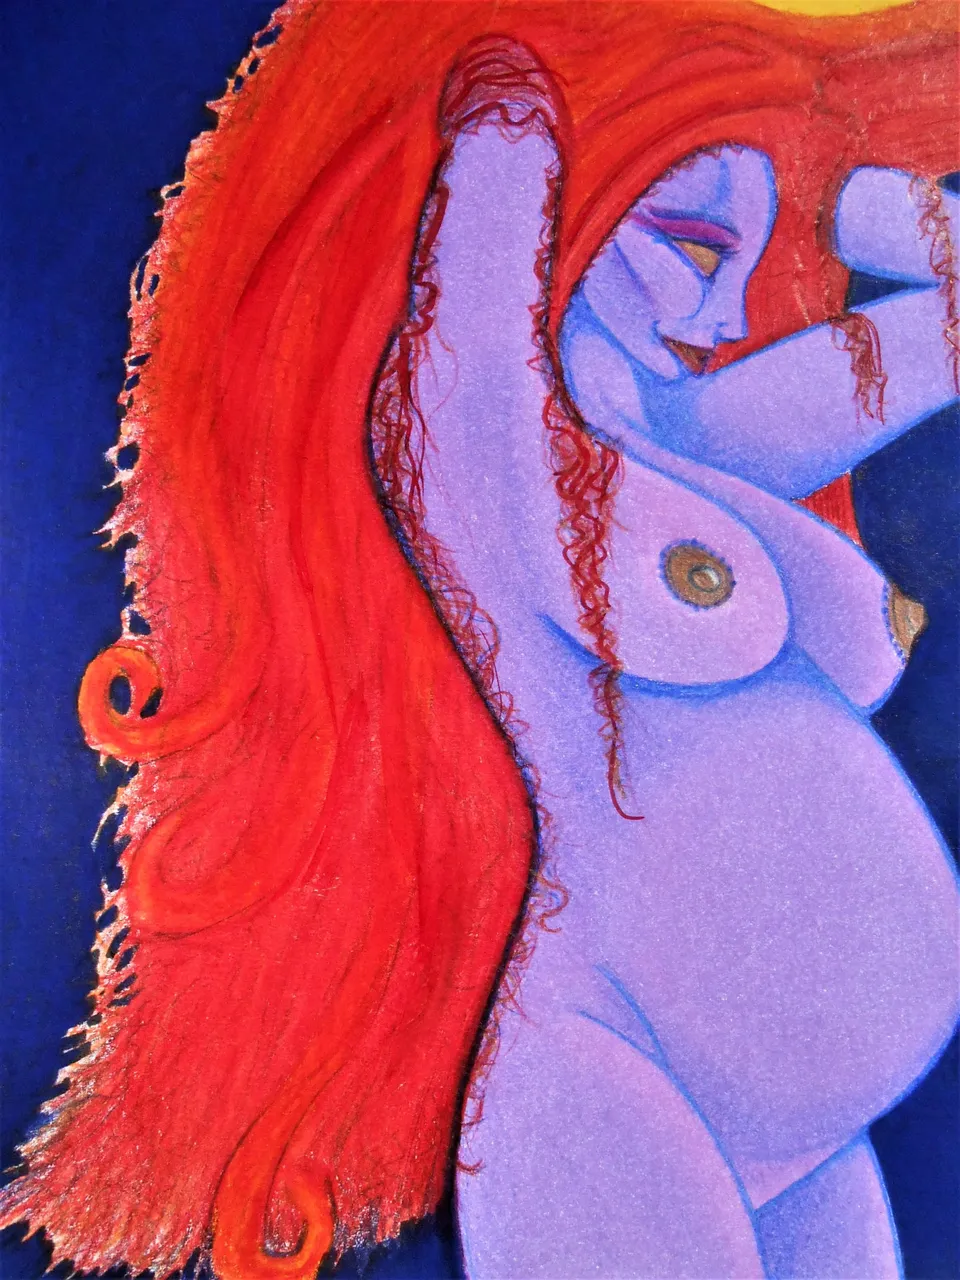
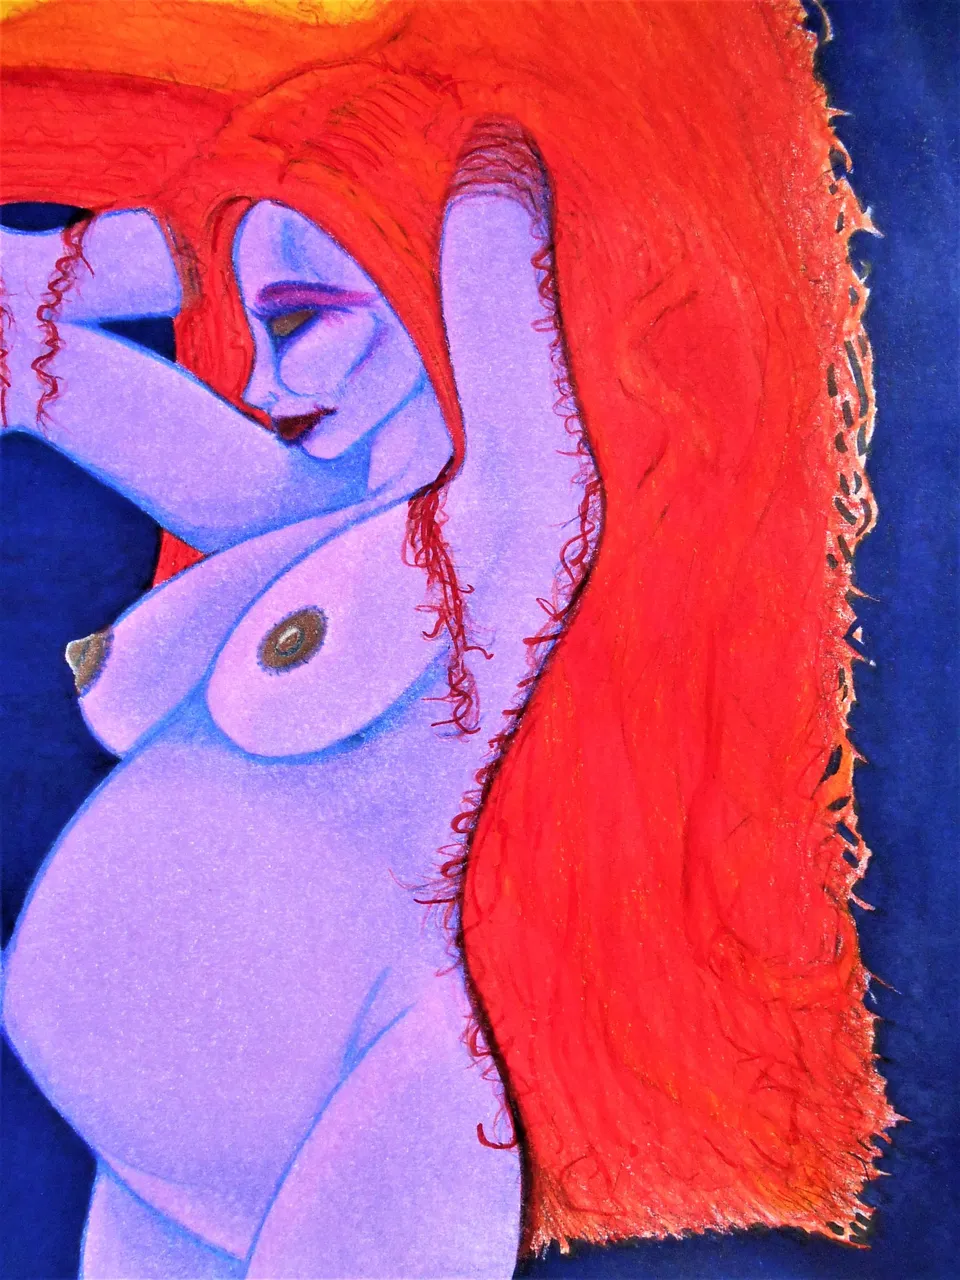
Since i am taking photographs of this whole process the lighting and angle of the paper makes a huge difference in the values, contrast, and tones. I tried to use different settings on my camera to express the variety of color and values along the way. You can see an example in the two yellow lady versions below.
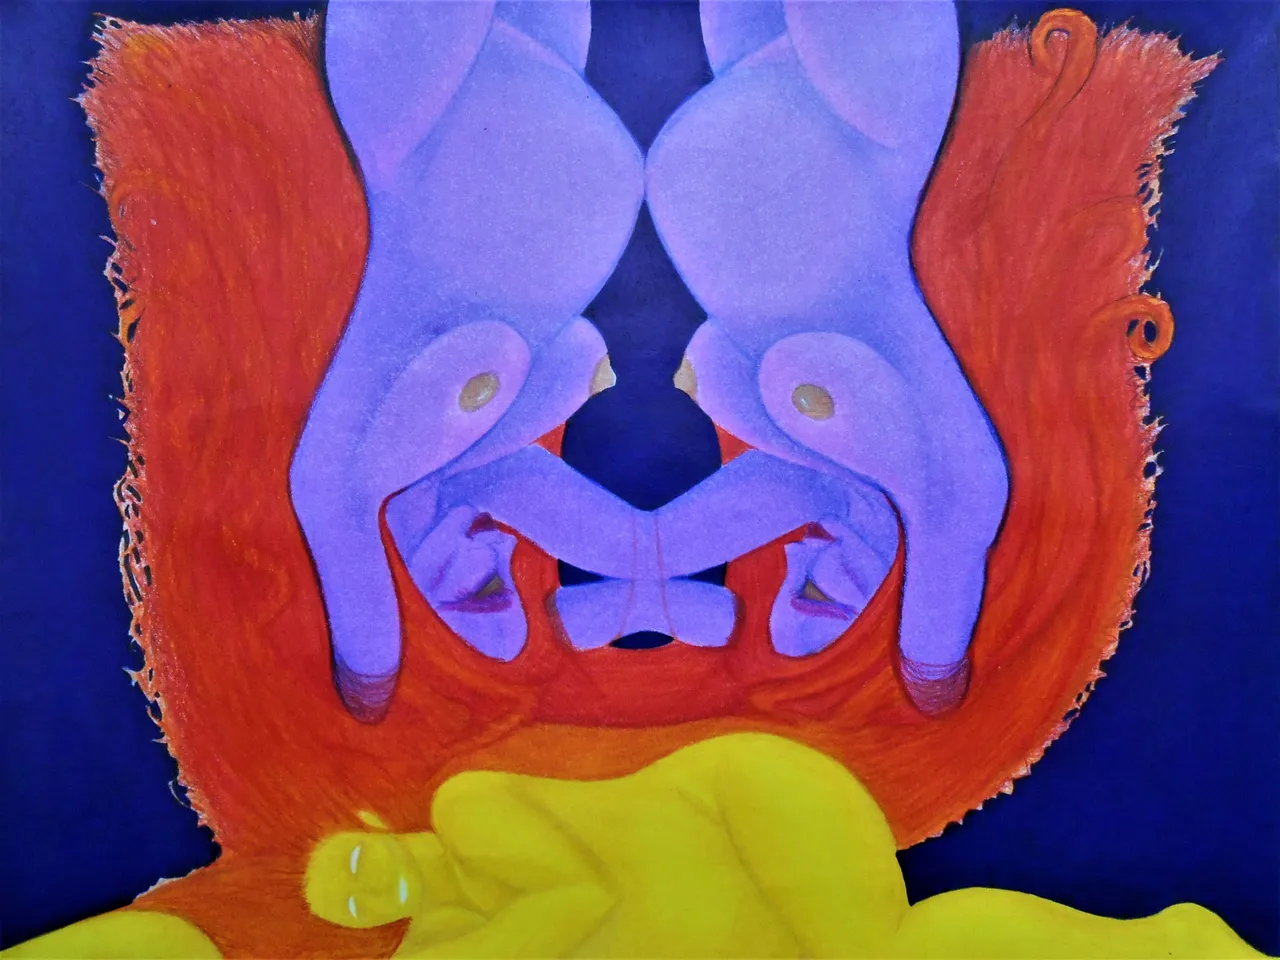
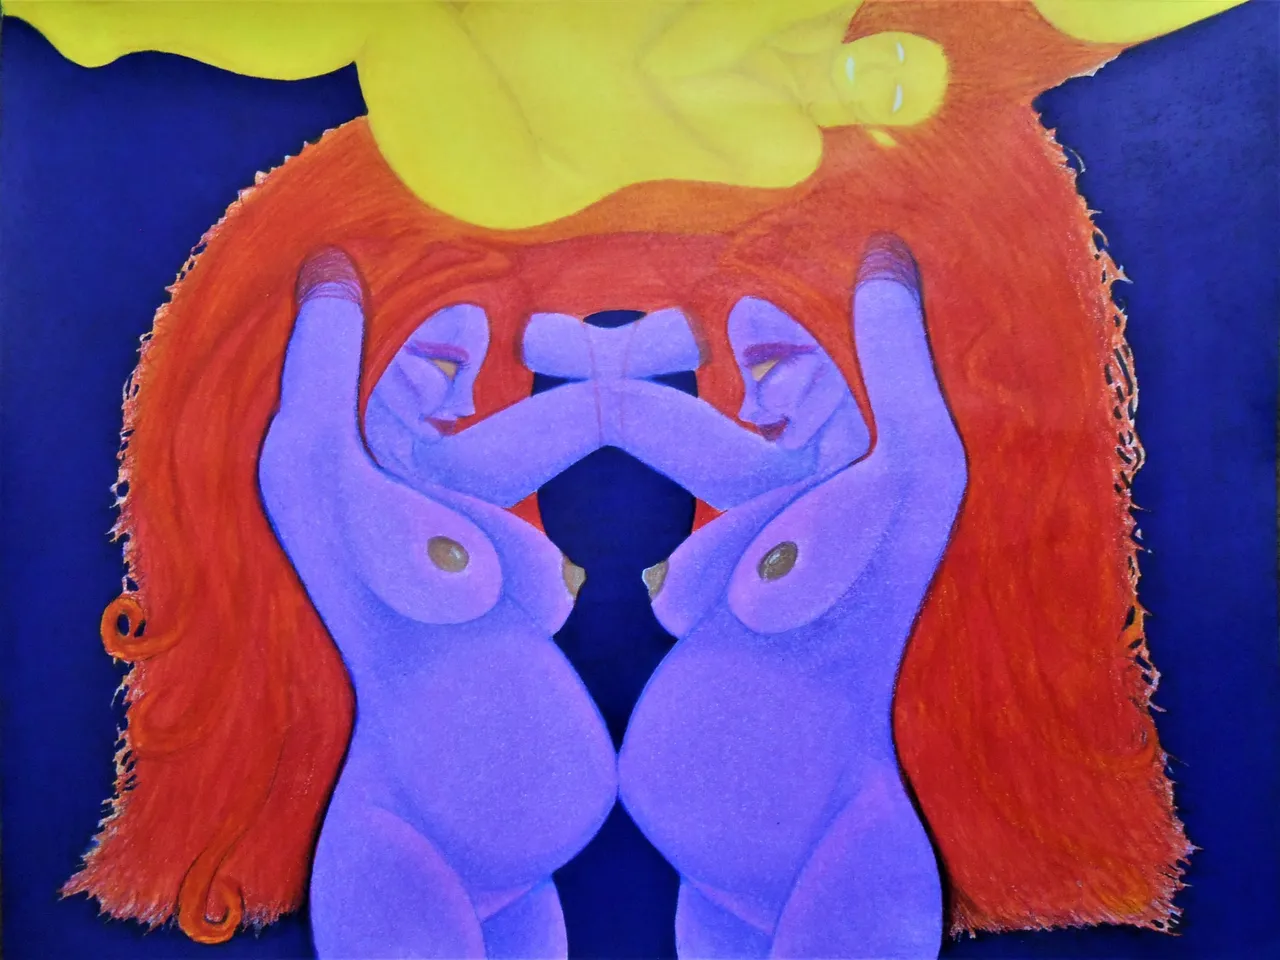
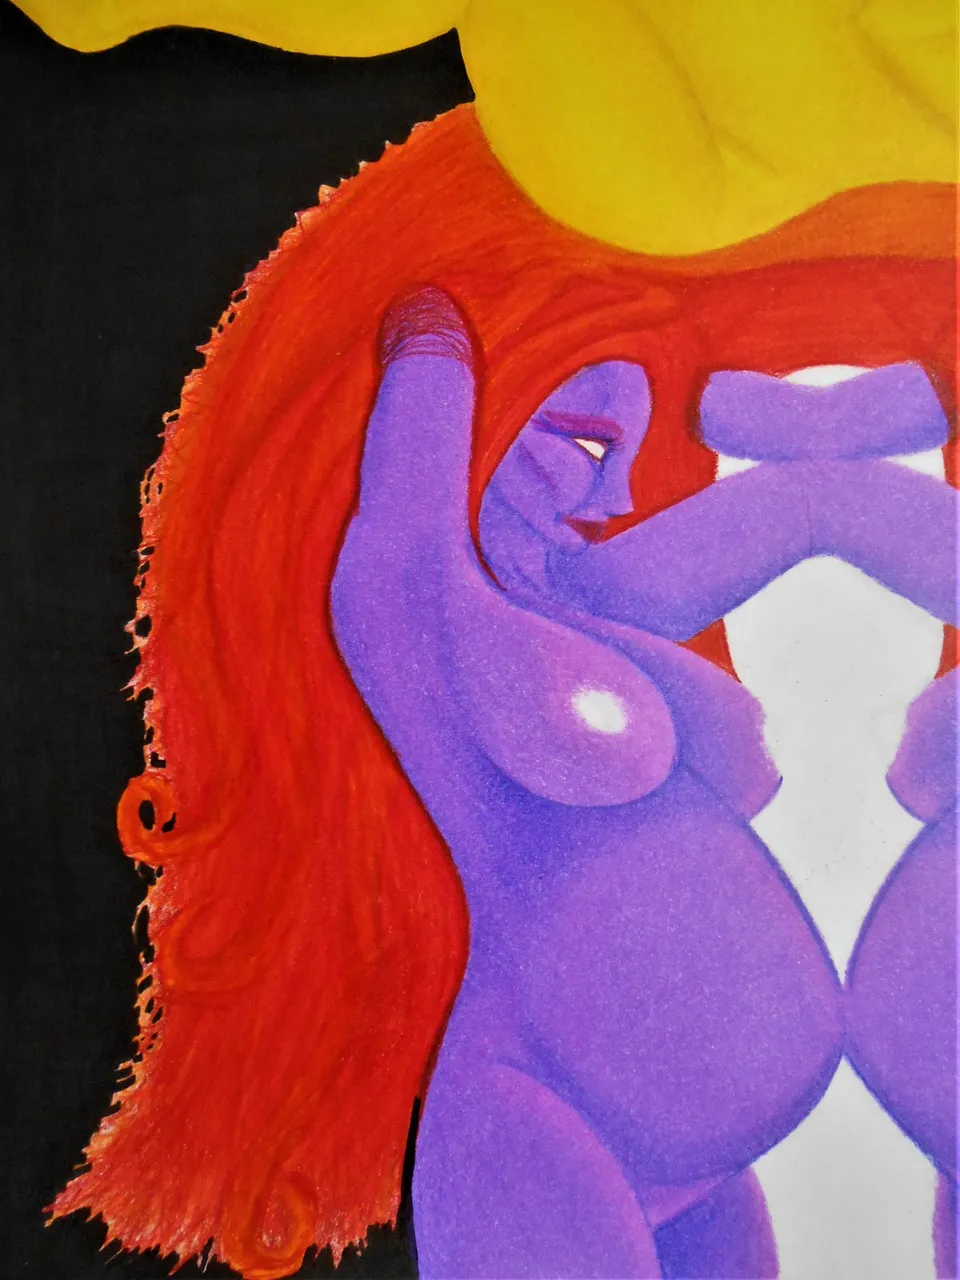
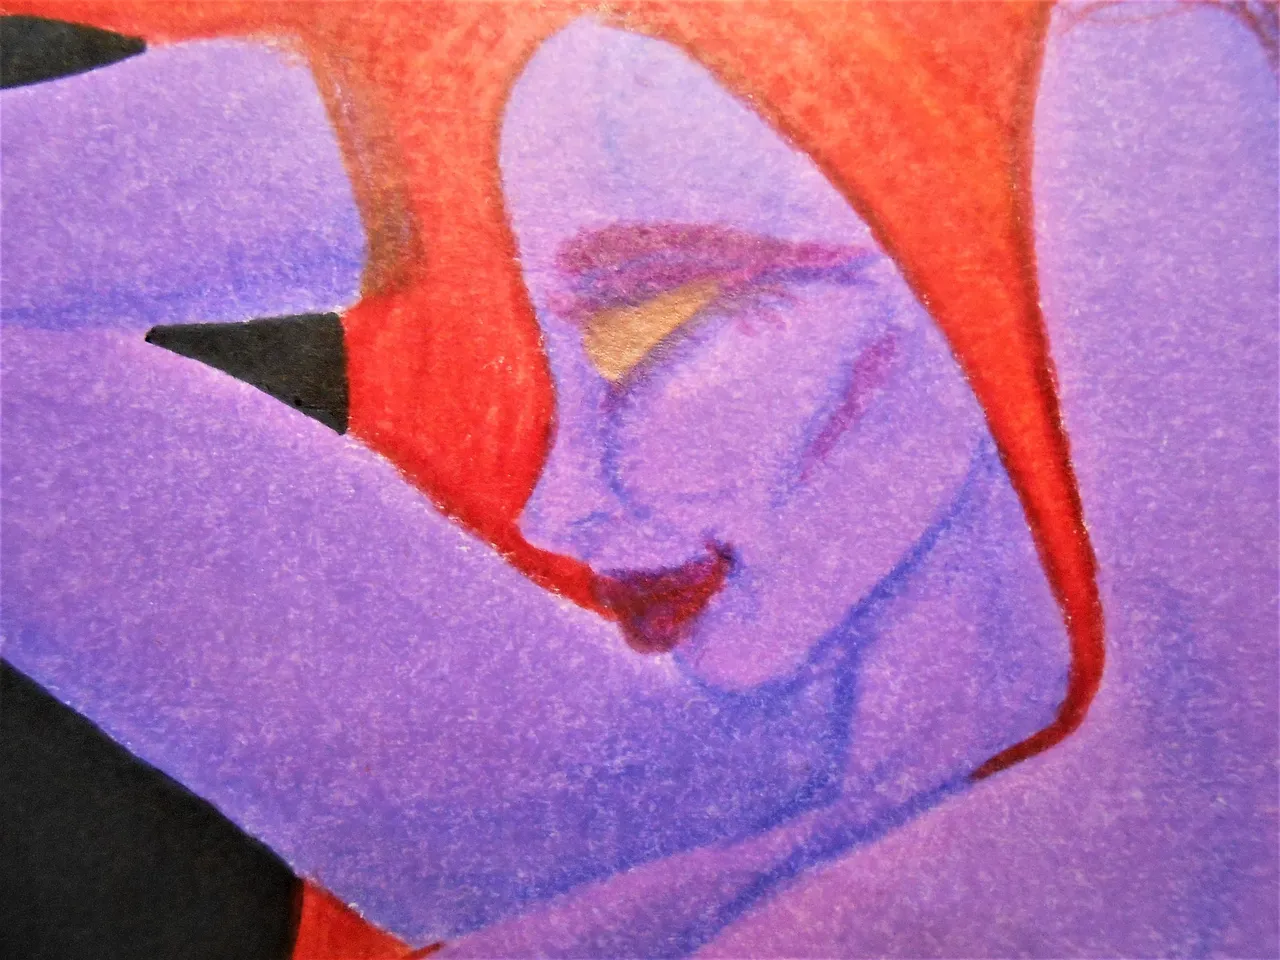
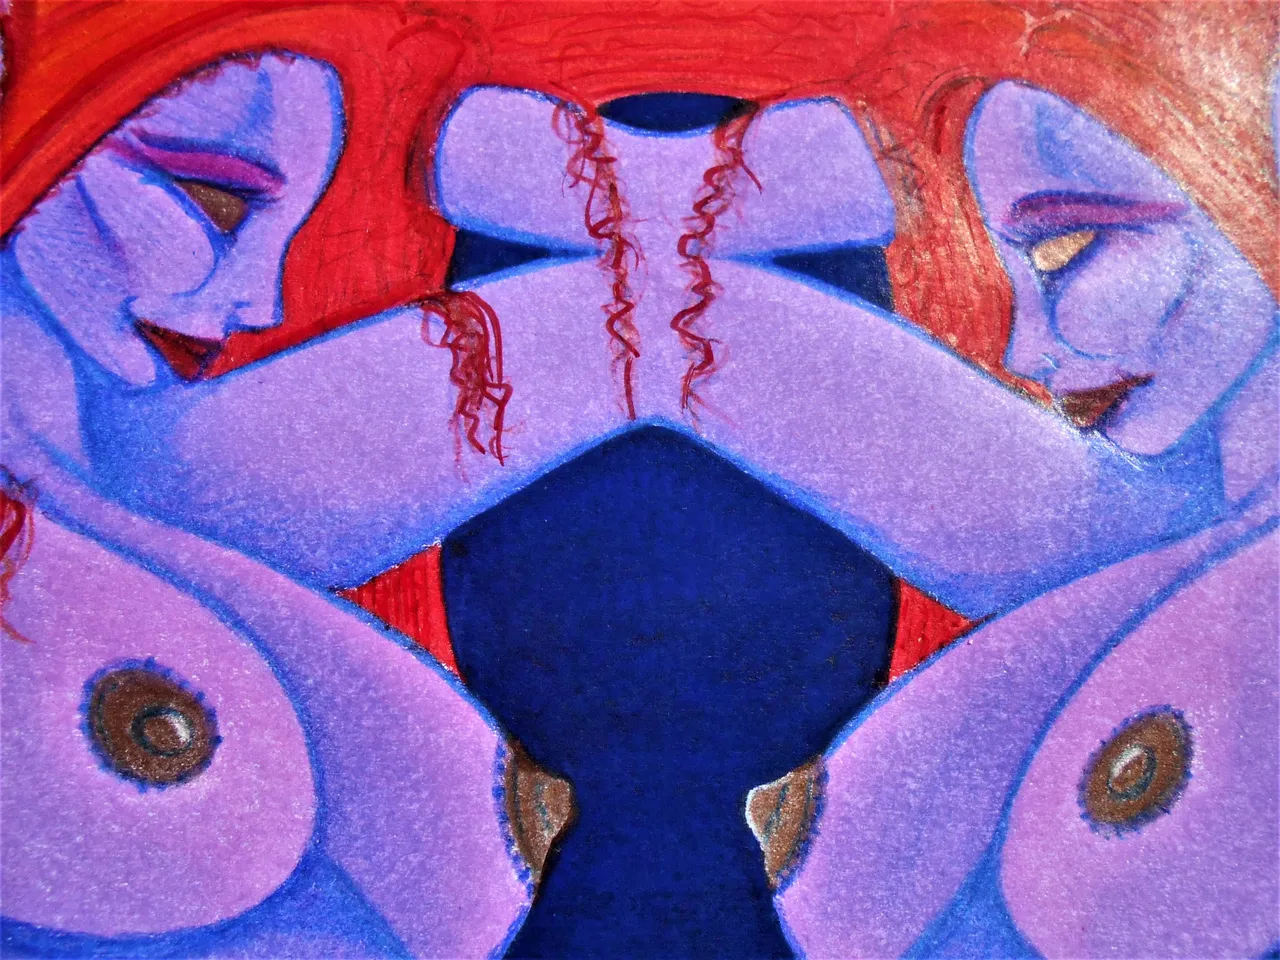
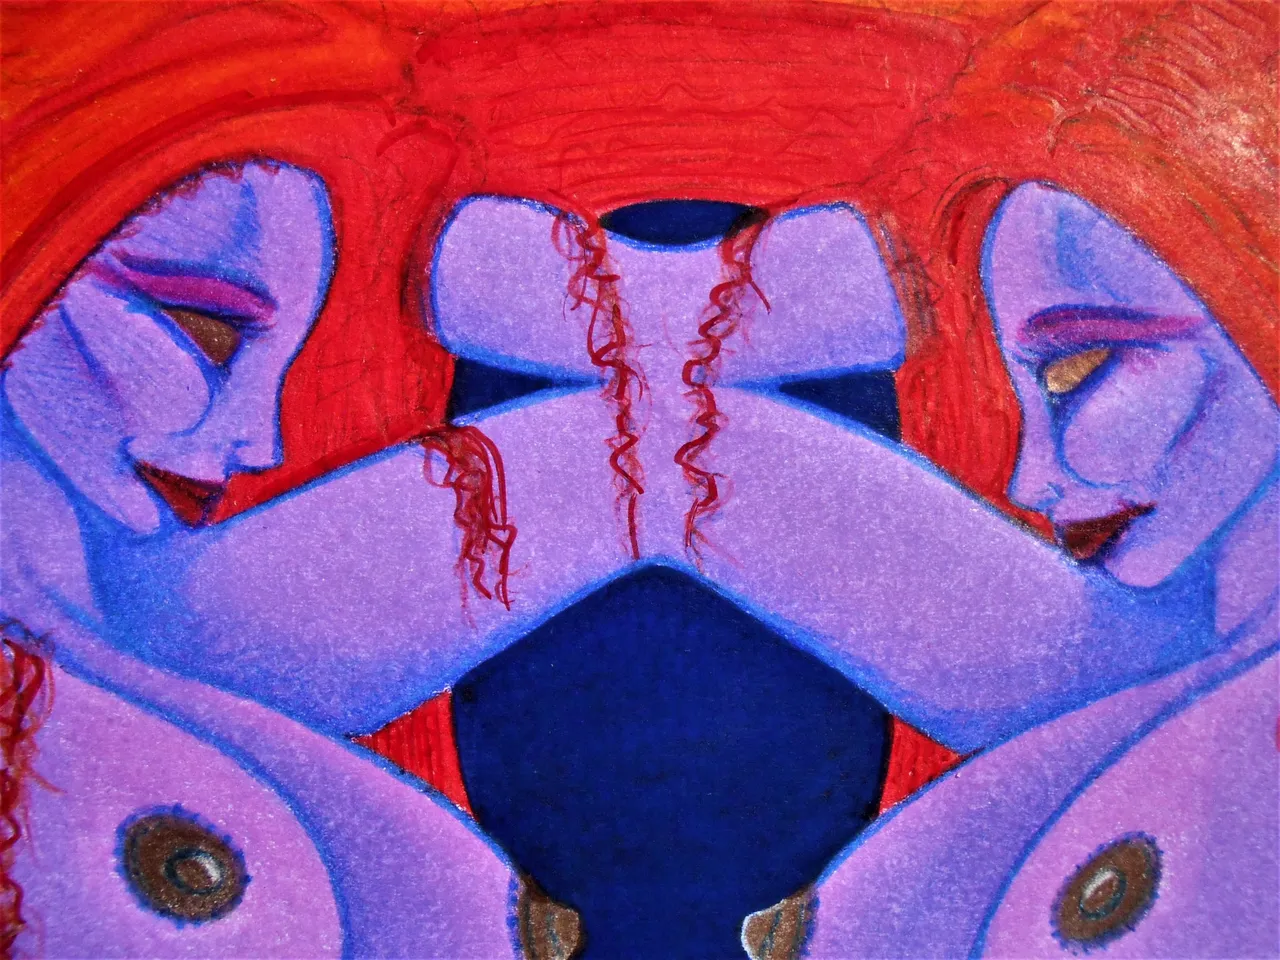
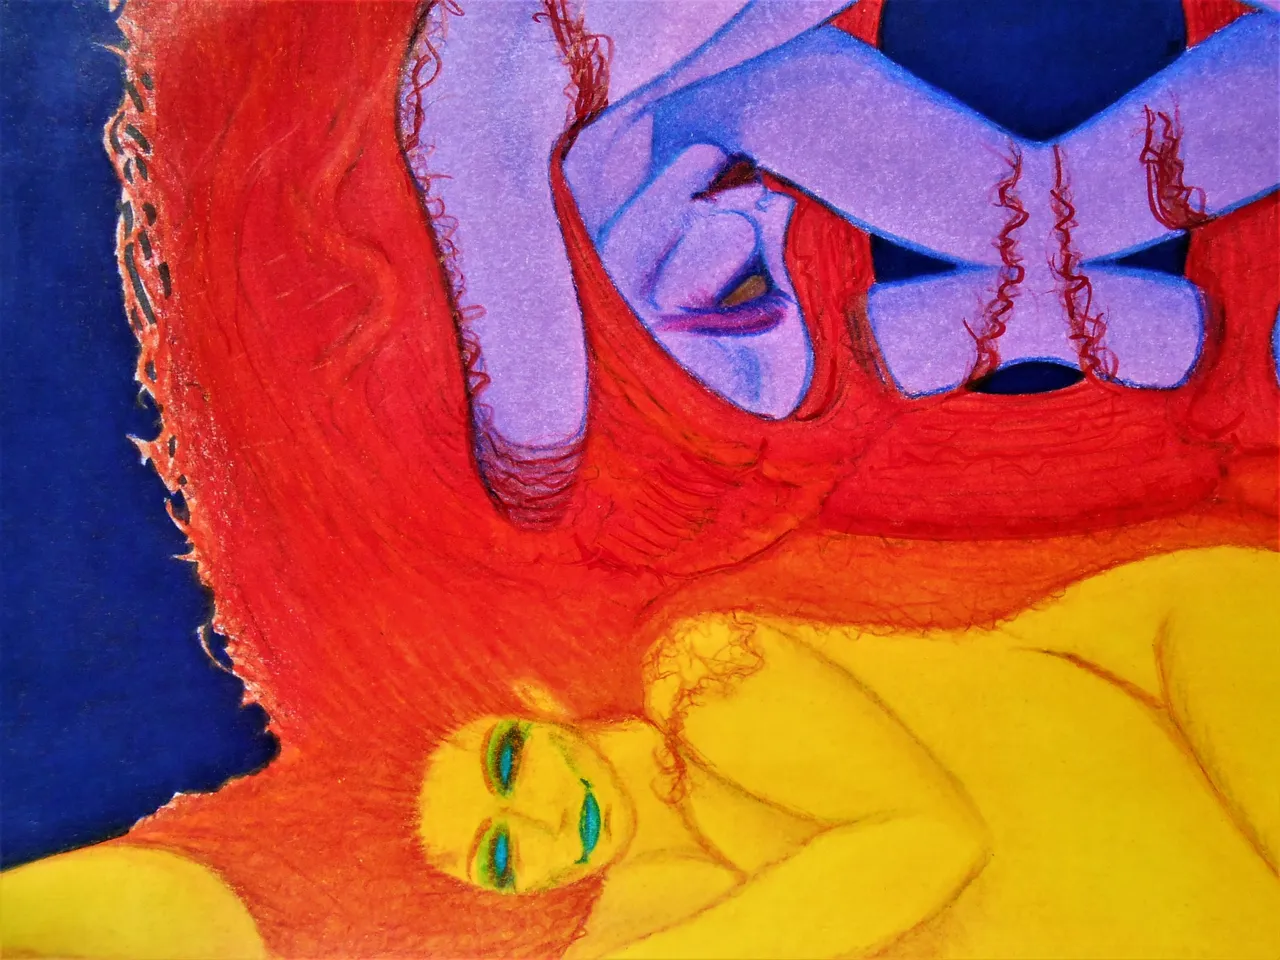
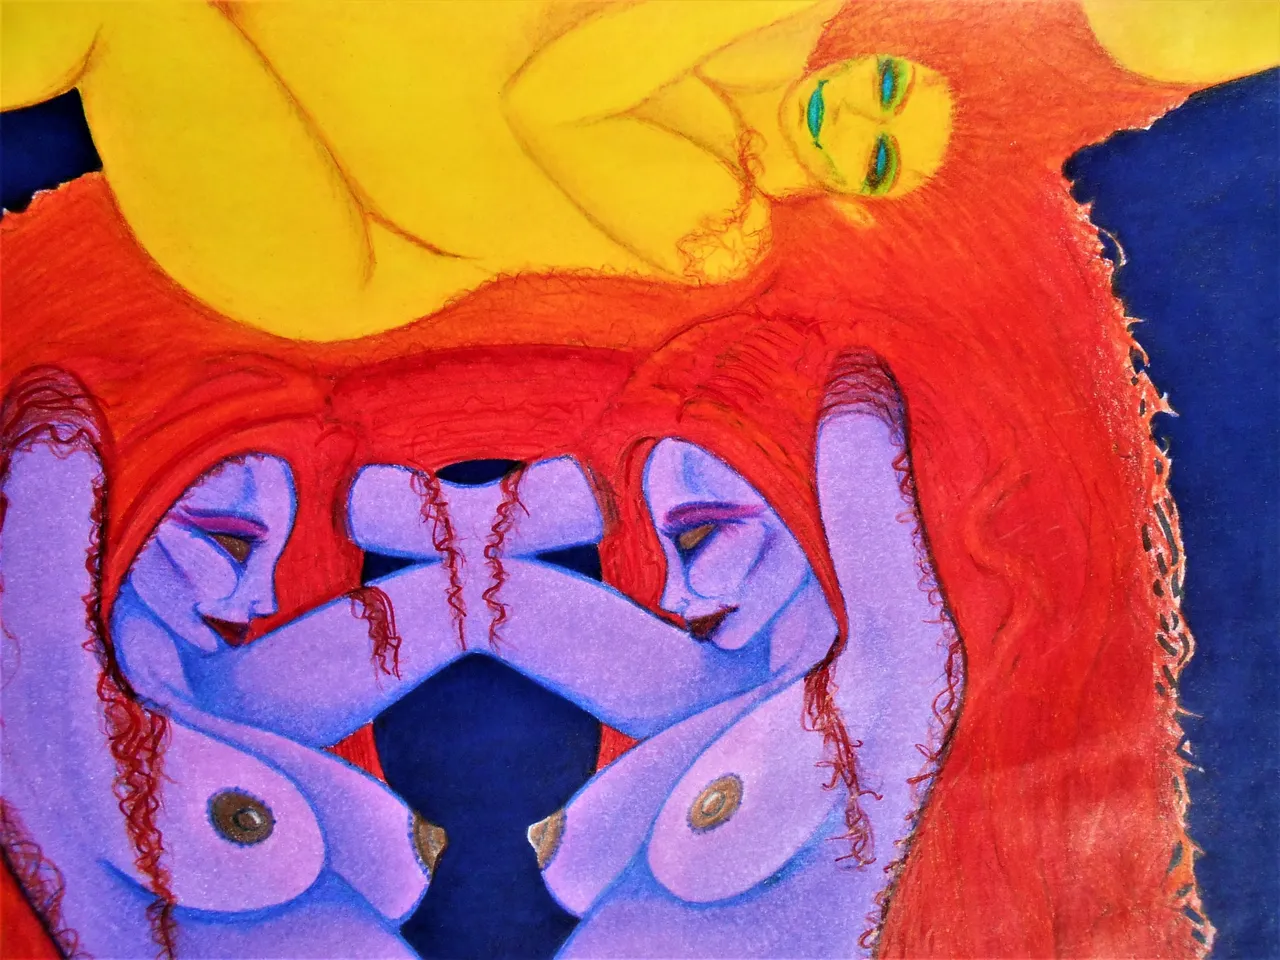
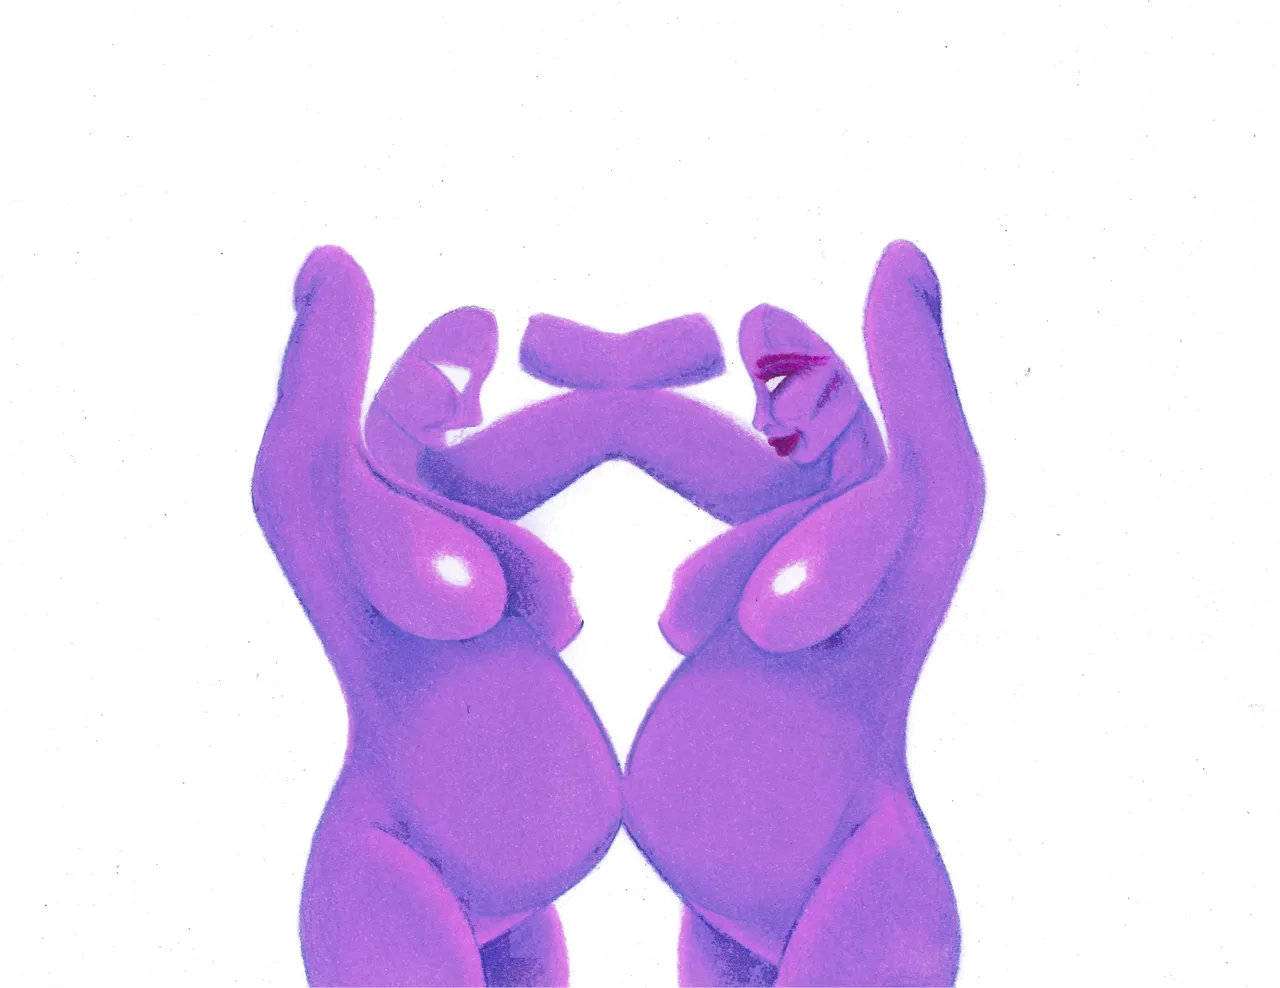
At this stage, i began to work on the final details. You can see that in the hair. I took the advice of a friend that said there should be some loose strands dangling about and i had thought the same. So, it was nice to confirm that and to work on it. Though i was nervous i would ruin the whole thing here at the end.
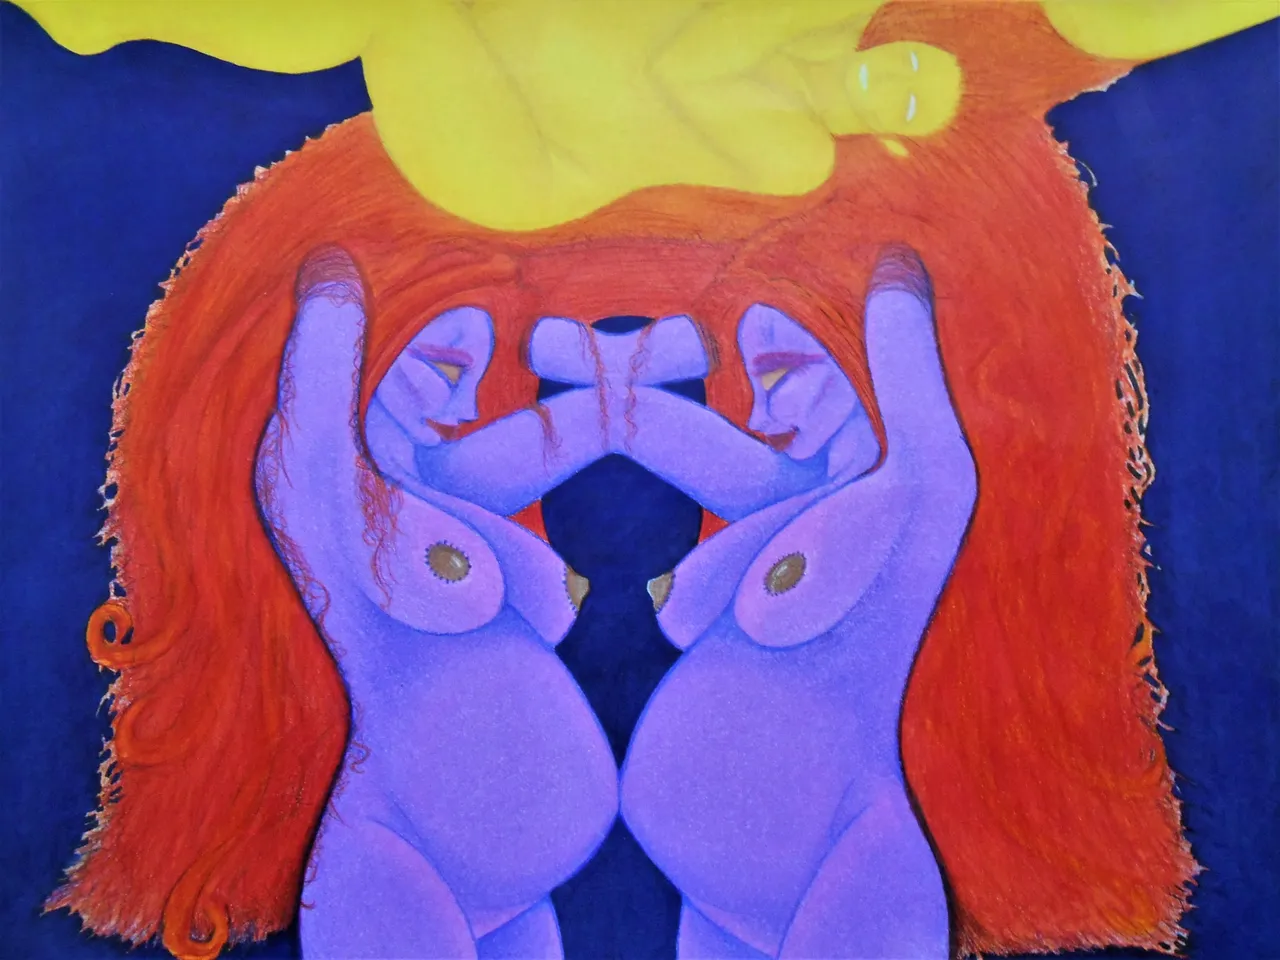
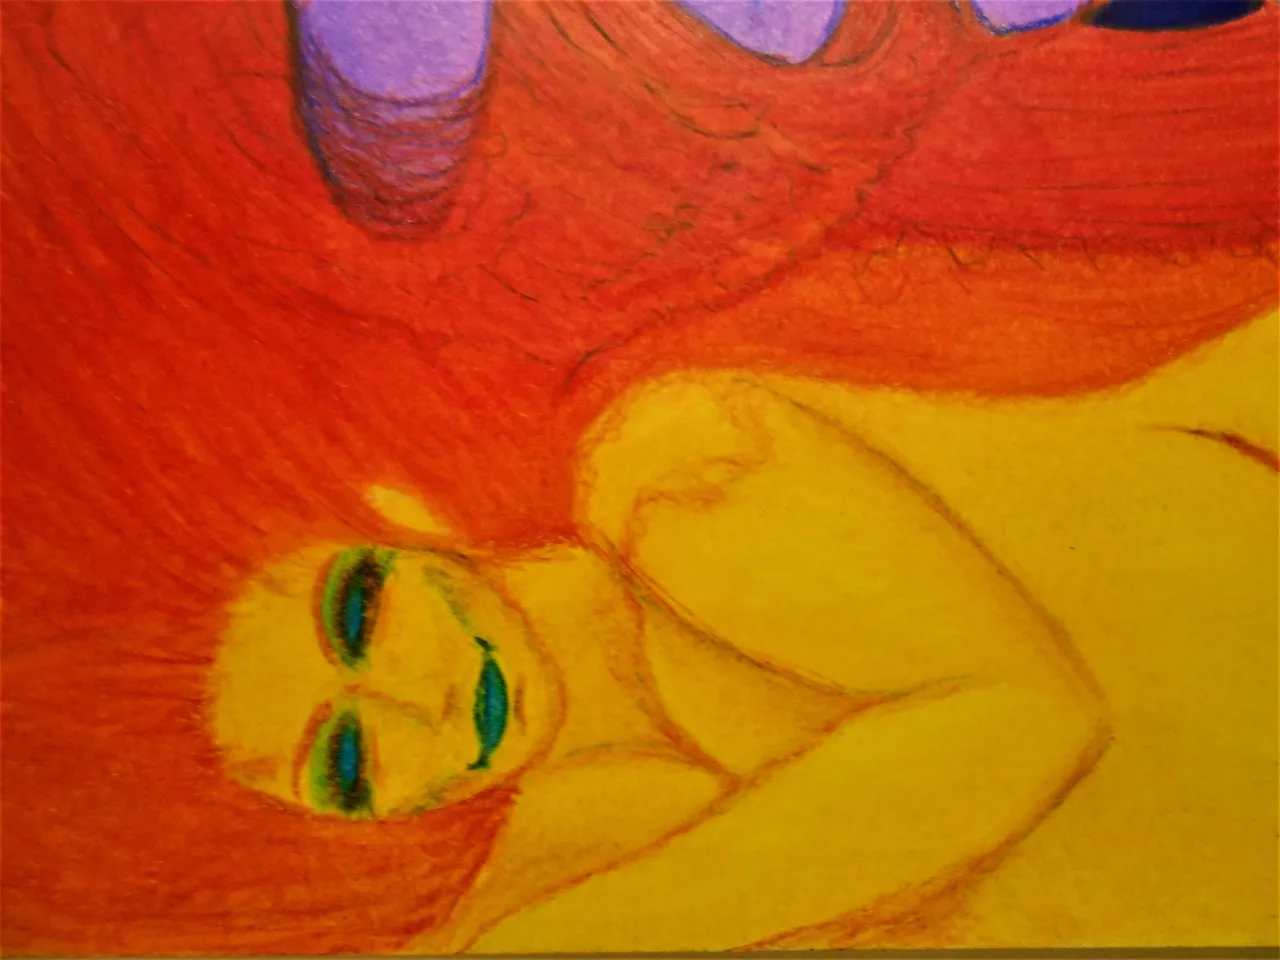
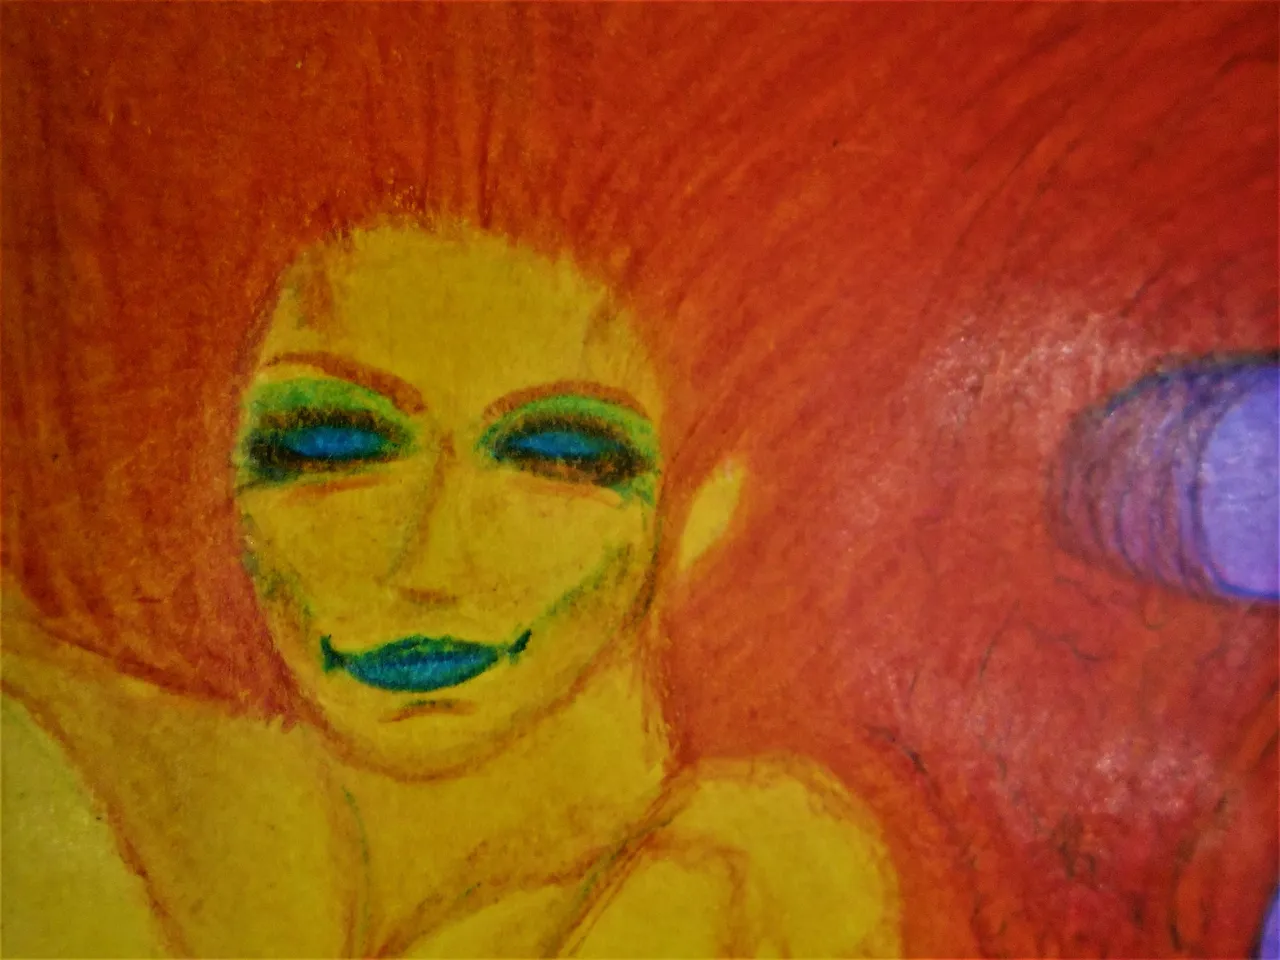
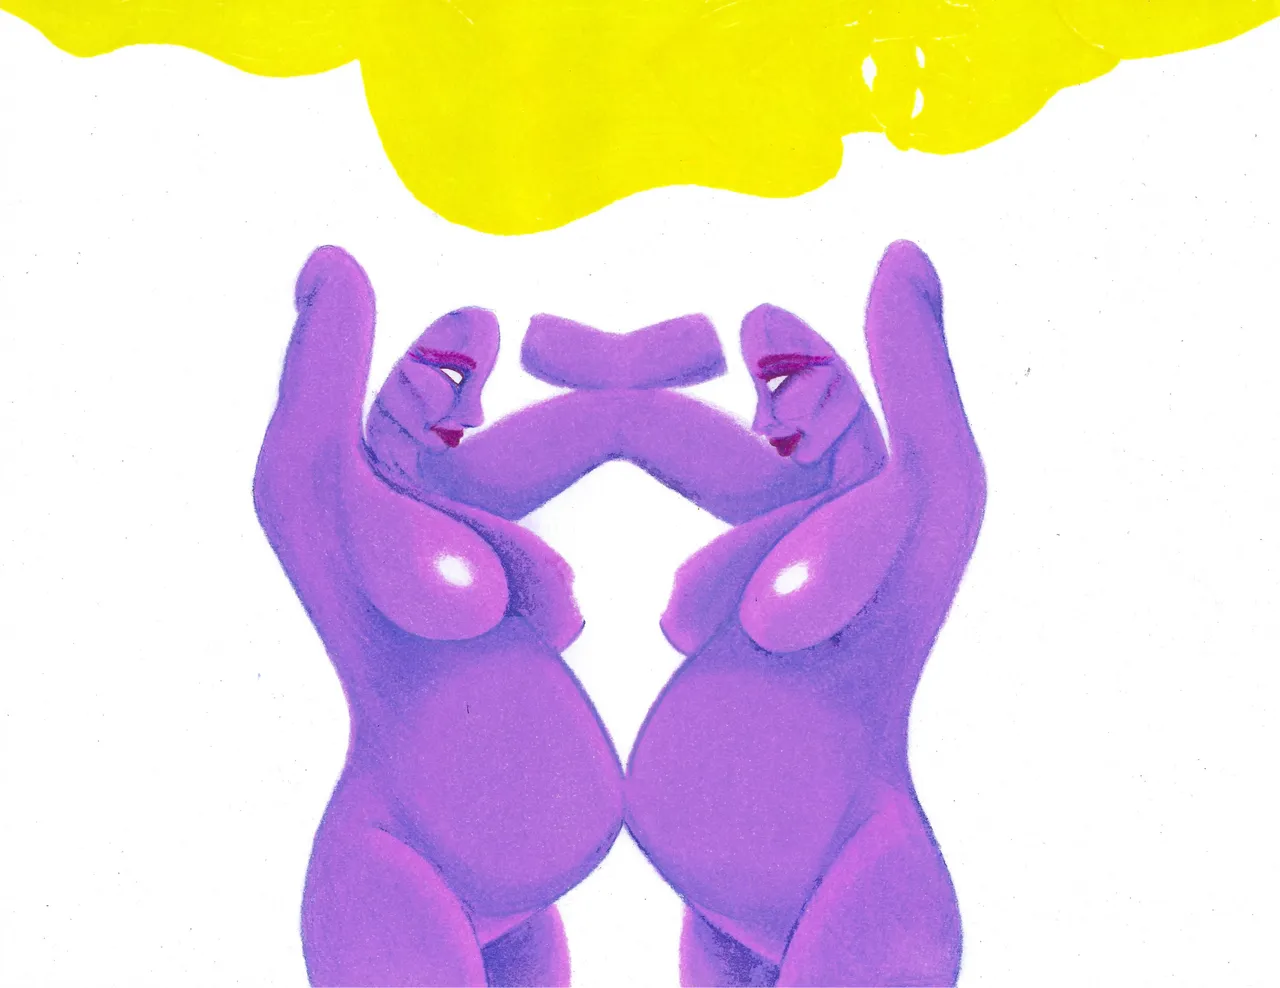
I also started to work on the face of the yellow lady and some of her shading... which i knew in advance would be a tough job. I find yellow to be one of the most uncooperative and unforgiving colors to work with.
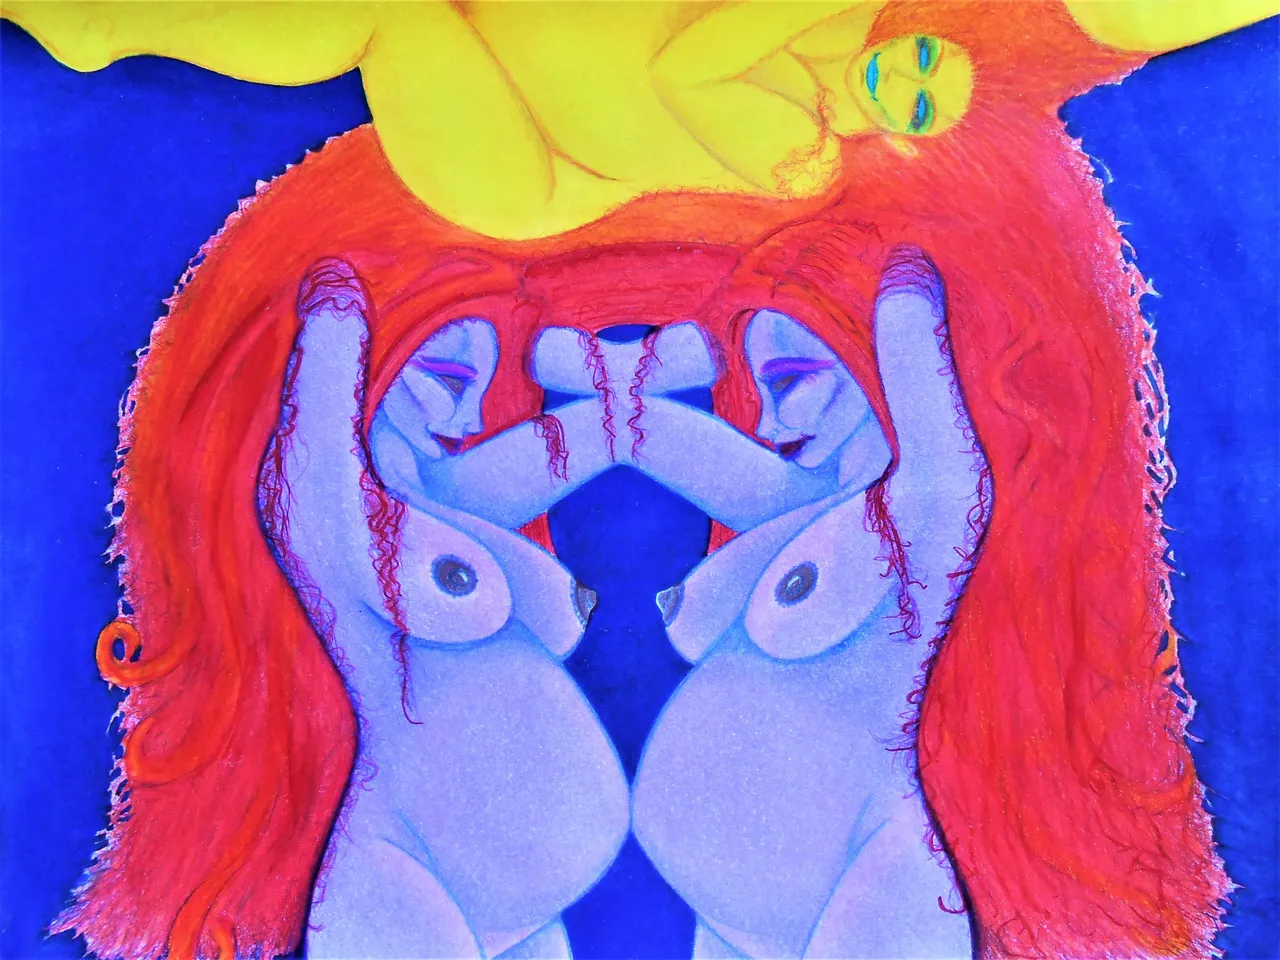
~ Final Touches ~
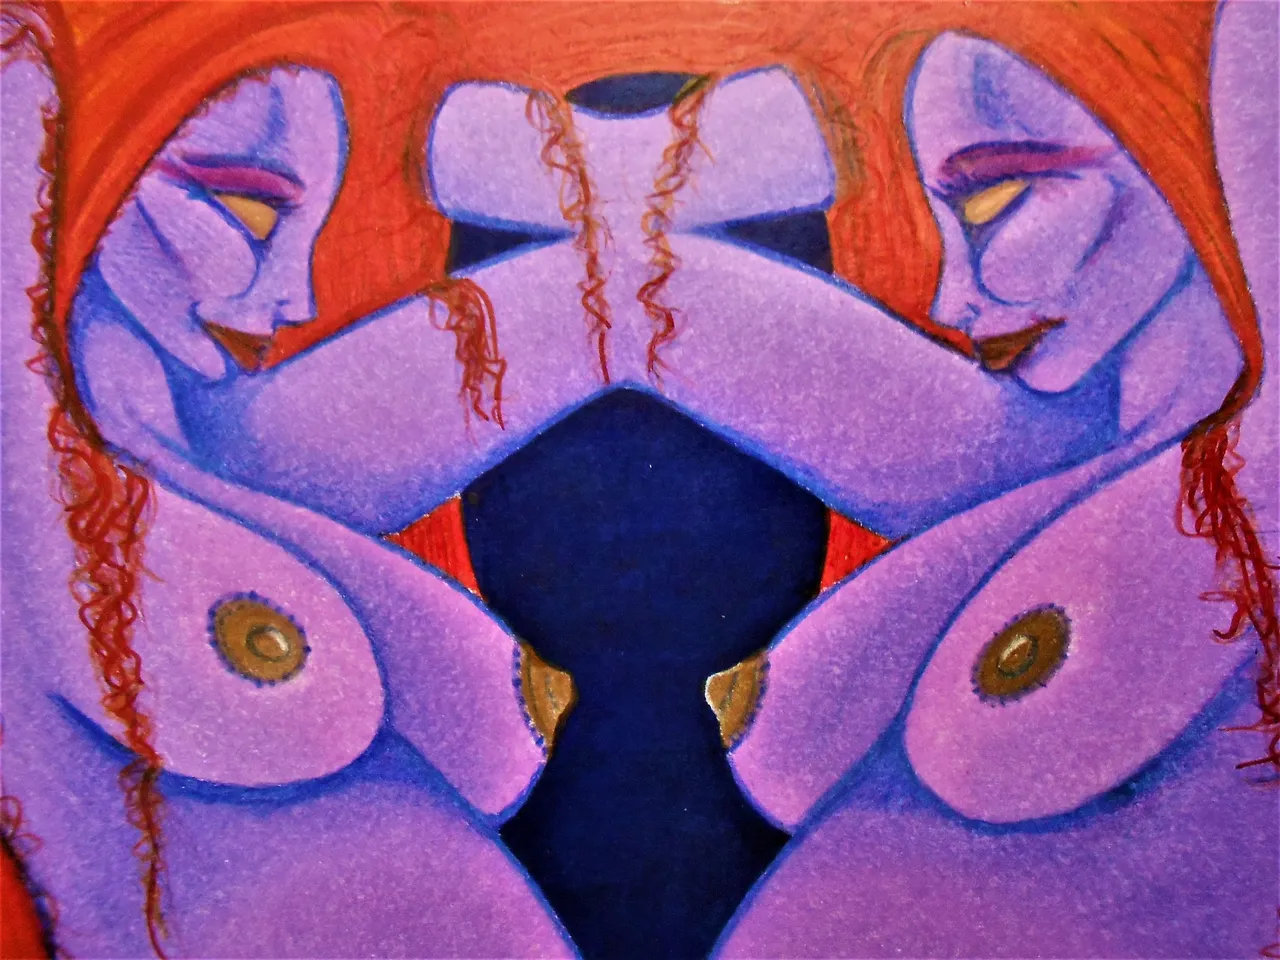
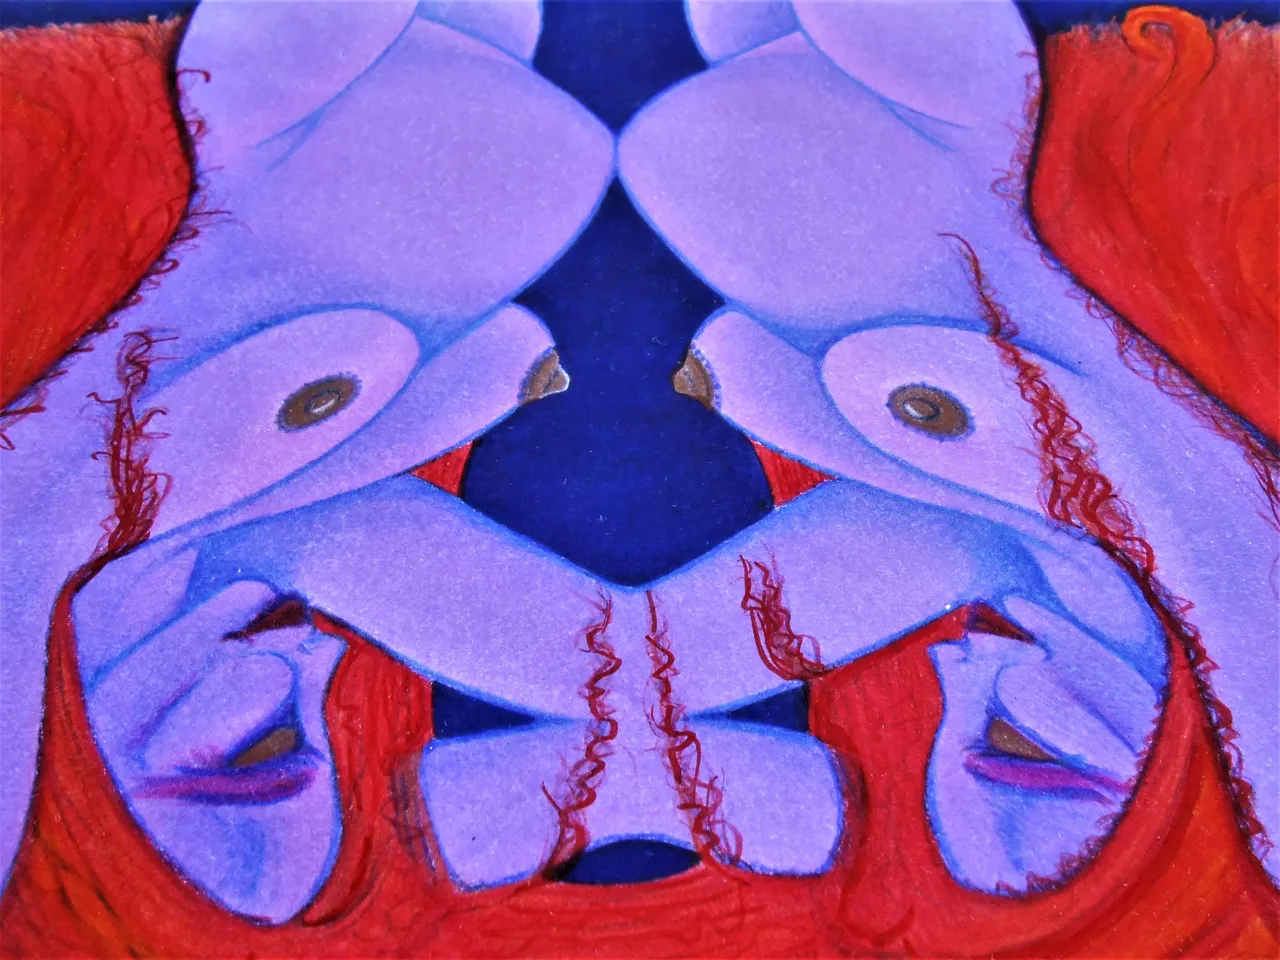
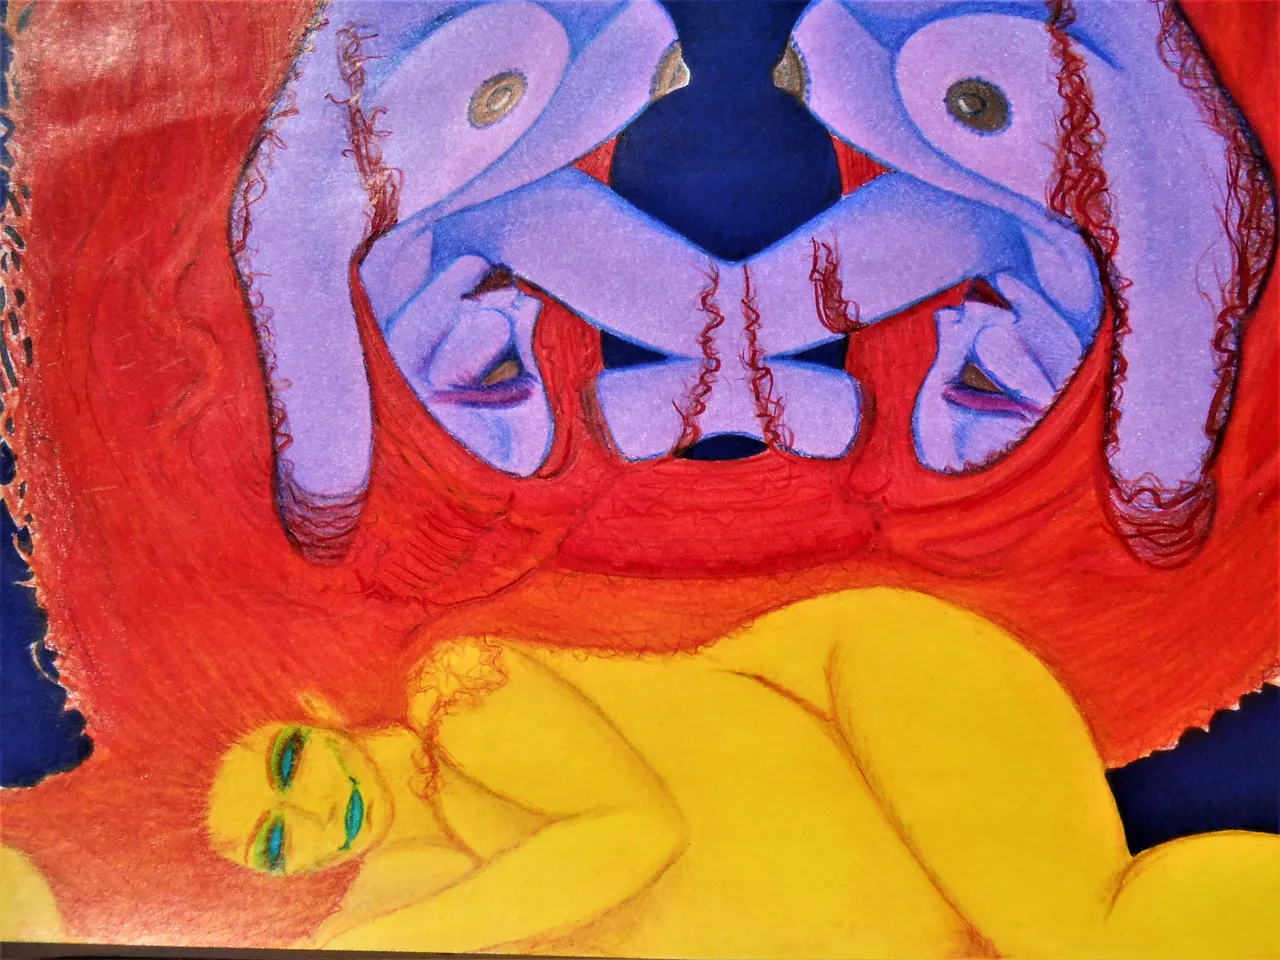
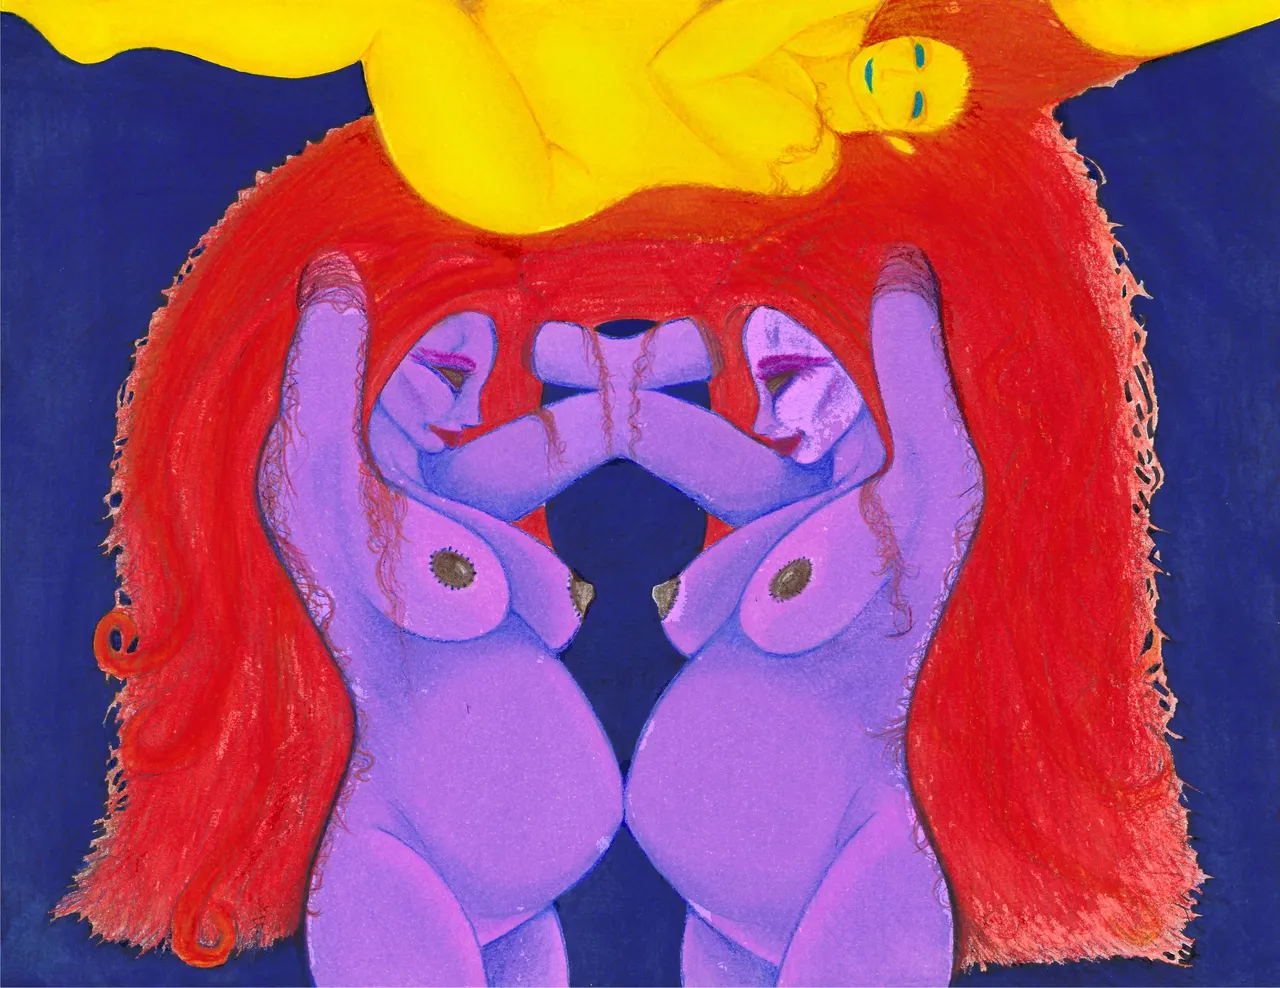
Now that many of the highlights, contours, shadows, and details have been addressed it was time for the final touches and to show off some of the areas in their final form.
I decided not to use ink on this artwork. Usually, a final session of adding details with ink is my standard practice. So, this was a bit out of my norm to just let the color do all the talking. I feel like ink would have polluted the purity of having drawn this all in color without any graphite pencil or ink.
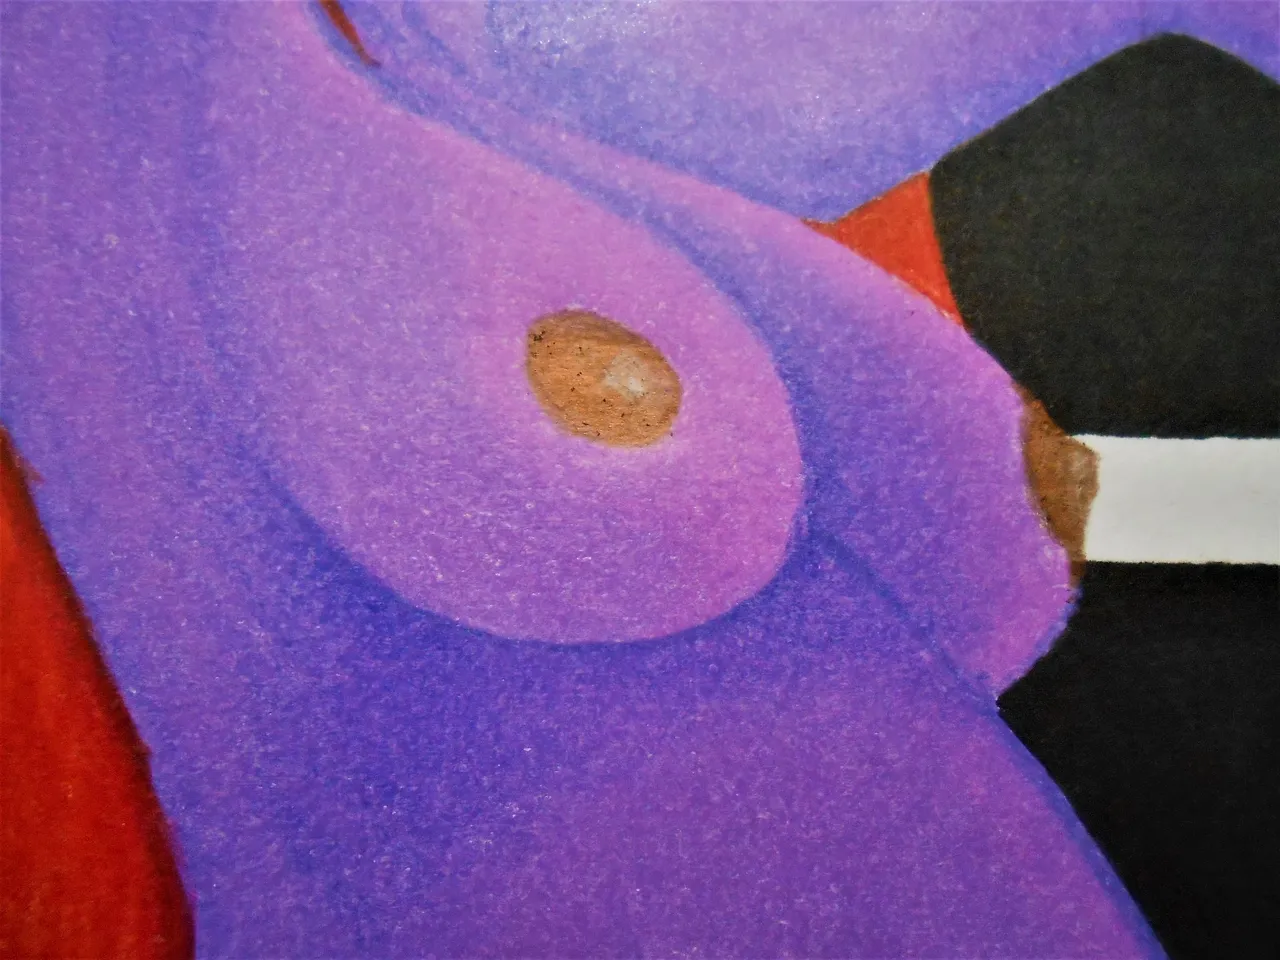
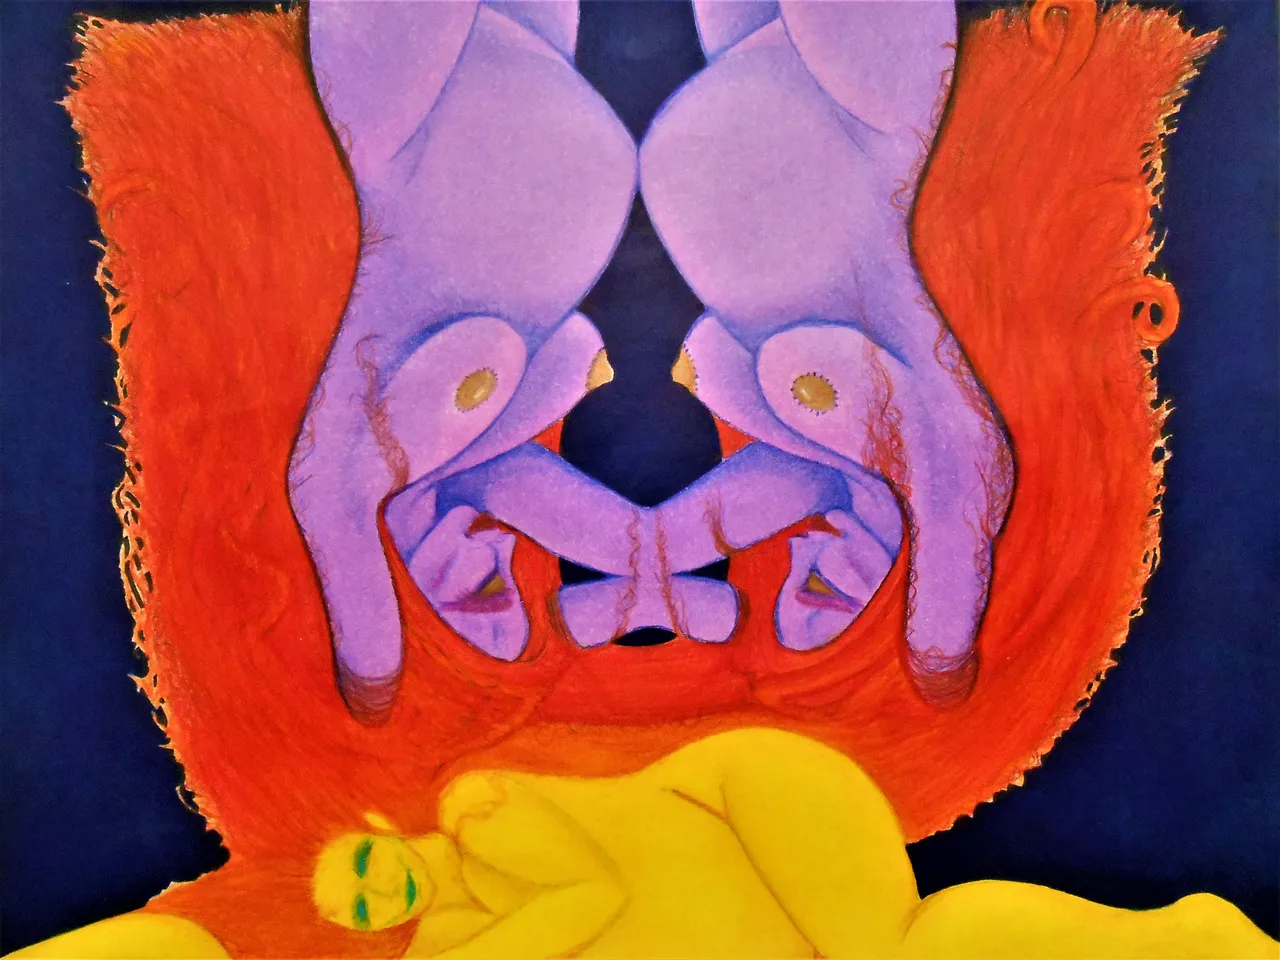
At this point, there is still some tweaking to do with the nipples.... pun fully intended! #ProofOfNipples
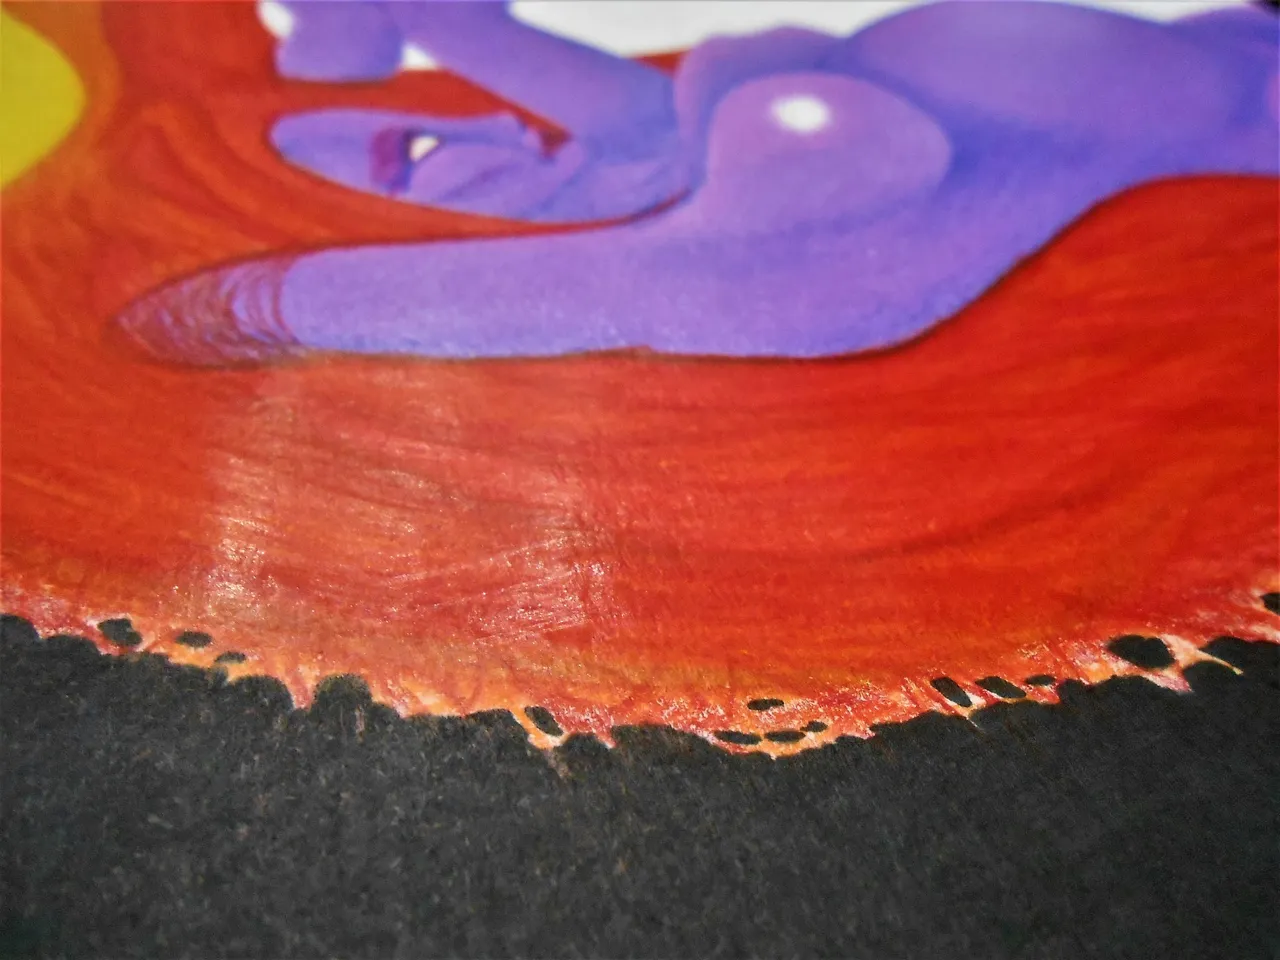
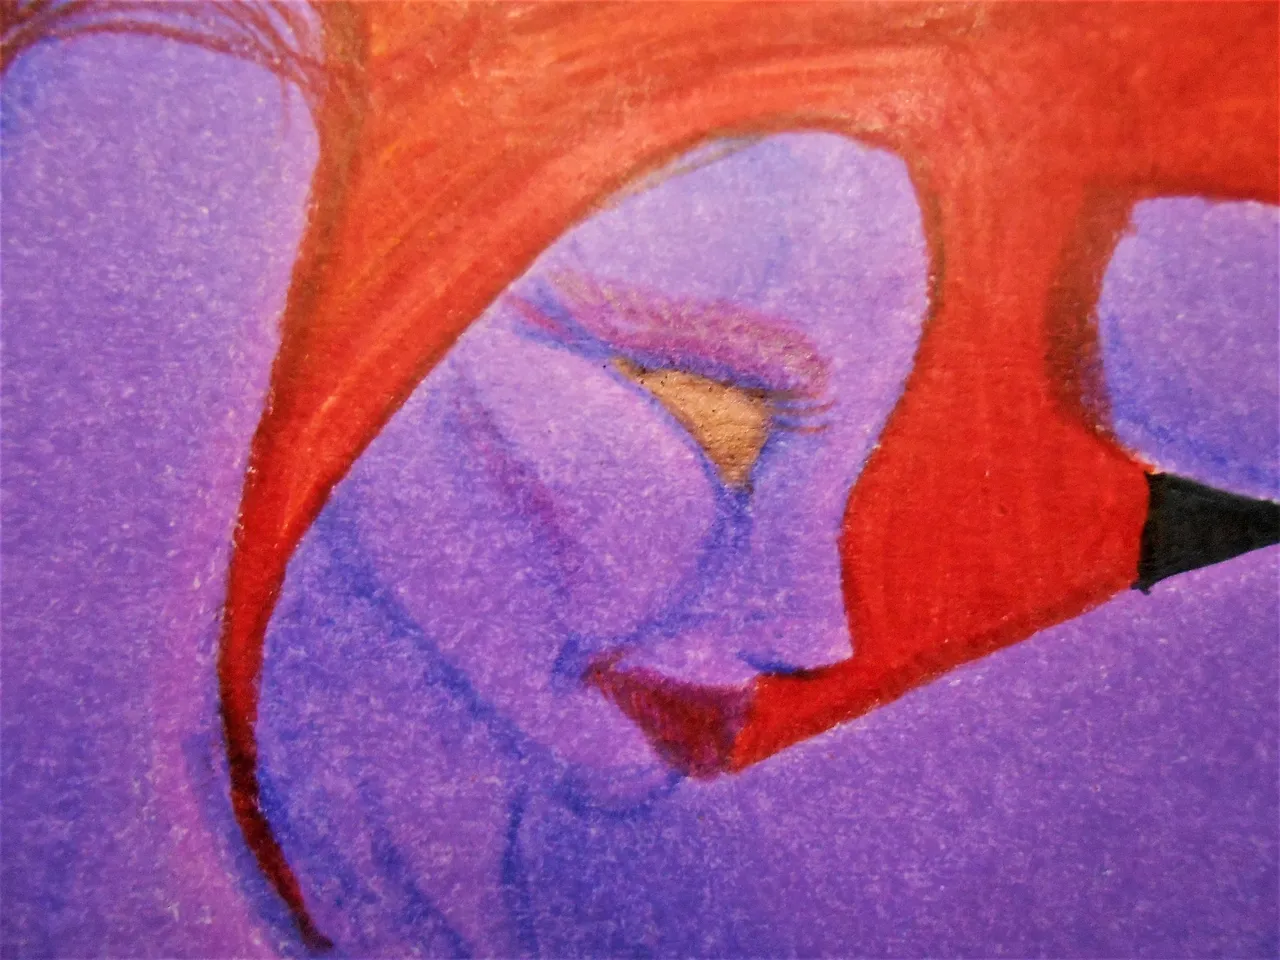
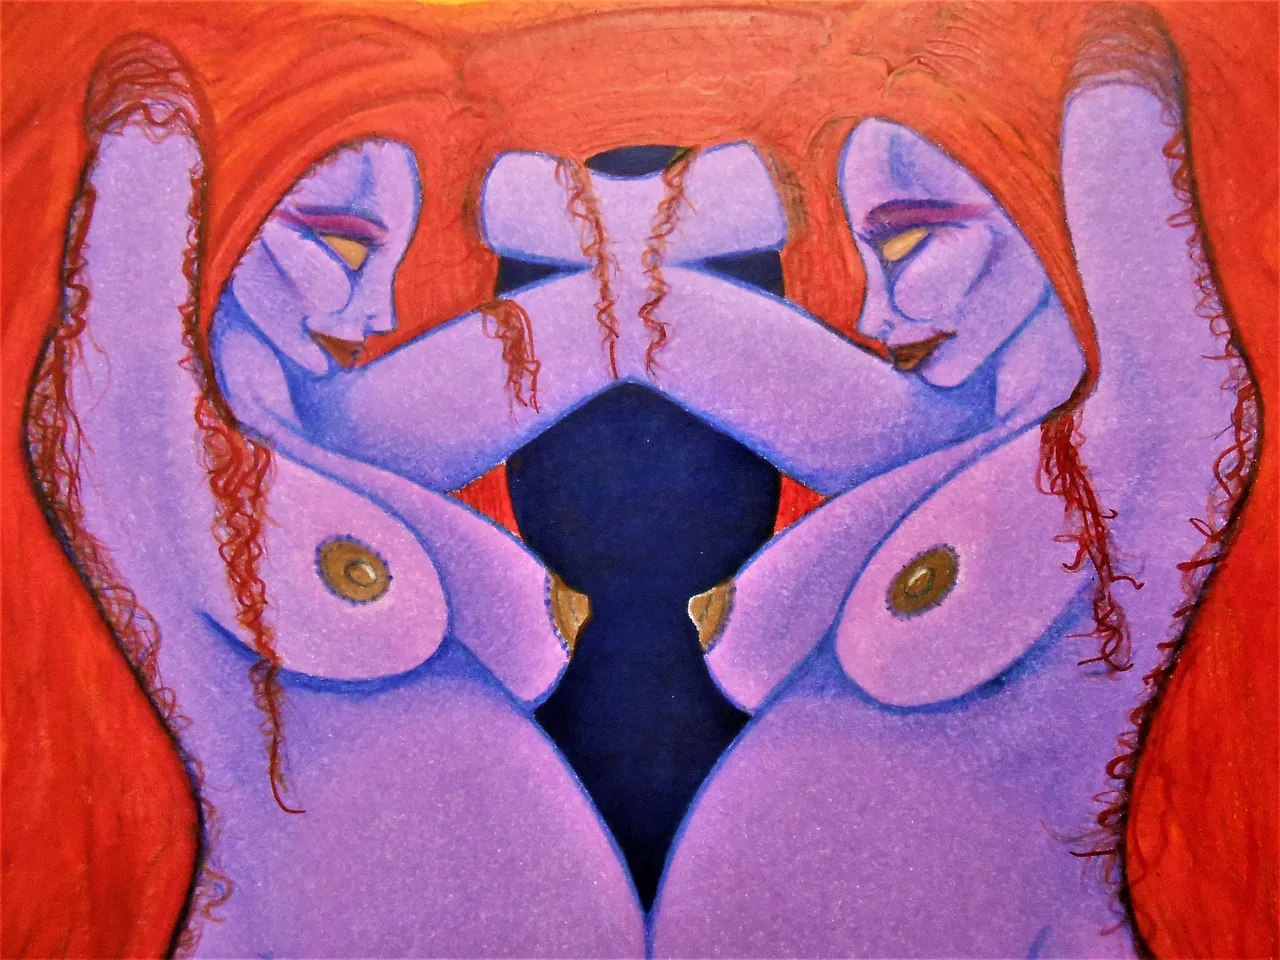
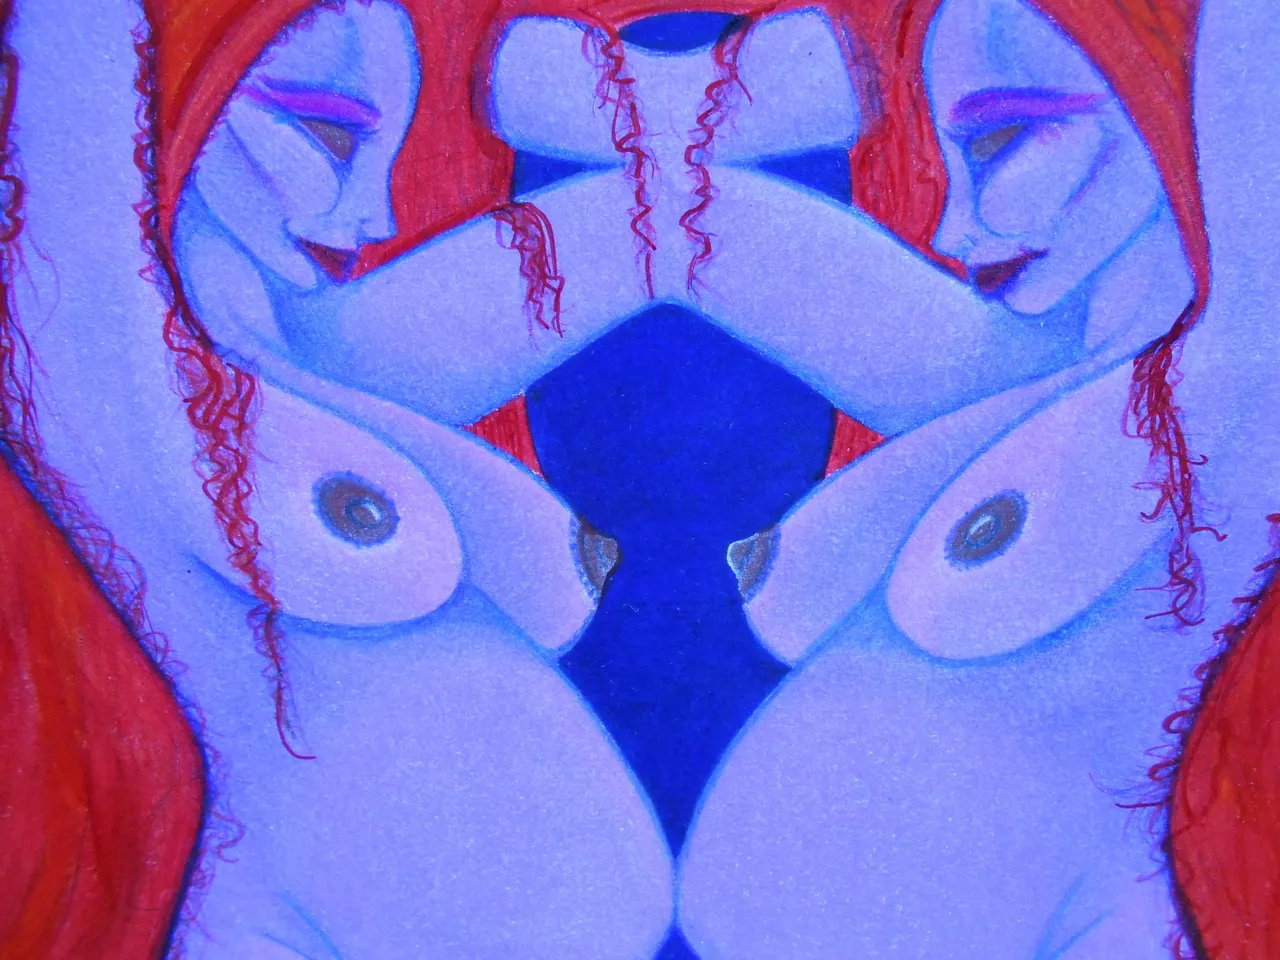
For some of the final details within the red hair i used the red Sharpie maker. Since there was so much wax build up on the paper the red Sharpie stayed wet longer than usual. (i know... that's what she said!)
While it was looking for a place to absorb i used my finger to blend it in. I think that helped give some variety and depth to the red tones.
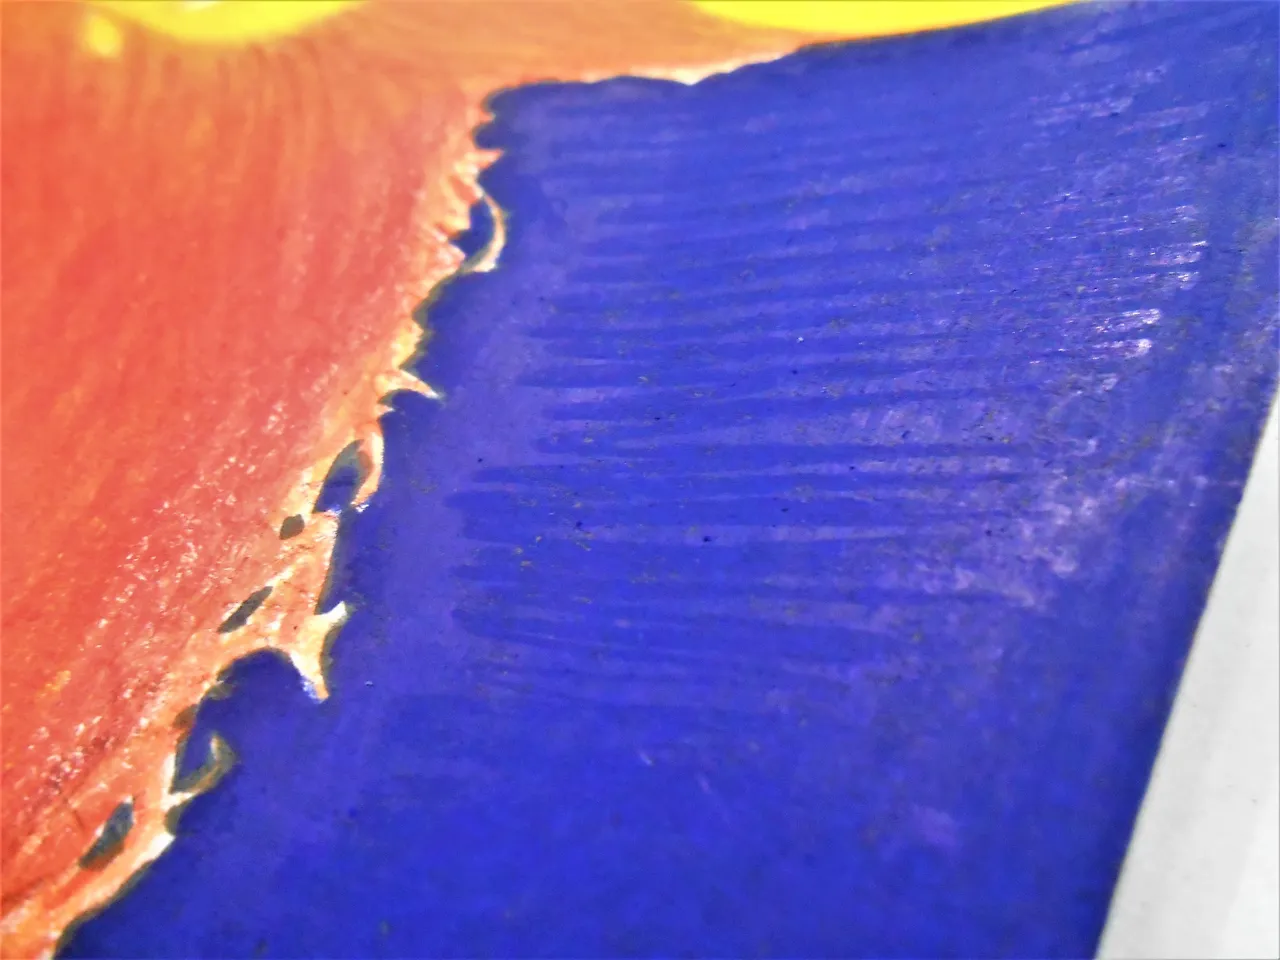
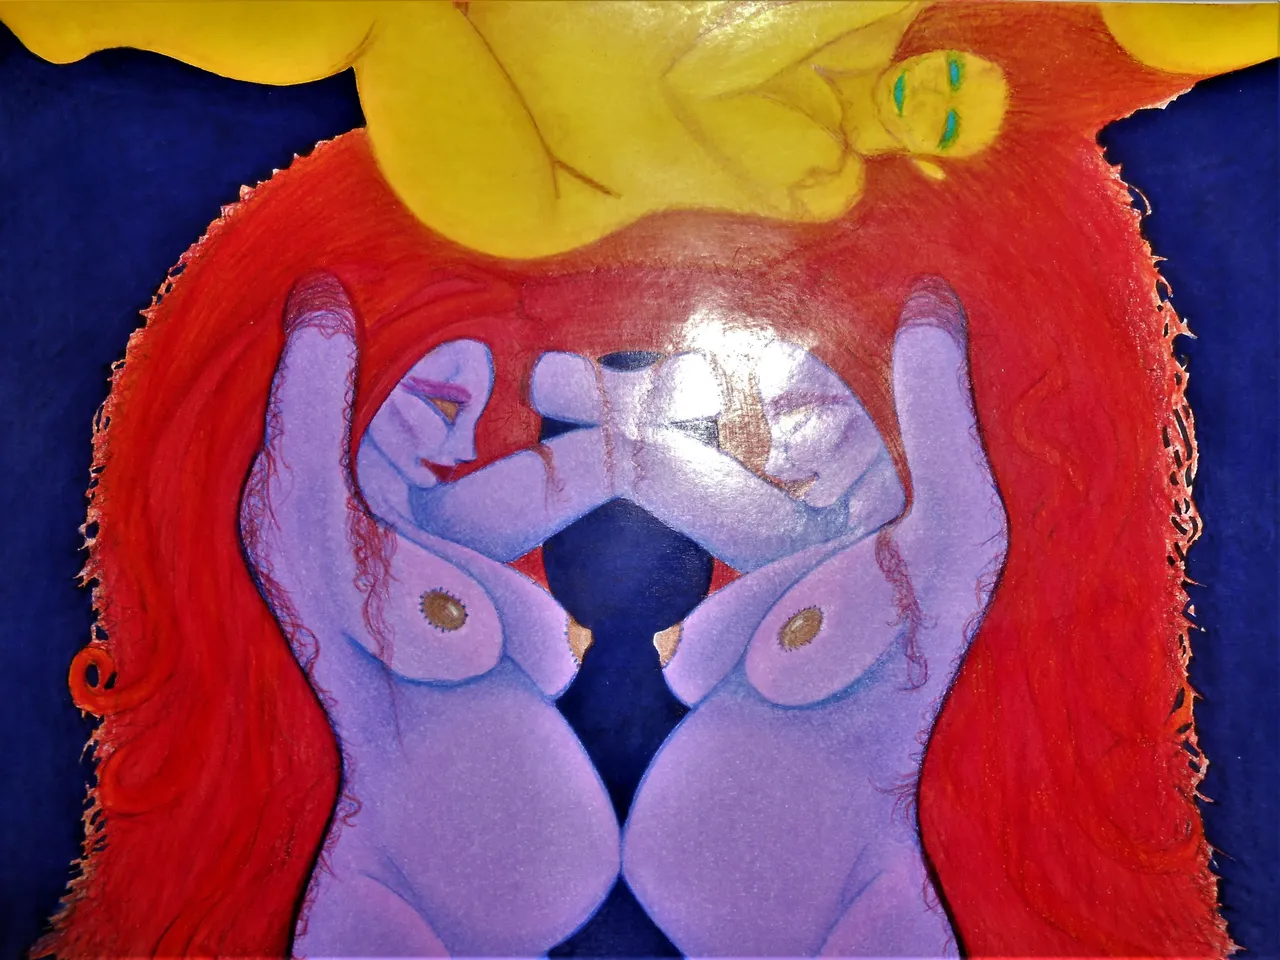
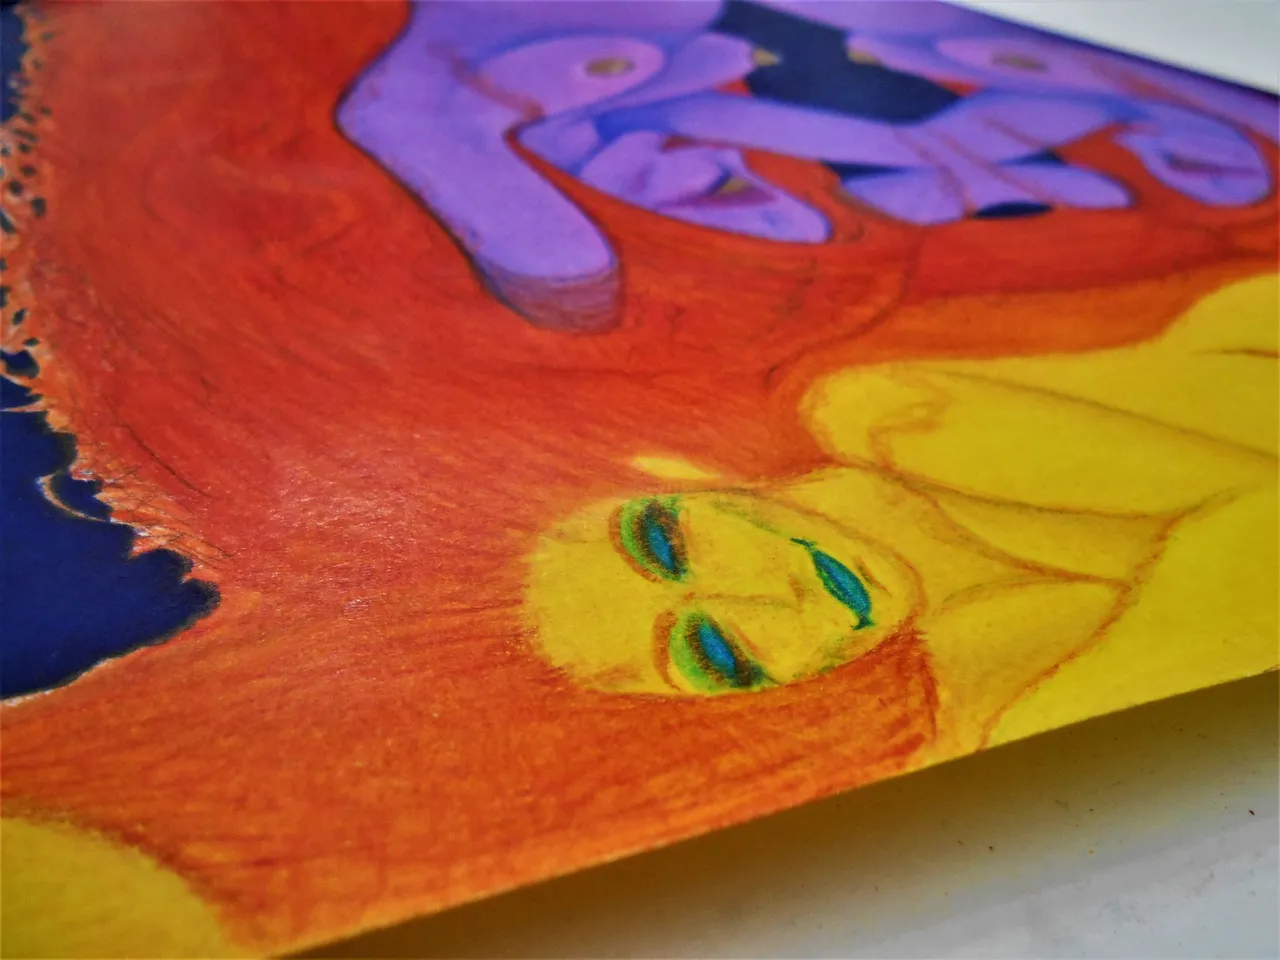
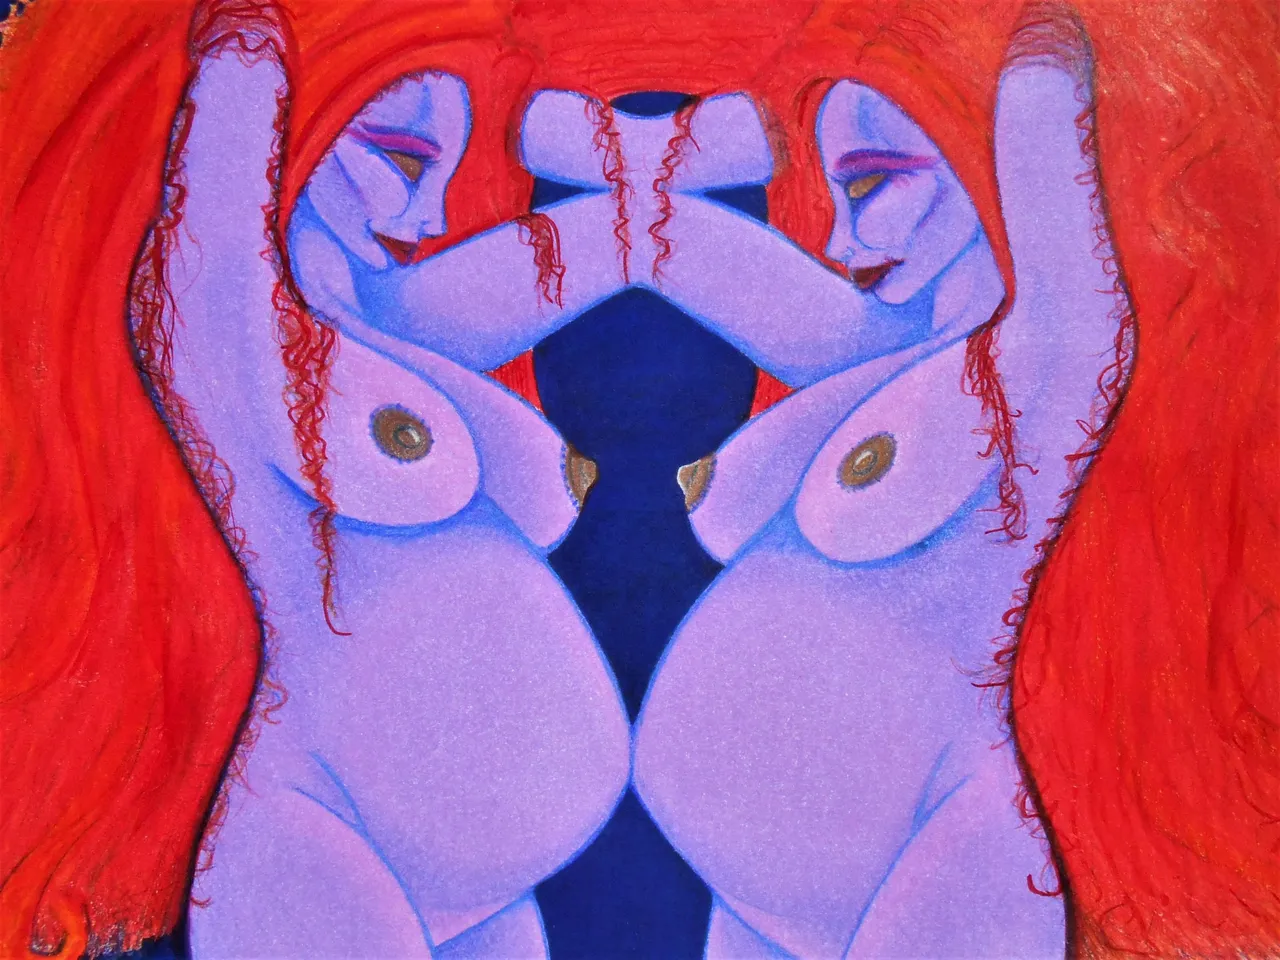
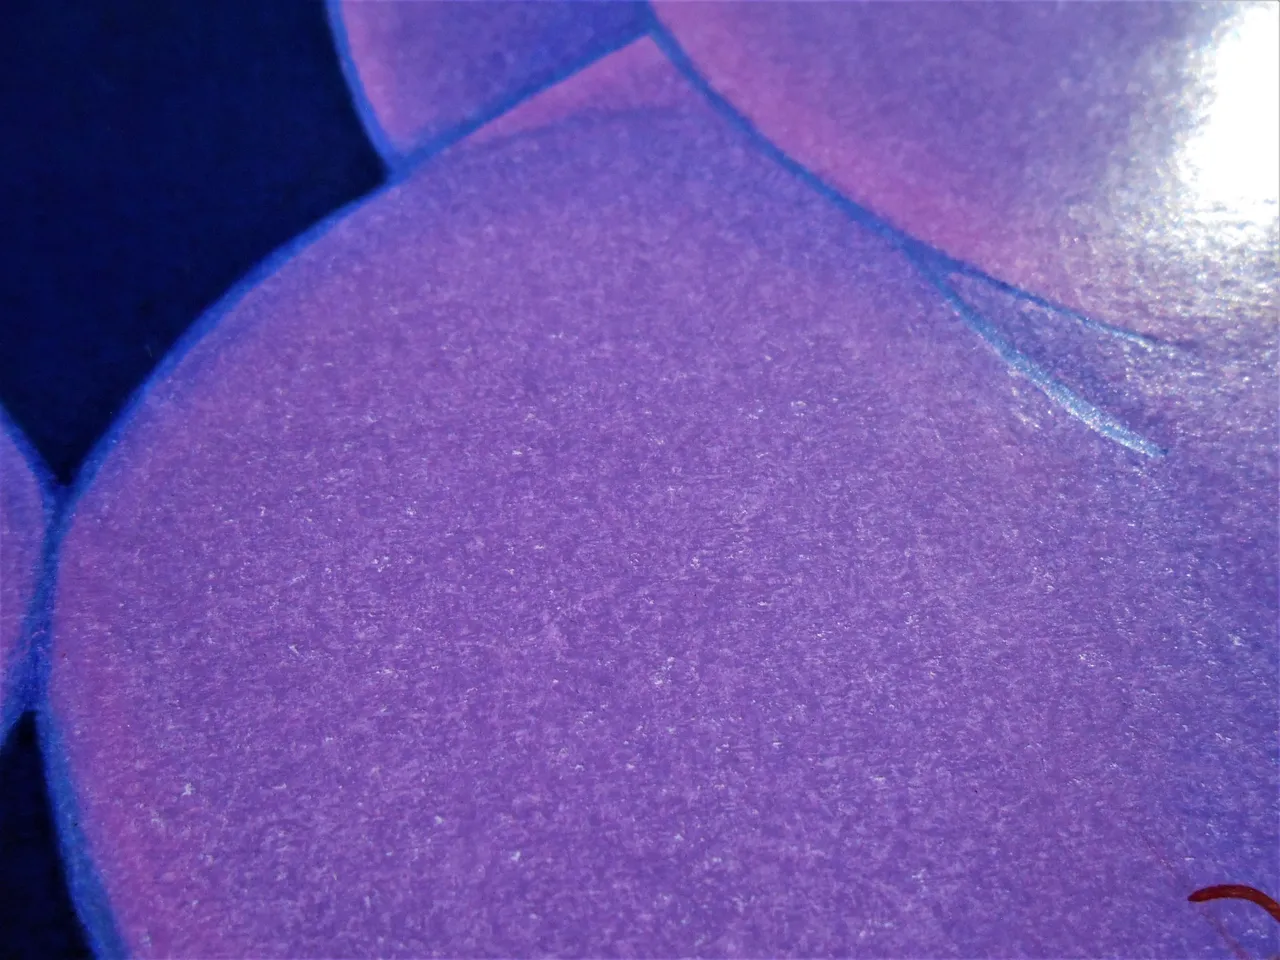
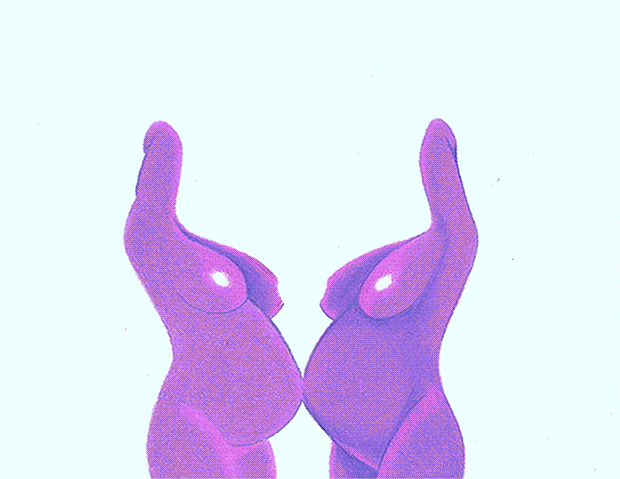
Here in the next series of shots i took the artwork outside to try and see if the natural daylight would give any better visuals than my camera could do on it's own indoors. It was strange that the purple seemed to diffuse into it's blue tones.

At this point, i opted to go out into the yard and capture some direct sunlight!
It most certainly is...
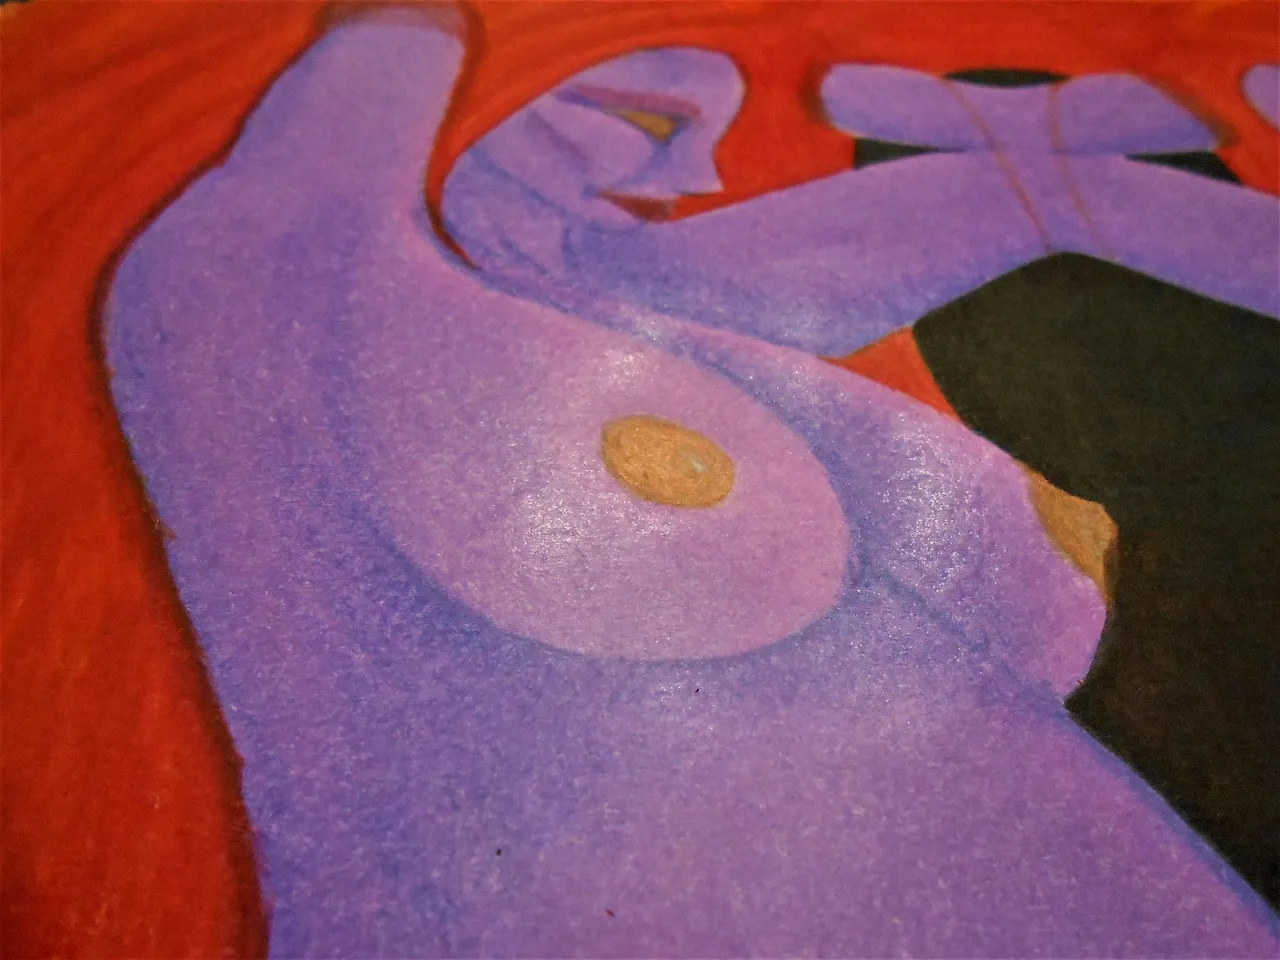
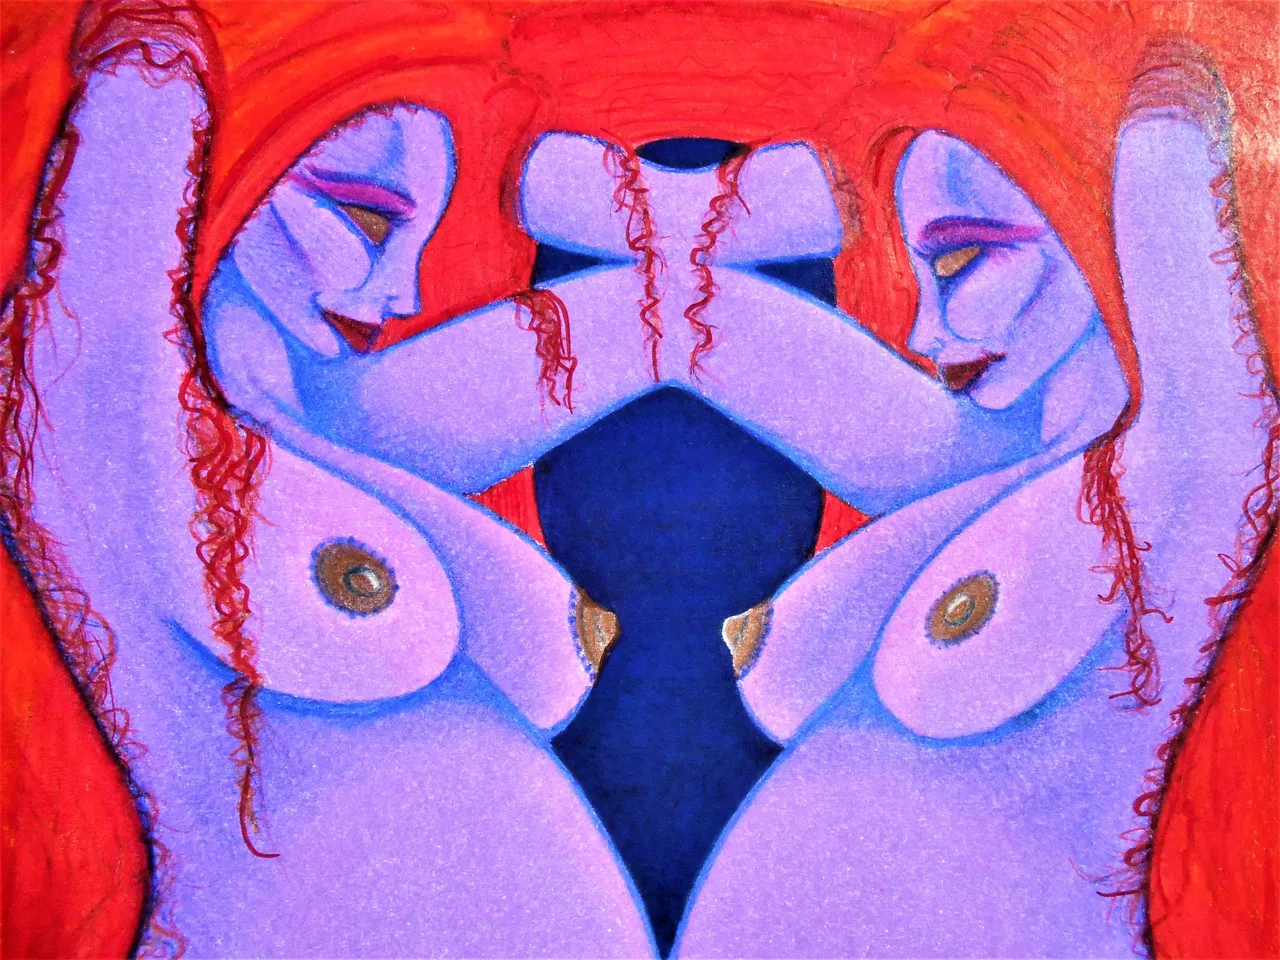
I tried to get different angles to show the metallic sheen in the copper. I think it was mildly successful.
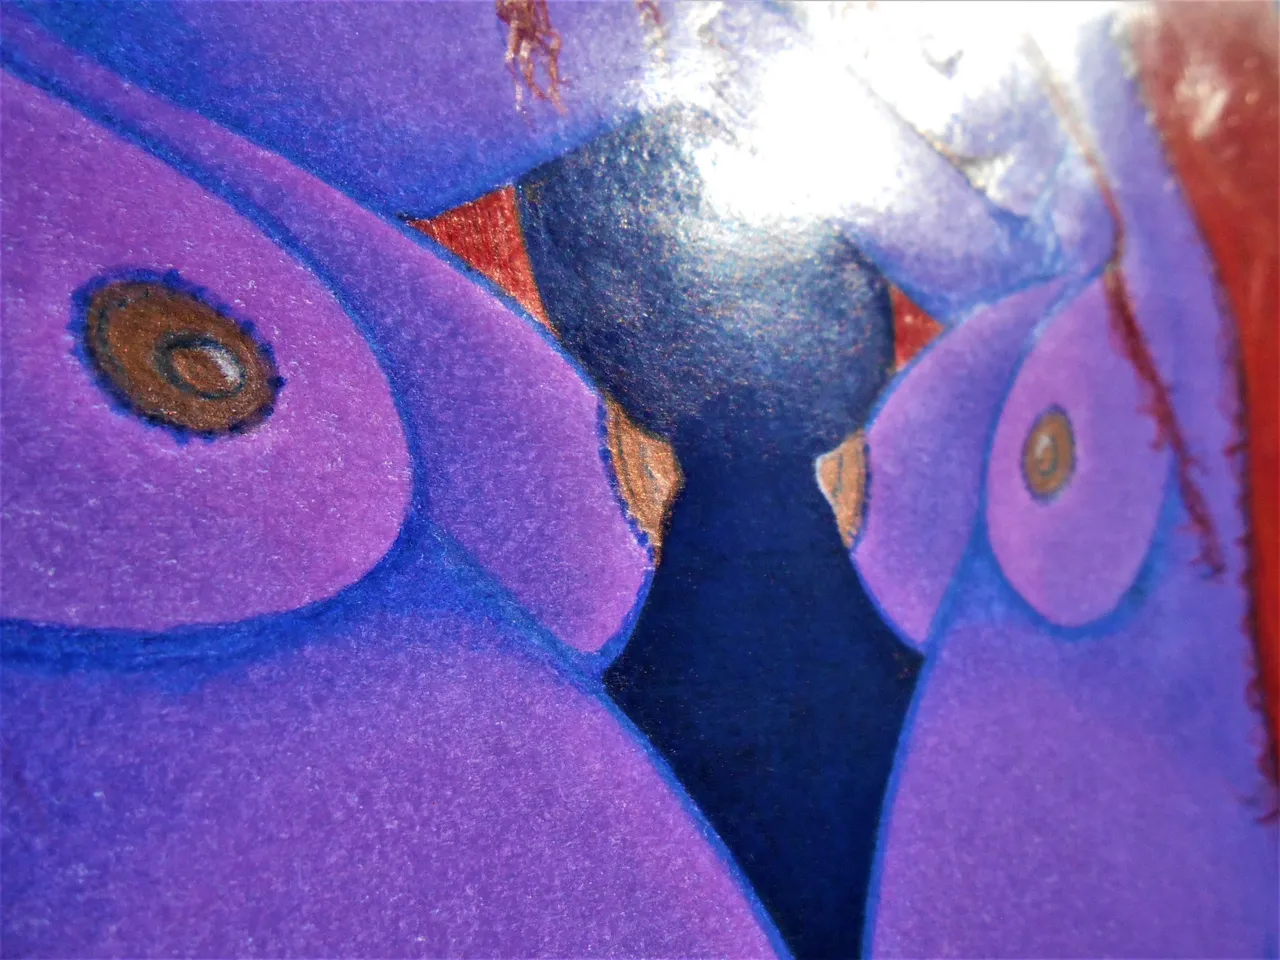
Even if only mildly successful in emphasizing the metallic sheen... i do love the gloss of the sun's reflecting light off of the wax color layer.
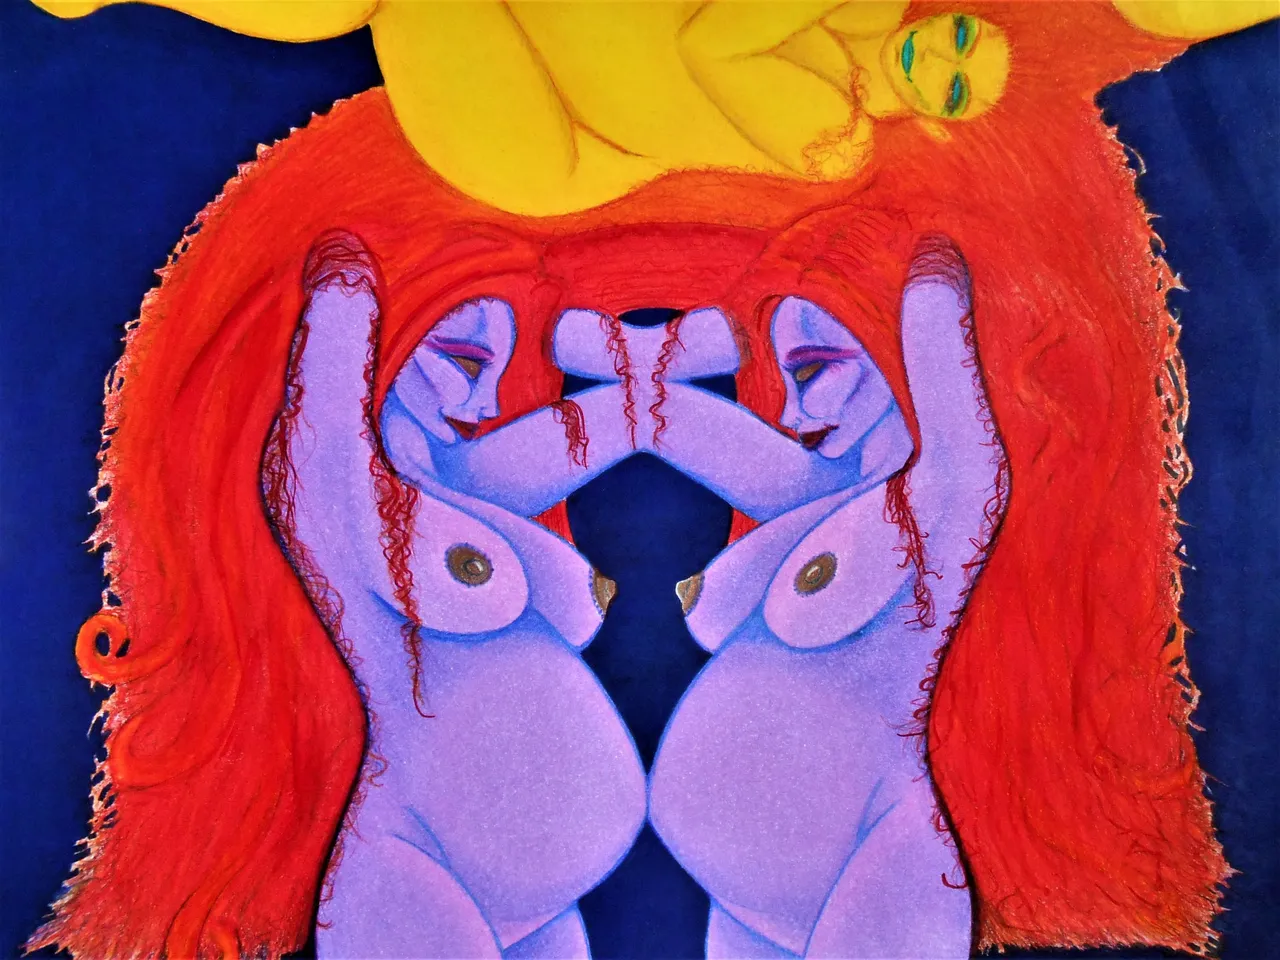
Uncovered Beauty
Now, we get to the end of all things.
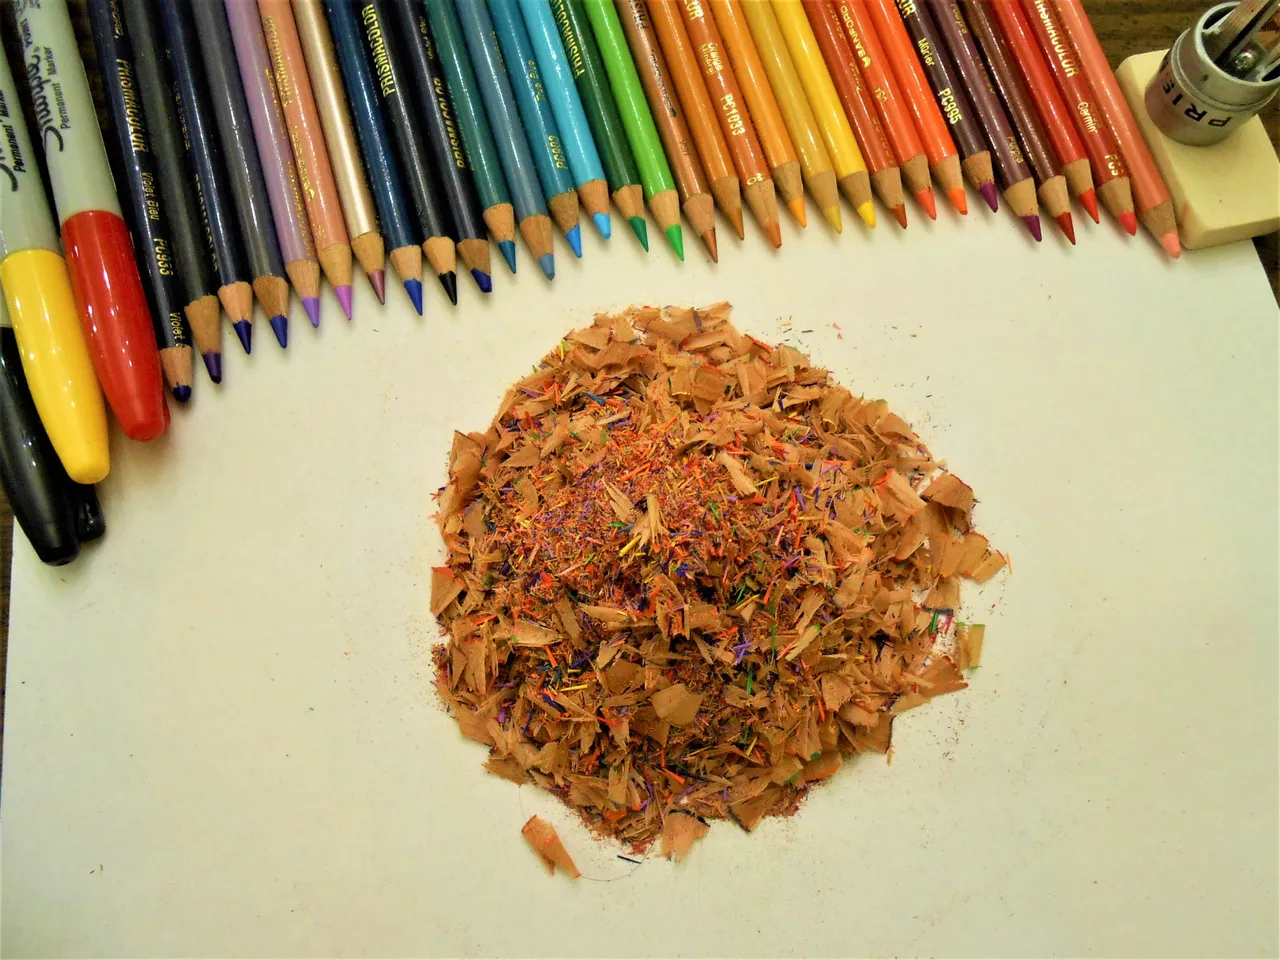
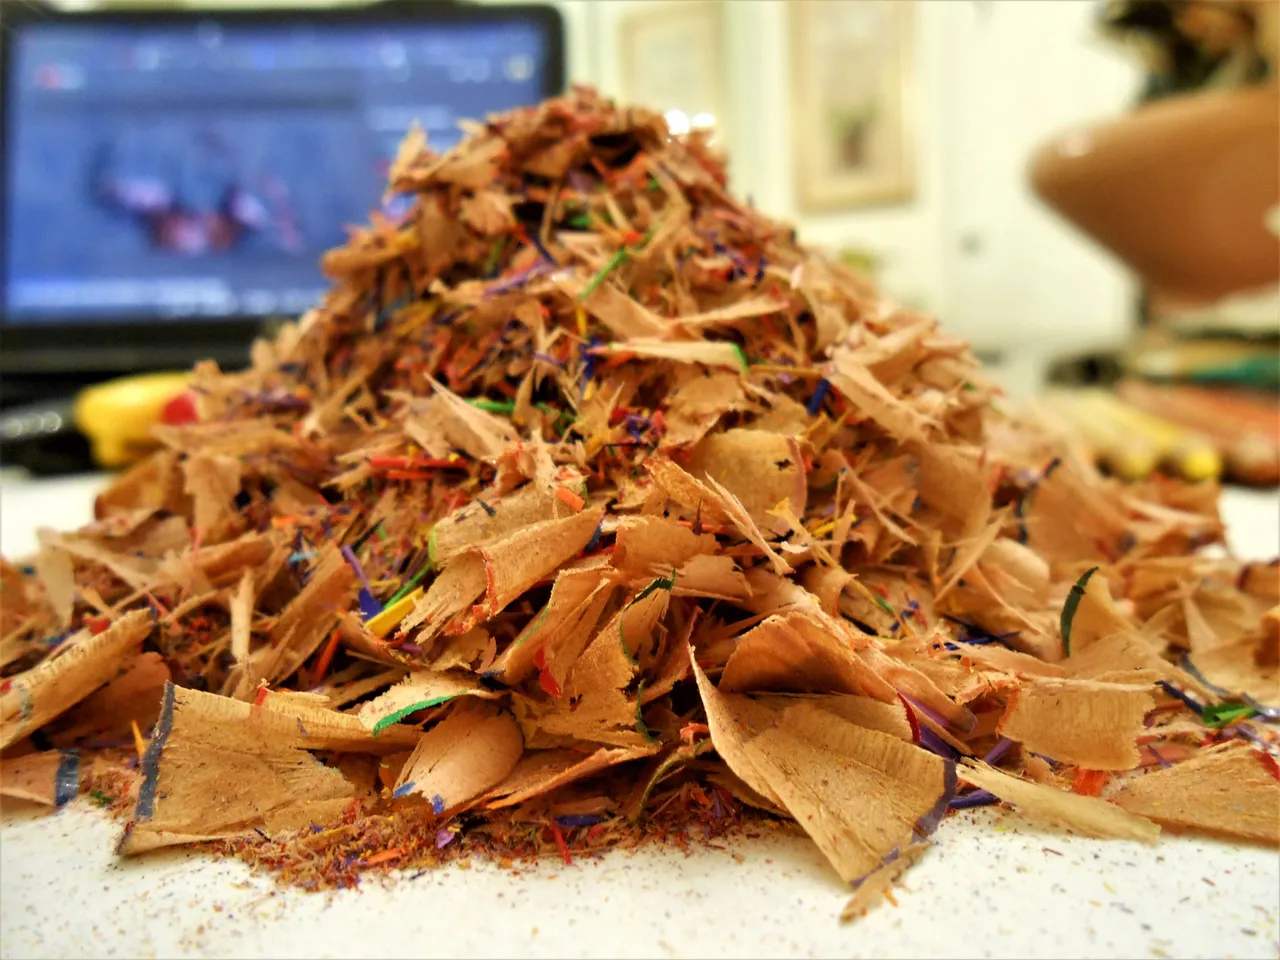
I dumped my pencil shavings out from just this one project to show you the aftermath. You can even see one of my long hairs that got caught in the crossfire!
~ The Grand Finale ~
I didn't intend on making this post so long or adding all the good shots i took. But by now i figured why not. I promised i would put the higher resolution scans in and now i will finish with those, a link to purchase the NFT, and a gif of the scans. Thanks for sticking with me this long. I appreciate your time and attention.


Now that we are at the end of the road here i figure it's safe to say that i have this minted and for sale in My NFT ShowRoom Gallery. You can click on that link to see everything i have minted and up for sale.
I was going to explain my thought process and inspiration behind this work... but you can actually read about that in the description for this artwork and the Expectant Collection description in my gallery.
I will create an auction in the future for the fist edition. But i had 16 other editions at staggered prices. I priced this one to sell and there are only a couple editions left for the lowest price of 3 Hive. The others are 4 and 5 Hive. Right now with the dip in value of Hive is a great time to go buy some art.
Click on the blue link beleow to go straight to the purchase page for this artwork i titled "Expectant: Trifectant " I also added an unlockable file with the finished High Resolution scan of the final copy for those that purchase the art.
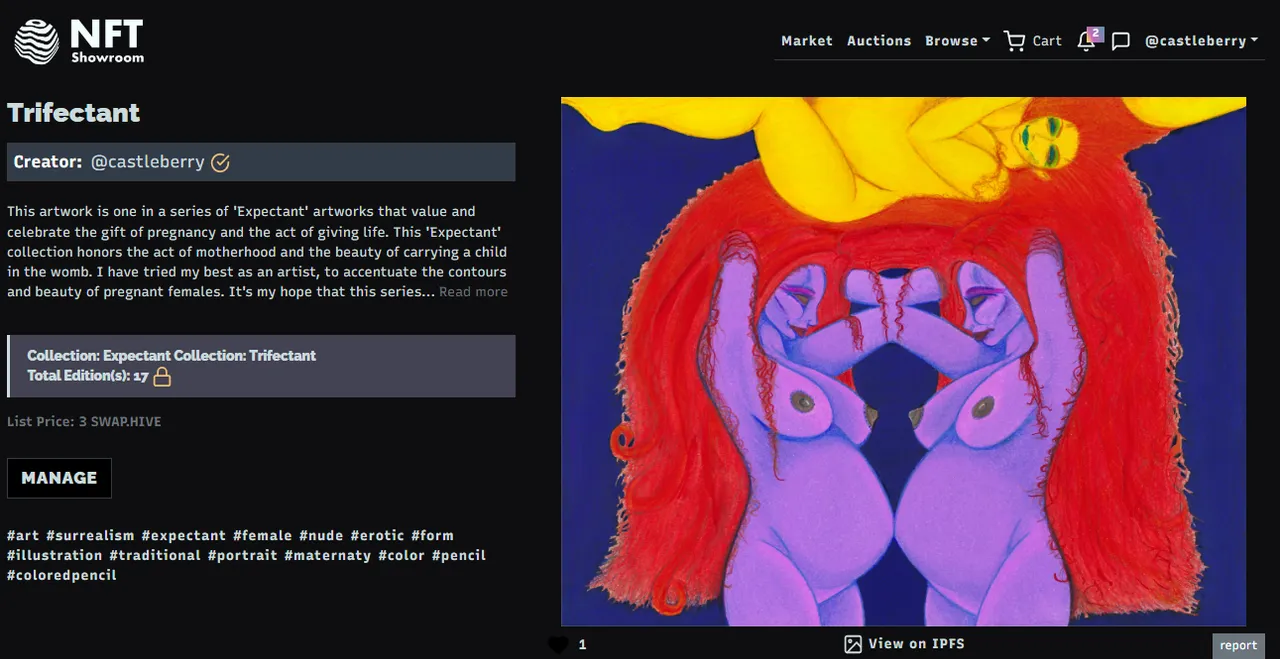
BUY MY ART HERE
Thanks again for your time and attention. I'm glad you made it this far. I'm glad we all made it this far. Now, we can put this all behind us and move on to the next big thing. I apologize to your thumbs and scrolling fingers and joints. I also apologize to your eyes for all the work they've had to do. Hopefully, in the end... it was all worth it.
Happy Ending Dance
