

Hi everyone! How's everybody?, right now I'm hanging out with friends, it's hard for me to write because I'm laughing too much, Just at the moment that my friends arrived at my house, I was finishing the topic that I wanted to share today, it is the "Puppet Warp", it is quite useful when making effects or moving people by adding different poses (that look natural), in addition also a small explanation of how to make the text adapt to a geometric shape, so I'll start explaining, I hope you like it 😊✍🏼.
Puppet Warp
- First we duplicate our photo and lock the first one, now you have already seen my previous blog where I explain how to remove a person, you will do exactly the same in this first step.
If you have not seen that tutorial, here is the link on how to do it
Remove (or delete) people in a photo/ Remover (o eliminar) personas en una foto
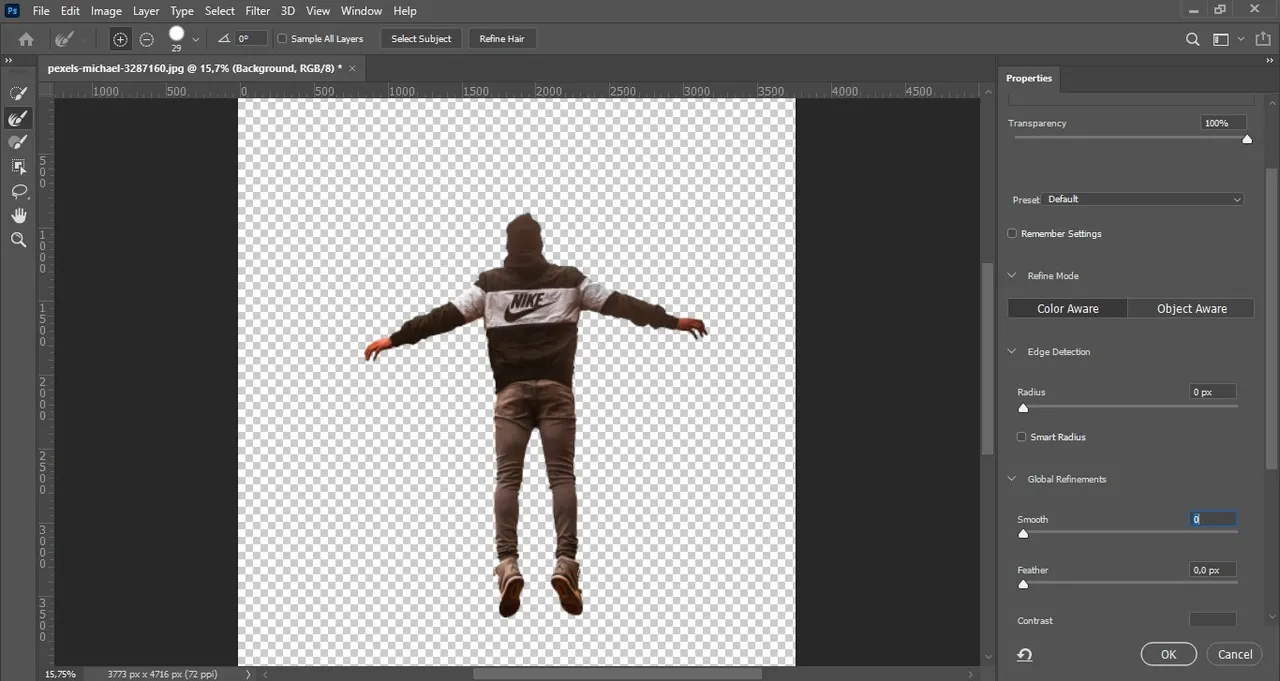
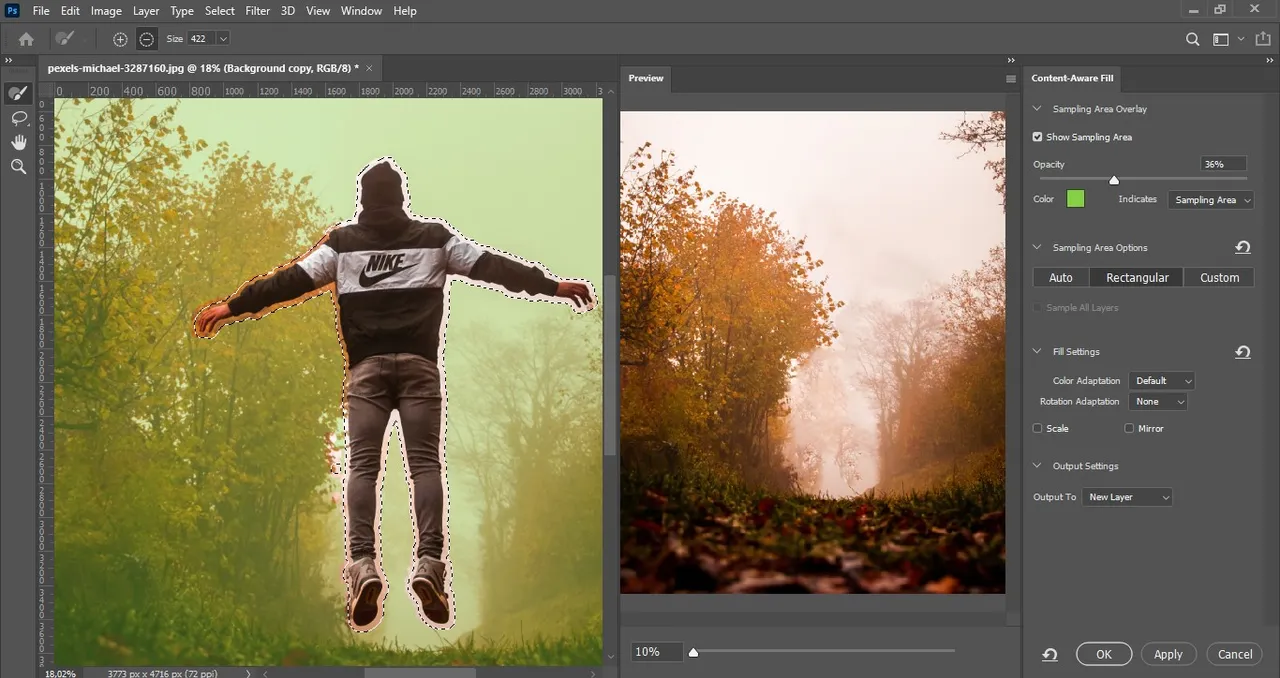
- Once we have a photo without the person, we make another duplication of the first image and now we will take care of removing the background.
- Now we have our background and the person separately.

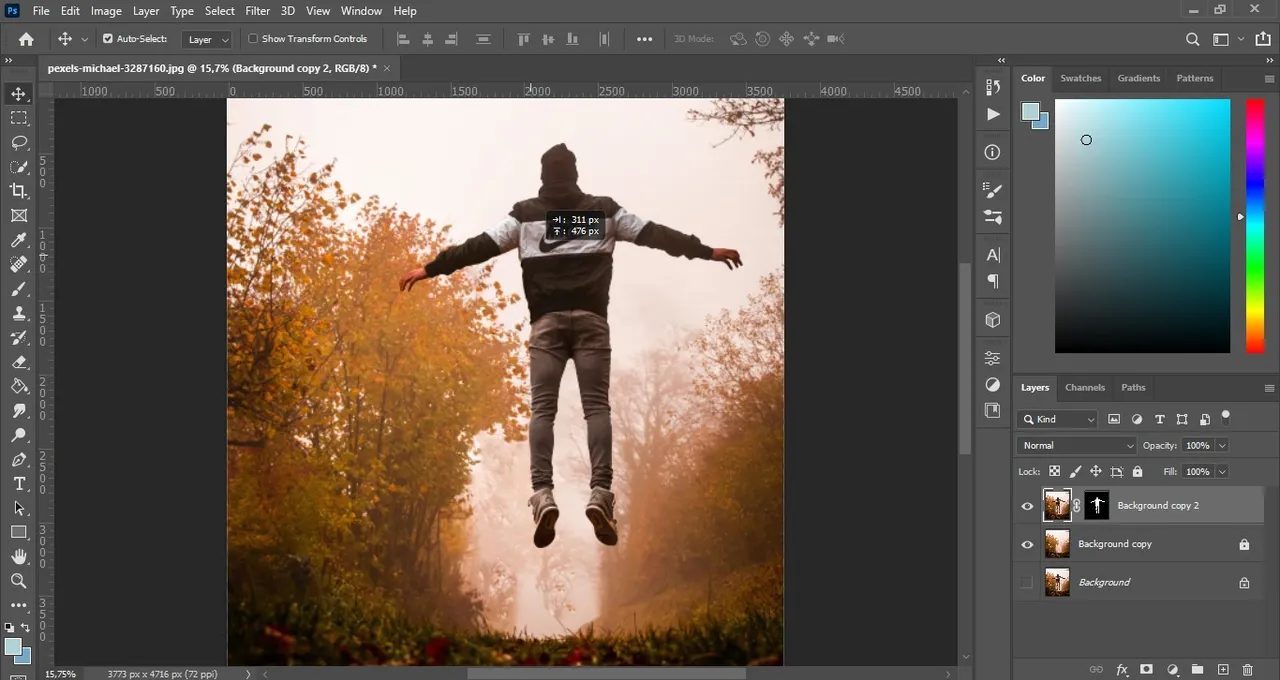
- We go to where it says "Puppet Warp" and we start to put the points where we are going to flex the person.

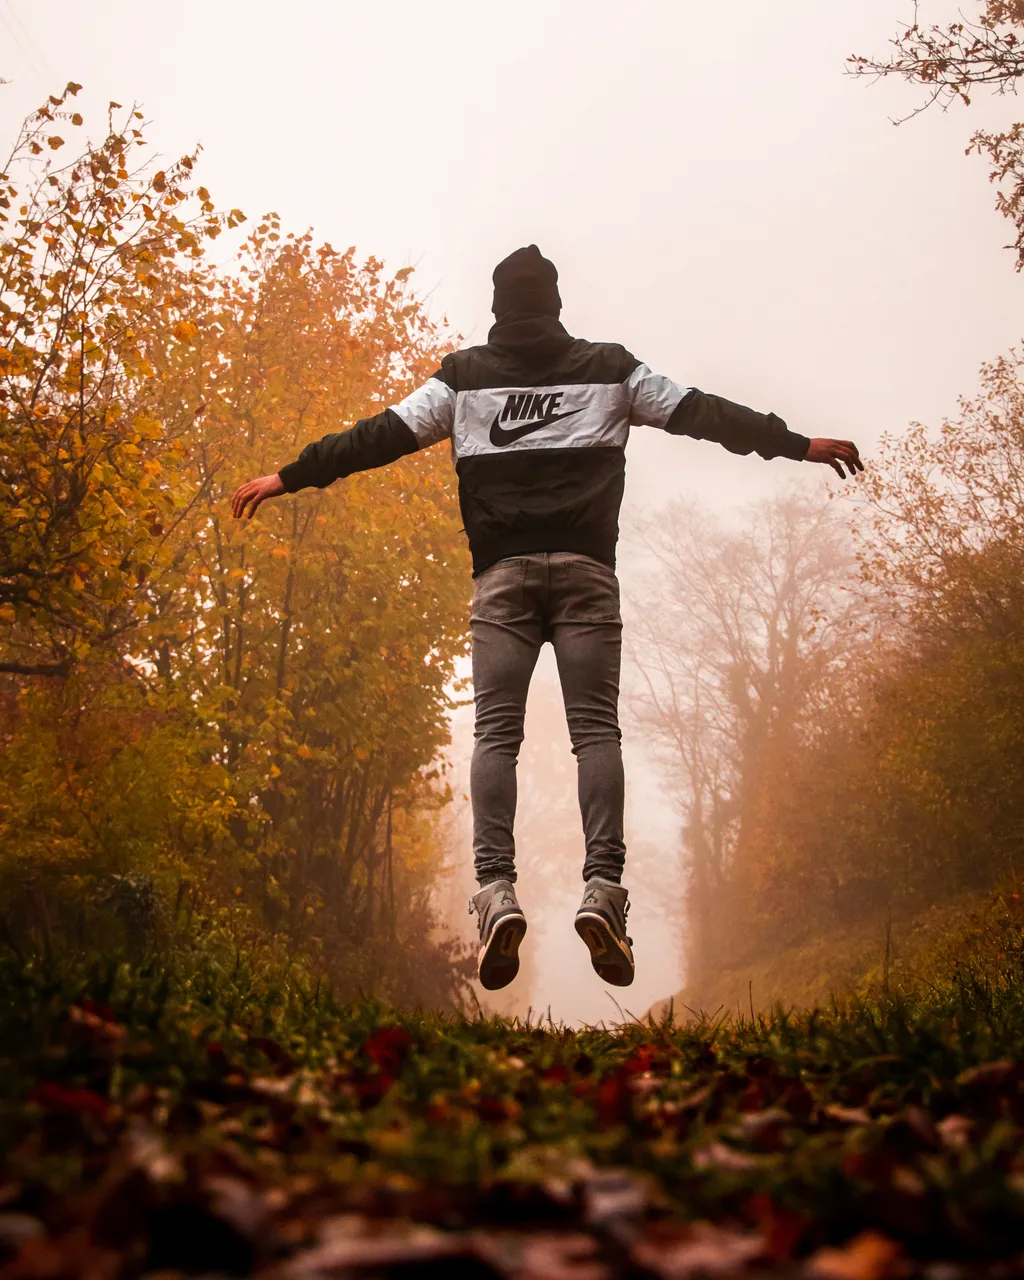
- Now, here I just made an example of how to move the person, I just put it as if him was levitating (it even gave me the impression that it seemed that the aliens were taking him hahaha)

- In the end I just started to raise it a bit and clear details.
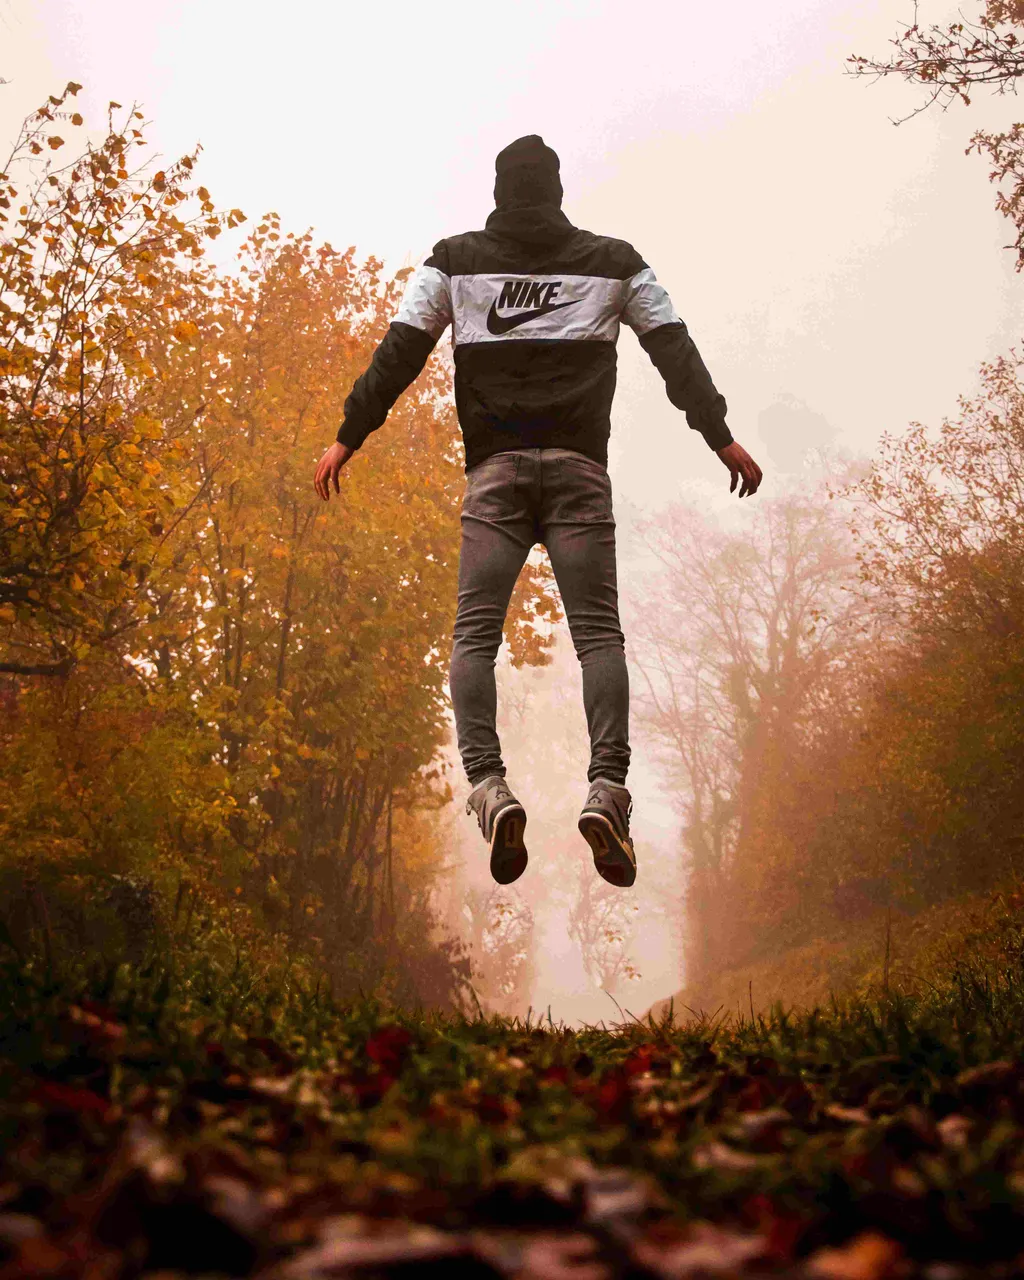
Original Photo
I took the image from www.pexels.com
Image link: https://www.pexels.com/photo/man-in-black-hoodie-and-gray-pants-standing-on-forest-3287160/
And this is how our first part of the image turned out
Now I'm going to explain how to use a geometric shape in a text (or better say the text in a geometric shape?), thus the image becomes more attractive to the eye, you can also make the words around the person or object, though that would need to go to "Select" "Modify" and click "expand" and then "Smooth", then make sure you have the quick selection tool activated and right click and finally click on "Make Work Path", although the latter is what we would do only in a geometric form, I just wanted to explain what it would be like if we had the person totally selected, Continuing with the explanation, now we go to this second part:
Inserting text into a geometric shape
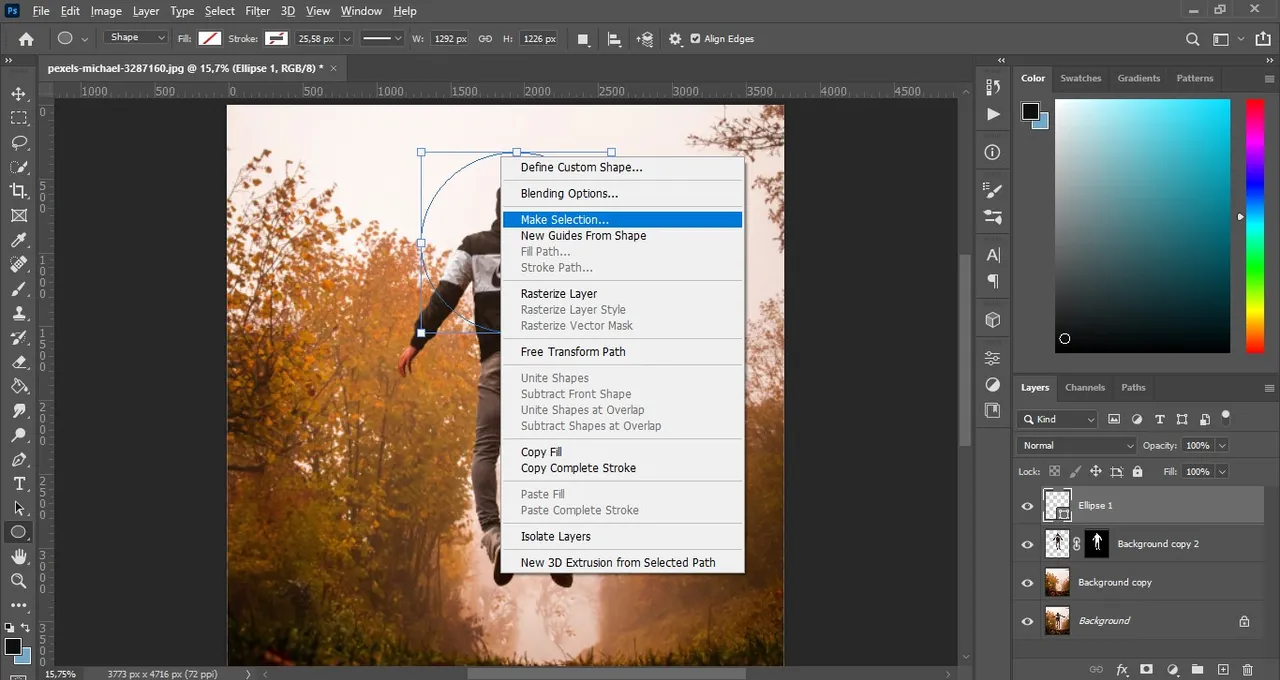
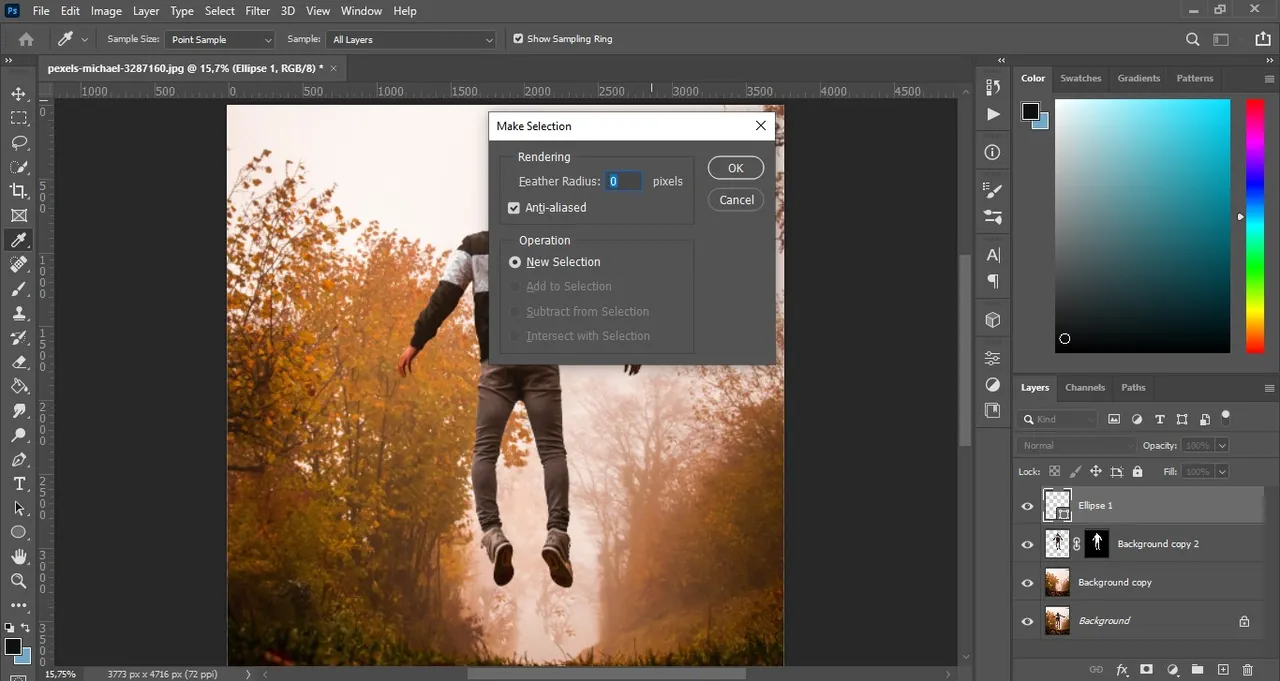
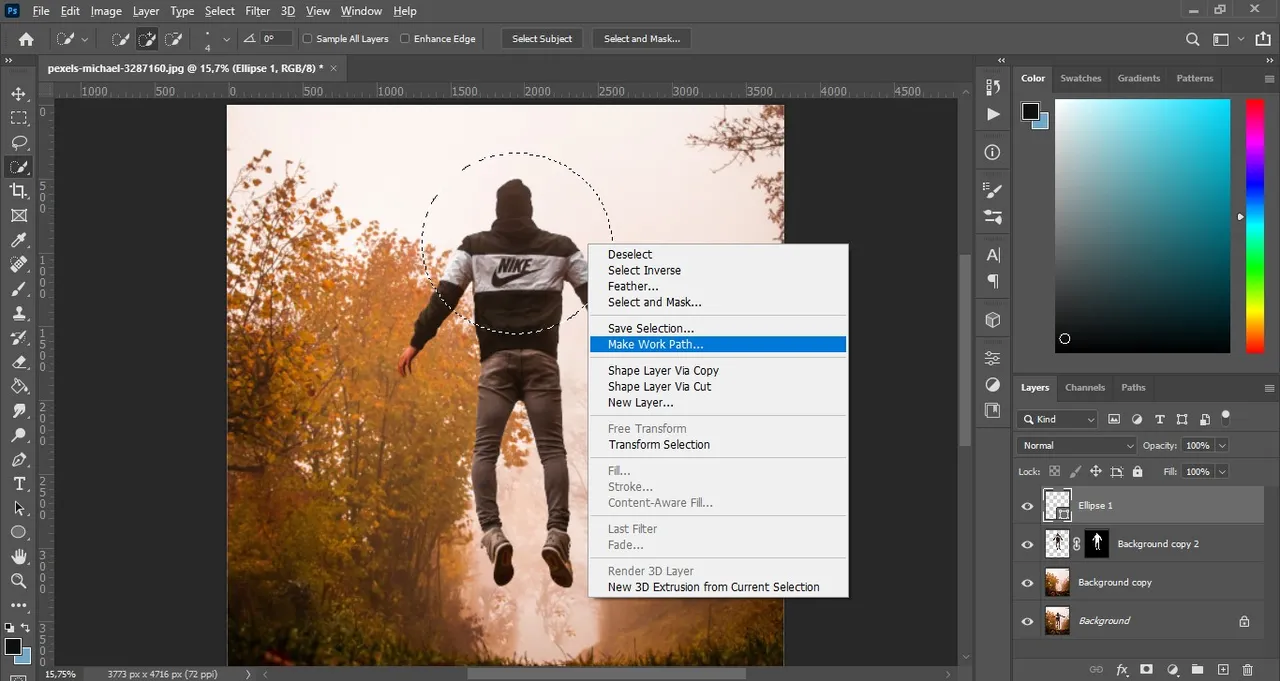
- We insert a geomatic shape without fill and without border, then we right click and press "Make Selection", then we press "Ok" in the window that will appear.
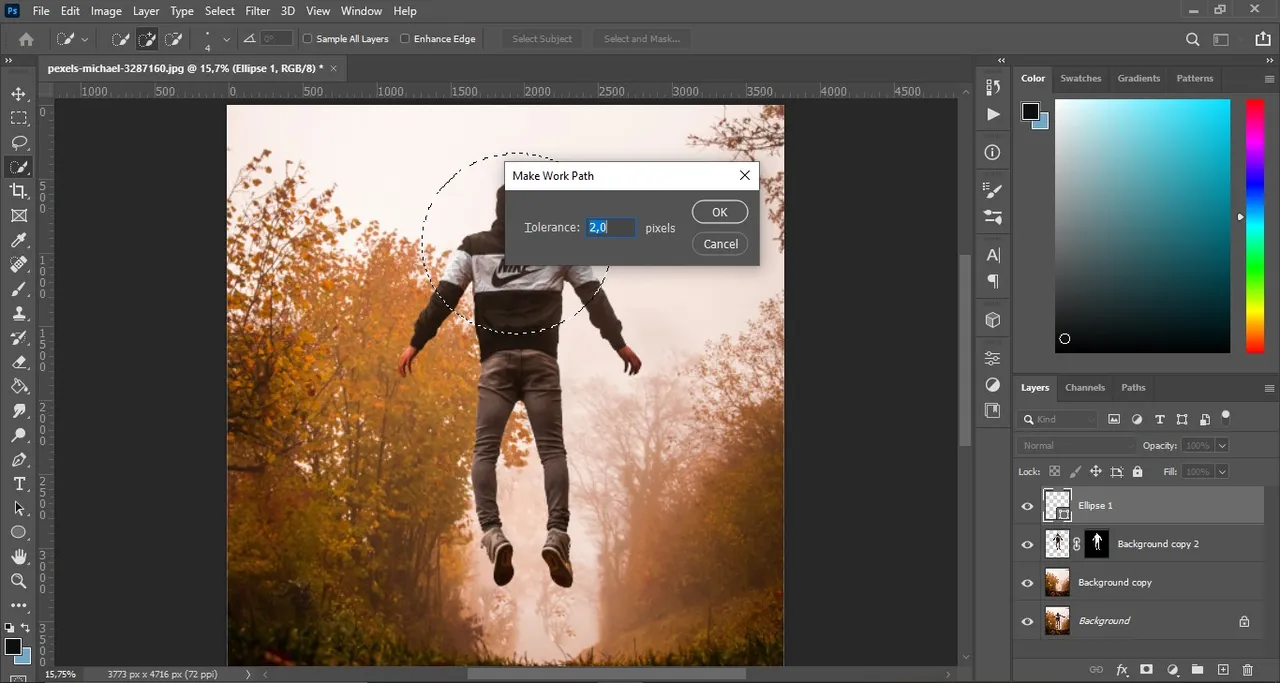
- Then, we see if we are in "quick selection tool", to then right click and click again on "Make Work Path" and leave the tolerance as it appears in the window and click "Ok".
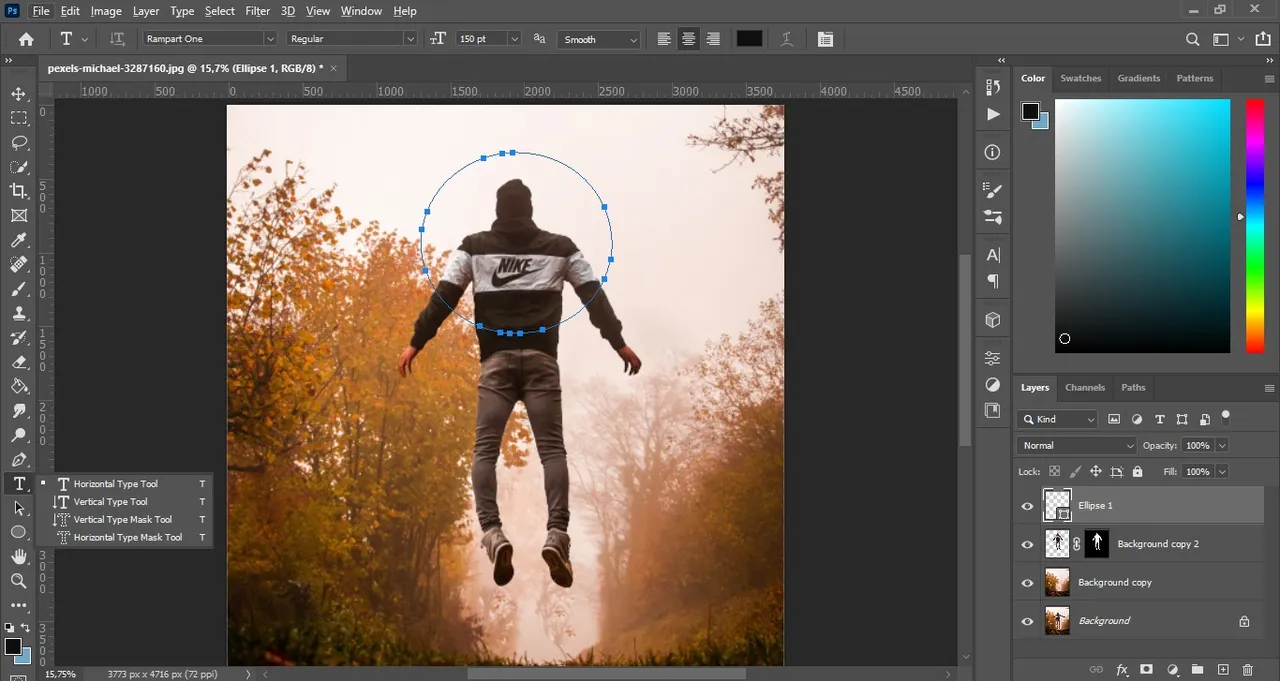
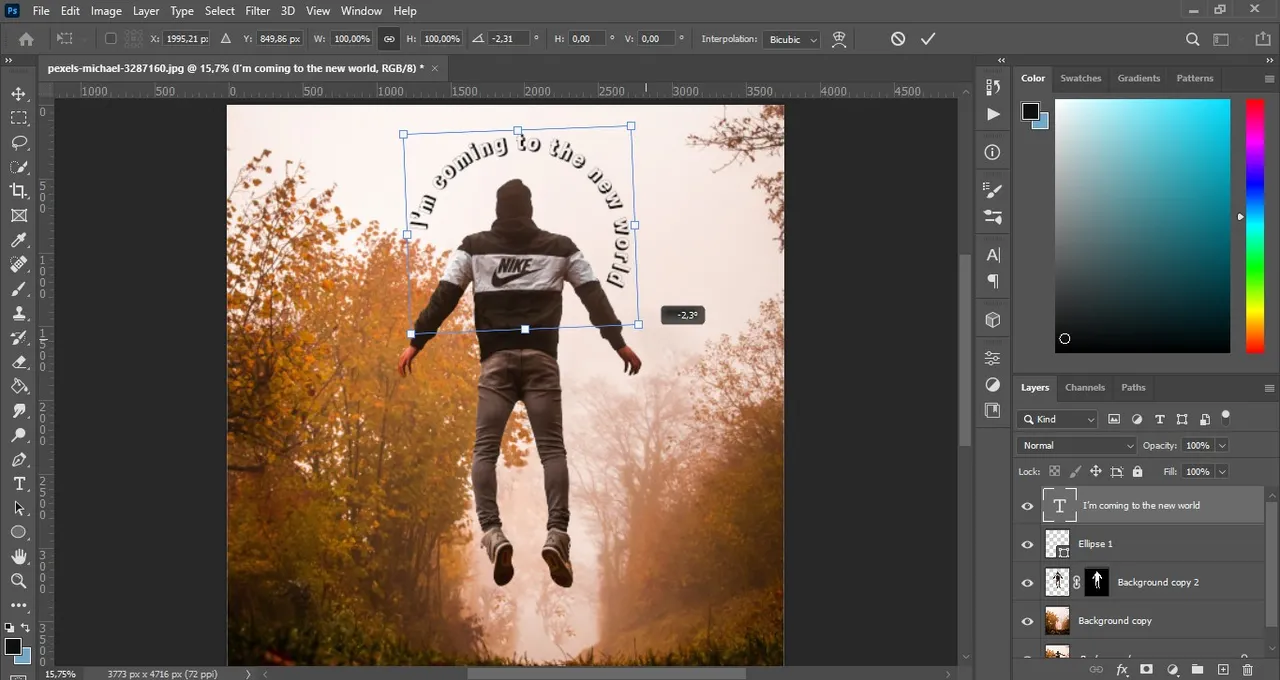
- Now that it is almost done, we are going to insert a text by clicking on the same circle, now you can write the text of your liking and adjust its address using CTRL + T, I fixed my text a bit after this.
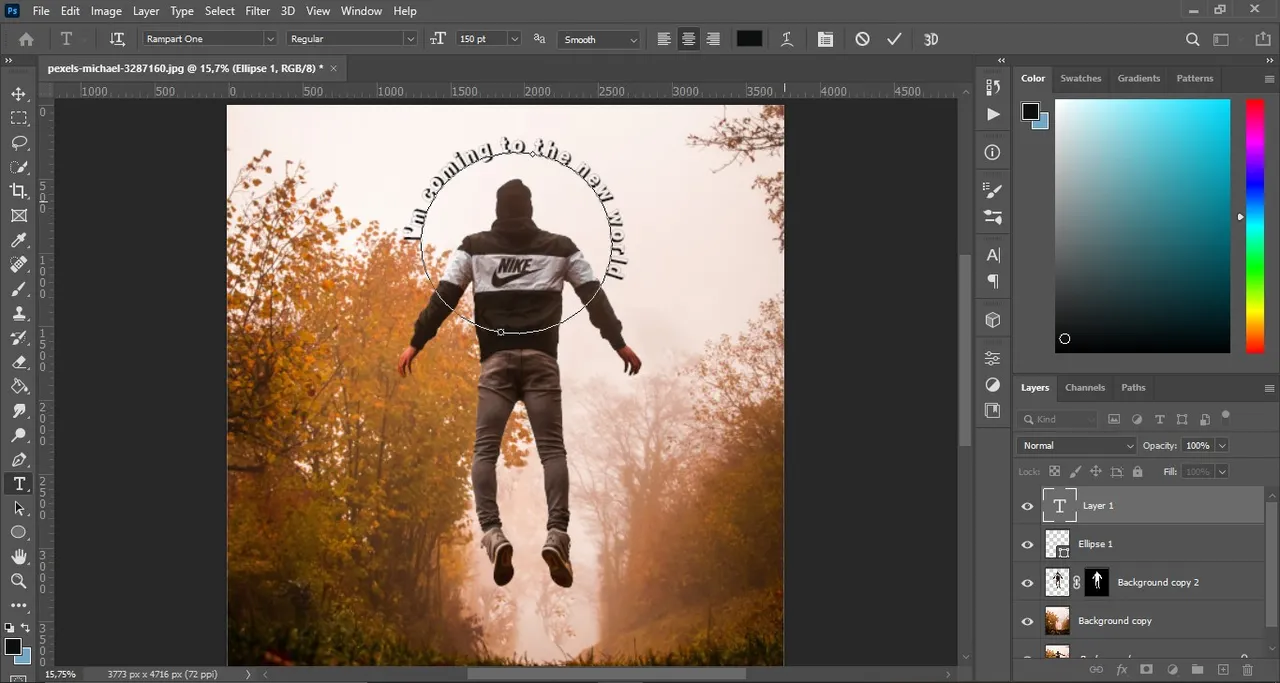
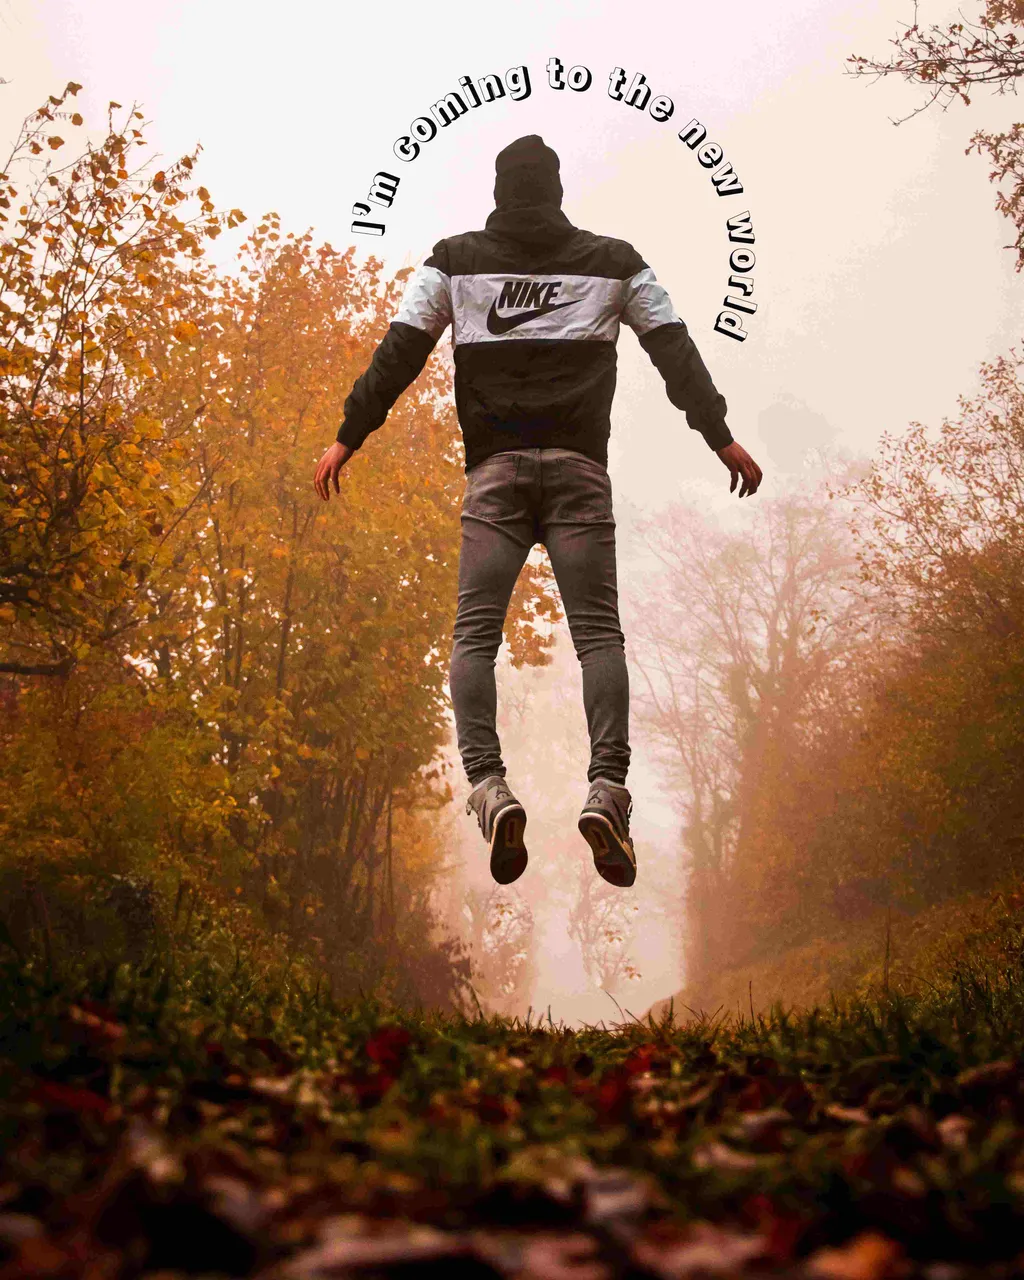
And this is how the final result of the image looked:
Lately I'm thinking more about how to change my personal image, I'm thinking about editing a photo, although I have been saying that I will do it for quite some time but I am stubborn about these things 😹😅, as I really like the idea of creating my personal image but at the same time that what I do is seen as "Noctav", so it remains until now just an idea and a thought, haciendo el puppet warp I even had an idea of what I could do for that..."representation of my person"?, I think it could be said like this, I wanted to comment on this, something that they told me a lot at university is that "you have to have something that represents you as a designer", although sometimes I think I'm pretty lousy at finding myself, however, this about leaving the comfort zone and starting to accentuate more my path in what I want (as well as design and editing), so I'm focused on making a personal image, when it all comes down to oneself, I thought it would be easier but there is the question of "who am I?" "what identifies me?", that's where I start to smoke the most in my head, I have to think about everything well since it will be something that will accompany me and that will make others remember me and my work ✍🏼😖 but little by little and without haste, things done by force do not turn out well, so I will only have to explore and design many things until I find the "chosen one", well that was all I wanted to share.
Thanks for paying attention! I hope you liked it!

¡Hola a todos! ¿Cómo están todos?, ahorita ando con amigos, me cuesta escribir porque me río mucho, justo en el momento en que mis amigos llegaron a mi casa, estaba terminando el tema que quería compartir hoy, es el "Puppet Warp", es bastante útil a la hora de hacer efectos o mover personas agregando diferentes poses (que se vean naturales), además también una pequeña explicación de cómo hacer que el texto se adapte a una forma geométrica, así que empezaré a explicar, espero que les guste 😊✍🏼.
Yo uso Photoshop en inglés para mayor comodidad, intentaré traducir lo más cercano que pueda.
Deformación de marionetas
- Primero duplicamos nuestra foto y bloqueamos la primera, ahora sí ya han visto mi blog anterior donde explico cómo eliminar a una persona, entonces harán exactamente lo mismo en este primer paso.
Si no han visto ese tutorial, aquí tienen el enlace de cómo hacerlo
Remove (or delete) people in a photo/ Remover (o eliminar) personas en una foto
- Una vez que tenemos una foto sin la persona, hacemos otra duplicación de la primera imagen y ahora nos encargaremos de quitarle el fondo.
- Ahora tenemos nuestro fondo y la persona por separado.
- Vamos a donde dice "Deformación de marionetas" y empezamos a poner los puntos donde vamos a flexionar a la persona.
- Ahora, aquí solo hice un ejemplo de cómo mover a la persona, solo lo puse como si estuviera levitando (hasta me dió la impresión de que parecía que los extraterrestres se lo llevaban hahaha)
- Al final solo comencé a subirlo un poco y aclarar detalles.
Foto original
Tomé la imagen de www.pexels.com
Enlace de imagen: https://www.pexels.com/photo/man-in-black-hoodie-and-gray-pants-standing-on-forest-3287160/
Y así quedó nuestra primera parte de la imagen
Ahora les voy a explicar como usar una forma geométrica en un texto (¿o mejor dicho el texto en forma geométrica?), así la imagen se vuelve más atractiva a la vista, también pueden hacer las palabras alrededor de la persona u/o objeto, aunque para eso se necesitaría ir a "Seleccionar" "Modificar" y hacer clic en "Expandir" y luego "Suavizar", luego asegúrese de tener activada la herramienta de selección rápida y hacen clic derecho y finalmente hagan clic en "Crear ruta de trabajo", aunque esto último es lo que haríamos solo en forma geométrica, sólo queria explicar como sería si tuviéramos a la persona totalmente seleccionada, continuando con la explicación, ahora vamos a esta segunda parte:
Insertar texto en una forma geométrica
- Insertamos una forma geomática sin relleno y sin borde, luego hacemos clic derecho y presionamos "Hacer Selección", luego presionamos "Ok" en la ventana que aparecerá.
- Luego, vemos si estamos en "herramienta de selección rápida", para luego hacer clic derecho y volver a hacer clic en "Hacer ruta de trabajo" y dejar la tolerancia como aparece en la ventana y hacer clic en "Ok".
- Ahora que está casi terminado, vamos a insertar un texto haciendo clic en el mismo círculo, ahora pueden escribir el texto de su agrado y ajustar su dirección usando CTRL + T, yo arreglé mi texto un poco después de esto.
Y así quedó el resultado final de la imagen:
Últimamente estoy pensando más en cómo cambiar mi imagen personal, estoy pensando en editar una foto, aunque llevo bastante tiempo diciendo que lo haré pero soy terca con estas cosas 😹😅, como a mí me gusta mucho la idea de crear mi imagen personal pero al mismo tiempo que lo que haga se vea como "Noctav", por lo que hasta ahora sigue siendo solo una idea y un pensamiento, haciendo el "Puppet Warp" incluso tuve una idea de que podría hacer eso para mí en una foto, por esa..."representacion de mi persona"?, creo que se podría decir así, quería comentar esto, algo que me decían mucho en la universidad es que "tienes que tener algo que te represente como diseñador”, aunque a veces pienso que soy bastante pésima para encontrarme, sin embargo, esto de salir de la zona de confort y empezar a acentuar más mi camino en lo que quiero (como el diseño y la edición), así que estoy enfocada en hacer una imagen personal, cuando todo se reduce a uno mismo, pensé que sería más fácil, pero está la cuestión de "¿quién soy?" "¿que me identifica?", ahí es donde más empiezo a echar humo en mi cabeza, tengo que pensarlo todo bien ya que será algo que me acompañará y que hará que los demás se acuerden de mí y de mi trabajo ✍🏼😖 pero poco de a poco y sin prisas, las cosas hechas a la fuerza no salen bien, así que solo tendré que explorar y diseñar muchas cosas hasta dar con el "elegido", bueno eso era todo lo que quería compartir.
¡Gracias por prestar atención! ¡Espero que les haya gustado!