This content was deleted by the author. You can see it from Blockchain History logs.

Remove (or delete) people in a photo/ Remover (o eliminar) personas en una foto

img_0.8099830818579181.jpg

img_0.007137818087577312.jpg

img_0.813131407821037.jpg

Hello, hello everyone!, how are you?, I was away for days~, I went away for a while with my older sister and friends, I'm back with my social batteries recharged 😂, so I feel quite motivated to make a new tutorial , it is something that helps many of us, to avoid errors or overloads in photos (or at least that's how I see it 👀), which has been eliminating people or an object in a photograph, I know two ways to get to the same result, you can use the one you like the most (although I don't know if I know exactly 2 or there were more ways 😂, well, my physics teacher in high school used to say a lot that the path didn't matter while the result is reached 😅), I will first explain the method that, in my opinion, is the easiest (although it may have small flaws, not everything easy, it is usually perfect), so without further ado, I will begin to explain!
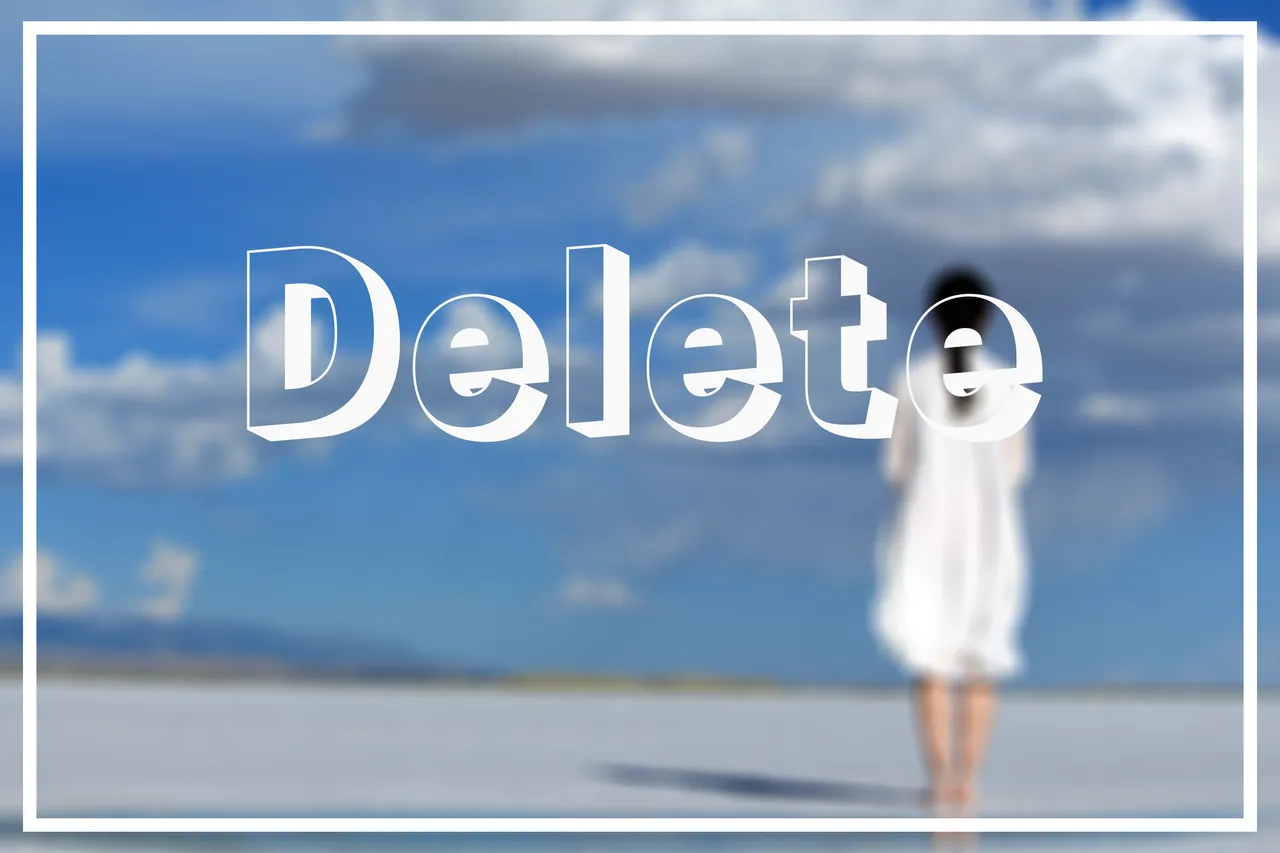
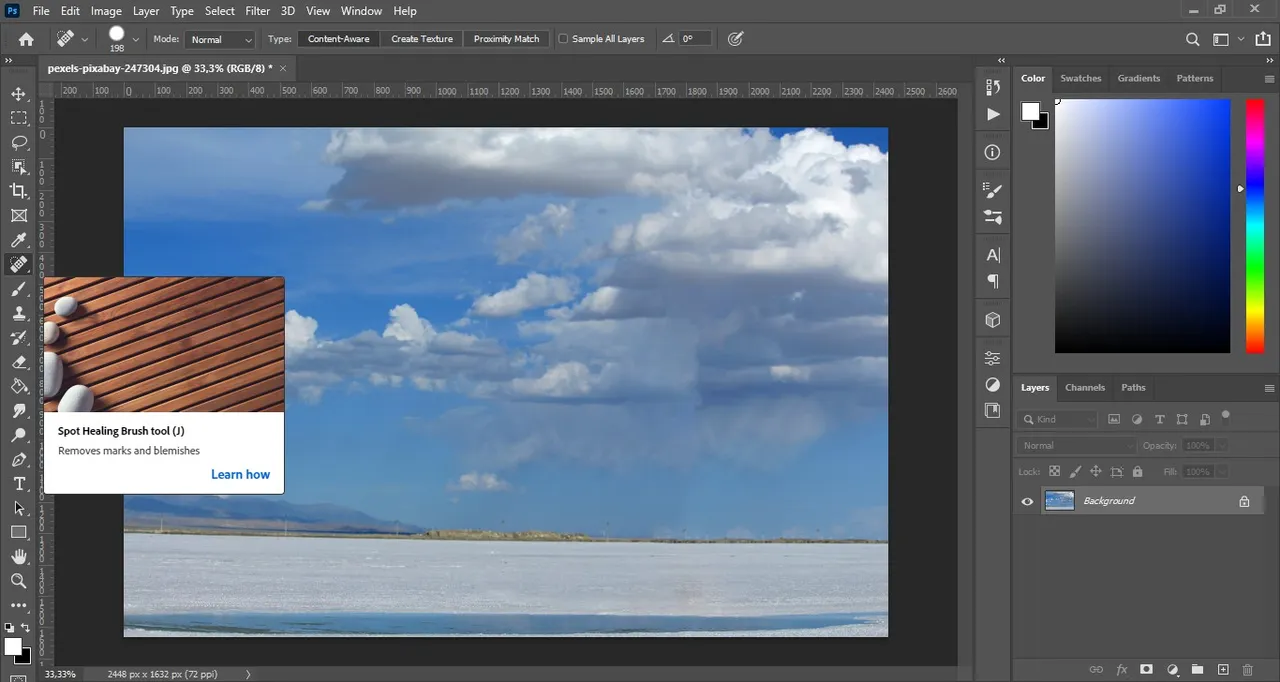
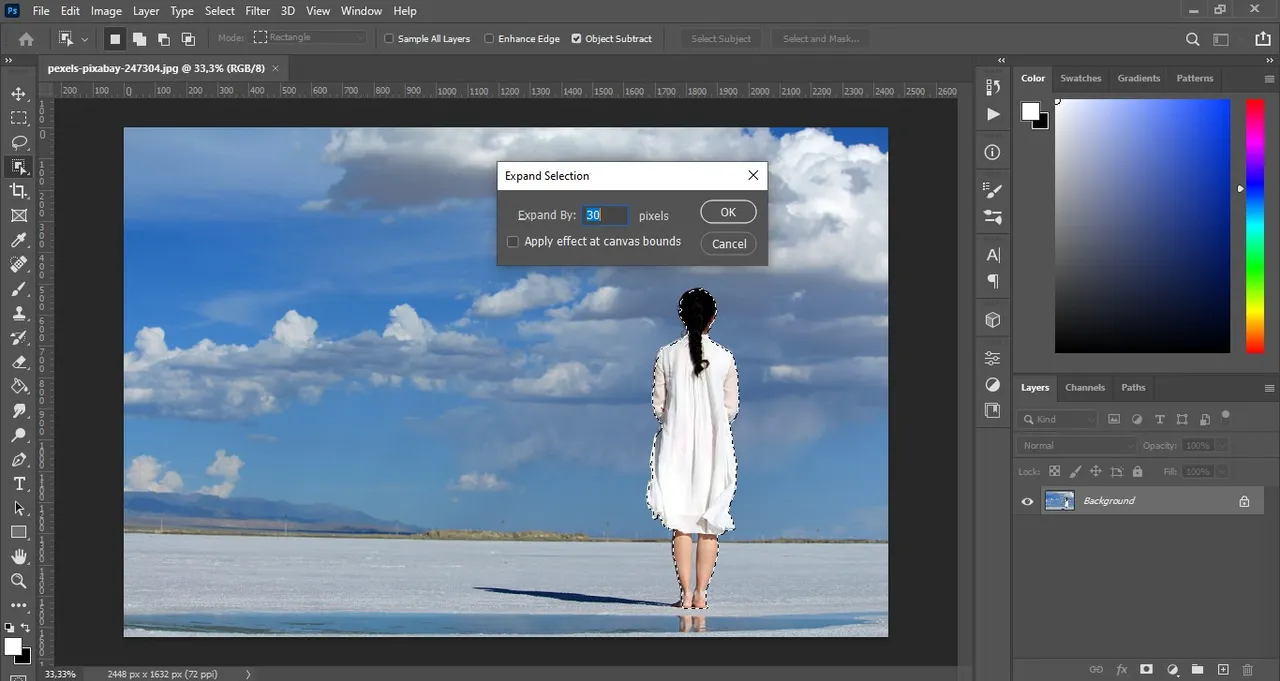
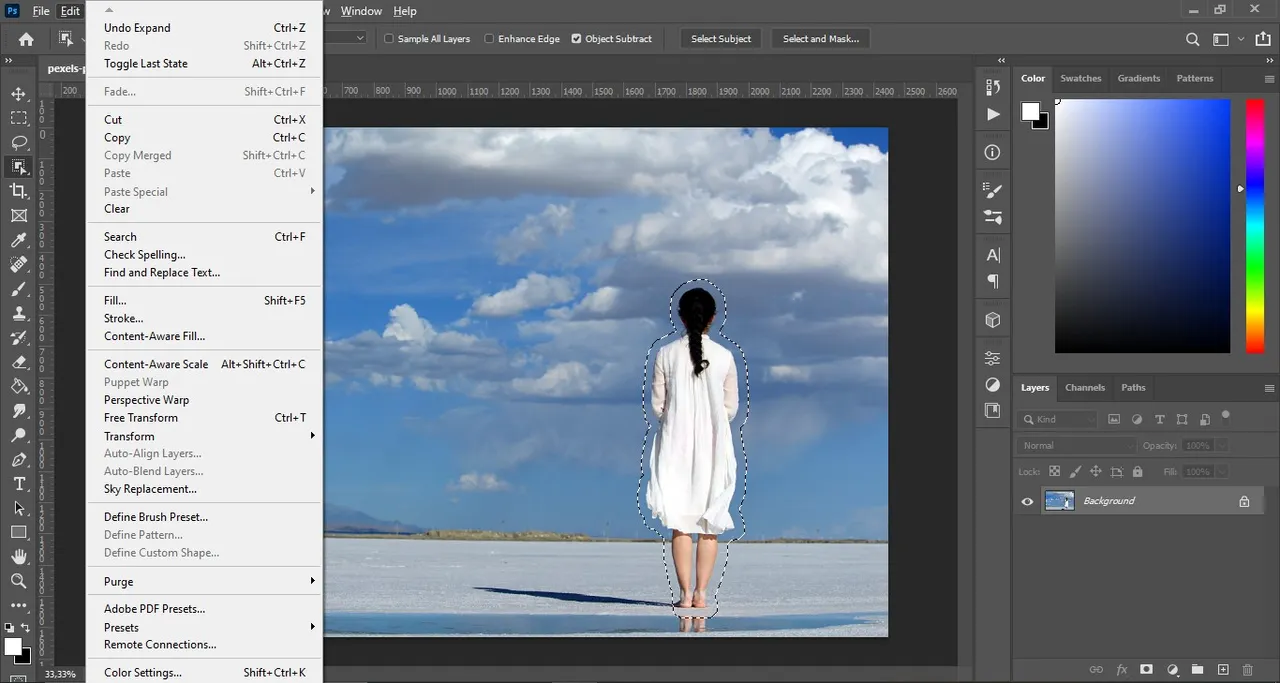
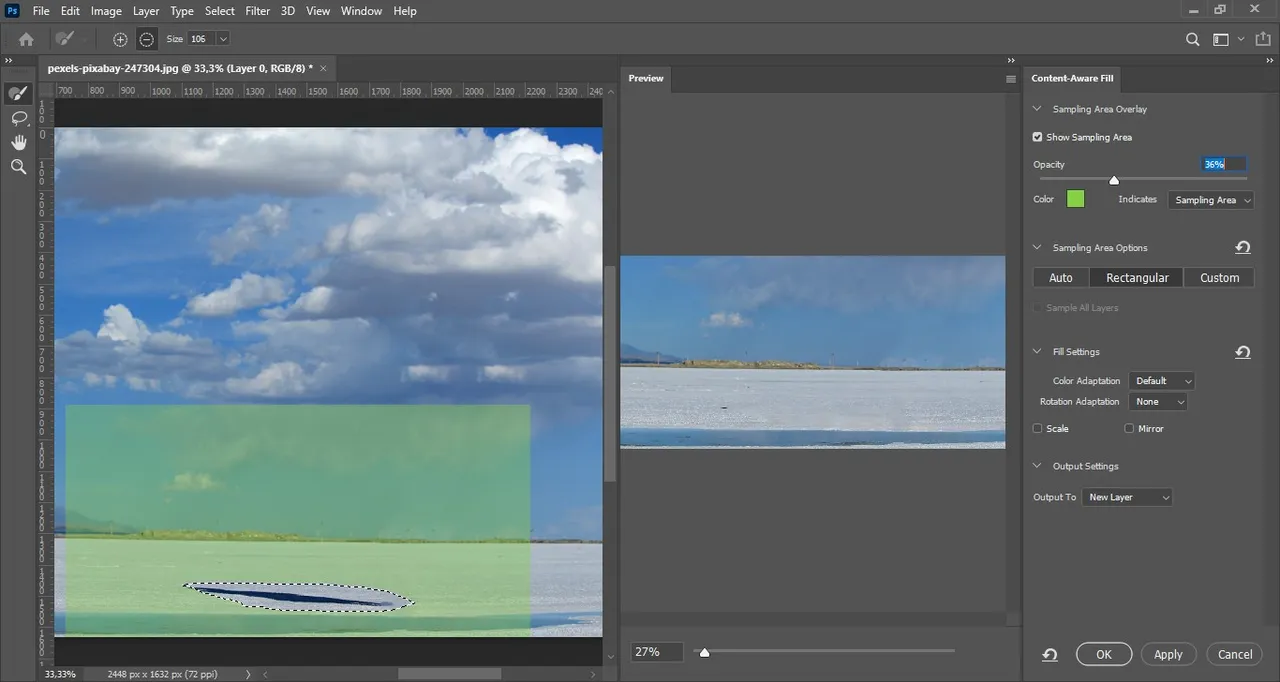
Method 1

img_0.5438971636546581.jpg

  • Once we have the image open, we use the lasso tool, we mark around the person to make a selection.

img_0.4913687744142958.jpg

  • Then we press Shift + F5, so we directly open "Fill" and mark the boxes as they appear in the capture (they do the same with the remaining details such as the shadow and the reflection from the feet).

img_0.9657064892085742.jpg

  • As you saw, there are still details like the cut that can be seen between the clouds.

img_0.9751740569959672.jpg

img_0.9592895382202289.jpg

  • So we will use the "Spot Healing Brush Tool" to modify the image a bit and make it look natural, draw only in the area to be corrected or they will disfigure the image.

img_0.36434043805909916.jpg

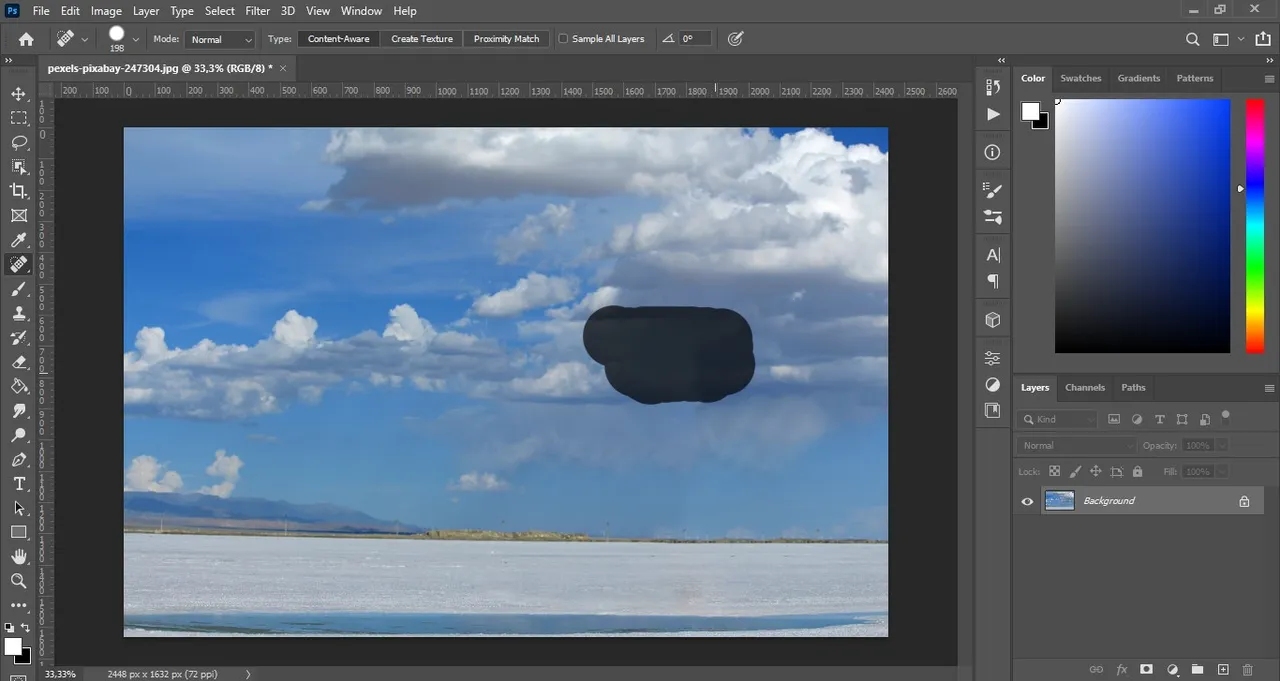
And so we arrive at the final result of the first method 👌🏻, in a few simple steps.

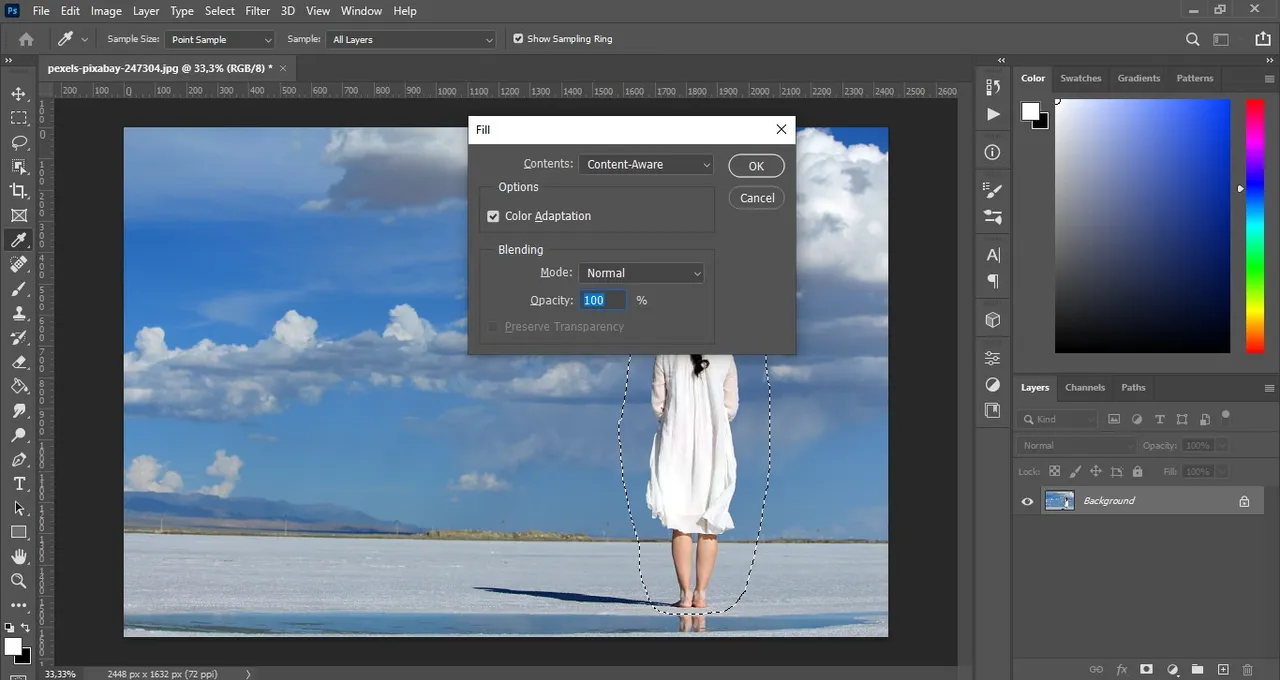
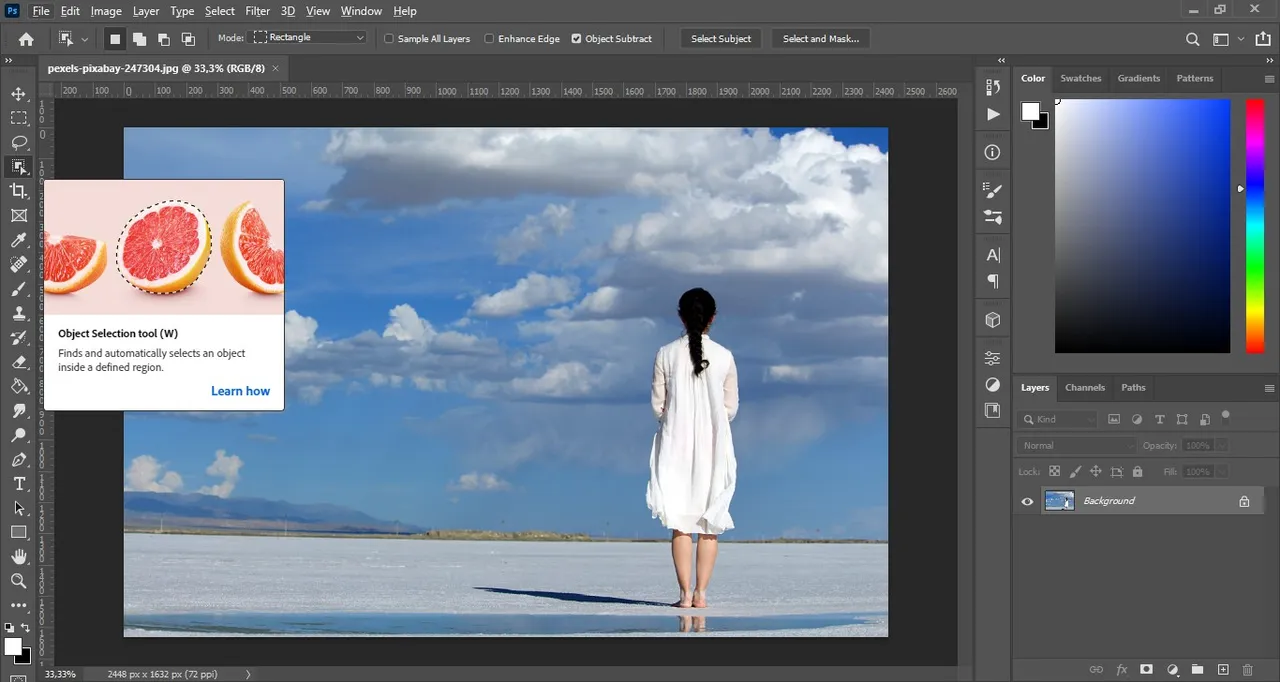
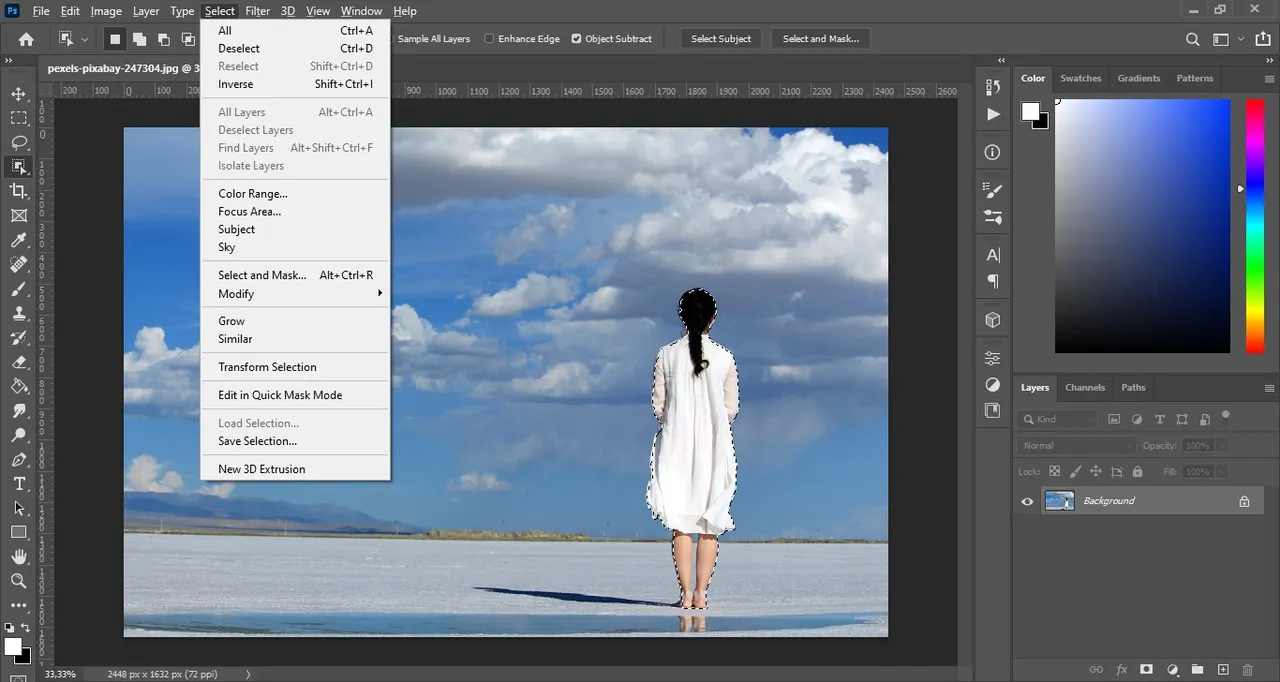
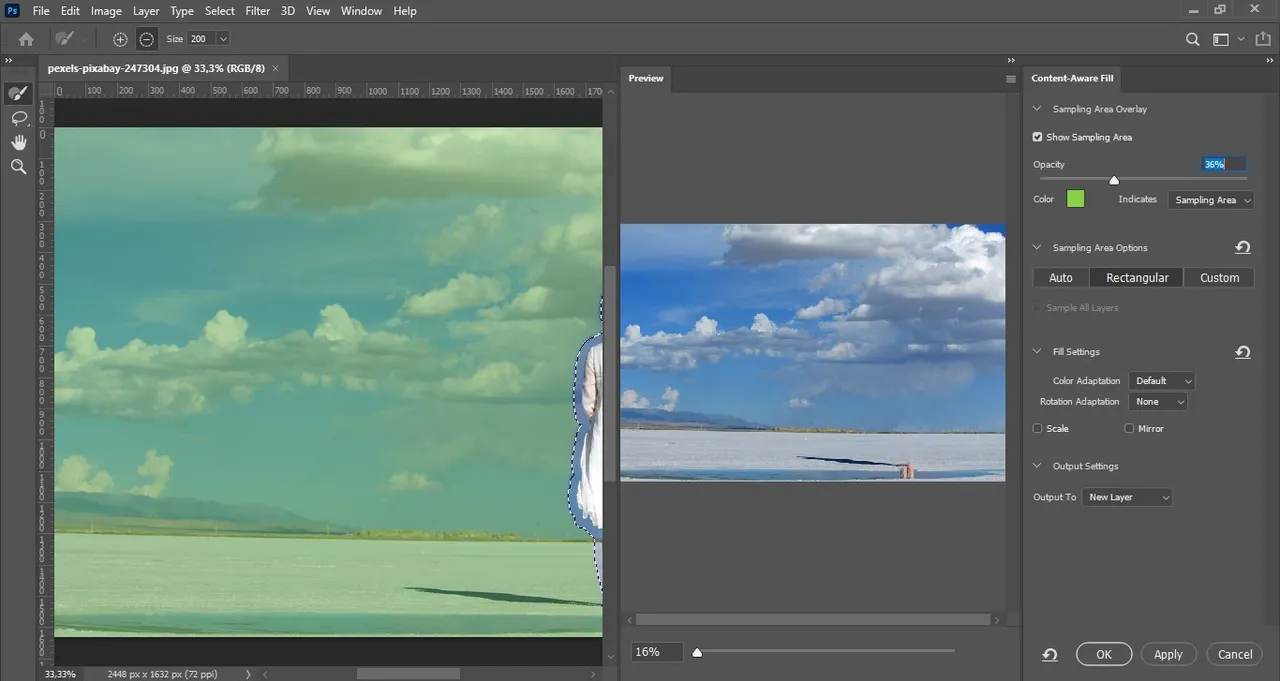
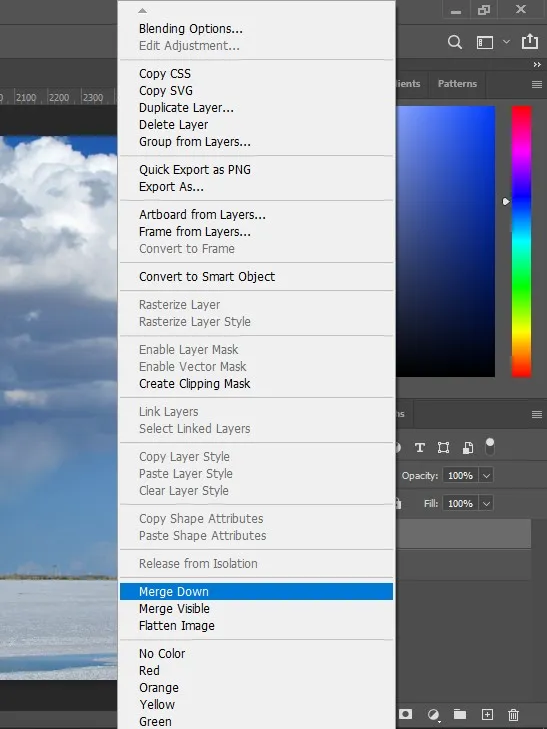
In the second method, it's a bit longer but I find it gives much cleaner results.

Method 2

img_0.3534513969779384.jpg

  • Now we use the "object selection tool", we let it mark with a rectangle, we put the rectangle on the person and there it will be selected.

img_0.23040066245235283.jpg

img_0.010951734887657574.jpg

  • Now we go up in "select", modify and click on "expand", between 20-30 it is good to expand it, this helps to avoid that when removing the person or object, there are no edges of the figure .

img_0.17703517947107375.jpg

  • Go back to the top, "Edit", and click on "content-aware fill".

img_0.9161443838177158.jpg

  • We leave everything as seen in the image, you will notice that there are still imperfections in between, it is normal, you have to go little by little (or an error could occur that deforms the image).

img_0.8421971284512282.jpg

img_0.9961397028252094.jpg

img_0.9145520806102859.jpg

  • From here, you have to merge down the layers so that they can use the content-aware fill tool again and remove the details that are still there.

img_0.8044130665603954.jpg

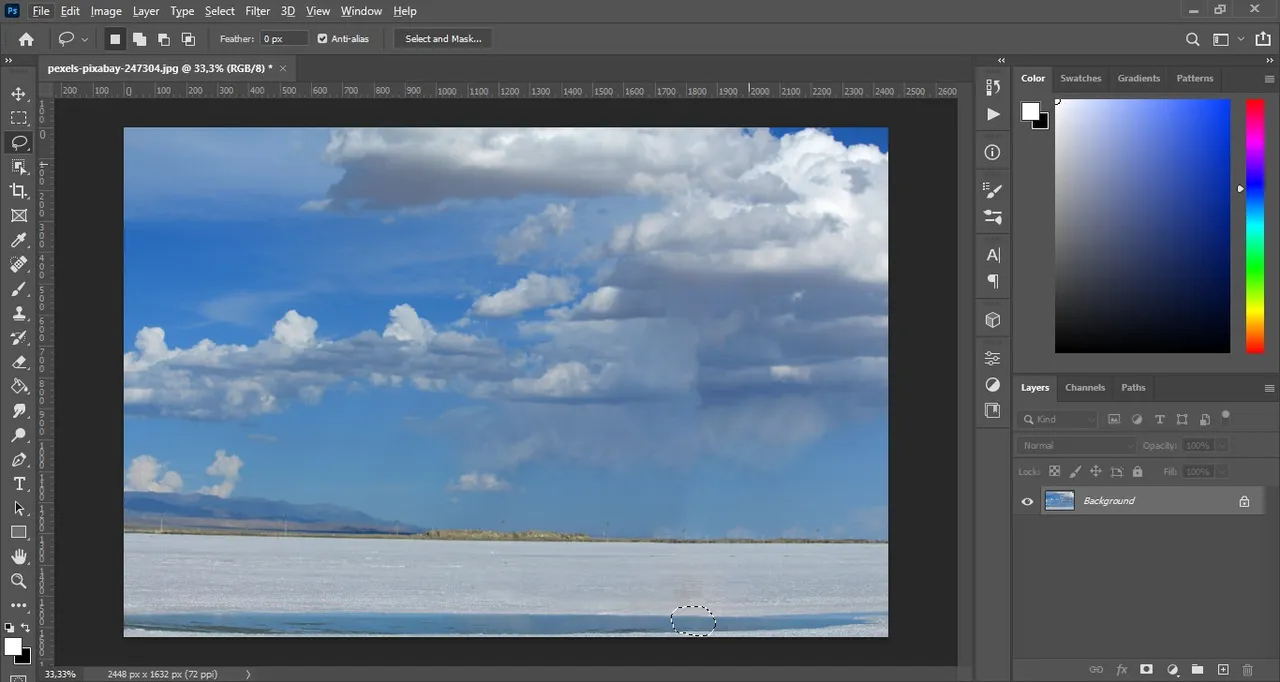
That was it!, a little longer but as you can see, the result was much cleaner, both methods are useful and it seems to me that they may be necessary depending on the needs of each person.

I hope you liked this explanation 😊 it always makes me happy to be able to do these things, I really feel very useful haha, plus I wanted to do something because it's been a long time outside without doing anything 😂.

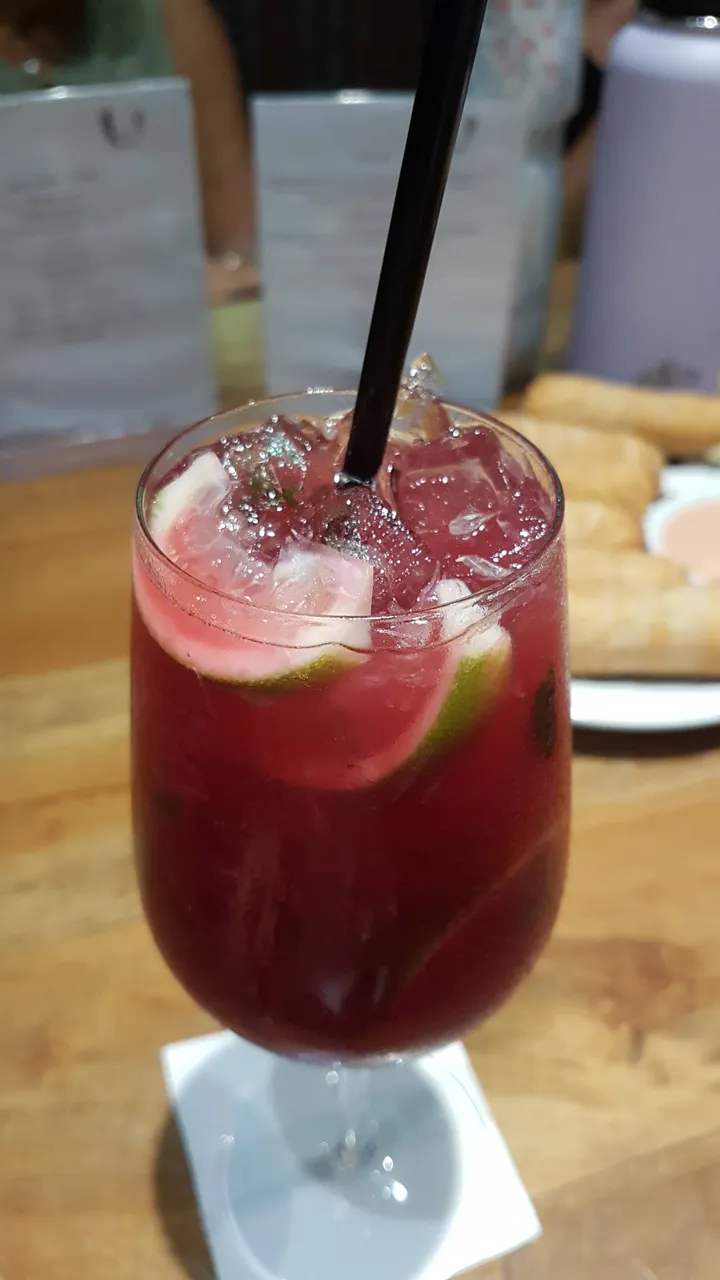
One of the days, my sister invited me to drink something new, it was a drink with beetroot, I thought it was interesting to give it a try and it was quite good, I like to try new things, this one was quite smooth and with a pleasant sweetness, nothing it overshadowed the taste of beets, I could say that my sister and I found it very enjoyable 👌🏻.

And that ends today's blog, thanks for being here!

img_0.007137818087577312.jpg

img_0.9717636888349208.jpg

¡Hola, hola a todos!, ¿cómo están?, estuve días afuera~, me fui un tiempo con mi hermana mayor y amigos, he vuelto con mis baterías sociales recargadas 😂, así que me siento de bastantes ánimos para hacer un nuevo tutorial, es algo que a muchos nos sirve, para evitar errores o sobrecargas en fotos (o al menos así lo veo yo 👀), lo que viene siendo eliminar personas o un objeto en una fotografía, me sé dos formas para llegar a ese mismo resultado, pueden usar la que más les guste (aunque no sé si es que me sé exactamente 2 o habían más formas 😂, bueno, mi profesor de física en la secundaria decía mucho que no importaba el camino mientras se llegue al resultado 😅), explicaré primeramente el método que a mí parecer, es el más fácil (aunque puede llegar a tener pequeños fallos, no todo lo fácil, suele ser perfecto), así que sin más que decir, ¡empezaré a explicar!

No olviden que, yo tengo la versión en inglés de PS, se hace más cómodo para mí, trataré lo mejor que pueda de traducir los nombres de los botones.

Método 1

img_0.5438971636546581.jpg

  • Una vez tenemos la imagen abierta, usamos la herramienta lazo, marcamos alrededor de la persona para que haga una selección.

img_0.4913687744142958.jpg

  • Después pulsamos Shift + F5, así abrimos directamente "Rellenar" (también puede ser "llenar" en la versión en español) y marcan las casillas como salen en el capture (hacen lo mismo con los detalles que quedan como la sombra y el reflejo de los pies).

img_0.9657064892085742.jpg

  • Como vieron, aún hay detalles como el corte que se puede ver entre las nubes.

img_0.9751740569959672.jpg

img_0.9592895382202289.jpg

  • Así que usaremos la herramienta "Herramienta de pincel corrector puntual" para modificar un poco la imagen y que se vea natural, trazan solamente en el área a corregir o van a desfigurar la imagen.

img_0.36434043805909916.jpg

Y así llegamos al resultado final del primer método 👌🏻, en pocos pasos y sencillos.

En el segundo método, es un poco más largo pero me parece que da resultados mucho más limpios.

Método 2

img_0.3534513969779384.jpg

  • Ahora usamos la herramienta de "selección de objeto", lo dejamos que marque con rectángulo, ponemos el rectángulo en la persona y ahí quedará seleccionada.

img_0.23040066245235283.jpg

img_0.010951734887657574.jpg

  • Ahora vamos arriba en "selección", modificar y damos en "expandir", entre 20-30 está bien que lo expandan, esto ayuda a evitar que a la hora de remover a la persona o el objeto, no queden bordes de la figura.

img_0.17703517947107375.jpg

  • Vamos de nuevo arriba, "Edición", y damos clic en "relleno consciente del contenido".

img_0.9161443838177158.jpg

  • Dejamos todo como se ve en la imagen, notarán que aún quedan imperfecciones de por medio, es normal, hay que ir poco a poco (o podría ocurrir un error que deforme la imagen).

img_0.8421971284512282.jpg

img_0.9961397028252094.jpg

img_0.9145520806102859.jpg

  • A partir de aquí, hay que fusionar hacia abajo (combinar, fusionar, como pueda salir en español) las capas para que puedan volver a usar la herramienta de relleno consciente de contenido y quitar los detalles que siguen estando.

img_0.8044130665603954.jpg

¡Eso fue todo!, un poco más largo pero como ven, el resultado fue mucho más limpio, ambos métodos son útiles y me parecen que pueden ser necesario dependiendo de las necesidades de cada persona.

Espero que les haya gustado esta explicación 😊 siempre me hace feliz poder hacer estas cosas, me siento muy útil la verdad haha, además que quería hacer algo porque ya fue mucho tiempo afuera sin hacer nada😂.

Uno de los días, mi hermana me invitó a tomar algo nuevo, era un trago con remolacha, pensé que era interesante darle una oportunidad y estaba bastante bueno, me gusta probar cosas nuevas, este era bastante suave y con un dulzor agradable, nada opacaba al sabor de la remolacha, podría decir que a mi hermana y a mí nos pareció muy disfrutable 👌🏻.

img_0.8593947185059054.jpg

Y hasta aquí el blog de hoy ¡gracias por estar aquí!

Logo
Center