
Saludos a todos mis queridos Hivers, espero venir repotenciada. He tenido algunos inconvenientes con el internet, nada nuevo, pero bueno, lo importante es estar de regreso. Hoy les quiero enseñar cómo hacer porcelana fría, muy conveniente para todos los que nos gustan las manualidades. A parte de ser relajante, el hacerla, trae otros beneficios. Sí, ya que la porcelana fría tiene muchísimos usos, pueden hacer desde llaveros, arreglos florales, esculturas, adornos para el refrigerador, jarrones, etc., Y no hay que negar que en estos tiempos de pandemia hay que ser muy dinámicos al momento de adaptarse, y esta es una buena forma de producir y ser creativos.
Greetings to all my beloved Hivers, I hope to come in a strengthened position. I have had some problems with the internet, nothing new, but well, the important thing is to be back. Today I want to teach you how to make cold porcelain, very convenient for all of us who like crafts. Besides being relaxing, making it brings other benefits. Yes, since cold porcelain has many uses, you can make everything from key chains, flower arrangements, sculptures, refrigerator adornments, vases, etc., And there is no denying that in these times of pandemic you have to be very dynamic when adapting, and this is a good way to produce and be creative.
En mi próximo post estaré publicando cómo usar la porcelana. Cómo ven el la portada tengo un vasito en forma de totoro.
In my next post I will be publishing how to use porcelain. As you can see on the cover I have a little glass in the shape of totoro.
Así que aquí les muestro la lista de ingredientes que usé…
So here's the list of ingredients that I used...
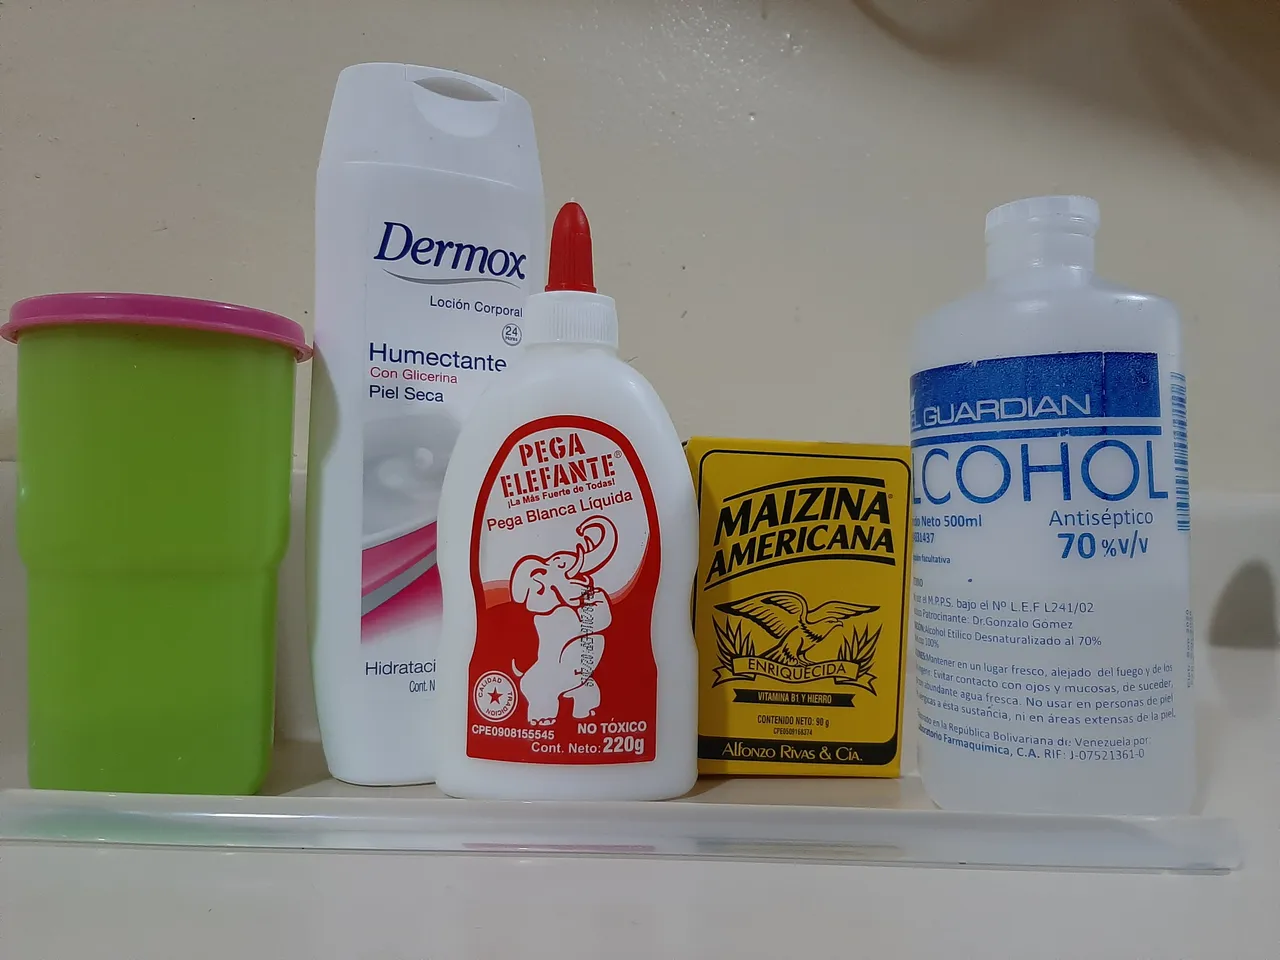
Ingredientes
Ingredients
Para la masa:
For the dough:
220g de pega blanca
220g of white glue
25ml de vinagre (o limón)
25ml of vinegar (or lemon)
25ml de aceite
25ml of oil
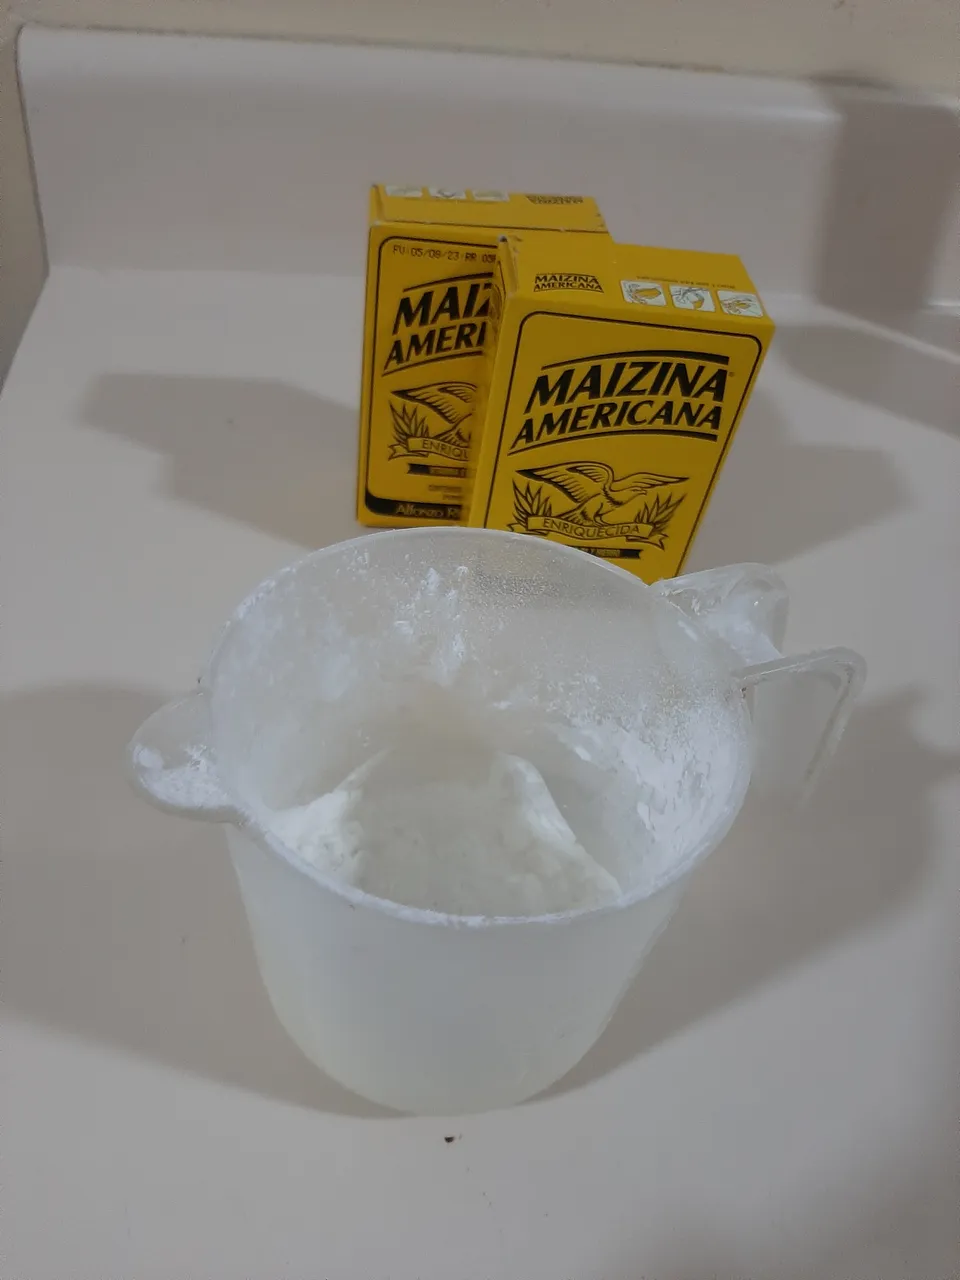
135g de maicena
135g of cornstarch
Para el barniz:
For the varnish:
50ml de silicón frío
50ml of cold silicone
50ml de alcohol
50ml of alcohol
¡Muy bien! ¡Preparación de la masa!
All right! Preparation of the dough!
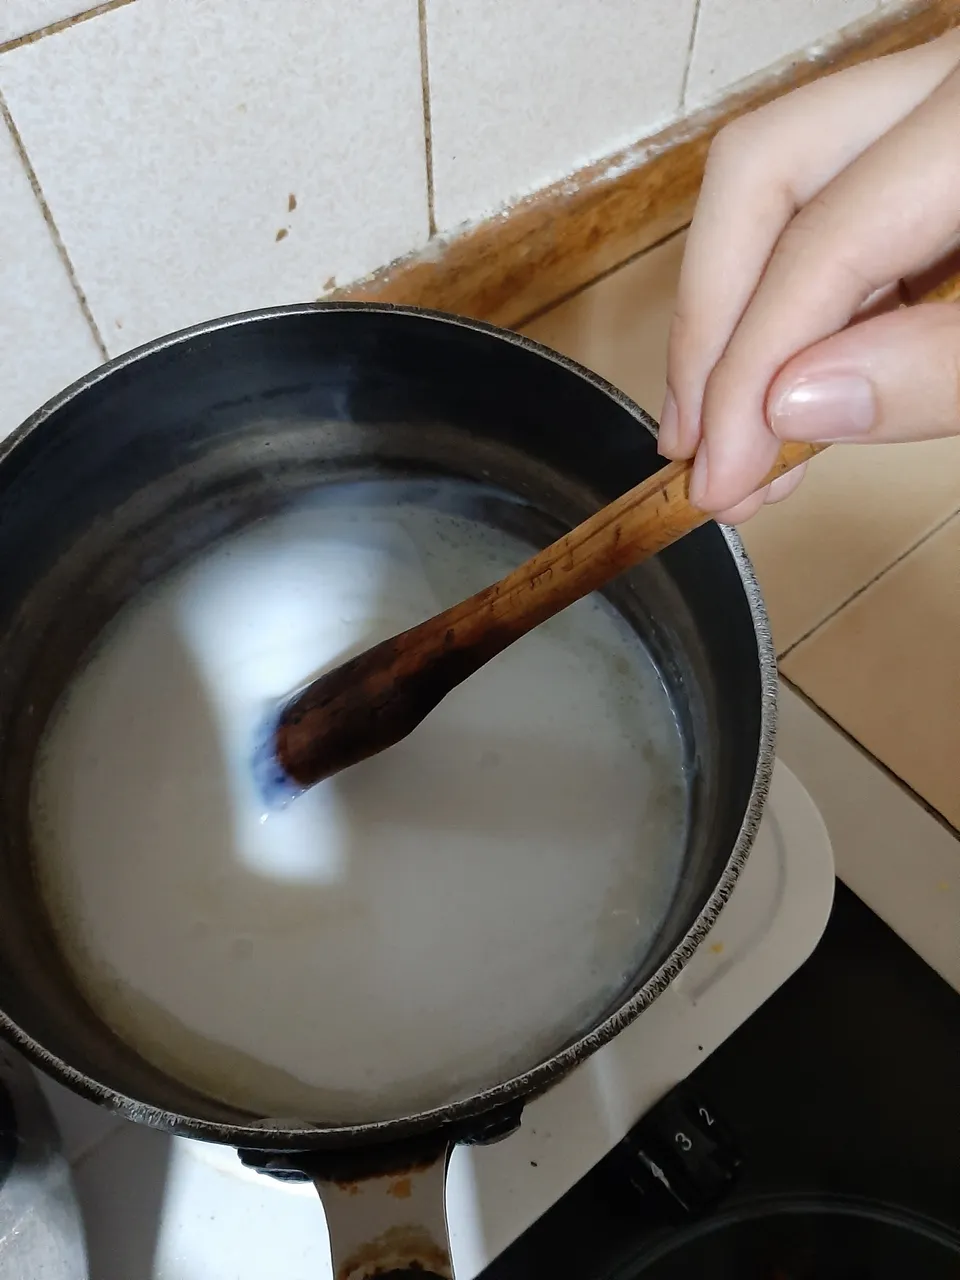
Ok, lo primero que debemos hacer es mezclar todos los ingredientes líquidos (aceite, pega y vinagre) en una cacerola, olla o sartén, lo que prefieras. Es importante que uses una paleta de madera para preparar la masa. La diferencia entre el vinagre y el limón es que uno funciona mejor que el otro, el vinagre la da una textura mucho más suave y menos amarillenta a la masa y esto hará que sea más fácil de pintar.
Ok, the first thing to do is to mix all the liquid ingredients (oil, glue and vinegar) in a pan, pot or frying pan, whichever you prefer. It is important that you use a wooden palette to prepare the dough. The difference between vinegar and lemon is that one works better than the other, vinegar gives it a much softer and less yellowish texture to the dough and this will make it easier to paint.
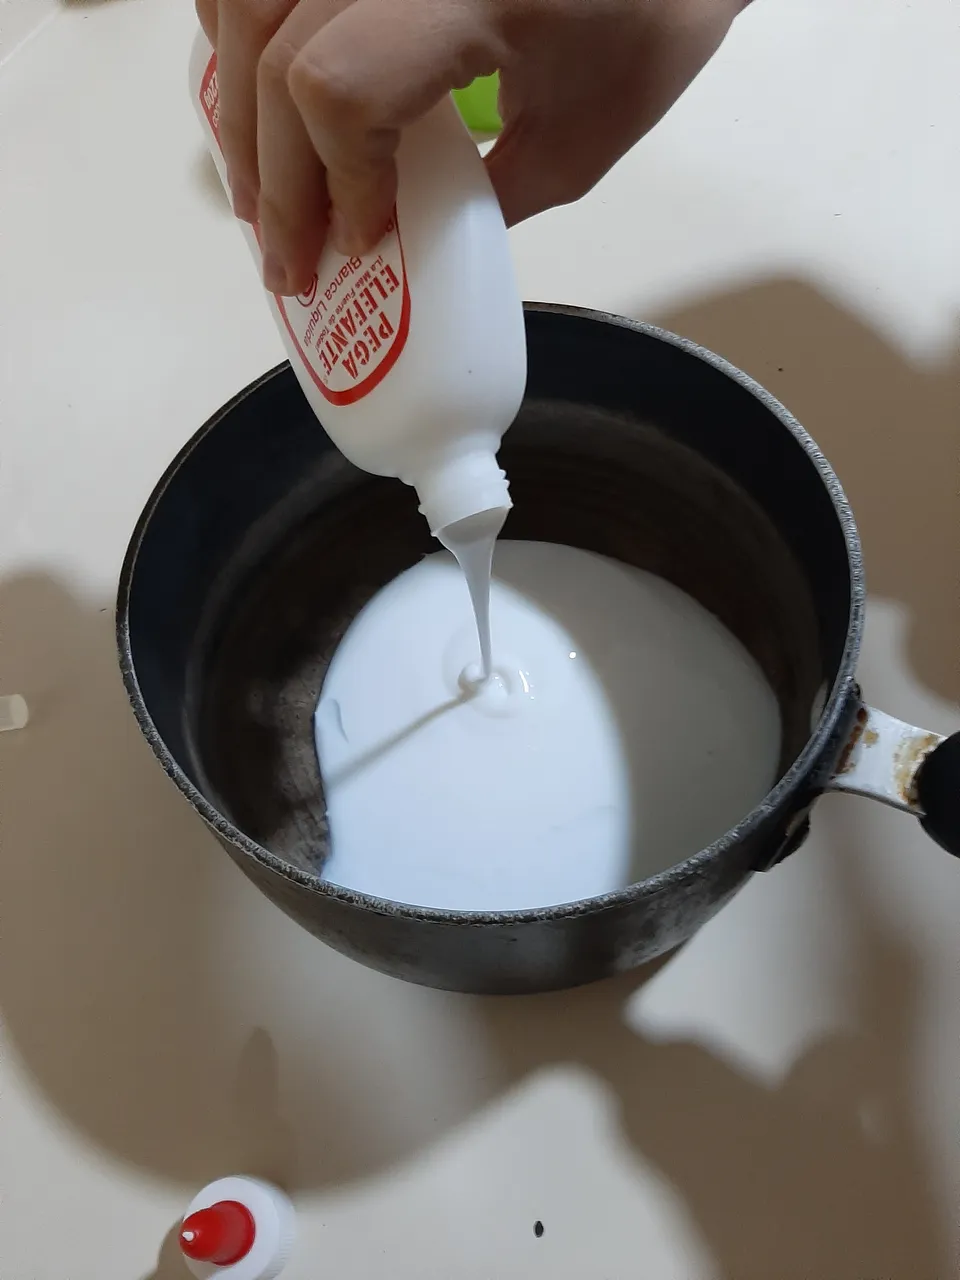
Enciendes la hornilla de tu cocina y la colocas lo más baja posible, sí, la cocina, porque esta masa se prepara de esta forma.
You turn on the stove in your kitchen and place it as low as possible, yes, the stove, because this dough is prepared this way.
Ahora, colocas la olla en la hornilla, sin dejar de menear con la paleta. Cuando veas que comience a pegarse el líquido debes retirarlo del fuego ¡No apagues la cocina!
Now, you place the pot on the stove, without stopping the trowel. When you see that the liquid starts to stick, you must remove it from the fire.
Si bien debemos evitar los grumos y que se nos queme la mezcla, y para evitarlo mi recomendación es que batan afuera del fuego ¿Por qué lo digo? Porque el siguiente paso es ir añadiendo la maicena poco a poco, y mientras tenemos que batir la pega se seguirá cocinando, entonces puedes sencillamente retirar la olla y volverla a colocar. Y repites este proceso hasta haber añadido toda la cantidad de maicena predicha en la lista de ingredientes.
Although we must avoid lumps and burning the mixture, and to avoid this my recommendation is to beat it out of the fire. Because the next step is to add the cornstarch little by little, and while we have to beat the paste it will continue cooking, then you can simply remove the pot and put it back. And you repeat this process until you have added all the amount of cornstarch predicted in the list of ingredients.
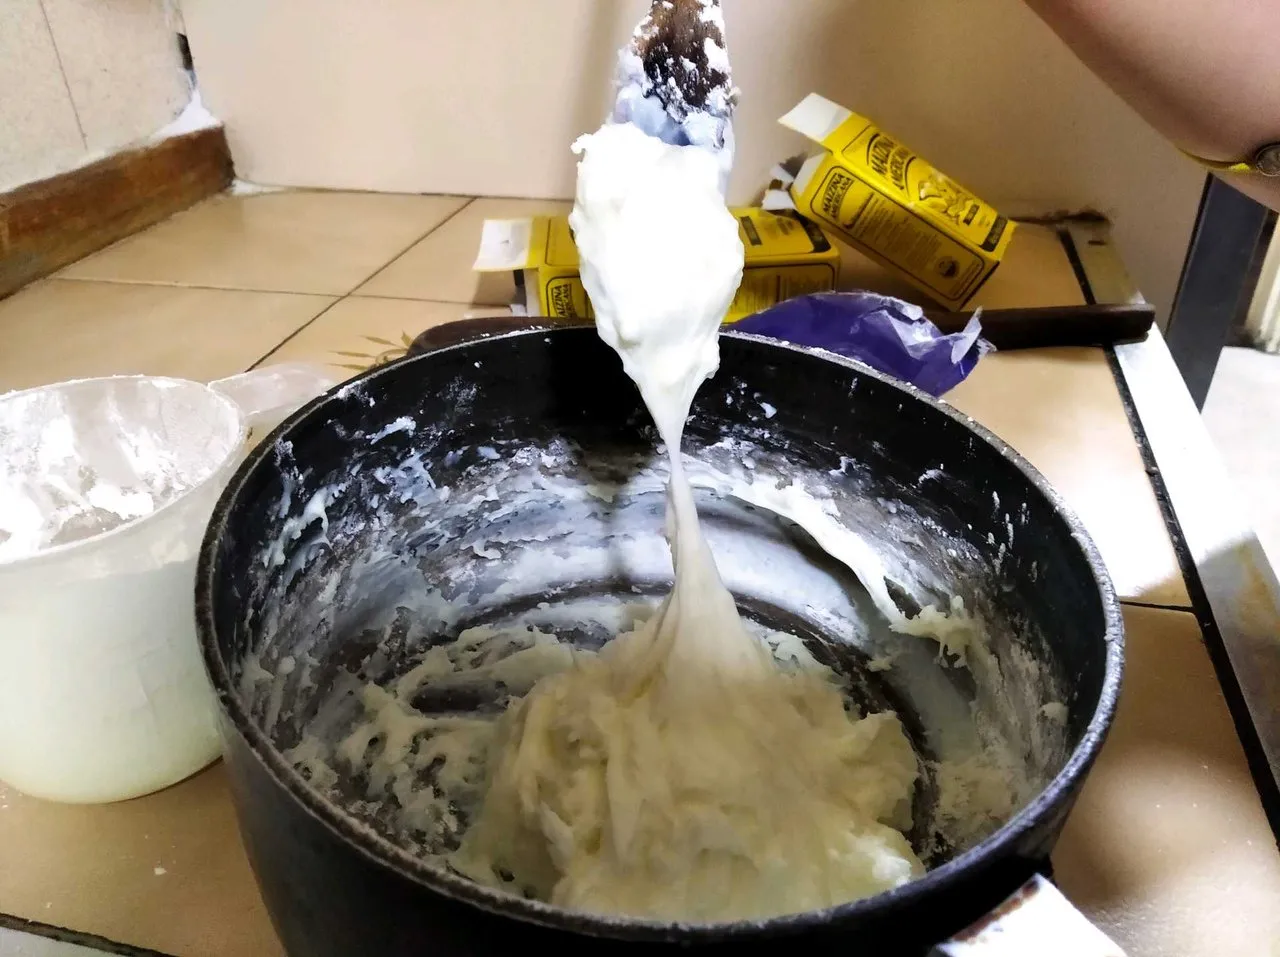
¿Como saber si mi masa está lista y bien cocida? Estirala hacia arriba con la paleta y debe hacerse un cachito o un pico (igual cuando la amasas)
How do I know if my dough is ready and well cooked? Stretch it up with the popsicle and make a little piece or a pickaxe (the same as when you knead it)
Bueno queridos, toda masa se deja reposar y esta no es la excepción, por unos veinte minutos ¡Importante! Esta masa no puede entrar en contacto con el aire a me la que la vayas a usar. Una de las maravillas de la porcelana es que se seca solita, no necesita de un horno ni mucho menos, pero para conservar la masa debes cubrirla con papel envolvente o una bolsa jajaja, meterla en una taza no basta, no se los recomiendo porque se les va a cuartear.
Well dear, all dough is left to rest and this is no exception, for about twenty minutes. This dough must not come into contact with the air you are going to use it in. One of the wonders of porcelain is that it dries by itself, it doesn't need an oven or much less, but to preserve the dough you must cover it with wrapping paper or a bag hahaha, putting it in a cup is not enough, I don't recommend it because it will crack.
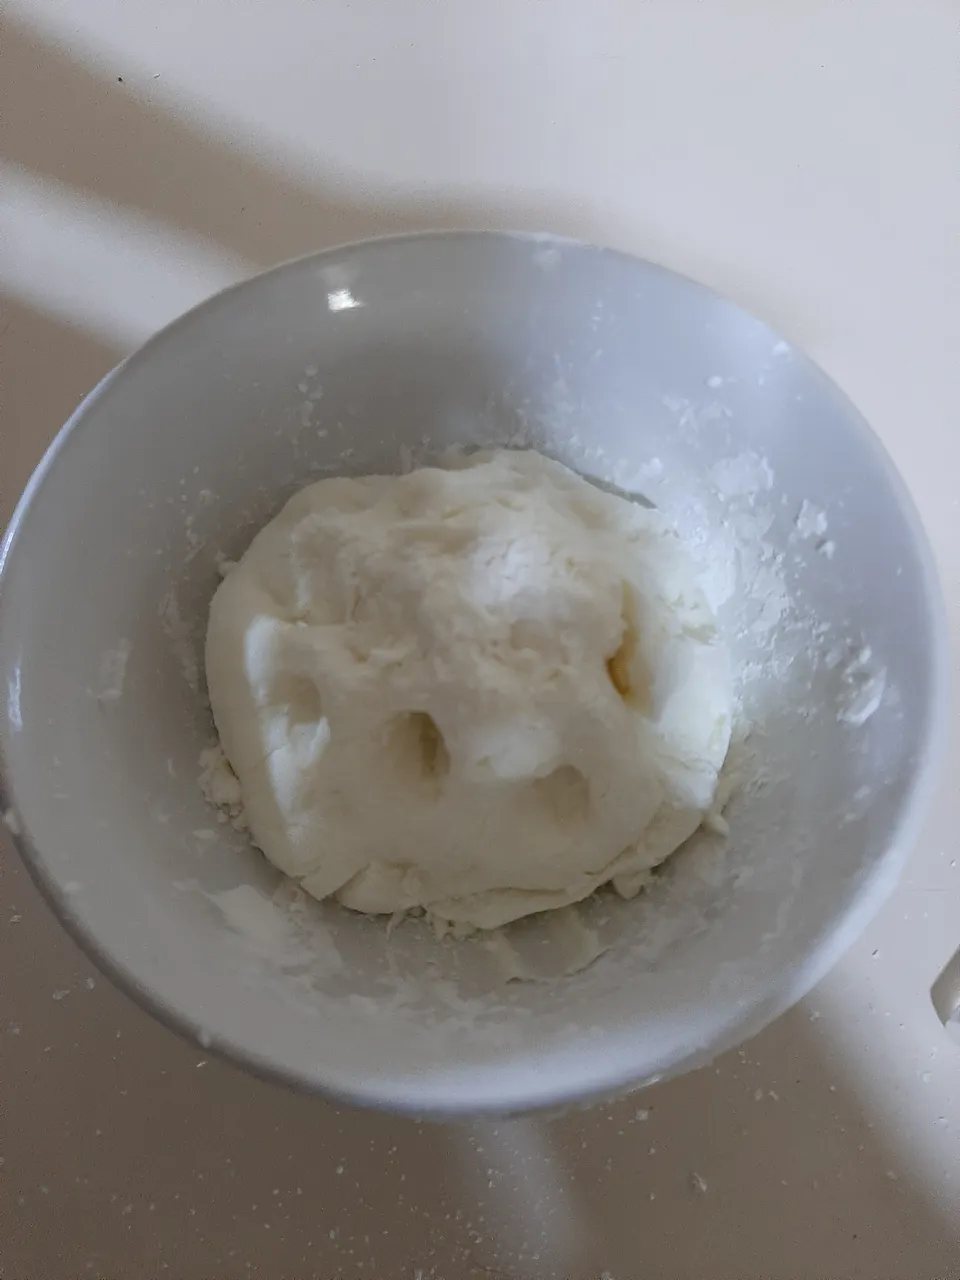
Después para finalizar, si quieren, pueden amarsarla un poco más, colocan maicena en la mesa y la estiran hacia adelante, le dan vuelta y repiten el movimiento. Para que quede mucho más firme y moldeable.
Then to finish, if you want, you can knead it a little more, put cornstarch on the table and stretch it forward, turn it over and repeat the movement. So that it is much more firm and moldable.
Preparación del barniz
Preparation of the varnish
Tan sencillo como esto mis hivers, tomas un envase de vidrio con tapa. Primero va el silicón ¡Atención! Y después es que se añade el alcohol, siempre debe ser la misma cantidad de ambos ingredientes, no uno más que el otro.
As simple as this my hivers, you take a glass container with a lid. First comes the silicone. Attention! And then you add the alcohol, it must always be the same amount of both ingredients, not one more than the other.
Meneas la mezcla con una paleta y la dejas reposar al menos unas cinco horas antes de usar. Solo aplica el barniz después de que tú trabajo esté seco, y lo más probable es que según el tamaño cada pieza tarda al menos un día o mucho más en secar.
You stir the mixture with a trowel and let it rest for at least five hours before using it. Only apply the varnish after your work is dry, and most likely, depending on the size, each piece takes at least a day or more to dry.
TIPS
Si se te cuartea tu trabajo en pleno proceso de secar, colócale pega blanca en la grieta para mejorar el aspecto y cada vez que seque, le colocas más.
If your work cracks in the middle of the drying process, put white glue in the crack to improve the look and every time it dries, you put more on it.
En caso de que tu masa se seque o quede muy dura, porque se te pasó la mano con la maicena jajajaja, humedece tus manos y luego aplícate crema humectante, y la amasas, de poquito en poquito para que después no esté aguada, sino tienes cremita pues con agua basta, pero te tomará mucho más tiempo.
In case your dough is dry or very hard, because you missed the hand with the cornstarch, wet your hands and then apply moisturizing cream, and knead it, little by little so that later it is not watery, but you have cream because water is enough, but it will take much longer.
Puedes usar cubiertos como herramientas, pero una cosa que recomiendo, es que al cortar la masa, en los bordes quedará un aspecto grumoso y muy ordinario una vez que seque, en vez lijar o algo parecido, simplemente humedece con agua la zona para que quede suave.
You can use cutlery as a tool, but one thing I recommend is that when you cut the dough, the edges will look lumpy and very ordinary once it dries, instead of sanding or something similar, just moisten the area with water to make it soft.
Ten las manos muy limpias porque se mancha con facilidad.
Keep your hands very clean because it stains easily.
Usa colorante o pinturas a base de agua, si usas alguna en base de aceite solo aplícala después de secar, sino se hará una capa de humedad y tu pieza nunca se secará.
Use coloring or water-based paints, if you use an oil-based one just apply it after drying, otherwise it will become a layer of moisture and your piece will never dry.