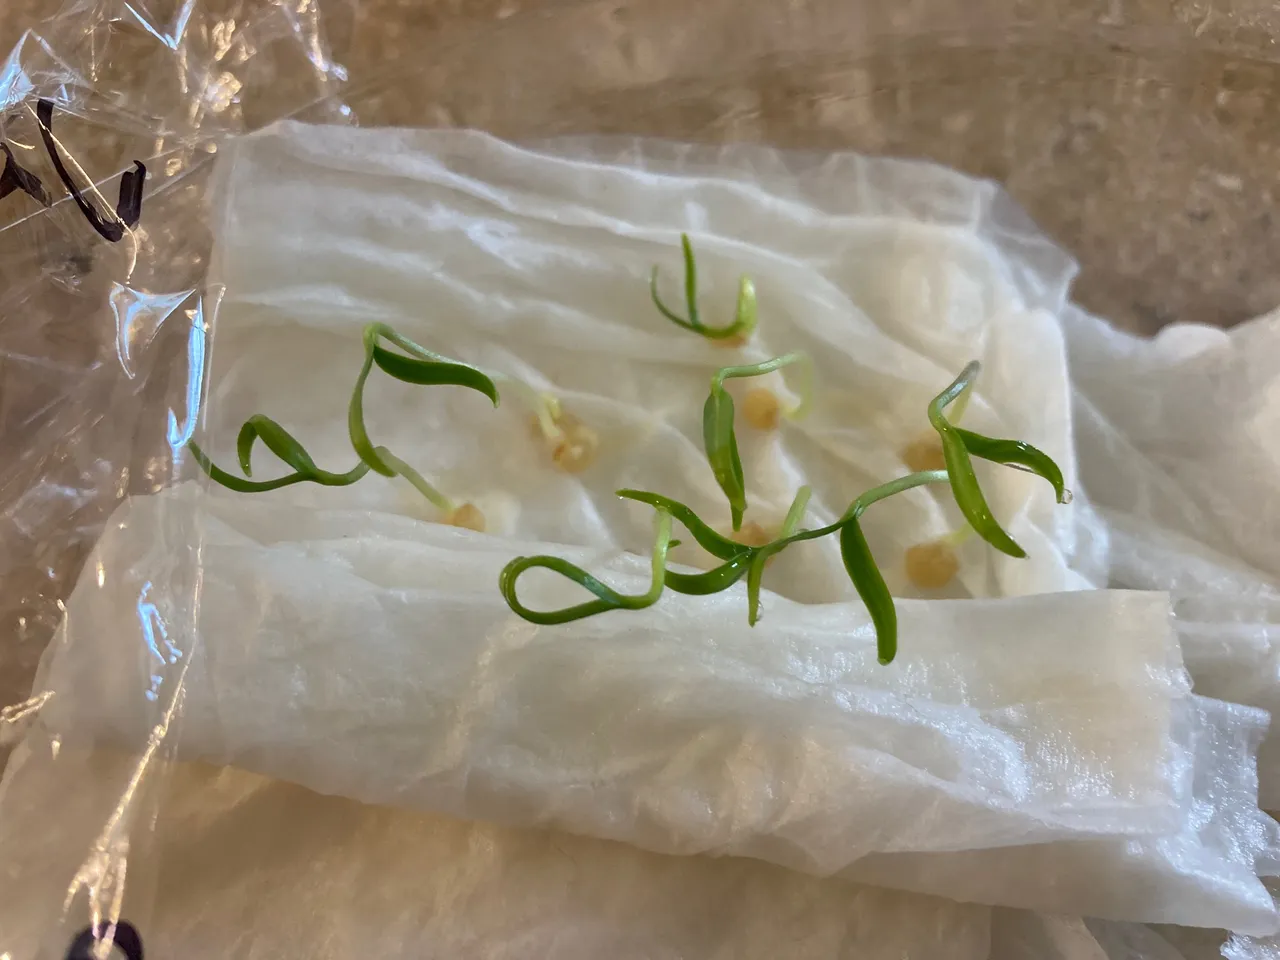
In my previous pepper starting post, I showed you all how I sprout my pepper plants on paper towels on top of my fridge. In this post I am going to delve into the most fun part (for me anyway), moving the sprouts to their growing pots!
To start with, as with all things on occasion, my sprouts took a bit longer to do their explode into life thing thanks to a cold snap. Honestly, that didn't bother me too much because it just gave me more time to get things ready, namely washing the grow shelf, putting it all back together, and getting the growing pots and medium ready to roll.
Here's a not at all pro tip for ya'll: If you read my last post about turkey pot pie, I talked about the French concept of mise en place (put into place), when it comes to gardening I have the best experience if I practice that whole putting into place thing in this realm too.
That of course means, I don't start my sprout transplanting process without getting all of my equipment needed out and organized. Sprouting on, as I like to call it, isn't a labor or time intensive project, but it's not fun to stop in the middle of it, hands covered in soilless growing medium and realize that you don't have the labels you need or a pencil for the sprouts (more on this in a moment).
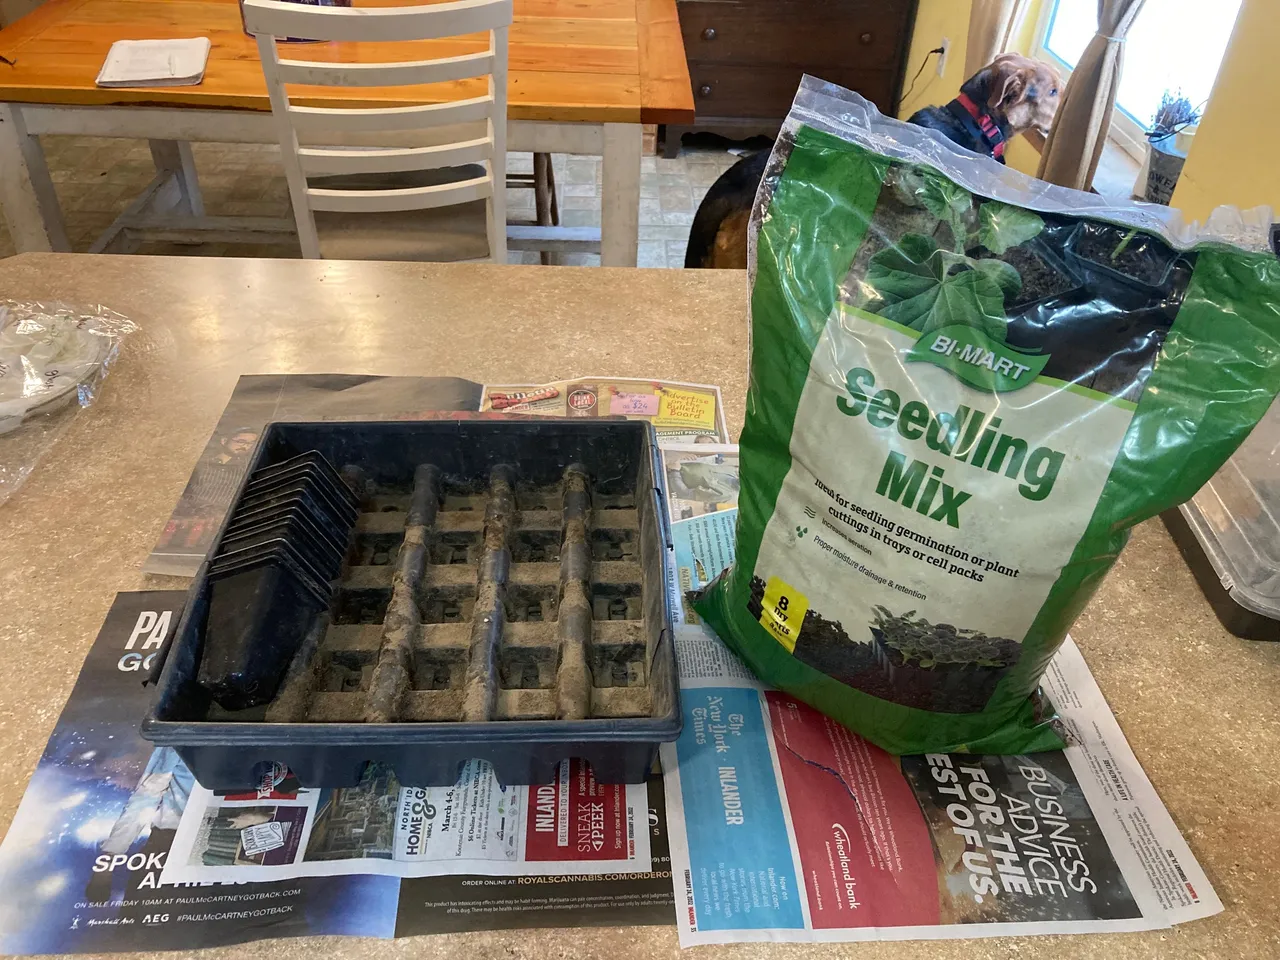
So, with that sentiment in mind, I laid out a barrier of newspapers on my kitchen counter, I got out my grow pots, brought in my bags of soilless growing medium, grabbed a pencil, a Sharpie, and some previously used plastic eating utensils. After laying all that out, I lifted the sprout plate off of my fridge and was ready to get to work!
Okay, well, actually before I got down to sprout transplanting business, I went in to my bedroom and turned on my big ol bluetooth speaker and started blasting Come And Get Your Love by Redbone. Now, dancing is not required while sprout transplanting, but singing and dancing while you work is pretty much always a given around these parts.

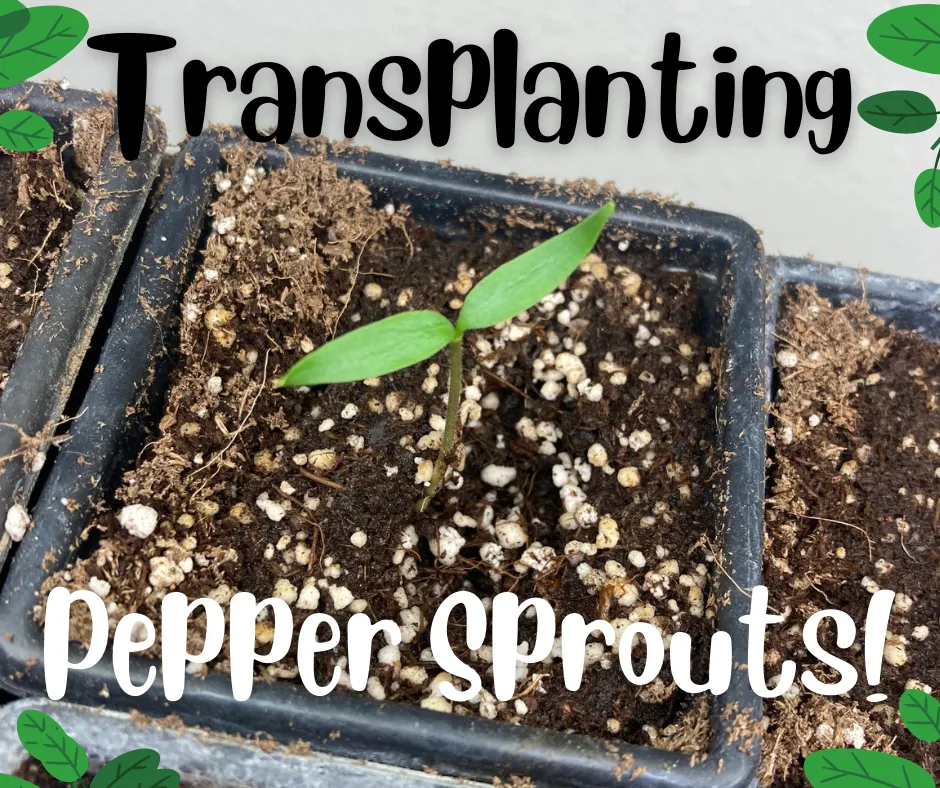
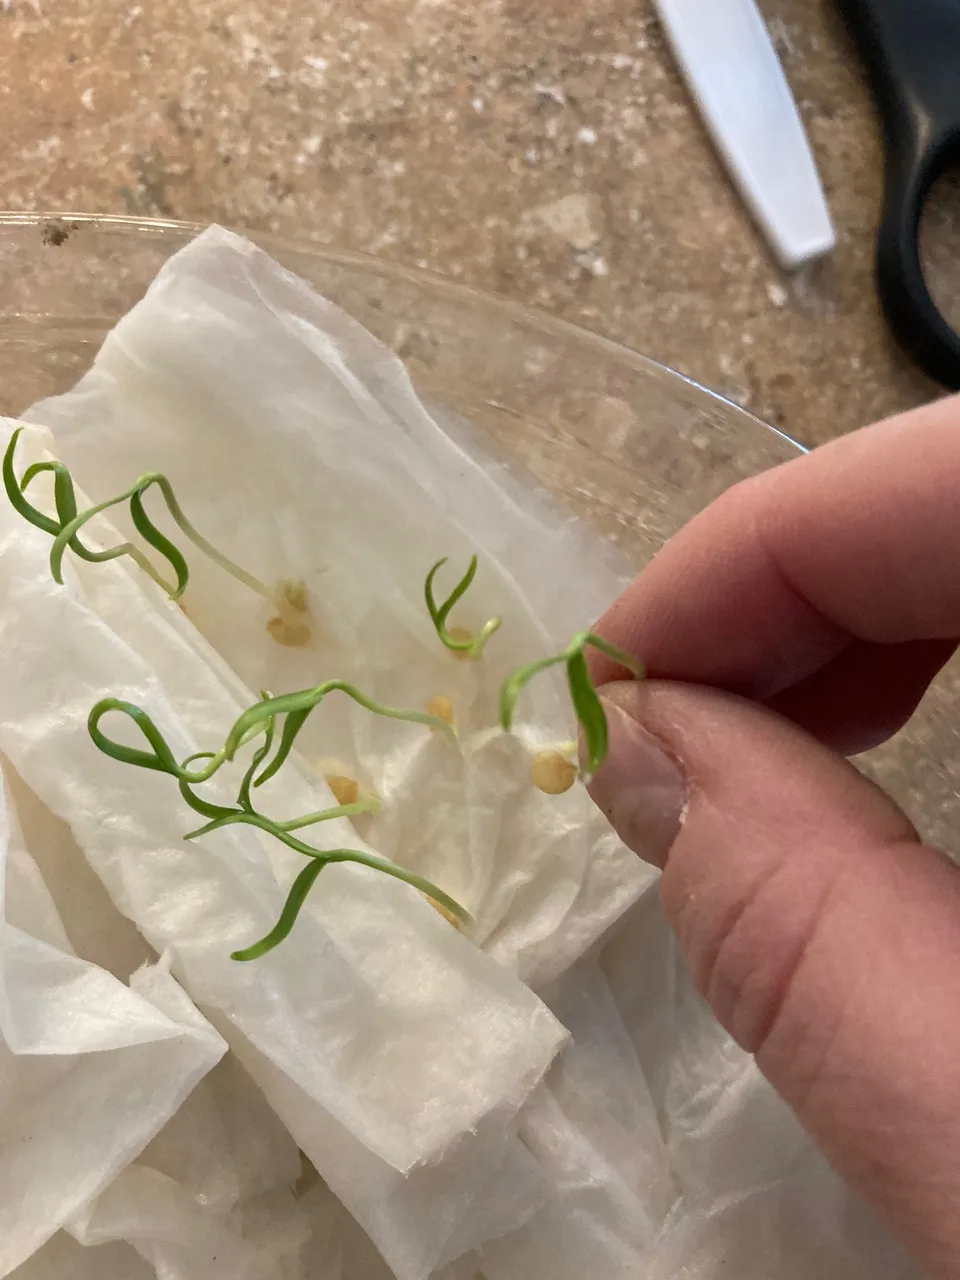
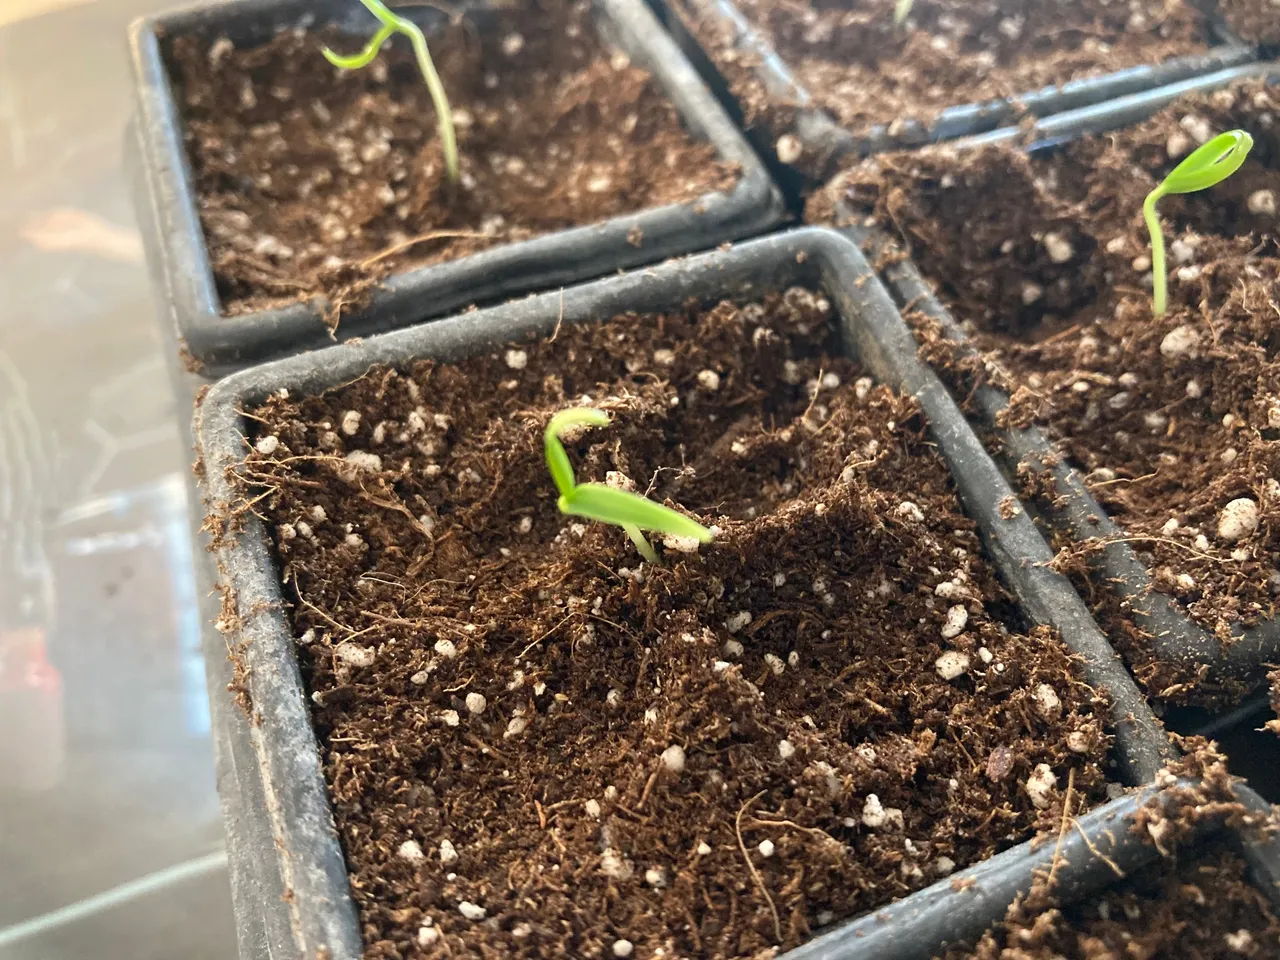
Only two of the seven varieties of peppers that I started were ready to transplant, jalapeno and serrano. They are always the first two out of the gate. The rainbow blend sweet peppers are right behind them, as are the bhut jolokia (ghost pepper). Just seeing those little green cotyledons did my soul a solid, I am so excited for spring, Squee!
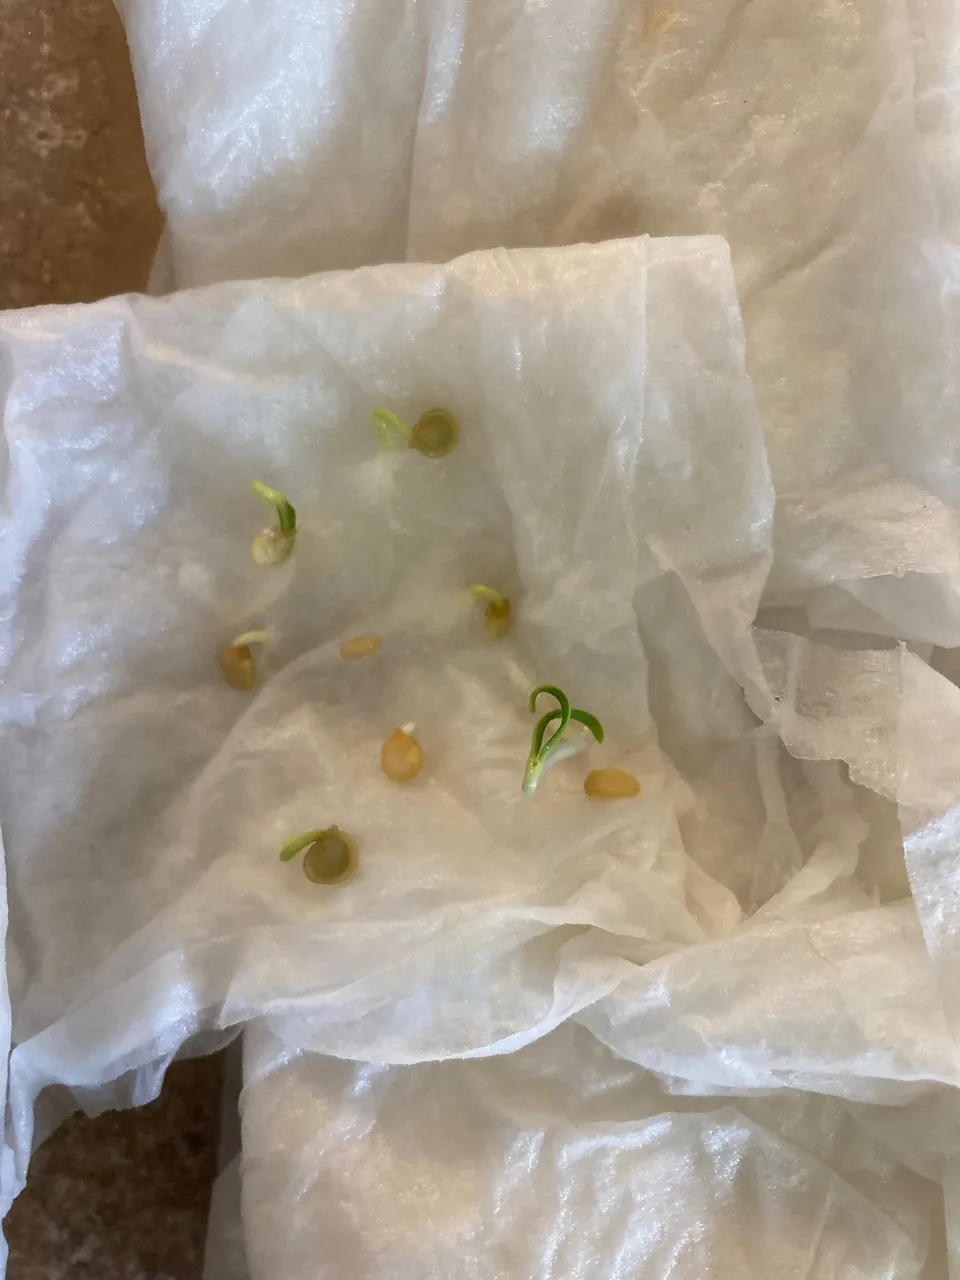
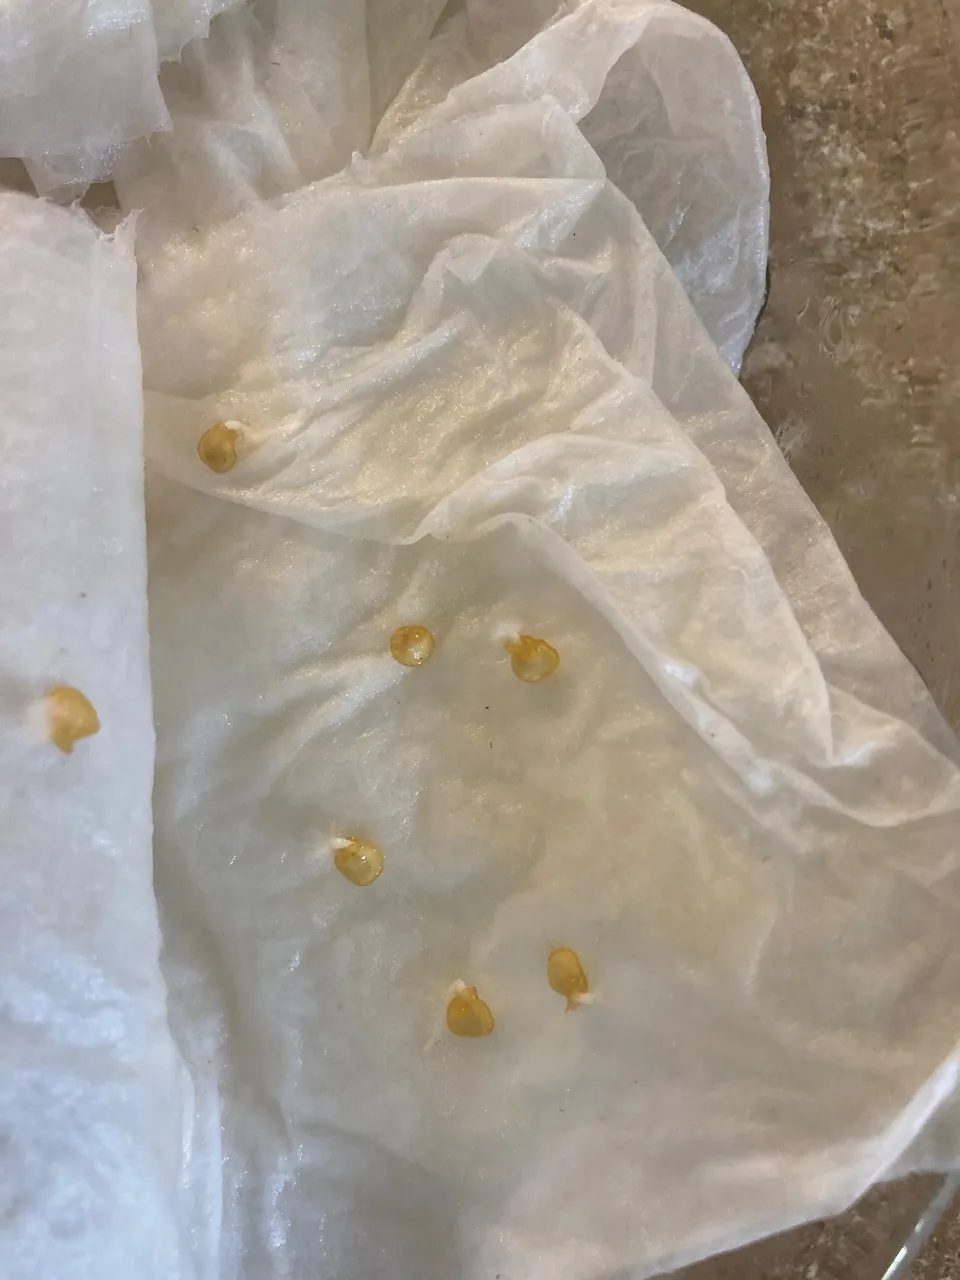
Normally I am a bit of a loon and start way more plants than any sane non market gardener subsistence homesteader should. But this year I resolved to try to be more, ahem, wise and only started a few of each variety. So, I only had to transplant seven jalapeno sprouts and five serranos. I gotta say if felt weird not doing several dozen, but I am hanging in there!
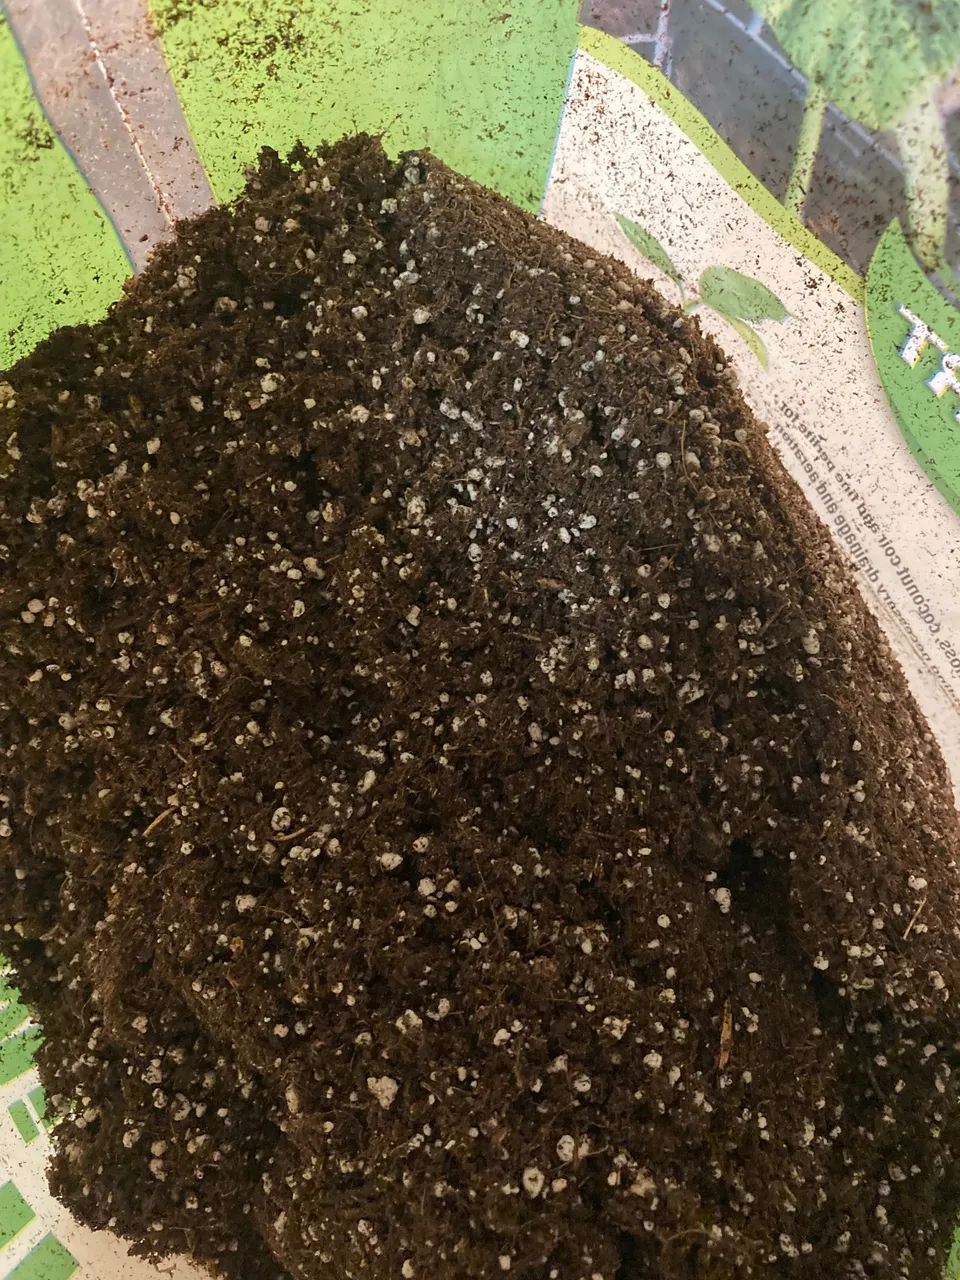
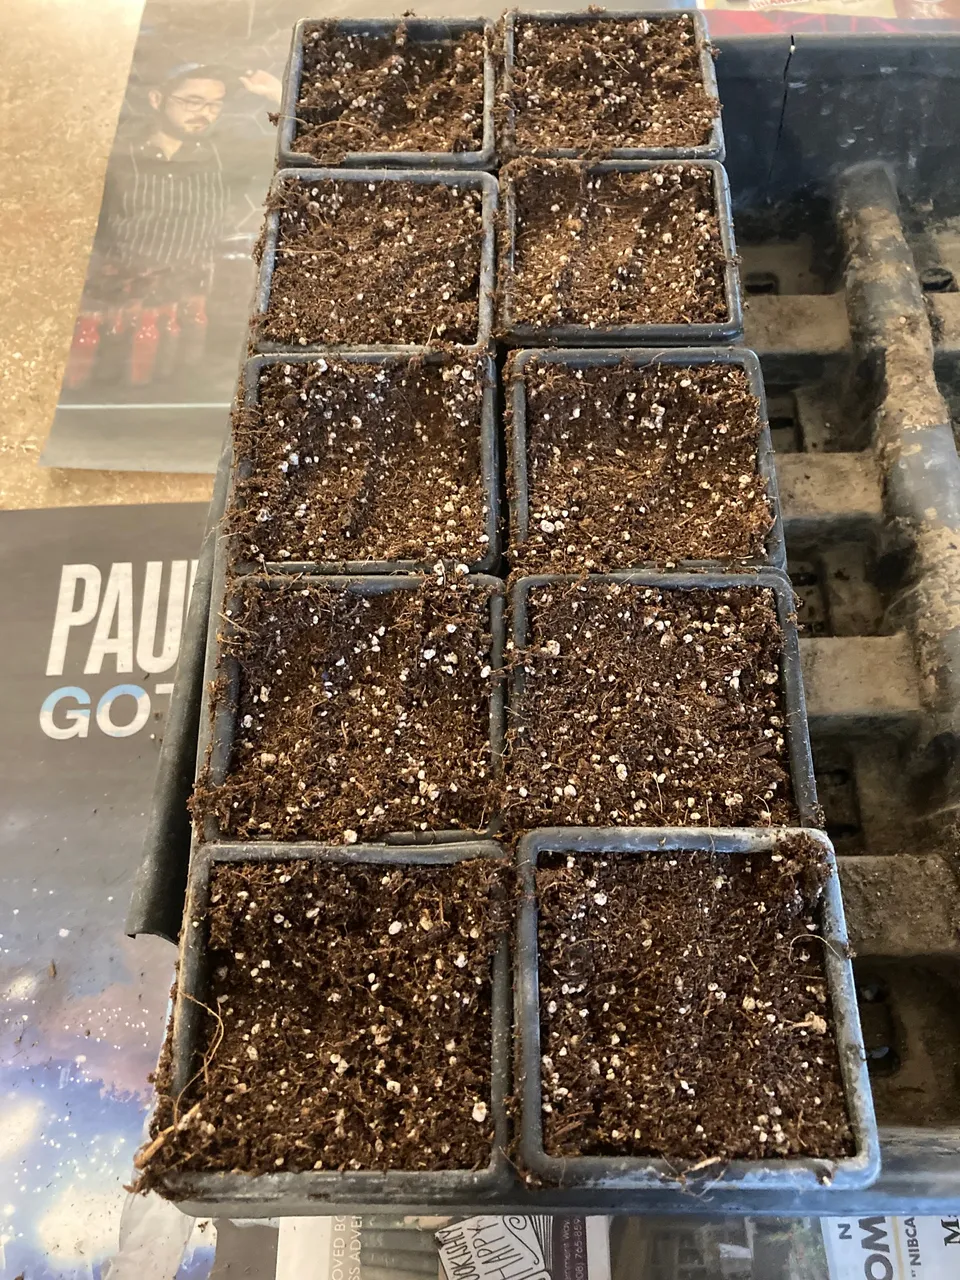
After I filled each pot with soilless growing medium (this is important btw, you want a sterile environment for your baby sproutlings, bring on the compost later when you pot on or transplant!), I began the sprout transplant process.
My elation hit a crescendo at that moment because to transplant the sprouts, I use this:
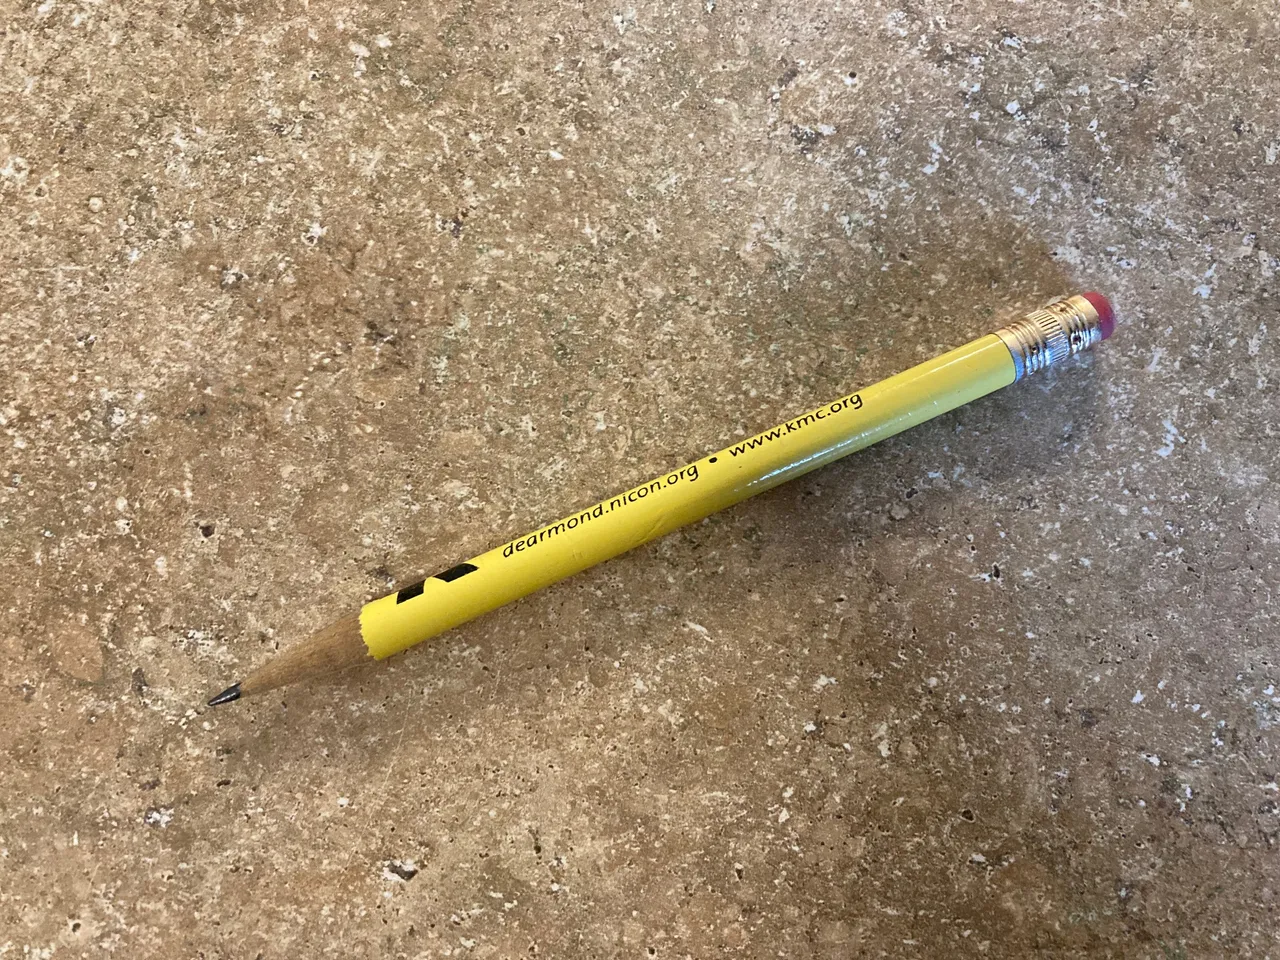
That's right, a humble little pencil.
To transplant the sprouts, I carefully pull a sprout from the damp paper towel, hold it gingerly, and with my other hand I poke a hole in the soilless growing medium. I then use the tip of the pencil to tenderly push the root of the sprout into the hole, remove the pencil, and gently press the soil against the sprout.
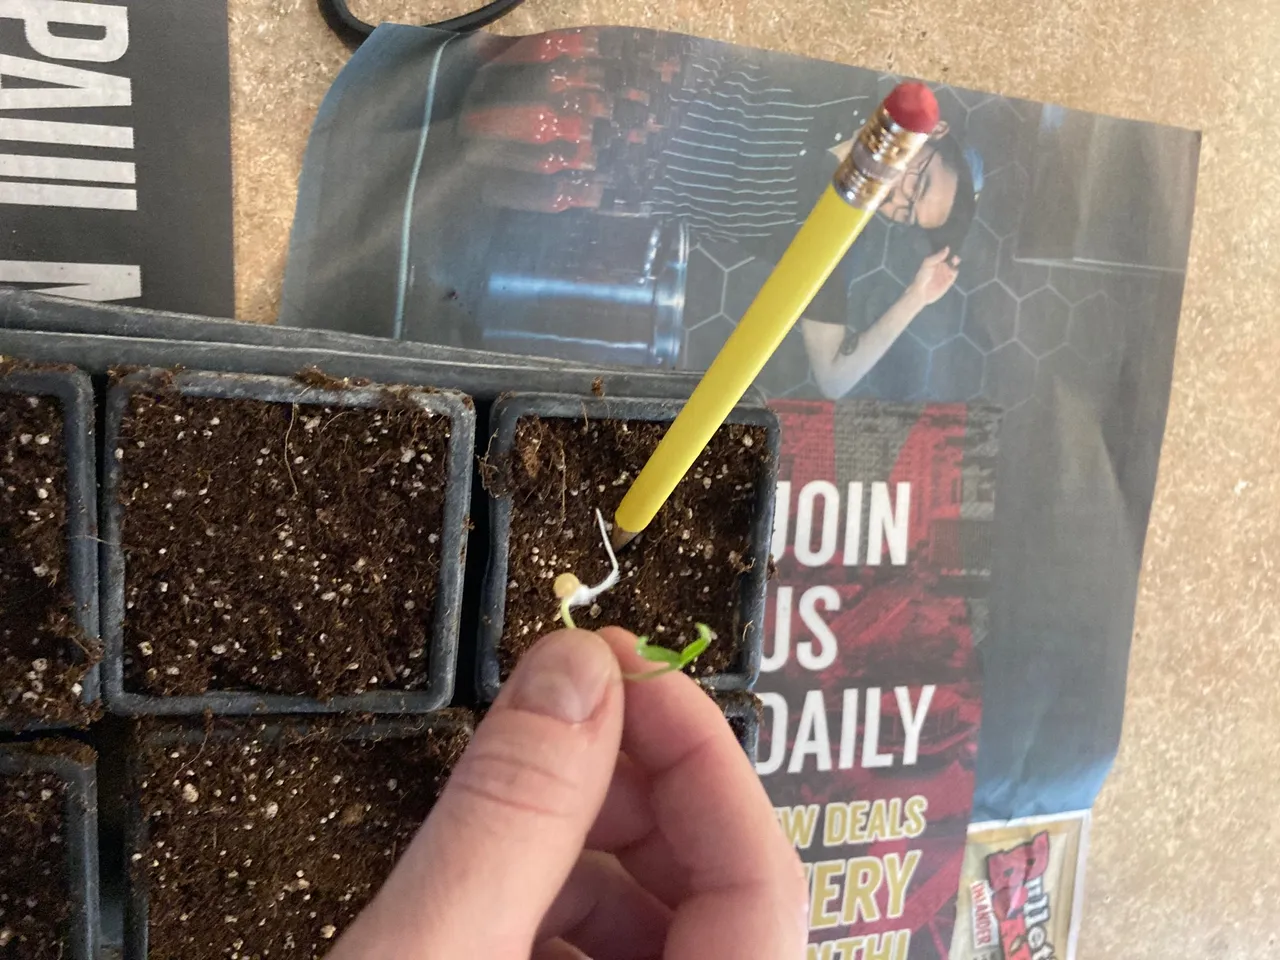
You might notice I keep using the words careful and gentle. That's because you have to be tender in your handling of the sproutlings, it's no fun to spend 10-14 days sprouting something and then break it because you have a propensity to handle things like The Hulk or something.
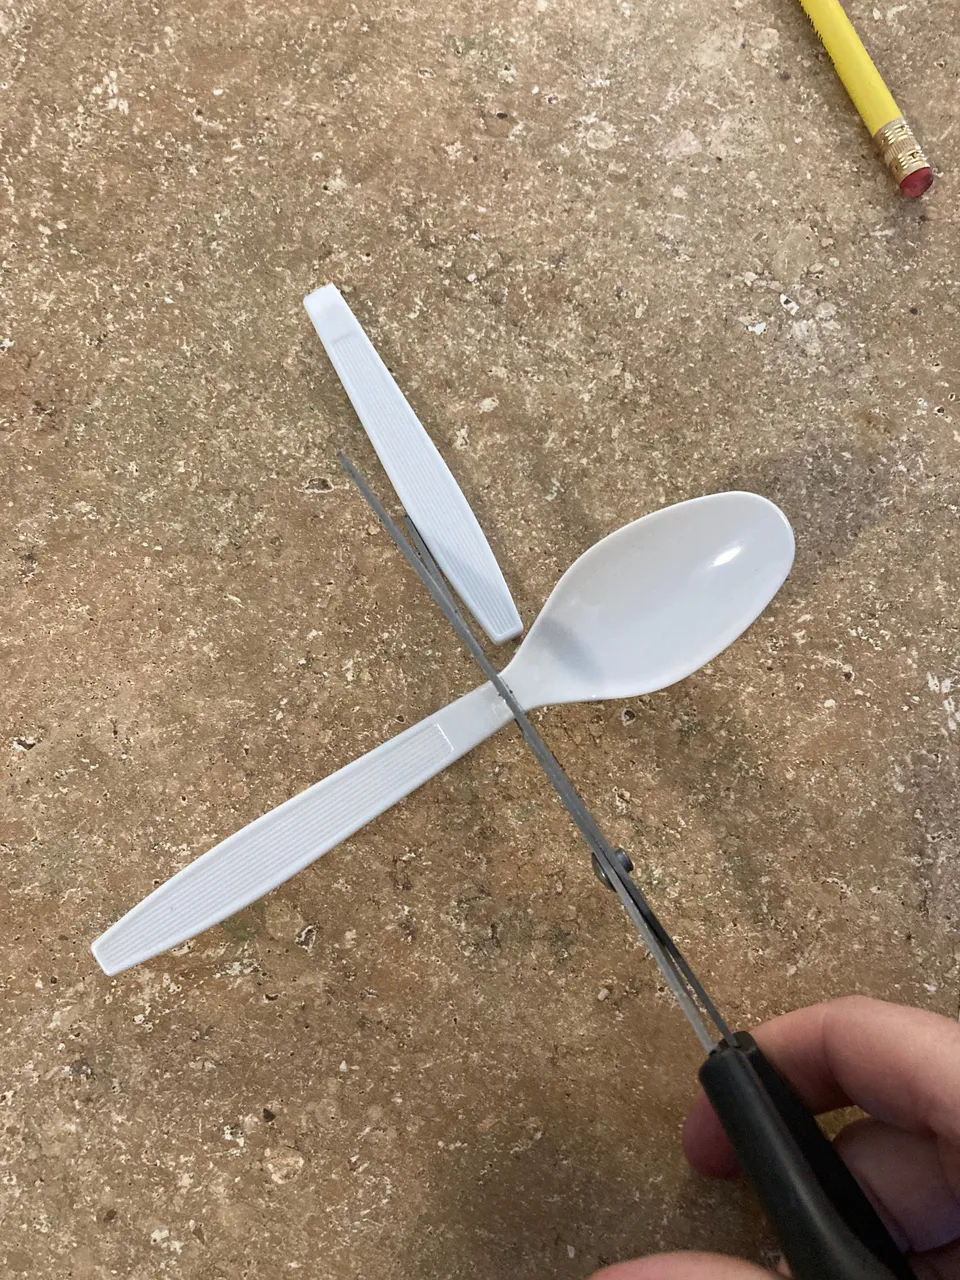
As I went, I used my super fancy labeling process to mark my progress. By fancy I mean I recycled some old plastic flatware from our annual Fourth of July extravaganza. Using scissors, I cut the end off of a plastic spoon, and then marked the amount of whatever variety along with it's name on the end with a black Sharpie. Upon sticking the diy label into the soil, I then stepped back and smiled, because hello baby plant!
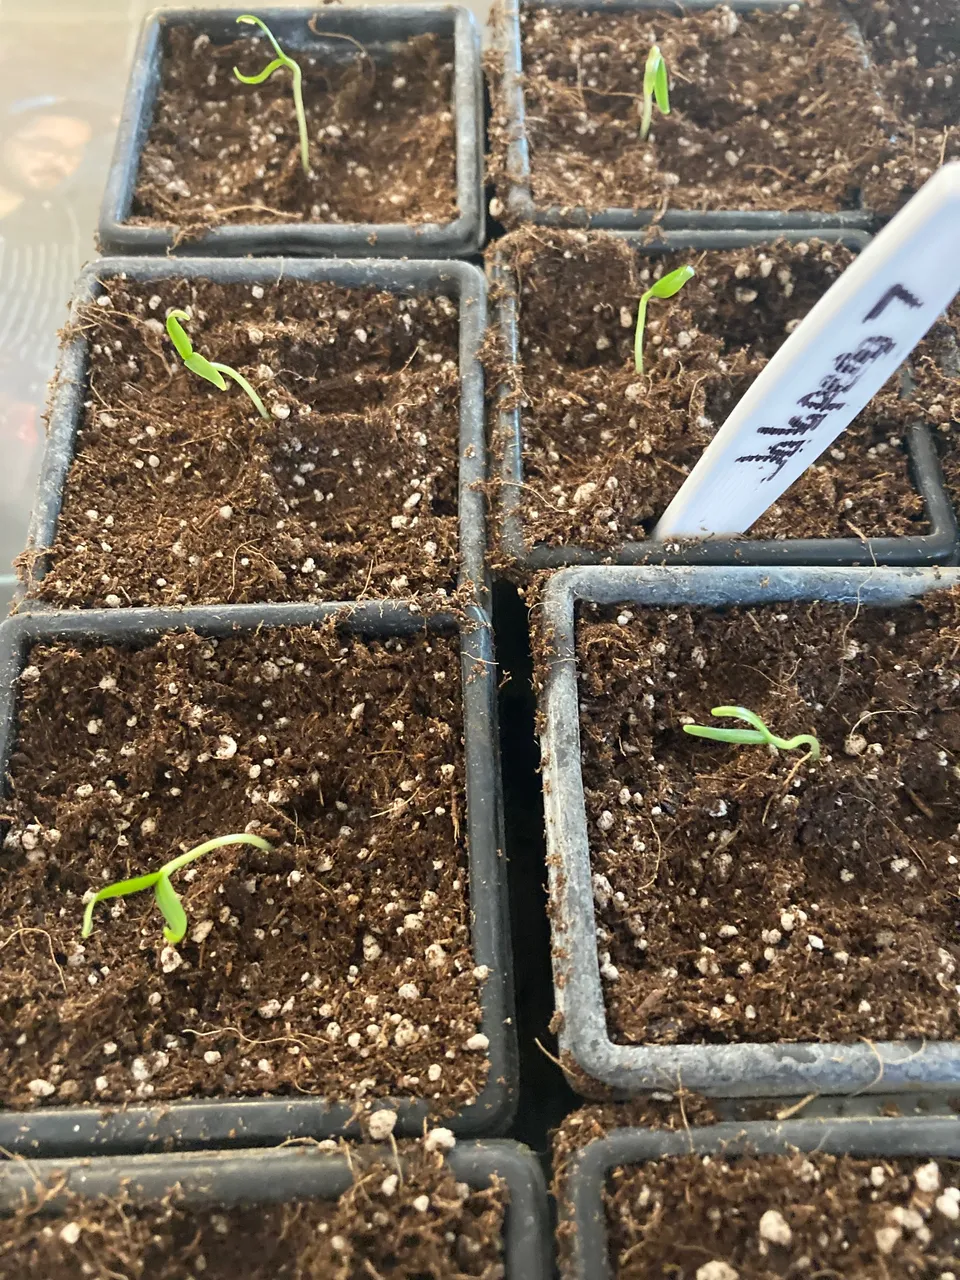
After transplanting all the sprouts and marveling that I somehow escaped wearing soilless growing medium for once, I packed my tray of sprouts into my bathroom and placed it on the grow shelf under the already blazing grow lights. The only thing left to do was water the little ones, which I did with lukewarm water because peppers don't like the cold. I also keep a plastic spray bottle on the grow shelf and give the rooting sprouts a spray every now and then.

Here's the thing, you want to keep them moist, but you do not want to over water them. In the beginning I water them every morning when I plug the lights in. I plug the lights in in the morning and unplug them when I go to bed. They get around 12-14 hours of light that way. Plants like to sleep too!
And that is that! Of course I will be doing it again and again for the next few days as more sprouts achieve ready to grow stage. What amazes me is just how fast the little sprouts start rooting and growing. It's only been two days since I transplanted them and already I notice the difference in their overall size and growth.
And that's all there is too it! In a few weeks I will pot on the peppers to a bigger pot so they don't become rootbound or transplant them in the greenhouse. They'll just need watered and fed. Plants want to grow, it's just up to us to provide the best possible growing conditions if we want them to thrive. And you don't have to live on a big farm or have a massive garden to enjoy growing things, peppers do lovely in pots on a terrace, their bell shaped flowers and growing fruit are beautiful to behold. I believe everyone who has a desire to can be successful growing food, they just have to find their groove, and it all comes from giving it a try!