Saludos, estimada comunidad. En días pasados estaba arreglando mi closet y encontré algunas prendas que tengo mucho tiempo que no uso. ¿Todos tenemos pantalones o atuendos viejos que no empleamos o simplemente nos queden apretados? En mi caso, hallé una falda de blue jeans muy coqueta que no me sirve y consideré confeccionar una cartera con este material. Así empezó este nuevo proyecto, esta tela sería la parte más grande, es de color azul oscura y verde. Por ello, busqué un blue jean azul claro para combinar y colocárselo en la zona frontal. En esta ocasión, mi buena vecina me prestó su máquina de coser, lo cual haría más rápido el trabajo.
Materiales:
- Tela de falda
- Tela de blue jean claro
- Hilos
- Aguja
- Tirantes
- Flecos decorativos
- Cierre
- Tijera
- Botón metalizado
- Cola de ratón
- Alfileres
Greetings, dear community. In recent days I was arranging my closet and I found some clothes that I haven't used for a long time. Do we all have old pants or outfits that we don't use or that are simply too tight? In my case, I found a very flirty blue jeans skirt that doesn't fit me and I considered making a purse with this material. Thus began this new project, this fabric would be the largest part, it is dark blue and green. So, I looked for a light blue jean to match and put it in the front area. On this occasion, my good neighbor lent me her sewing machine, which would make the work faster.
Materials:
- Skirt fabric
- Light blue jean fabric
- Yarn
- Needle
- Suspenders
- Decorative fringe
- Zipper
- Scissors
- Metallic button
- Mouse tail
- Pins

Procedimiento:
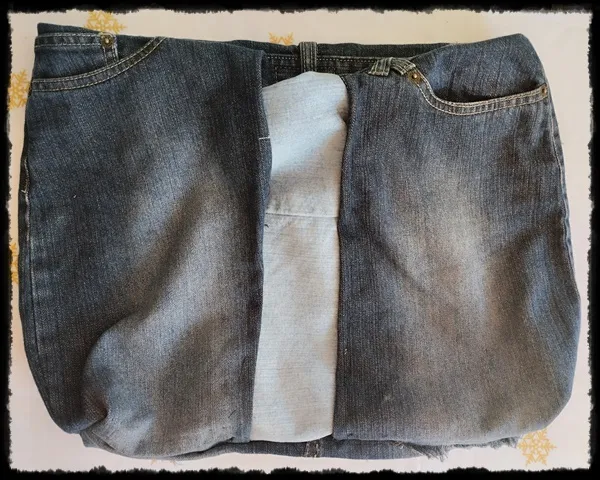
Corté la tela con una altura de 35 cm y 50 cm de ancho, lo hice con esta medida porque quería una cartera grande, así podría guardar muchos accesorios, desde mi monedero hasta un cuaderno para ir a la universidad, lo cual me pareció muy práctico para mis actuales compromisos académicos.
Aproveché que la tela ya estaba unida para sacar un pedazo de 50 cm, esto abarcaría la parte de atrás. Luego, recorté un triángulo en el blue jean claro, este sería el diseño del frente, lo sujeté con unos alfileres para ver una imagen previa del resultado. Una vez que terminé esta parte, coloqué unos flecos para decorar el borde, los uní con mucho cuidado para que luciera estético.
Procedure:
I cut the fabric with a height of 35 cm and 50 cm wide, I did it with this measure because I wanted a large wallet, so I could keep many accessories, from my purse to a notebook to go to college, which I found very practical for my current academic commitments.
I took advantage of the fact that the fabric was already joined to take out a 50 cm piece, this would cover the back. Then, I cut out a triangle in the light blue jean, this would be the front design, I pinned it to see a preview of the result. Once I finished this part, I placed some bangs to decorate the border, I joined them very carefully so that it would look aesthetic.
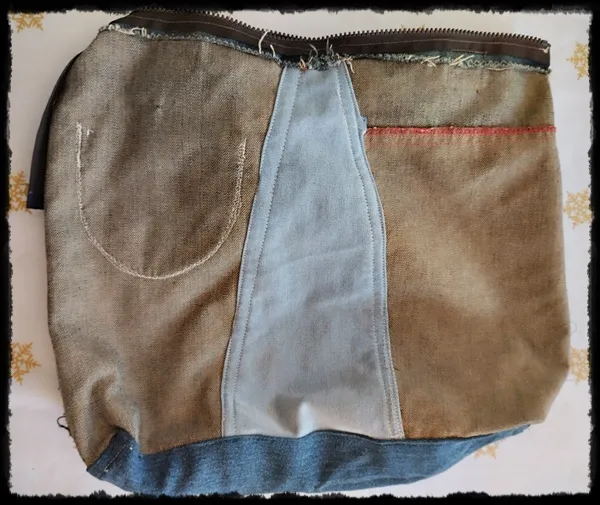
A continuación, recorté un óvalo para colocárselo como base a la cartera, el cual cosí por el borde de la estructura confeccionada. Compré un cierre negro de un largo considerable, como el tamaño era más grande que el requerido, una parte quedaría hacia adentro del bolso. Cuidé cada detalle para obtener un buen acabado. La peculiaridad de este era que tenía dientes grandes y era de plástico, se veía llamativo desde mi apreciación.
Next, I cut out an oval to be used as a base for the wallet, which I sewed along the edge of the structure I had already made. I bought a black zipper of considerable length to attach to the wallet, which I attached to the upper surface, taking care of every detail to obtain a good finish. As the size was larger than required, a part of it would be inside the bag. The peculiarity of this one is that it had big teeth and it was made of plastic, it looked striking from my appreciation.
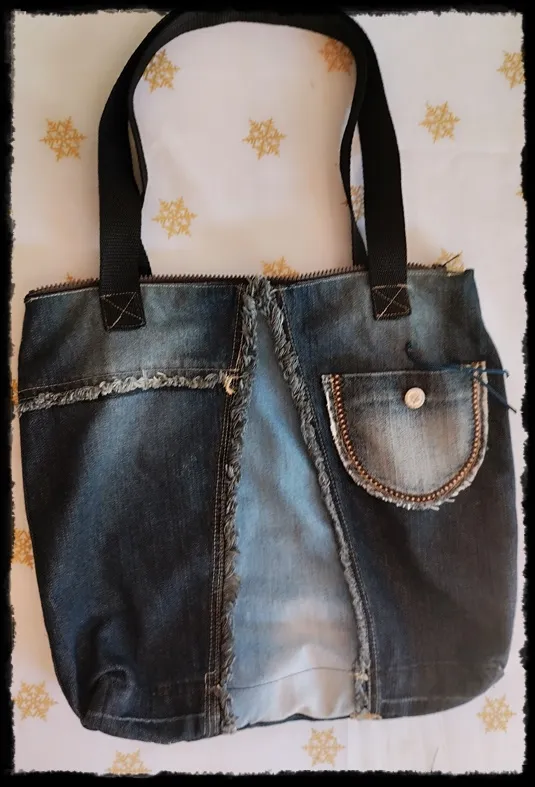
A la zona izquierda del bolso le coloqué una línea de flecos para ornamentar un poco más, lo hice para personalizar y hacerlo más de mi agrado. Del otro lado, decidí agregarle un bolsillo para fines prácticos, el objetivo de este es guardar el dinero para pagar el autobús y quizás algunos caramelos (jaja). Como pueden fijarse en la fotografía, el color que elegí fue azul claro para que combinara con el resto de la estructura. Para hacer esta pieza más llamativa, punteé con hilo dorado las orillas de la misma. Luego, le cosí un botón metalizado, el cual tendría arriba un pedazo de la tela de ratón para sujetarlo, de modo que pudiera cerrarse y evitar que se cayera algo.
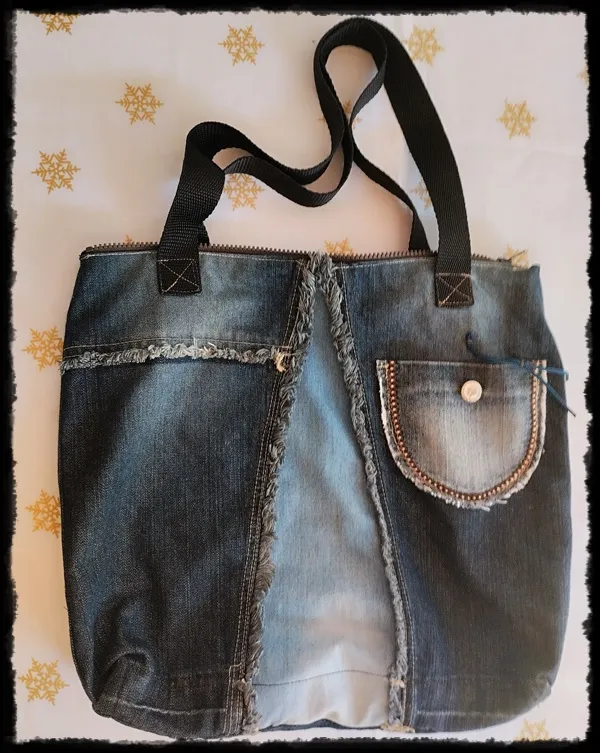
Los tirantes los elegí de color negro, consideré que este armonizaría con este accesorio. Corté dos de 30 cm cada uno, el largo ideal para mi estatura. Cada uno puede ajustar esta medida a sus necesidades corporales y de otra índole.
Solo me resta mencionar que el diseño de esta cartera se fue dando a medida que coloqué manos a la obra, así que las personas que deseen guiarse por este tutorial (manualistas, costureras o aficionados) pueden modelar otro y añadir todos los detalles que consideren apropiados. Fue un gusto compartir con ustedes nuevamente.
On the left side of the bag I added a line of bangs to ornament it a little more, I did it to personalize it and make it more to my liking. On the other side, I decided to add a pocket for practical purposes, the purpose of this one is to keep the money to pay the bus and maybe some candies (haha). As you can see in the picture, the color I chose was light blue to match the rest of the structure. To make this piece more eye-catching, I stippled the edges with gold thread. Then, I sewed on a metallic button, which would have a piece of the mouse fabric on top to hold it, so that it could close and prevent anything from falling off.
I chose the straps in black, I thought it would harmonize with this accessory. I cut two of 30 cm each, the ideal length for my height. Everyone can adjust this measurement to their body and other needs.
It only remains for me to mention that the design of this wallet was given as I put my hands to work, so people who wish to be guided by this tutorial (manualists, seamstresses or amateurs) can model another one and add all the details they consider appropriate. It was a pleasure to share with you again.

Translated with www.DeepL.com/Translator (free version)
Todas las fotografías son de mi archivo personal.
Translated with www.DeepL.com/Translator (free version)
All photographs are from my personal archive.