¡Saludos abejitas creativas! | ¡Greetings creative bees!
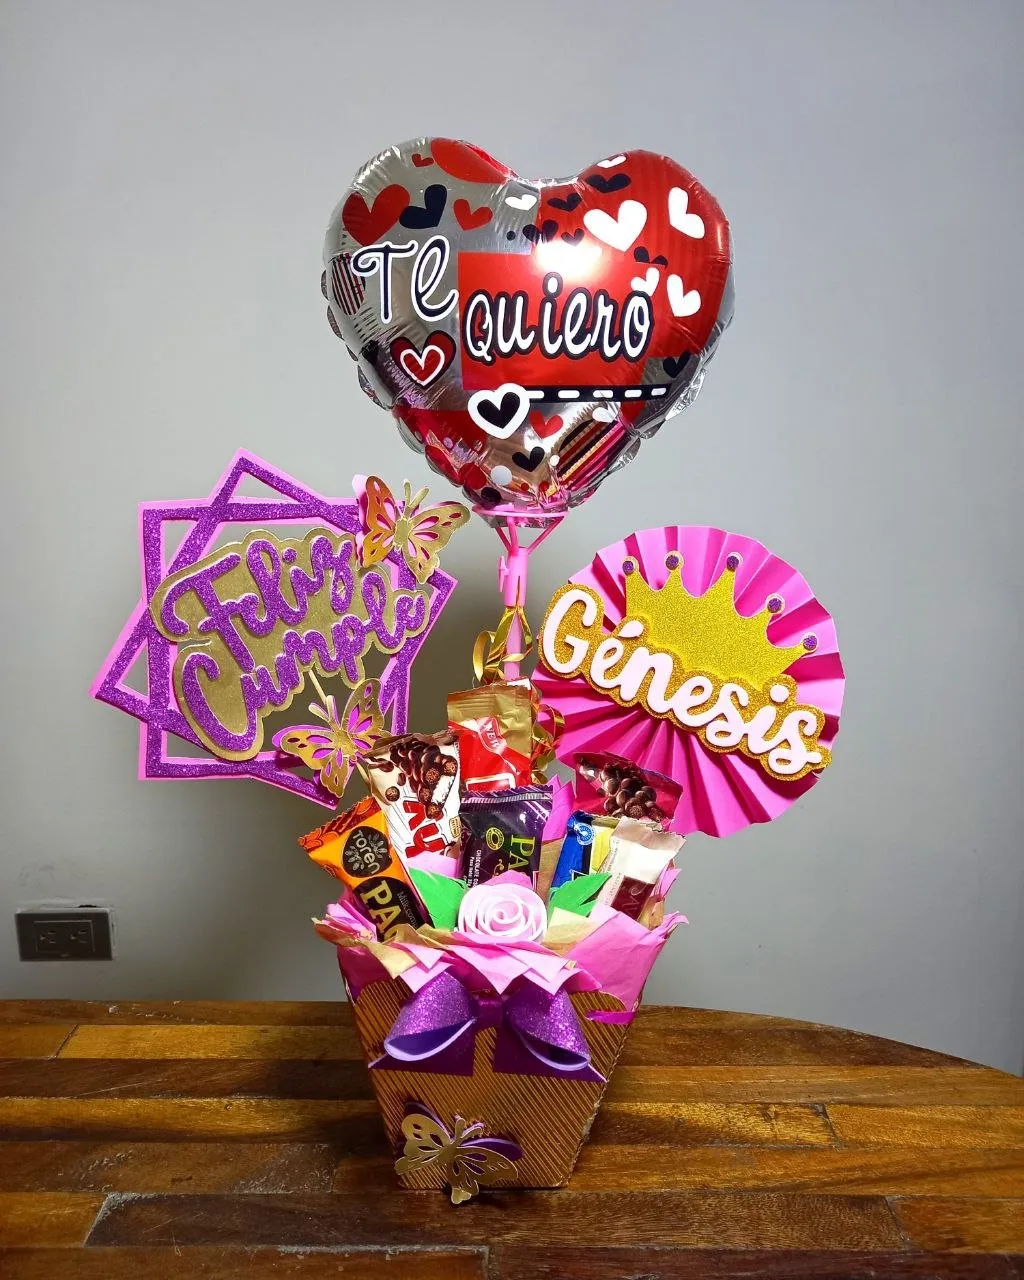
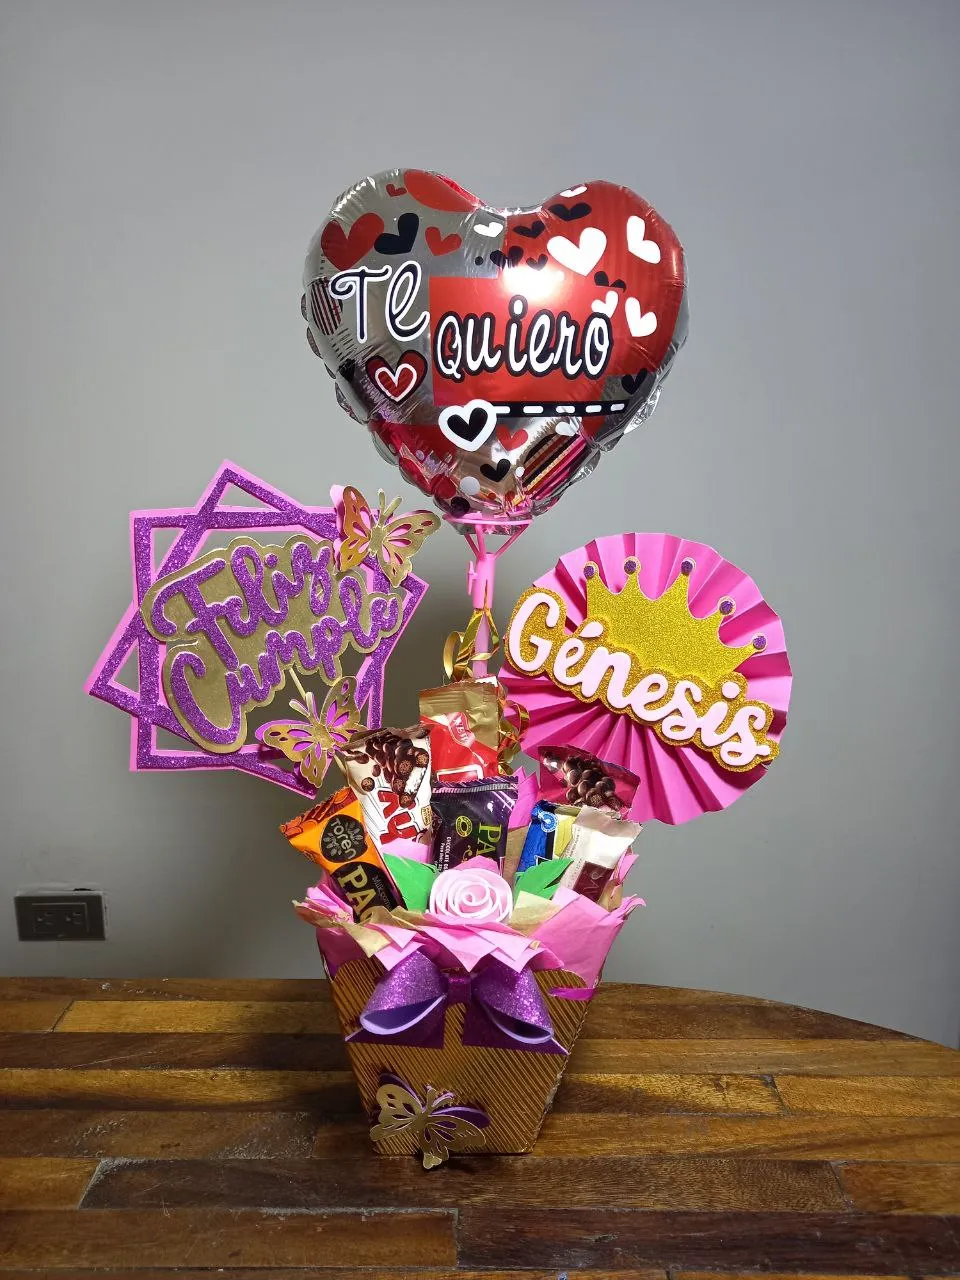
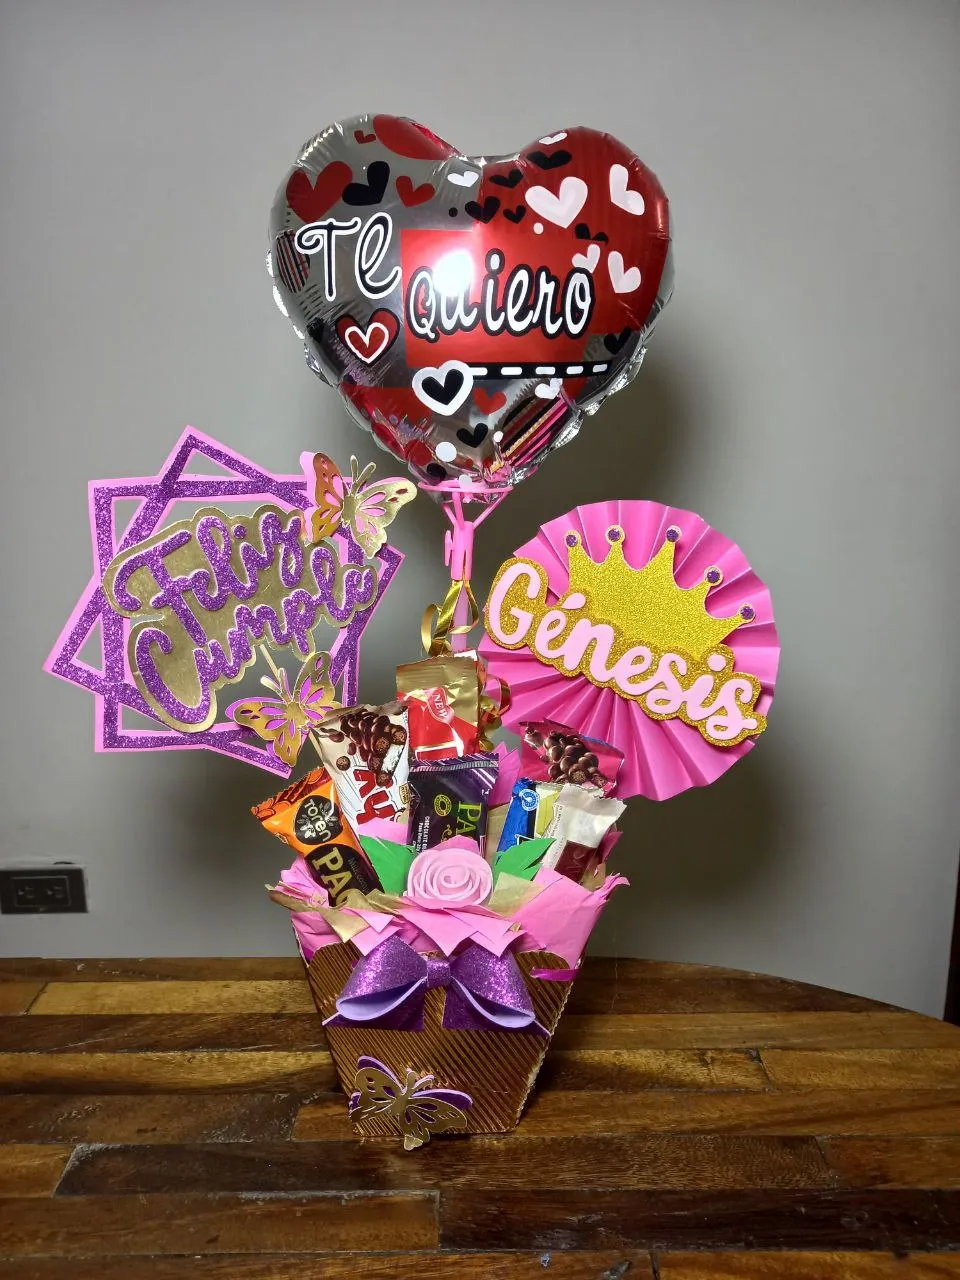
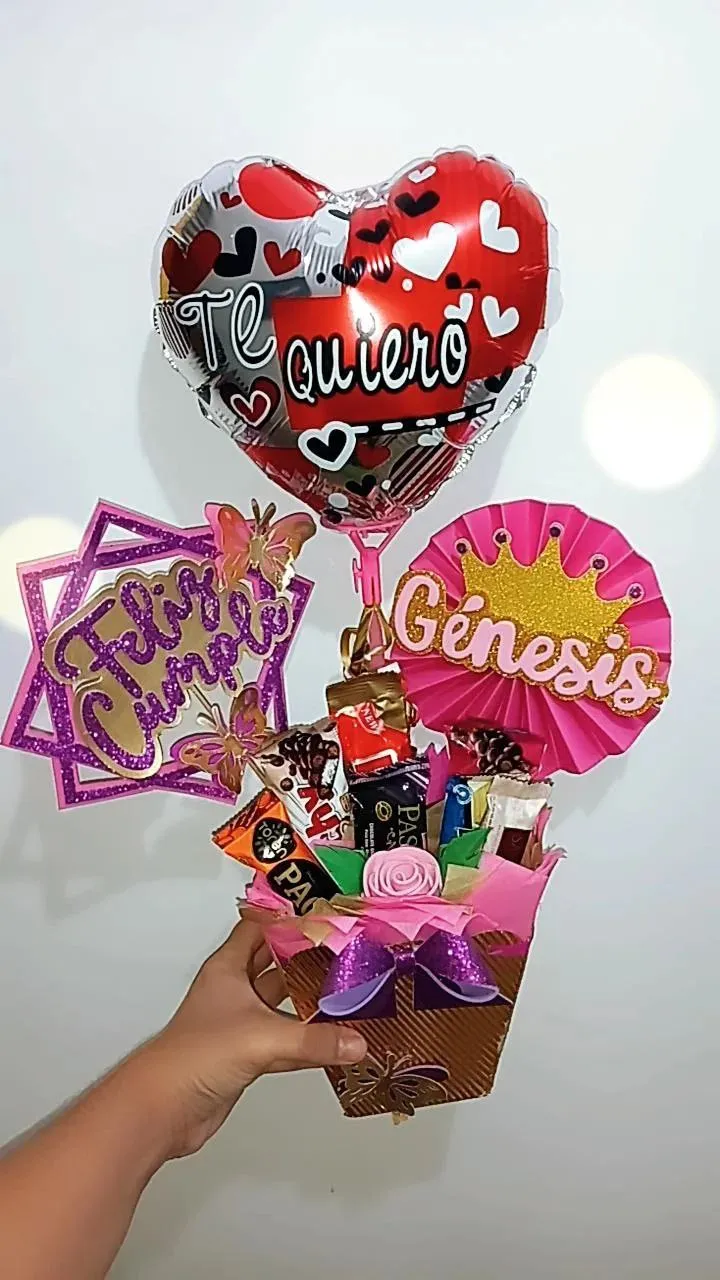
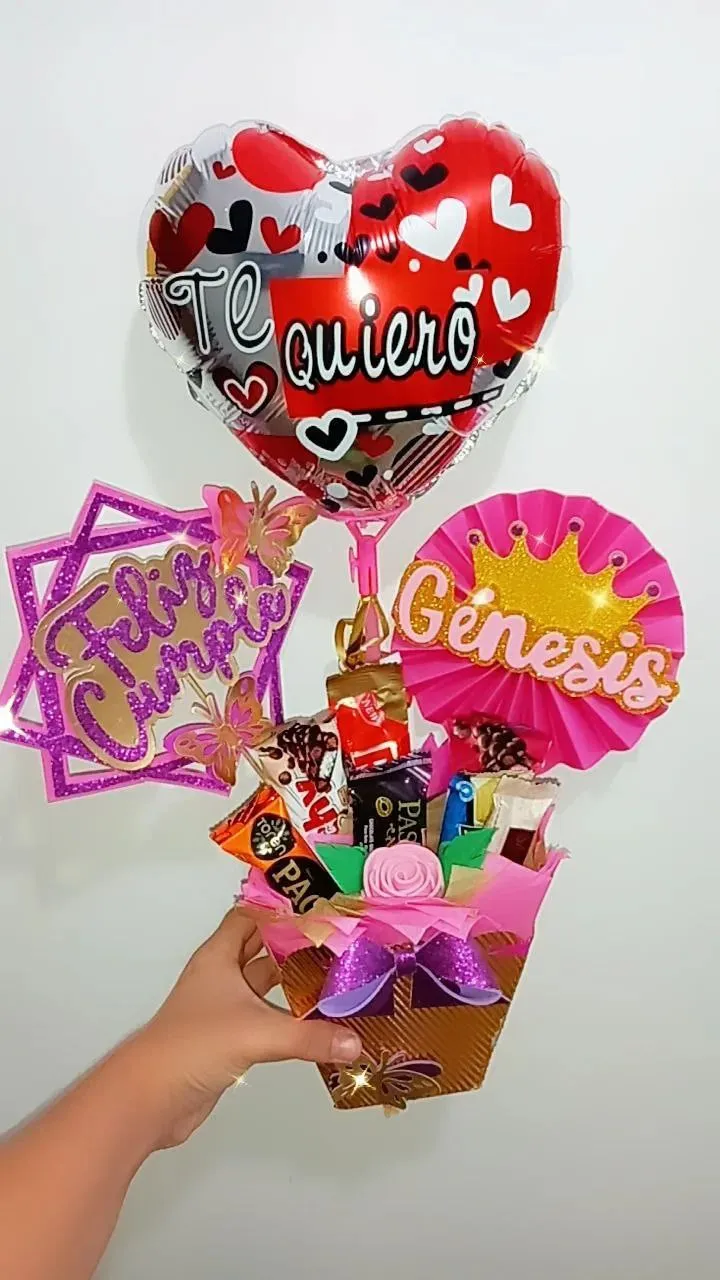
En este lindo día quiero compartir con ustedes una de mis más recientes creaciones, un hermoso arreglo de dulces con globo para una linda cumpleañera, mi amiga @genesishernandez, una persona muy especial en mi vida y una de mis mejores amiga, para su día especial no podía faltar un detalle de mi parte y por ser una amante del chocolate al igual que yo se me ocurrió prepararle un arreglo lleno de ellos para que pudiera disfrutarlo en su día, lo elaboré con una combinación de colores muy linda igual a la que tendría la decoración de su cumpleaños para que así pudiera combinarlo, fue un detalle hermosa y muy especial y hoy quiero compartir con ustedes su elaboración, espero que les guste, sin más, ¡manos a la obra!
On this beautiful day I want to share with you one of my most recent creations, a beautiful balloon candy arrangement for a beautiful birthday girl, my friend @genesishernandez, a very special person in my life and one of my best friends, for her special day. I could not miss a detail on my part and being a chocolate lover like me, it occurred to me to prepare an arrangement full of them so that she could enjoy it in her day, I made it with a very nice combination of colors just like the one she would have the decoration of his birthday so that he could combine it, it was a beautiful and very special detail and today I want to share with you its elaboration, I hope you like it, without further ado, ¡let's get to work!

🎈 Cajita de cartulina.
🎈 Papel de seda rosado y dorado.
🎈 Silicón caliente.
🎈 Tijera.
🎈 Lápiz.
🎈 Palito para globo.
🎈 Cinta adhesiva transparente.
🎈 Palitos de altura.
🎈 Globo metalizado.
🎈 Topper con nombre.
🎈 Topper de cumpleaños.
🎈 Mariposas troqueladas.
🎈 Chocolates.
🎈 Cardboard box.
🎈 Pink and gold tissue paper.
🎈 Hot silicone.
🎈 Scissor.
🎈 Pencil.
🎈 Balloon stick.
🎈 Transparent adhesive tape.
🎈 Height sticks.
🎈 Metallic balloon.
🎈 Topper with name.
🎈 Birthday toppers.
🎈 Die-cut butterflies.
🎈 Chocolate.


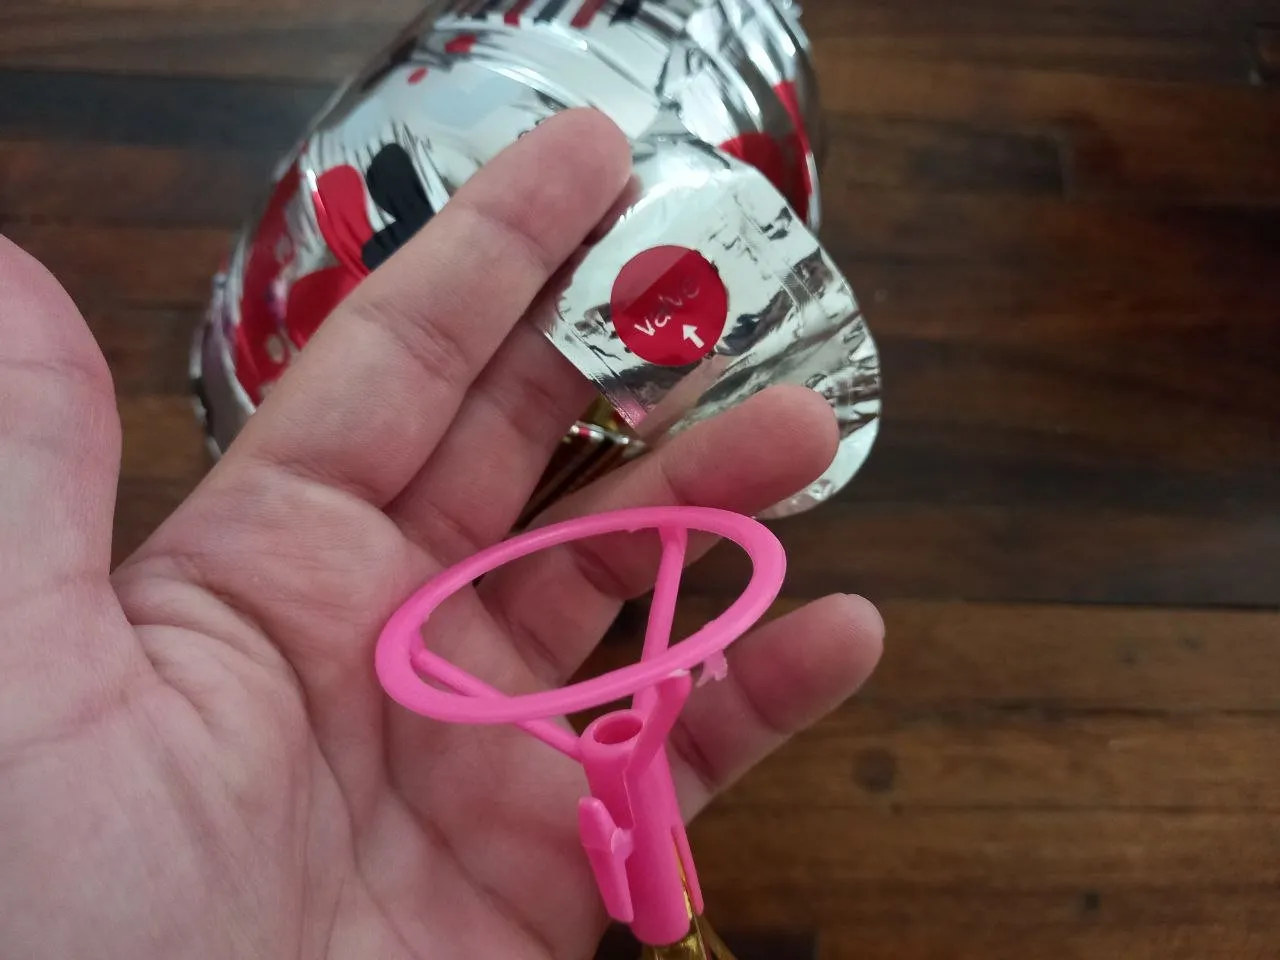
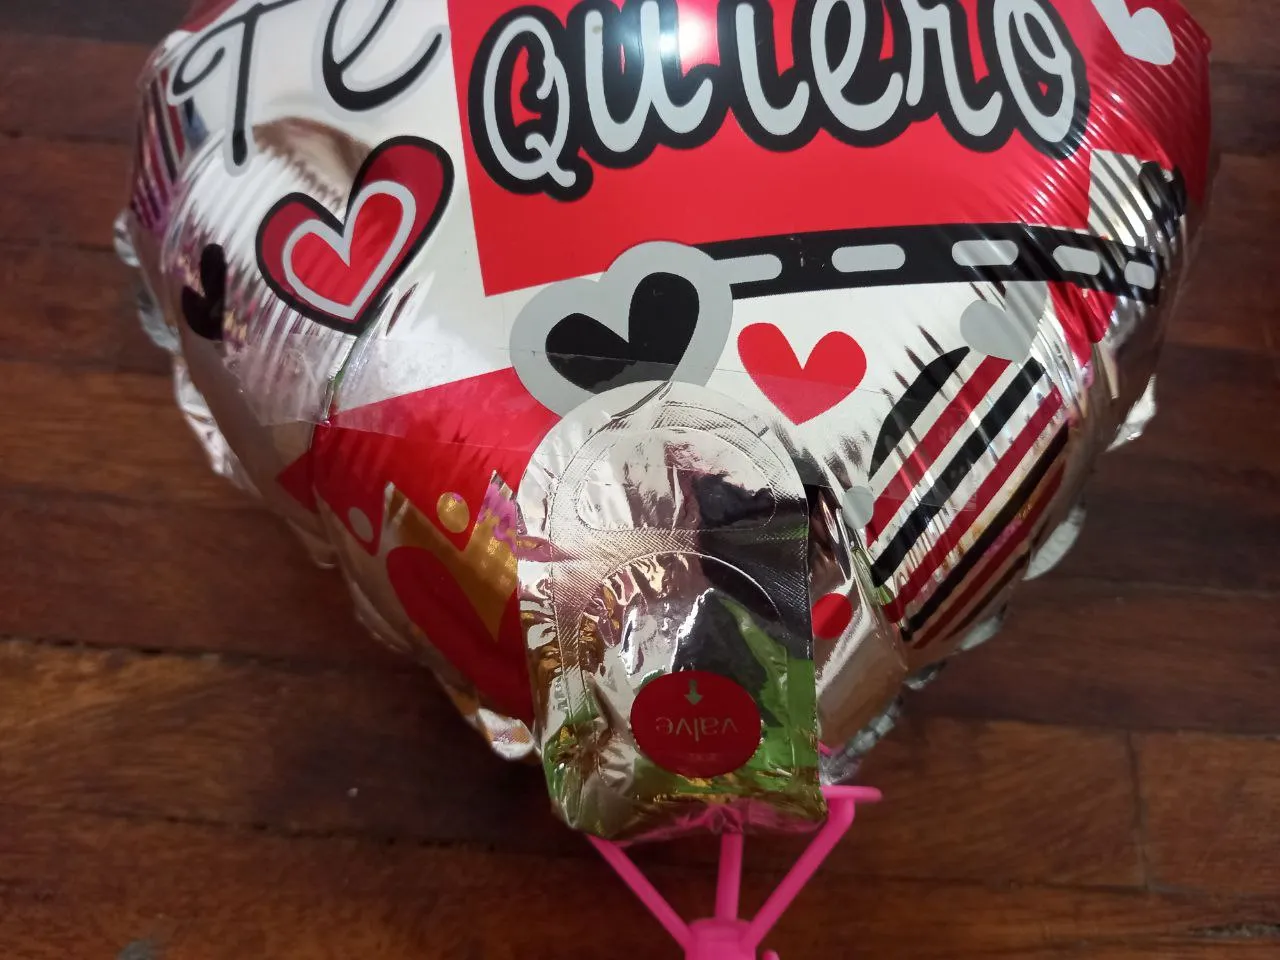
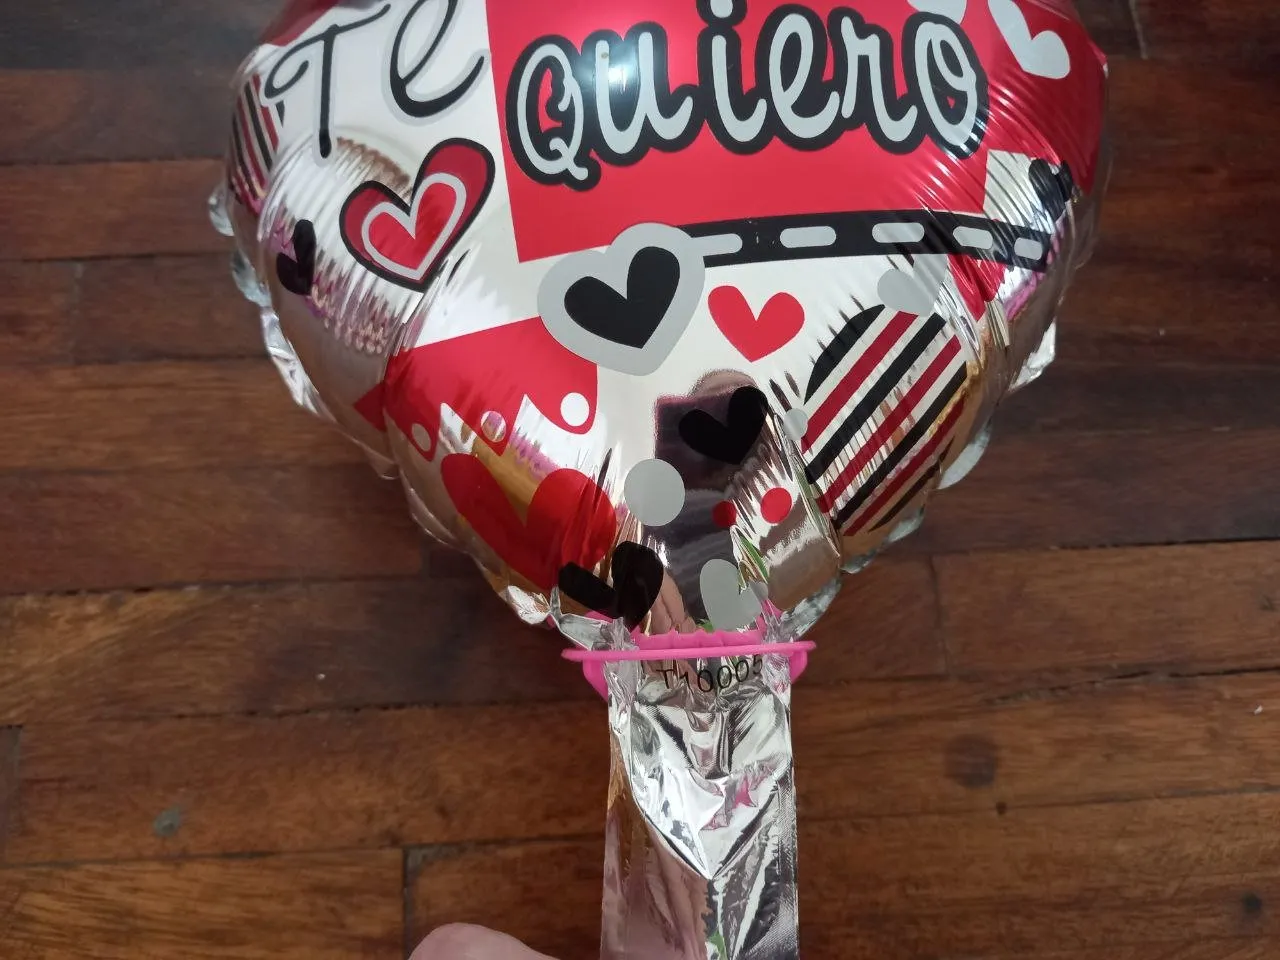
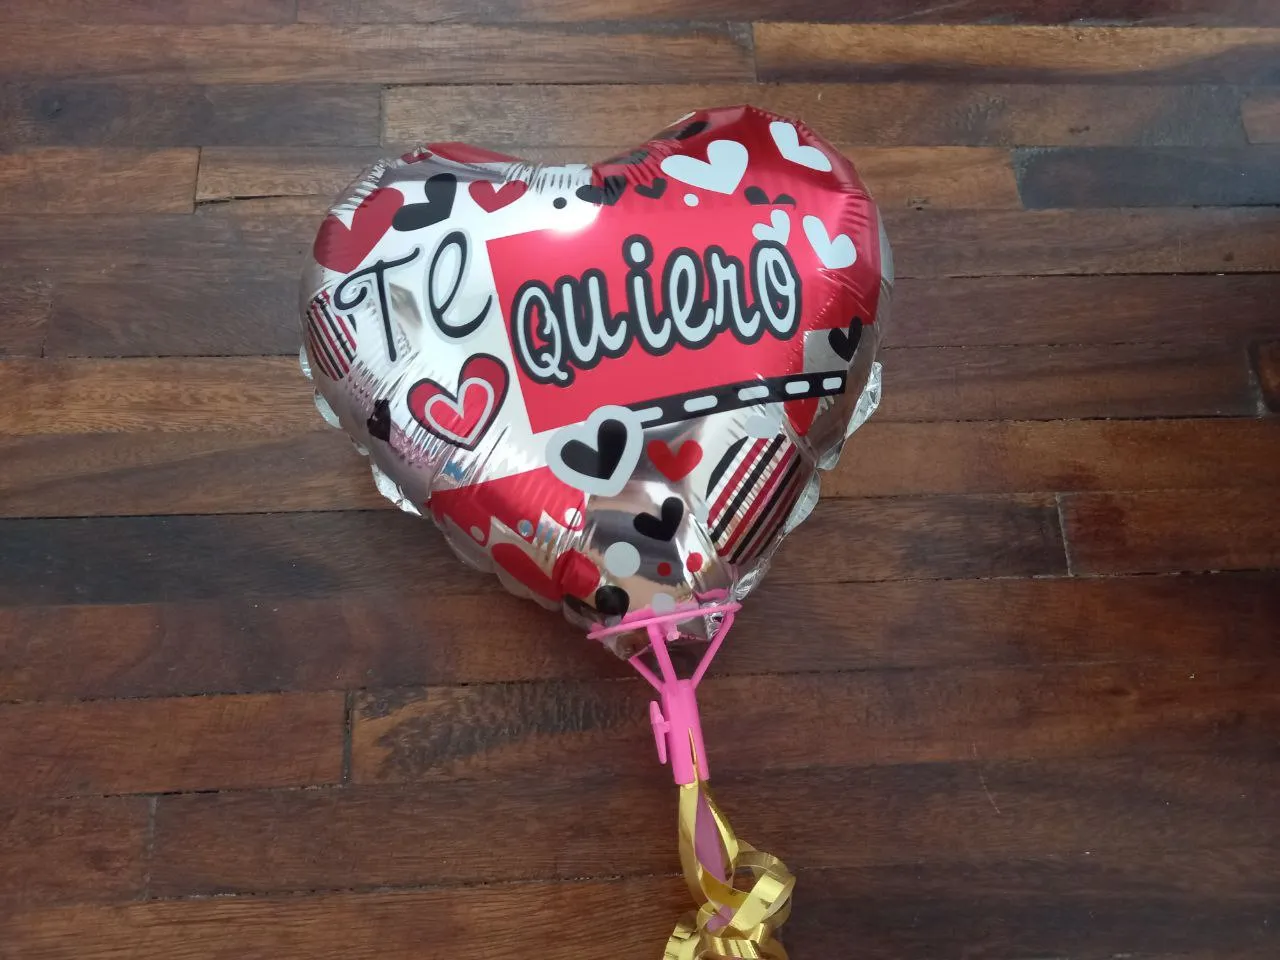
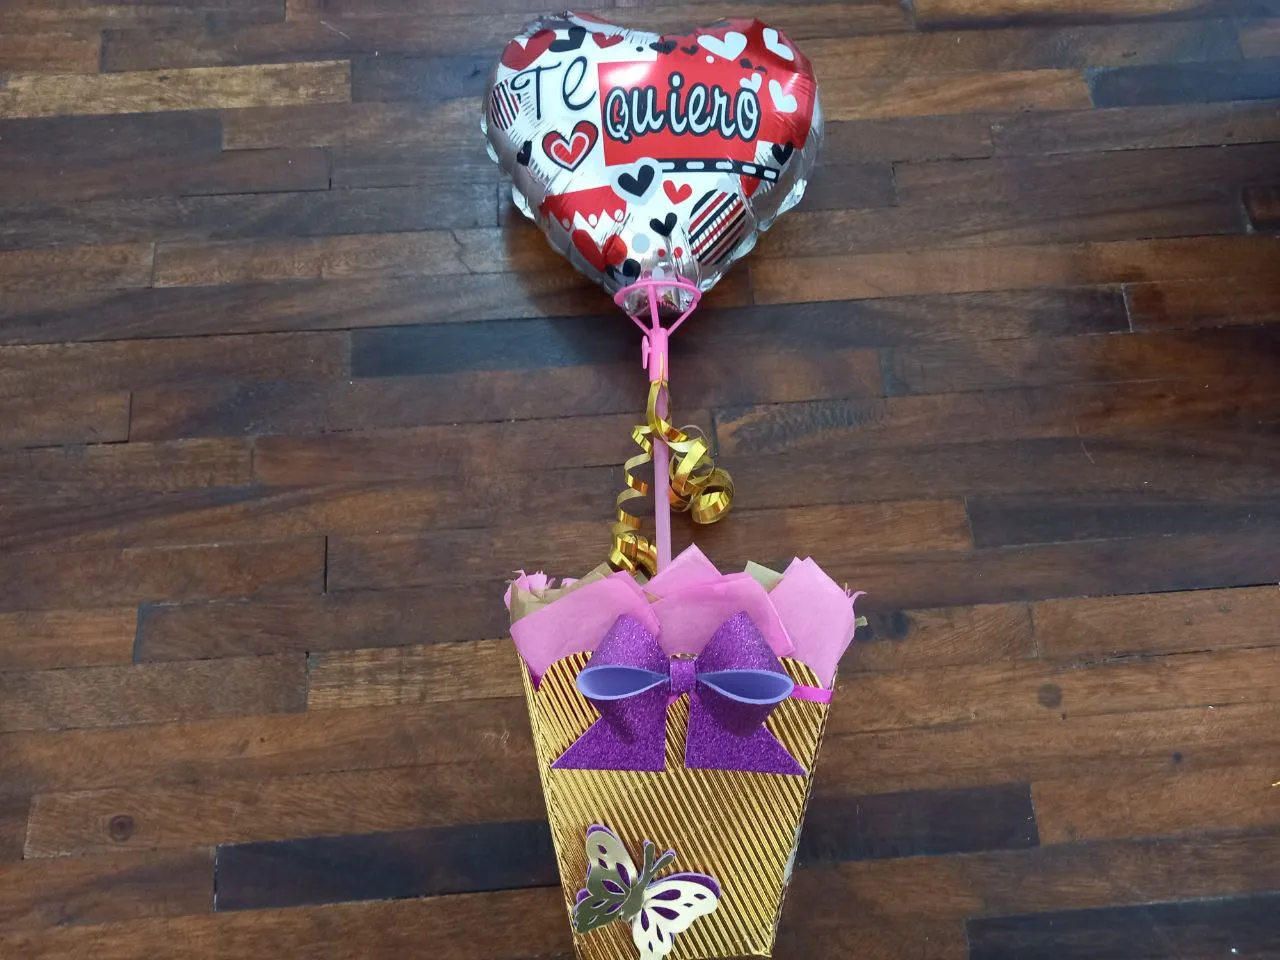
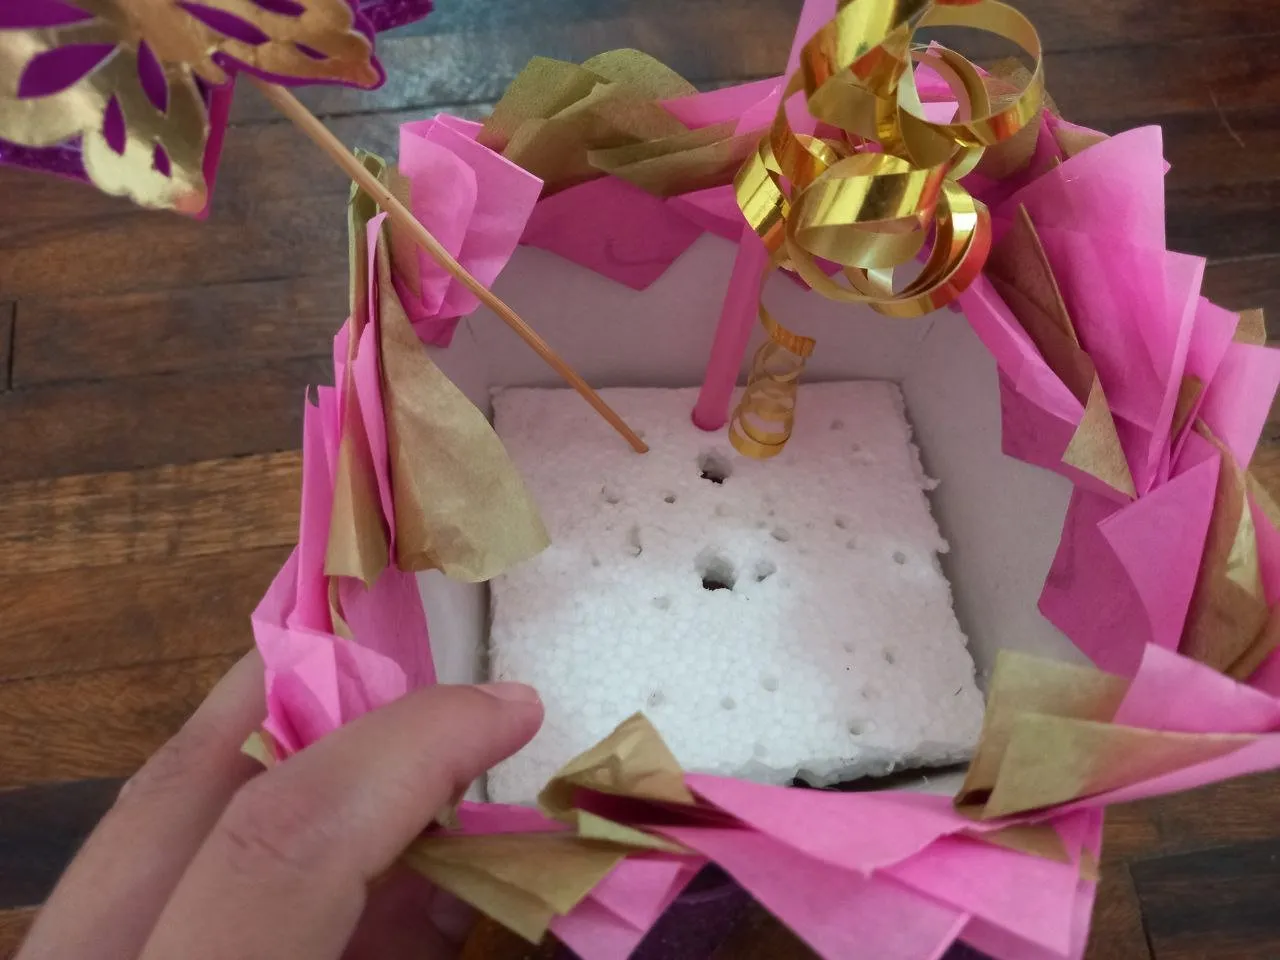
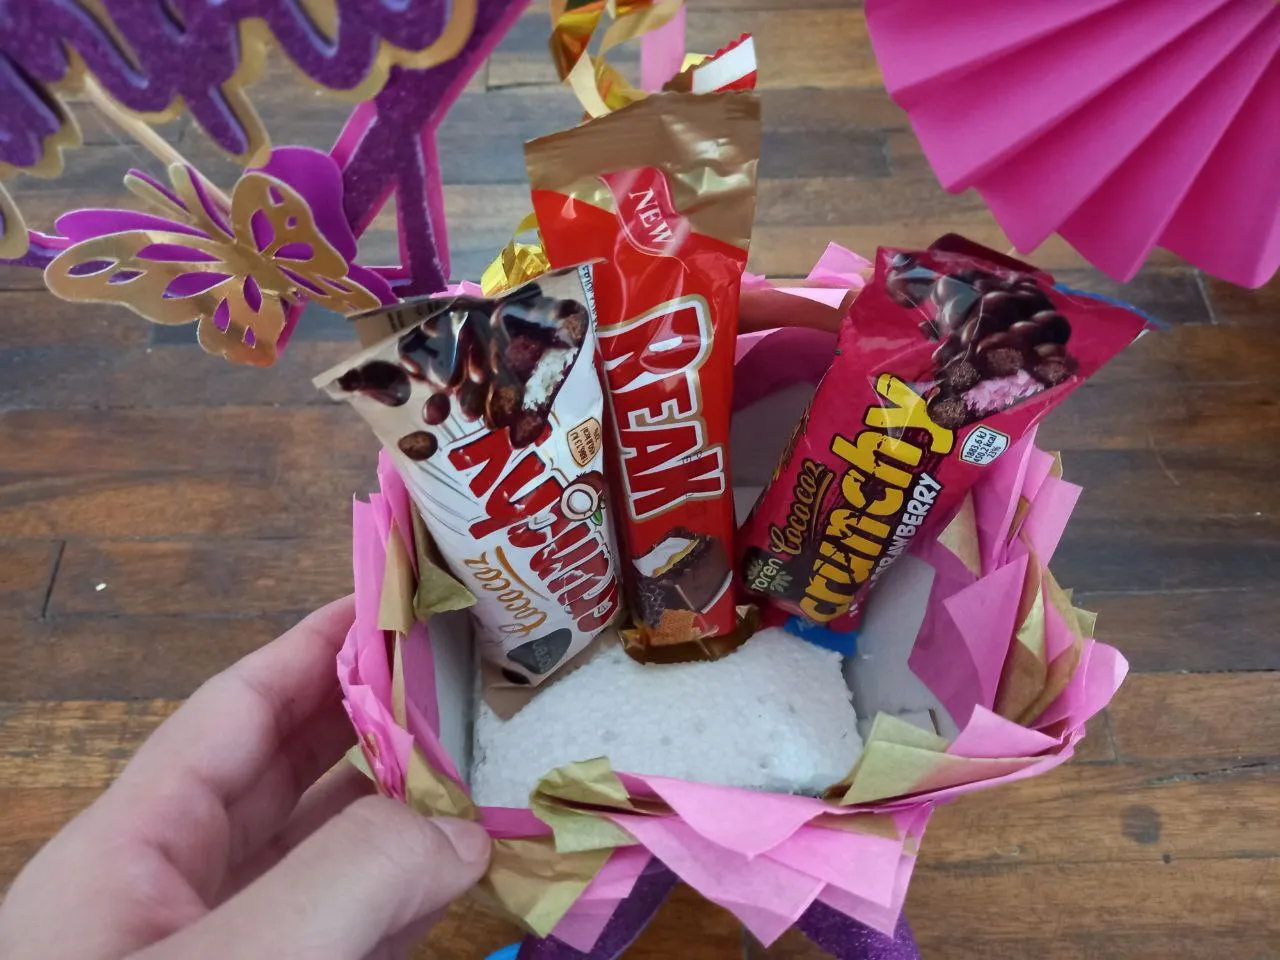
🎈 PASO 1. Como ya tenemos nuestra cajita lista solo debemos decorarla y rellenarla con los dulces, aquí les dejo el tutorial de como hice esta cajita por si les interesa aprender a hacerla, lo primero que le colocaremos a la cajita es un globo metalizado, puede ser de cumpleaños o del motivo que más nos guste, lo inflamos, pasamos su parte inferior por el palito de globo y lo pegamos a su parte trasera con cinta adhesiva transparente, luego de esto insertamos el palito en el anime de la parte inferior de la cajita, justo en el centro.
🎈 STEP 1. Since we already have our box ready, all we have to do is decorate it and fill it with sweets, here is the tutorial about how I made this little box in case you are interested in learning how to make it, the first thing we will put in the little box is a metallic balloon, it can be for a birthday or for whatever reason we like the most, we inflate it, we pass its part bottom by the balloon stick and stick it to its back with transparent adhesive tape, after this we insert the stick in the anime at the bottom of the box, right in the center.


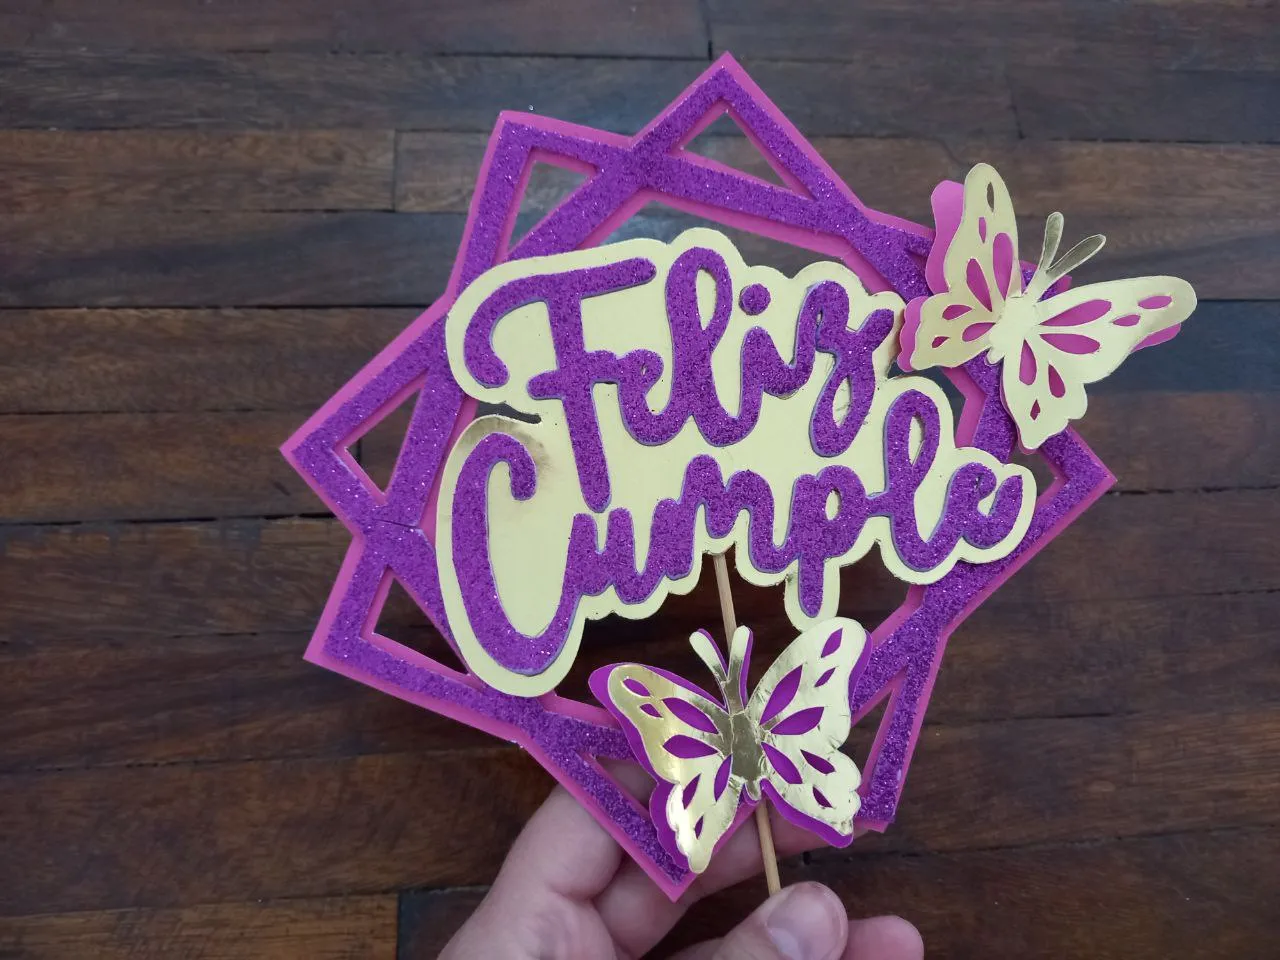
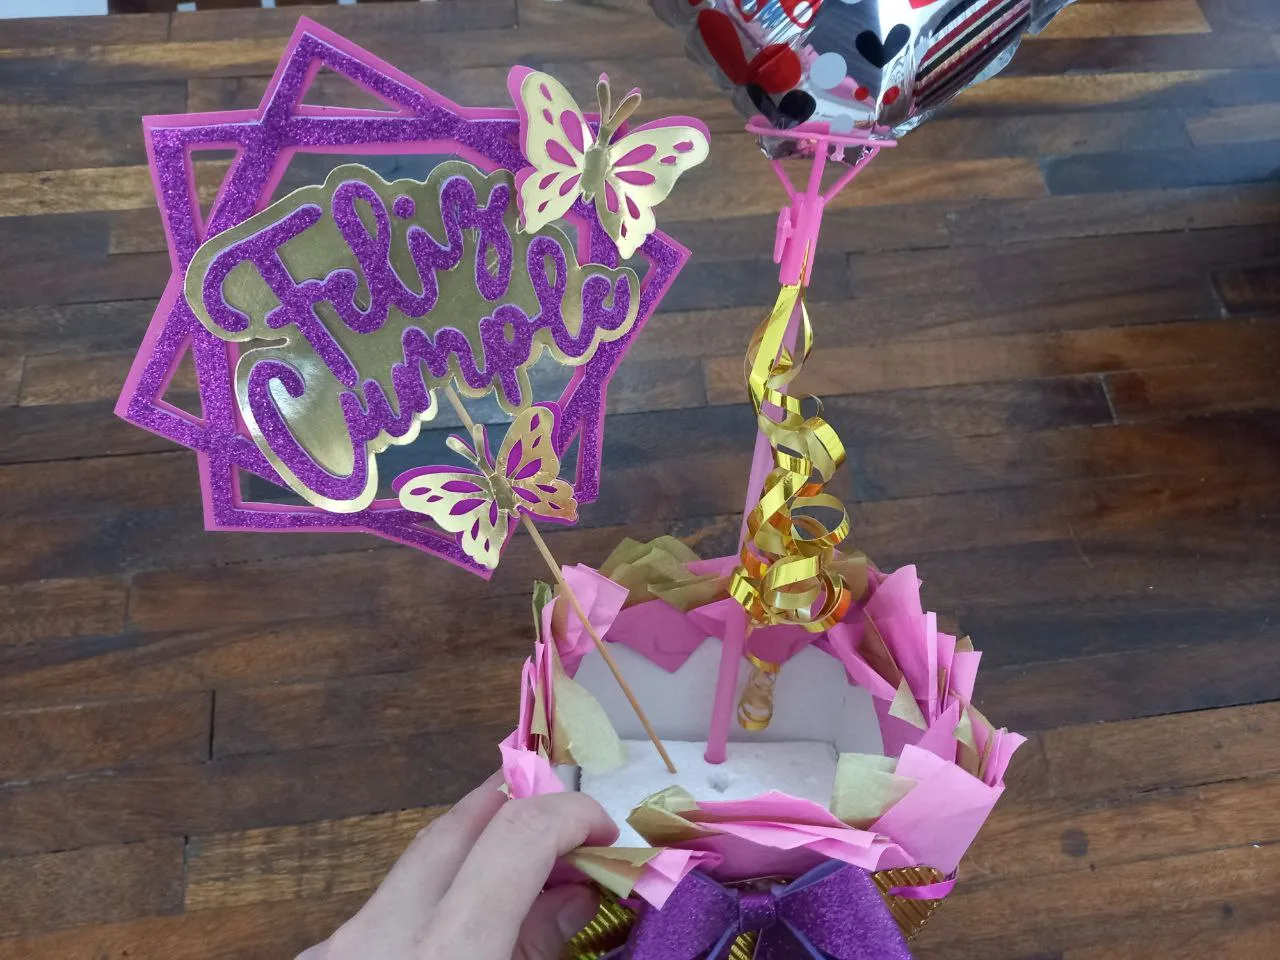
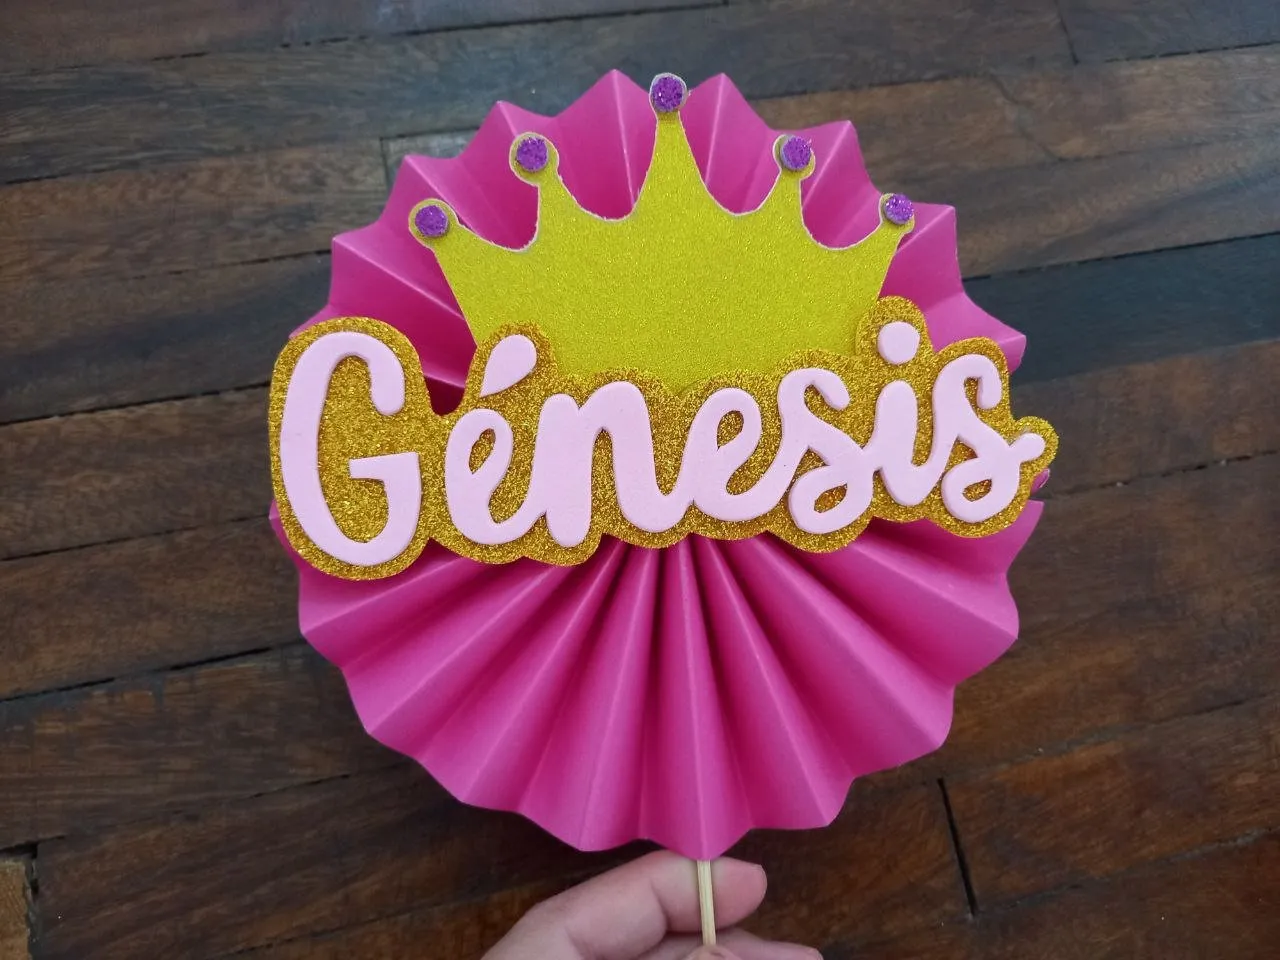
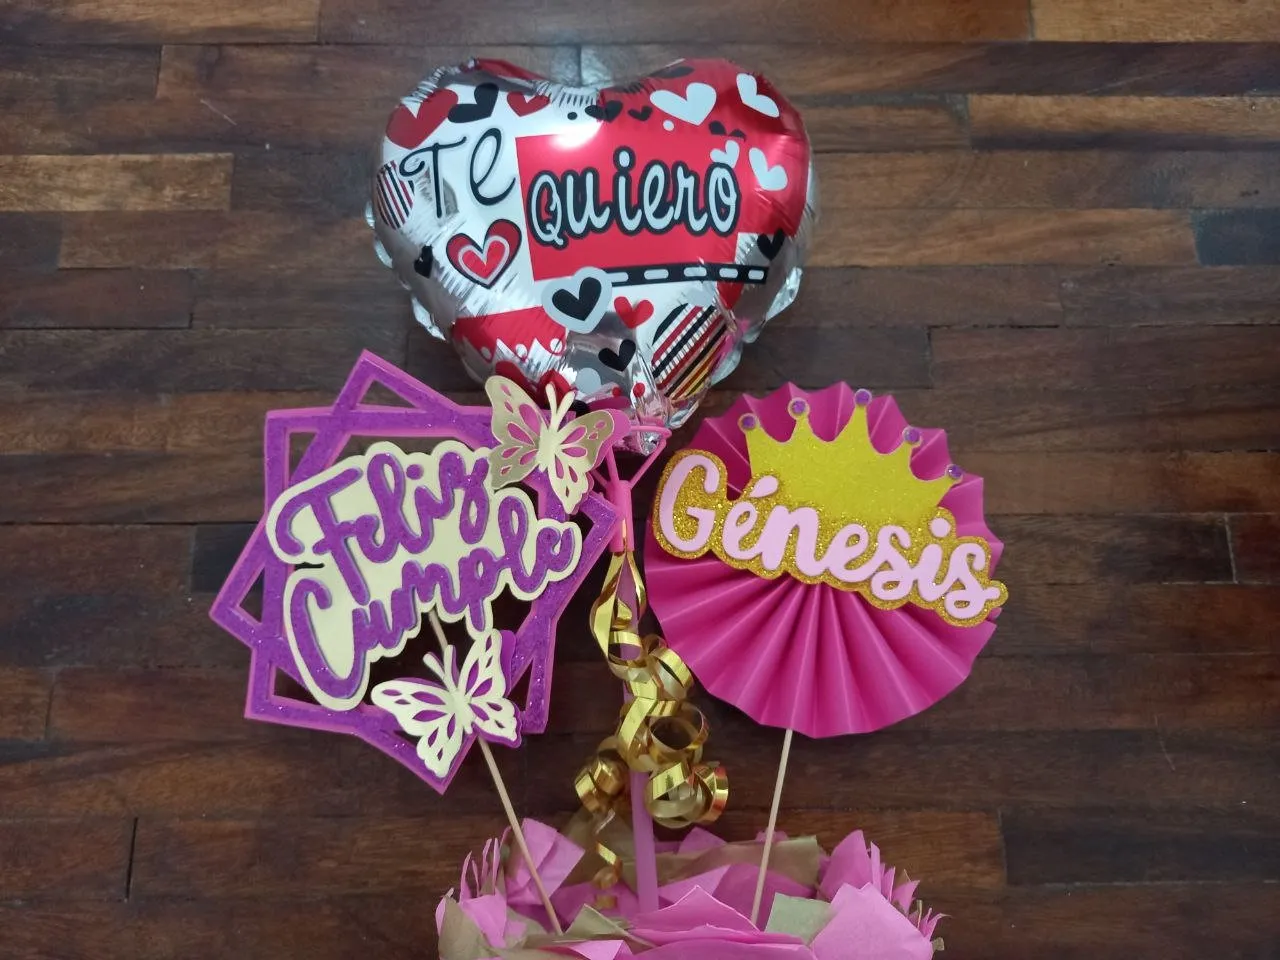
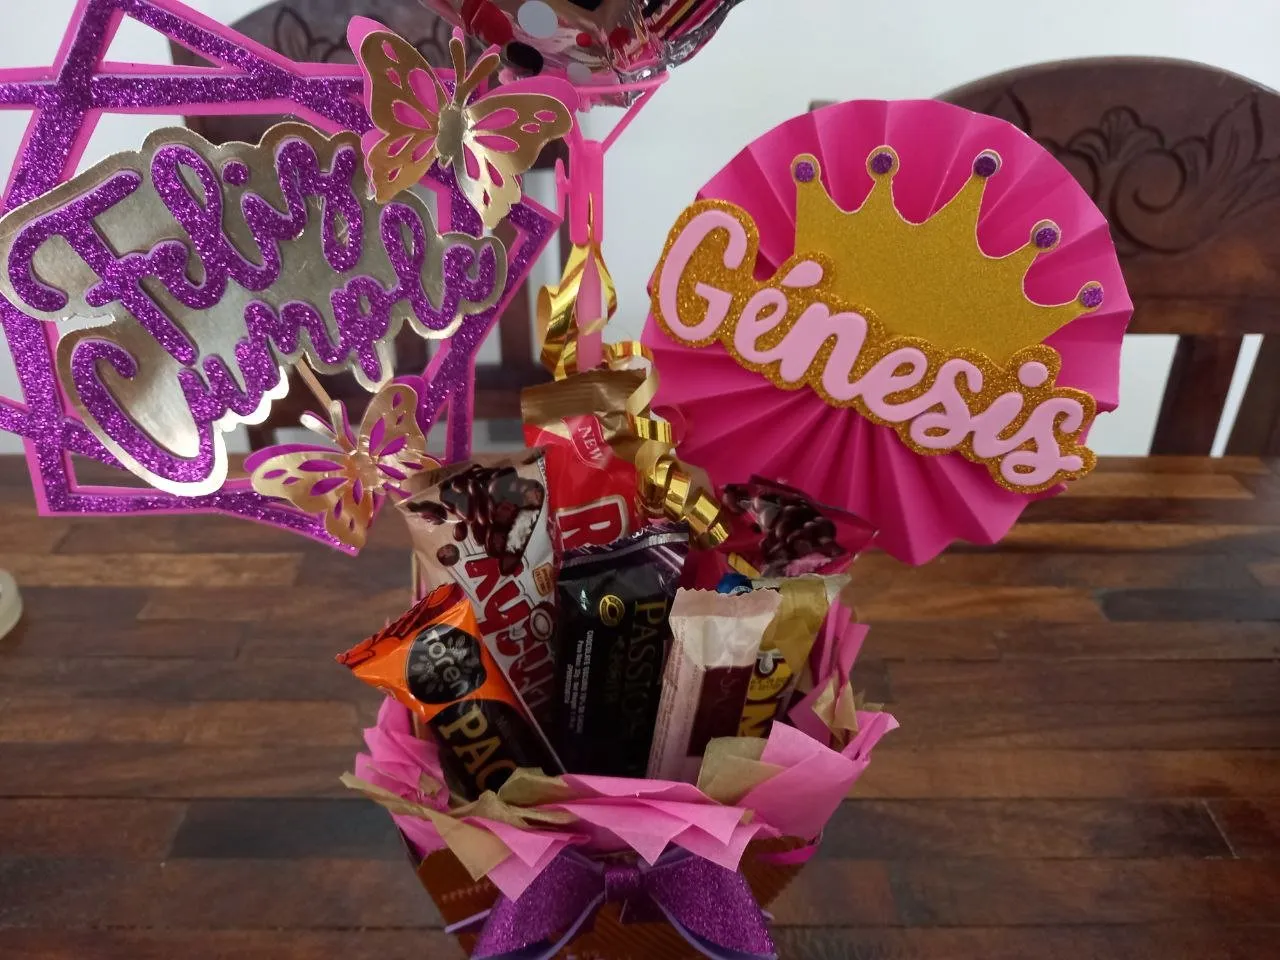
🎈 PASO 2. Ahora colocaremos los toppers a los lados, el de cumpleaños a un lado y el del nombre en el otro, quedando el globo en el centro.
🎈 STEP 2. Now we will place the toppers on the sides, the birthday one on one side and the name one on the other, leaving the balloon in the center.
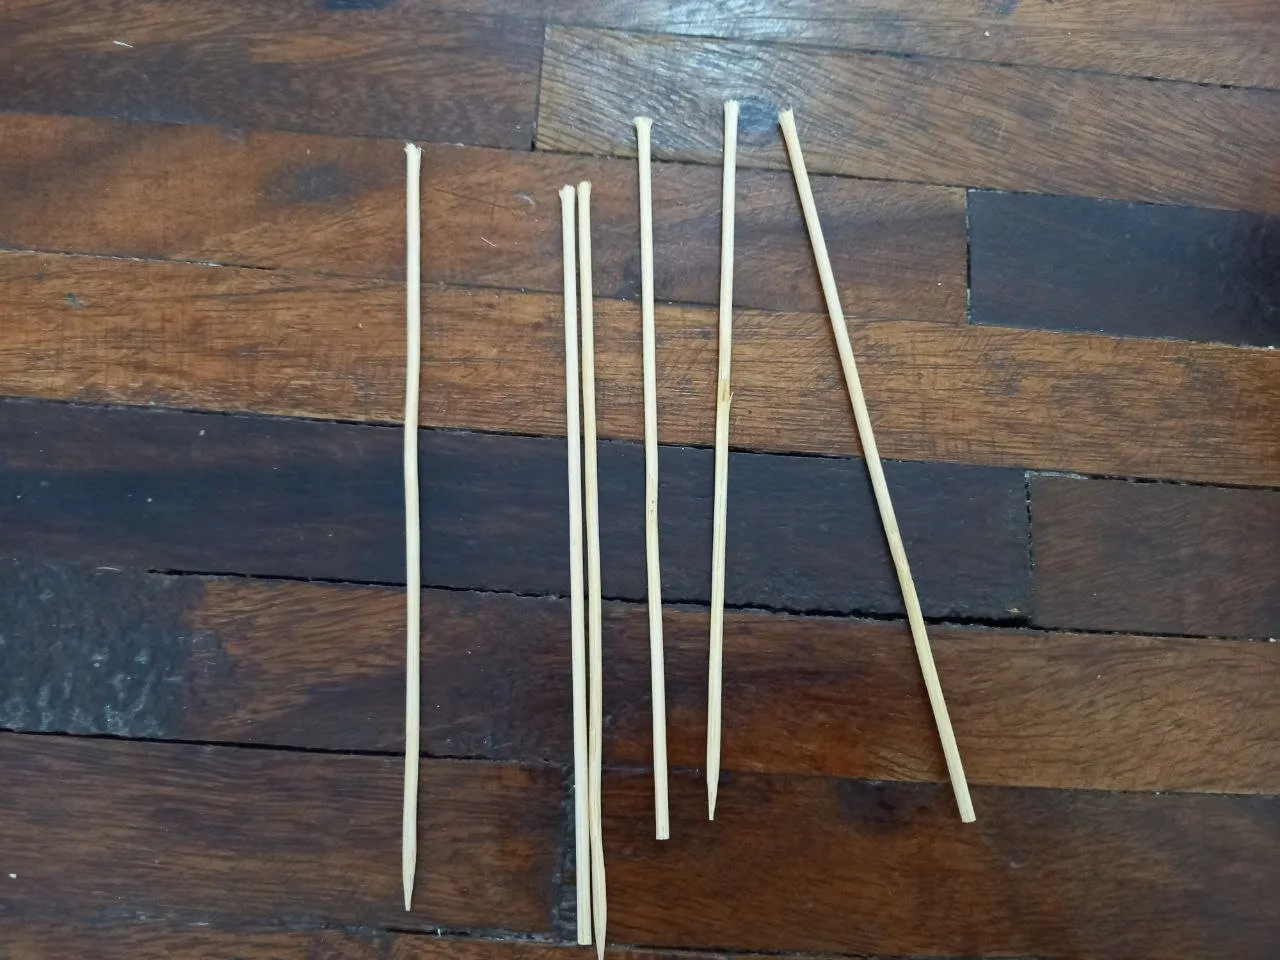
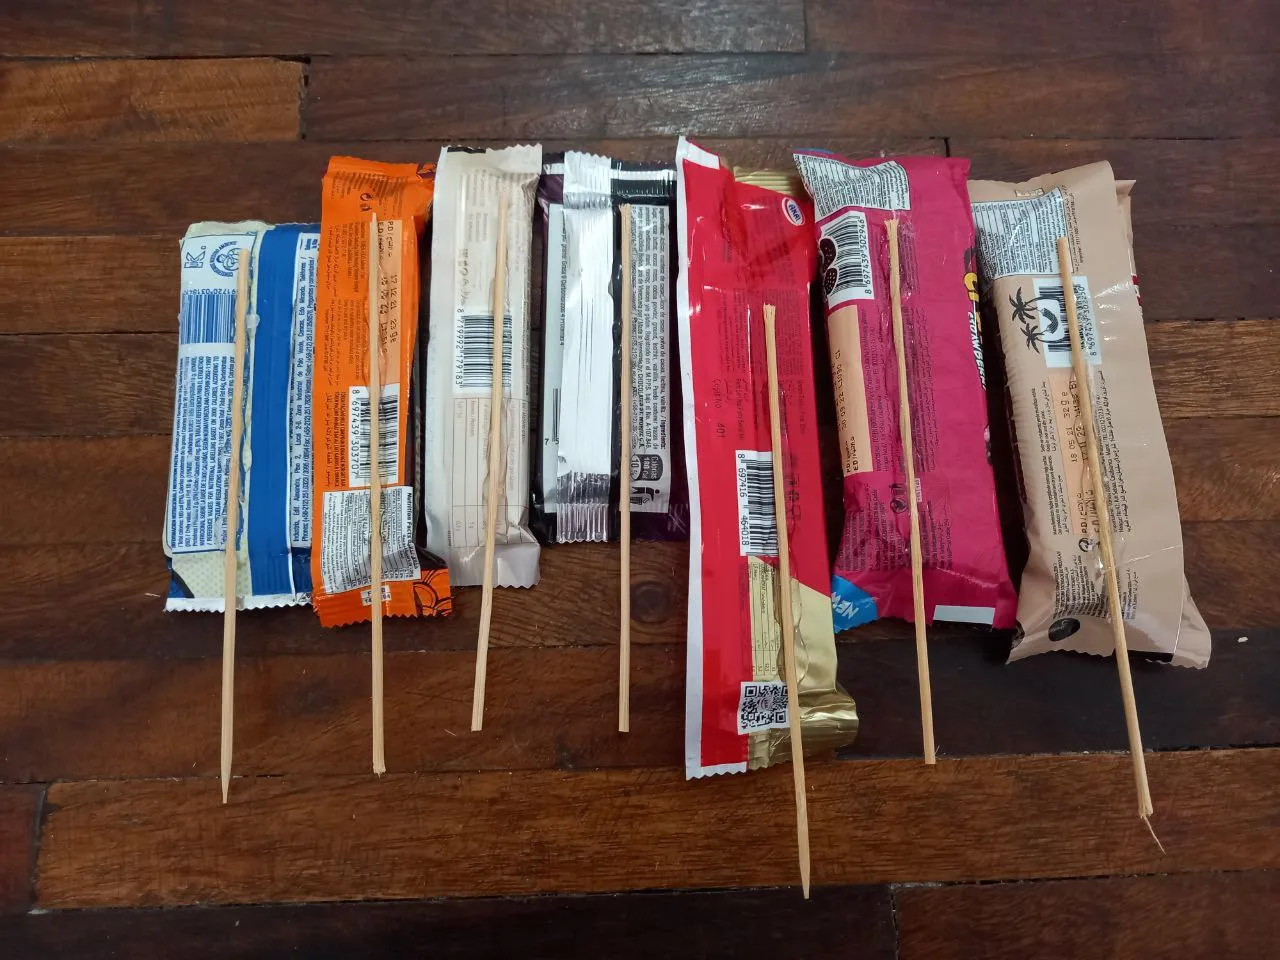
🎈 PASO 3. Cortamos varios palitos de altura a la mitad y los pegaremos en la parte trasera de los dulces con silicón caliente, sobrando apenas una pequeña parte de los palitos hacia afuera.
🎈 STEP 3. We cut several sticks in half and stick them to the back of the sweets with hot silicone, leaving just a small part of the sticks out.
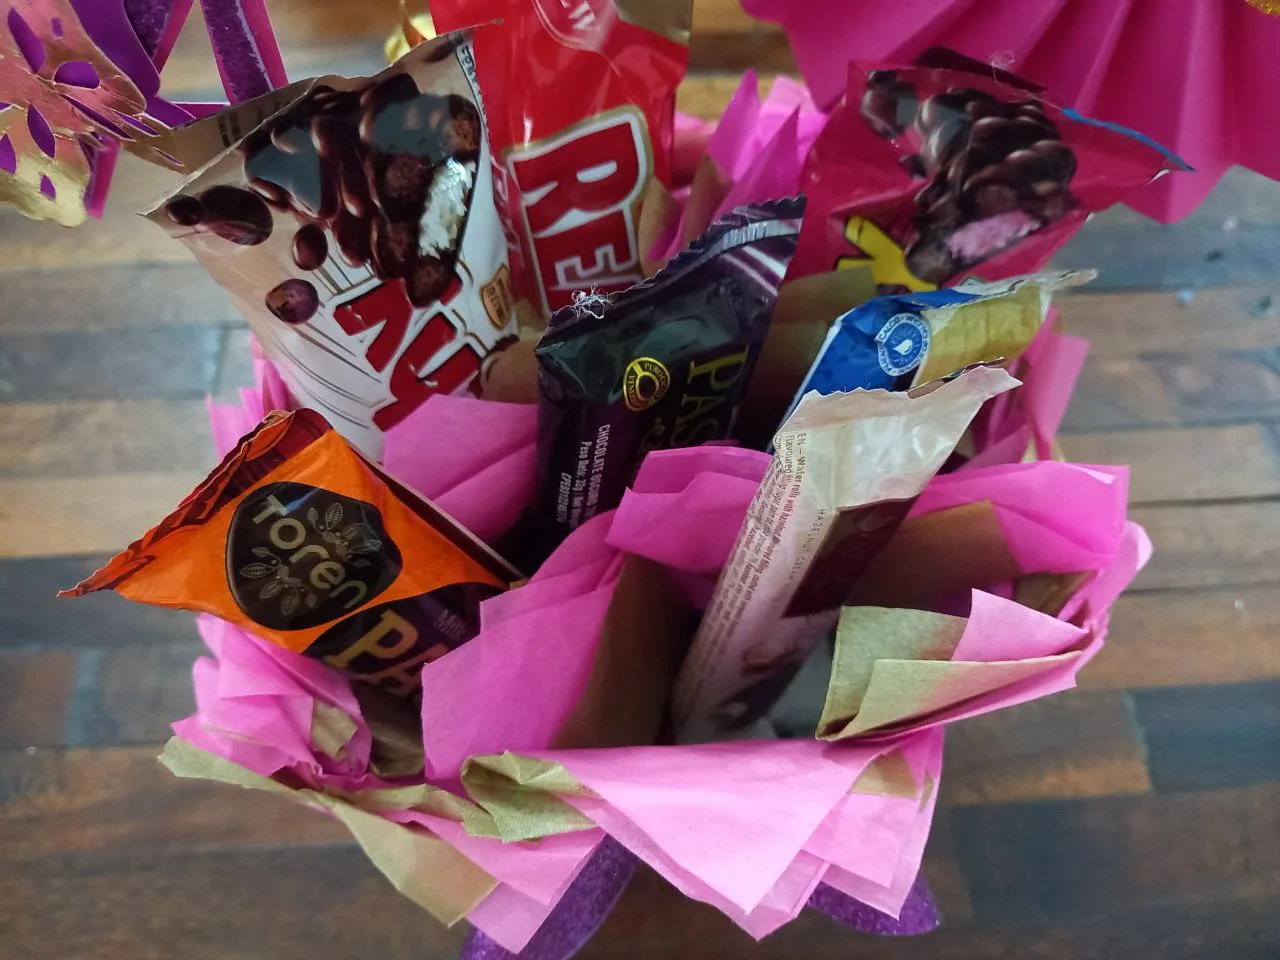
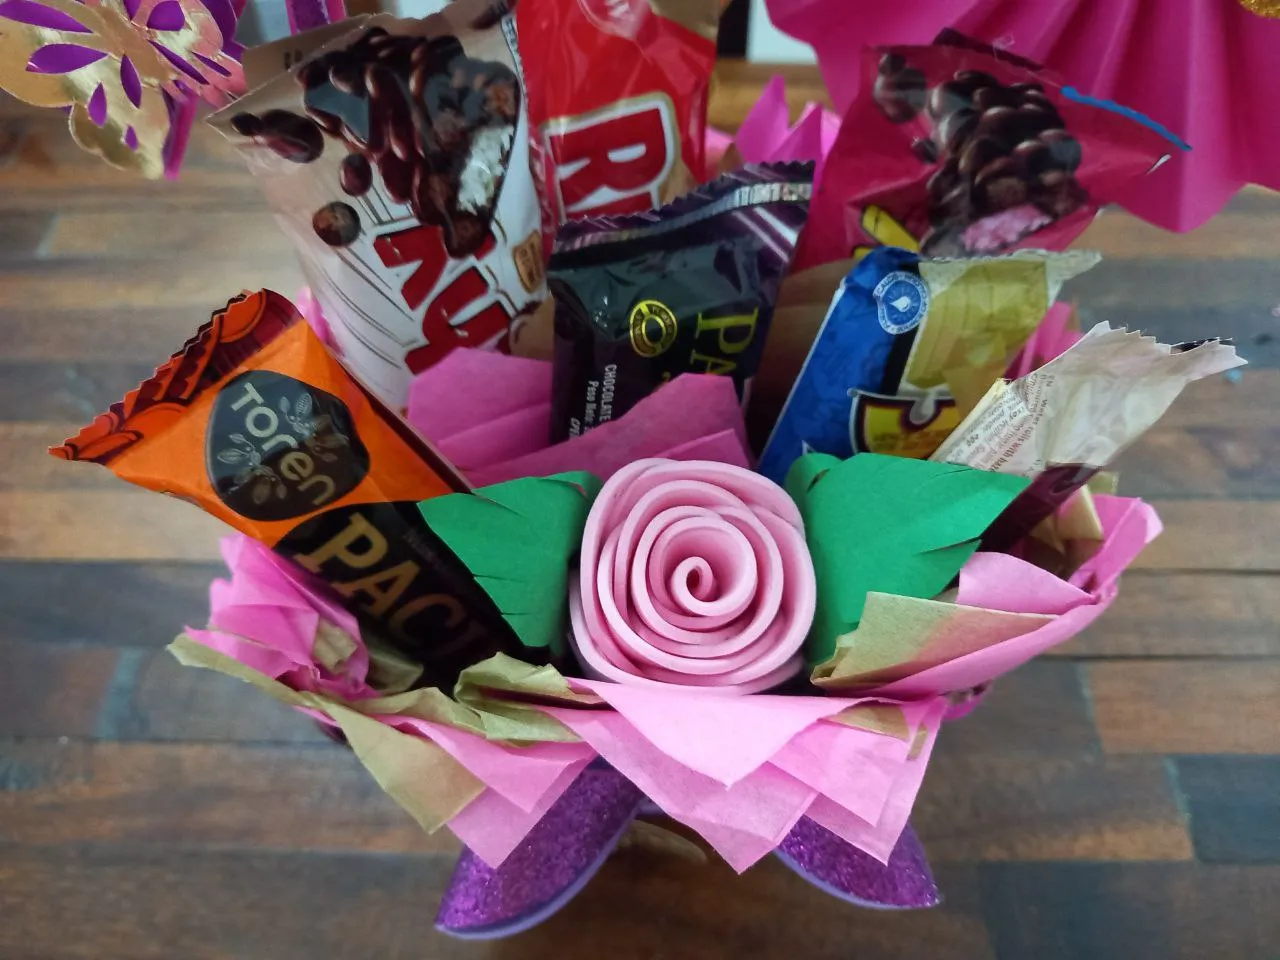
🎈 PASO 4. Insertaremos los dulces en el anime de la cajita, dejando los más grandes en la parte trasera y los más pequeño en la parte delantera.
🎈 STEP 4. We will insert the candies into the anime in the box, leaving the largest ones at the back and the smallest ones at the front.
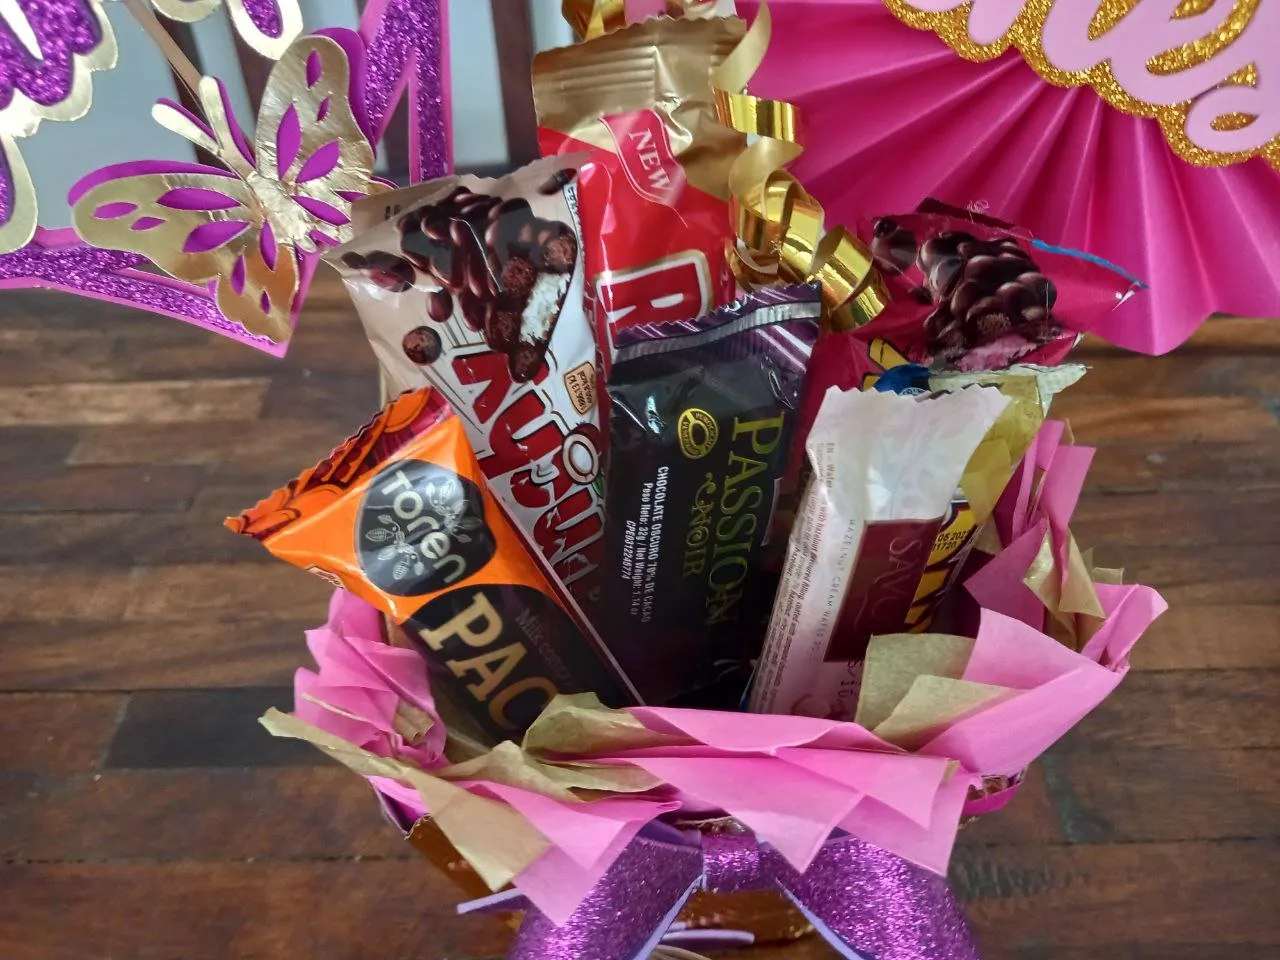
🎈 PASO 5. Hacemos algunos conitos de papel de seda rosado y dorado y los vamos a colocar entre los dulces para rellenar espacios vacios.
🎈 STEP 5. We make some pink and gold tissue paper cones and place them between the candies to fill in any empty spaces.

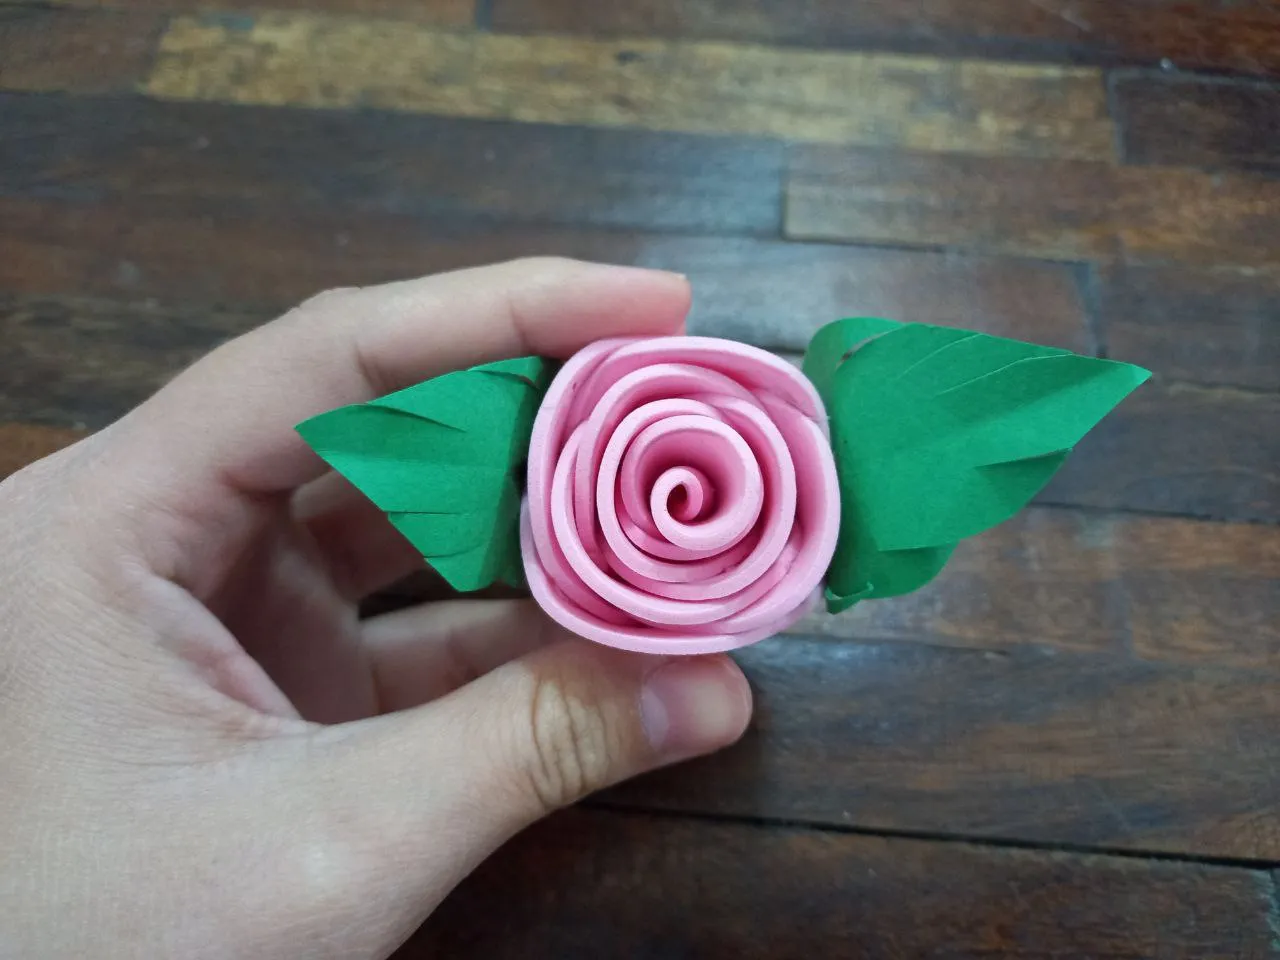
🎈 PASO 6. Por último, agregué como detalle final una lida rosa de foami para decorar, la cual coloqué junto a los dulces.
🎈 STEP 6. Finally, as a final detail, I added a pink foamy lida to decorate, which I placed next to the sweets.
¡Y listo! De esta manera tan sencilla fue como hice el arreglo de dulces y globos para mi amiga Génesis por su cumpleaños, muy fácil, lindo, colorido y sobre todo lleno de dulces, un regalo especial para una persona especial, espero que les haya gustado esta idea y les pueda servir de guía para elaborar un lindo detalle en casa, nos vemos en un siguiente post con una nueva idea creativa.
And ready! In this very simple way I made the arrangement of sweets and balloons for my friend Genesis for her birthday, very easy, cute, colorful and above all full of sweets, a special gift for a special person, I hope you liked this idea and it can serve as a guide to make a nice detail at home, see you in a next post with a new creative idea.


Todas las fotografías son de mi propiedad.
Fotografías capturadas con mi Samsung Galaxy A12
Separador de texto elaborado en Canva.
Nos vemos en mi próxima publicación.
¡Tengan un feliz día!
All photographs are my property.
Photos captured with my Samsung Galaxy A12
Text separator made in Canva.
See you in my next post.
¡Have a happy day!