ENGLISH CONTENT
Hello to all members of this community and lovers of sewing! I recently attended an event where I wore an outfit that I showed you how I made here . As an addition to the outfit, I thought of making a bag that would allow me to carry my personal items with me without affecting the aesthetics of the character.
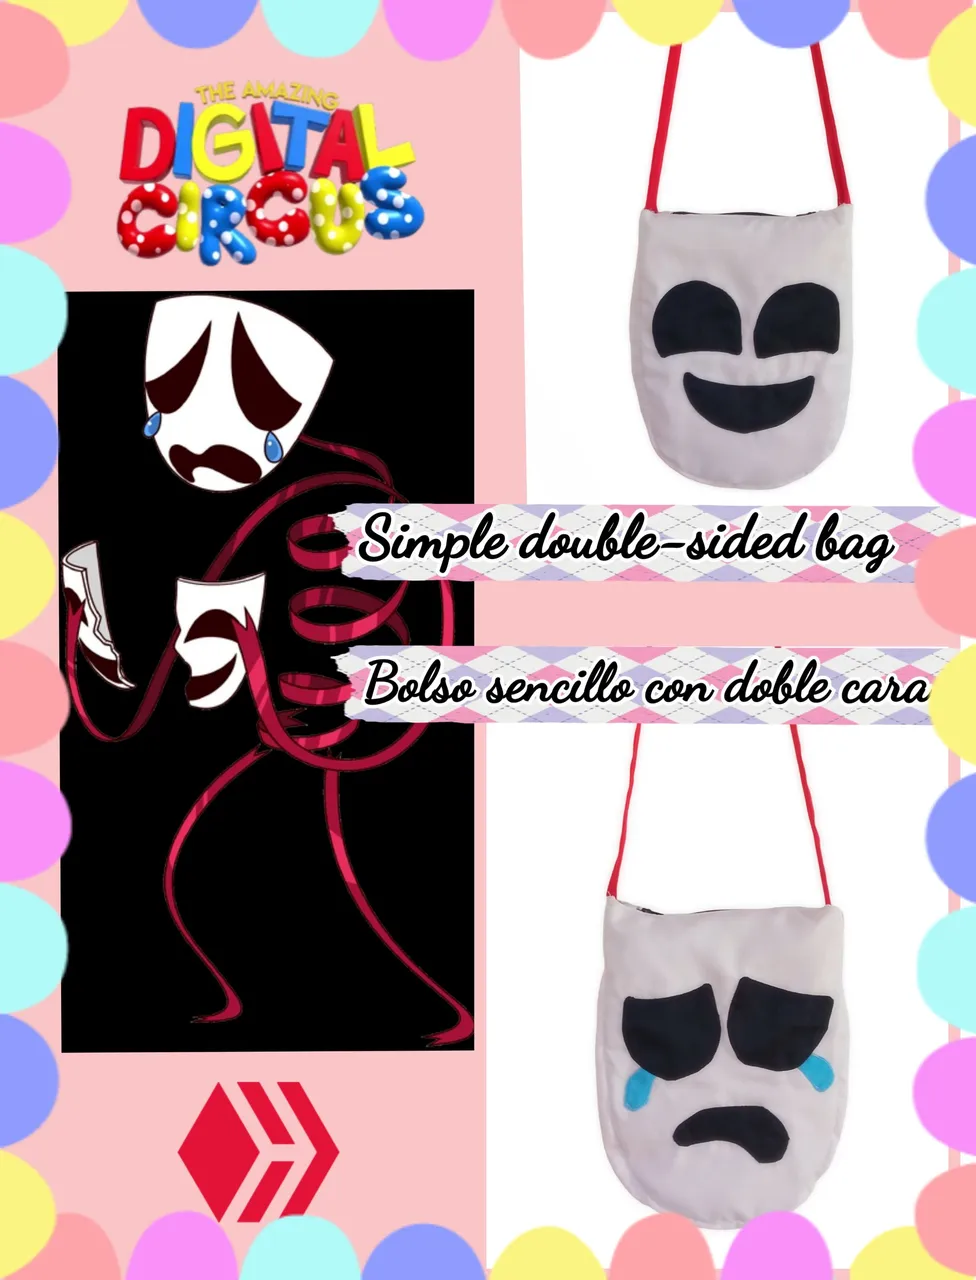
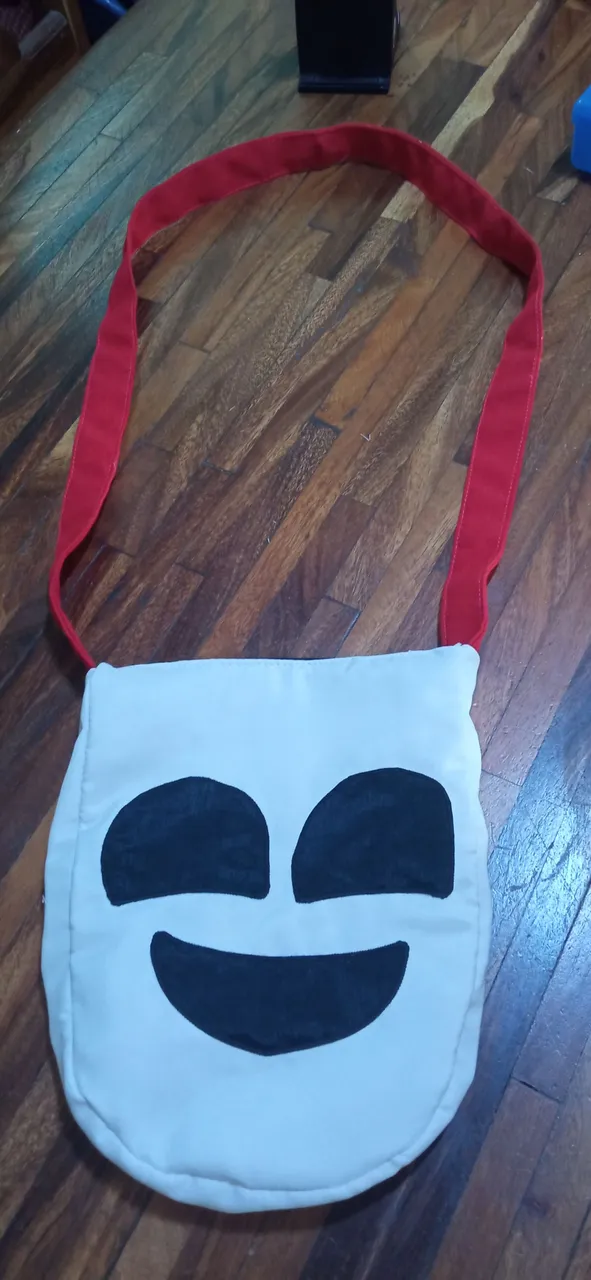
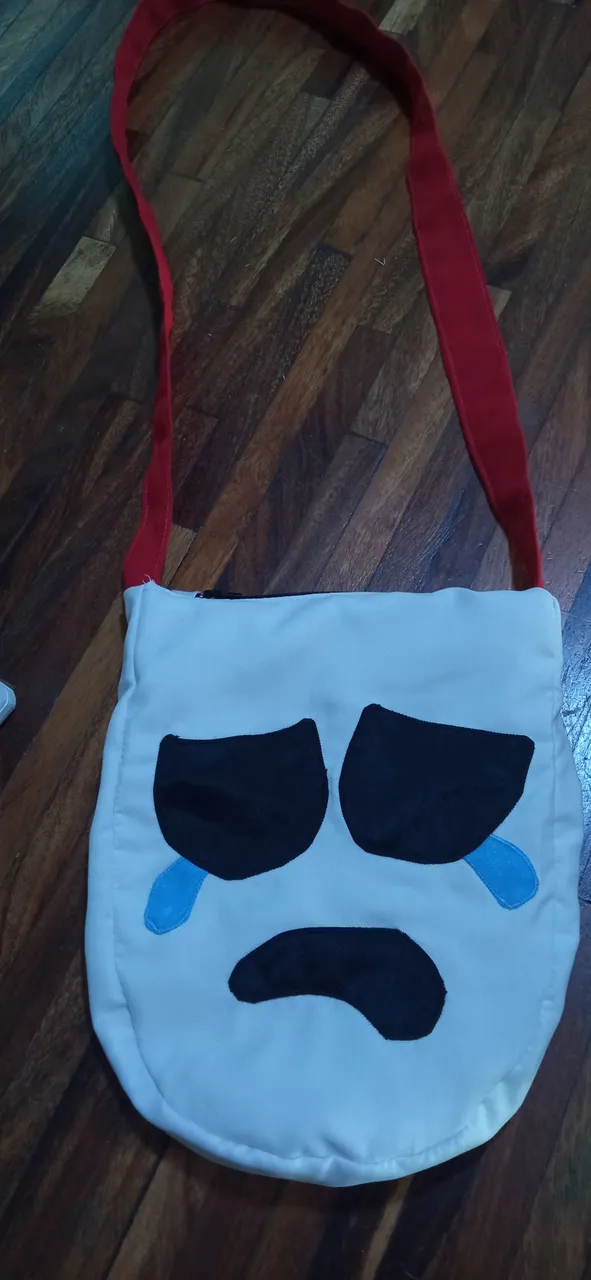
I love making bags based on a character, so this time, I thought about which of the other characters from the Incredible Digital Circus would be the most suitable for my project. Finally, I chose Gangle, which is a character that looks like a kind of mask and whose body is made of red ribbons.
 |  |
|---|---|
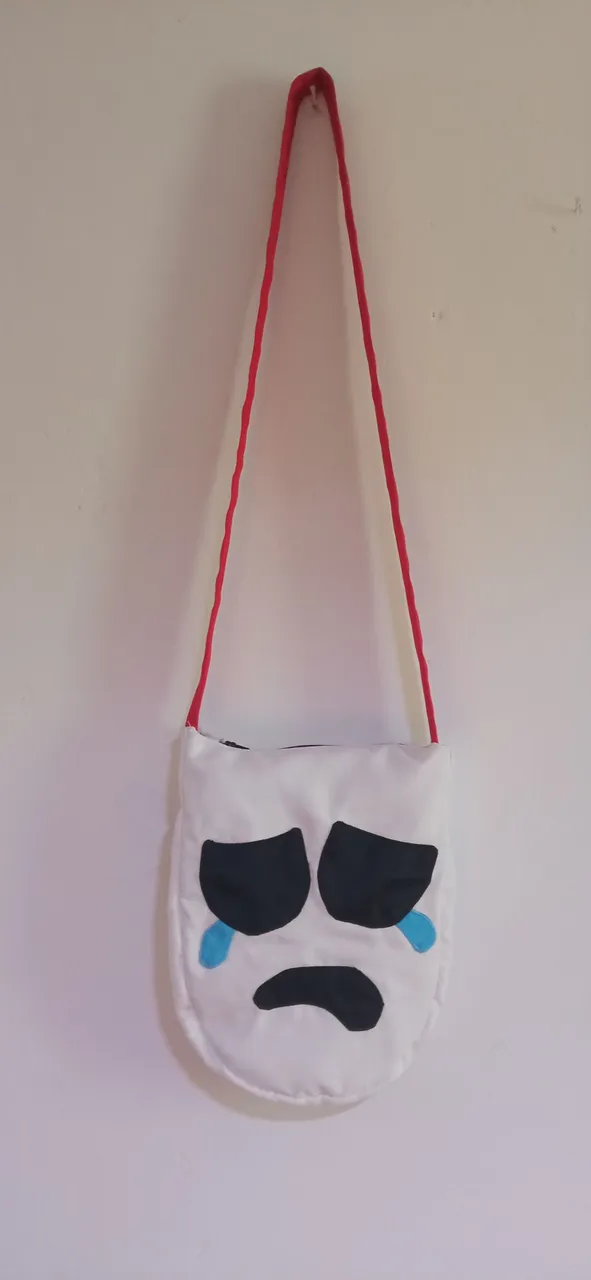
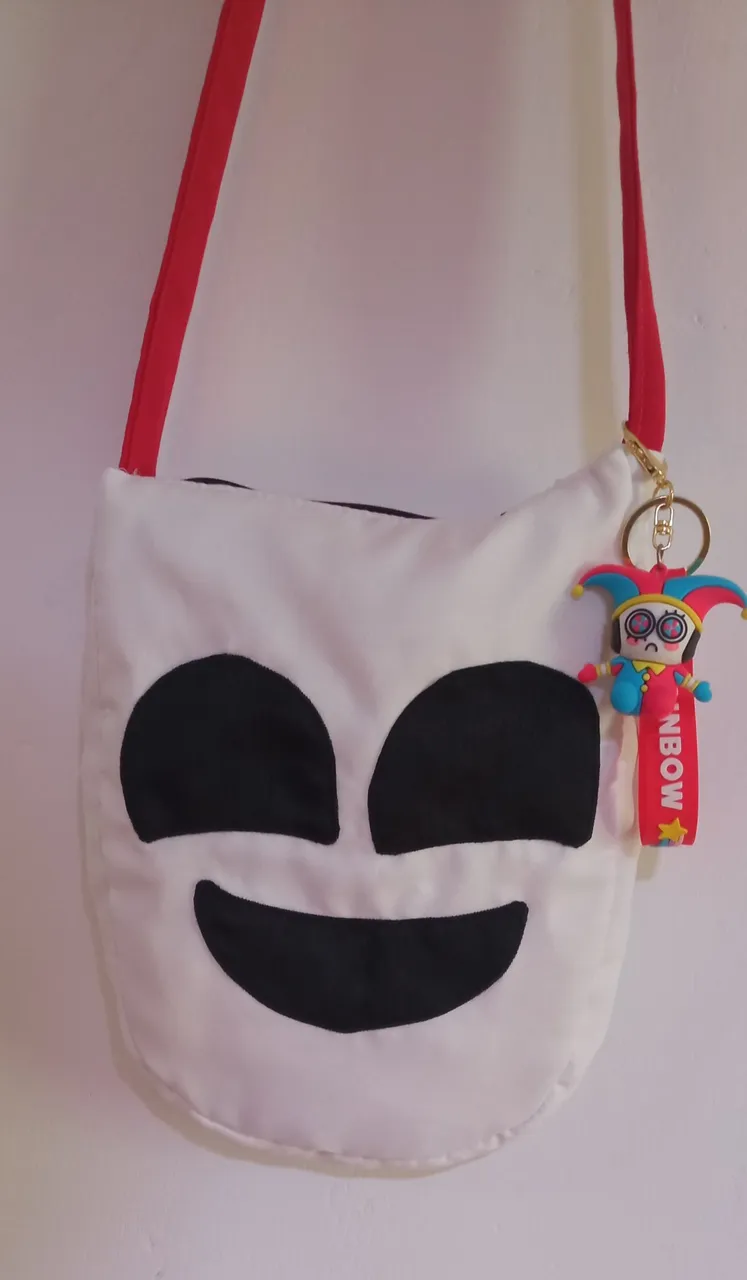
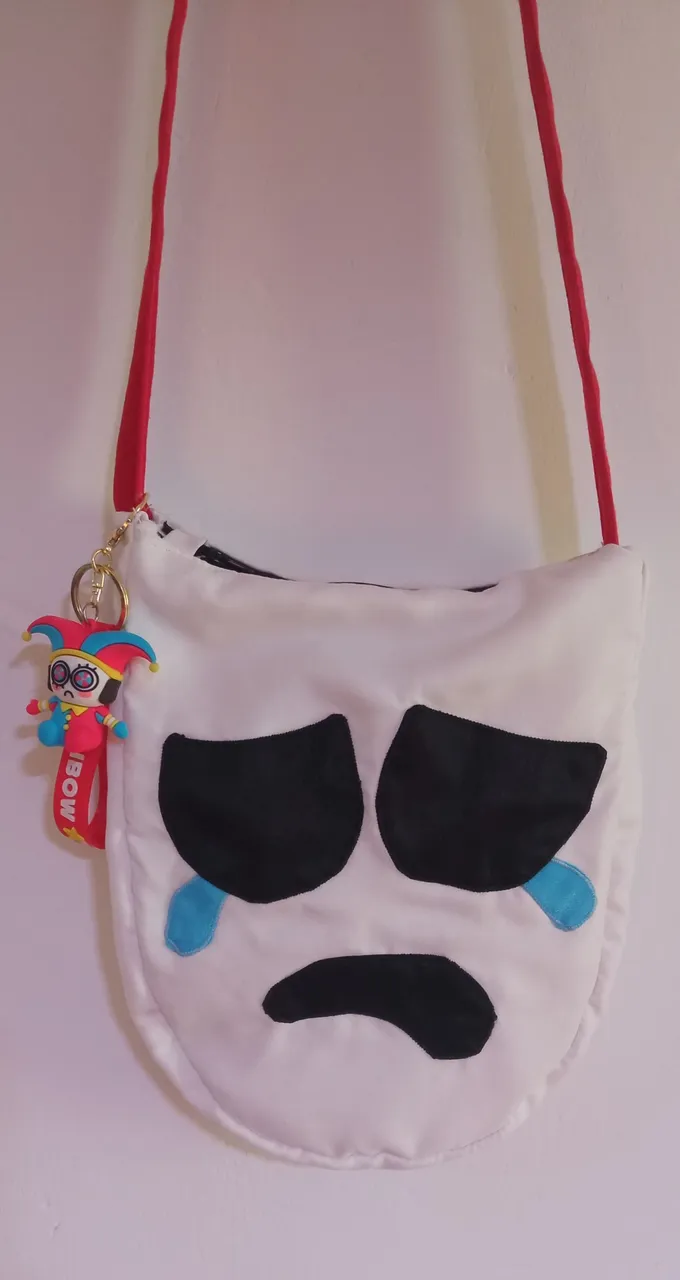
Since the character often alternates between masks to show his emotions (mostly happiness and sadness), I thought of having the bag have a happy face on the front and a sad face on the back of the bag.
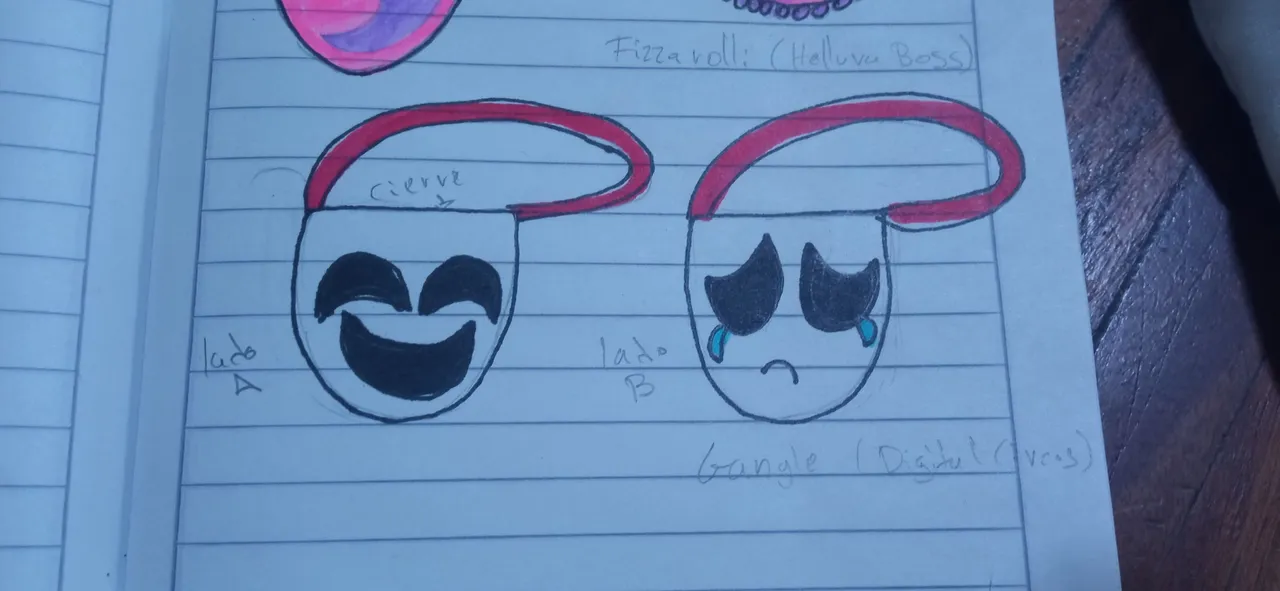
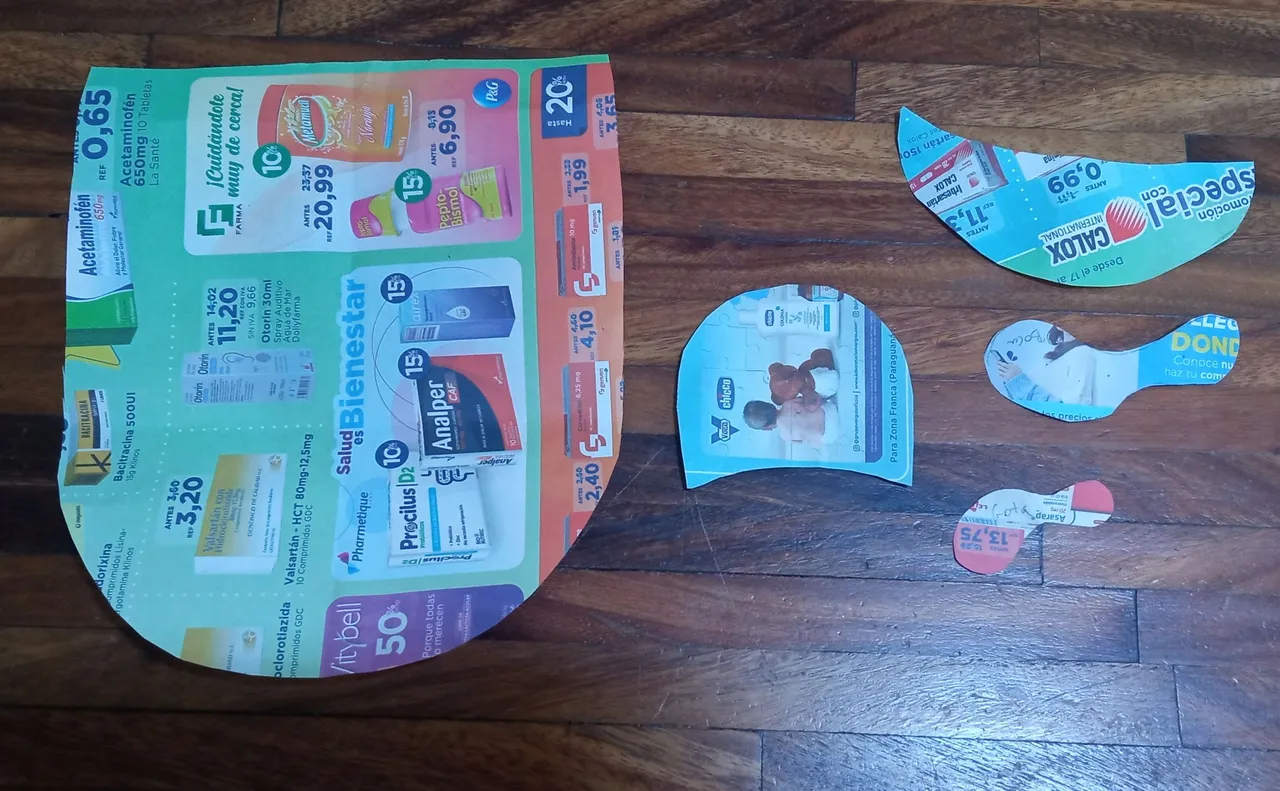
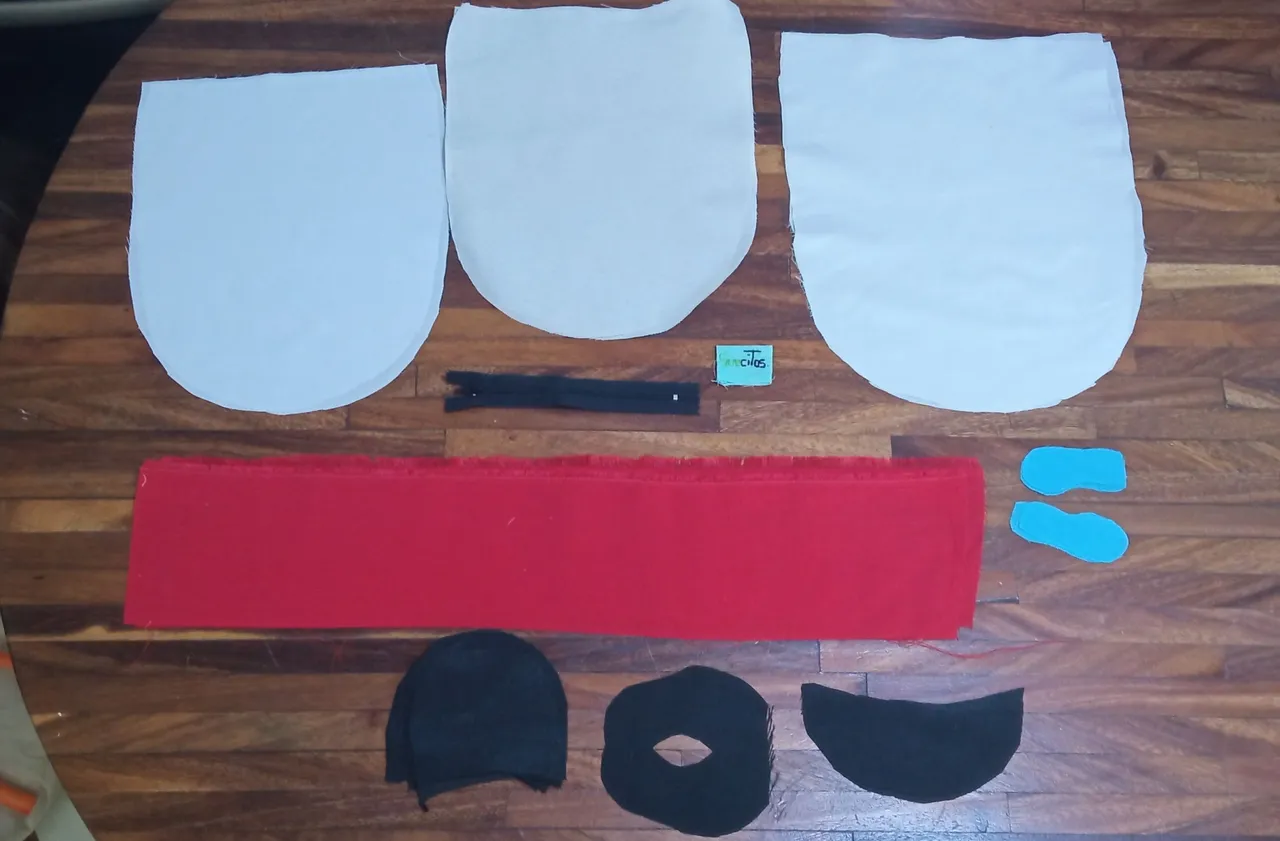
To make the pattern, I used a booklet that is usually available for free at pharmacies (any piece of paper can be used in some way 😉). I took out the pieces that would help me to make the design I had drawn in my notebook: the bag cover, which was suitable for the clasp I had available; as well as the pieces for the face, such as the eyes, mouth and tears.
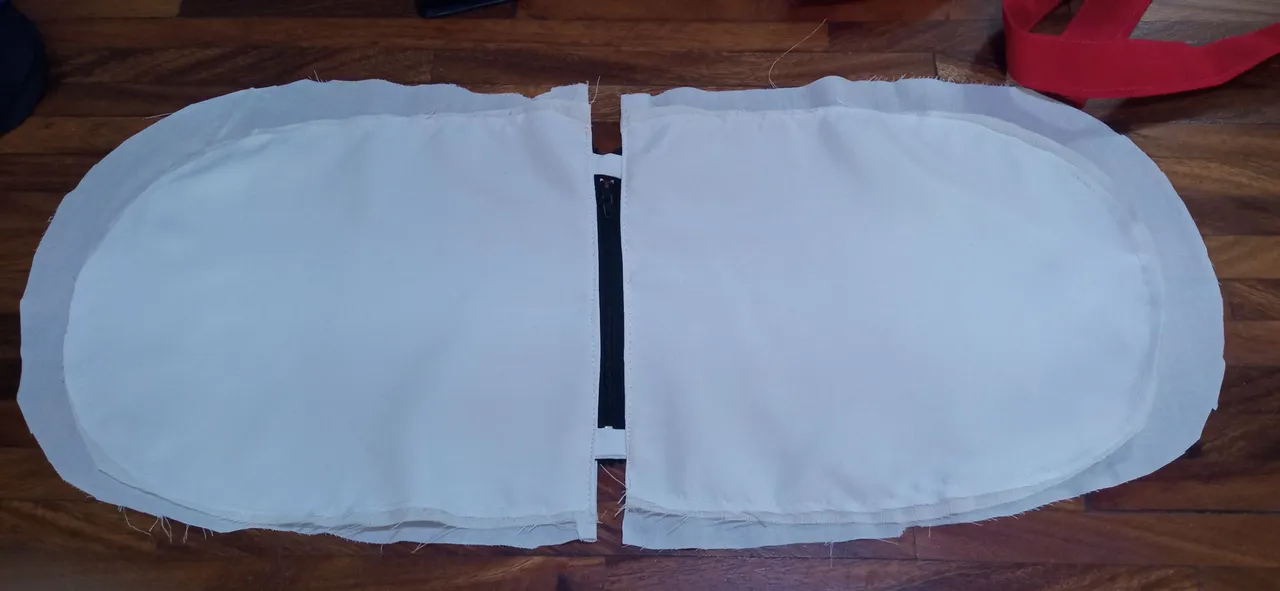
Moving on to the fabric, I cut out the pieces, adding the appropriate seam allowance. In addition, I cut out some extra pieces to make the lining of the bag and the handles. The zipper I had was black and about 15 cm long, and I also added the label that I usually sew on the pieces I make from scratch to my materials.
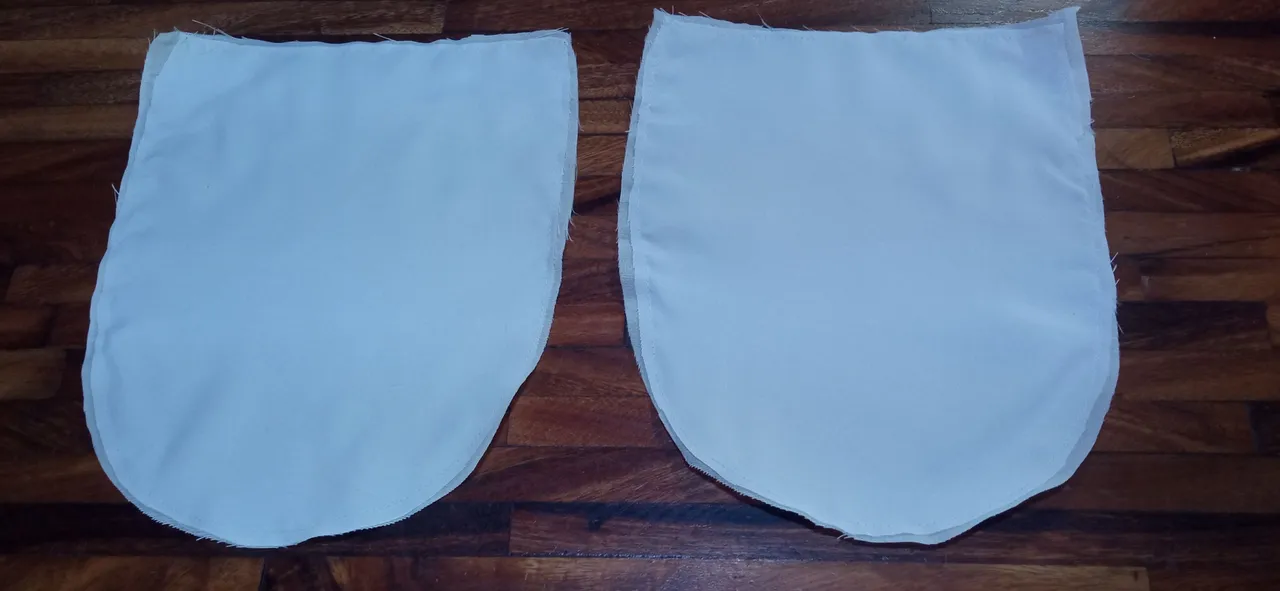
I started by attaching the lining pieces to the main pieces of the bag. I used a fabric called "canvas" to make the lining, to give it a bit of strength, since the fabric I used for the bag was quite thin, but it was the only one I had available for the project 😅 With a simple straight seam, the bag flaps were ready.
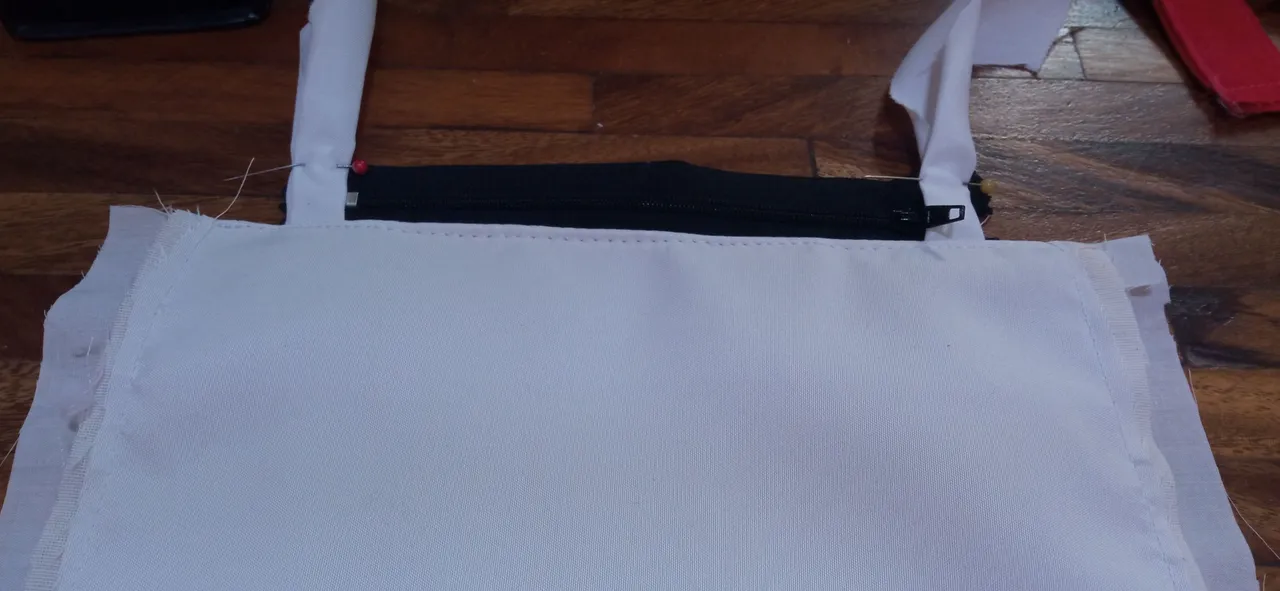
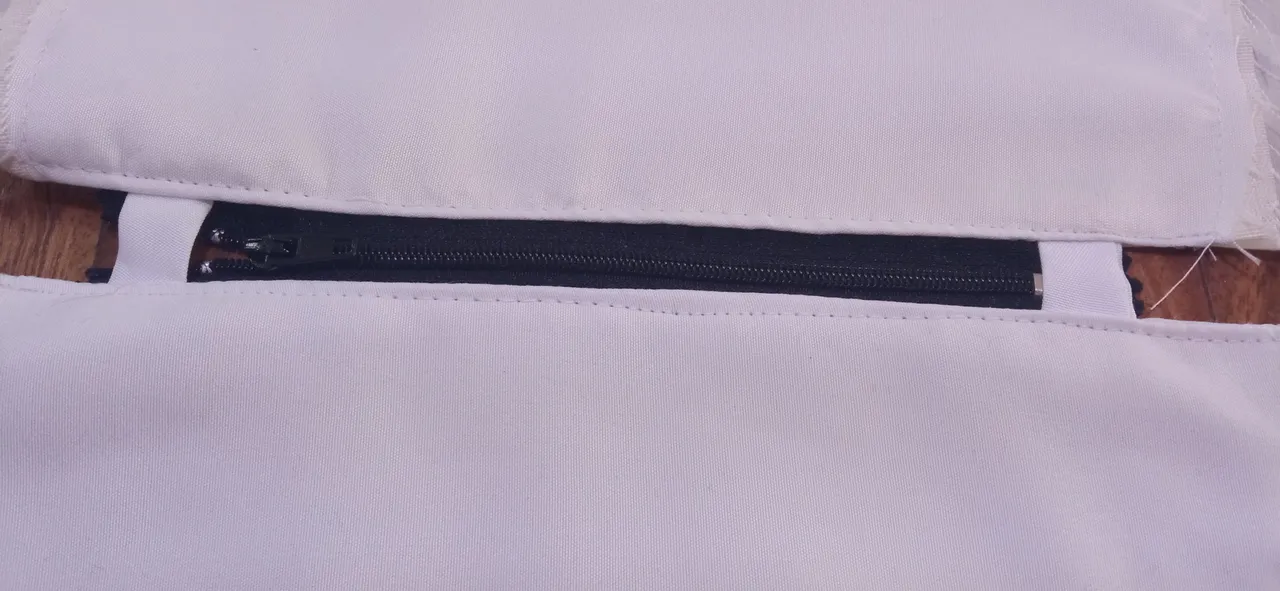
The next thing I did was sew the closure, doing it on both upper edges of the bag flaps. For a better finish, I placed a small piece of fabric on each end of the closure, hiding the metal pieces a little and giving the bag a little width at the top.
 |  |  |
|---|
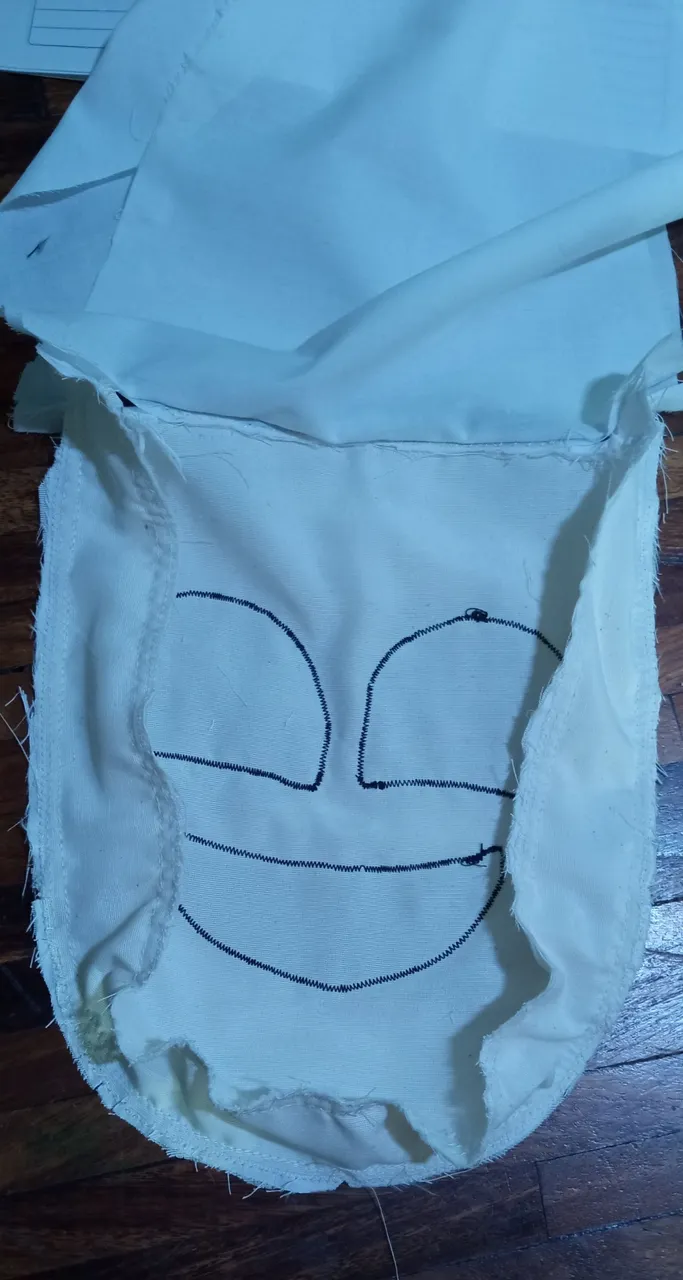
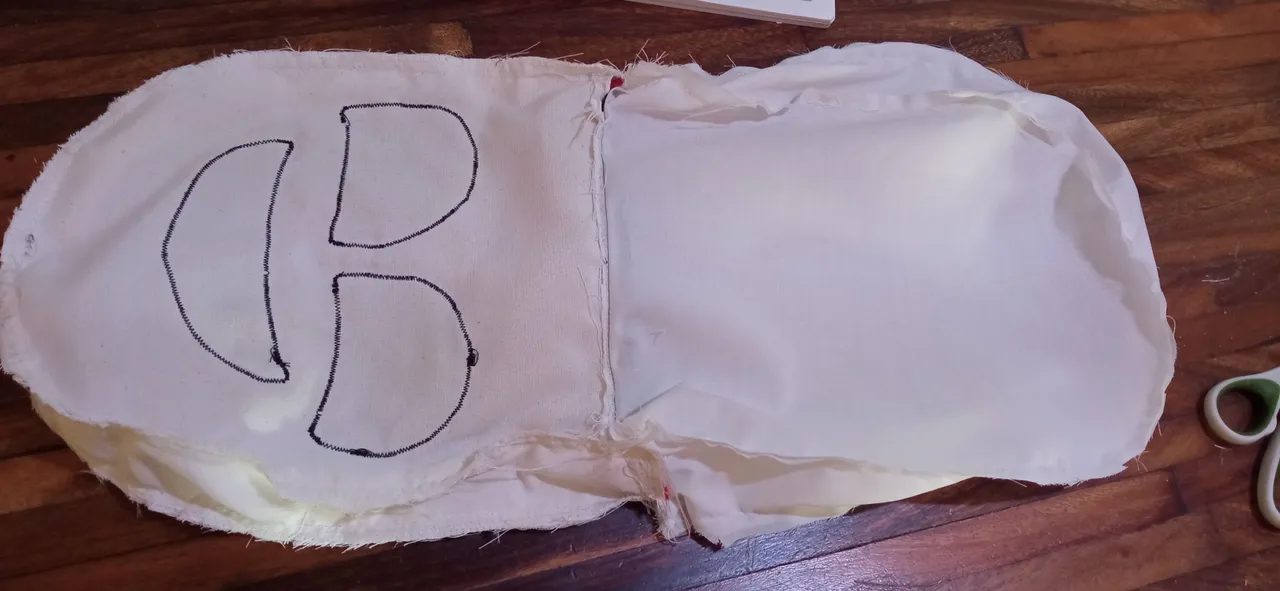
For the character expression pieces, I cut them in double so that when joining each pair with a straight seam, I could make a small opening through which I could turn the pieces over and after ironing them, obtain figures with hidden edges.
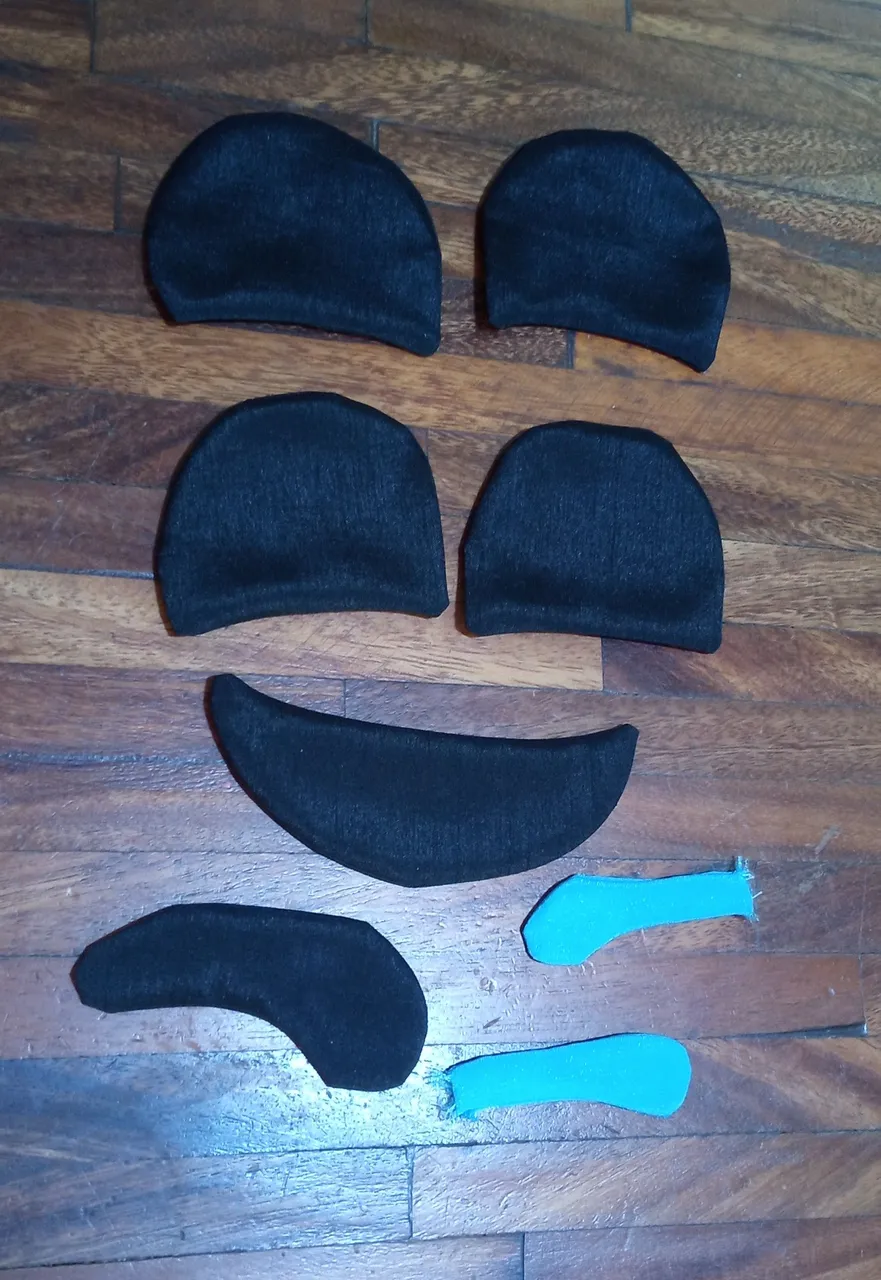
Having these pieces ready, I proceeded to sew them onto both lids of the bag, using a small zigzag stitch, so that it looked like a kind of embroidery.
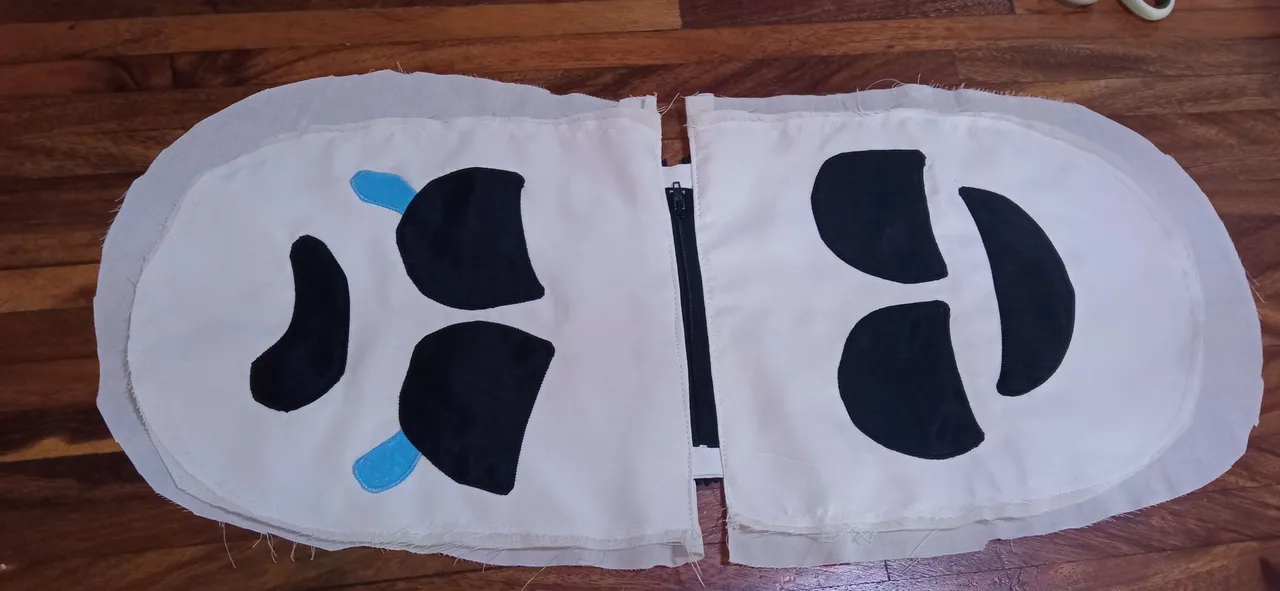
I could have then closed the bag at this point, but I preferred to cut an extra piece of white and linen fabric to sew on the sides of the bag. This way, I was able to give it a little more width.
 |  |
|---|
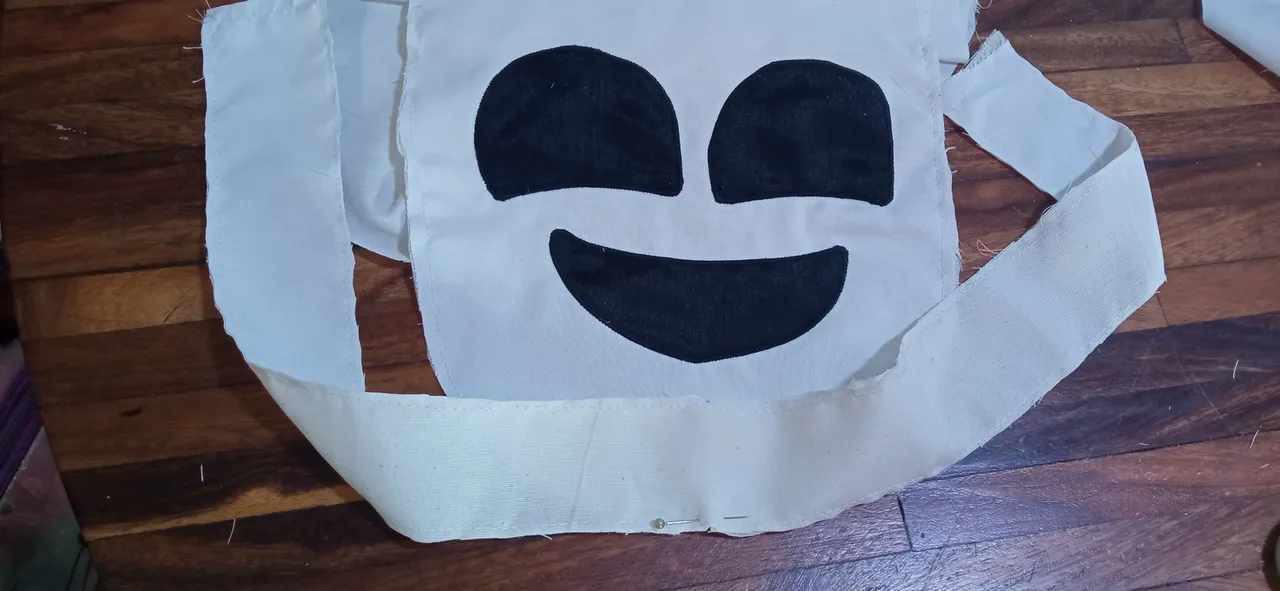
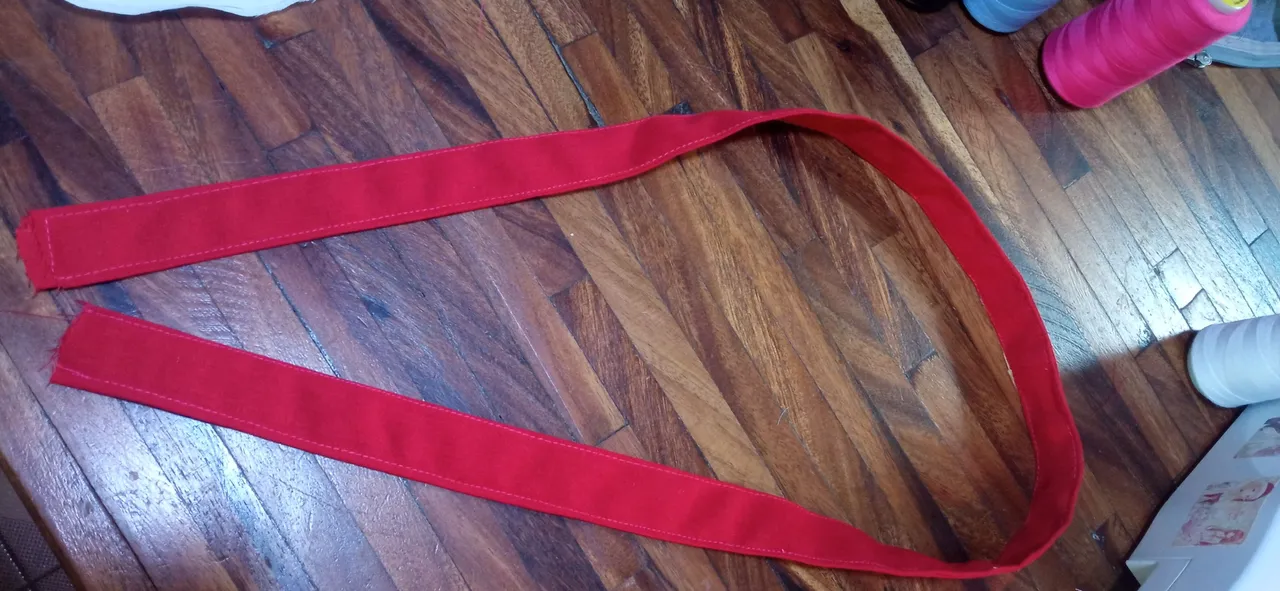
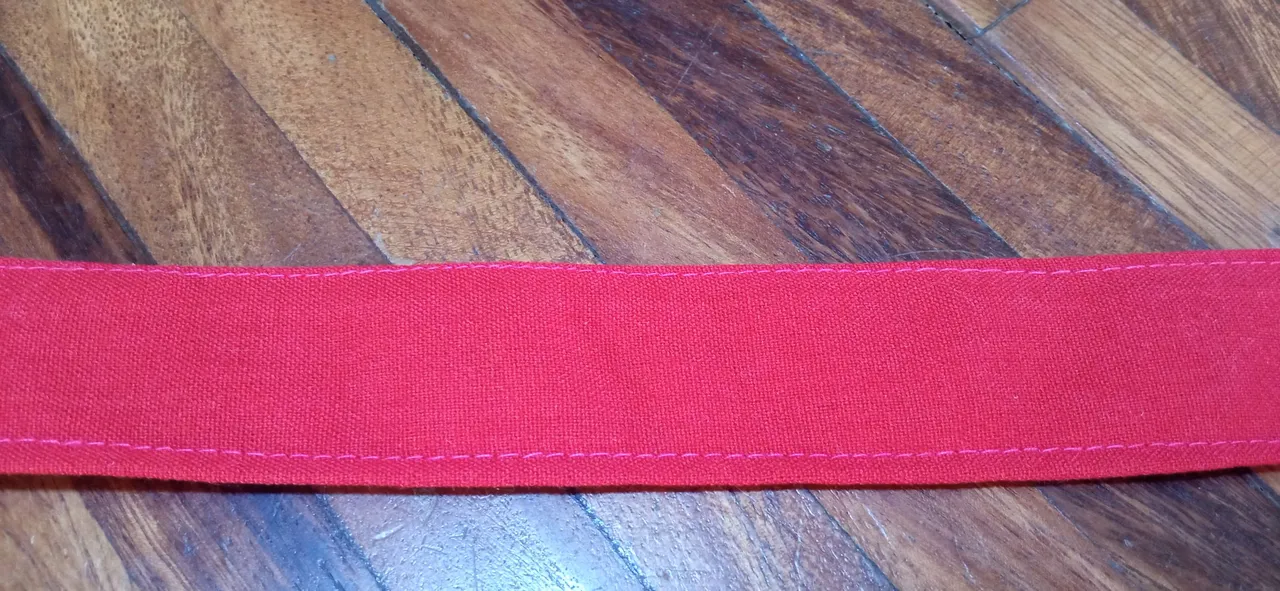
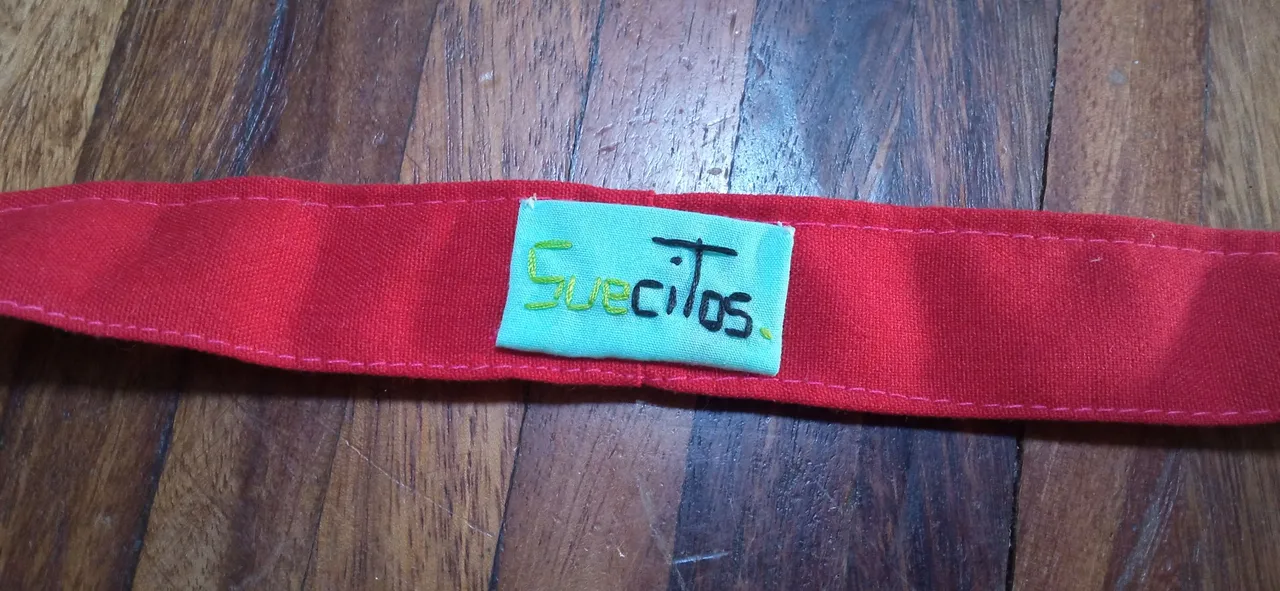
For the handle, I just folded the red strips of fabric and sewed them together with a straight seam. I also took advantage of the opportunity to sew the label on this part.
 |  |  |
|---|
Finally, I sewed the handle onto the bag and proceeded to close it and turn the piece over.
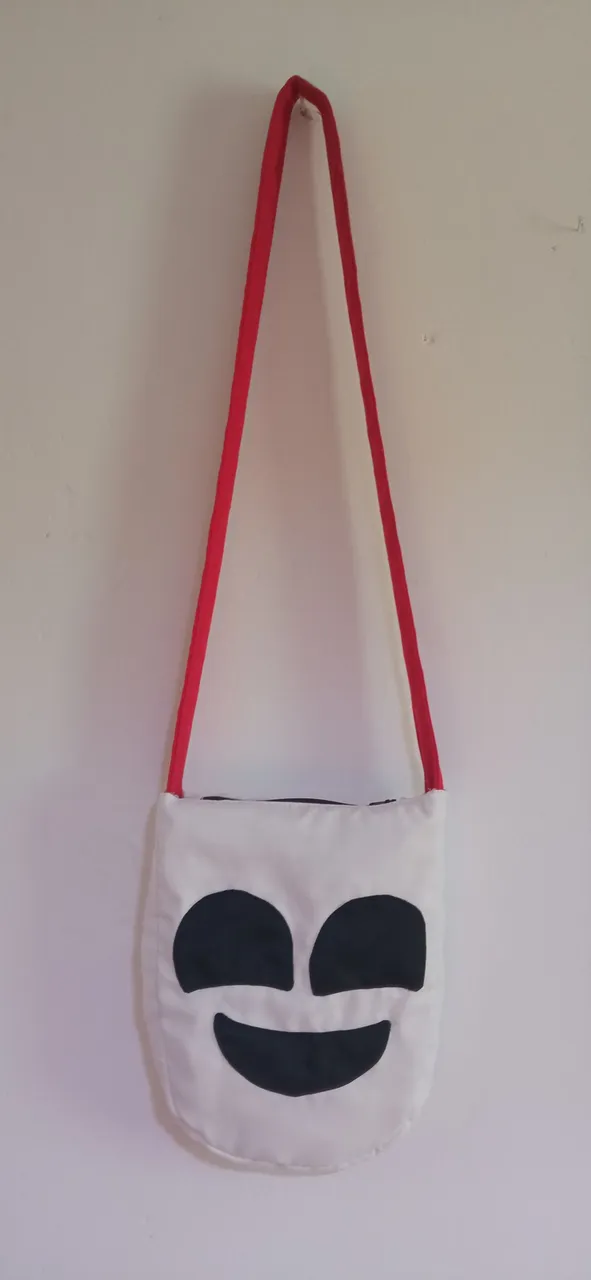
In this way, the double-sided bag was ready. I like it because it's like having two bags in one. It's roomy enough, I can carry my cell phone, my wallet, my keys and even a fan inside, perfect for those hot moments made worse by wearing such a tight suit hehe.
 |  |
|---|
I was really pleased with the result. I think it turned out really nice and the design was great for the character. As a special touch, I added a cute keychain with a theme from the series. I like to do this kind of projects and as you can see, it's super easy to have something of our favorite characters, you just have to be creative and all of us in this community have creativity to spare hehe 😉
 |  |
|---|
 |  |
|---|
Muchas gracias por haber visitado mi publicación. Espero que les haya parecido interesante.
¡Hasta una próxima oportunidad!

CONTENIDO EN ESPAÑOL
¡Hola a todos los integrantes de ésta comunidad y amantes de la costura! Hace poco asistí a un evento al cual llevé un traje que les mostré como lo hice aquí . Como añadido al traje, pensé en elaborar un bolso que me permitiera llevar conmigo mis objetos personales sin afectar la estética del personaje.
Me fascina elaborar bolsos basándome en un personaje, así que en ésta ocasión, pensé en cual de los otros personajes del Increíble Circo Digital sería el más adecuado para mi proyecto. Finalmente escogí a Gangle, el cual es un personaje que luce como una especie de máscara y cuyo cuerpo, son unas cintas de color rojo.
| |
|---|---|
Como el personaje suele intercalar entre máscaras para demostrar sus emociones (más que nada felicidad y tristeza), pensé en que el bolso tuviera una cara feliz en la parte frontal y una cara triste, en la parte trasera del bolso.
Para elaborar el patrón, utilicé un folleto que suelen obtenerse de manera gratuita en las farmacias (todo papel puede servir de alguna forma 😉). Saqué las piezas que me servirían para realizar el diseño que había dibujado en mi cuaderno: La tapa del bolso, el cual era adecuado para el cierre que tenía disponible; así como las piezas del rostro, como lo eran los ojos, la boca y las lágrimas.
Al pasar a la tela, corté las piezas agregándoles el aumento de costura correspondiente. Adicional a ello, corté unas piezas extras para hacer el forro del bolso y las asas. El cierre que tenía era de color negro y de unos 15 cm de largo, así como también agregué entre mis materiales, la etiqueta que suelo coser a las piezas que elaboro desde cero.
Comencé anexando las piezas correspondientes al forro a las piezas principales del bolso. Utilicé una tela llamada "liencillo" para elaborar el forro, para darle un poco de dureza a la pieza, ya que la tela que utilicé para el bolso, era bastante delgada, pero era la única que tenía disponible para el proyecto 😅 Con una simple costura recta, las tapas del bolso estuvieron listas.
Lo siguiente que hice, fue coser el cierre, haciéndolo en ambos bordes superiores de las tapas del bolso. Para un mejor acabado, le coloqué un pedacito de tela en cada extremo del cierre, ocultando un poco las piezas de metal y dándole un poco de anchura al bolso en la parte superior.
| | |
|---|
Para las piezas de las expresiones del personaje, las corté doble de forma que al unir cada par con una costura recta, le pudiera hacer una pequeña abertura por la cual, pudiera voltear las piezas y tras plancharlas, obtener unas figuras con bordes ocultos.
Teniendo estas piezas listas, procedí a coserlas en ambas tapas del bolso, utilizando una costura pequeña en zig zag, para que luciera como una especie de bordado.
Luego, pude haber cerrado el bolso en éste punto, pero preferí cortar una pieza extra de tela blanca y de liencillo para coserla en los laterales del bolso. De ésta forma, pude darle un poco más de anchura al mismo.
| |
|---|
Para la asa, sólo doblé las tiras de tela roja y las cosí con una costura recta. También aproveché de coser la etiqueta en ésta parte.
| | |
|---|
Finalmente, cosí la asa en el bolso y procedí a cerrarlo y voltear la pieza.
De ésta forma, el bolso con doble cara estuvo listo. Me gusta porque es como tener dos bolsos en uno. Es lo suficientemente espacioso, en su interior puedo llevar mi teléfono celular, mi monedero, las llaves y hasta un abanico, perfecto para esos momentos de calor aumentados por llevar un traje tan cerrado jeje.
| |
|---|
Estuve realmente satisfecha con el resultado obtenido. Pienso que quedó muy lindo y que el diseño quedó muy bien para el personaje. Como toque especial, le coloqué un lindo llavero con temática de la serie. Me gusta hacer éste tipo de proyectos y como pueden ver, es súper fácil tener algo de nuestros personajes favoritos, sólo hay que ser creativos y todos los que estamos en ésta comunidad, tenemos creatividad de sobra jeje 😉
| |
|---|
| |
|---|
Muchas gracias por haber visitado mi publicación. Espero que les haya parecido interesante.
¡Hasta una próxima oportunidad!