ENGLISH CONTENT
Hello to all members of this community and lovers of sewing! I'm making a cosplay for an anime event (based on Japanese animation) and the costume design had a manga style that I had never done before, which after searching, the most similar to what I needed were the Snow White style sleeves.

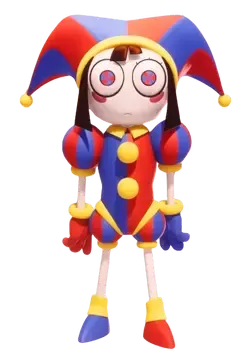
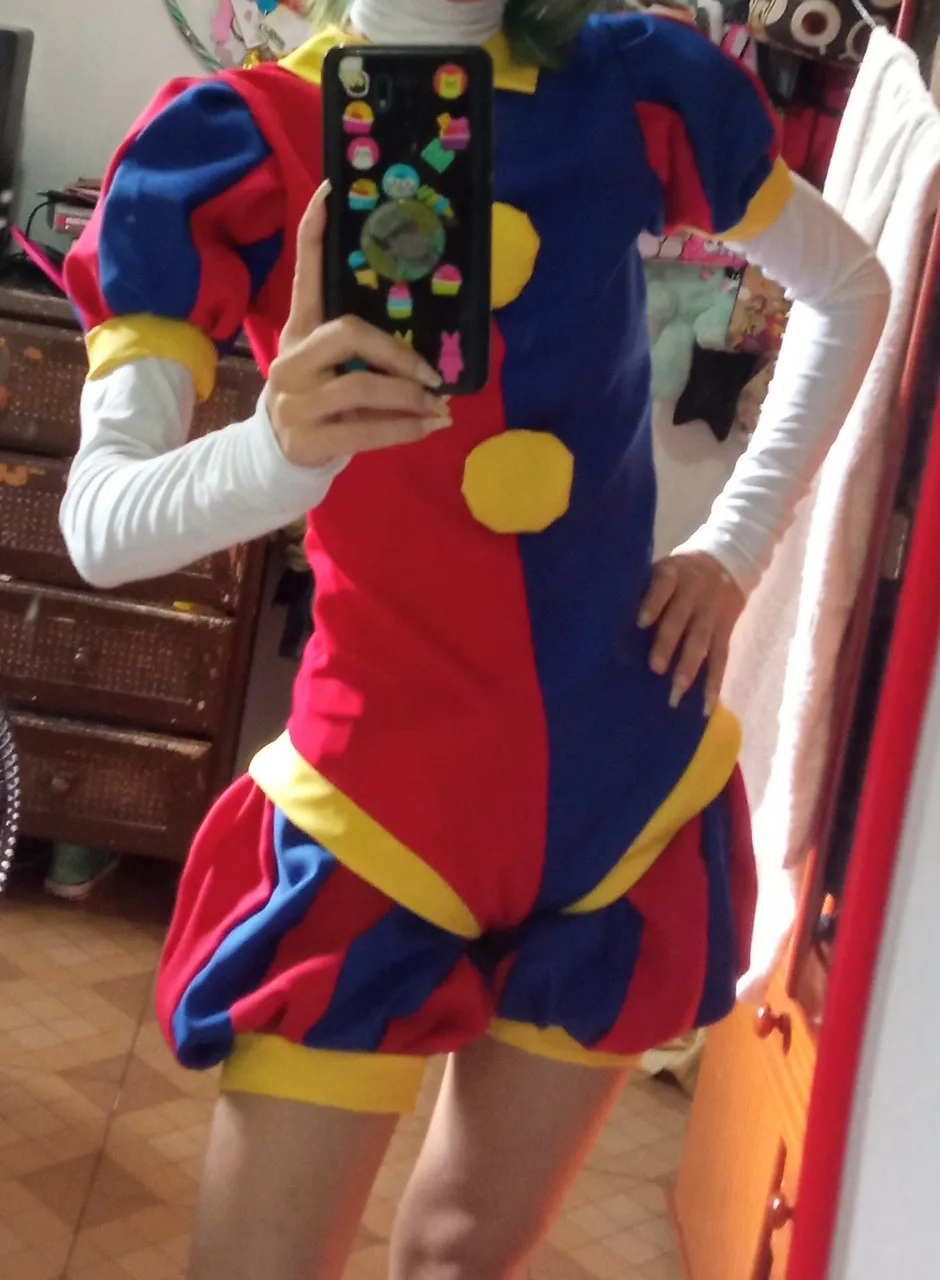
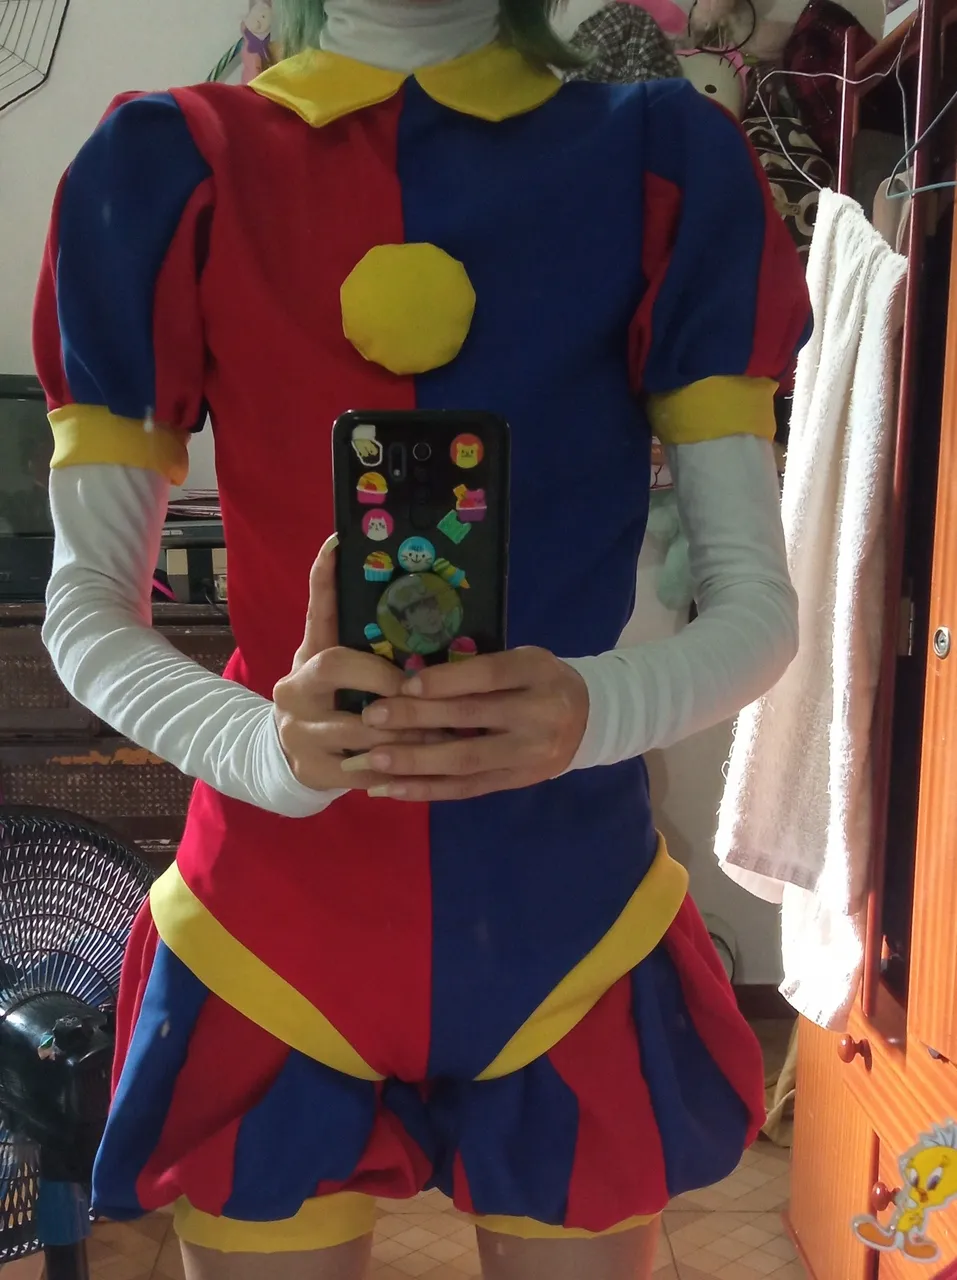
First, I'll tell you about the character this project is based on. She's a clown called Pomni and as you can see, the sleeves on her outfit give the allusion of two-colored balls. I thought that the type of sleeves like Snow White's were the most ideal to make it.

❤️ SLEEVES 💙
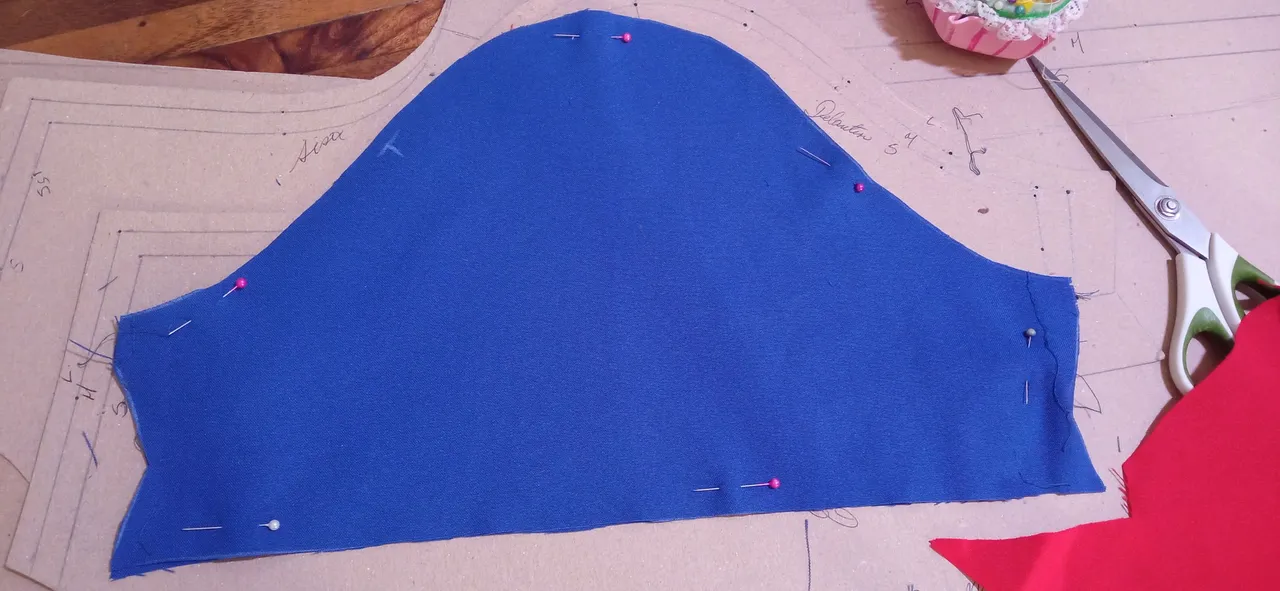
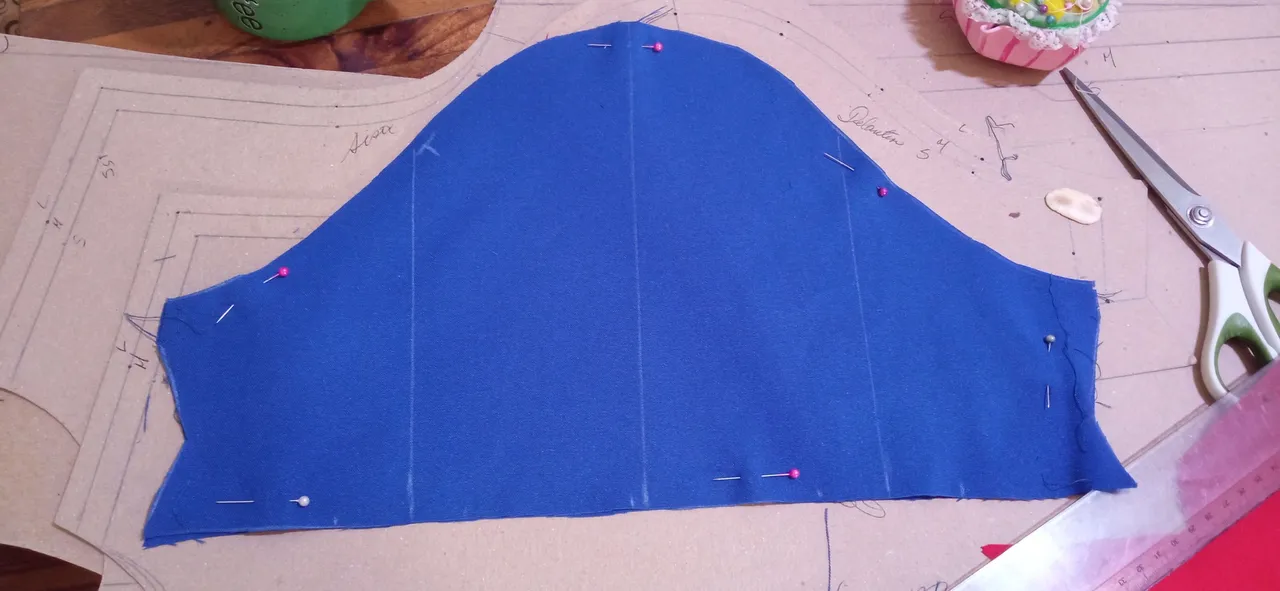
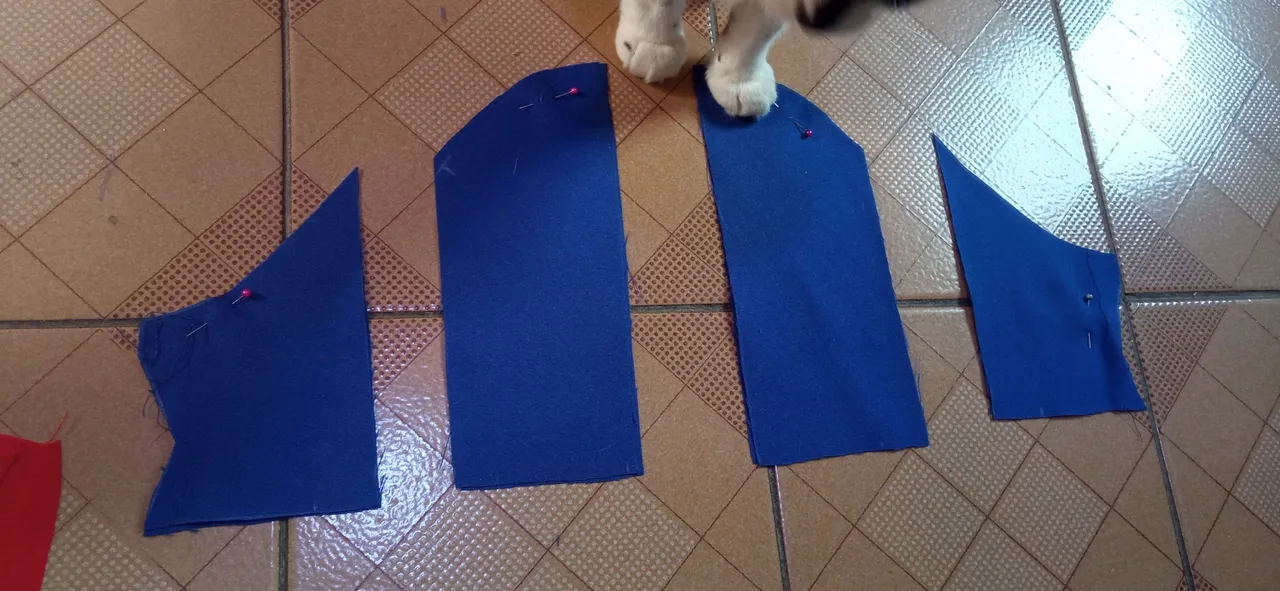
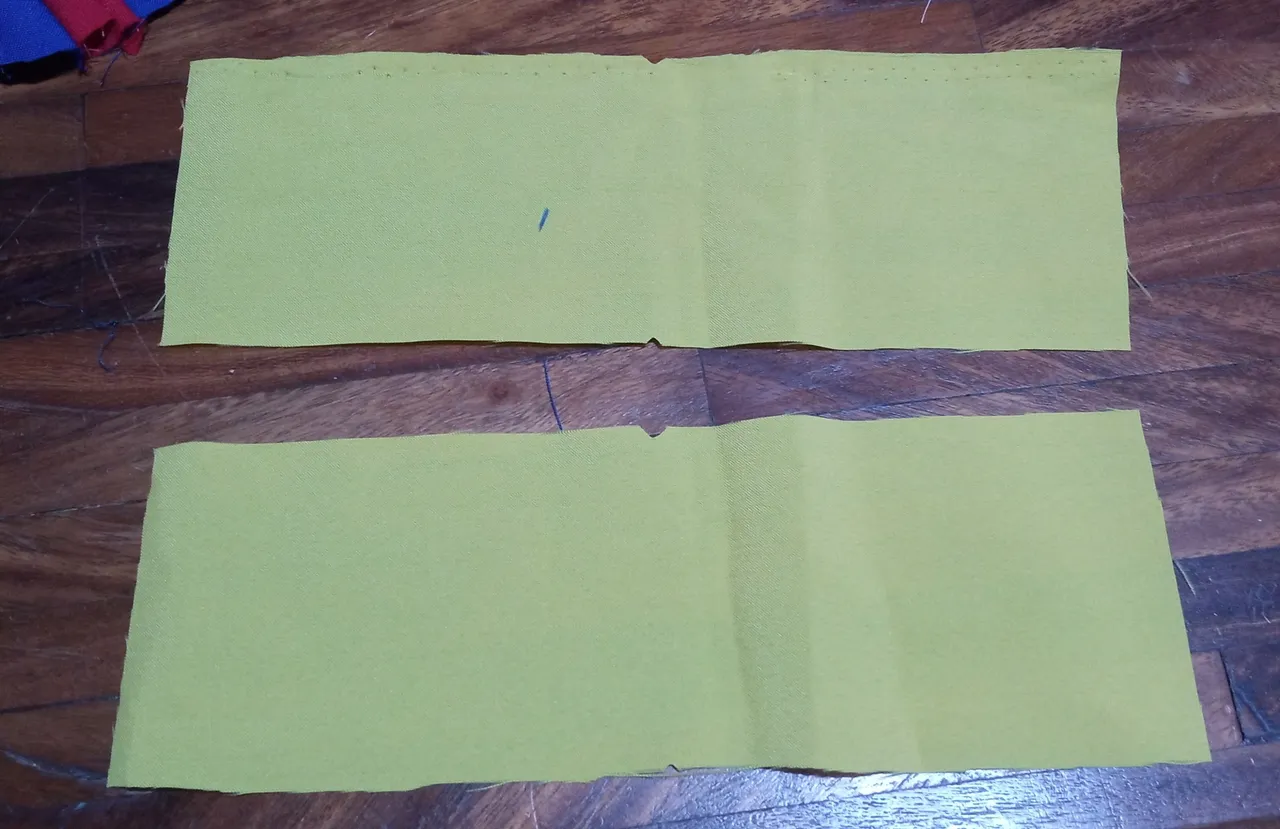
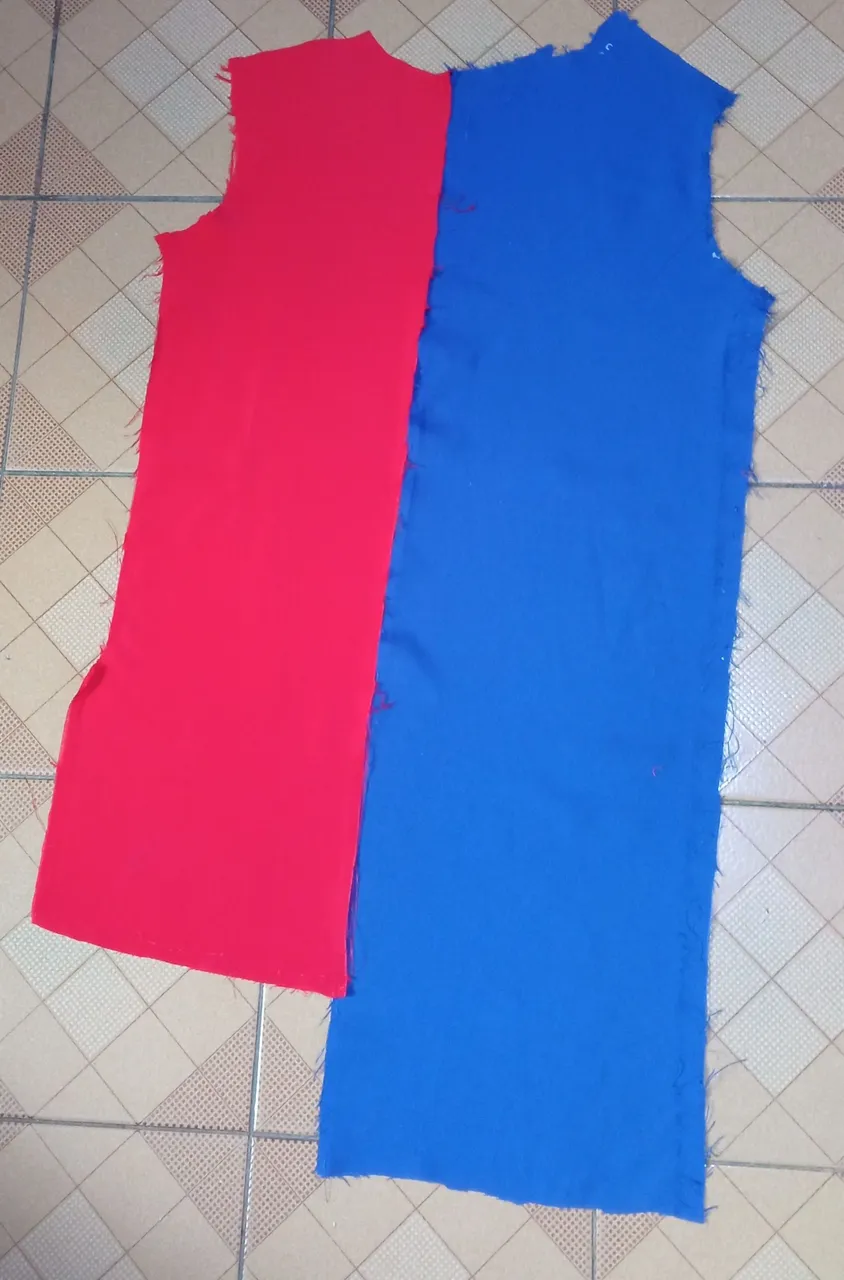
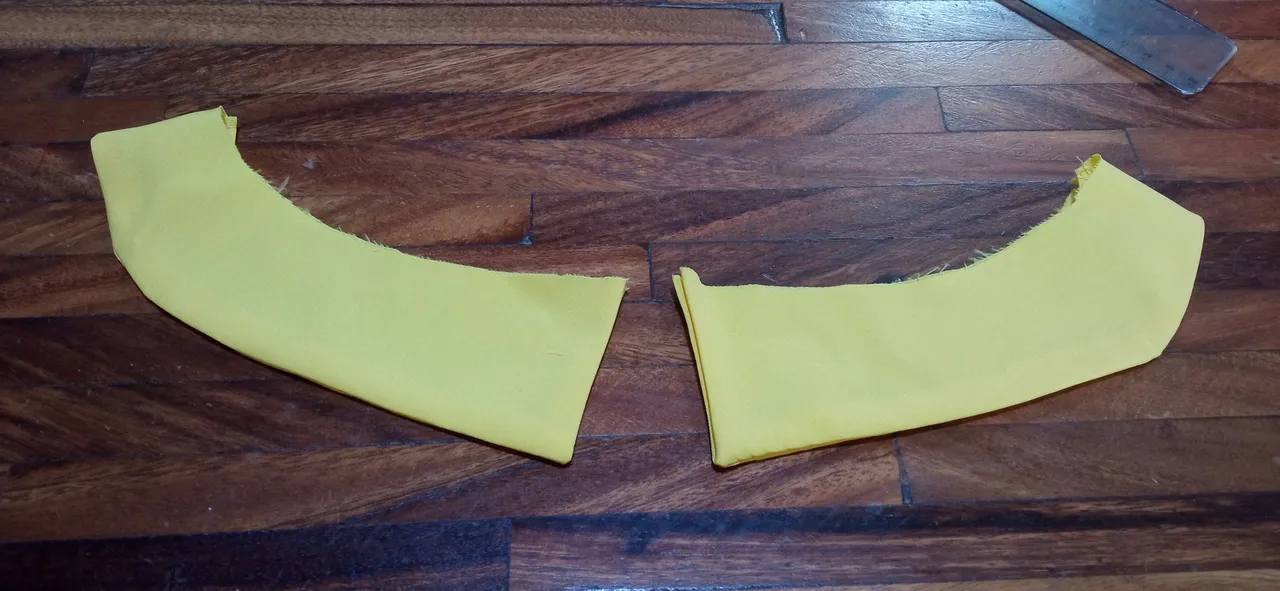
To make this type of sleeve, the first thing I did was cut the pieces to my size and then I made three dividing lines, making sure that the separation between each one was even.
 |  |
|---|
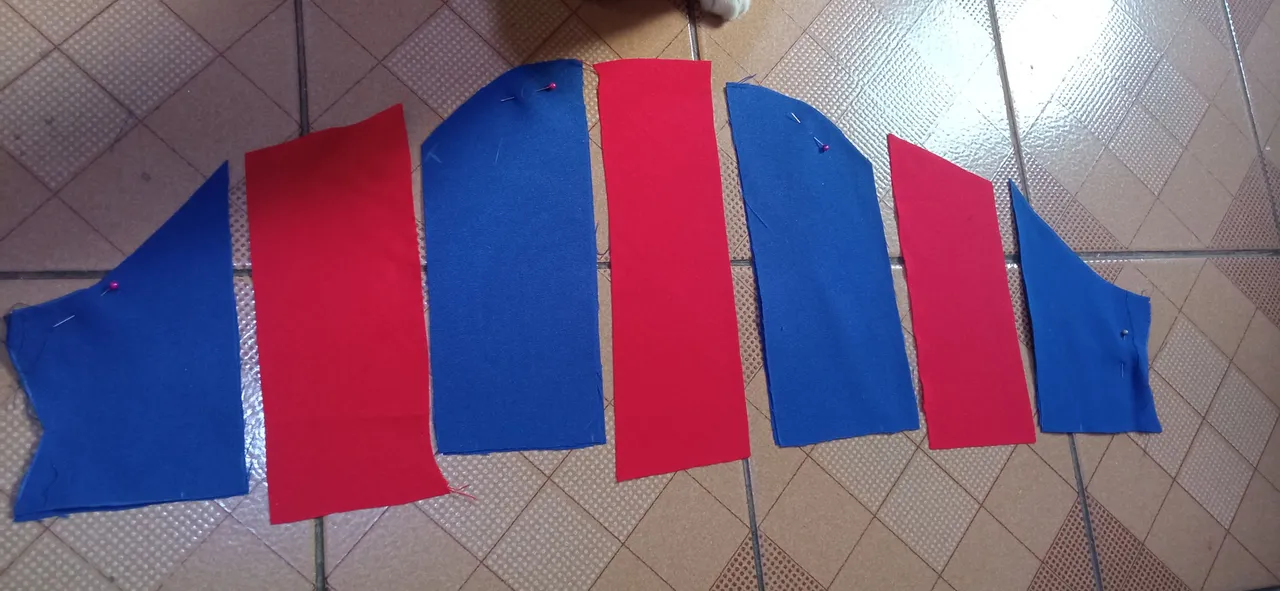
Once this was done, I cut the piece along the lines and cut some rectangles in red fabric, which I proceeded to sew alternately on the sleeve piece, thus increasing its size.
 |  |  |
|---|
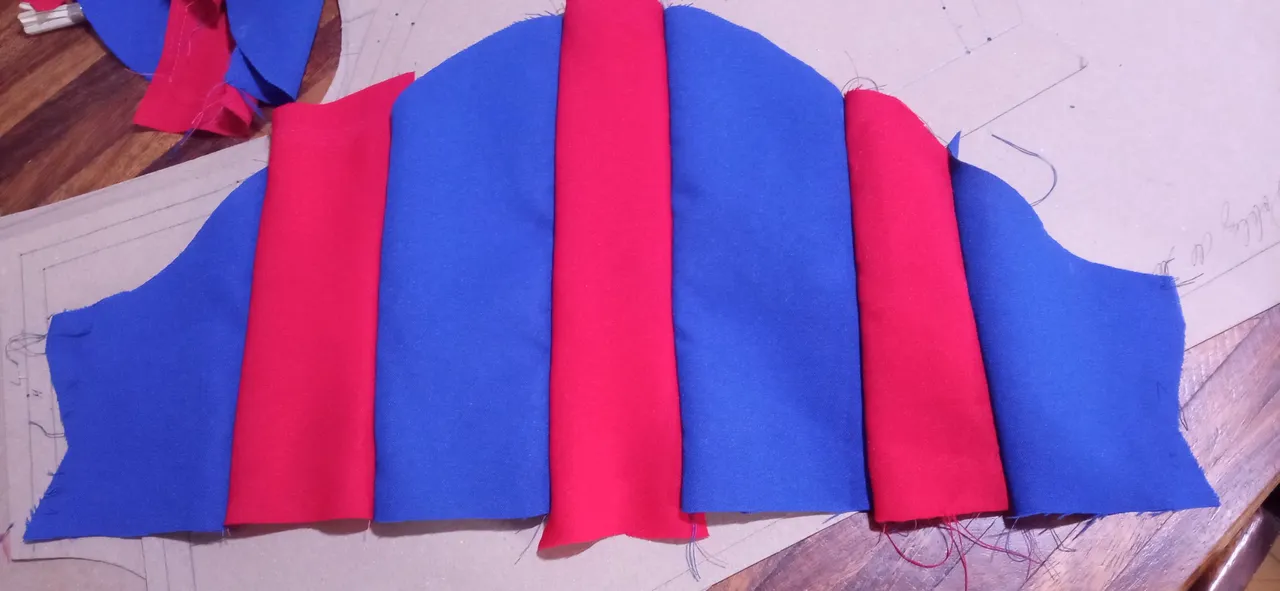
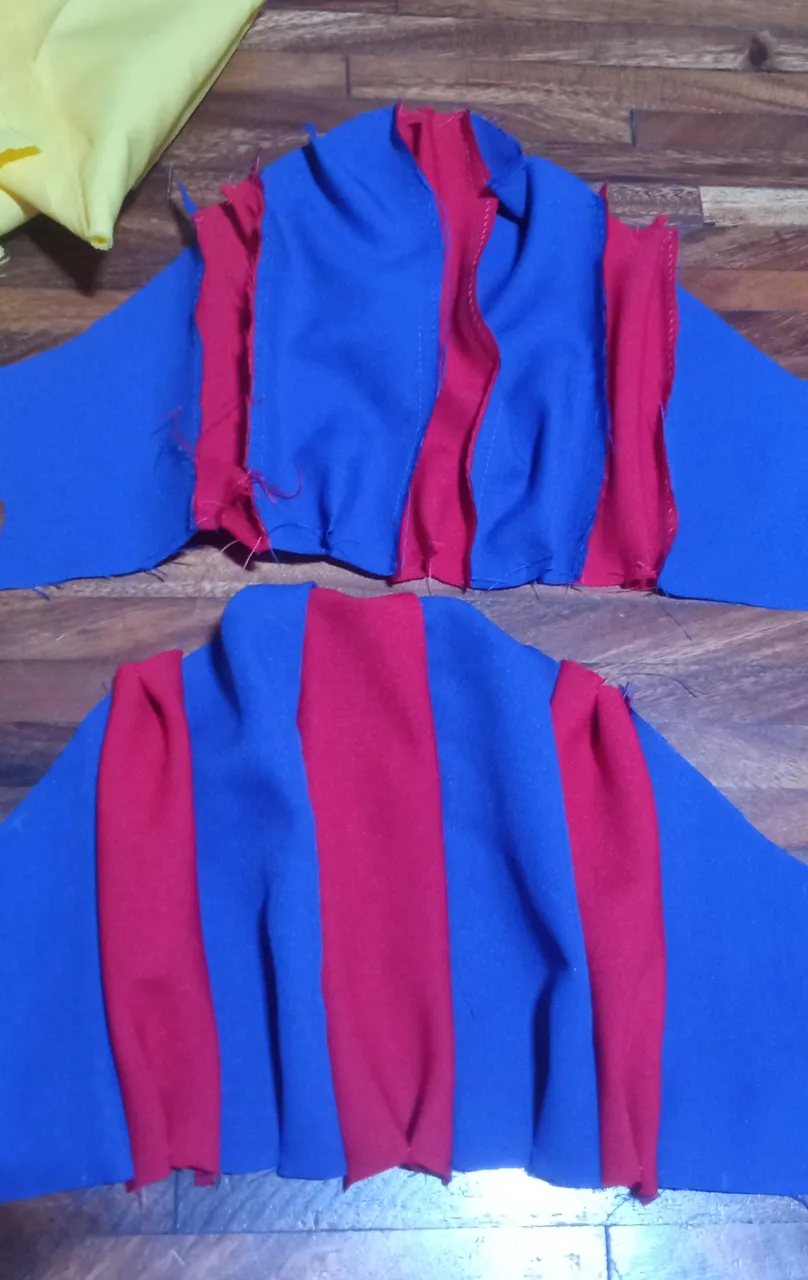
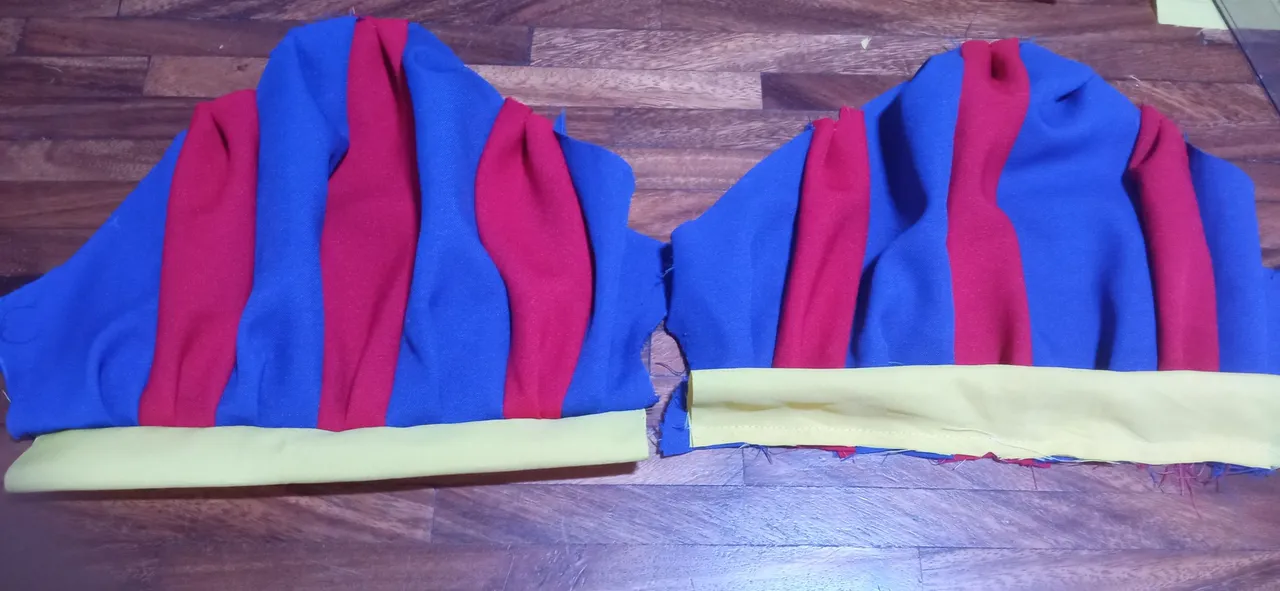
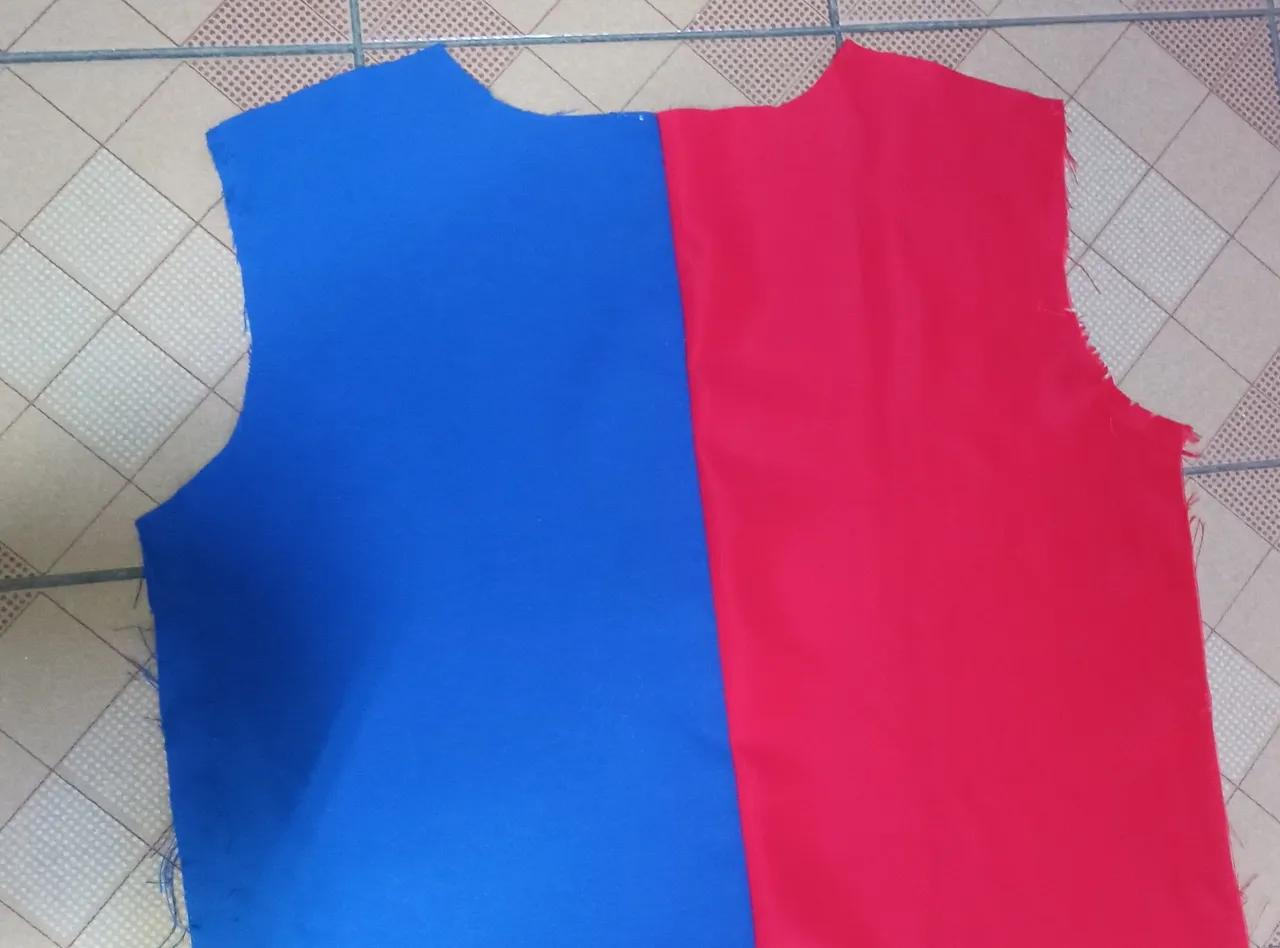
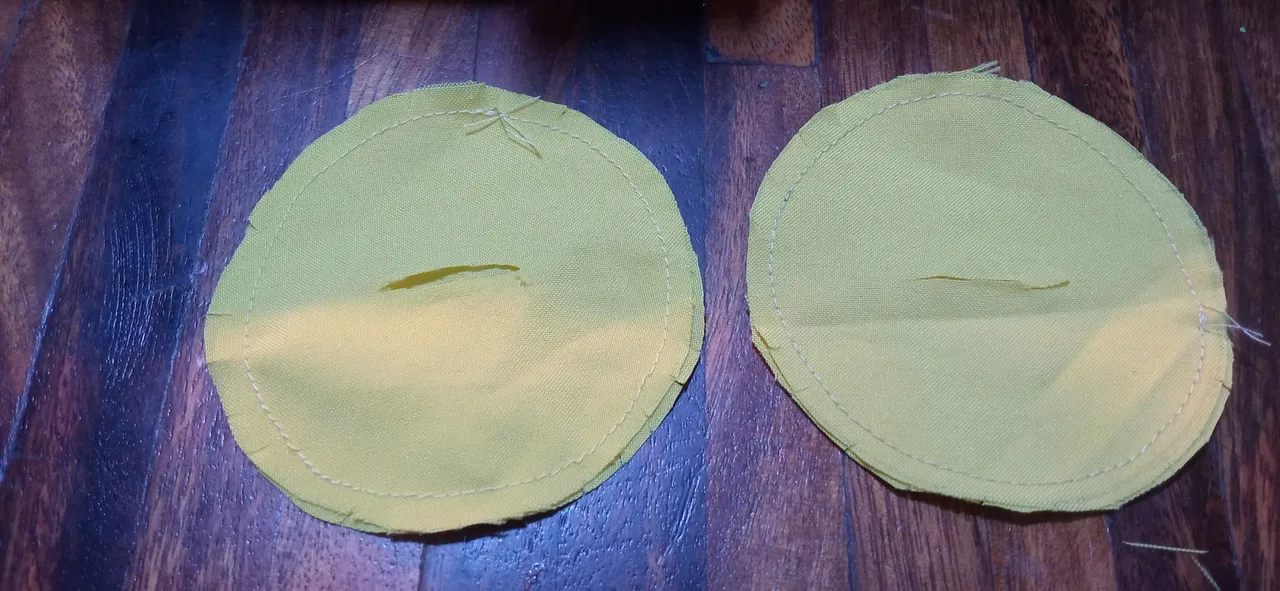
Thanks to this increase that I made, then, I made some small darts in each section of the sleeve, so that it would be gathered a little (in the Snow White style, the red parts are gathered completely, but for my costume, I only did it a little, since I wanted both the red and the blue parts to be visible in the same way). Additionally, I cut some strips of yellow fabric, which I sewed on the bottom of the sleeves, as a hem. With this step, we can finish our Snow White style sleeves and attach them to the dress or shirt of our preference.
 |  |  |
|---|
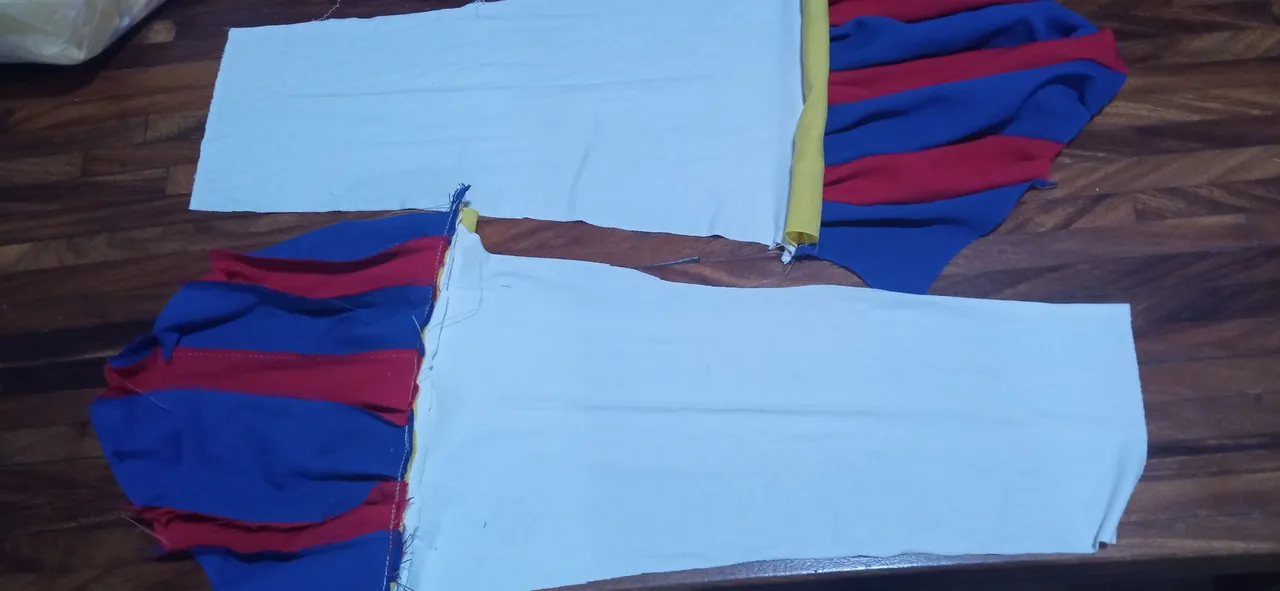
In my case, I added some pieces of white lycra fabric to my sleeves, so I wouldn't have to paint my skin (since the character has white skin 😆).
❤️ BODY 💙
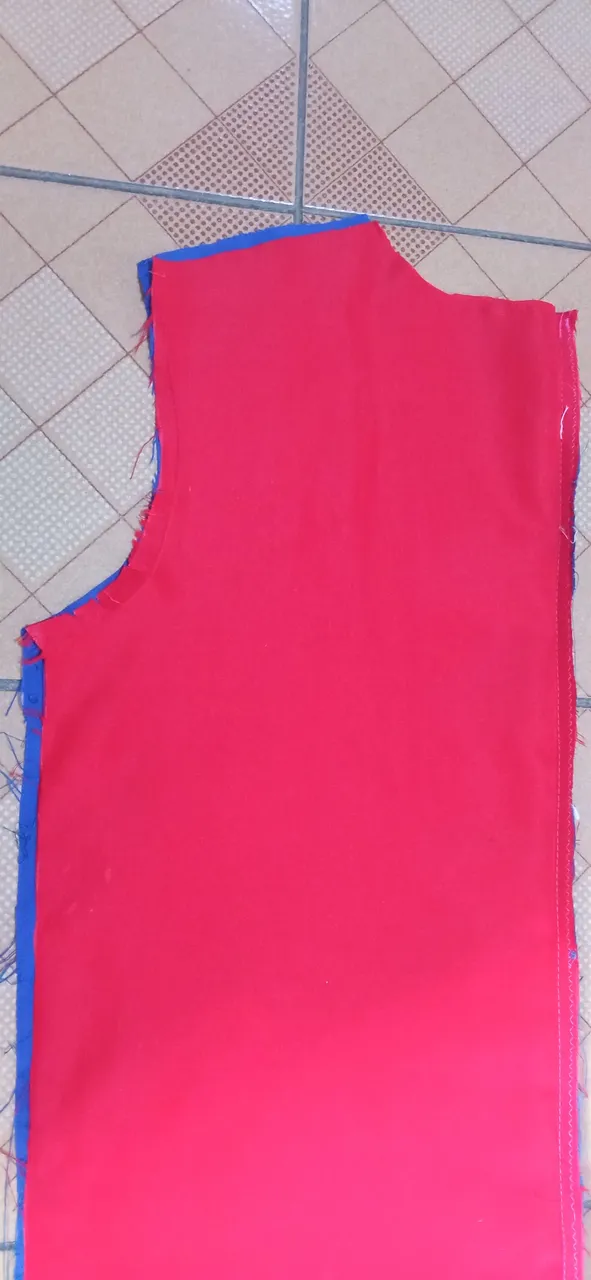
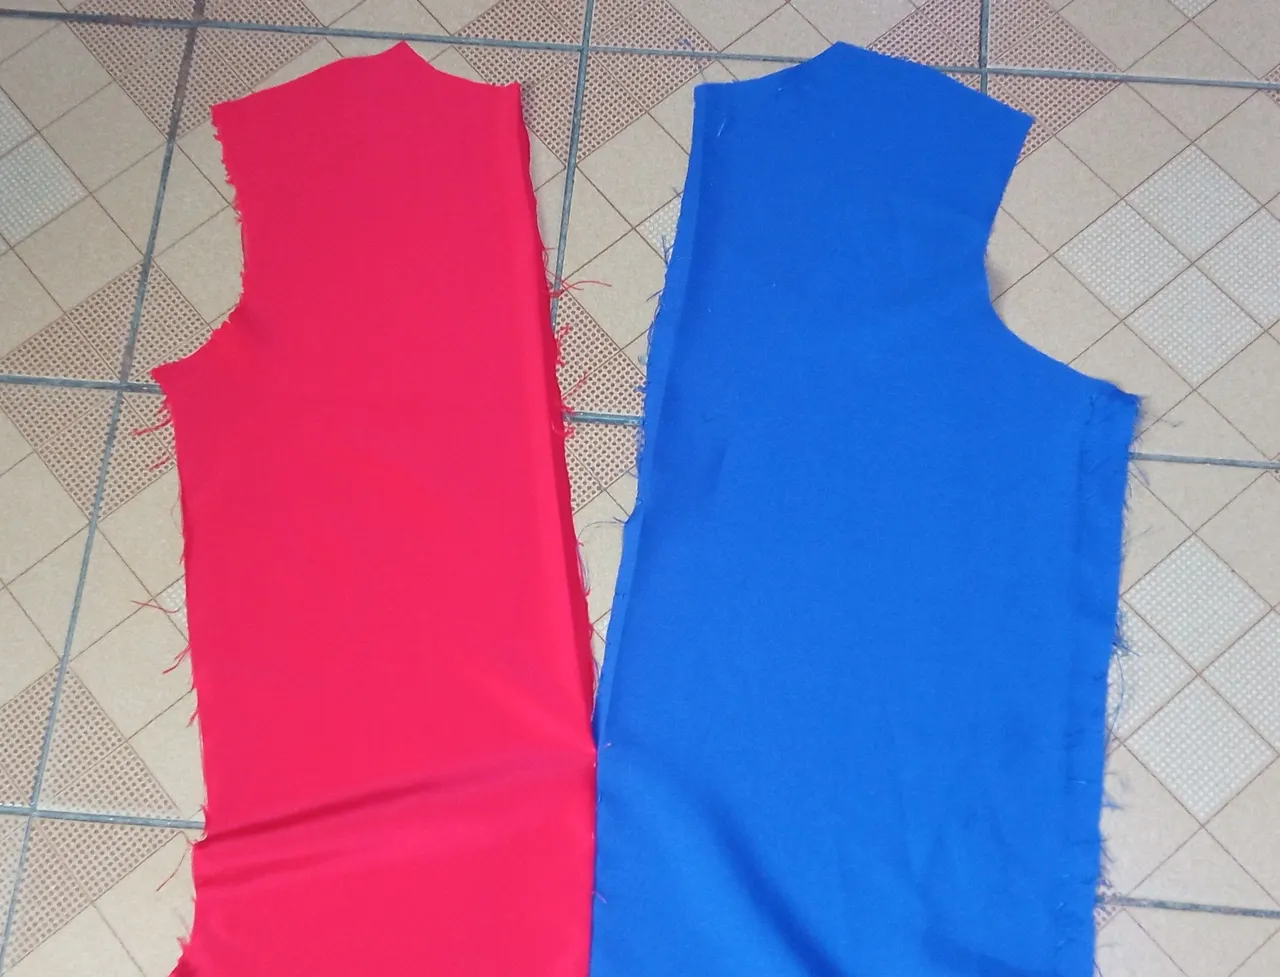
As for the costume, I made it by recycling a cosplay I had previously made for one of my brothers. After seeing the image of the character, I realized that in order to make this costume, I needed to sew a kind of bodysuit. I had never made this type of garment and the fabric I had was a stiff fabric, so I didn't know if it would turn out well (ok, I admit, I started this project mostly with faith 😆). But, I had nothing to lose by trying, so I cut the front and back pieces in my size. Luckily, since my brother is taller and wider than me, I didn't lack fabric and I could cut the excess with ease.
 |  |  |
|---|
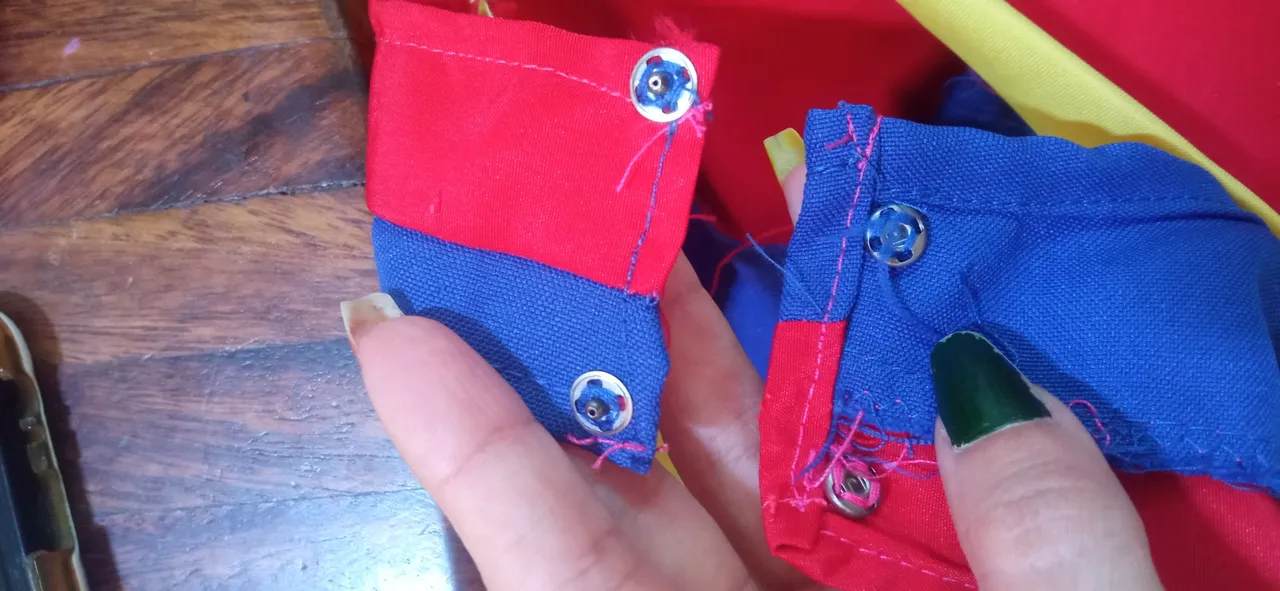
At this point, I sewed the sleeves I made previously and for the lower part, I tried to give it the shape of the bodysuit, sewing some yellow strips so it would look like the character's. To make it close, I sewed some snap buttons by hand where the back and front pieces join.
 |  |  |
|---|
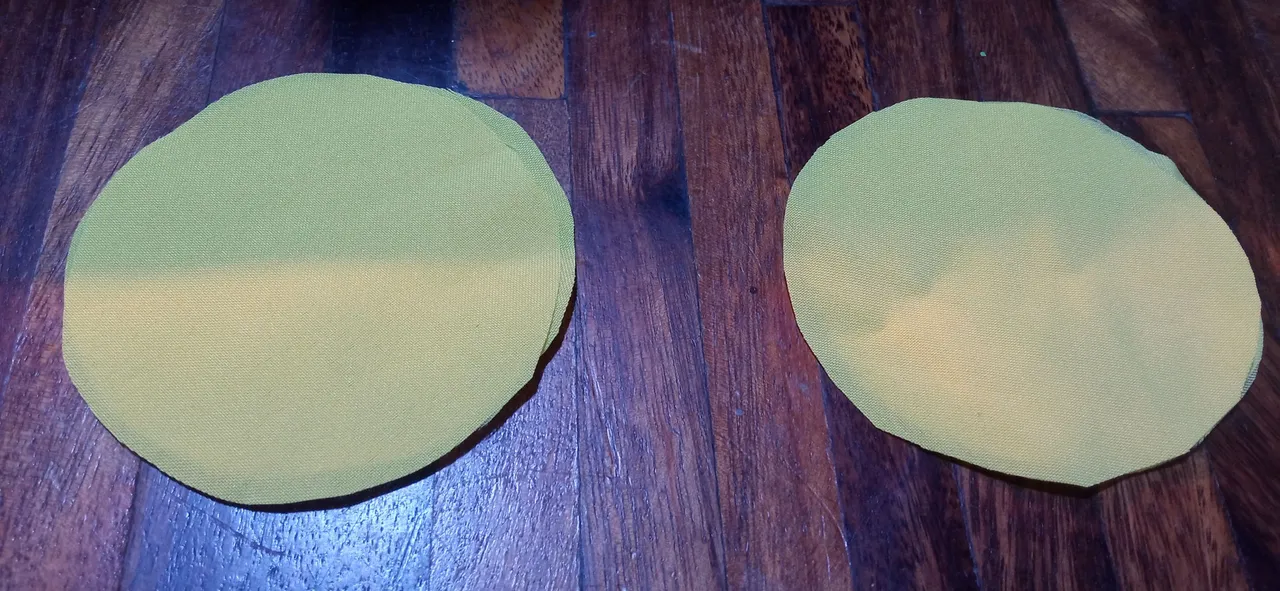
For the buttons on the suit, I chose to make some circles out of fabric, which I then stuffed with a bit of batting or anti-allergy stuffing. I sewed them to the body with a hand seam. As for the collar, I made one in a simple way, drawing directly on the fabric the shape that seemed most suitable to me and then I sewed it to the body.
 |  |  |
|---|
💙 SHORT ❤️
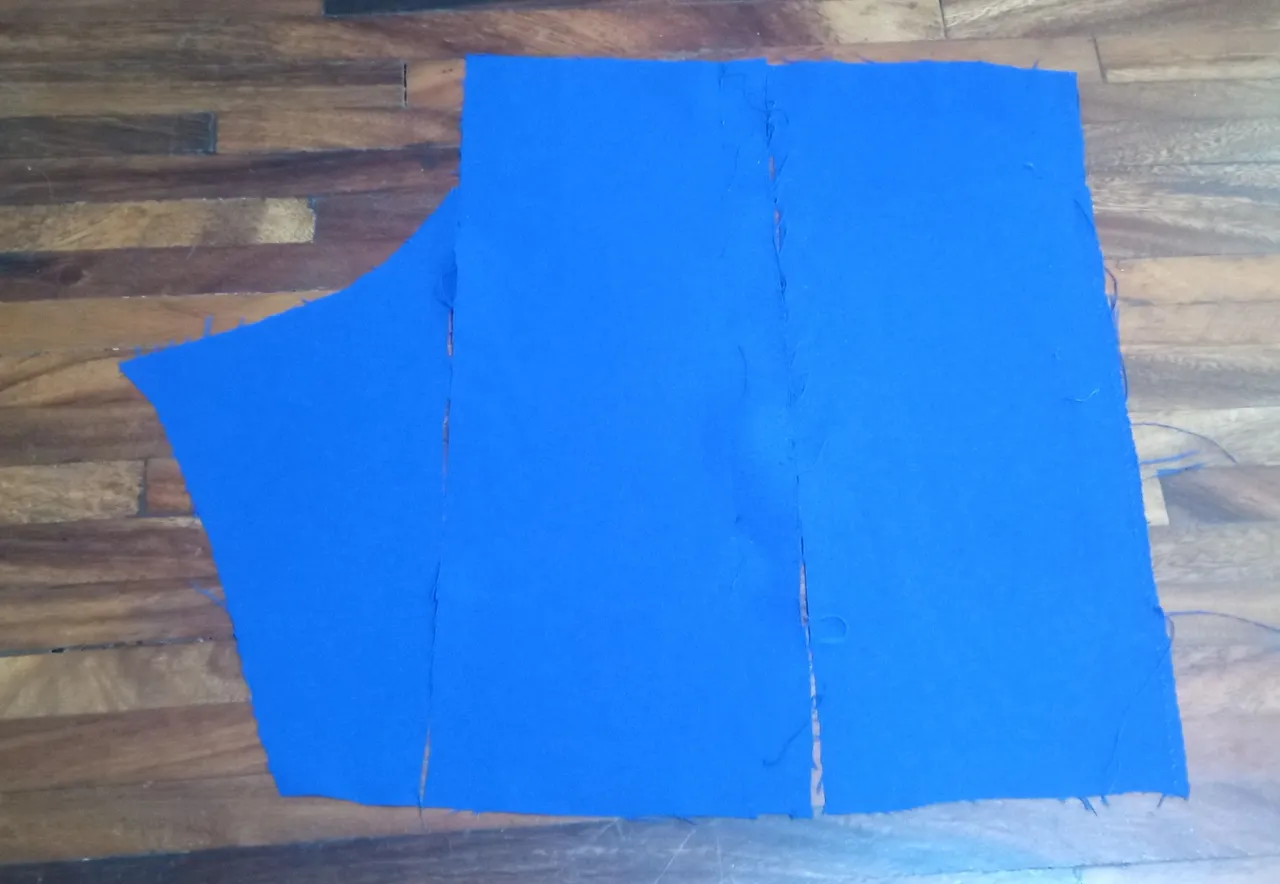
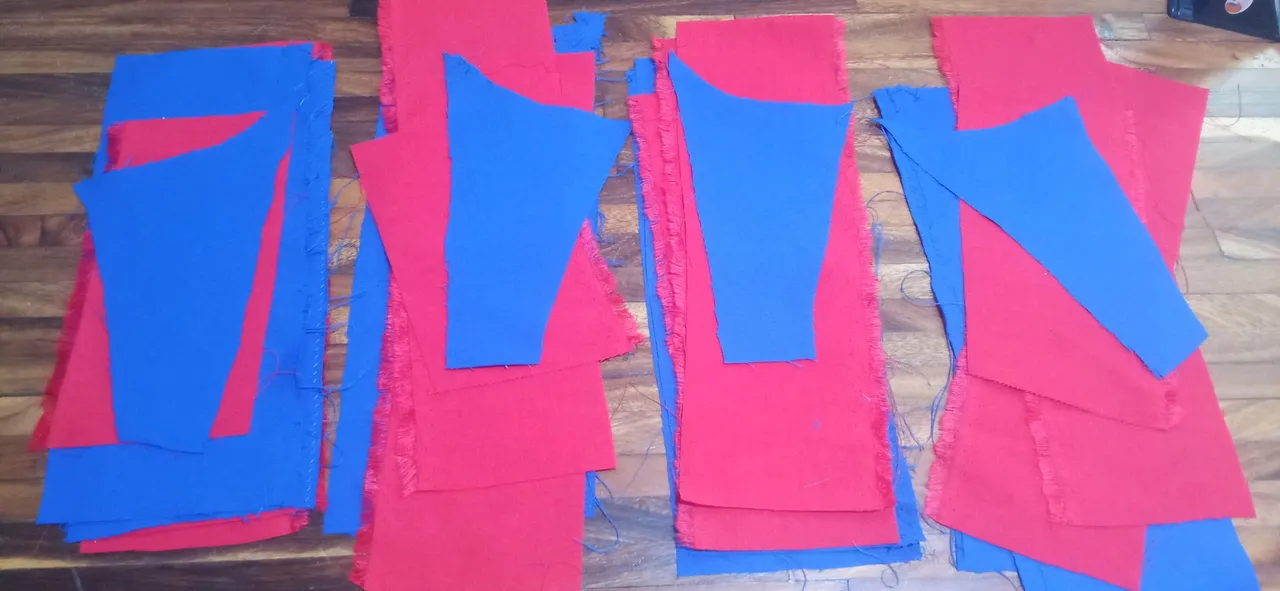
At first, I had thought of making the thigh-high part of the bodysuit by sewing it directly onto the bodysuit. But after analyzing the piece I had, I realized that it was impossible because how would I put it on? That's when I came up with the idea of sewing an extra piece, which would be placed before the bodysuit. In this case, a pair of baggy shorts. Luckily, having made the sleeves helped me to know how to make this type of shorts, since it's basically the same procedure. So, I cut the pieces corresponding to the shorts and divided them, then cutting the excess from red fabric. It's worth mentioning that I cut these pieces from the outfits that I had previously unstitched.
 |  |
|---|
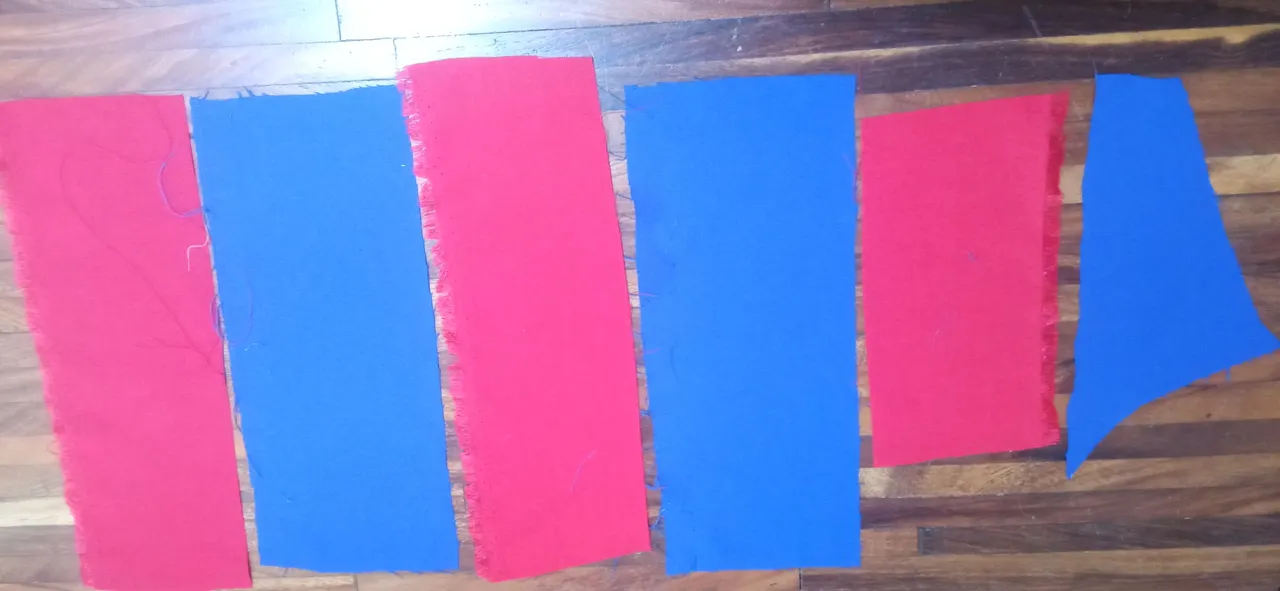
When it came time to cut it out, there were several pieces and I was stressed for a moment (I remembered when I used to work making pencil cases in bulk), but as I kept sewing, I started to feel encouraged. I attached the red strips of fabric to the shorts pieces and made the darts on the red pieces (the darts on the blue ones were made later). Once I had done this, I joined the front and back pieces together at the crotch area.
 | 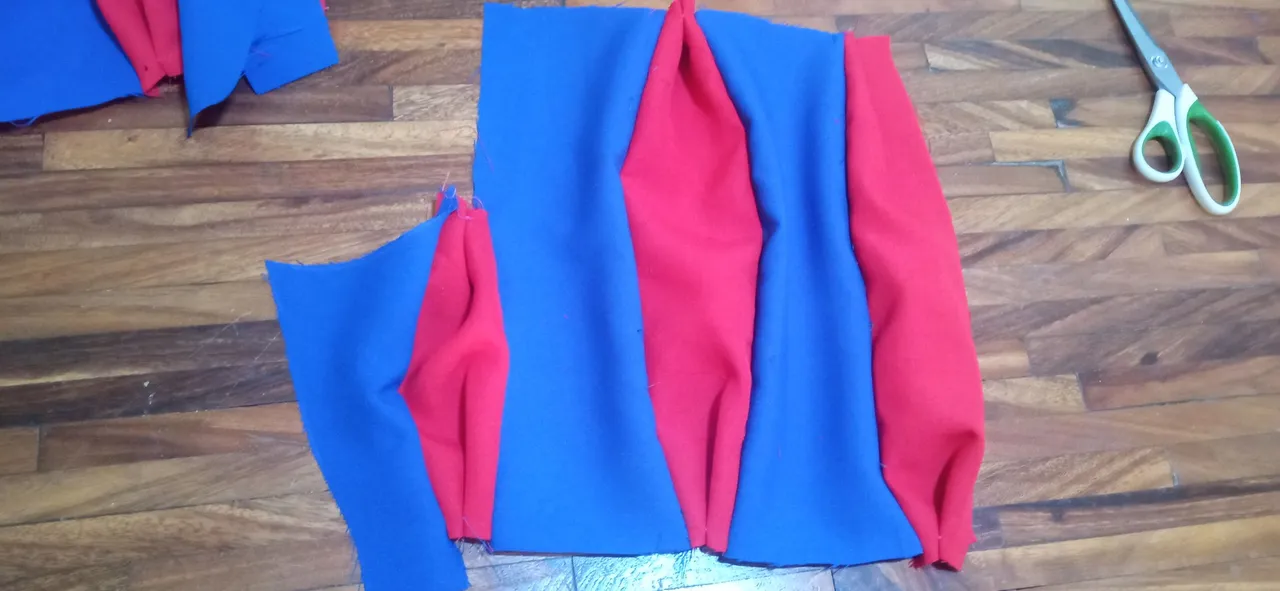 | 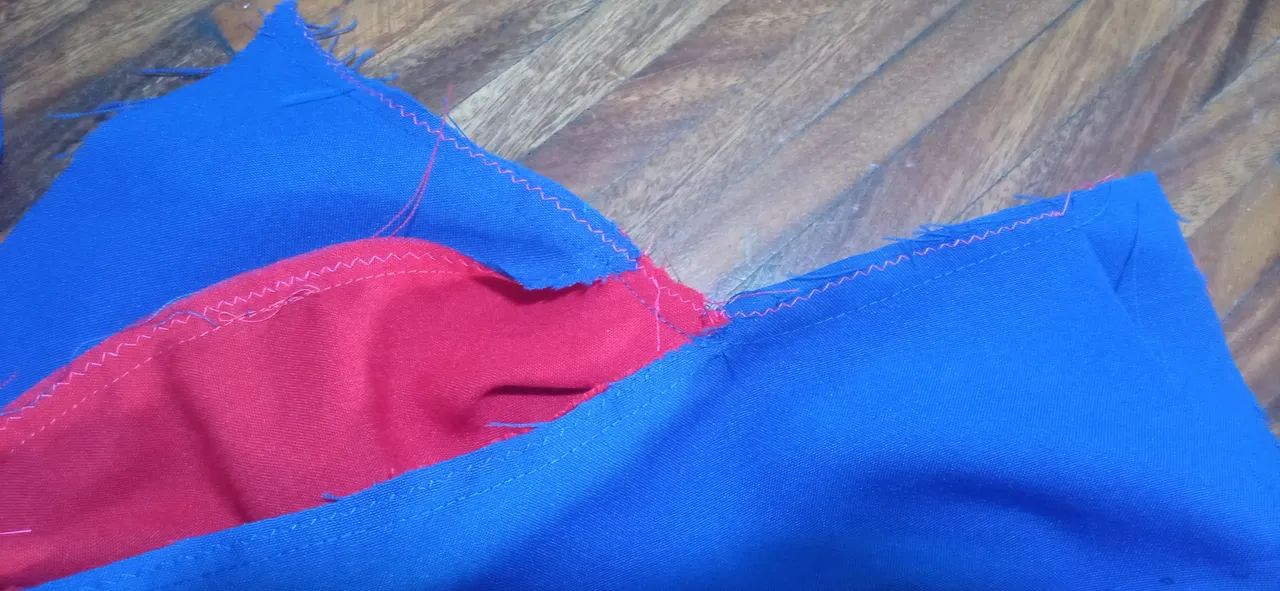 |
|---|
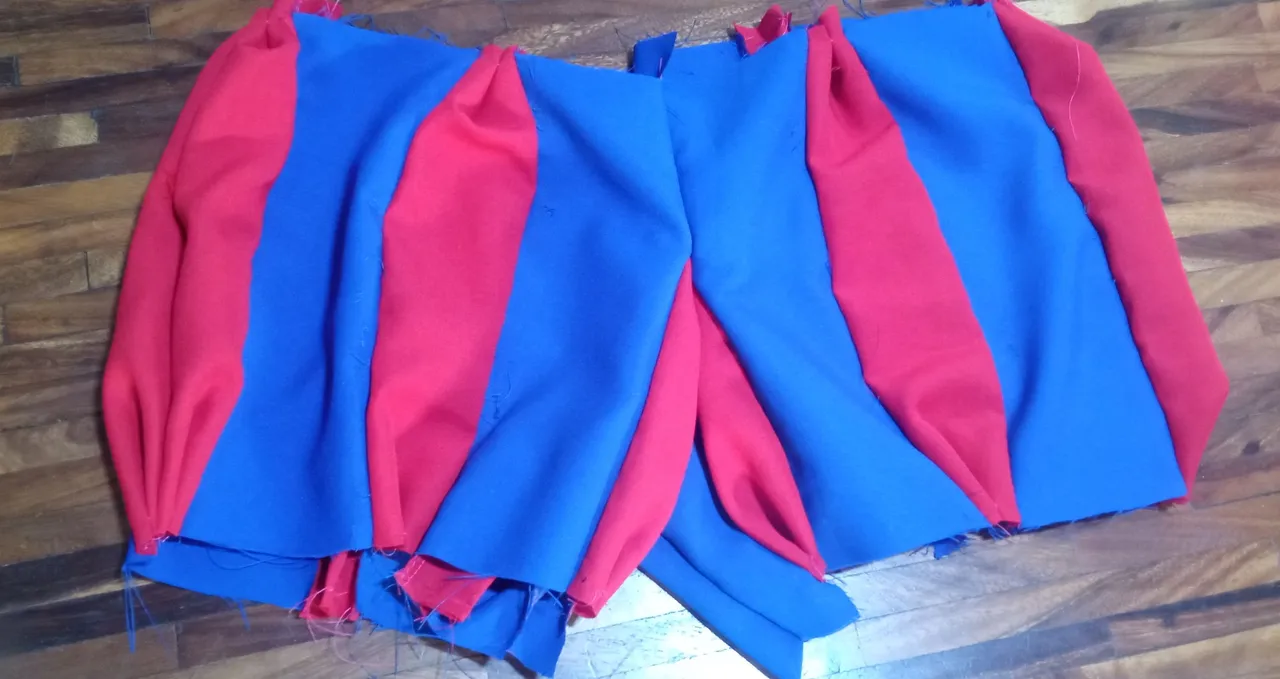
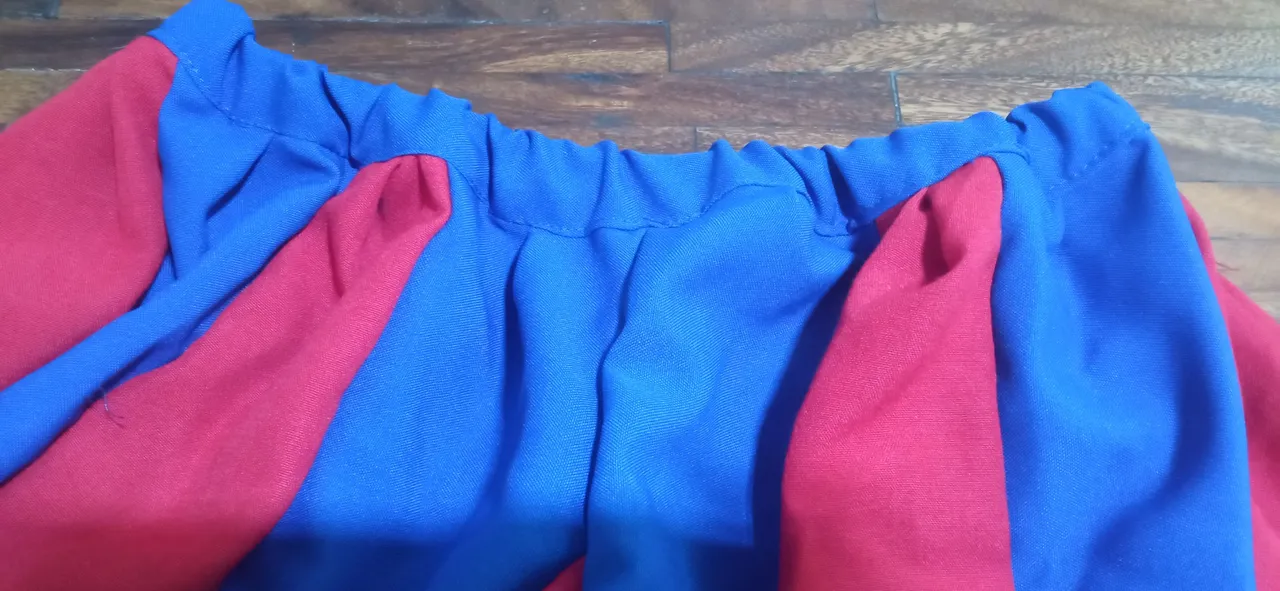
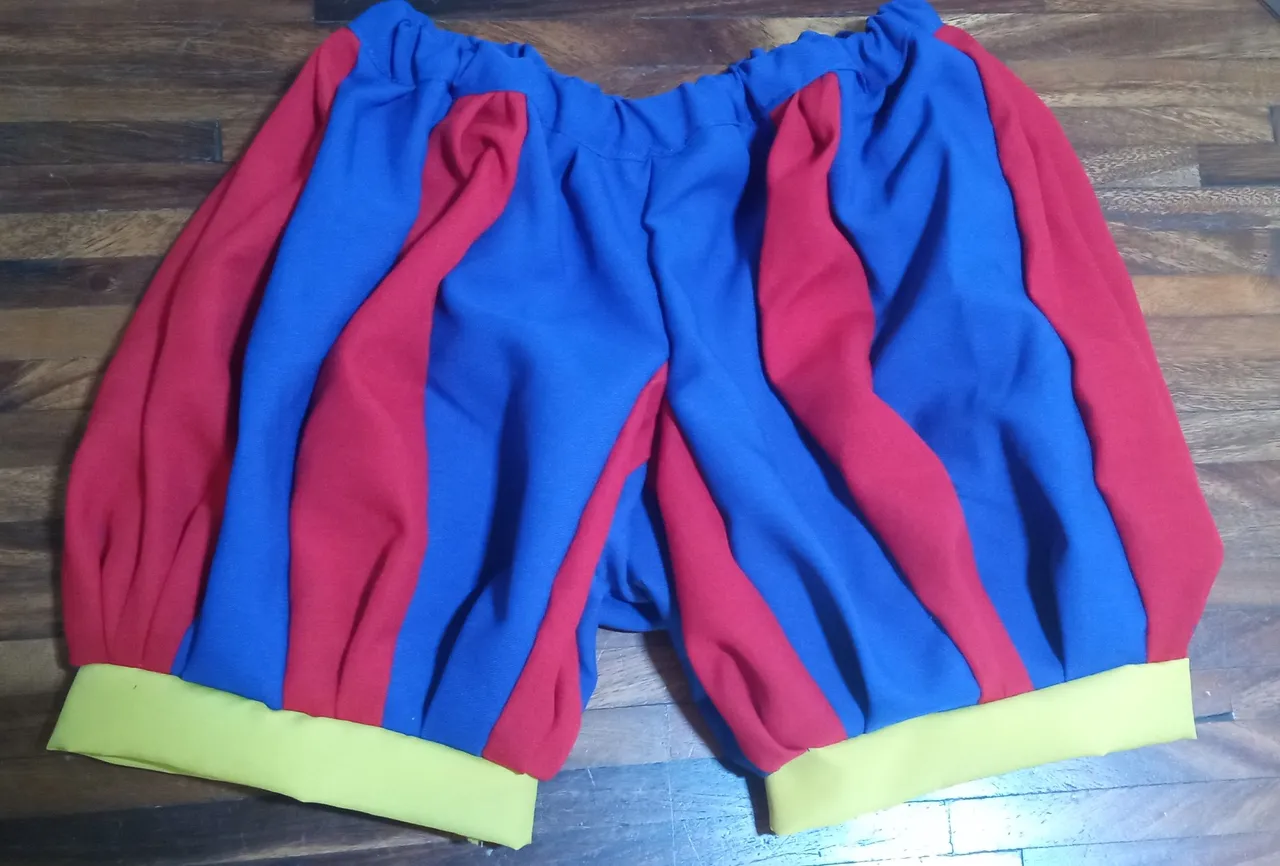
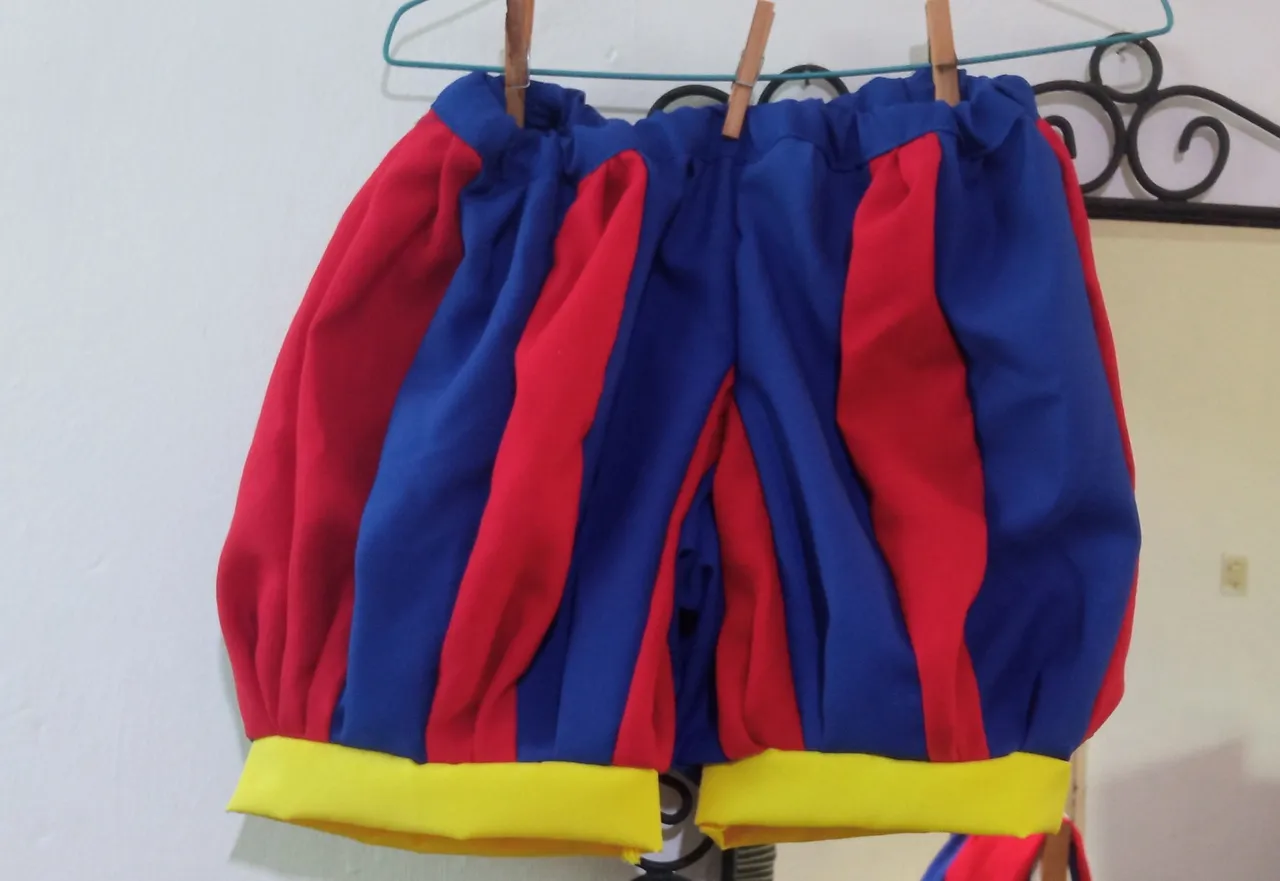
Then, I joined these pieces at the crotch and closed the shorts at the sides. To make the waistband, I cut a strip of blue fabric, roughly the size of my waist, taking advantage of the opportunity to make the darts in the blue areas of the shorts. I sewed the waistband and while I was doing so, I put in an elastic band so that it would fit my waist. Finally, for the lower hem, I used some strips of yellow fabric, the size of my thighs.
 |  |  |
|---|
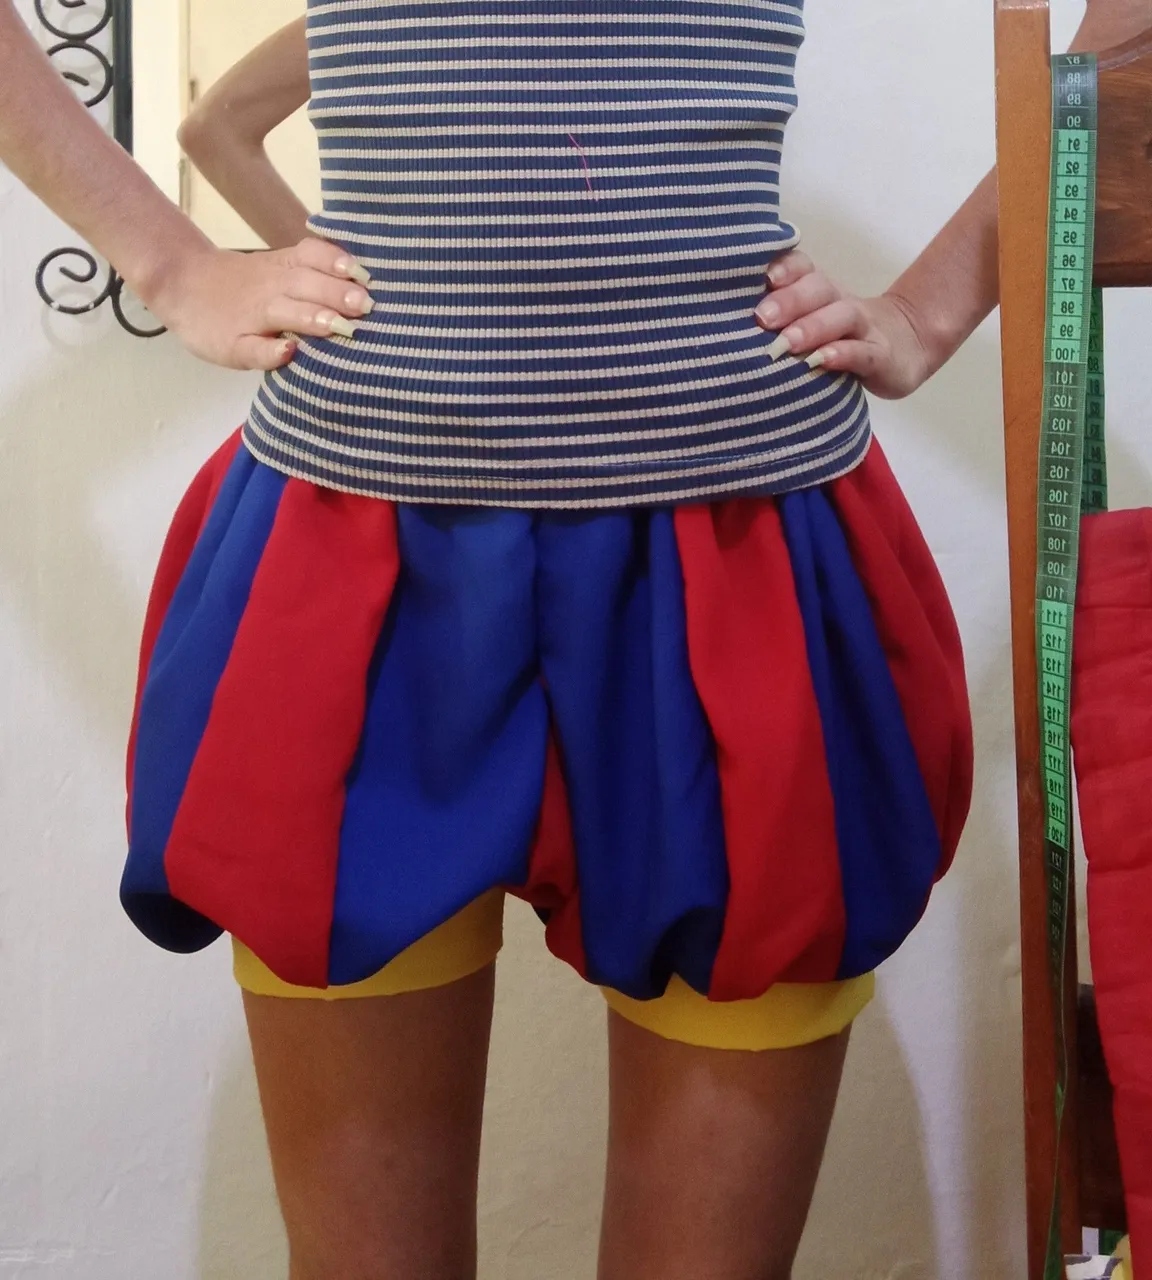
This way, I had the shorts ready. And if I want, I can wear them independently of the suit because I think they look pretty good.
 |  |
|---|
💙 CENTRAL PIECE FINISHED ❤️
With this, I was able to have the character's body ready; I consider it to be the most complicated piece of the entire costume and even though the fabric was not the right one, I consider that I did a good job with the material I had available. In order to put on the cosplay, therefore, I have to put on the shorts first and then, from the top, put on the body, which as I mentioned, closes at the bottom with snap buttons. I honestly didn't think it would turn out that well, but once I finished it, I was quite satisfied with the final result, not to mention that it feels quite comfortable to wear, the same for its placement.
For the white part of the legs, I was thinking of doing the same thing as the sleeves and sewing a white piece of spandex fabric on them, but I don't have enough spandex fabric to do it right now. Although I'm also thinking of buying some white pantyhose instead... I'm not sure yet. Since the last time I used body paint I was allergic and I don't want to take any risks 😅
I also need to make the gloves, the shoe lining and the hat, but with these pieces, I feel much more encouraged with what's missing, which I think is much simpler. As I mentioned, I made all of this with fabric that I got from some suits that I unstitched. We should never doubt the power of using pieces that we think are no longer useful, so I always accept clothes that are given to me, mostly for the fabric that you never know when it might be useful in our sewing projects.
Thank you very much for visiting my post. I hope you found it interesting.
Until next time!
CONTENIDO EN ESPAÑOL
¡Hola a todos los integrantes de ésta comunidad y amantes de la costura! Estoy realizando un cosplay para un evento anime (basado en animación japonesa) y el diseño del traje, tenía un estilo de manga que nunca había realizado, la cual después de buscar, la más parecida a lo que necesitaba, eran las mangas al estilo Blanca Nieves.
Primero, les hablaré acerca del personaje del cual, está basado éste proyecto. Es una payasita llamada Pomni y según se puede apreciar, las mangas de su traje dan la alusión de pelotas bicolores. Pensé que el tipo de mangas como las de Blanca Nieves, era la más ideal para realizarlo.
❤️ MANGAS 💙
Para hacer éste tipo de manga, lo primero que hice fue cortar las piezas de mi talla y luego, hice tres líneas divisorias, procurando que la separación entre cada una, fuese pareja.
| |
|---|
Una vez hecho esto, corté la pieza a través de las líneas y corté unos rectángulos en tela roja, los cuales, procedí a coser de forma intercalada en la pieza de la manga, aumentando de ésta forma, el tamaño de la misma.
| | |
|---|
Gracias a éste aumento que hice, después, realicé unas pequeñas pinzas en cada sección de la manga, para que ésta, se fuese ruchando un poco (en las de Estilo Blanca Nieves, las partes rojas se ruchan en su totalidad, pero para mi traje, sólo lo hice un poco, ya que quería que tanto la parte roja como la azul, fueran visibles del mismo modo). Adicional a ello, corté unas tiras de tela de color amarillo, las cuales cosí en la parte inferior de las mangas, a modo de dobladillo. Ya con éste paso, podemos dar por terminadas nuestras mangas al estilo Blanca Nieves y anexarlas al vestido o camisa de nuestra preferencia.
| | |
|---|
En mi caso, le añadí a mis mangas unas piezas de tela licrada blanca, para no tener que pintarme la piel (ya que el personaje, tiene la piel blanca 😆).
❤️ BODY 💙
En cuanto al traje, éste lo realicé reciclando un cosplay que había hecho anteriormente para uno de mis hermanos. Luego de ver la imagen del personaje, me di cuenta de que para poder elaborar éste traje, necesitaba coser una especie de body. Nunca había hecho éste tipo de prenda y la tela que tenía, era una tela rígida, así que no sabía si me iba a salir bien (ok, lo admito, este proyecto lo inicié más que nada con fe 😆). Pero, no perdía nada con intentarlo, de modo que corté las piezas delanteras y traseras, de mi talla. Por suerte, como mi hermano es más alto y ancho que yo, no me faltó tela y pude cortar el sobrante con tranquilidad.
| | |
|---|
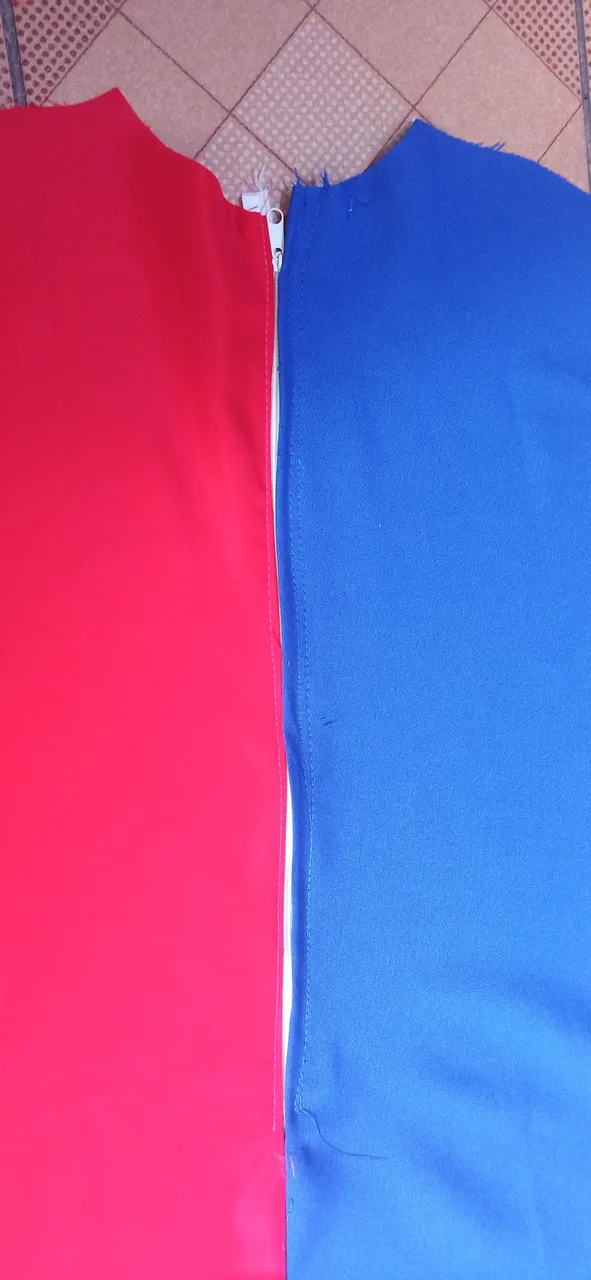
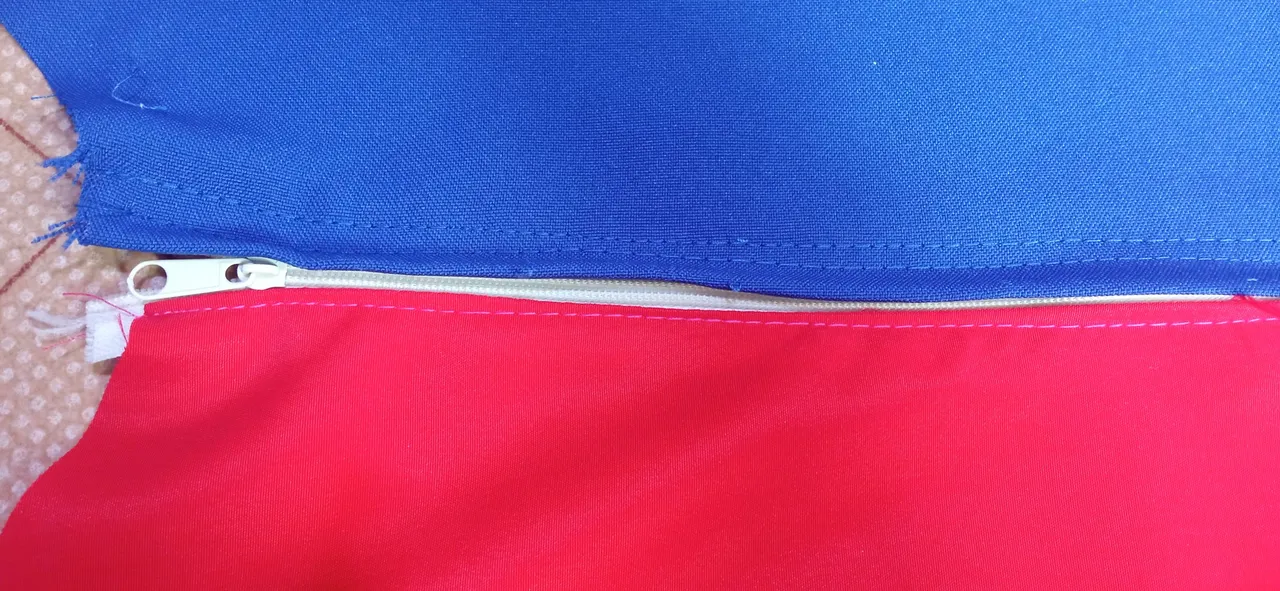
Lo que más animó del diseño, era exactamente su estilo bicolor, me permitió hacer los empates con las piezas que había descosido del traje de mi hermano y que me sirvieran perfectamente. En el caso de las piezas traseras, le añadí un cierre (también reciclado, era de un bolso que se dañó), ya que como mencioné, la tela es rígida y si o sí, necesitaba un cierre para poder ponerme y quitarme el traje. Traté de coserlo lo más oculto posible... pero en definitivamente, necesito un pie de máquina para coser cierres jaja pero bueno, al menos es blanco y no de un color que desentona 😅
 |  |  |
|---|
Llegado a éste punto, cosí las mangas que hice previamente y para la parte inferior, traté de darle la forma del body, cosiéndole unas tiras de color amarillo para que se viese como la del personaje. Para que se pueda cerrar, le cosí a manos unos botones a presión en la unión de las piezas trasera y delantera.
| | |
|---|
Para los botones del traje, opté por realizar unas circunferencias de tela, a las cuales luego, rellené con un poco de guata o relleno antialérgico. Los cosí al body con una costura a mano. Y en cuanto al cuello, realicé uno de forma sencilla, dibujando directamente sobre la tela la forma que me pareció, era la más conveniente y después, lo cosí al body.
| | |
|---|
💙 SHORT ❤️
Al principio, había pensado realizar la parte abultada de los muslos del body, cosiéndola directamente al mismo. Pero luego de analizar la pieza que tenía, me di cuenta de que era imposible porque ¿Cómo me lo pondría? Fue entonces cuando se me ocurrió la idea de coser una pieza extra, que se colocaría antes del body. En éste caso, un short bombacho. Por suerte, haber realizado las mangas me ayudó a poder saber cómo realizar éste tipo de short, ya que se trata básicamente del mismo procedimiento. Así que, corté las piezas correspondiente al short y las dividí, cortando luego en tela roja, los excedentes. Cabe mencionar que estas piezas las corté de los trajes que había previamente descosido.
| |
|---|
A la hora de cortar, fueron varias piezas y por un momento me estresé (recordé cuando trabajaba haciendo cartucheras en cantidades), pero a medida que iba cosiendo, me iba animando. Uní las tiras de tela roja a las piezas del short e hice las pinzas en las piezas rojas (las pinzas en las azules, las hice después). Una vez que hice esto, uní las piezas delanteras y traseras por la zona del tiro.
| | |
|---|
Luego, uní estas piezas en la parte de la entrepierna y cerré el short en los laterales. Para realizar la pretina, corté una tira de tela de color azul, más o menos del tamaño de mi cintura, aprovechando entonces, de realizar las pinzas en las zonas azules del short. Cosí la pretina y mientras lo hacía, metí una goma para que quedara a mi talle. Finalmente, para la parte del ruedo inferior, utilicé unas tiras de tela amarilla, del contorno de mis muslos.
| | |
|---|
De ésta forma, tuve el short listo. Y si lo deseo, puedo usarlo de forma independiente al traje porque considero que se ve bastante bien.
| |
|---|
💙 PIEZA CENTRAL TERMINADA ❤️
Con esto, pude tener listo lo que sería el body del personaje; considero que es la pieza más complicada de todo el traje y a pesar de que la tela no era la adecuada, considero que hice un buen trabajo con el material que tenía disponible. Para poder colocarme el cosplay, por tanto, tengo que ponerme primero el short y luego, colocarme desde la parte de arriba, el body, el cual como mencioné, se cierra en la parte de abajo con unos botones a presión. No pensé sinceramente que quedase tan bien, pero una vez que lo terminé, quedé bastante satisfecha con el resultado final, sin mencionar que se siente bastante cómodo puesto, lo mismo para su colocación.
Para la parte blanca de las piernas, estaba pensando en hacer lo mismo que en las mangas y coserles una pieza de color blanco, en tela de licra, pero no tengo tela de licra suficiente para hacerlo en este momento. Aunque estoy pensando también en comprarme mejor unas medias pantys de color blanco... Aún no estoy segura. Ya que la última vez que usé pintura corporal medio alergia y no me quiero arriesgar 😅
También me falta realizar lo que serían los guantes, el forro de los zapatos y el gorro, pero con éstas piezas, me siento mucho más animada con lo que falta que considero, es mucho más sencillo. Como les mencioné, todo esto lo hube realizado con tela que obtuve de unos trajes que descosí. Nunca dudemos del poder de aprovechamiento de piezas que pensamos, ya no tienen utilidad, por eso, yo siempre suelo aceptar ropa que me obsequian, más que nada por la tela que nunca se sabe, cuando pueda servirnos en nuestros proyectos de costura.
Muchas gracias por haber visitado mi publicación. Espero que les haya parecido interesante.
¡Hasta una próxima oportunidad!