
Greetings and blessings to everyone around here, I missed you all, since last week I didn't visit this community, to which I gladly come every needlework Monday to share with you some of my creations for my beautiful princesses. Checking the feed of @needleworkmonday I see a lot of cute posts and the fabrics call my attention, I feel motivated to knit, so I'll be practicing to see what I can do in this beautiful technique.
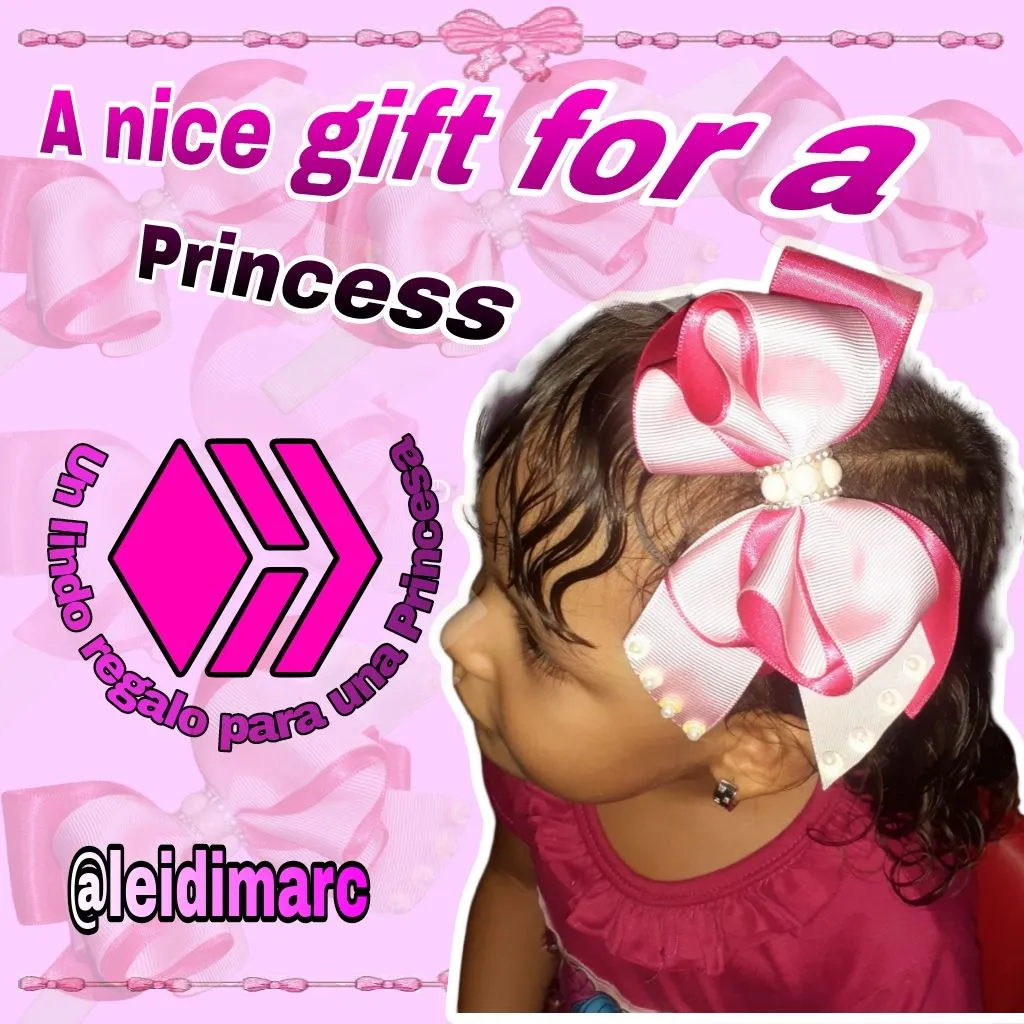
Today I want to show you a very nice and easy to make headband. A few days ago a friend told me that she needed to make a nice gift for a princess, who is her niece who had a birthday, she asked me if I could make her a headband like the ones I make for my girls, since she always sees in my WhatsApp statuses that my girls are always combined between their clothes and hair accessories.
The bad thing was that she called me at night and wanted it for the other day and in those pink, fuchsia and white colors. At that moment I hesitated to tell her if I could accept her request, since I didn't know if I had the material on hand. I told her I would call her as soon as I went through my boxes of materials. After spending quite a while looking for the combination of ribbons, elastic and decorations, I took a breath and called her to tell her that I could.
I have plenty of material to make bows, because every time I go shopping for my girls, I always buy extra, also that the decorations come in quantity, but for me it's never enough and I keep buying heh, heh, heh. I used to do it more often, but now that I have it in stock, when I need something, I look first before I go shopping.
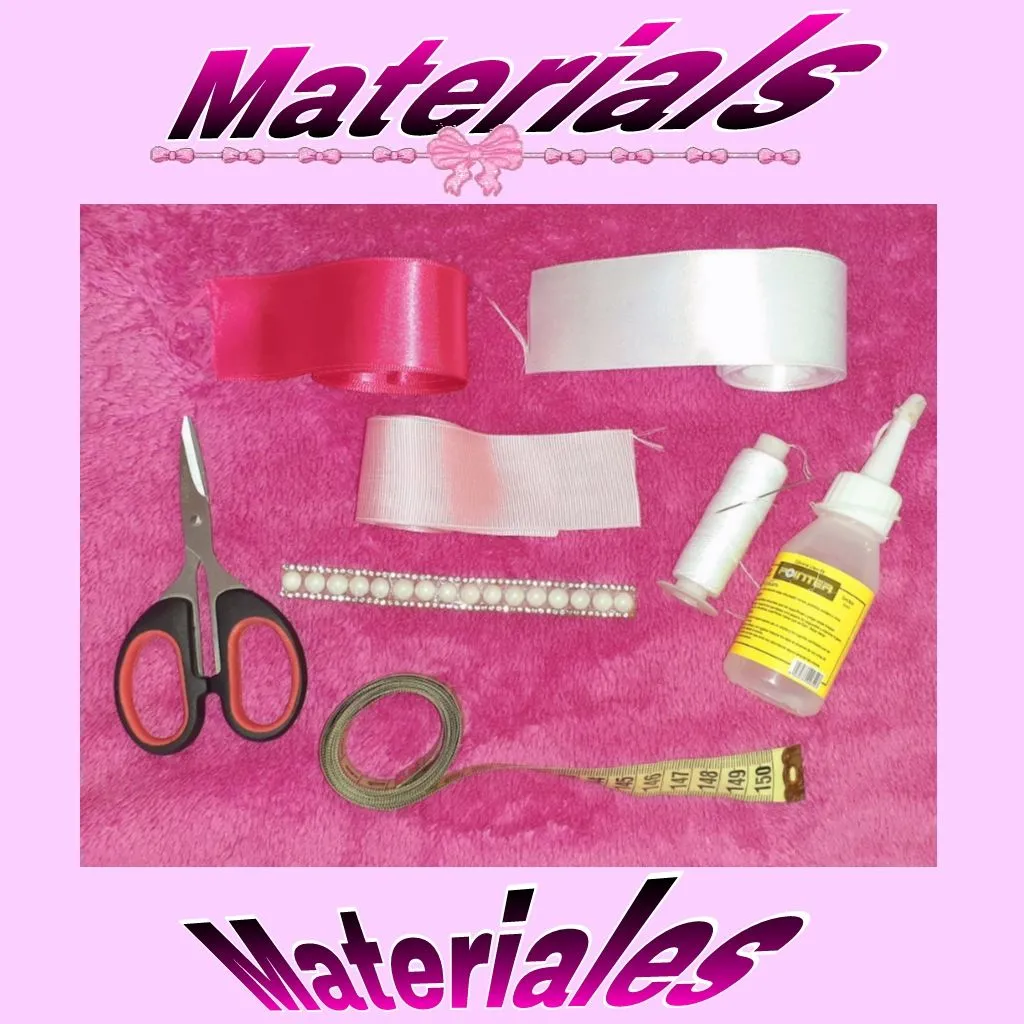
Now that I have told you the story of why I made this delicate headband, let me tell you how I did it, maybe you will dare to recreate it. For this I show you the materials I used:
- 3.8 cm white ribbon.
- Fuchsia ribbon of 3.8 cm.
- Pink grosgrain ribbon 3,8 cm.
- White elastic 45 cm.
- Decorations.
- Thread and needle.
- Scissors.
- Lighter.
- Pins.
- Silicone.
- Tape measure.
Procedure
To make this cute headband for little girls, the spoiled of the house. We must do the following:
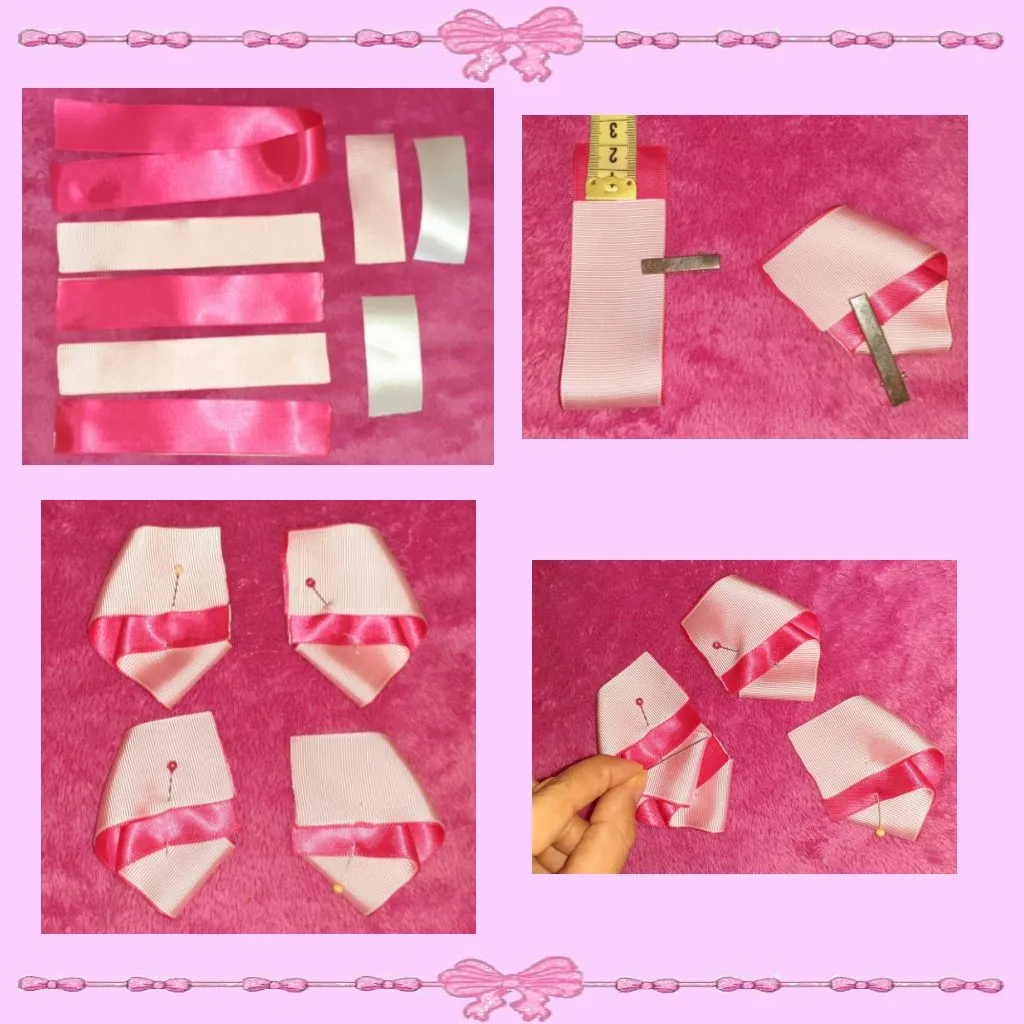
First we cut all the ribbons to need:
- 1 fuchsia of 42 cm.
- 4 pink of 19 cm.
- 4 fuchsia of 19 m.
- 1 white of 9.5 cm.
- 1 pink of 9.5 cm.
- 1 white of 8 cm.
We glue the pink ribbons with the fuchsias, sealing them at the ends with the lighter, so they will have two layers or two colors.
Now make the bow, as I said it is easy, just fold the ribbon, leaving a distance of 2 cm, as shown in the picture, then fold each end towards the middle of the ribbon. We hold it with a clip or pin and do the same with the other ribbons.
We mount one of the parts on top of the other, making the ends coincide.
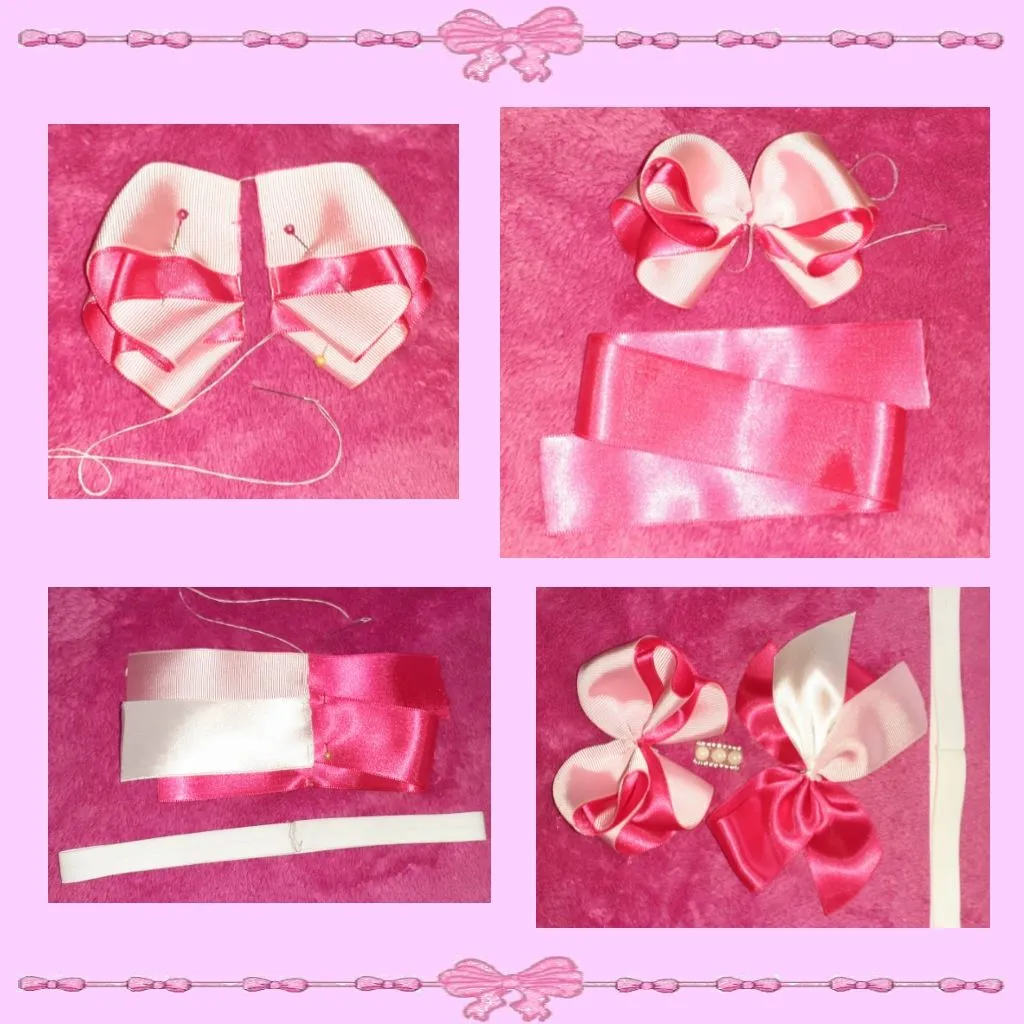
Now it's time to sew the seams, for which we will make 6 stitches on each side, stretch the thread, secure it well and that's it.
Now we will make the base, with the longest ribbon we make this basic loop, which consists of placing the ribbon in an S shape and then mark the center, there place the smaller pieces of white and pink ribbon, we pass seams.
The elastic is sewn in the center and we have all the pieces to assemble this craft.
Place one ribbon on top of the other and then on top of the elastic, secure it very well with seams and silicone, so that it is secure, because sometimes when the girls take them off or put them on, if they are not secure, they can get damaged.
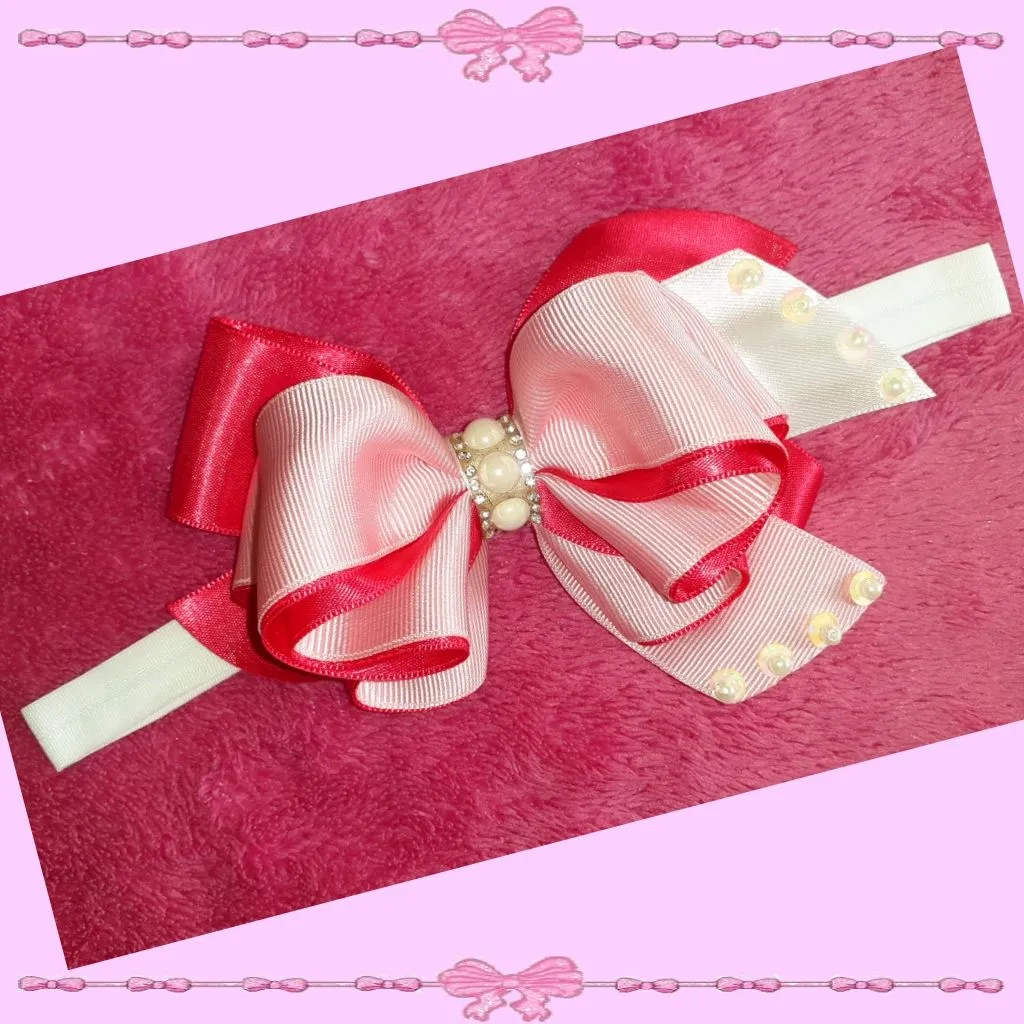
Then in the center I put tape to cover the seams and glued the decorations. I really liked the result and it looks great, Ambar lent herself as a model for this beautiful handmade bow made with love for a beautiful princess.
My friend was very happy with the result, I also gave her another gift ribbon that was Ambar's and no longer fit her, she liked that one too, it's very cute.
Well, friends, I hope you liked my publication, I made it with love for you. If you have girls you can try to make it, it is very easy.
By the way, I want to share it with my friend @rlathulerie, this one is very easy so you can make it for princess Miranda and take it to her ballet or flute performances. Come on, do it and tell me about it. Let it be a challenge, as I know you love them, I hope you overcome it too 🙂😉🥰😙 I know you can.
Saludos y bendiciones a todos por aquí, ya los extrañaba, ya que la semana pasada no pase por esta comunidad, a la que con gusto vengo cada lunes de aguja a compartir con ustedes algunas de mis creaciones para mis bellas princesas. Revisando el feed de @needleworkmonday veo muchas publicaciones lindas y me llaman la atención los tejidos, siento motivación a tejer, así que estaré practicando para ver que puedo realizar en esta técnica tan bonita.
Hoy les quiero mostrar un cintillo muy bonito y además muy fácil de hacer. Hace días una amiga, me dijo que necesitaba hacer un lindo regalo para una princesa, que es su sobrina que estaba de cumpleaños, me dijo que si le podía hacer un cintillo de los que le hago a mis niñas, ya que siempre ve en mis estados de WhatsApp que mis niñas andan siempre combinadas entre su ropa y los accesorios para el cabello.
Lo malo fue que me llamo en la noche y lo quería para el otro día y en esos colores rosado, fucsia y blanco. En ese momento dudé en decirle si podía aceptar su pedido, ya que no sabía si tenía el material a la mano. Le dije que la llamaría en cuanto revisara mis cajas de materiales. Al pasar un buen rato buscando la combinación de cintas, elástico y decoraciones, respiré y le llamé para decirle que si podía.
Tengo bastante material para hacer lazos, porque cada vez que voy comprando para mis niñas, siempre compro demás, también que las decoraciones vienen en cantidad, pero para mí nunca es suficiente y sigo comprando je, je, je. Antes lo hacía con más frecuencia, pero ahora como tengo en existencia, cuando necesito algo, primero busco antes de ir a comprar.
Ya que les eche el cuento de por qué hice esta delicadeza de cintillo, ahora vamos, que les digo como lo hice, a lo mejor se atreven a recrearlo. Para eso les muestro los materiales que utilicé:
- Cinta de razo blanco de 3,8 cm.
- Cinta de razo fucsia de 3,8 cm.
- Cinta de gros rosada de 3,8 cm.
- Elástico blanco 45 cm.
- Decoraciones.
- Hilo y aguja.
- Tijera.
- Encendedor.
- Alfileres.
- Silicona.
- Cinta métrica.
Procedimiento
Para hacer este lindo cintillo para niñas, las consentidas de la casa. Debemos hacer lo siguiente:
Primero cortamos todas las cintas a necesitar:
- 1 fucsia de 42 cm.
- 4 rosadas de 19 cm.
- 4 fucsias de 19 m.
- 1 blanca de 9,5 cm.
- 1 rosada de 9,5 cm.
- 1 blanca de 8 cm.
Las cintas rosadas la pegamos con las fucsias, sellándolas por las puntas con el encendedor, así quedarán con dos capas o dos colores.
Ahora hacer el lazo, como dije es fácil, solo doblamos la cinta, dejando de distancia 2 cm, como se muestra en la imagen, luego doblamos cada punta hacia el medio de la cinta. Lo aguantamos con una pinza o alfiler y hacemos lo mismo con las demás cintas.
Montamos una de las partes encima de la otra, haciendo coincidir las puntas.
Es hora de pasar costuras, para lo cual haremos 6 puntadas en cada lado, estiramos el hilo, aseguramos bien y listo.
Ahora haremos la base, con la cinta más larga hacemos este lazo básico, que consiste en colocar la cinta en forma S y luego marcar el centro, ahí colocar los trozos más pequeños de cinta blanca y rosado, pasamos costuras.
El elástico lo cocemos por el centro y ya tenemos todas las piezas para ensamblar esta manualidad.
Coloque un lazo encima del otro y luego sobre el elástico, asegure muy bien con costuras y con silicona, para que quede bien seguro, ya que las niñas a veces cuando se los quitan o ponen, si no están seguros, se pueden dañar.
Luego en el centro le coloque cinta, para tapar las costuras y pegue las decoraciones. A mí me gusto mucho el resultado y puesto se ve genial, Ambar se prestó como modelo para este lindo lazo hecho a mano con amor para una bella princesa.
Mi amiga, quedo feliz con el resultado, además le di otro cintillo de obsequio que era de Ambar y ya no le quedaba, ese le gustó también es muy lindo.
Bueno, amigos, espero que les haya gustado mi publicación, la hice con mucho cariño para ustedes. Si tienen niñas pueden intentar hacerlo es muy fácil.
Por cierto, quiero compartirlo con mi amiga @rlathulerie, este si está muy fácil para que se lo hagas a la princesa Miranda y lo lleve a sus presentaciones de ballet o de flauta. Anímate hacerlo y me cuentas. Qué sea un reto, como sé que te encantan, espero lo superes también 🙂😉🥰😙 yo sé que tú puedes.
Photos taken by @leidimarc | Fotos tomadas por
Device | Dispositivo | Samsung Galaxy A20
Photos edited in | Fotos editadas en: | App Picsart
Separators made in | Separadores hechos en | App Picsart
Gif created in | Gif creado en | App Video Maker
Translation with| Traducción con | DeepL