Hey #FOODIES! We're here for PART 2 of the Kimchi Fried Rice and Steak recipe. If you haven't read PART 1, do give it a read! Today, we'll be making #STEAK, which is a favorite go-to in our household as it takes very little preparation but is absolutely delicious.
PAN SEARED STEAK WITH PAN SAUCE
Ingredients:
Steak (ideally 3/4 to 1-inch)
Salt
Pepper
Neutral Oil
Option for sauce:
Shallots
Red Wine
Butter
Beef Stock
Herbs
STEP 1: Thawing It Out
Perhaps the most important part of the preparation is making sure that your steak is ready to be cooked. If it's frozen, best to take out your steak a few hours before and if chilled, allow it to come into room temperature before doing any cooking. This step would ensure that the entire steak is cooked evenly. Even if you've nailed the time it takes to cook the steak for the thickness, it won't matter if your uncooked steak is cold on the inside, it won't come out in your preferred doneness.
STEP 2: Let's Get Seasoning
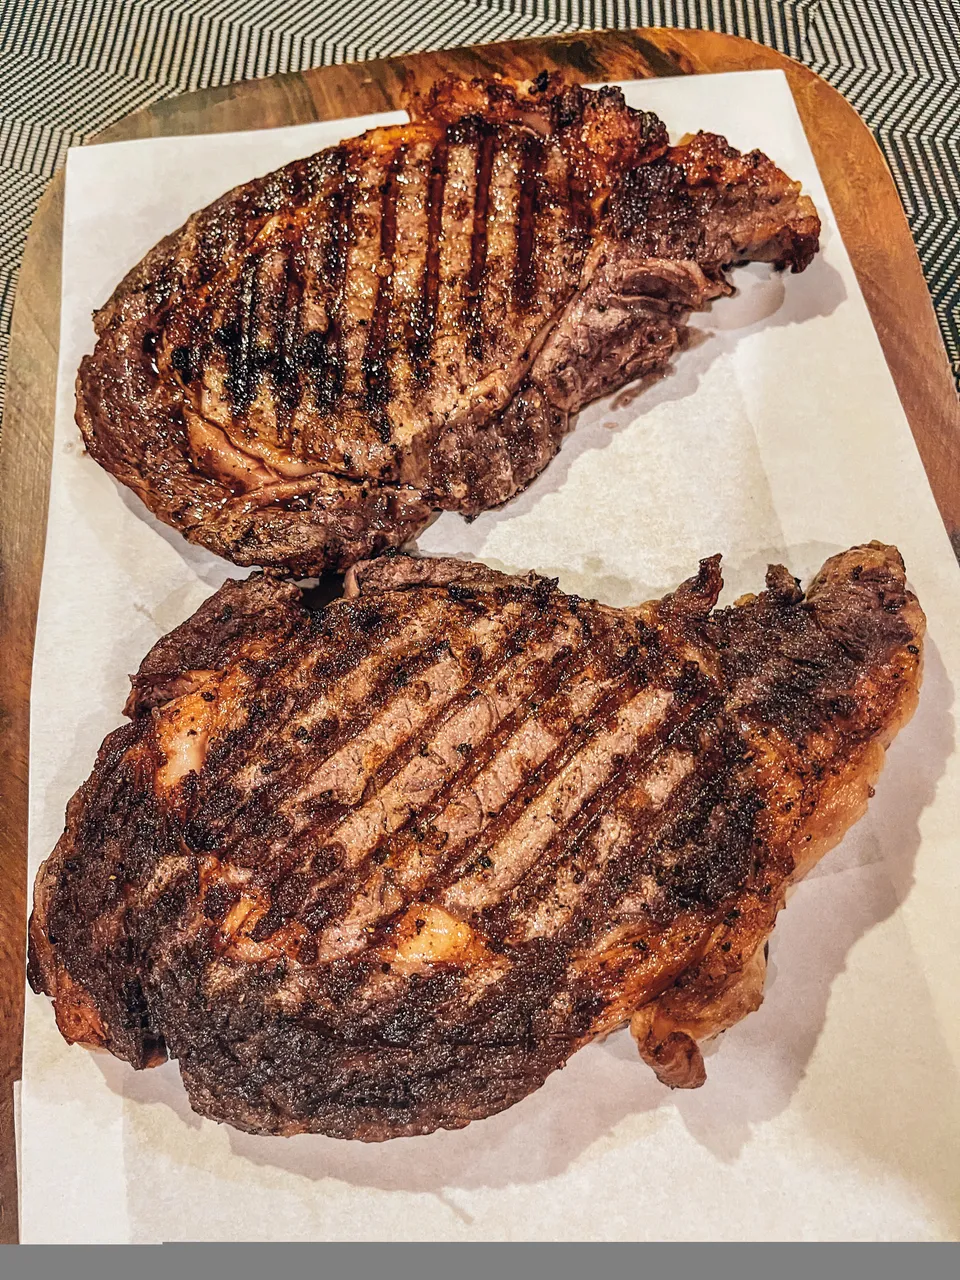
Since I got around an inch of steak, it's important to heavily season the meat. I use kosher salt cause it's a little bit more forgiving in terms of overall saltiness. Using table salt in the large amounts needed for a thick cut of steak may be a bit risky. For the freshly ground pepper, just make sure you've covered most areas of the steak. You can even play around with different types of peppers for your steak as it really changes up the flavor. Here are some photos of the seasoned steak, the salt isn't that obvious cause it's been absorbed.
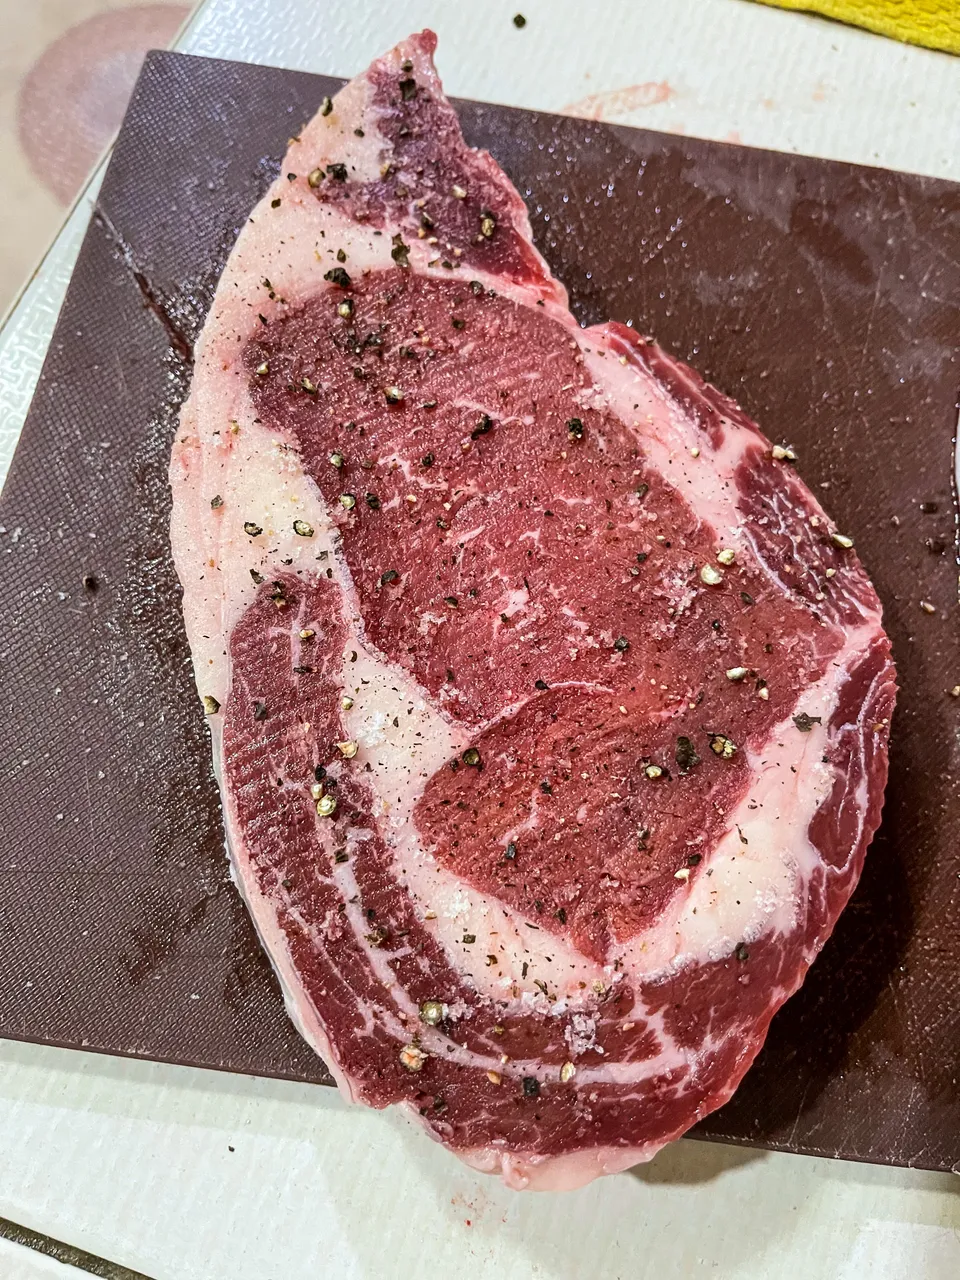
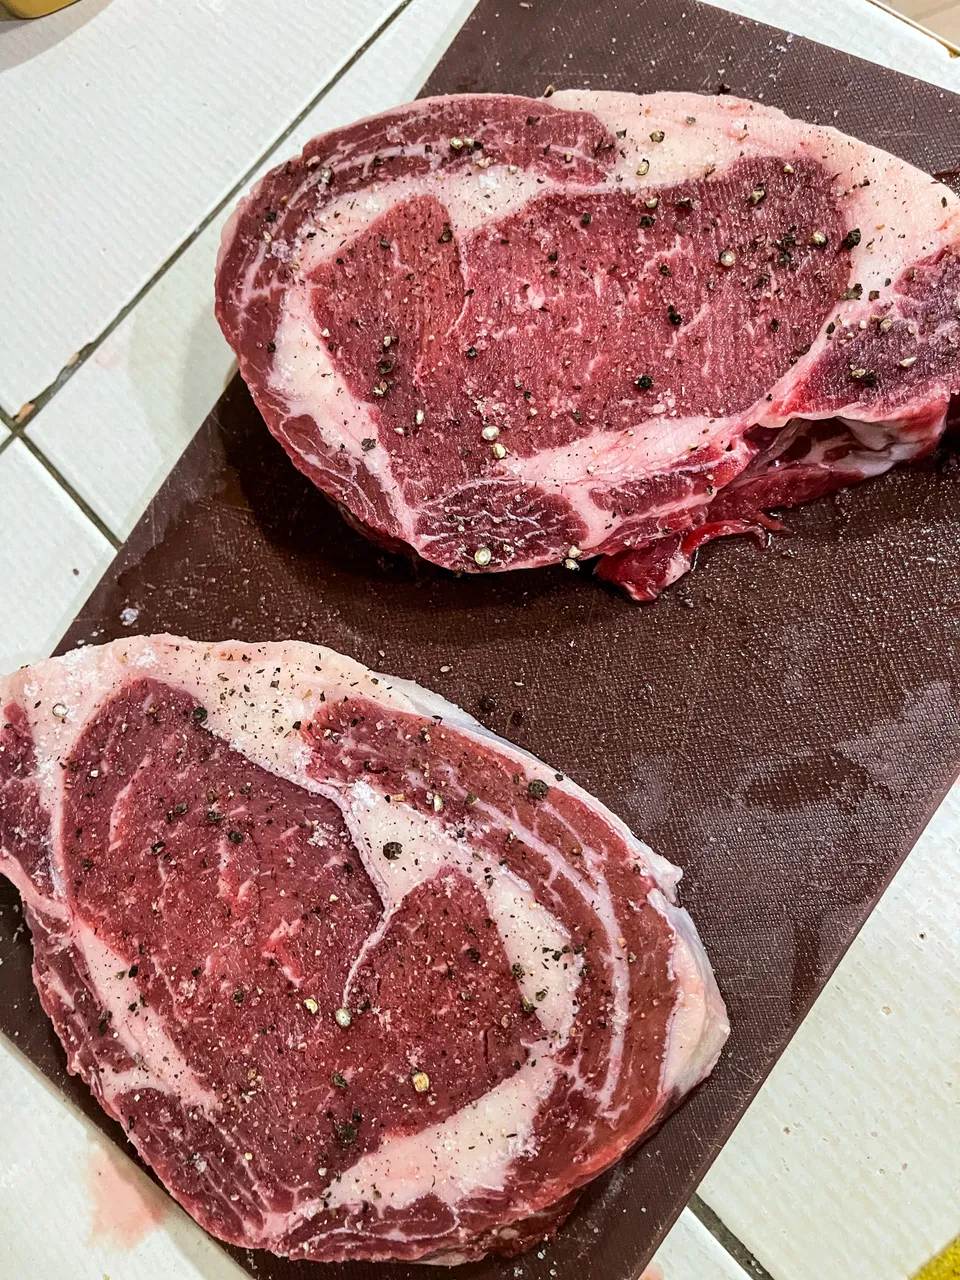
I actually added a bit more seasoning after I took the photos cause I felt like it needed more. It really does depend on the thickness, if you play around with it a bit, you'll find that perfect amount for your usual thickness. Also, don't forget to season the sides!
STEP 3: Fire It Up
It's super important to have a really HOT pan. Like smoking hot. I chose a cast-iron pan cause it retains heat really well. apparently, stainless steel and carbon steel works just as well. But yeah, I've had really good success with our cast-iron pan so I just used that. I usually just put the flame on the highest setting and let it heat up until I see wisps of smoke.
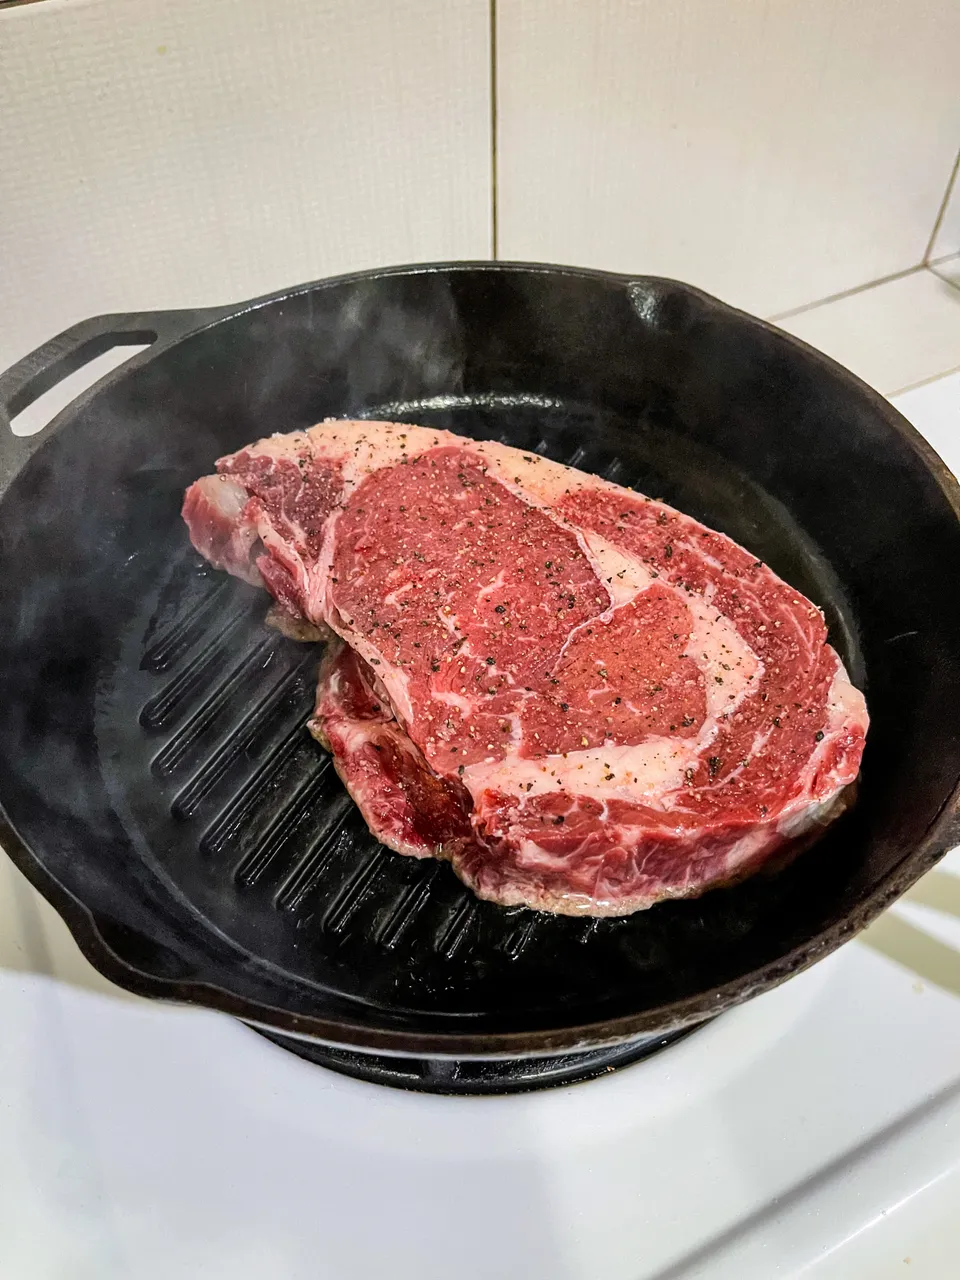
I usually don't move my steak around until I see that there's a crust. But if your pan doesn't retain heat that well, you might wanna move it to a hotter part of the pan. Just don't flip the steak until there's a crust and you should be good. For this 1-inch steak, it usually takes me around 2 minutes and 30 seconds to get a nice crust.
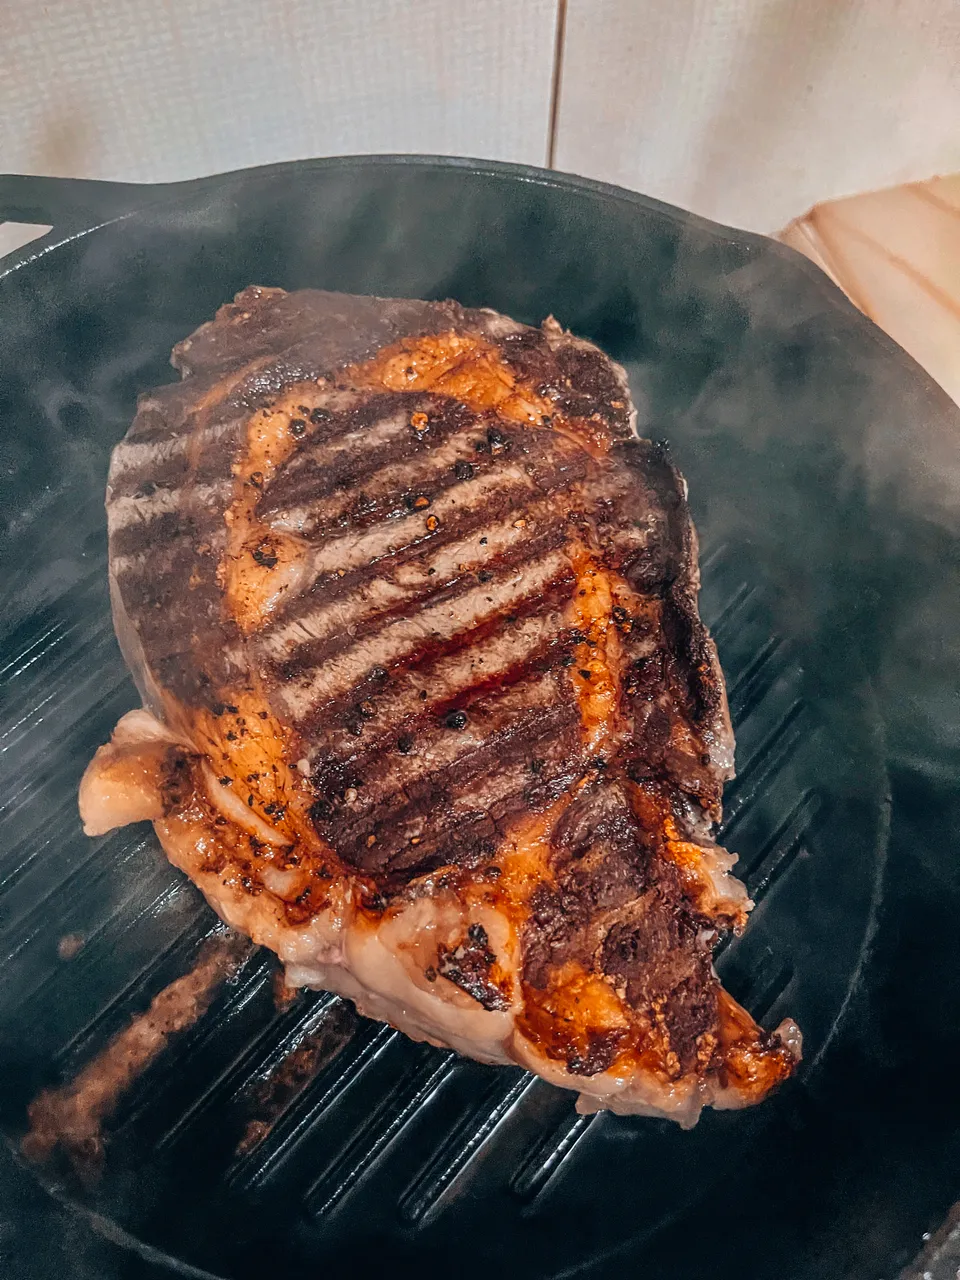
Unfortunately, cause of the ribbing some parts didn't get that crusty. You could use something heavy to make sure it stays in contact with the pan. but otherwise, I was happy with this, as we don't have something I can put on top of the steak to act as a weight. You should be able to feel that crust with whatever you used to flip the steak. Once flipped, wait for the same amount of time you cooked the first side. My 2 minutes and 3 seconds would be just right for medium rare for a 1-inch steak. Make sure that you also sear the sides! The fat is usually on the sides and it would be a shame to let all those go to waste by not rendering them. You'll see that it's done once it turns slightly crusty.
STEP 4: Rest In Yum
Once you're done with the cooking process, take out the steak from the heat. If your pan isn't big enough, you can clean the pan and then proceed to cook your next steak. I don't really recommend crowding the pan if your steak is big, it might not be able to retain a lot of heat and won't give you that nice crust. Once you're done cooking, transfer the cooked steak to a cutting board, BUT don't cut it yet. Let the steak rest while you're preparing the sauce, or if you're eating it without a sauce, just leave it for around 10 minutes or so. This will let the juices redistribute inside the steak.
STEP 5: Feelin Saucy
I gotta be honest, it totally slipped my mind to take photos of this part. When I realized it, I was halfway through it already. Anyway, I'll still walk you through it. I started by turning the heat around the same pan I cooked the steak in (don't throw the juices!) on medium in order not to burn the chopped shallots, you can also add garlic if you want, I'd add it a little later than the shallots as it's easier to burn. I let it cook until it's golden brown and fragrant. At this point, if you're using red wine, you can use that to deglaze the pan. Let it simmer for a bit in order to cook the alcohol, you'll know it's done when you can't smell that strong alcohol scent.
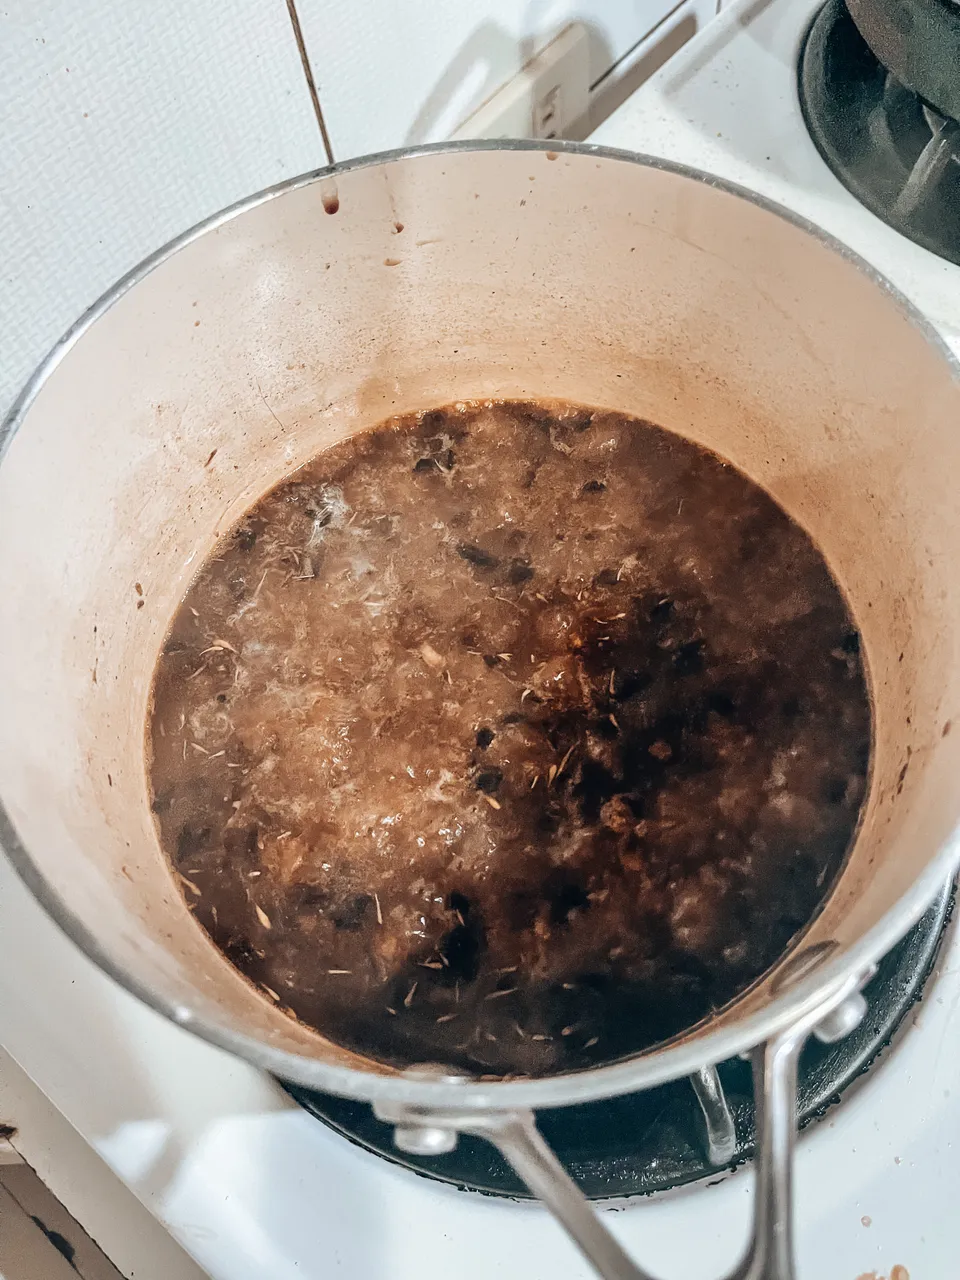
At this point, you can go and add the stock. Let it simmer for a few minutes and you can thicken the sauce with a slurry or you can just leave it loose like I did in the photo. It tastes better than it looks I promise haha. I added some thyme to my sauce cause I like the taste of it. You can also add butter if you want that rich buttery flavor in your sauce. If you added a thickener, it should coat the back of a spoon. If not, reduce it until about half or until your desired consistency. You can remove it from the heat and set aside.
STEP 6: Fancy Plates
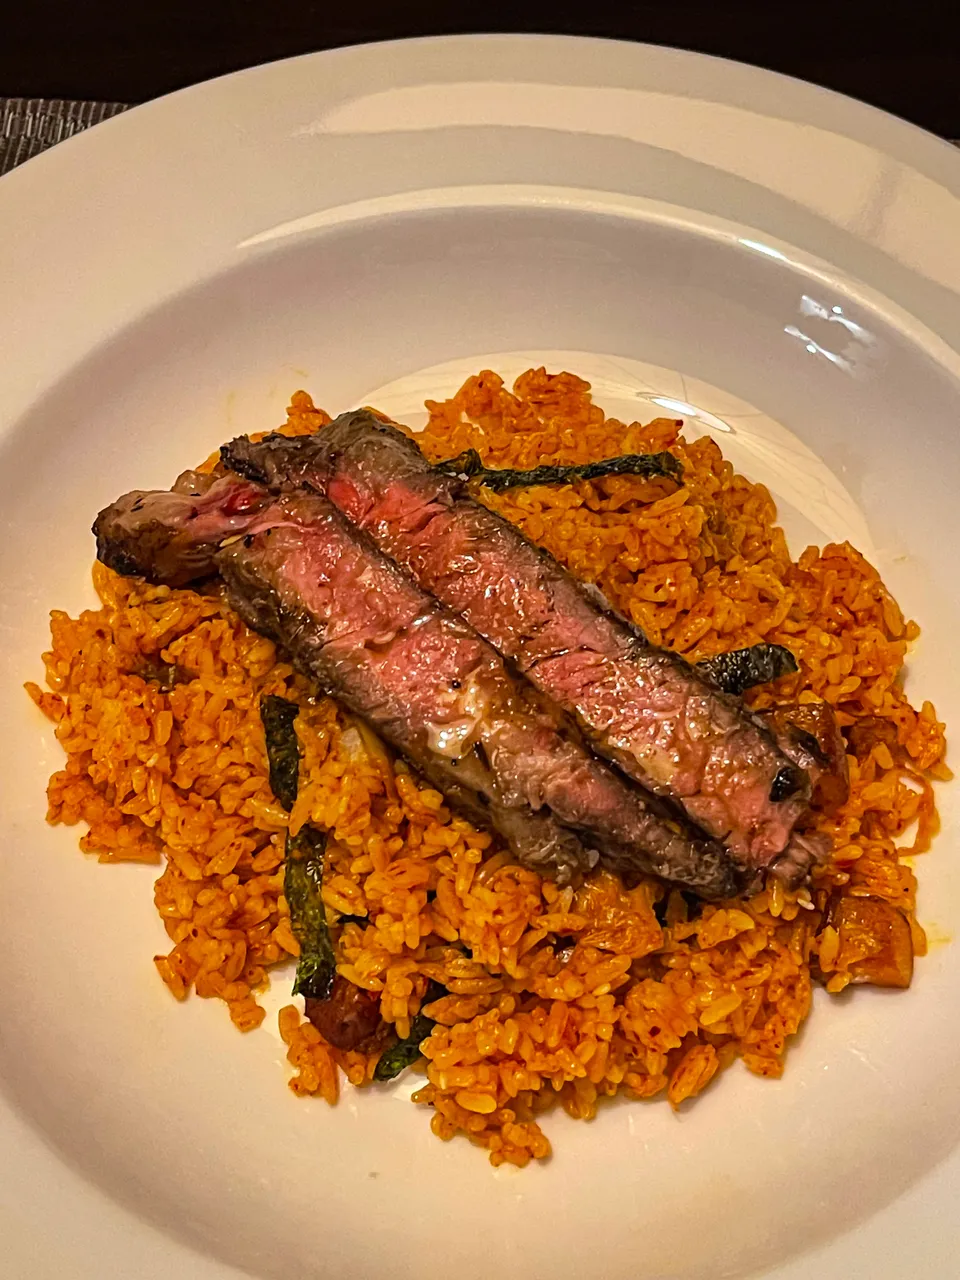
After making your sauce, or after 10 minutes, you can finally cut your steak! I'm not the best at cutting so I let someone else do it haha. You should, however, cut against the grain as it apparently makes for a more tender piece of steak. I think it has to do with the shortening of muscle fibers or something like that. Anyway, once cut, drizzle with extra virgin olive oil and top with some sea salt.
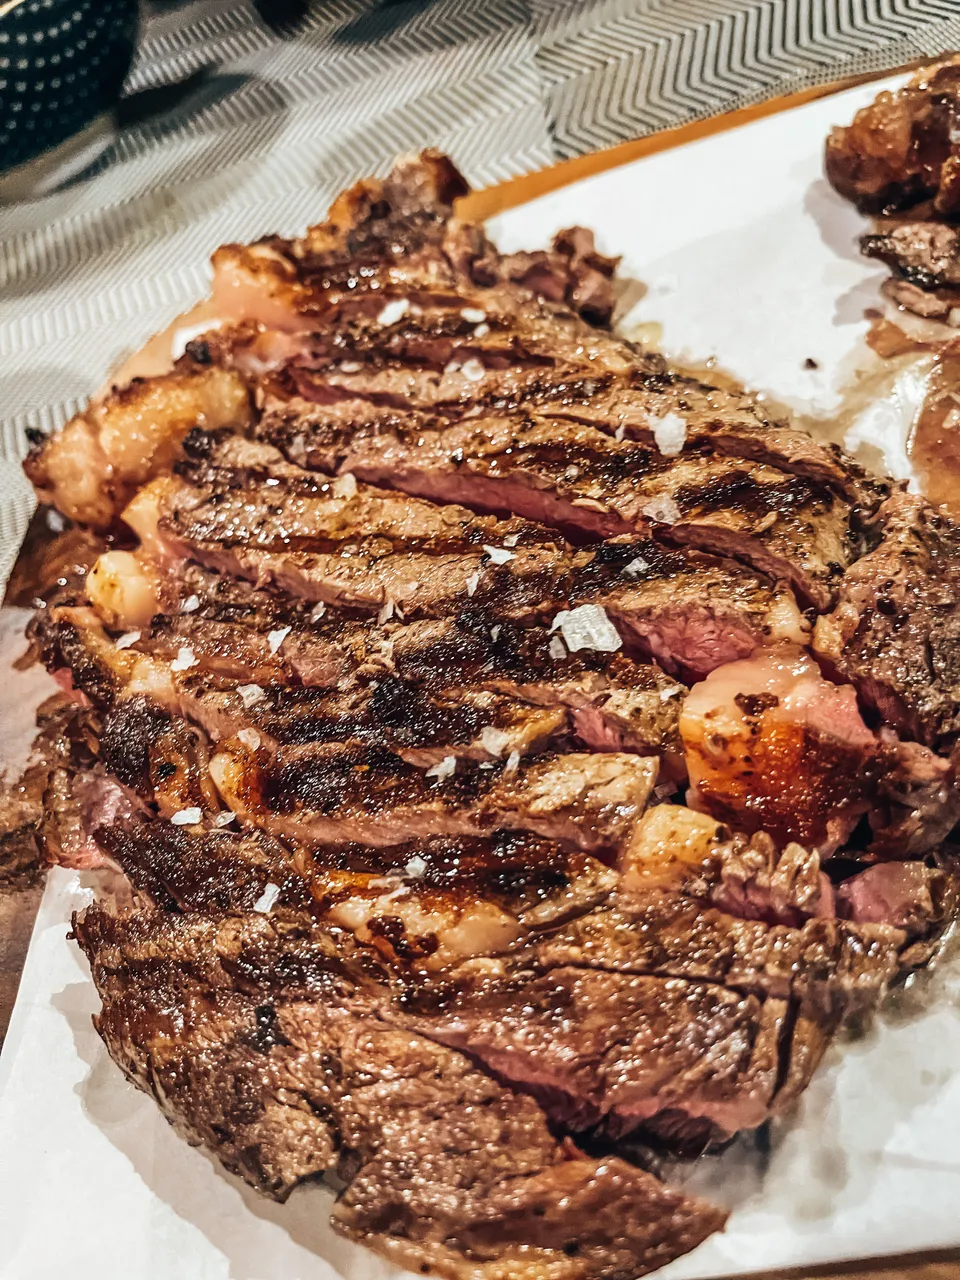
Sorry for the not-so-focused photo! At this point, I was just so hungry lol. Since we paired this with some kimchi rice, I had to plate it a bit. You can use more Asian seasonings so it would fit the rice more but we didn't have a lot of that at home even though we're Asian lol. But anyway, it still turned out pretty great I think.
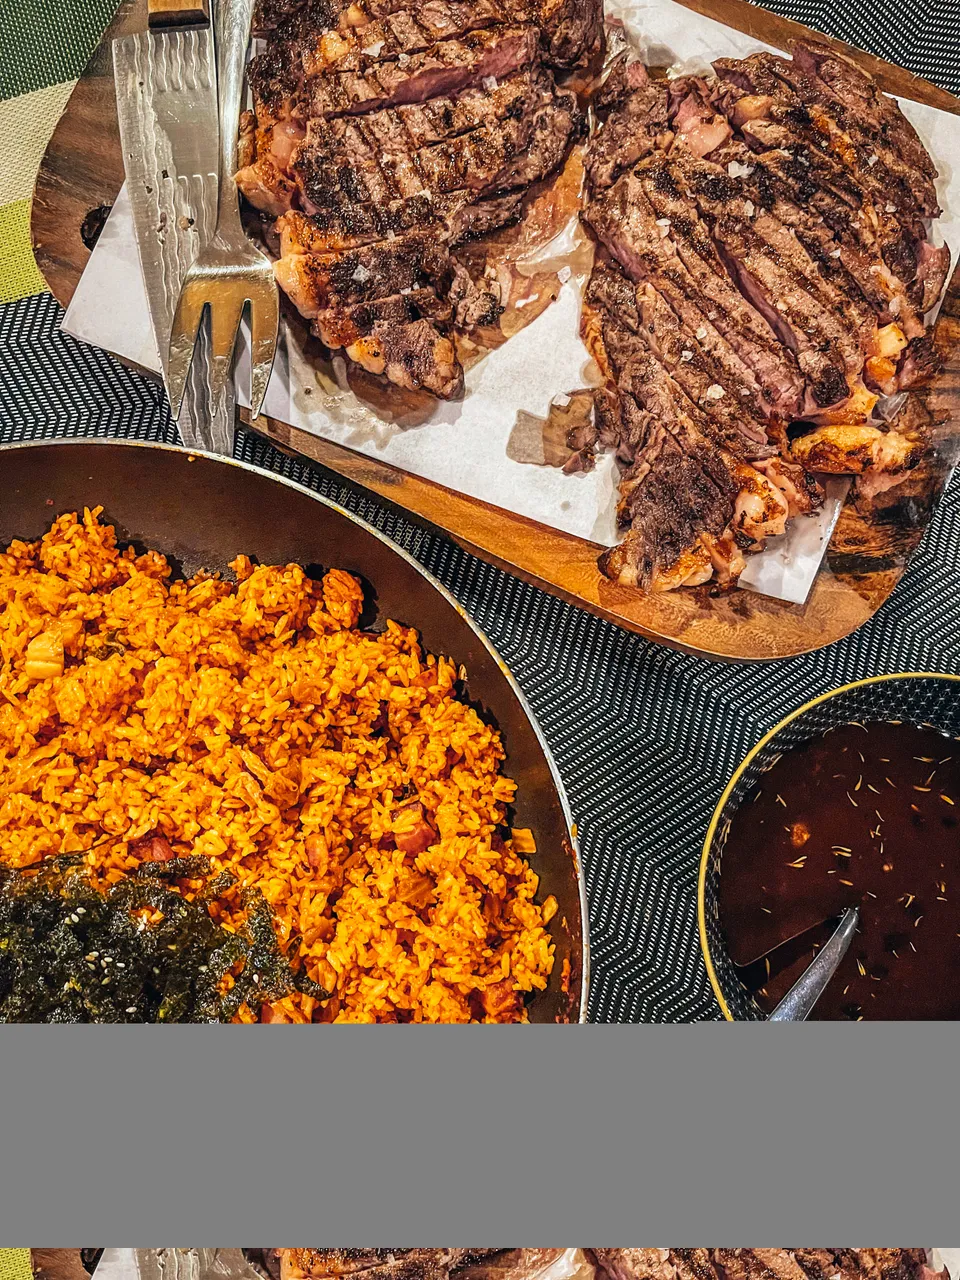
Of course, I had to plate my food. I just drizzled a bit of the sauce on the steak itself even though it didn't really need it. But yeah, you can totally play around with the sauce as well. An Asian twist doesn't sound so bad to be honest.
Anyway, that's all for this particular post. Hope you enjoyed reading this series! If you liked this post, do consider following! I usually post about food and my travels. Thank you so much, til next time!