Saludos amigos de @hivermotors tenia muchos meses sin publicar por diferentes razones, se daño mi laptop, me quede sin celular, estuve desempleado un tiempo y bueno me desanime y me aleje, estoy tratando de volver a la plataforma y comence con buen pie, ya que participe en un concurso de soloescribe y quede entre los tres ganadores, aqui dejo el enlace de mi post por si desean leerlo; CONCURSO # 10 SOLO ESCRIBE (VACIANDO RECUERDOS) (ESP)(ENG)
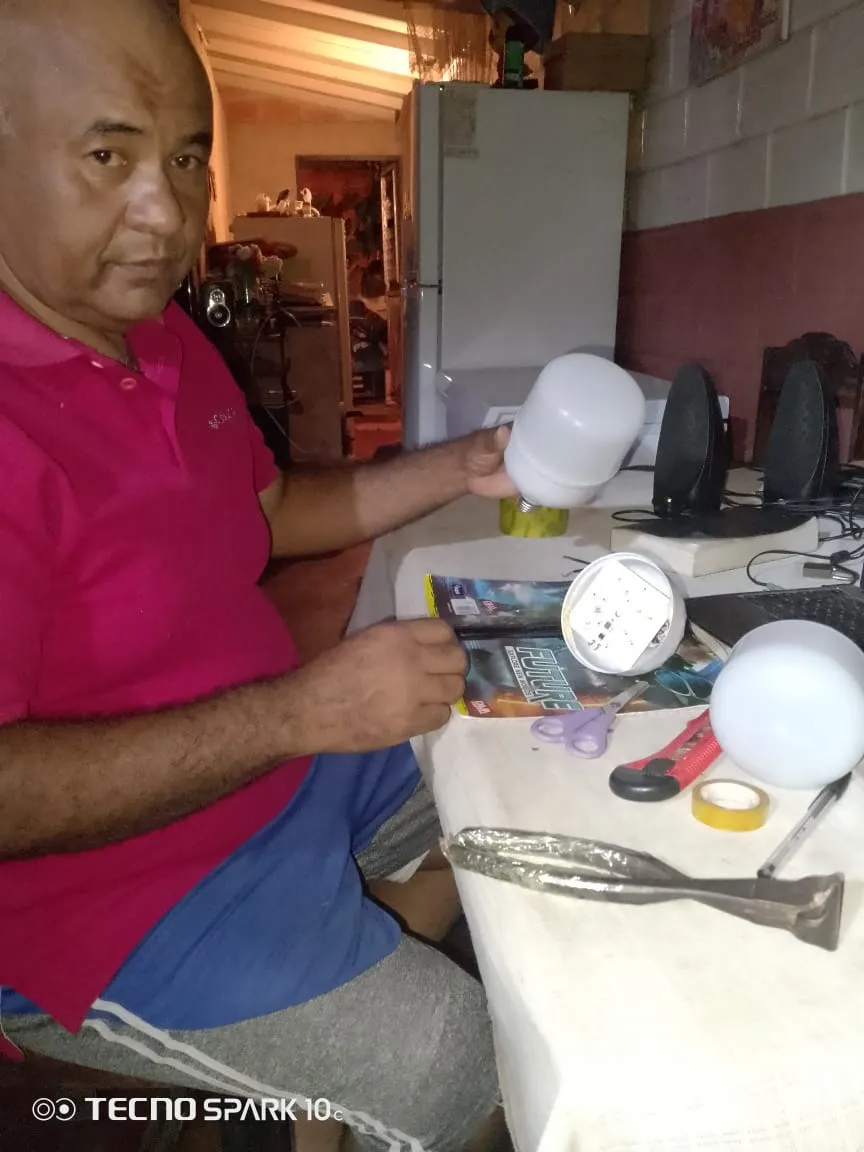
Hoy deseo compartirles un conocimiento nuevo que adquirí , me parece que es algo interesante y de beneficio para quien desee aprenderlo, se trata de reparar bombillos led, es algo sencillo y rapido, no requiere de herramientas complicadas y en sencillos pasos se le extiende la vida útil a estos bombillos.

Utilice una tijera, una cinta adhesiva, un exacto de cortar, una tenaza y un pedacito de hilo de cobre
Aprendí con información de un amigo, luego investigue un poco y descubrí que existen varias maneras de reparalos, por supuesto que hay diferentes tipos de fallas que presentan los bombillos, yo solo se reparar una, es la que les presento:
Cuando se quema uno de los diodos led:
Tengo entendido que ellas trabajan en serie, osea estan conectadas y cuando una se quema se pierde la continuidad del flujo electrico, entonces para reparar, puentiamos ese diodo y continua su función de circuito y sucede el milagro, vuelve la luz.
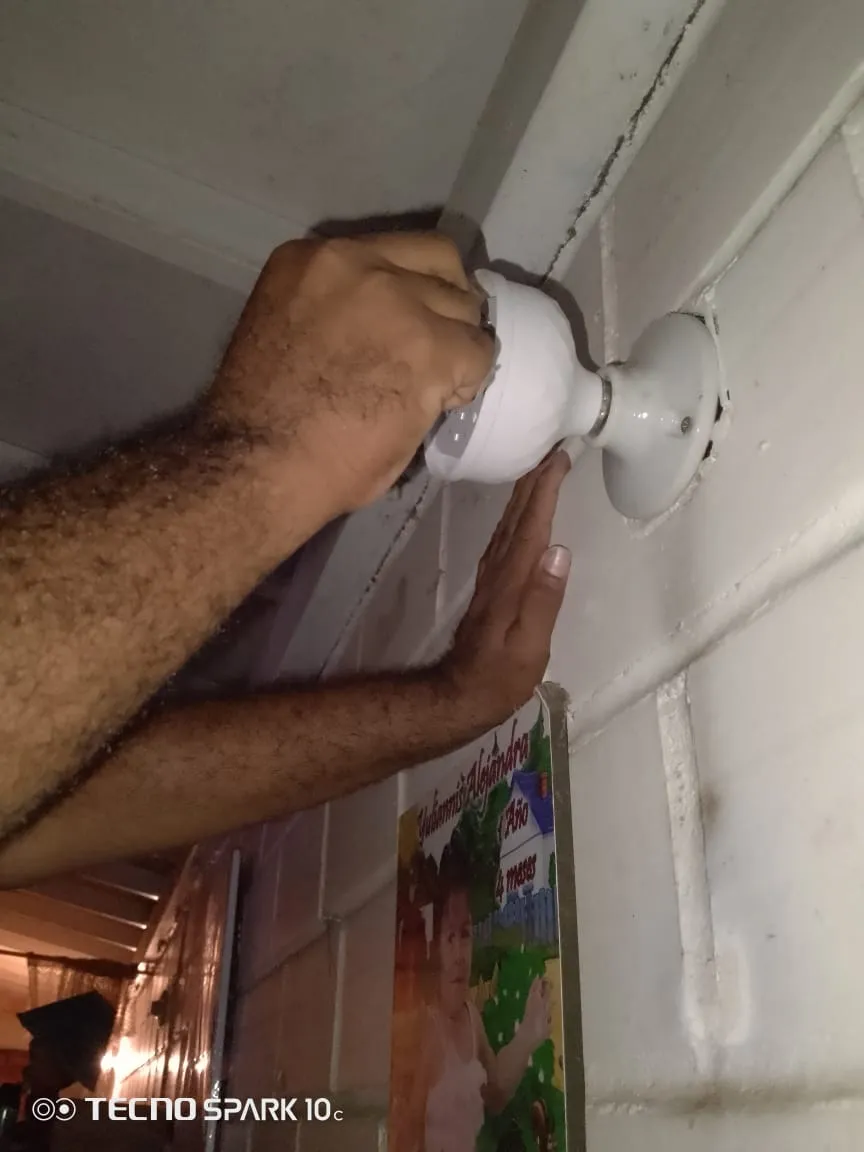
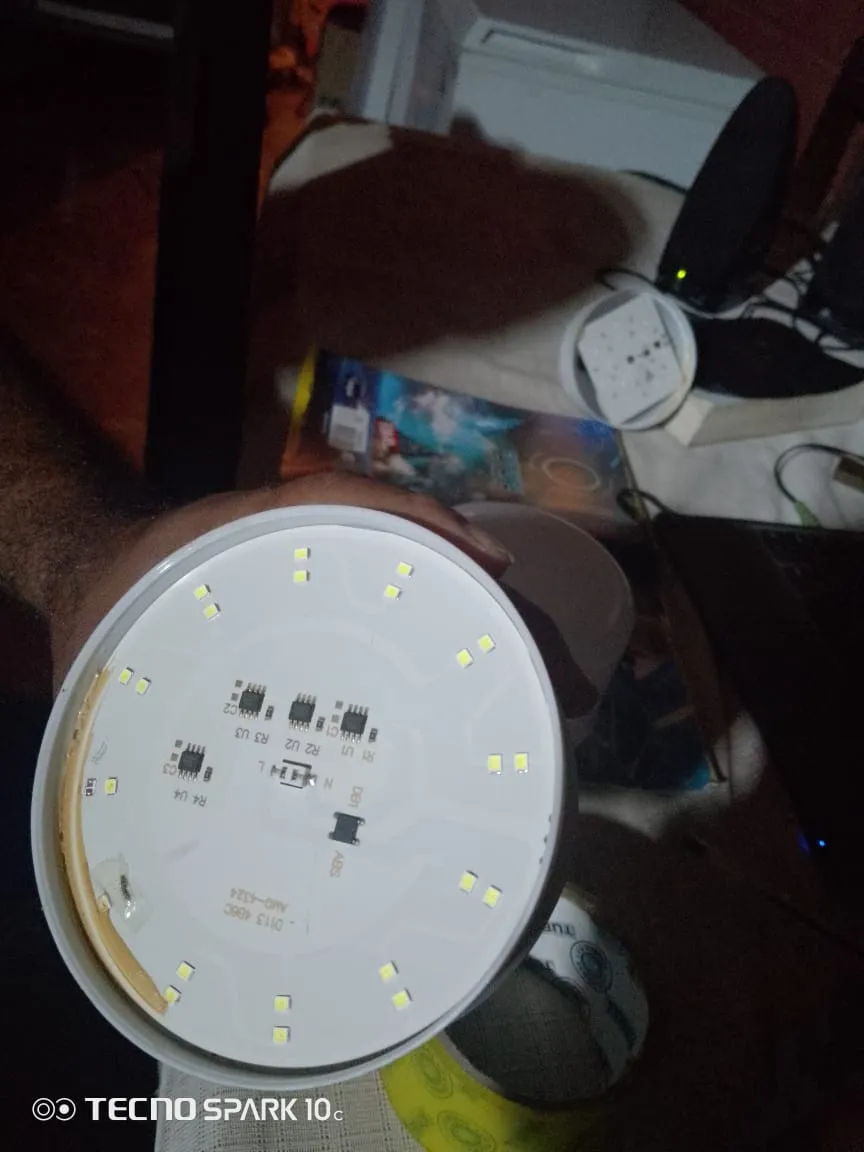
Para detectar el diodo led que falla, conectamos el bombillo y con un pedacito de cable pelado en ambas puntas probamos cada diodo, ellas tienen un lado negativo y uno positivo, alli puentiamos y donde el bombillo encienda, esa es el diodo que debemos puentear.
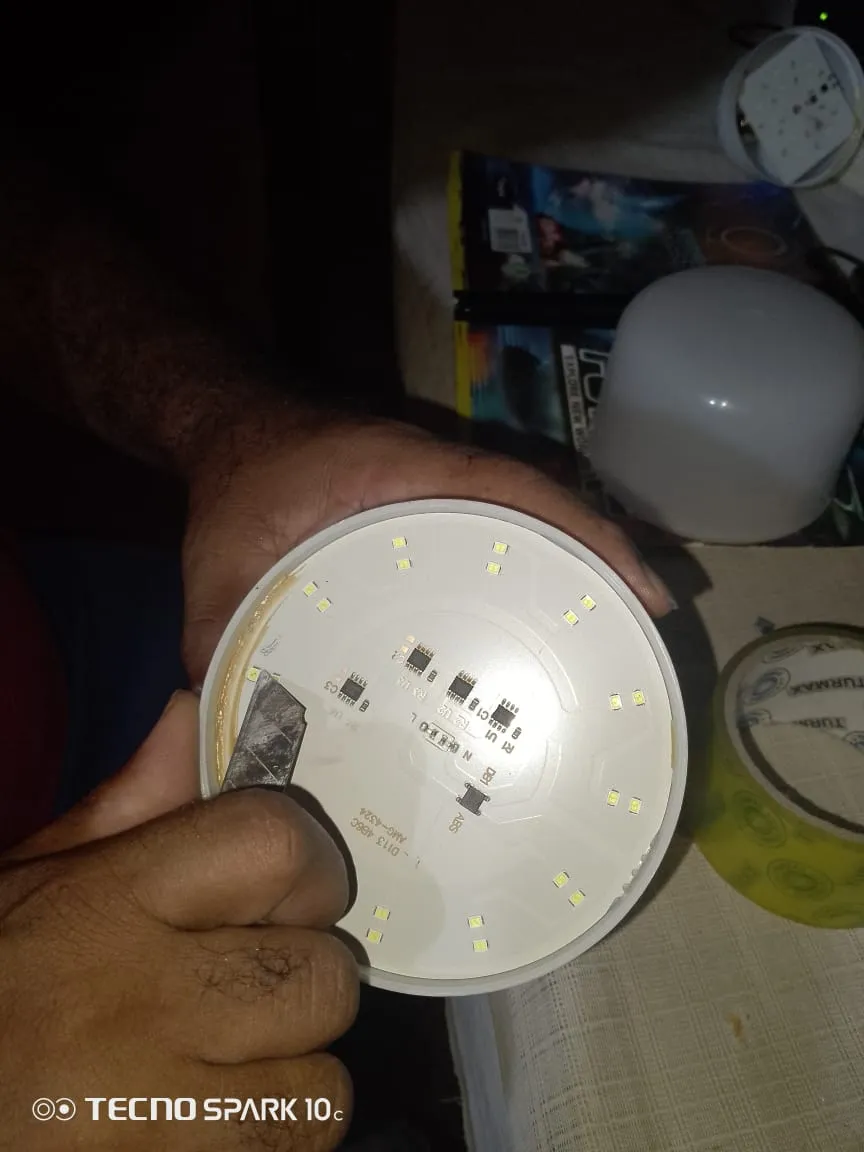
 Aqui estoy probando con un cable en forma de U cada diodo
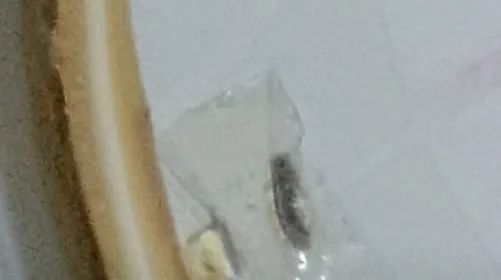
Al detectar la falla, procedemos a quitar el color amarillo que recubre el diodo y asi se expone la parte metalica y colocamos un pedacito de aluminio, hay otros que colocan un pedacito de hilo de cobre de un cable, luego se le coloca un pedacito de teipe o cinta plastica para fijar y listo, colocamos el plastico que recubre el bonbillo y la probamos.
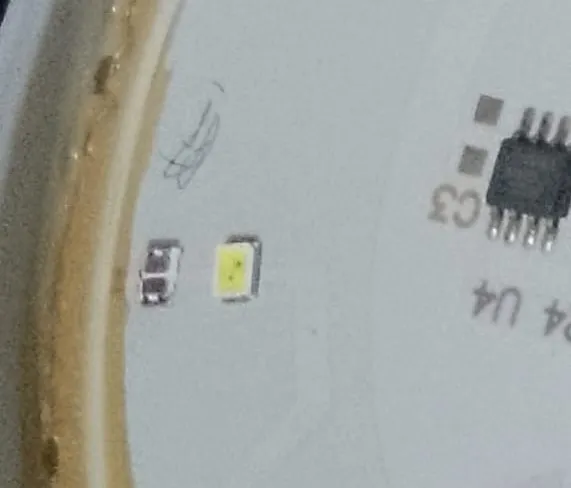
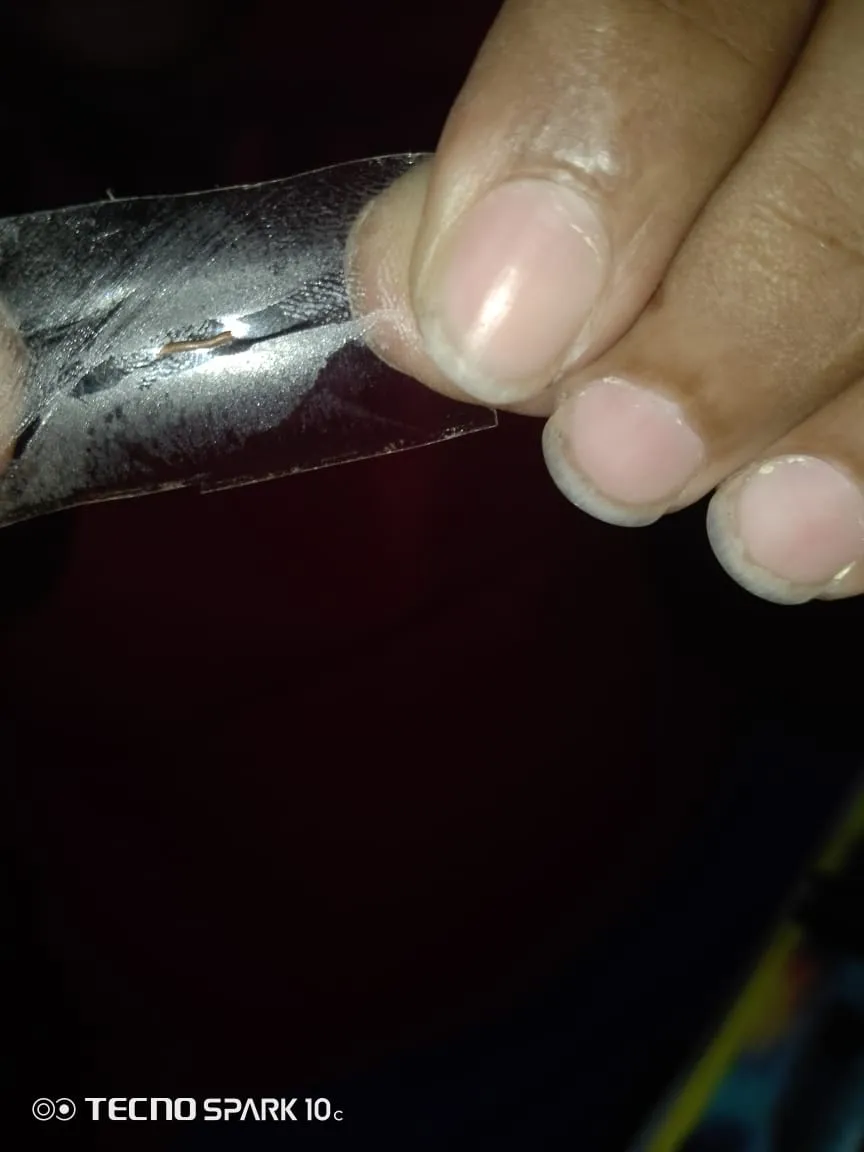
El hilo de cobre
Esto se ve un poco rudimentario, pero es una solución económica , no tengo idea cuanto tiempo mas durará el bombillo, pero le haré un seguimiento y les estaré contando luego, gracias por leer, espero sus sugerencias y comentarios.

Greetings friends of @hivermotors I had many months without publishing for different reasons, my laptop was damaged, I was without a cell phone, I was unemployed for a while and well I got discouraged and I moved away, I am trying to return to the platform and started with good foot, as I participated in a contest of soloescribe and was among the three winners, here I leave the link of my post if you want to read it; CONCURSO # 10 SOLO ESCRIBE (VACIANDO RECUERDOS) (ESP)(ENG)
Today I want to share with you a new knowledge that I acquired, I think it is something interesting and beneficial for those who want to learn it, it is about repairing led bulbs, it is something simple and fast, does not require complicated tools and in simple steps extends the life of these bulbs.
Use scissors, adhesive tape, a cutting tool, pliers and a piece of copper wire.
I learned with information from a friend, then I did some research and discovered that there are several ways to repair them, of course there are different types of failures that present the bulbs, I only know how to repair one, is the one I present:
When one of the LED diodes burns out:
I understand that they work in series, i.e. they are connected and when one burns out the continuity of the electrical flow is lost, then to repair, we put that diode and it continues its circuit function and the miracle happens, the light comes back.
To detect the LED diode that fails, we connect the bulb and with a piece of wire peeled at both ends we test each diode, they have a negative side and a positive one, there we puentiamos and where the bulb lights, that is the selda that we must puentiar.
Here I am testing with a U-shaped wire each diode. When detecting the failure, we proceed to remove the yellow color that covers the diode and so the metal part is exposed and we place a piece of aluminum, there are others who place a piece of copper wire from a cable, then we place a piece of tape or plastic tape to fix and ready, we place the plastic covering the bulb and test it.
Copper wire
This looks a little rudimentary, but it is an economical solution, I have no idea how long the bulb will last, but I will follow up and I will be telling you later, thanks for reading, I look forward to your suggestions and comments.
Las fotografias fuerón tomadas con el celular de mi esposa un Tecno spark10C
Utilice el traductor gratuito DeepL.
The pictures were taken with my wife's Tecno spark10C cell phone.
Use the free translator DeepL.