Now that I’m back home in Mexico City again, it’s time to re-assemble my urban homestead, piece by piece. Today I want to show how to set up a spirulina cultivator. Unlike my previous one, which was a huge system of 300 liters (79 gallons) that would only fit on the roof, I’d like to keep this one small. Two carboys of 15 liters (4 gallons) each should be sufficient to grow enough spirulina for our own consumption. Also, since this system can be easily assembled in our apartment, it will be possible to control the water temperature, and hence grow (hopefully) more than in the big one. We’ll find out. So let’s see, what is needed in order to grow spirulina in your home:
The Receptacle
I used two 20 liter (5 gallon) carboys. These plastic bottles are super common here in Mexico, where the tap-water is generally not considered clean enough to drink. More on that in another post…
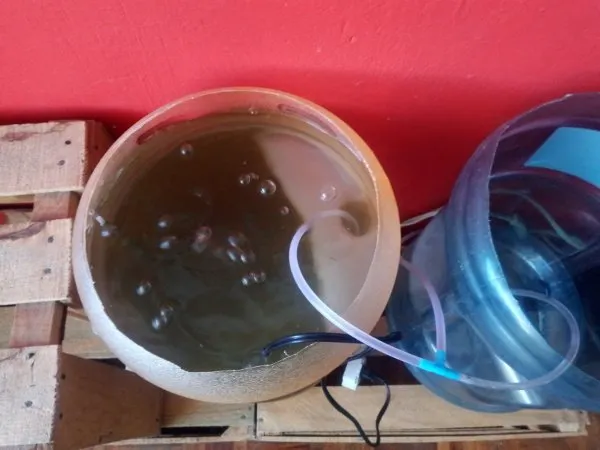
I cut off the top of the carboys so I could have easy access to the inside. This will be useful later on when it’s time to harvest, and of course it’s easier to clean them too this way. With the top gone I don’t fill them up all the way, only at ¾ capacity, or 15 liters (4 gallons) is plenty. But before I fill the second tank, I want to let the spirulina grow in the first one.

The Right Kind of Water
The most important thing for this nutritious blue-green alga is its growing medium, that is water. But not just any kind of water! It needs to be slightly saline, and very alkaline. To achieve this, we take regular tap water, and add the right amount of salt and baking-soda: For every 10 liters (2.6 gallons) of water you need 100 grams (3.5 oz) of baking soda, and 50 grams (1.8 oz) of table salt. (Sure, I converted it to imperial units, though it doesn’t give us such nice numbers, so easy to remember.)
If you live close to the ocean, you can also mix sea water with fresh water at a ratio of one saltwater to two freshwater. You’ll still need the baking soda to raise the pH, of course. The ideal pH is 10 or above, but I’ve put spirulina in water with pH of 9, and it still worked. Once it starts growing, it’ll help raise the pH too. Since I couldn’t find any pH test strips, I’ll just trust that the baking soda has done a good job, and the water is at the right pH.
Adding the Spirulina
Once the salt and baking soda is completely dissolved you can add the live spirulina. How do you know it’s live? Simple: it looks like green water, since it’s dissolved in its growing medium. Once harvested, that is taken out of the water, it starts dying, and quickly turns black (with a horrible smell and probably an even worse taste). To keep this from happening, the alga is dried, frozen, or dry-frozen. In either case, it stops being useful for starting a cultivation.
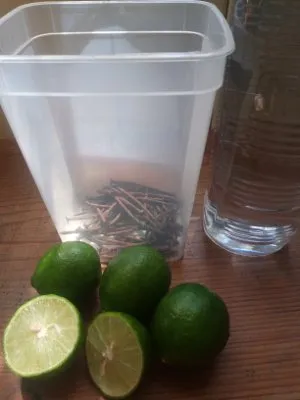
Once in the water, the spirulina may as well be given its first feeding. It will grow anyway, but like all of us, it performs best when all its needs are met. To feed it, you need urea and extra iron. I’m sure they sell these ingredients produced industrially from a laboratory, but you can go straight to the source: your pee! As for the iron, it’s not too hard to make the iron insume the spirulina loves.
A feeding consists of 100 ml (3.4 fl oz) urine for vegetarians, or 85 ml (2.9 fl oz) for carnivores, and one ml (0.03 fl oz) of iron insume. For the former part I recommend a pee-bottle, marked at the proper volume, for the latter part a syringe.
Preparing the Iron Insume

Movement and Temperature
Now that everything is added, you don’t need to do much more. The spirulina is going to grow if it feels happy. As it grows, the alga tends to stick together, forming pieces, and floating to the top of the water. As more of it rises to the surface, the first pieces get pushed out of their growing medium and die. To prevent this, the water needs to be kept moving constantly. For this I use a simple aquarium pump. The one I have can be easily hooked up to keep two carboys bubbling. I just had to weigh down the hose with a rock so it stays at the bottom.
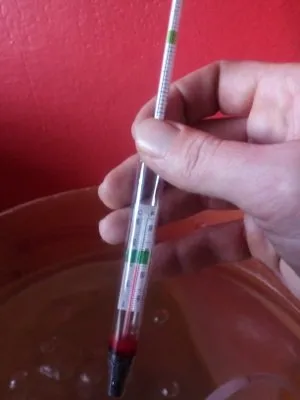
The other important part is the temperature. Spirulina grows best if the water is between 20°C and 35°C (68-95°F). If it’s colder than that, nothing will happen, the spirulina is just going to sit there without growing, but alive. If the temperature gets higher than the optimal growing range it will get cooked! This is why I consider a thermometer way more important than pH test-strips. This thermometer comes combined with a hydrometer, helping you check the salinity (1.01 is what you need). It's neat, but even less necessary than the pH test strips.


This is the tricky part, by the way! I have a simple water heating device, which I tried before adding the culture. It heats up the water quite quickly, which I’m not too fond of. However, I’m gonna have to give it a 5-10 minute heating each day, just to get the water to growing temperature. In my big cultivator on the roof I didn’t even expect a harvest until March, when the night-time temps wouldn’t drop too far, and the water tank would stay above 20°C.
All You Need Summed Up
Here is a list of all the things you need to start your own spirulina cultivation:
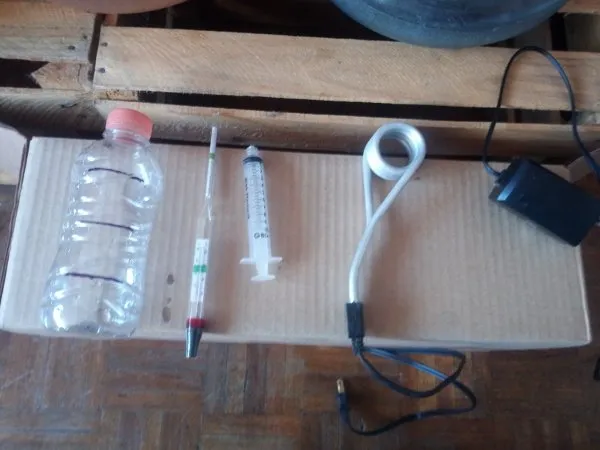
a container, a pump, a heater, a syringe, a thermometer, and a pee-bottle. pH test strips are useful, though they’re not in the picture. Other than that you need some salt, some baking soda, rusty nails, vinegar, limes, your urine, and of course some live culture, ideally gifted by another spirulina enthusiast.

So, that’s pretty much it. Doesn’t seem to hard, does it? I’ll write another spirulina post on how to harvest the spirulina, once the time comes for in a couple of weeks, and of course how to know that it is ready to be harvested.
Please check out these great communities I'm contributing to:

#ecotrain | What is EcoTrain | Discord Community

#cyclefeed | Introducing CycleFeed | Discord Community


Introducing SteemitDreamit | Discord Community