Taking care of your worms so they can take care of you
In the first part of this article I described the reasons why composting can be a good idea even for city dwellers without a farm or a garden, how California Red Worms (Eisenia foetida) can help compost our kitchen scraps, and how to set up an urban vermicomposter. Now I want to look at the details of how to take care of the worms:
The feeding routine
Running the system is super easy, and once the routine has become established, it will almost run itself. Every time I produce organic kitchen waste, I place it into a small (1 liter / quart) bin that I keep next to the kitchen sink. This one I empty every 1-2 days, right into the worm box, on top of everything that’s already in it. Next, I use some dry, carbon-rich material to cover it with. Since most of our food is high in nitrogen, this step is essential. Once again, I could use leaves or straw, but in an urban setting newspaper is a lot easier to come by, or bank statements, or other printed propaganda. It is important to make sure this cover material does not include any harmful substances for our microorganisms, such as lead-based ink or bleached paper. My experience in Hungary and Mexico has taught me that most newspapers can be trusted, even the colorful ones. What I still avoid, though, are glossy prints that are almost certain to include plastic, and white tissues which are most likely chlorinated.
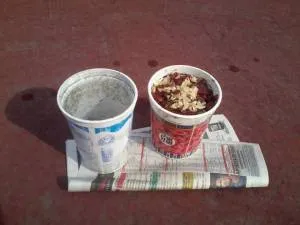
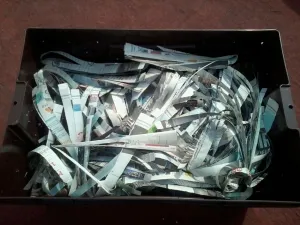
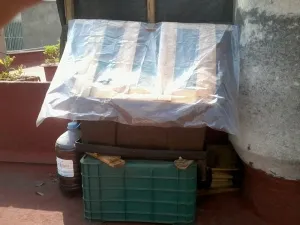
Covering the food will not only add the necessary carbon, but will also control the smell and keep invading insects in check. To maximize efficiency I like to rip the newspaper in stripes, and once it has completely covered the little pile of food, I pour some water over it. The water makes the strips stick together, hiding the food underneath, ready to be discovered and colonized from below. Before watering it, I usually empty out the effluent bucket, so it won’t overflow. This worm-tea I collect in a bottle to use for irrigation, generally in a diluted form. Finally, to protect the worms from the light, and to reduce evaporation, I place a cardboard lid on top of the bin. An old piece of carpet, blanket, sweater, etc. can also do the trick, while keeping moisture from evaporating. Just make sure there are no poisons involved.
What do the worms eat?
As for the dos and don’ts of feeding the worms, the rule of thumb is: they’re not too picky, but are generally vegetarians. Also they are not too fond of oily stuff, and they absolutely hate salt! So I mostly give them fruit and veggie pieces that accumulate while preparing any meal. They don’t object to cooked food per se (cooled down, of course), but since that usually includes oil and salt, it should probably be avoided. Otherwise they get everything from flowers to salad rests, even the dust from the floor. Quite obviously, though it can’t be stressed enough, chemicals should be always avoided!
Even the water I use on the worm bin I set out in the sun for a while to let the chlorine evaporate. Also, the smaller the chunks I give them, the faster the decomposition will go. Putting their daily food into a blender and pouring it on in liquid form would make it even more readily accessible, though I’ve never gone that far in my efforts.
What about the flies?
At this point many users may wonder about possible insects this indoor worm farm could attract. Sure, the better you cover the food, the less insects you have, but in my experience it was hard to avoid a small population of flies. Though they tended to be the tiny fruit flies, and not the unpopular houseflies, it can still be annoying to have them around. Fortunately, their population came suddenly under control, just when it seemed like it was getting out of hand…
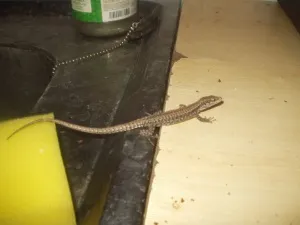
The solution was a natural predator, who just showed up on its own, in form of a little lizard. I have no idea where it came from, but it quickly made itself home on my kitchen curtain, from where it hunted the flies with agile determination. First I celebrated this incident as a unique marvel of nature, but since then I have seen many lizards hanging around my worm-bin I keep on the roof here in Mexico. They seem to find delicious flies, even though I don’t! Just goes to show how effective they are.

Completing the cycle with a second bin
Once there is no more room in the bin to accommodate more compost it's time for a second bin. After drilling its holes similarly to the first one, I just place it on top of the first one, letting it slide down all the way to the top of the compost. I even push it down a bit, to make sure it is in complete contact, since the worms will want to crawl through the holes into the second bin. This takes time, of course, but there is no rush.
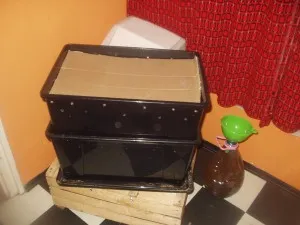
With a similar substrate, and regularly added fresh food, the worms will want to migrate upwards, especially once they have eaten up everything in the bottom bin. The rest of the compost will be taken care of by other microbes, so by the time the second bin is full too, the first one will be ready to be emptied and placed on top. This whole cycle takes about a year, depending on how much you produce.
And a year later...
Okay, so we’ve kept our kitchen trash food-free for a year, the plants in our home have grown like crazy since we started feeding them with the worm-tea, and our house lizard is getting chubby while keeping the flies to a minimum. So one day we reach the point when the second bin is also almost overflowing with compost. What now?

Instead of getting a third bin (and a step-ladder that would eventually be needed), it’s time to empty the first bin, and set it on the top of the second. This should give the user a sack full of good humus. Now I’ve seen people plant straight into that, and in fact, lots of time you’ll find volunteer plants growing out of it. But this fresh vermi-humus has so much potential that it would be a waste not to dilute it. The first time I harvested a batch of 50 liters, it ended up revitalizing 500 liters (that’s more than 130 gallons, or about half a ton) of exploited, nutrient-poor soil in a nearby community garden. And yes, there will be some worms left in this humus, which is exactly what we want. After all, the organic decomposition doesn’t stop just because it was taken out of the bin. And why should it? Especially if we mix it with used soil (once again without any chemical poisons), still more organic matter, and start growing plants in it, the continuous cycle of nutrients will go on and on. The most exciting part is starting just now, and to think back that it all came out of our kitchen makes the whole endeavor worth while.
Sources: This is a modified form of an article I published once before here. All the photos are originals. There are also some good vermicomposting articles on Steemit: Some of my favorites are here, here, here, and here.