Hefeweizen All Grain Brewday – Part 1 of 2
Beer. Who doesn't like beer? People I don't want to talk to, that's who. I'm making a nice Hefeweizen beer today, which is very easy and quick (relatively speaking), going from brewday to glass in about two weeks.
A bit of background on the style:
(From Beeradvocate) Hefeweizen: A south German style of wheat beer (weissbier) made with a typical ratio of 50:50, or even higher, wheat. A yeast that produces a unique phenolic flavors of banana and cloves with an often dry and tart edge, some spiciness, bubblegum or notes of apples. Little hop bitterness, and a moderate level of alcohol. The "Hefe" prefix means "with yeast", hence the beers unfiltered and cloudy appearance. Poured into a traditional Weizen glass, the Hefeweizen can be one sexy looking beer.
Sexy beer? Can't go wrong there.

Here is our target. Beer. Since this will be a hefeweizen, I'd prefer that our end result looks like the beer on the right than either of the other two. This here pic is from a local taphouse I go to. They gave us a free black and tan (the middle beer). Probably because we're so awesome. Or maybe because they had an extra one they poured by accident.
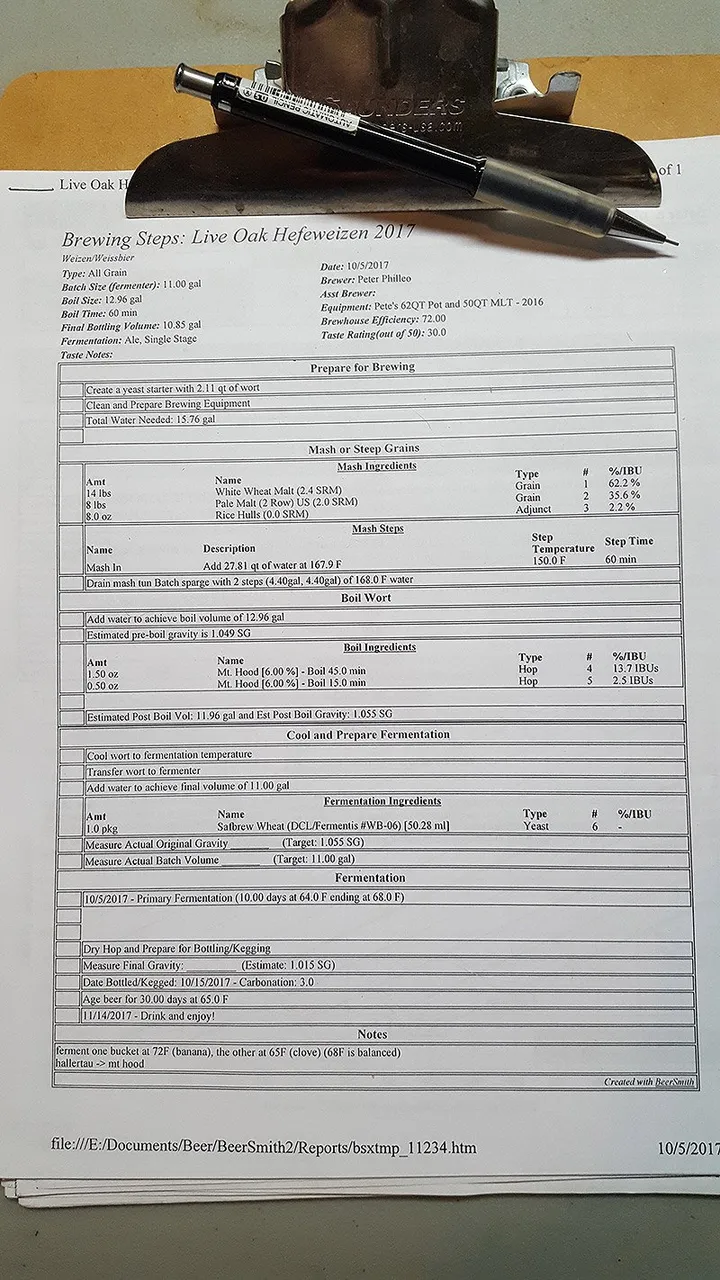
I start off my brew day…the day before. Prep is key. I have my recipe here, spelling out all my ingredients, hops, temperatures, etc. A hefe is a simple beer, usually only containing one or two types of pale grain. In this case, mostly white wheat and a bit of barley.
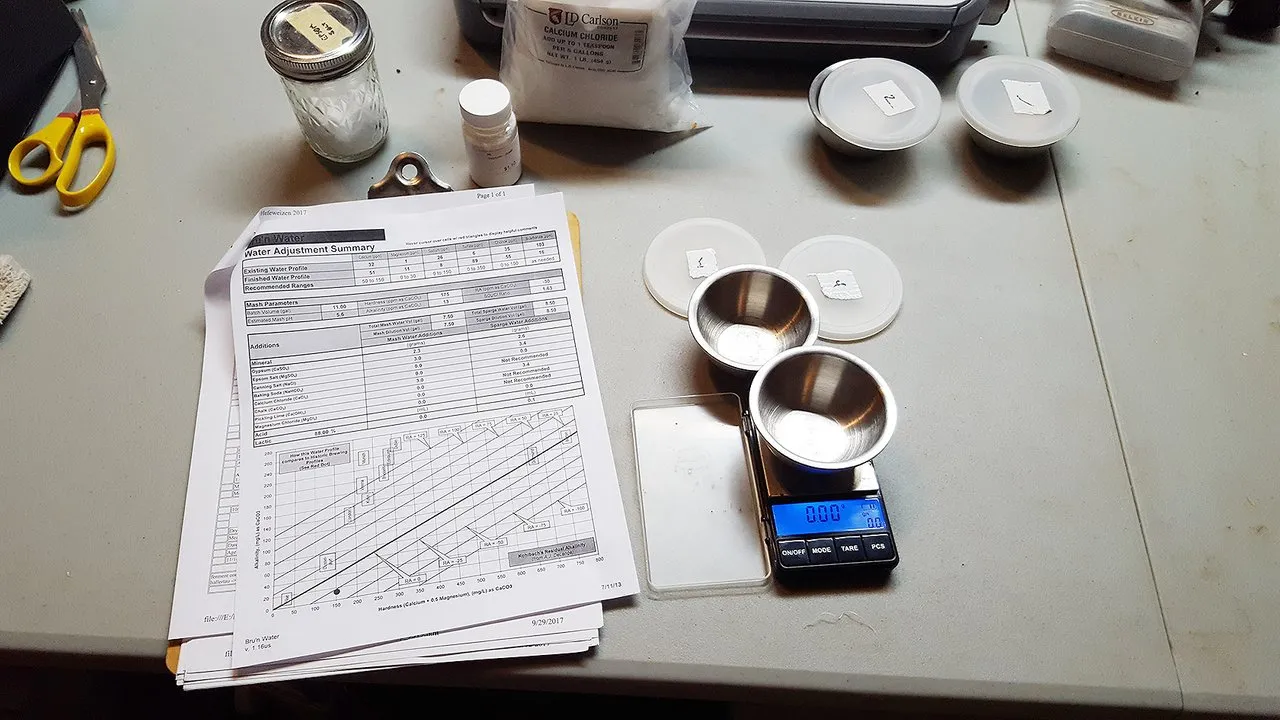
I also adjust my water I use. Tap water in Florida is normally bleached somewhat heavily and is somewhat skunky at times depending on recent rainfall, so I run it all through my Berkey water filter (or my RO filter) to get it clean and then add certain minerals and salts back into it to get the water composition right. In this case, we added gypsum, Epsom salt, and calcium chloride.
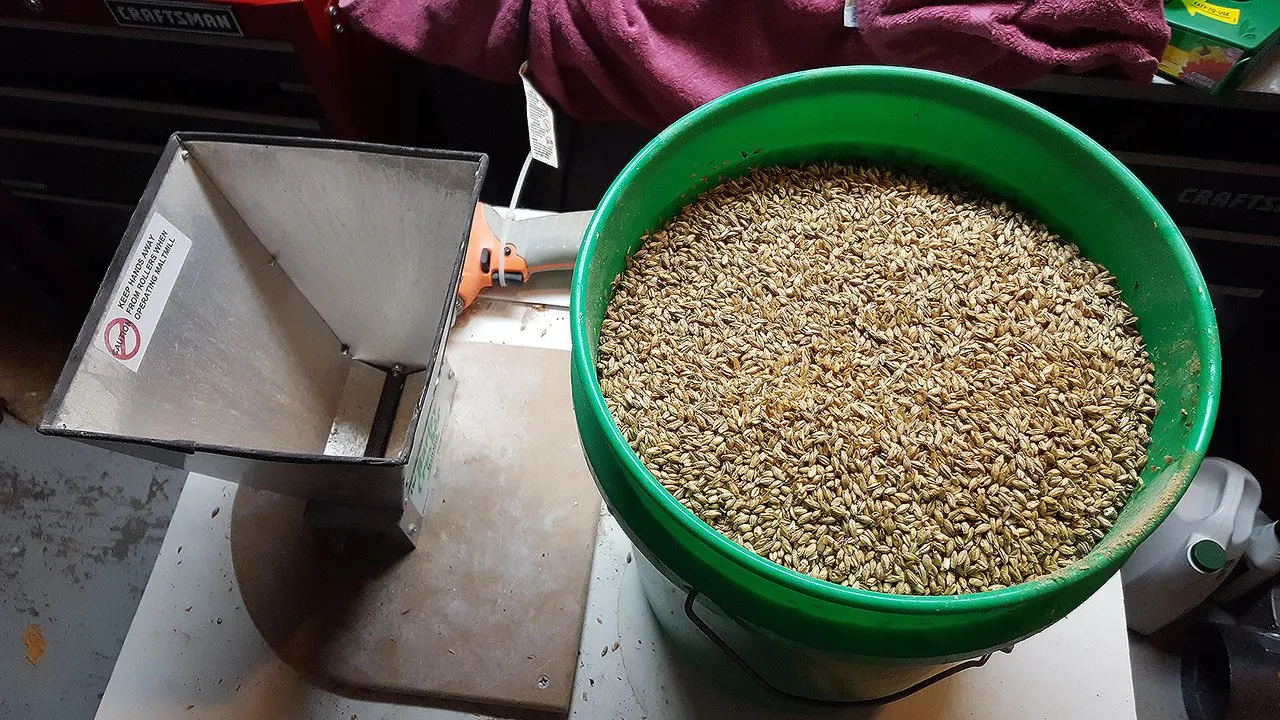
Grain also gets measured out the night before. About 22lbs of grain in this 5 gallon pail. We have to crush it so we can expose the sweet goodness inside, which is where our fermentable sugar is.
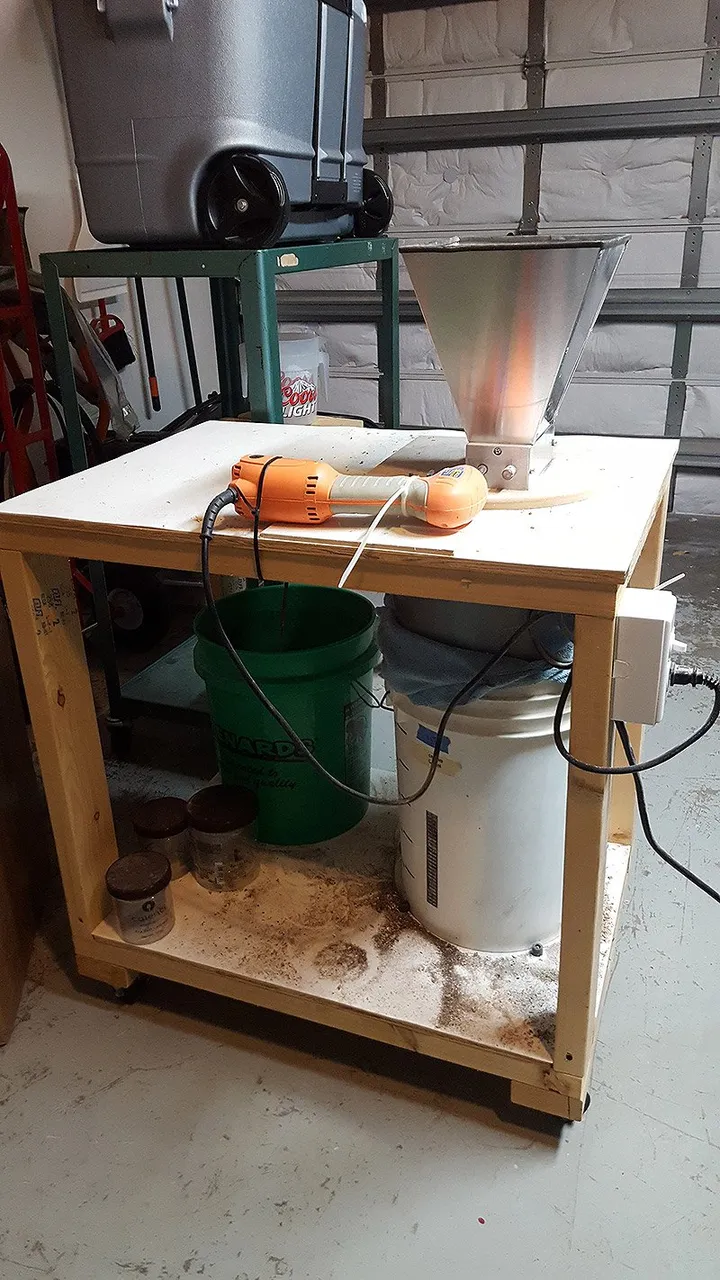
Here is my homemade grinding machine. Just a hand-drill connected to a (formerly) hand-cranked grinder, powered by a light-switch on/off switch. Grain goes in the top, then comes out the bottom into the bucket.

Now I start collecting my brewing equipment. I have a utility cart where I keep all my stuff, and roll it from the garage to my back patio where all the real brewing happens. White bucket has my grain, green bucket has my copper cooling coil, and the metal cart has most of the rest of what we need.

Pots and burners all setup! The large pot is 15 gallon, and does the main boiling of our beer. Smaller pot is about 30qts, and heats up the water we use at the various stages of the process.
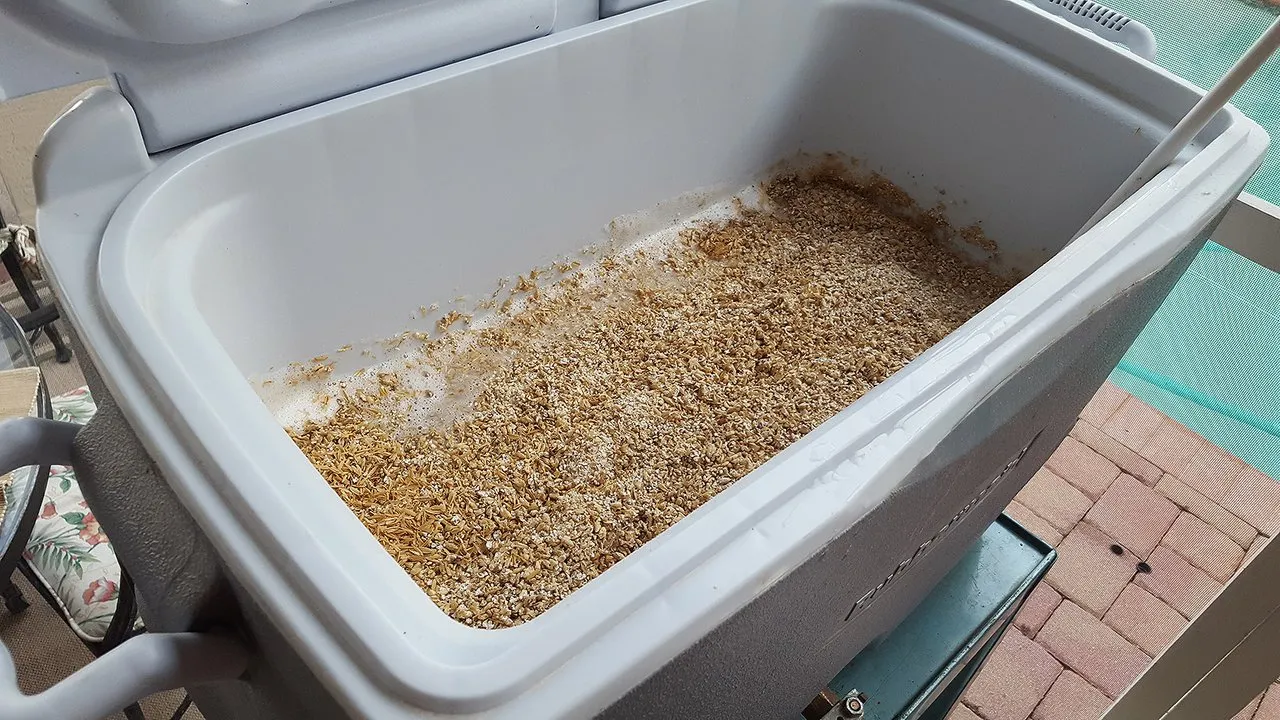
Hey look, it's a Rubbermaid cooler. Where did this come from? This cooler is our'mash tun', which is a technical term for where we combine our grain and our heated water at a certain temperature. In this case, we want the cooler grain and the hotter water to settle in at about 150F. At that point, we cover it up and let it sit about 60 minutes.
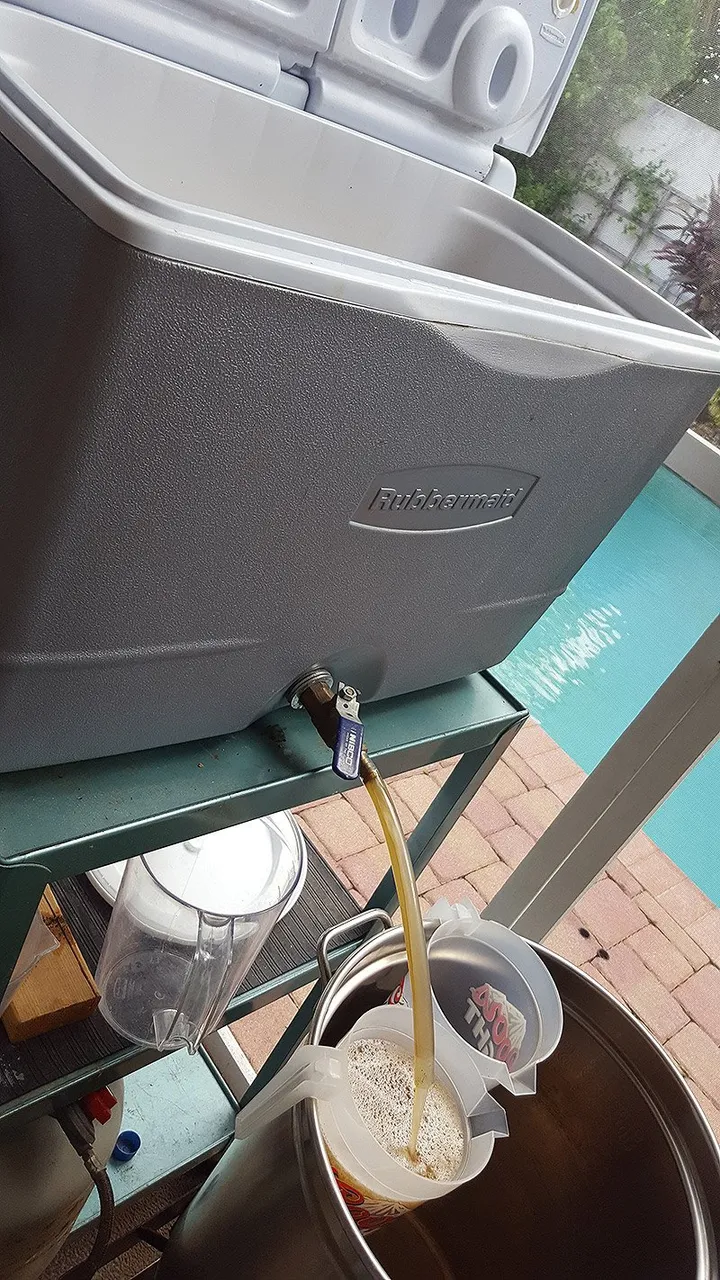
Now we drain our hot liquid out via my fancy custom spigot. Inside the cooler there is a metal braid that acts as a filter against the grain, letting mostly just our hot wort (hot grain sugar water) out. I usually run a couple quarts into these little pitchers until I get all the loose grain and flour out of my flow, then let it run right into the pot.

Here's the full setup in action.
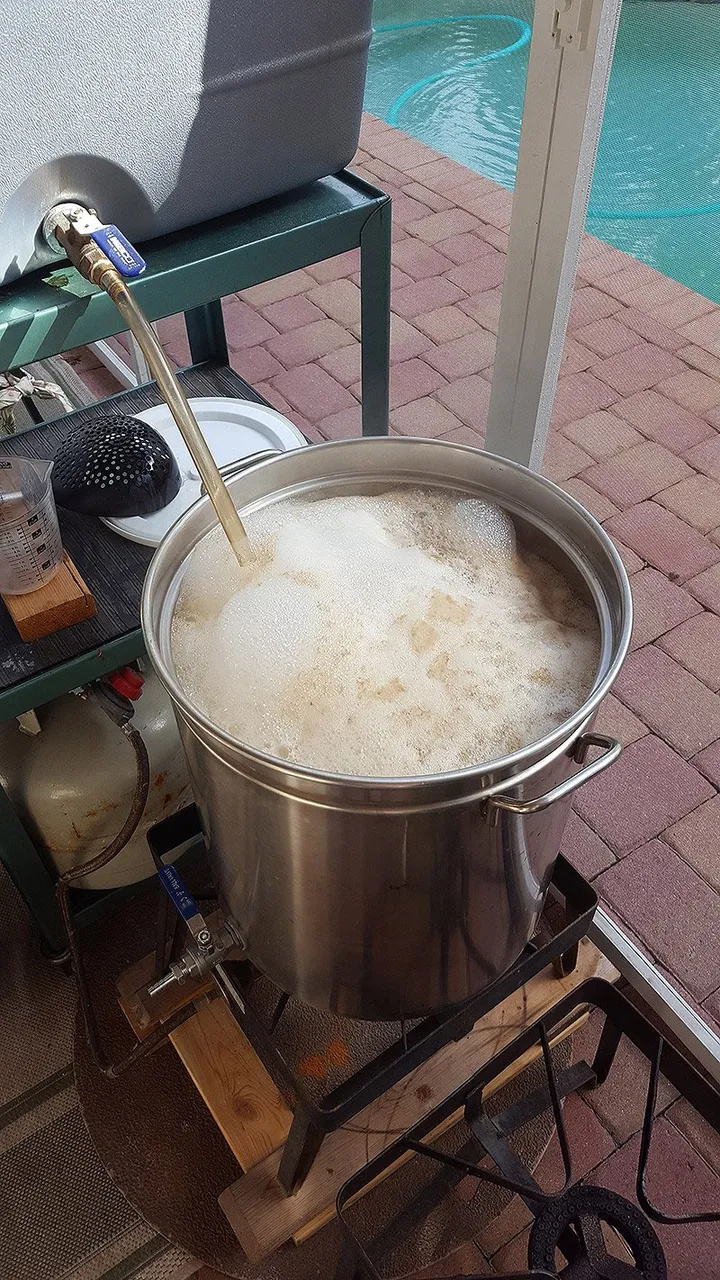
Just started boiling! It takes a long time to get about 13 gallons of liquid to boil, which is why we have these high output burners.
Look for my upcoming Part 2, where we move on through the rest of the beermaking process, cooling things down, fermenting, and then kegging the beer! And also maybe drinking it.