Introduction
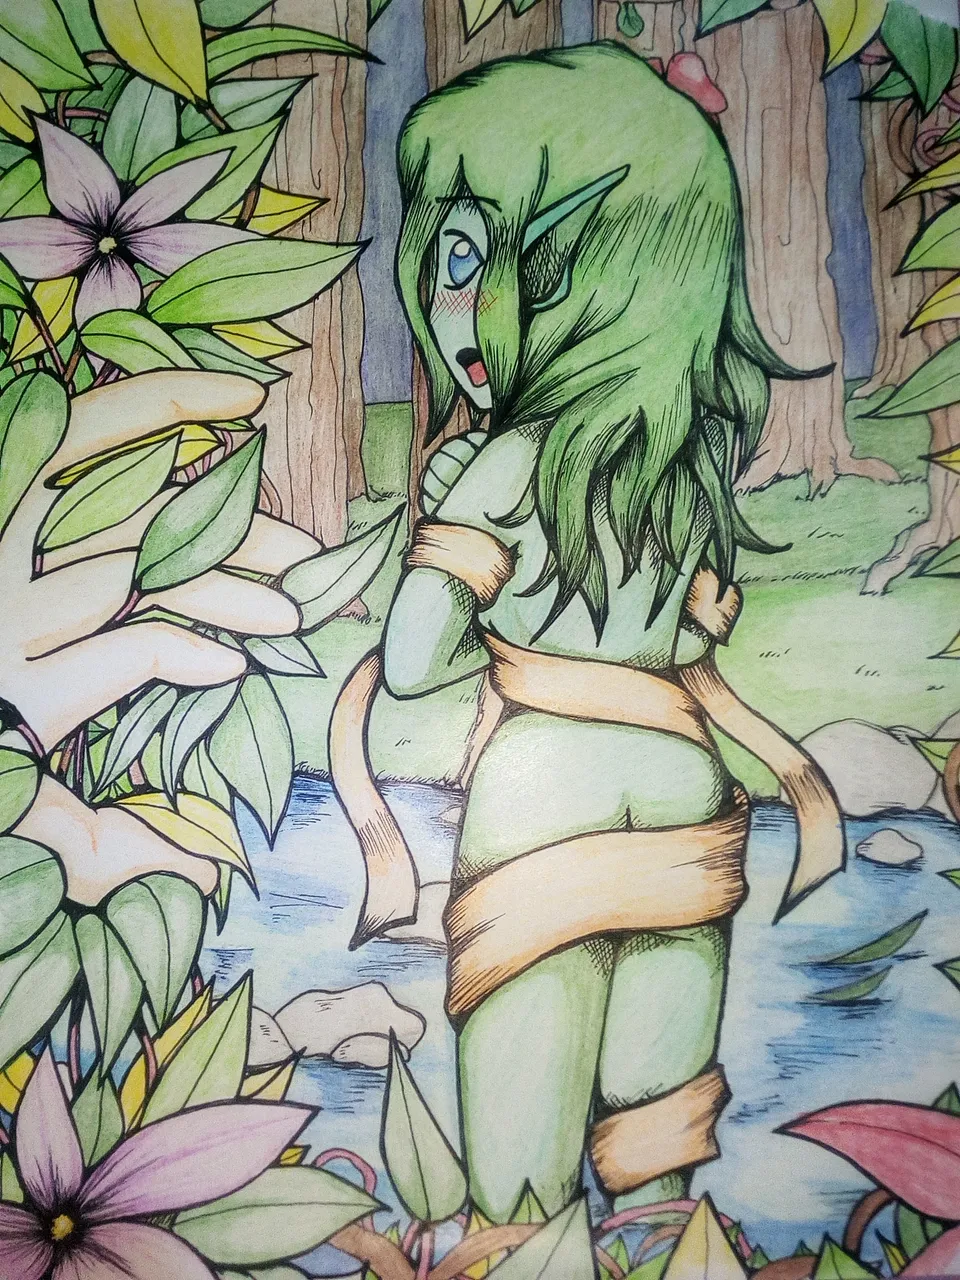
Among the characters in Splinterlands, Wood Nymph is probably one of the easiest. There's not much clothes to consider and really few creases in clothes.
Wood Nymph is a beginner friendly character that you would have lots of fun creating as you start your drawing journey.
Sources
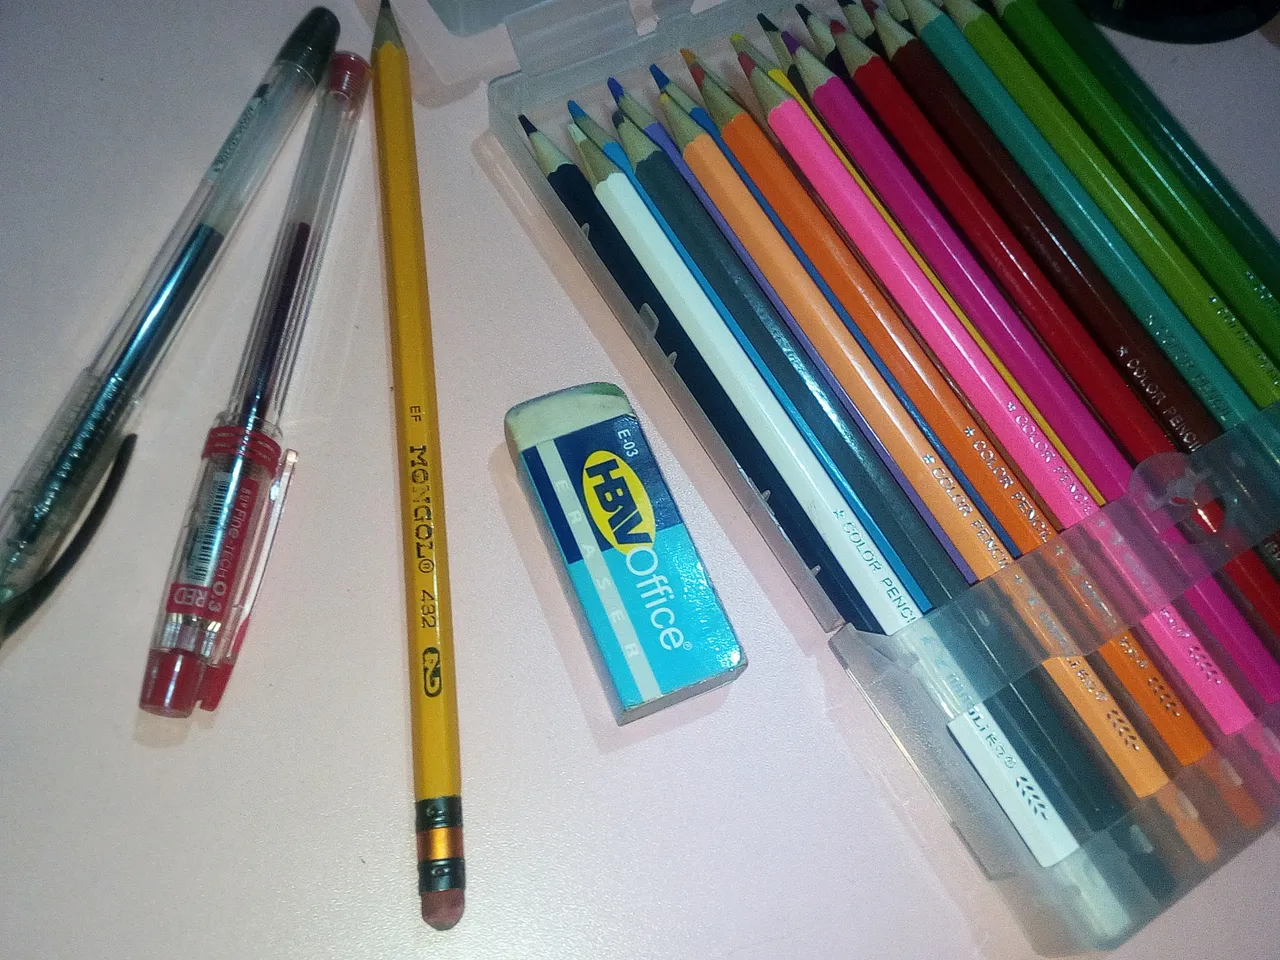
I didn't use expensive stuff. The color pencil is a $4 one borrowed from my niece.
For the pens, I like to use what they call "Gel Pens". Although I think they're actually oil based. They're a bit better since they don't break too much that might result in unwanted dots or lines.
The pencil is a simple Mongol. I think it's around $0.10 from stores. If you have money, buy an H3 pencil instead. H3 is a code (I think). I used them before and how it differs is that H3 pencils has a lighter color. Regardless of the weight or force you use, you get a very light color which is good for drafts.
Step by Step
Step 1: Rough Draft
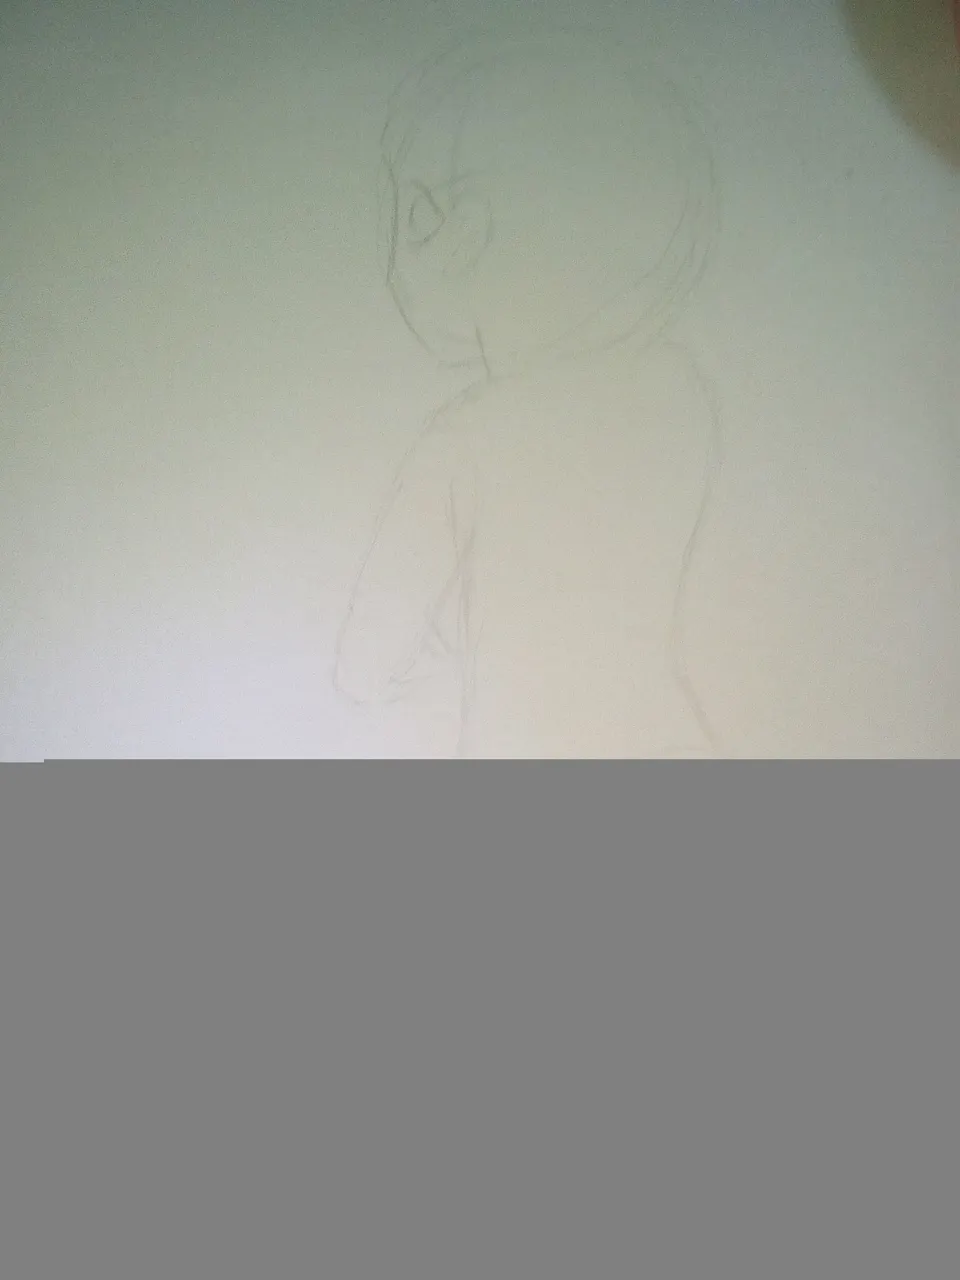
Rough Draft is that stage where you position and build ideas of your drawing. You use pencil as you add and subtract ideas before using pen and ink.
Due to Wood Nymph's natural look, I want the feel of her bathing in private and so, that's the main idea.
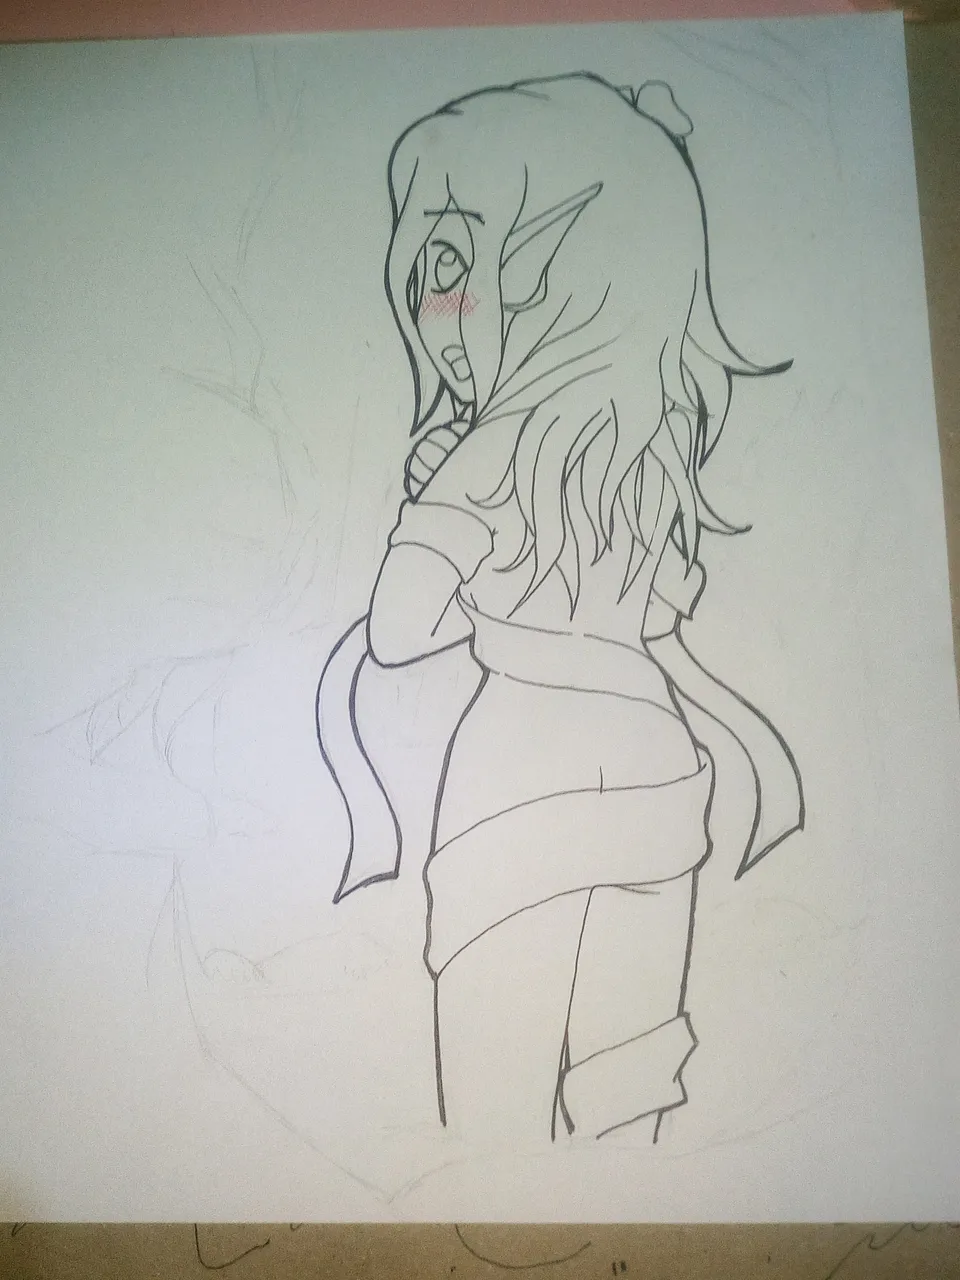
Step 2: Added Clothes and Hair
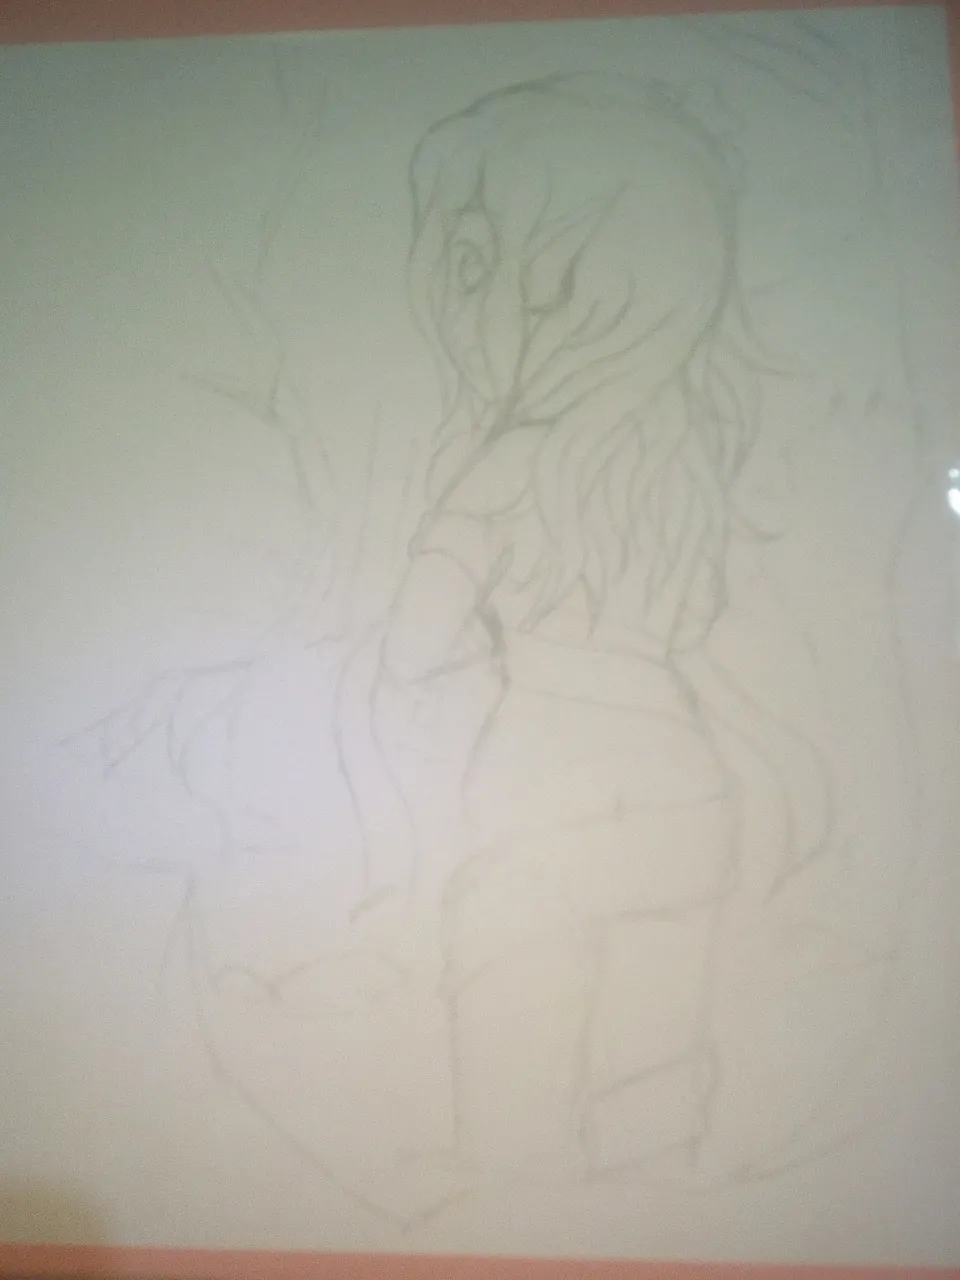
I added Wood Nymph's signature cloth over private parts. I really like Wood Nymph's sexiness using this method.
Wood Nymph's wavy hair looks like seaweed and so, I used this as the inspiration.
At this stage, I added a scene of someone discovering Wood Nymph bathing. I really like the point of view (POV) of the readers being the person discovering Wood Nymph.
I will also probably add this style in the future on my other entries.
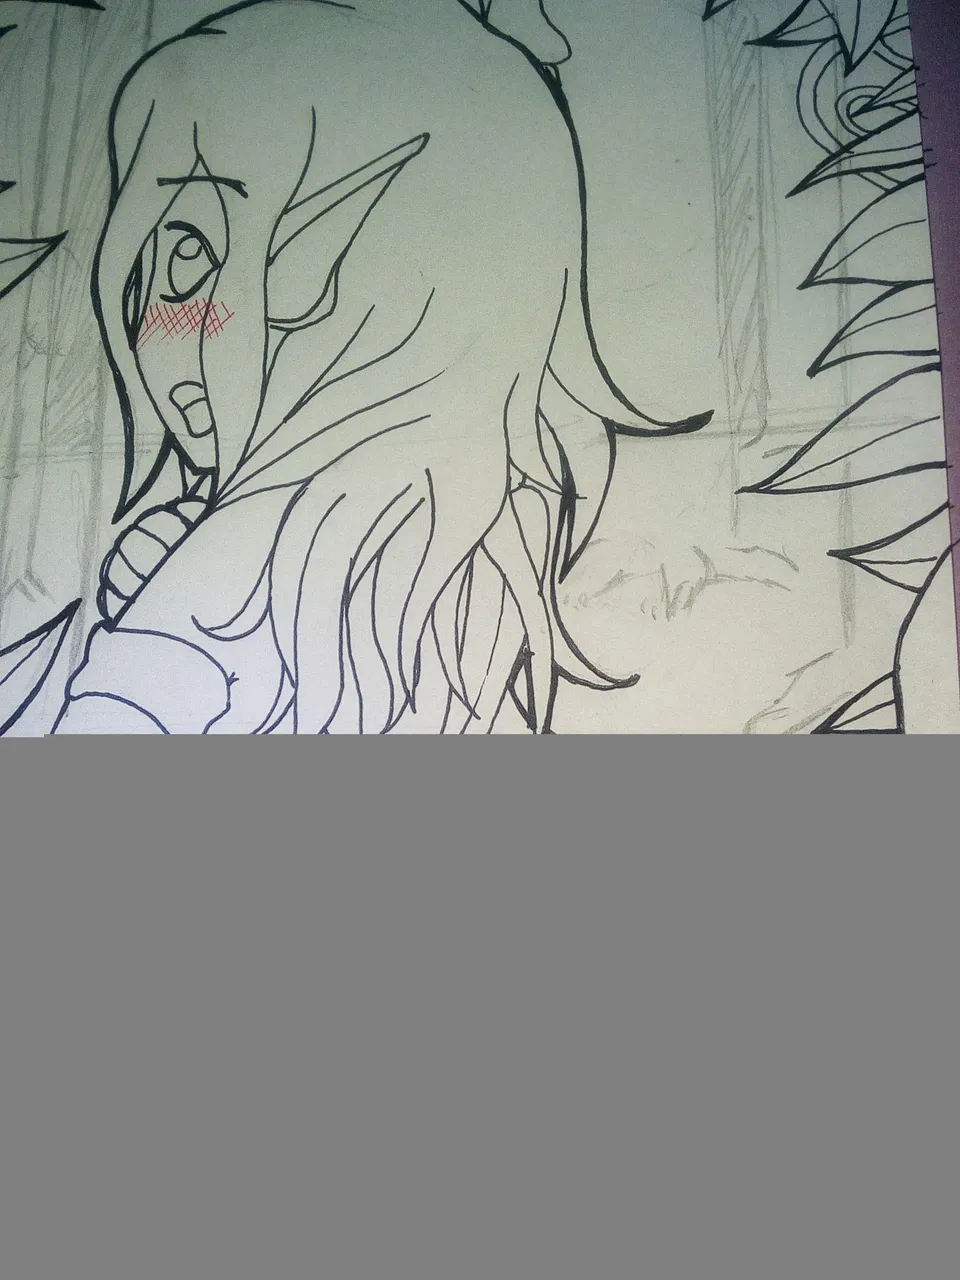
Step 3: Inking Wood Nymph
The main purpose of inking stage is to solidify the lines before coloring.
The red ink on the cheeks indicates blush or embarassed reaction.
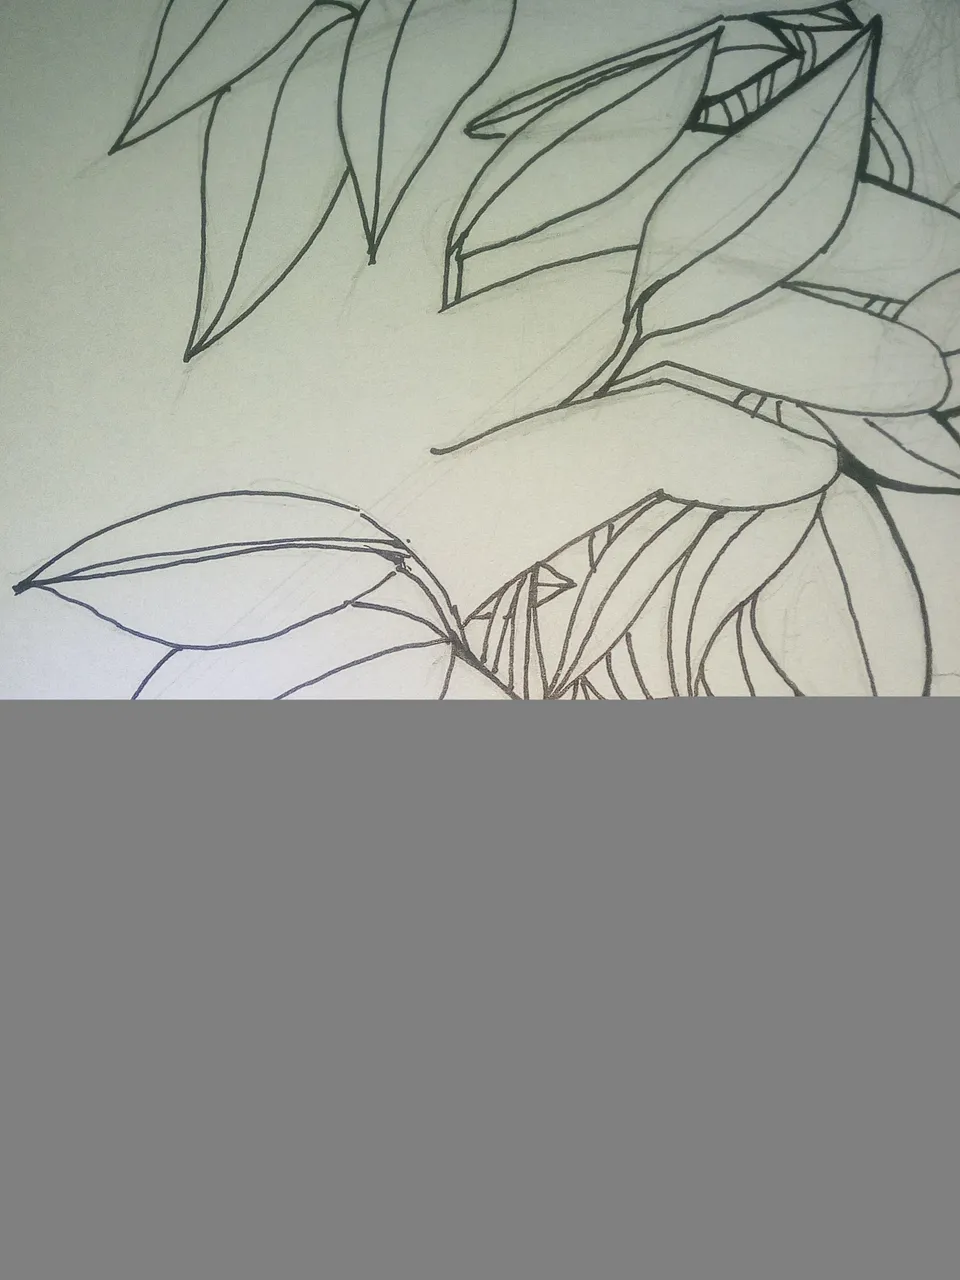
Inked foreground leaves, hands and flowers. I also added a rough draft of woods or forest.
Step 4: Finalized Background Draft
I added the river, stones and fallen leaves to reduce the white areas. White areas in background is bad because it feels off in the drawing.
Step 5: Coloring Wood Nymph
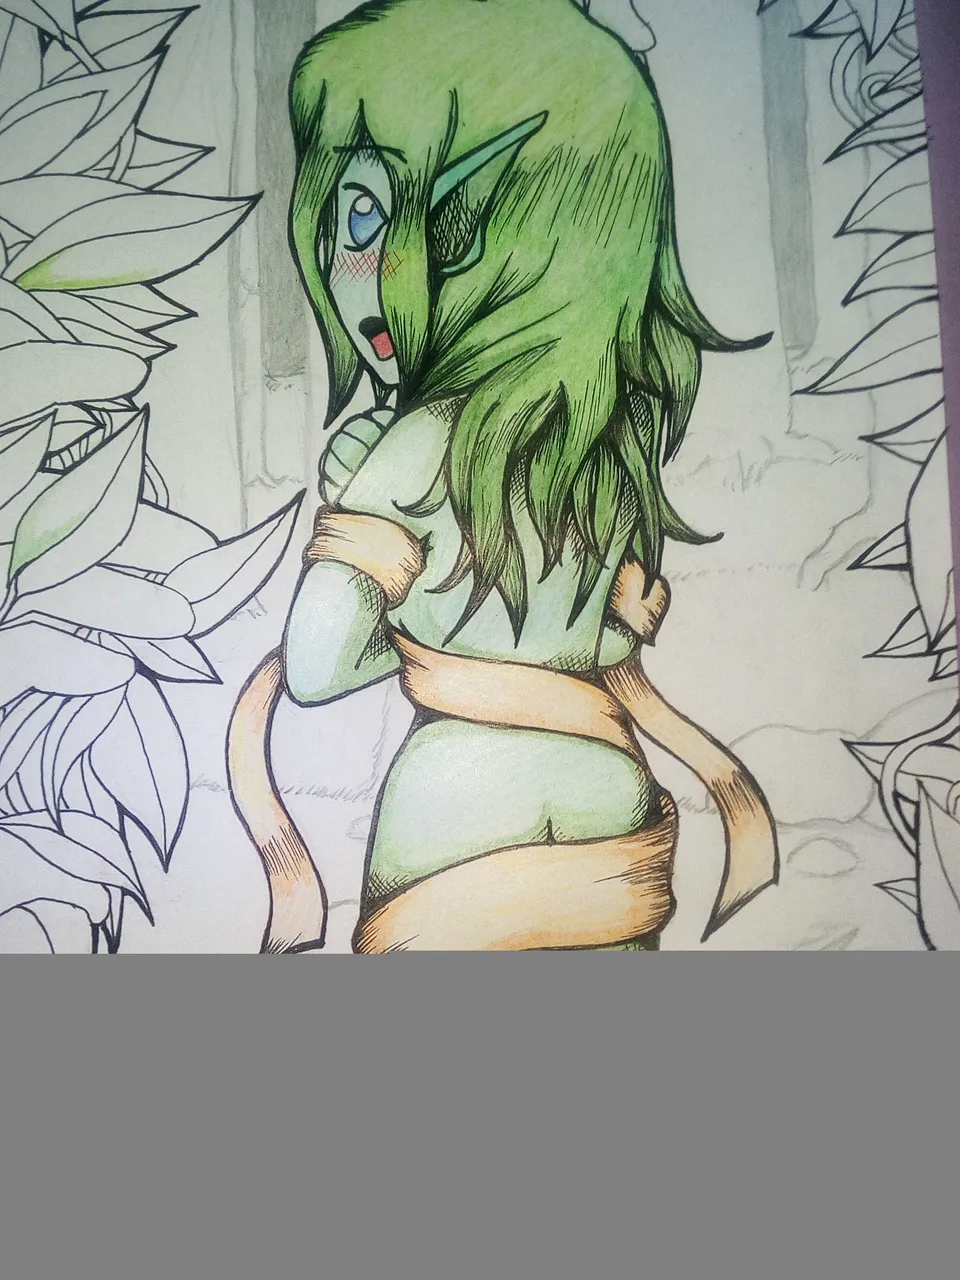
Using my very limited selection of colors, I needed to be creative and chose these colors:
- Violet and Blue for the eyes.
- 3 shades of Green for the hair
- Green and Yellow Green for the skin.
- Peach and orange for the cloth around the body.
The cloth should be white and peach but the Peach is too pale to serve as shadows. That's why I increased the hue a little bit and the nearest color to complement Peach is Orange for shadows.
I also used Class 101's style for the hair. This allows me to have a unique feel and touch on the drawing. It also increases the dark parts and add a pseudo-hair strands for a better look.
The style doesn't work on the body but it came from a manga technique called "Cross Hatching."
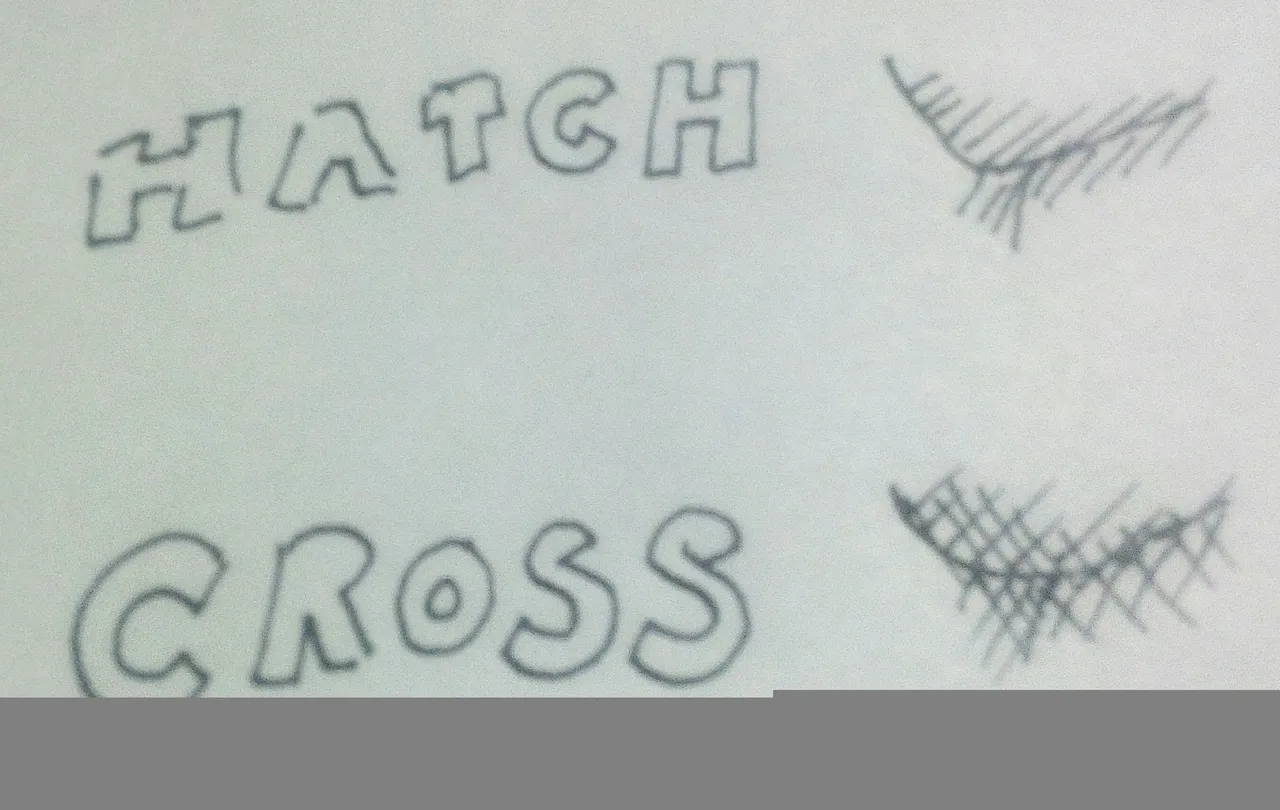
This technique uses criss-cross lines to produce a dark tone which is used for shadows.
Step 6: Added Fauna Colors
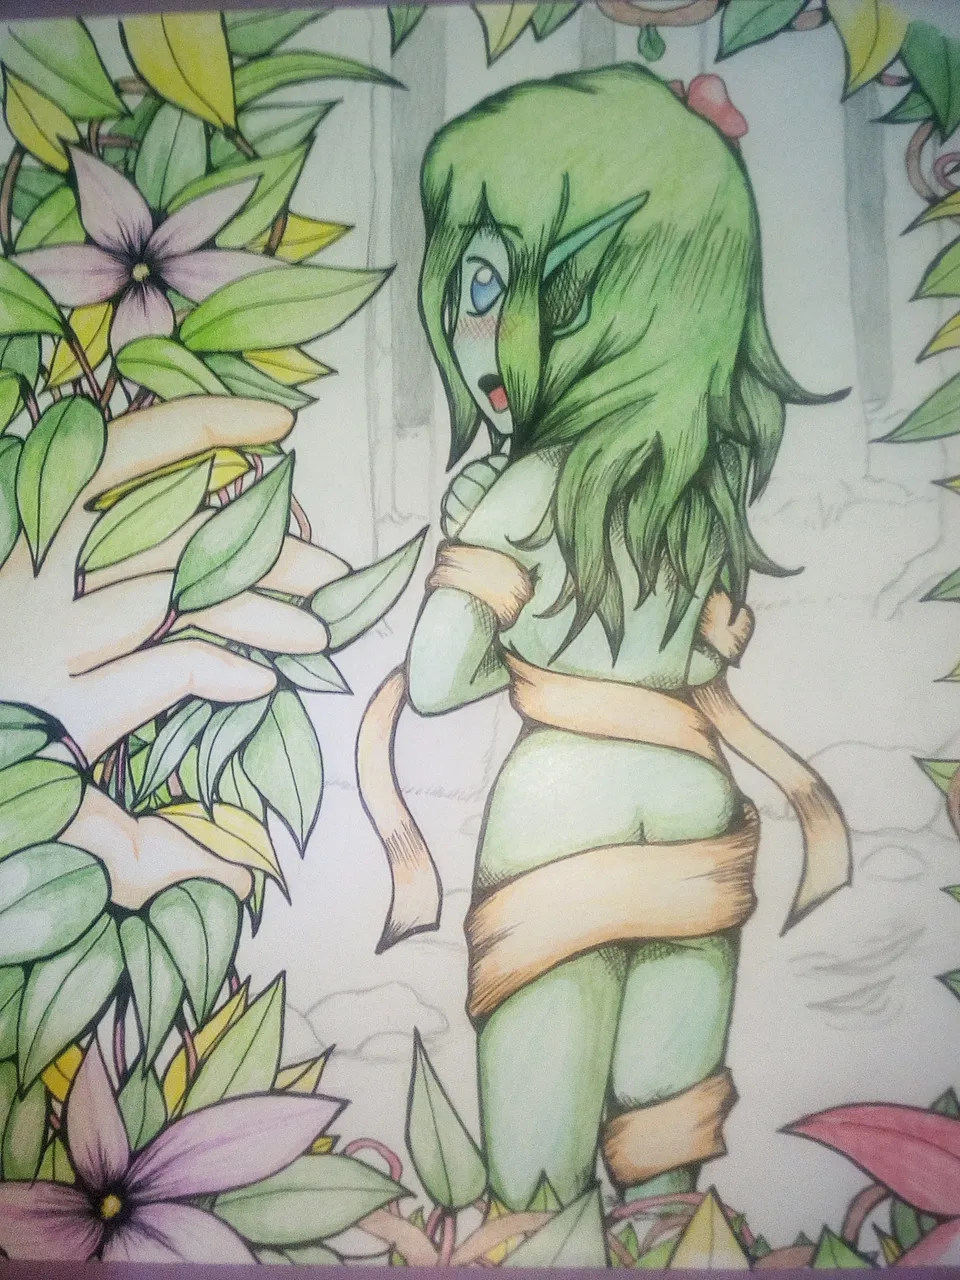
Yellow, Green and Yellow Green were used on the foreground leaves.
Two colors of vines signify different types. Violet for a more soft vine like in Sweet Potatoes, and Brown for the harder vines.
I used Violet and Red on the flowers. I added the Class 101 style on it for a more unique feel.
Step 7: River and Other Details
I added colors on the river, other details and background to finish. The 3 shades of green were used on the grass to express distance. The farther the grass, the darker the green is.
Disclaimer
- Wood Nymph is a character from Splinterlands.
- Class 101 is my original work and the style I incorporated in the drawing is mine as well.
Have a fun day!