Setting up a masternode for the ZACA Framework is straightforward. However, a few steps have to be followed in order to make it work smoothly.
Prerequisites:
min. 1000 ZACA
ZACA COIN Windows
White static IP with open ports for masternodes
PREPARING MASTERNODE
1 - Choose the directory where you will hold your masternodes (you need 1.5Gb free space for every masternode)
2 - Create a folder "ZacaMN1" there
3 - Copy file "zaca-qt.exe" to folder "ZacaMN1"
4 - Create a new folder "data" in folder "ZacaMN1"
6 - Rename "zaca-qt.exe" to "zaca-mn1.exe"
7 - Press Win+R and type "cmd" and press Enter
8 - Now type there:
echo start zaca-mn1.exe -datadir=./data > %homepath%/Desktop/startmn1.cmd
9 – Move created file "startmn1.cmd" from Desktop to the "ZacaeMN1" folder
10 - Repeat the process from step 2 for each masternode you want to create, changing mn1 to mn2, mn3
11 - Run startmn1.cmd, startmn2.cmd and startmn3.cmd, wait for complete loading wallets and complete syncing with blockchain
12 - Now you can exit from each running masternode wallet
PREPARING CONTROLLER WALLET
1 - Open your main wallet where you have your coins
2 - Go to File >> Receiving Addresses
3 - Press button "New" and enter "Masternode 1" in Label, followed by “OK”.
4 - Send exactly 1000 ZACA to this address
5 - Wait for 30 confirmations of the transaction and go to Tools >> Debug Console
6 - Run command "masternode genkey" and copy down generated key (this is your masternode private key)
7 - Run command "masternode outputs" and copy down hexnumbers (this is your masternode tx) and digit after ":" (this is tx index)
8 - Go to Tools >> Open Masternode Configuration File (masternode.conf), and open with Notepad.
9 - Using (one line per masternode), use the following format:
Alias IP:Port Privkey TxHash OutputIndex
10 – As "Alias", enter "MN1" (do not use spaces and special characters)
11 – As "IP:Port", enter "YOUREXTERNALIP:PORT" (your external white IP and port for masternode), such as 123.456.789:48882 12 – As "Privkey", enter the masternode private key you generated with "masternode genkey"
13 – As "TxHash", enter the masternode tx from "masternode outputs" command
14 – As "OutputIndex", enter the tx index from "masternode outputs" command
15 - Now you can File >> Save and exit out.
16 - In Case you want to setup multiple Masternodes, repeat the process from step 2 for MN2 and MN3, while renaming MN1 to MN2 and MN3 and changing ports
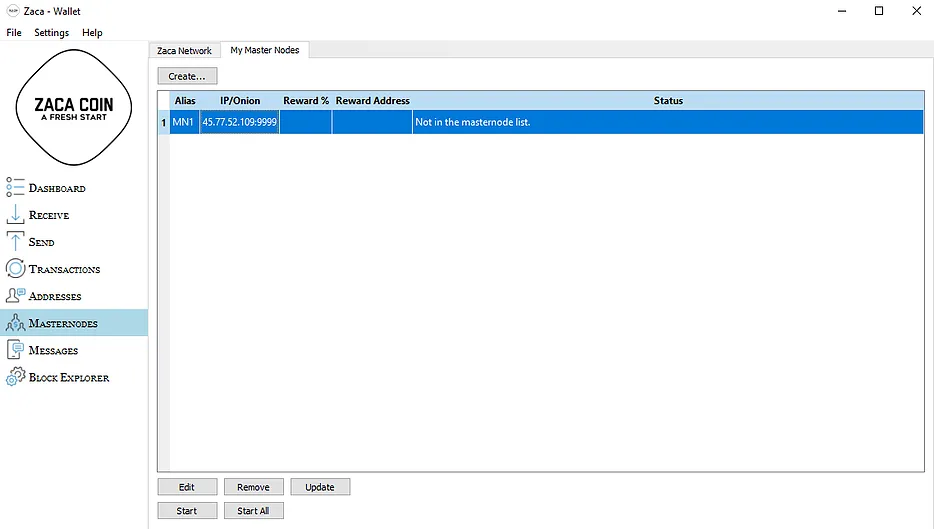
17 - Press "Update Status" and you will see all three masternodes in list with status "Not in the masternode list."
CONFIGURING MASTERNODES
1 - Go to "ZacaMN1/data" folder
2 - Open "zaca.conf" in Notepad
3 - Type there: port=PORT masternode=1 masternodeaddr=IP:PORT masternodeprivkey=PRIVKEY
File should look like this:
rpcuser=ZacaRPCUser
rpcpassword=< ANY LONG RANDOM STRING >
rpcallowip=127.0.0.1
listen=1
server=1
daemon=1
staking=1
logtimestamps=1
port=< PORT >
masternode=1
masternodeaddr=< IP >:< PORT >
masternodeprivkey=< PRIVKEY >
4 - Replace PORT with the port used for your Masternode 1, IP:PORT with your external white IP and the same port for your Masternode 1
5 - Replace PRIVKEY with the masternode private key you generated with "masternode genkey" in controller wallet for Masternode 1
6 - Save it and repeat process for Masternode 2 and Masternode 3 (in case you set up multiple)
STARTING MASTERNODES
1 - Now you can start all your masternodes with "startmn1.cmd", "startmn2.cmd" and "startmn3.cmd"
2 - Go to controller wallet, check that your transactions in Masternode 1, 2 and 3 addresses have at least 15 confirmations.
3 - Go to the "My Masternodes" tab.
4 - Press "Start All"