
User interfaces, game mechanics and sounds are fundamental in every game.
We will learn how to create a simple 2D dice game called Dice Pig in Godot Engine.
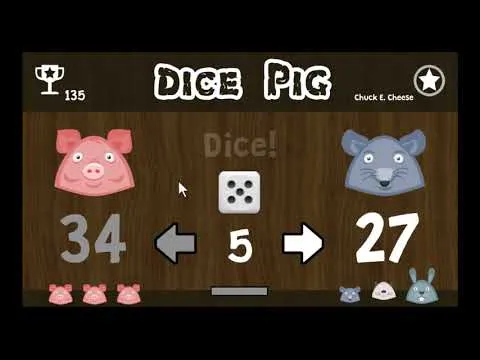
At first, let's take a look at the game itself. Dice Pig has some simple game rules that anyone can learn in a snap:
- Roll the die. If you roll a one you lose all the points you accumulated during that turn and you lose your turn.
- Continue rolling the die until you're happy with the number of points you've scored. Then "hold" by handing the die over to your opponent and track all points earned during your turn.
- Reach 100 points first and win the round.
You play as the pig on the left. Battle against 9 individual animals (rat, cat, rabbit, dog, monkey, bear, cow and two specials) and get a high score - but keep in mind that you only have 3 lives. (Win extra life by playing risky)
You can download and play the final game for free (Windows/macOS/Linux) to get an idea how your game can look like, or just watch it here:
The tutorials will help you create your own dice game from scratch. You can follow the steps, make adjustments and customize that way your game.
If you get lost in the tutorial, you can always go to Github. There you can download and try the latest state of the game. At the end of each tutorial step you will find a link to the related commit in the repository.
In this tutorial you will learn...
- How to set up a new 2D game project in Godot Engine
- How to create a scene and add certain UI elements
- How to connect buttons to a game script
- How to write and test basic game mechanics
- How to add sounds to your game for audio feedback
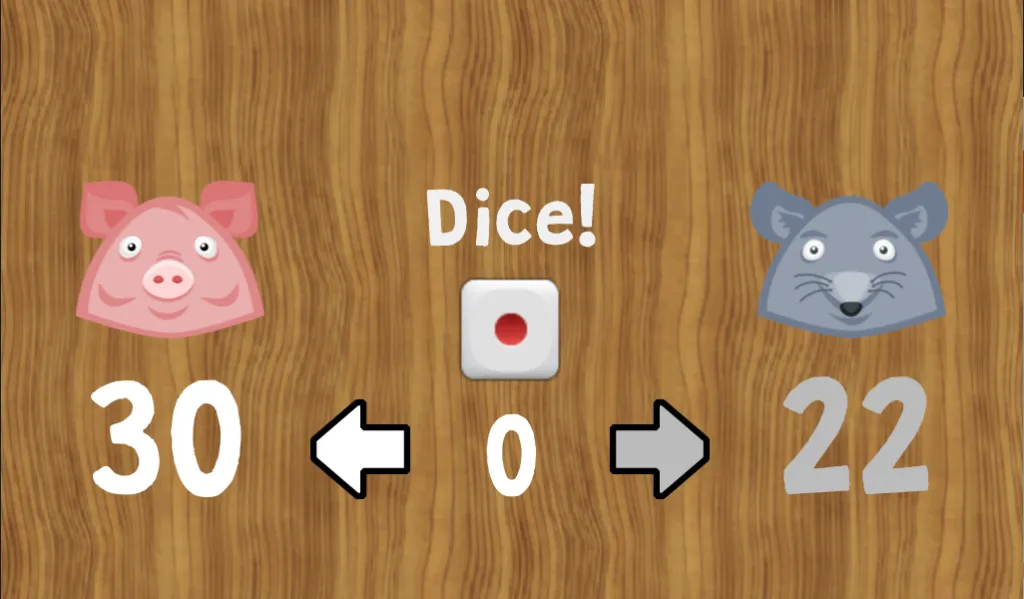
At the end of this tutorial you will have a basic game that will look like:
Requirements
- Godot Engine (latest) installed - Get it here
- Basic understanding of user interfaces
If you need help or more information, you can dip into the documentation of Godot Engine and leave a comment under this tutorial. Feedback is welcome!
1. Create a new project and set up the game
Alright, it's time to start the Godot Engine.
If you start it the first time you will get a dialog that asks you to open the Open Asset Library. Just Cancel the dialog and create a New Project by clicking the button in the right section of the Project Manager window.
Next, in the Create New Project dialog set the Project Name to Dice-Pig and select the Project Path to a folder where you want to store your game. Click on Create folder and finish the dialog with Create & Edit.
If you need help with the first steps, simply watch this video tutorial. You are ready now to set up the game scene.
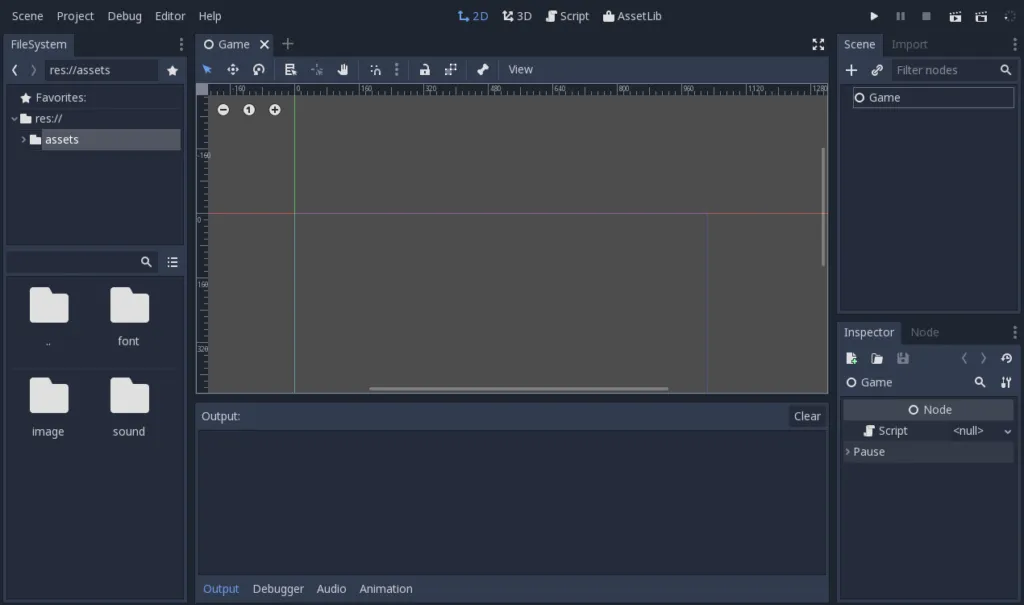
Switch to 2D. You can zoom out and adjust it for a better overview:

Note: On the top of the window you can easily switch between the workspaces (2D, 3D, Script and AssetLib).
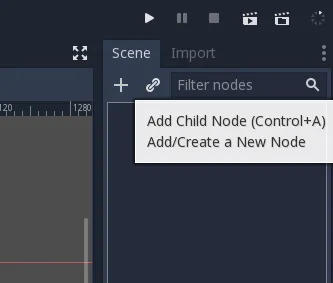
Now, we need a main scene for our game: Click on the + in the Scene dock (right upper corner) to add a new Node:
This opens the Create New Node dialog. Select Node and click on Create. Node is the base class for all scene objects. This will be our main scene. Double-click on the created Node and rename it to Game.
Go into the Scene menu and select Save Scene. A dialog will ask for a name, keep Game.tscn and click Save. Play the project by pressing F5 on your keyboard - or use the play button in the right upper corner. On first project start a dialog will appear to Select a main scene. Confirm and Open Game.tscn. The game window will open and run, please close it afterwards.
On the left side you have the FileSystem dock, where you will manage your project files and assets. Download the asset package for Dice Pig and unzip it into your project folder. The assets folder contains fonts, images and sounds.
Godot Engine will automatically update the FileSystem dock:
Optional: Download the Dice Pig icons and unzip them also into the project folder to replace the existing icons.
Finally, we need to adjust settings. Open the Project menu and select Project Settings. Find and set following preferences:
- Application/Config/Name = Dice Pig
- Application/Boot Splash/Image = res://assets/image/splashscreen.png
- Display/Window/Stretch/Mode = 2d
- Display/Window/Stretch/Aspect = keep
2. Add and adjust user interface elements
In the last chapter we added a Node called Game. Now it's time to add some more UI elements. Repeat the same steps to create and rename the new Nodes. Right-click on a Node to Add Child Node.Here is a hierarchical list of Nodes (and specific types in brackets) we need for our game:
- Game (Node)
- Background (TextureRect)
- Dice (Sprite)
- DiceButton (Button)
- Turn (Node)
- Left (TextureButton)
- Points (Label)
- Right (TextureButton)
- Player1 (Node)
- Image (TextureRect)
- Points (Label)
- Player2 (Node)
- Image (TextureRect)
- Points (Label)
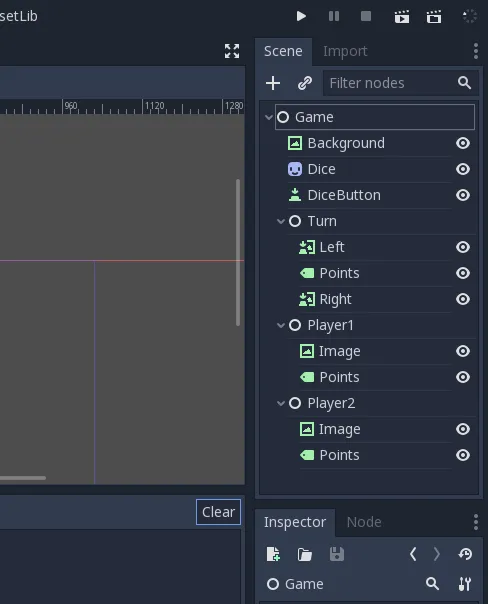
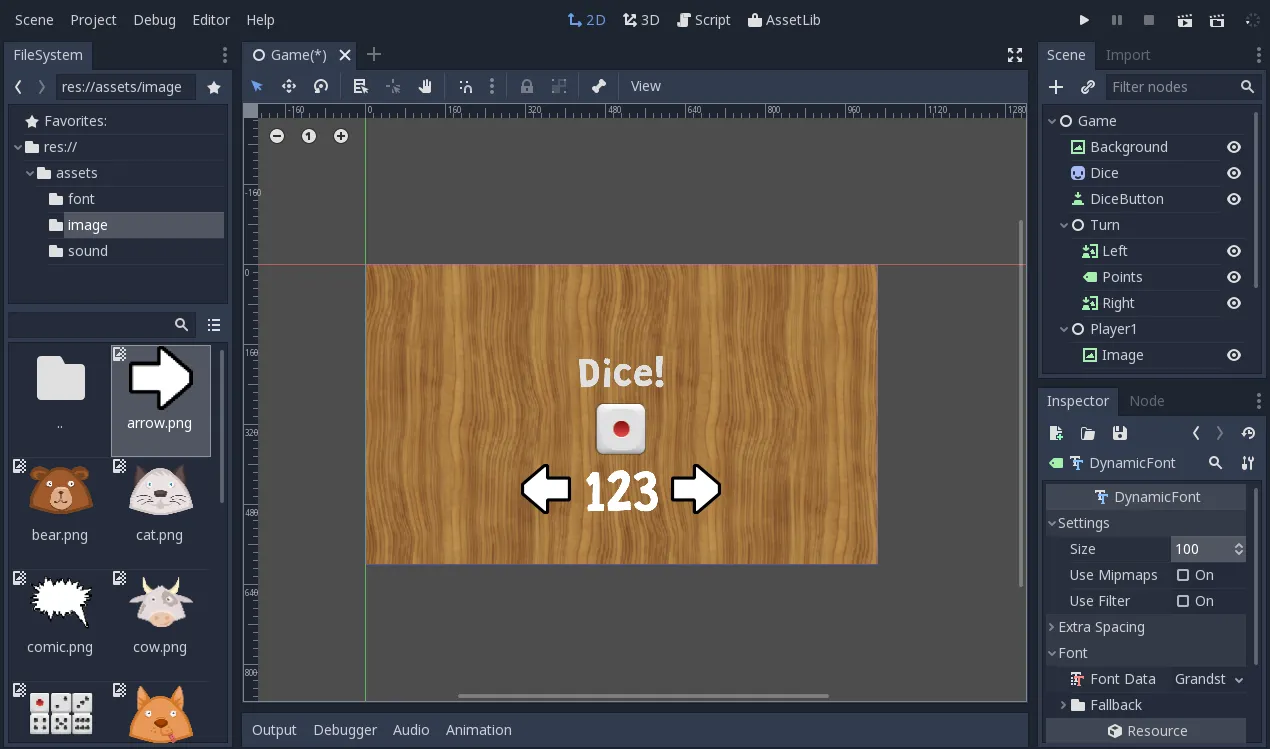
When you finished adding the Nodes as shown in the screenshot, you can adjust the properties in the Inspector dock. But first Save your project. Select a Node in the Scene and set its values in the Inspector. We will start with the Background:
Game/Background:
- Set the Texture to wood.png
- Expand: On
- Stretch Mode: Tile
- Margin/Right: 1024
- Margin/Bottom: 600
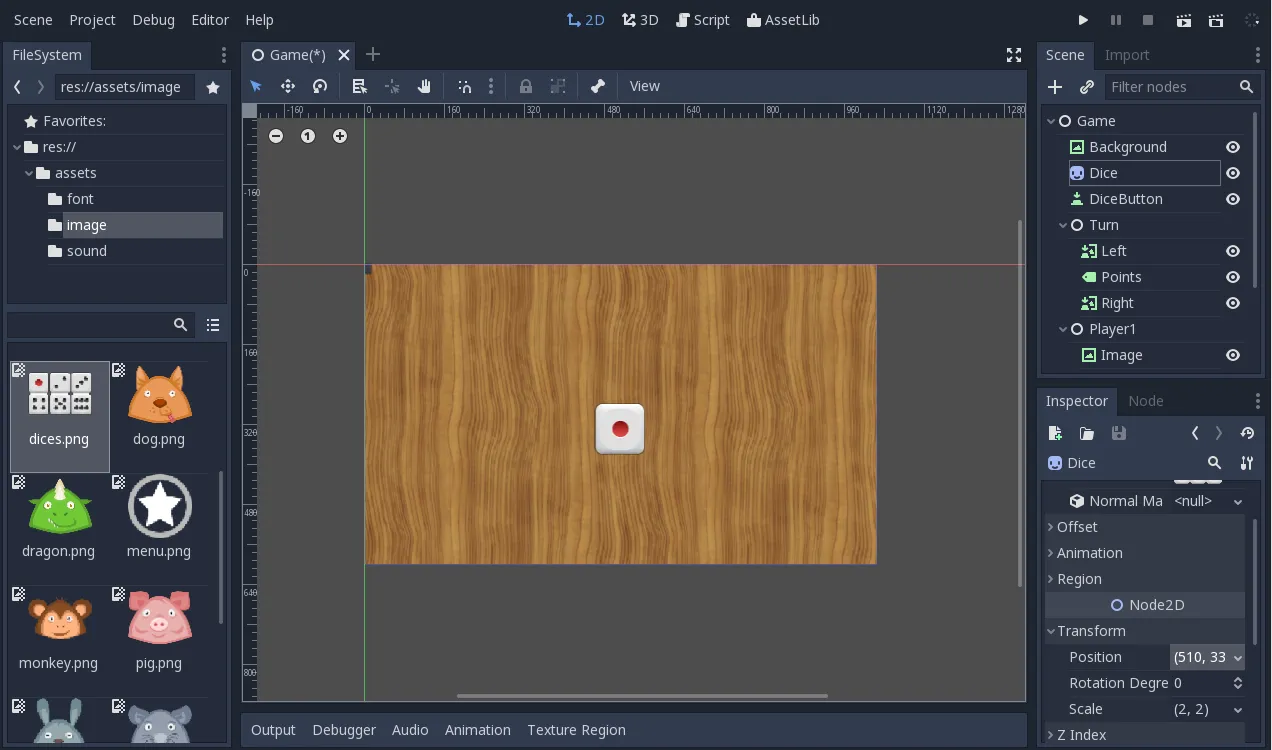
- Set the Texture to dices.png
- Animation/Vframes: 2
- Animation/Hframes: 3
- Transform/Position: 510, 330
- Transform/Scale: 2, 2
Game/DiceButton:
- Text: Dice!
- Flat: On
- Enabled Focus: None
- Margin/Left: 400
- Margin/Top: 190
- Margin/Right: 630
- Margin/Bottom: 267
- Custom Fonts/Font: New DynamicFont
- Font/Font Data: Load Grandstander-clean.ttf
- Settings/Size: 70
Game/Turn/Left:
- Set Textures/Normal to arrow.png
- Enabled Focus: None
- Margin/Left: 410
- Margin/Top: 500
- Margin/Right: 510
- Margin/Bottom: 600
- Rect/Rotation: 180
- Set Textures/Normal to arrow.png
- Enabled Focus: None
- Margin/Left: 610
- Margin/Top: 400
- Margin/Right: 710
- Margin/Bottom: 500
- Text: 123
- Align: Center
- Valign: Center
- Margin/Left: 440
- Margin/Top: 420
- Margin/Right: 590
- Margin/Bottom: 520
- Custom Fonts/Font: New DynamicFont
- Font/Font Data: Load Grandstander-clean.ttf
- Settings/Size: 100
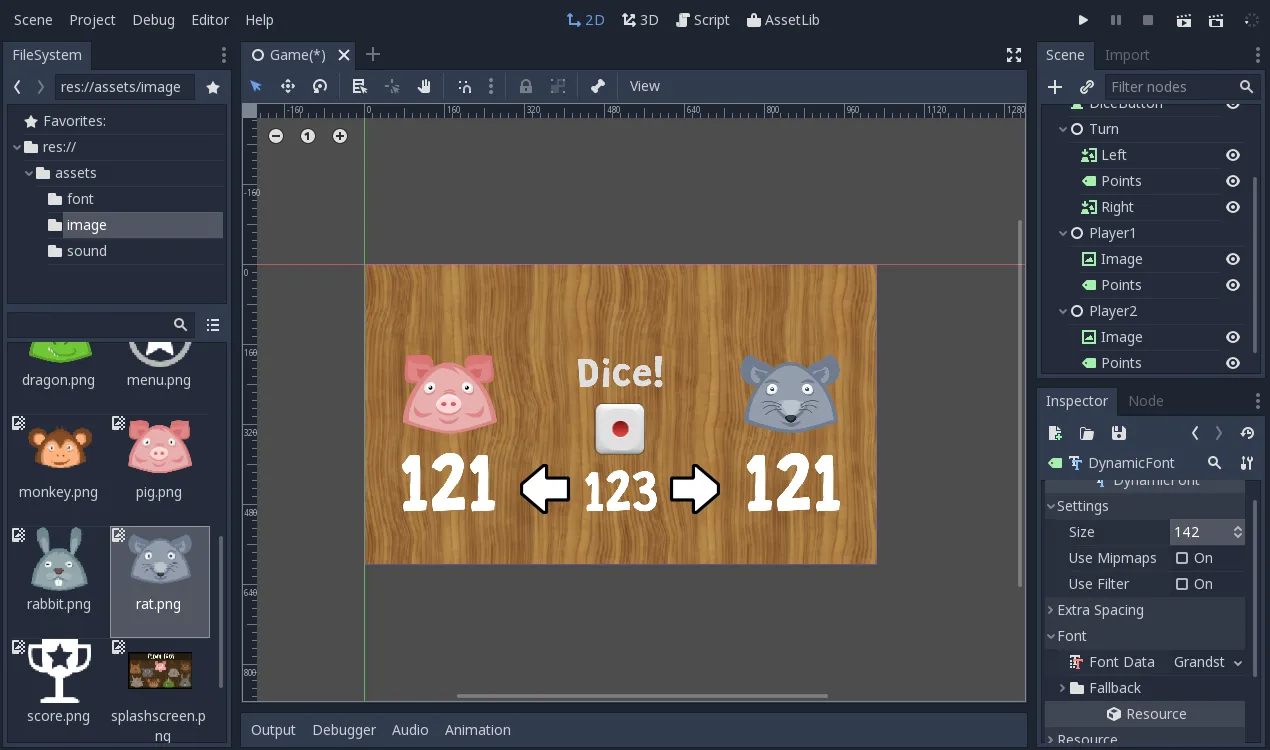
Game/Player1/Image:
- Set Texture to pig.png
- Stretch Mode: Keep Centered
- Margin/Left: 20
- Margin/Top: 150
- Margin/Right: 320
- Margin/Bottom: 370
- Text: 121
- Align: Center
- Valign: Center
- Margin/Left: 20
- Margin/Top: 380
- Margin/Right: 320
- Margin/Bottom: 540
- Custom Fonts/Font: New DynamicFont
- Font/Font Data: Load Grandstander-clean.ttf
- Settings/Size: 142
- Set Texture to rat.png
- Stretch Mode: Keep Centered
- Margin/Left: 700
- Margin/Top: 150
- Margin/Right: 1000
- Margin/Bottom: 370
- Text: 121
- Align: Center
- Valign: Center
- Margin/Left: 710
- Margin/Top: 380
- Margin/Right: 1010
- Margin/Bottom: 540
- Custom Fonts/Font: New DynamicFont
- Font/Font Data: Load Grandstander-clean.ttf
- Settings/Size: 142
Save the project again. (Github commit)
3. Connect buttons to a game script
In this step we have to connect the UI elements (Buttons) to a game script, so that we can handle the mechanics. That's easy to do in Godot Engine. First, we need a game script, take a look how to create a new one:

This will generates a default script:
extends Node

# class member variables go here, for example:
# var a = 2
# var b = "textvar"

func _ready():
# Called every time the node is added to the scene.
# Initialization here
    pass

#func _process(delta):
# # Called every frame. Delta is time since last frame.
# # Update game logic here.
# pass
Godot Engine uses a script language called GDScript. There is a good introduction in the documentation you should read first.
Delete the comments starting with #, so that game script shrinks to:
extends Node

func _ready():
    pass
Take care of the TAB before the keyword pass. GDScript uses tab-based indentation. Read more about it in the documentation linked above.
Let's take a look how to connect the DiceButton to the game script:
Note: In the Connection Signal dialog you can choose where and how a signal should be handled. First of, we keep the method name, select Game for our script and enable Make Function, so that a new function will be automatically created in the script and linked to the signal. (default)
Connect the Turn/Left and Turn/Right buttons the same way. We will end up with a game script that looks like:
extends Node

func _ready():
    pass

func _on_DiceButton_pressed():
    pass # replace with function body

func _on_Left_pressed():
    pass # replace with function body

func _on_Right_pressed():
    pass # replace with function body
Delete the comments again and remove the empty (double) lines:
extends Node

func _ready():
    pass

func _on_DiceButton_pressed():
    pass

func _on_Left_pressed():
    pass

func _on_Right_pressed():
    pass
Save the project and script. (Github commit)
4. Write game mechanics in script
It's time to write the simple dice game. Please adjust the script parts in your game script:
extends Node

var dice = 0 # 0 - 5
var turnPoints = 0 # 0 - 100
var player1Points = 0 # 0 - 100
var player2Points = 0 # 0 - 100
var currentPlayer = 0 # 0 - 1

const colorActive = Color("#ffffff")
const colorInactive = Color("#bbbbbb")
We added some variables and constants that will represent the current state of our game. The comment defines the range of that variable, for example: if dice is 0 the actual dice in the UI will show a one, so if dice is 5 we will see six.
Turn and player points will start from 0 and go to 100. The variable currentPlayer will represent the sequence-player, 0 stands for Player1 and 1 for Player2. It's a little bit tricky, because we always start counting from 0.
There are two color constants that will be used to change the color of the player points and arrows.
func _ready():
    randomize()

    resetTurnPoints()
    resetPlayerPoints()
    setCurrentPlayer(0)

func resetTurnPoints():
    turnPoints = 0
    $Turn/Points.text = str(0)

func resetPlayerPoints():
    player1Points = 0
    $Player1/Points.text = str(0)
    player2Points = 0
    $Player2/Points.text = str(0)
The _ready() function will be called once then the game starts. We have to call the randomize() function first, so that the game gets fresh random numbers for our dice. Then we reset the game state calling the two reset functions and set current player to Player1.
Add the two reset functions resetTurnPoints() and resetPlayerPoints() to your script.
func setCurrentPlayer(player):
    currentPlayer = player
    if currentPlayer == 0:
        $Player1/Points.modulate = colorActive
        $Player2/Points.modulate = colorInactive
        $Turn/Left.modulate = colorActive
        $Turn/Left.disabled = false
        $Turn/Right.modulate = colorInactive
        $Turn/Right.disabled = true
    else:
        $Player1/Points.modulate = colorInactive
        $Player2/Points.modulate = colorActive
        $Turn/Left.modulate = colorInactive
        $Turn/Left.disabled = true
        $Turn/Right.modulate = colorActive
        $Turn/Right.disabled = false

func setNextPlayer():
    resetTurnPoints()
    if currentPlayer == 0:
        setCurrentPlayer(1)
    else:
        setCurrentPlayer(0)
The setCurrentPlayer() function is used to update the internal variable currentPlayer and to change the player UI: We change modulate to colorInactive and colorActive and enable/disable the Left or Right buttons. The setNextPlayer() function will switch between the two players.
func _on_DiceButton_pressed():
    dice = randi() % 6
    $Dice.frame = dice
    if dice == 0:
        setNextPlayer()
        return

    turnPoints += dice + 1
    $Turn/Points.text = str(turnPoints)
This is the signal function for the dice button. randi() will give use a random number and with modulo 6 the result will be within the range of 0 to 5. Dice is a Sprite with the animation from 0 to 5. If dice is 0, we will show the frame 0 with one and if dice is 5, then we will show frame 5 with six:
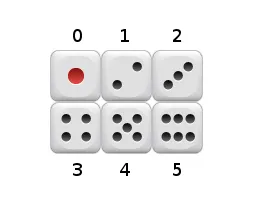
If the dice is 0 (red one) the current player lose the turn points and the next player can go on. The return will end the function. Otherwise the dice points will be added to the turn points and the current player can roll again, or...
func _on_Left_pressed():
    if turnPoints == 0:
        return

    player1Points += turnPoints
    $Player1/Points.text = str(player1Points)
    setNextPlayer()

func _on_Right_pressed():
    if turnPoints == 0:
        return

    player2Points += turnPoints
    $Player2/Points.text = str(player2Points)
    setNextPlayer()
...the current player can press either the Left or Right button to 'hold' the turn points and add them to the player points. At the end of the two function we will call the function setNextPlayer().
Note: Make sure you use TAB and no spaces for indentation. Coping and pasting the above code lines can result in spaces. If you ran into errors, make sure the script code is correct and fix spaces manually.
Save the script again. (Github commit)
It's time to play and test the game. Press F5 to run the game. Check if the mechanics works as expected.
There is one thing left to do...
5. Add Sounds
Let's add another Child Node into our Game and rename it to Sound. In Sound we add 6 AudioStreamPlayer Nodes:
- Game (Node)
- ...
- Sound (Node)
- Dice1 (AudioStreamPlayer)
- Dice2 (AudioStreamPlayer)
- Dice3 (AudioStreamPlayer)
- Dice4 (AudioStreamPlayer)
- Hold (AudioStreamPlayer)
- Pig (AudioStreamPlayer)
Now, set the streams in the Inspector:

To play the sounds, add the code lines in the game script.
func _on_DiceButton_pressed():
    dice = randi() % 6
    $Dice.frame = dice
    if dice == 0:
        $Sound/Pig.play() # <-- play pig sound
        setNextPlayer()
        return

    # play dice sounds:
    var diceType = randi() % 4
    if diceType == 0:
        $Sound/Dice1.play()
    if diceType == 1:
        $Sound/Dice2.play()
    if diceType == 2:
        $Sound/Dice3.play()
    if diceType == 3:
        $Sound/Dice4.play()

    turnPoints += dice + 1
    $Turn/Points.text = str(turnPoints)

func _on_Left_pressed():
    if roundPoints == 0:
        return

    $Sound/Hold.play() # <-- play hold sound

    player1Points += roundPoints
    $Player1/Points.text = str(player1Points)
    setNextPlayer()

func _on_Right_pressed():
    if roundPoints == 0:
        return

    $Sound/Hold.play() # <-- play hold sound

    player2Points += roundPoints
    $Player2/Points.text = str(player2Points)
    setNextPlayer()
Save the script again. (Github commit)
Congrats, we completed this tutorial. Now it's time to play your dice game.
There are some things that are missing: High score and Game over
But what about a computer opponent or the game menu?
Feel free to implement it by yourself, or stay tuned for next tutorials when we add new features.
Posted on Utopian.io - Rewarding Open Source Contributors