What Will I Learn?
- how to make Bootable USB Windows using Windows PowerShell
Requirements
- Windows PowerShell (available in Windows OS)
- Windows 10 or 8 ISO Image File
- Flashdrive 8GB or Higher
Difficulty
- Basic
What is Windows PowerShell?
Windows PowerShell, previously named with Micrososft Shell or PowerShell is a command line interface (abbreviated CLI) tool and a scripting language developed by Microsoft Corporatiom. This tool already exists directly in the Windows Operating system.
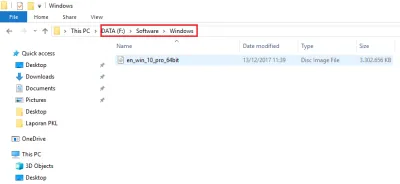
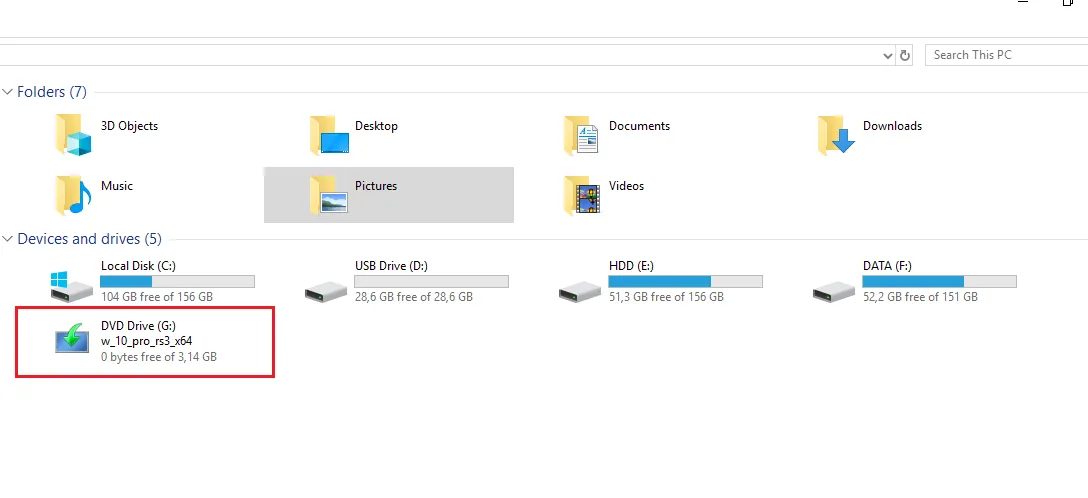
Before the bootable process, it would be nice to know in the folder where the Windows ISO file is located. Here we will use windows 10. So let's see and check where Windows 10 ISO file is located.
The ISO file to be processed for bootable is named en_win_10_pro_64bit. The file is stored in the directory F: \Software\Windows.
Here we go for the next step.
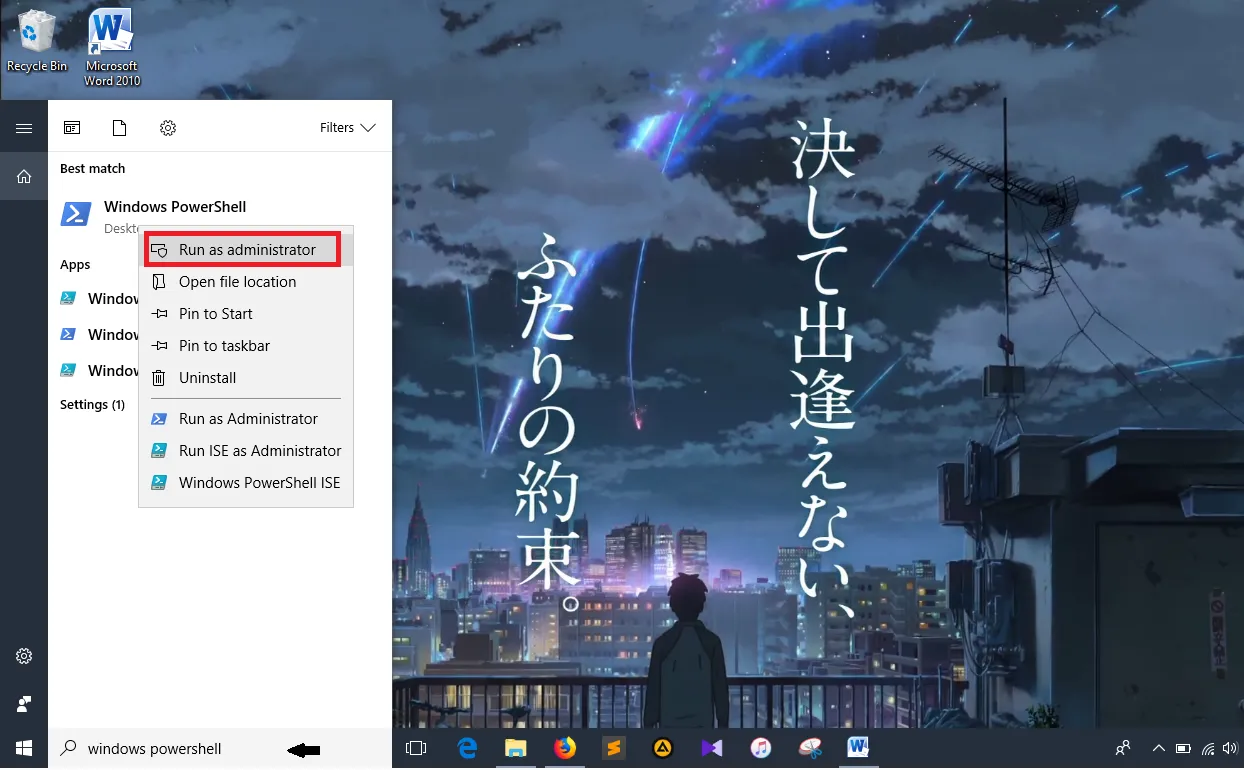
1.Find Windows PowerShell through the Windows Search box and type in the keyword "windows powershell" so that Windows PowerShell will appear. Then open the run as Administrator.
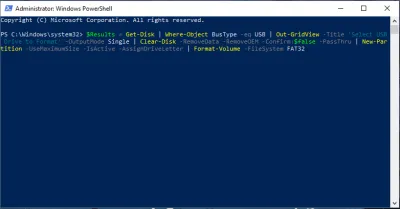
2.Then input the command below, where this command is to get all USB list connected to PC and then USB will be in format to FAT32. And then click Enter.
$Results = Get-Disk | Where-Object BusType -eq USB | Out-GridView -Title 'Select USB Drive to Format' -OutputMode Single | Clear-Disk -RemoveData -RemoveOEM -Confirm:$false -PassThru | New-Partition -UseMaximumSize -IsActive -AssignDriveLetter | Format-Volume -FileSystem FAT32
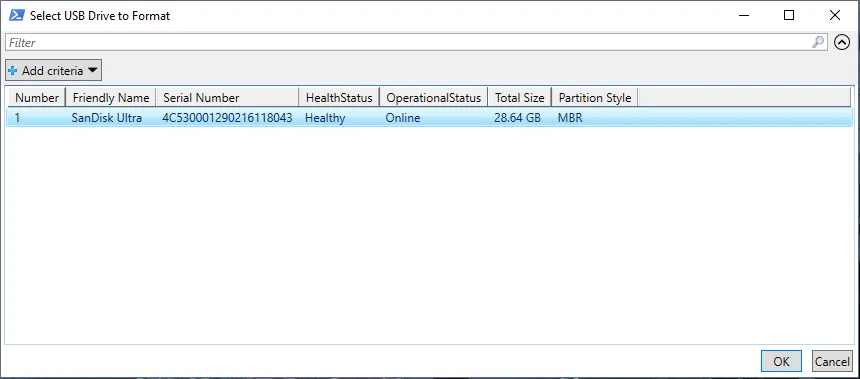
3. Afterwards , will appear a window that displays the USB list. Press the OK button.
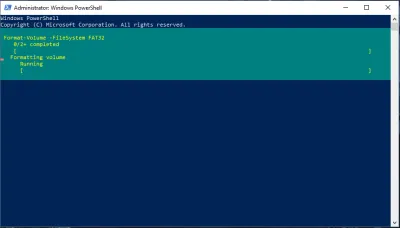
4.Then the command will appear to format the flashdrive.
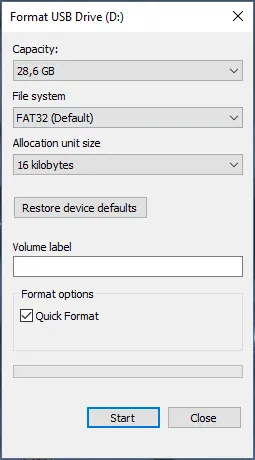
5. A pop up window appear for the disk formatting commands. Click Start and wait until the process is complete.
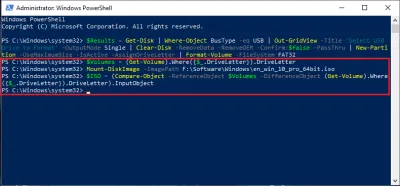
6.Then, mount the Windows ISO file to appear in the Exprorer file (main page). We can open it by double clicking on the ISO file (this way can only be used in Windows 8.1 and Windows 10) or use the command below. Make sure the bold is the directory where the Windows file is stored.
$Volumes = (Get-Volume).Where({$.DriveLetter}).DriveLetter
Mount-DiskImage -ImagePath F:\Software\Windows\en_win_10_pro_64bit.iso
$ISO = (Compare-Object -ReferenceObject $Volumes -DifferenceObject (Get-Volume).Where({$.DriveLetter}).DriveLetter).InputObject
7. Check in the page file exproler. The mount that we did earlier will appear.
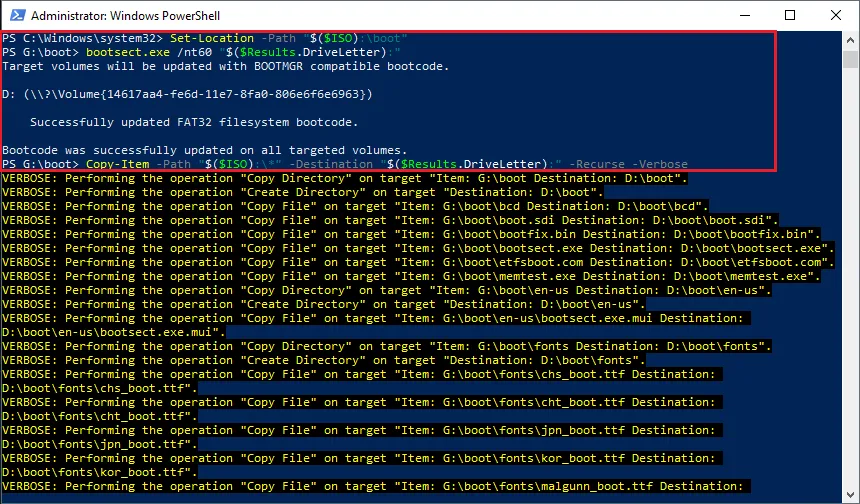
8.The next step is to create a bootable Windows that has been mounted and then copy it to Flashdrive media. Type the following commands one by one and wait for the process to complete.
Set-Location -Path "$($ISO):\boot"
bootsect.exe /nt60 "$($Results.DriveLetter):"
Copy-Item -Path "$($ISO):*" -Destination "$($Results.DriveLetter):" -Recurse -Verbose
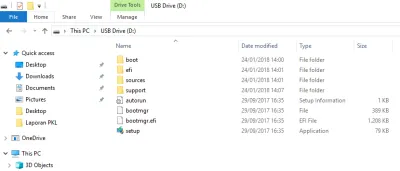
9. Finally, see what happened on your flashdrive. If successful, on your flashdrive there will be a copy of the ISO that has been mounted from the directory G (directory mount ISO before).
Curriculum
This is the first tutorial i'm contributing using Windows PowerShell.
Posted on Utopian.io - Rewarding Open Source Contributors