What will we learn?
- Tutorial lecture with Python / Series 1 ( Applied File System Description )

Requirements:
- Notepad+
- Operating System
- Python
Difficulty Level:
- Normal Level
Let's Start the Course :
File Uploads with Python
In our previous post, we may ask users to upload their images, required documentation, or any other files via the form we made.
Let's start by organizing our form design first.
<form action="send.py" method="post" enctype="multipart/form-data">

<input type="file" name="picture">

<input type="text" name="name" placeholder="Write your name.">
<input type="text" name="lastname" placeholder="Write your last name.">
<input type="text" name="email" placeholder="Type your email address.">

<button type="submit">SEND</button>
</form>
As you can see here, we have added the "enctyre" parameter inside the "" tag. With this parameter, we specify the file upload process from this form. We must use this parameter for each file upload. We added a new "" tag inside the tag to create the file upload area, and gave the value of "type" to the type parameter. We wrote "image" in the "Name" parameter. When we send the form we will take the name "picture" from the opposite side.
The new form view will look like the image below.
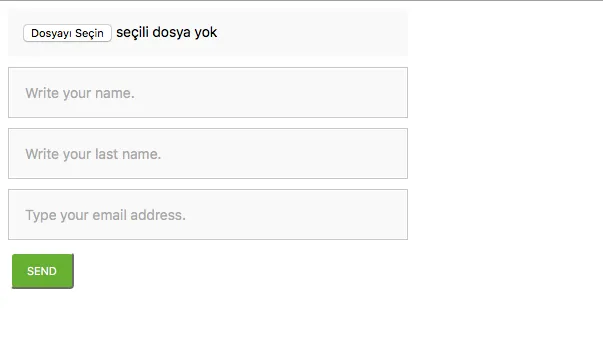
On my browser the default language is Turkish, so the "File" download button says "No File Selected". This text automatically changes according to the browser language. In other words, Turkish button names automatically appear in Turkish browsers.
Now, once the form is submitted, let's do the process of saving the file we have added to the folder. Let's open our "send.py" file. We created the "x" variable with the "FieldStorage" method.
Since the value of the "name" parameter in the "" tag is "image", we can get my file as follows.
image = x ["image"]
We took our file and assigned it to the image variable. Within this image variable we can get information about our file.
For example, let's take the name, type, character encoding and content of the file and assign it to the variables.
file_name                 =   image.filename
file_type                   =   image.type
file_encoding         =  image.encoding
file_content             =  image.value
You can print the contents of the image variable on the screen as below to see all the file information.
print (vars (image) )
The output of this usage will be as follows.
{ 'headers' : , 'filename' : 'm_avatar.png' , 'outerboundary' : b' ----WebKitFormBoundarywfMprMK3BjUEg7yF' , 'errors' : 'replace' , '_FieldStorage_file' : None, 'qs_on_post' : None, 'strict_parsing' : 0, 'bytes_read' : 20351, 'list' : None, 'tyre' : 'image/png' , 'encoding' : 'utf-8' , 'innerboundary' : b' ' , ' , '_binary_file' : True, 'fp' : , 'type_options' : { } , 'disposition_options' : { 'filename' : 'm_avatar.png' , 'name' : 'image' } , 'disposition' : 'form-data' , 'length' : -1, 'done' : 0, 'keep_blan_values' : 0, 'limit' : 20630, 'name' : 'resim' , 'file' : <_io.BufferedRandom name=4> }
Depending on this output, you may also receive other information from your file.
Before I can save the official parish, we must first create a folder to save and set permissions for that folder. I made "chmod" settings on Linux via "777", so I gave all permissions.
The "Chmod" setting does not exist in Windows. We need to allow Windows with its own folder permissions. Windows generally does not have a problem, but it is still useful to check the permissions to guarantee the job. Now we have the contents of our image file. After that, we will be writing the file we know. Let's save the contents of the image file in our file to the "/image" folder. When saving the image, we will use the original name of the downloaded image.
file_to_be_saved  =  open ("image/"  +. file_name,  "wb") ;
file_to_be_saved.write (file_content)
file_to_be_saved.close ()
Since my picture name is "m_avatar.png", a bie file named "m.avatar.png" is created in the folder. You can open the image and check whether it is installed properly. Now that we have saved the file, we can get this image link. Since I am working on the ip address of 185.118.142.21, I created the following link.
image_link = "http://185.118.142.21/images/" + file_name
The last output of this variable was  this way. When we look in the link, the image that we uploaded will come.
Now we can show our image on html using this link.
print ("<img src=' + image_links + "'> <br>")
Finally, I see you pick up our last days.
#!  /usr/bin/python

#We included the CGI module.
import cgi

# We included the CGItb module.
import cgitb

# Error to see error messages
# we activated capturing.
cgitb.enable ( )

# Header codes
print ("Content-Type :  text/html")
print ( )

x = cgi.FieldStorage ( )

Name           =  x.getvalue ("name"     ,   "[Name not written . ]")
LastName   =  x.getvalue ("lastname"  ,  "[Surname not written . ]")
Email       =  x.getvalue ("email"  ,  "[Email not written . ]")

#  image upload
image  =. x["image"]

file_name              =  image.filename
file_type               =  image.type
file_encoding     =  image.encoding
file_content        =  image.value

#  without changing the name of the file
#into the Images folder.
file_to_be_saved  =  open (images/" +  file_name ,  "wb") ;
file_to_be_saved.write ( dosya_type )
file_to_be_saved.close ( )

pictures_link  =  "http://185.118.142.21/images/" +  file_name

#  Press the screen with official HTML.
print ("<img  src' "  +  images_link +  ">
")

print("""
Name :                   """  +  Name         +  """

LastName :          """  + LastName   +  """

Email :               """  +  email      +  """

""")
SECURITY CONTROL WITH FILE INSTALLATION
We just uploaded our file beautifully. We needed an image file and we did all our processing according to the image file. What would we do if a user on the site had mistakenly or accidentally uploaded another file?
For example, if you installed a Python file and could access that file via the link, this could be our last, because we would have allowed our server to run a powerful language such as Python, which gives you permission to do anything.
In order to protect against such attacks and prevent them from harming us, we need to consider these probabilities from the very beginning and take precautions.
First of all, do not forget to take regular backups. If we close a security hole we can not close because we can not figure out, and if we get attacked through this open, worst case, we can send our server back to the last backup we received. Therefore, the most important item of security is "Backup". Once we have taken care of the backup, we can bypass the attacker.
Now what we want in this software is the "Image" upload. Then we need to check if the file loaded by Pythin is a picture. The methods may vary for this. I'll give you three checks and I'll show you.
First we can start by checking the file type. We took the file type above and set it to "file_type." When we uploaded the previous image, our file type got "image_png" value because we uploaded the PNG file, so for example if we uploaded a JPEG file it would get "image / jpeg" value.
When we installed a Python file, it would get "text / x-python-script" value. in short, for each type of file, this type of value also varies. This is very important information for us.
If you want to learn the type of a file, you can make a little software like this and write the type of the file, or if you do not want to deal with it, I created a file called "file_tips_list.docx" in the source files. From there you can find many types of files.
Now I want to upload only "PNG", "JPG" and "GIF" files to the server. For this I record these file types in a sequence first.
allowed_types [ "image/png" , "image/jpeg" , "image/gif" ]
Now when the file is loaded, I will check to see if the loaded file type is in the array. If not, let's print an error message on the screen and tell it to load an image.
Let's see all the codes we've checked.
resim  =  x ["image"]

file_name                = image.filename
file_type               = image.type
file_encoding  = image.encoding
file_icerigi        = image.value

allowed_types  :  ["image/png"  , "image/jpeg" , "image/gif"]

if dosya_tipi  in allowed_types :

# We're saving it into the images folder without changing the file name.
file_to_be_saved  =  open ("images/"  +  dosya_adi ,  "wb") ;
file_to_be_saved.write (dosya_icerigi)
file_to_be_saved.close ( )

image_linki  = "http://185.118.142.21/images/"  +  file_name

# Press the screen with official HTML.
print ("<img  src' "  +  image_linki +  ">
")

print("""
Name :                   """  +  Name         +  """

LastName :          """  + LastName   +  """

Email :               """  +  email      +  """

""")

else :

print ("Please upload an image file.")
Now, when I upload an image file, it works like we already do.
This was our first method. In the other method we can check the extension of the uploaded file. So when we upload a png file, the extension of this file is ".png" our. When we install JPEG, it will be ".jpg" and when we load the Python file it becomes ".py".
We can separate and check this extension from the file name.
extension = file_adi.split(" . ")
extension = extension [-1]
Here we distinguish the file name by a period (.) And take the last piece and save it as an extension variable. The next check is simple.
extension = file_name.split(" . ")
extension = extension [-1]

allowed_types. = ["jpg", "jpeg", "png", "gif". "py"]

if uzanti not in allowed_extensions:
   print("Please upload the file in the current extension.")
else:
We will do the third check on the HTML side. With this control we can only select images and python files when selecting files from the form.
Since the code in the HTML files can be viewed and modified from the browser, this method will provide a precise solution for experienced attackers, but it is also worth mentioning.
We add the "accept" parameter to the "" tag we have set for file upload, and we write the file types we want to upload here. The rest of us are doing it for us and preventing other files from being selected.
<input type="file" name="image" accept="image/x-png, image/jpeg, image/gif">
Update your code in this way and test the file upload.
As you can see when we click on the file upload button, you will see that all the files outside the image file on the incoming screen will be dimmed and will not be clicked on. Since we allow PNG file, these extensions will appear as clicked and you can choose easily.
For the rest of the article, follow our series.
Series :
1 - Tutorial lecture with Python / Series 1 #1
Posted on Utopian.io - Rewarding Open Source Contributors