What Will I Learn ?
- How to Modifications a table database with php artisan migration
Requirements
- Xampp 5.6.3
- Laravel 5.4
- Composer
- atom
Difficulty
- Basic
Preliminary
Migrations is one of Laravel's features to make it easier for us to develop an application related to Database.Migrations will be very useful when we work in a Team. Migration can also be called as Blueprint from the table that we will create or change. Migration is a facility in laravel used to simplify us when there are changes in the database and it can also be used to modify the table in a database.
Modification Table is a way that is done to change the form of a table.Modifikasi table is done if there is data to be added or fixed. Table modifications through artisan php are usually focused on coulumn.
Migration can not only be used to create new tables but we can also use them to modify the table fields. One of them adds a new column to the table.
Before following this tutorial, you should have a table in your database created using migration. For those of you who have not got the table or can not create the table. please read this How to Create a Table Database in Laravel With PHP Artisan Migration . Once you have a table created from php artisan . You are ready to follow the next step in this tutorial
Practice modificattion a table with php artis
In this Practice we will modify the tutorial table we had created before.
STEP 1 : Checking Structure and Script from tutorial table
Before making modifications we will see the structure of table and script from the tutorial table. So we can see the changes that will occur later after the table is modified
This is a show of the tutorial table now
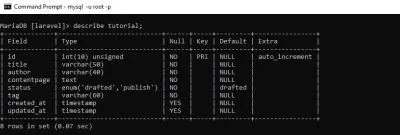
From there we can see there are 8 columns with different types of each other. We will add the data field and change the data type in the next step
STEP 2 : Add a new column to the tutorial table
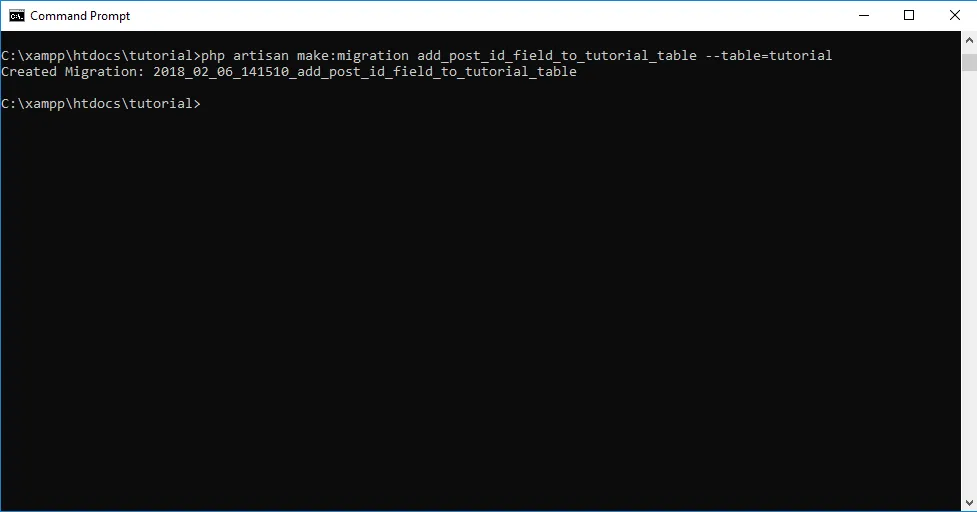
In the tutorial table, we want to add a new field with the name of post_id. For the initiation of the migration file, use the command more or less as below.
php artisan make:migration add_post_id_field_to_tutorial_table --table=tutorial
Then type all the above code in the Command prompt :
Here's a little explanation :
- Naming migration this time a little longer. This is intended to provide as detailed information as possible about the migration to be run.
--tableis an instruction to modify table columns and change existing tables.
Same with before tutorial, Results can be seen in the directory database / migrations with names like as 2018_02_06_141510_add_post_id_field_to_tutorial_ table.php . The date in the file name will correspond to your migration creation time. so it will not be the same as mine.and you should know. every time you want to modify your table will create a new migration file because you can not migrate on the same file. unless you make changes at once in one action using a single migration file.
Here is example add column to table tutorial :
<?php
use Illuminate\Support\Facades\Schema;
use Illuminate\Database\Schema\Blueprint;
use Illuminate\Database\Migrations\Migration;
class CreateTutorialTable extends Migration
{
    public function up()
    {
        Schema::table('tutorial', function (Blueprint $table) {
          $table->integer('post_id')->first();
          $table->integer('category')->after('id');
        });
    }
    public function down()
    {
      Schema::table('tutorial', function (Blueprint $table) {
                    //
      });
    }
}
now to add a column you must only be focus on the script below this. because the other scripts will be there automatically when you create the migration file.
    public function up()
    {
        Schema::table('tutorial', function (Blueprint $table) {
          $table->integer('post_id')->first();
          $table->integer('category')->after('id');
        });
    }
Here's a little explanation :
$table->integer('post_id')->first();is a method to add colums of data typeintegerand put the first colums in the table.$table->integer('category')->after('id')is a method to add columns of data typeintegerwith namecategoryand and put afteridcolumn using methodafter().
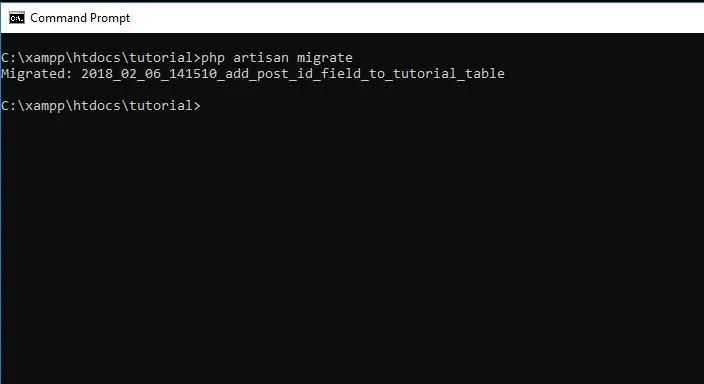
after that, use this script to execute migration files that have been edited
php artisan migrate
Here is an example that runs in the command prompt:
This is a show of the tutorial table we have migrate running.
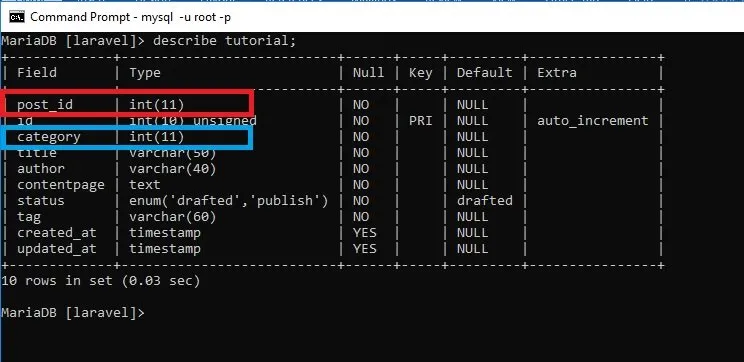
The column has been successfully added and now the tutorial table has 10 columns with post_id in first column and category after id column. at a glance this is the same as the previous tutorial but you need to know. this addition process can only be done if you already have a table in the database. the difference lies in the script migration is --table . next step we will change the type of column.
STEP 3 : Change Type of Column from tutorial table
In this step we will modify the column from the table is type of data . we will change the type of data from the title and author fields to be Text type.
Using this script below to command prompt:
php artisan make:migration alter_modification_coulums
the above command is used to create a migration file with the name alter_modifications_coulums .
this needs to be done because every time we will make modifications to the table we will need migration file.
Here is example change type of data from table tutorial :
<?php
use Illuminate\Support\Facades\Schema;
use Illuminate\Database\Schema\Blueprint;
use Illuminate\Database\Migrations\Migration;
class AlterModificationCoulums extends Migration
{
   public function __construct()
{
    DB::getDoctrineSchemaManager()->getDatabasePlatform() ->registerDoctrineTypeMapping('enum', 'string');
}
    public function up()
    {
        Schema::table('tutorial', function (Blueprint $table) {
            $table->text('title')->change();
            $table->text('author')->change();
        });
    }
    public function down()
    {
      Schema::dropIfExists('tutorial');
    }
}
now to change type of column you must only be focus on the script below this. because the other scripts will be there automatically when you create the migration file.
    public function up()
    {
        Schema::table('tutorial', function (Blueprint $table) {
            $table->text('title')->change();
            $table->text('author')->change();
        });
    }
Here's a little explanation :
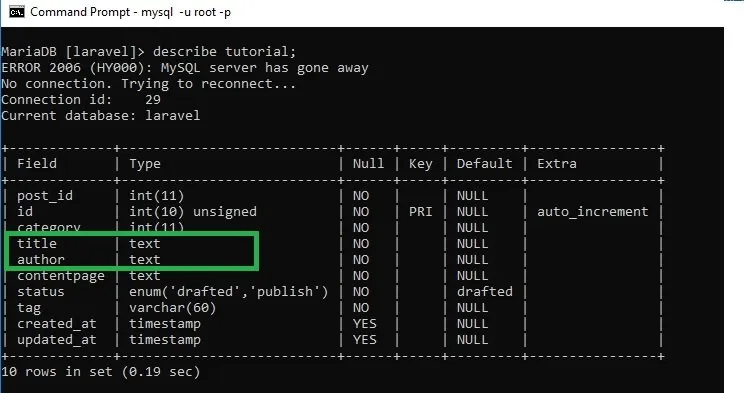
$table->text('title')->change();This is the method used to change the type of data from thetitlecolumn intotexttype$table->text('author')->change();This is the method used to change the type of data from theauthorcolumn intotexttype
and the code below should be added to avoid errors that will occur in the process data type changes using migration. You can see in the script above where the code must be put
   public function __construct()
{
    DB::getDoctrineSchemaManager()->getDatabasePlatform() ->registerDoctrineTypeMapping('enum', 'string');
}
Keep in mind the Schema that used for table modification it is different of making table . for table modification using schema :: table and this is we use in this tutorial.and also you must be running this command composer require doctrine/dbal on the command prompt before you running php artisan migrate.
Here is an example that runs in the command prompt:
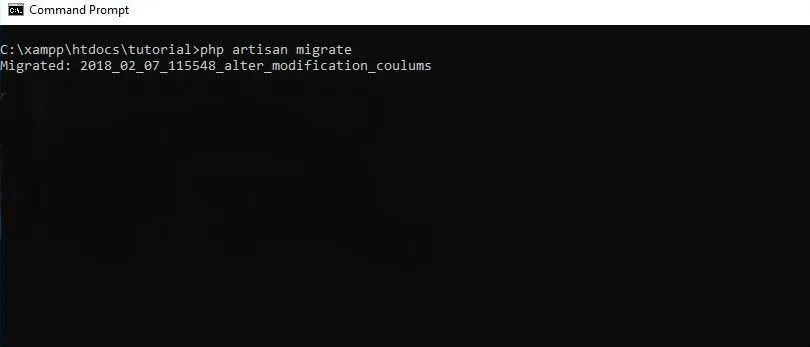
this is a modified tutorial table using migration. the data type of the title and author fields has changed from varchar to text
Basically to modify the table in a database with migration using the schema method and this I will explain more detail in the next post after the tutorial use of dropping and roolback table in laravel.
Curriculum
Posted on Utopian.io - Rewarding Open Source Contributors