What Will I Learn ?
- How to Create a table database with php artisan migration
Requirements
- Xampp 5.6.3
- Laravel 5.4
- Composer
- atom
Difficulty
- Basic
Preliminary
PHP Artisan is the commands that run in the command line / command prompt, the command is used to create Controller, Model, Middleware, Request and others. The advantage of using artistic php is that we are faster and more efficient in building applications. Laravel is one of the Frameworks that uses this new technology.
Migration is a facility in laravel that is used to facilitate us when there is a change in the database. Schema Builder is used to create database schema. By using migration and schema builder we do not have to bother opening phpmyadmin, or any other Sql app to create database. With migration and builder schemes it will also be easier when we create large projects and with different developers so developers do not need to import / export databases but only use migrations.
Migrations are essentially agnostic, not just specific in Laravel. In some modern PHP frameworks almost all have this feature. Migrations seems to be the standard in database modification on the fly. Migration is one of the features in php artisan and is very useful for creating tables in a database
Practice create a table with php artis
Here is an example of using the php artisan for create table with name is tutorial :
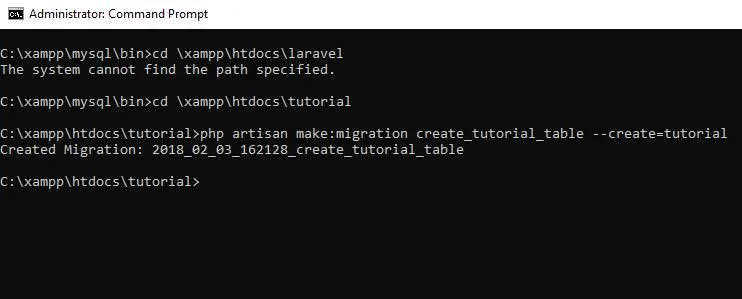
STEP 1 : using this code in CMD for create table
here is the command for create table:
php artisan make:migration create_tutorial_table --create=tutorial
Then type all the above code in the Command prompt.
Here's a little explanation :
--createis to provide the package name used in the new table is a tutorial in the databasecreate_tutorial_tableis the file name.phpof the table who ours created and are stored in the migration folder in laravel
Results can be seen in the directory database / migrations with names like as 2018_02_03_162128_create_tutorial_table.php . The date in the file name will correspond to your migration creation time. so it will not be the same as mine.
STEP 2 : add coloum table with atom editor to tutorial. table
In the file, there is method up() and method down().
method up ()is useful to create table columns that we will createmethod down()is useful to delete the table when in rollback
Here is example add column to table tutorial :

Here's a little explanation :
$table->increments('id');is method to create an increment field withidname.$table->string('title',50);is a method to add columns of data typestringwith nametitleand length field 50 characters.$table->string('author',40);is a method to add columns of data typestringwith nameauthorand length field 40 characters.$table->text('contentpage');is a method to add columns of data typetextwith namecontentpage.$ table-> enum ('status', ['drafted, 'publish']) -> default ('drafted');is a method to add columns of data type enum with two values, that is drafted and publish, and make the drafted as default.$table->string('tag',60);is a method to add columns of data typestringwith nametagand length field 60 characters.$table->timestamps();is a method that will automatically create two fields with the namecreated_atandupdated_at.
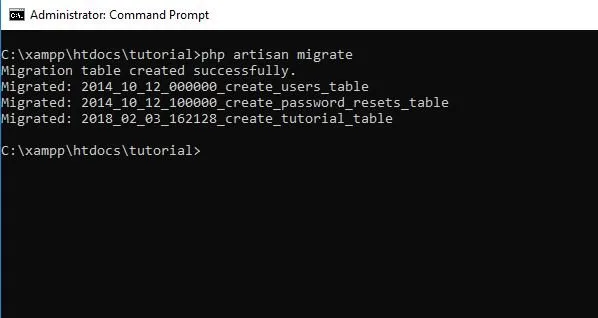
STEP 3: runing the migrate code to rebuild the table column
In the previous step we have added some columns and use php artisan then the table structure will change according to the data we input.
here is the command:
php artisan migrate
Here is an example that runs in the command prompt:
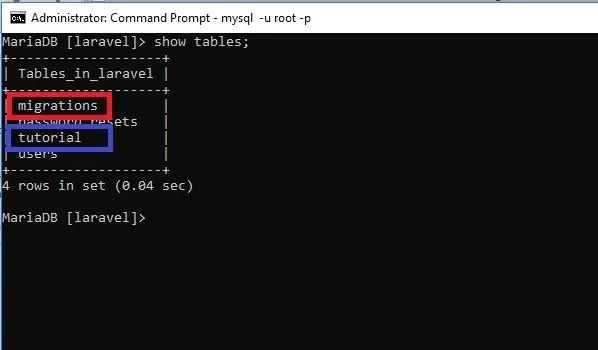
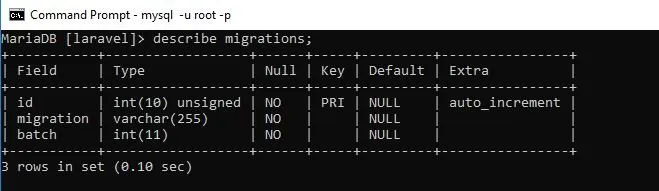
To make sure the tutorial table have created we will check into the database. In addition to the tutorial table, we will also find a table with the name of the migration. This table serves to store information about migration that we have created.
This is a show of the tutorial table we have created.
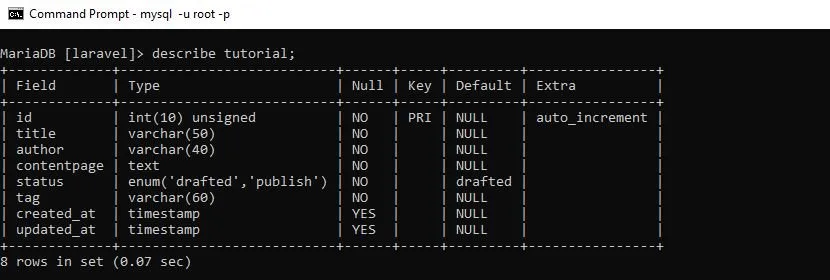
this is evidence all the columns we have added to the tutorial table using migrate have been successfully created and any migration creation information will be added to the migration table automatically.
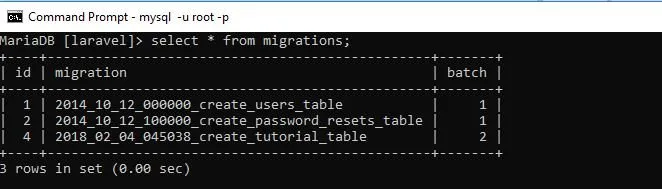
This is a show of the migration table :
This is the information content in the migration table :
Using Migration we can also modify and rollback, in my next tutorial I will explain how to make modifications using migration after that roolback tutorial . For now we have managed to create a table tutorial with some columns in it.
Posted on Utopian.io - Rewarding Open Source Contributors