Repository
https://github.com/nuxt/nuxt.js
What Will I Learn?
- Dynamic components
- Communication between components with props
- Transition page on nuxt.js
- Dynamic pages
Resources
Nuxt.js Website - https://nuxtjs.org/
Nuxt.js Github. - https://github.com/nuxt/nuxt.js
Vuex - https://github.com/vuejs/vuex
Poke API - https://pokeapi.co/
Difficulty
Intermediated
Tutorial contents
In this tutorial, I will continue the tutorial about nuxt.js. In this section, we will learn page transitions on nuxt.js and create dynamic pages on Nuxt.js. Of course for those of you who are familiar with vue.js can already know the transition on the page, in nuxt.js we will also use transitions between pages that are useful to add the user experience and not just the transition of the changed page but the data in the component will change accordingly with the page we are headed.
Dynamic components
in the previous tutorial we have created a component is <items> </ items>. In this tutorial, we will make the component become dynamic using props, for those of you who have used Vue.js of course, you are familiar with props. We can also use props to communicate between components to other components with small data.
- Create Props
We can make props easily using v-bind:name or with shorthand :name. name is the name of the props we will use in the component.
Example index.vue:
<template>
  <div>
    <items :data="'Pokemon'"></items>
  </div>
</template>
<script>
  import Items from '~/components/items.vue'
  export default{
    components: {
      Items
    },
    async fetch({store}){
      await store.dispatch('load_items', 'pokemon')
    }
  }
</script>
Example location_item.vue:
<template>
  <div>
    <items :data="'Location'"></items>
  </div>
</template>
<script>
  import Items from '~/components/items.vue'
  export default{
    components: {
      Items
    },
    async fetch({store}){
      await store.dispatch('load_items', 'location')
    }
  }
</script>
:datais the name of the props we will use in the component. data will be received in component<items></ items>." 'Pokemon' ": Pokemon is the value of props, there is something we need to consider when giving value to props. if we want to give a string value directly to the props, we should write in this way " 'value' ", we must add' '. If we do not add' ', then props will automatically find the value in the propertydata: {}, in this tutorial, I will pass the string value then from that I use' '.
Use Props in a Component
We have passed the props value on the item component <items :data="'Pokemon'"></items>, then we will use it in that component. We should define the name of props first in the property props: [], We store in the form of arrays[] because the probability of props will be more than one.
Example:
<template>
  <section class="container">
    <div style="text-align: center;">
      <app-logo/>
      <h1 class="title">
        millenuxt
      </h1>
      <h2 class="subtitle">
        tutorial
      </h2>
    </div>
    <div class="list-group">
        <a href="#" class="list-group-item list-group-item-action active">
          Data {{data}} from Props
        </a>
        <a v-for="item in items" :key="item.name" href="#" class="list-group-item list-group-item-action">{{item.name}}</a>
    </div>
  </section>
</template>
<script>
  import AppLogo from '~/components/AppLogo.vue'
  import {mapState} from 'vuex'
  export default{
    components: {
      AppLogo
    },
    computed: mapState([
      'items'
      ]),
    props:['data']
  }
</script>
We must first register props in props: ['data'] then we can use the name of the props with {{data}}.
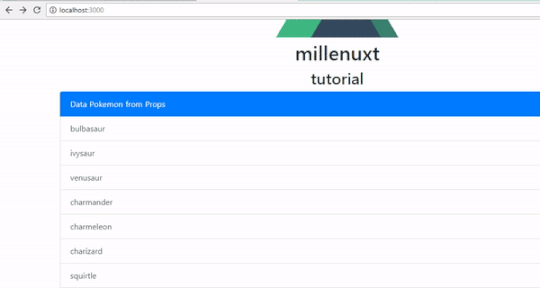
We can see the result by running our project with npm run dev and on localhost:3000.
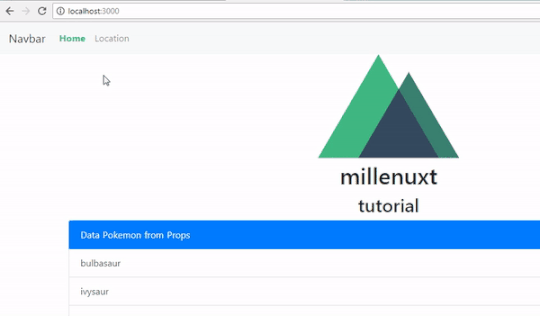
We can see the header part of the component changes depending on the routing that we are headed Data {{data}} from Props.
Transition between pages
We will add the transition in the routing we are going to. there are some transition models you can use, I will use transitions that we can make in CSS. I will make CSS as global CSS so that every page or component will be exposed to CSS style. We have created a global CSS in main.css
Example:
.page-enter-active, .page-leave-active{
    transition: opacity .5s;
}
.page-enter, .page-leave-to{
    opacity: 0;
}
.page-enter-active and .page-leave-active are the default class name that is available to set the transition we can use the class to give Style when the page is active. I will give transition: opacity .5s;. then we will return the opacity value to be opacity: 0; to neutralize the effect of opacity.
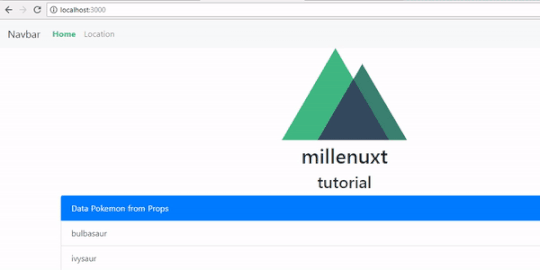
If there is no an error we will be able to see the results as below.
Dynamic pages
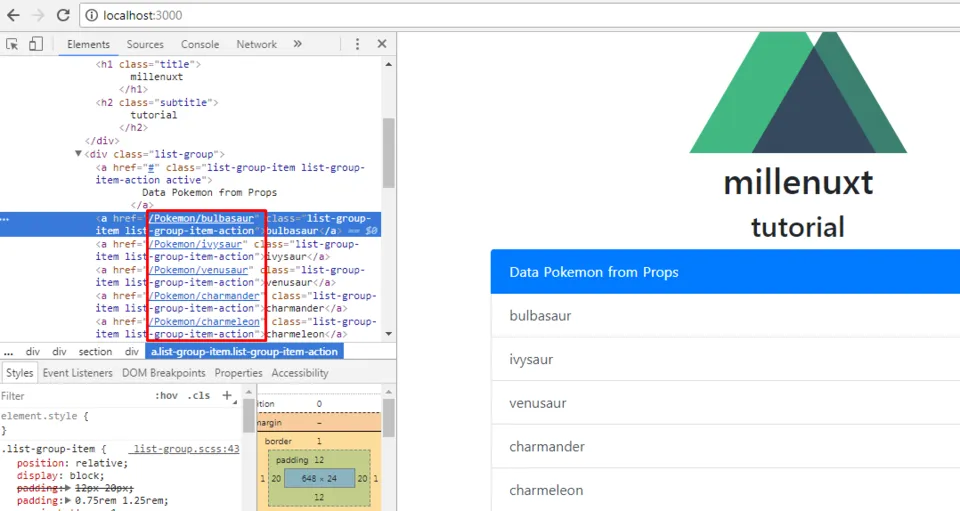
We will create dynamic pages with dynamic data as well, therefore we will make changes when we looping on items.results, we will replace the <a> tag with <nuxt-link></nuxt-link>.
Before:
<a v-for="item in items.results" :key="item.name" href="#" class="list-group-item list-group-item-action">{{item.name}}</a>
After:
<nuxt-link tag="a" v-for="item in items.results" class="list-group-item list-group-item-action" :key="item.name" :to="'/'+data+'/'+item.name">{{item.name}}</nuxt-link>
We will access the API separately on each data, so the idea is we will access the API in this way /pokemon/pokemon_name. We can access the API by retrieving the data props value and the name of each pokemon that exist on the item.name loop.
baseURL: 'http://pokeapi.salestock.net/api/v2/'
API access
baseURL/pokemon/pokemon_name = :to="'/'+data+'/'+item.name">
- Create Dynamics Page
We will start to create a dynamic page that can be used anything because the routing that we will use is pokemon/pokemon_name then I will create a folder with pokemon adjust to the name of the routing and inside the pokemon folder I will create a folder named _name.vue.
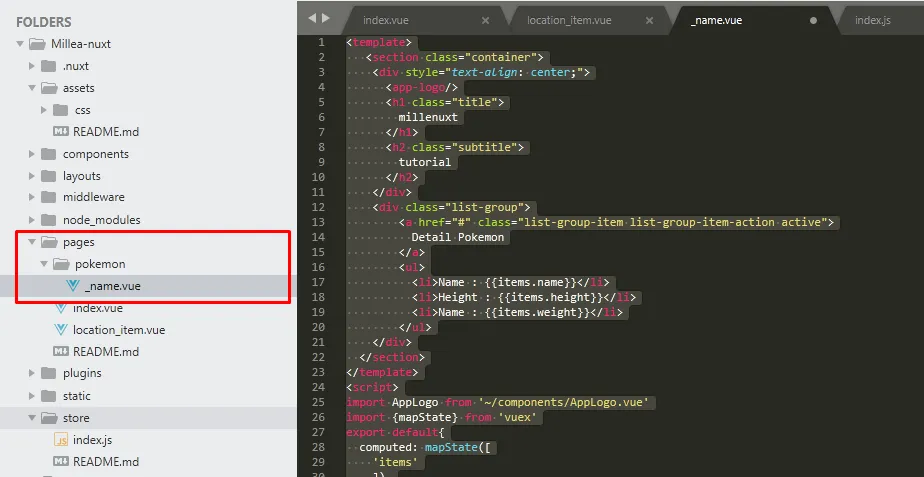
Noted: for dynamic pages do not forget to give underscore in the page name. if not then the system will not recognize it as a dynamic page
_name.vue
<template>
   <section class="container">
    <div style="text-align: center;">
      <app-logo/>
      <h1 class="title">
        millenuxt
      </h1>
      <h2 class="subtitle">
        tutorial
      </h2>
    </div>
    <div class="list-group">
        <a href="#" class="list-group-item list-group-item-action active">
          Detail Pokemon
        </a>
        <ul>
          <li>Name : {{items.name}}</li>
          <li>Height : {{items.height}}</li>
          <li>Name : {{items.weight}}</li>
        </ul>
    </div>
  </section>
</template>
<script>
import AppLogo from '~/components/AppLogo.vue'
import {mapState} from 'vuex'
export default{
  computed: mapState([
    'items'
    ]),
  components: {
    AppLogo
  },
  async fetch({store, params}){
    await store.dispatch('load_items', 'pokemon/'+params.name)
  }
}
</script>
- in the _name.vue page we will fetch data from the API using the same method ie
async fetch (), But there will be a difference we will pass parameters ie params. params is a parameter that we can use to retrieve parameters that are in the URL. - Example URL: http://localhost:3000/Pokemon/bulbasaur
It's meansparams.nameis bulbasaur, then we can make the params become a URL parameter for the load_items methodawait store.dispatch('load_items', 'pokemon/'+params.name). - Then we can retrieve the result data from the API by using
mapState (['items']),
and print the data like this{{items.name}}
for more details you can see the illustration of the following picture
We can see we only use one component to make detail for all items, you can do even more with the knowledge you see in this tutorial, hopefully, this tutorial useful for you thank you. If you feel confused you can see the curriculum I have created in the previous tutorial
Curriculum
Learn Nuxt#1 Nuxt structure, Global CSS, Request API
Learn Nuxt#2 Vuex in Nuxt.js, Classic Mode and Modules Mode
Learn Nuxt#3 Create components, Reusable components and Nuxt-link