Lesson Objectives
A. Working with Postback Model
B. Implement Cross-Page Posting in Forms
C. Steps for Cross-Page Postback Demo
Needs are;
A.Asp.NET
B. Visual Studio
C. C#
The difficulty level of commands we use is middle.
The Postback Model
ASP.NET uses the Postback Model in which the browser sends the page to the server when an event such as the click of a button happens. The event handlers are then evaluated on the server. After the evaluation, the result is produced on the same page and rendered to the browser. The controls on a web form can do a postback of the form. The Button control automatically does a postback every time a user clicks it. But some controls such as ListBox or RadioButton does not automatically do a postback of the form. The programmer can assign the AutoPostBack property for these controls to "true" to automatically postback when a user selects an item in the ListBox or selects a RadioButton.
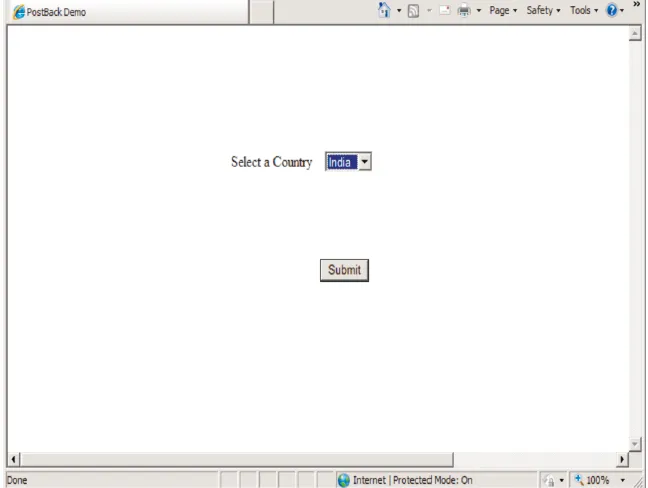
Demonstration : Handling Postback event and displaying the country selected in the DropDownList.
The PostBackDemo.aspx file:
<html >
<head runat="server">
<title>PostBack Demo</title>
</head>
<body>
<form id="form1" runat="server">
<div>
<asp:DropDownList ID="ddlCountry" runat="server" style="z-index: 100;
left: 395px; position: absolute; top: 131px">
</asp:DropDownList>
<asp:Label ID="lblMessage" runat="server" Font-Bold="True"
ForeColor="Blue" Height="31px"
Style="z-index: 101; left: 277px; position: absolute; top: 187px"
Width="785px"></asp:Label>
<asp:Label ID="lblCountry" runat="server" Style="z-index: 102; left: 278px;
position: absolute;
top: 132px" Text="Select a Country"></asp:Label>
<asp:Button ID="Button1" runat="server" Style="z-index: 104;
left: 389px; position: absolute; top: 243px" Text="Submit" />
</div>
</form>
</body>
</html>
The PostBackDemo.aspx.cs file :
using System;
public partial class PostBackDemo : System.Web.UI.Page
{
protected void Page_Load(object sender, EventArgs e)
{
if (!Page.IsPostBack)
{
ddlCountry.Items.Add("India");
ddlCountry.Items.Add("China");
ddlCountry.Items.Add("Japan");
}
if(Page.IsPostBack)
{
lblMessage.Text = " You have selected : " + ddlCountry.SelectedValue;
}
}
}
Run and view output 1 :
Cross-Page Posting
Cross-Page Posting is the process by which an asp.net web page performs a post back to another asp.net web page. Button, ImageButton and LinkButton controls contains a property called PostBackUrl which points to the destination page to which the current page will postback. The destination page can access the source page controls through Page.PreviousPage property which returns the reference of previous page. The FindControl method to get the reference to controls on the previous page.
Note : Server.Transfer() is another method used in ASP.NET to perform Cross Page Posting. Server.Transfer() method results in additional processing overheads when compared to using PostBackUrl property.
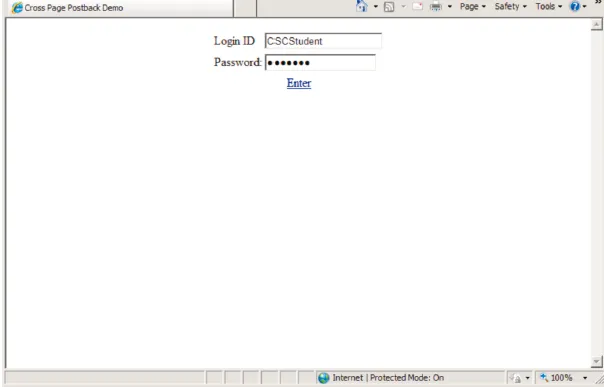
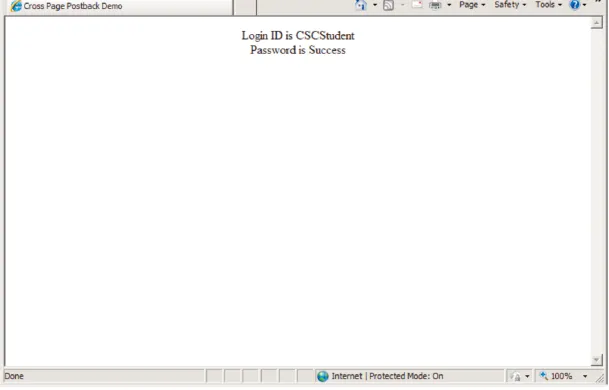
Cross-Page post back is done from CrossPagePostbackSource web page to CrossPagePostbackDestination web page. User enters the LoginID and Password in the CrossPagePostbackSource web page and clicks the Enter. A Cross-Page post back occurs and the CrossPagePostbackDestination web page displays the LoginID and Password by accessing the LoginID and Password in the CrossPagePostbackSource web page.
Steps for Cross-Page Postback Demo
- ) Create The CrossPagePostbackSource web page
The CrossPagePostbackSource.aspx is created using Single-Page File Model
<%@ Page Language="C#" %>
<html xmlns="http://www.w3.org/1999/xhtml" >
<head id="heading" runat="server">
<title>Cross Page Postback Demo</title>
</head>
<body>
<form id="form1" runat="server">
<div align="center">
<table>
<tr>
<td>Login ID</td>
<td><asp:TextBox ID="txtLogin" Runat="server"></asp:TextBox>td>
</tr>
<tr>
<td>
Password:</td>
<td><asp:TextBox ID="txtPassword" runat="server"
TextMode="Password"></asp:TextBox>td>
</tr>
<tr>
<td align="center" colspan="2">
<asp:LinkButton ID="LinkButton1" runat="server"
PostBackUrl="CrossPagePostbackDestination.aspx">Enter</asp:LinkButton>
</td>
</tr>
</table>
</div>
</form>
</body>
</html>


2 ) Create The CrossPagePostbackDestination web page
The CrossPagePostbackSource.aspx is created using Code-Behind File Model Code for CrossPagePostbackDestination.aspx .cs using System; using System.Web.UI.WebControls;
public partial class CrossPagePostbackDestination : System.Web.UI.Page
{
protected void Page_Load(object sender, EventArgs e)
{
{
if (PreviousPage.IsCrossPagePostBack)
{
TextBox txtLogin ;
TextBox txtPassword;
txtLogin = (TextBox)PreviousPage.FindControl("txtLogin");
txtPassword = (TextBox)PreviousPage.FindControl("txtPassword");
Response.Write("" + "Login ID is "+ txtLogin.Text + "
");
Response.Write("" + "Password is " + txtPassword.Text
+ " ");
}
}
}
}


Note : Nothing needs to be done in the CrossPagePostbackDestination.aspx file.
3 ) Run the CrossPagePostbackSource web page and enter the LoginID and Password and click Enter.

4  ) Verify the output in CrossPagePostbackDestination page.


Posted on Utopian.io -  Rewarding Open Source Contributors