Origami Spinner!
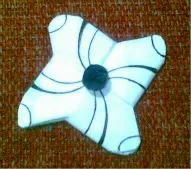
Welcome to all the Steemit Comunity to this little tutorial of a spinner in origami. I really hope you will enjoy so let´s start!
You will need:
- 2 sheets of paper.
- A piece of paperboard.
- A chopstick.
- Glue.
Tutorial
Source
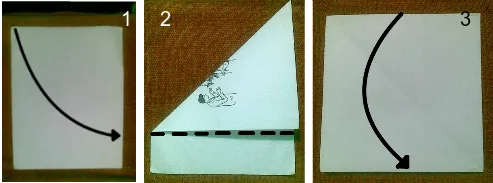
Step 1: Fold the corner trying to align the top border with the border of the right side.
Step 2: Cut along the line.
Step 3: Fold in half.
Source
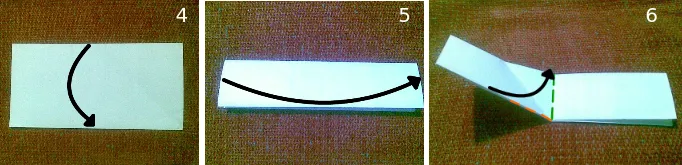
Step 4: fold in half again.
Step 5: fold in half vertically.
Step 6: Fold aligning the orange line with green line.
Source
Step 7: Fold like the last step but this time in the opposite direction of the step 6.
Step 8: Flip the paper.
Step 9: Fold the corner to the spot marked by the point of the arrow.
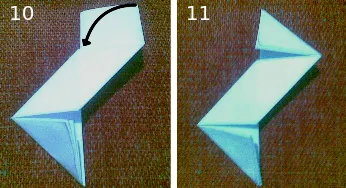
Step10: Repeat the previous step on the top of the paper.
Step 11: This is one part of the Spinner, repeat the process with the other sheet of paper.
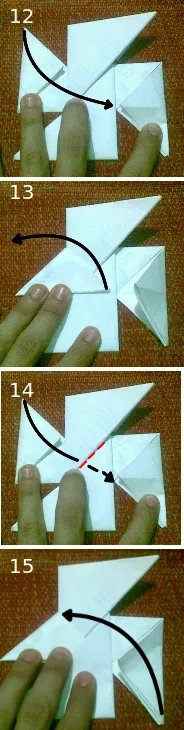
Step 12: Put the 2 modules in the position shown in the image and fold the tip to the pointed spot.
Step 13: Fold back the paper.
Step 14: Now fold the paper following the arrow but this time put it inside the little pocket in the red line.
Step15: This is step is like the number 12 but on the other side of the paper.
Source
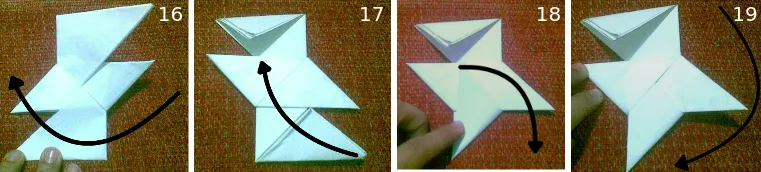
Step 16: Flip the paper.
Step 17: this step follows the same process of the steps that go from 12 to 15.
Step 18: Unfold de paper and put it inside on the pocker in the center of the paper just like step 14.
Step 19: turn the paper to make the next step easier.
Source
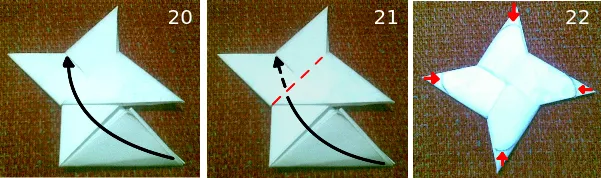
Step 20: Fold the point to the indicated spot.
Step 21: Unfold the paper and put it inside the pocket in the red line.
Step 22: Draw the lines with the pencil and cut the paper along those lines.
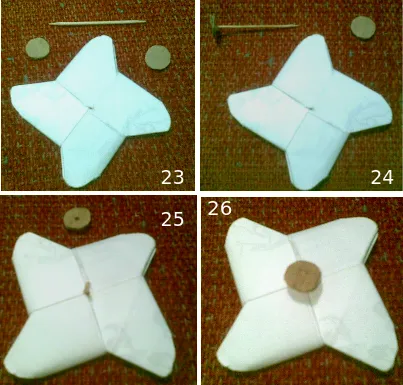
Step 23: Make a hole in the center of the spinner, and cut 2 little circles on the paperboard.
Step 24: Use the glue to fix the chopstick to the circle.
Step 25: Pass the chopstick trough the spinner and cut it.
Step 26: Fix the other circle on the chopstick.