Introduction
Hi, dev's what's up? Dinesh here!
SteamVR 2.0 is out, but it got some pretty bad ratings so far. With this blog post, I want to help you understand how to use the new steamVR plugin, and relieve you from most of the headaches you may have.
1. About SteamVR 2.0
First of all, we got a completely new input system, which is based on scriptable objects. All the scenes, prefabs and the interaction system use this new method. So it's quite important to adapt as well.
According to Valve, the new SteamVR plugin support start by Unity5.4, and all the way to Unity2018.
It supports finger tracking for the knuckles EV2, Vive wands, Oculus touch and Windows Mixed Reality using the skeletal input system.
2. Setting up SteamVR 2.0
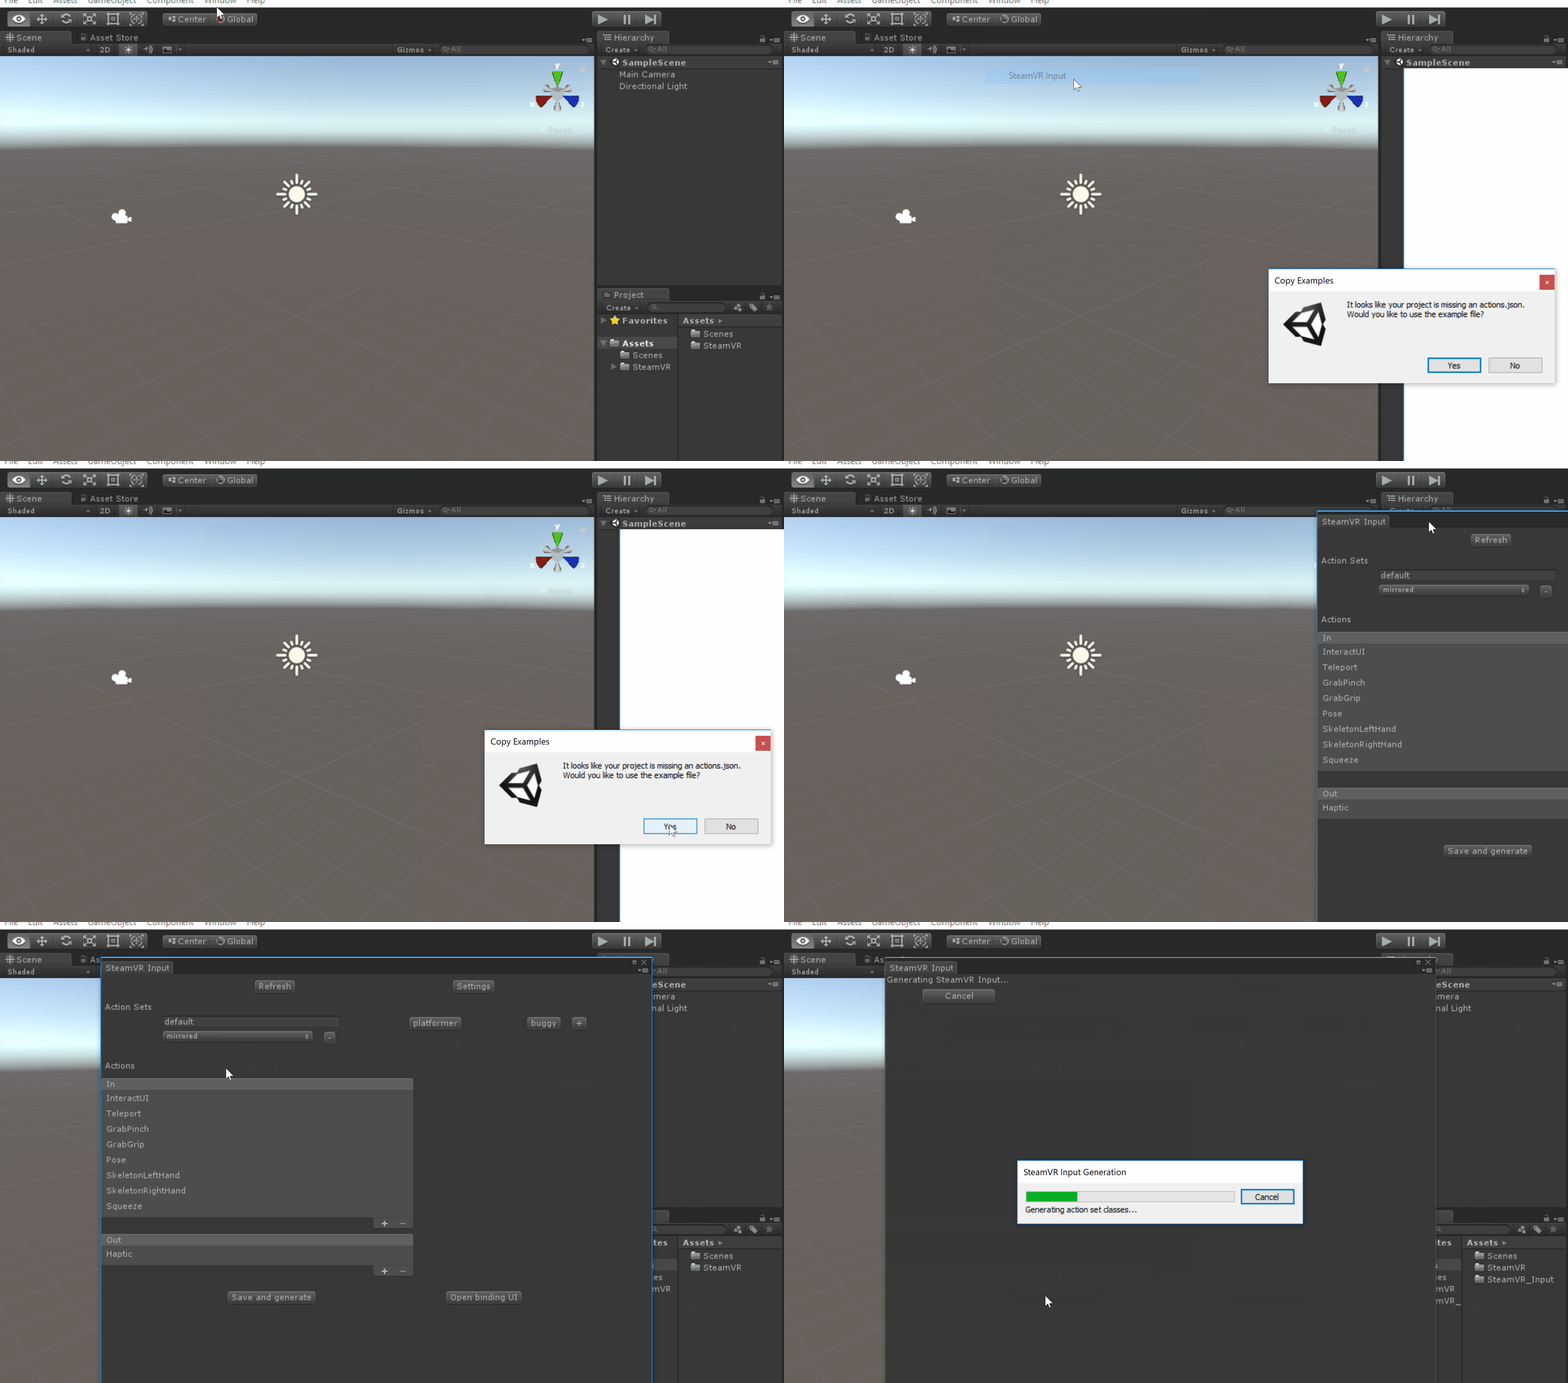
You can download the plugin on the Unity Asset store. Download and import the plugin just like any other plugin from the asset store. After importing the package, you should have a new folder in your Assets window. The next step is crucial. Your input won't work otherwise
You need to
- Create the actions.json file
- Generate the scriptable objects

After you have done those two steps, you should see a new folder called 'SteamVR_Input.' Now you can finally try out the new stuff in the interaction demo scene you find under Assets\SteamVR\InteractionSystem.
3. Using SteamVR_Actions
Let's now use our new generated actions. We will create a little demo, where you can switch the light on and off by pressing/releasing the trigger on the vive controller. Here the steps:
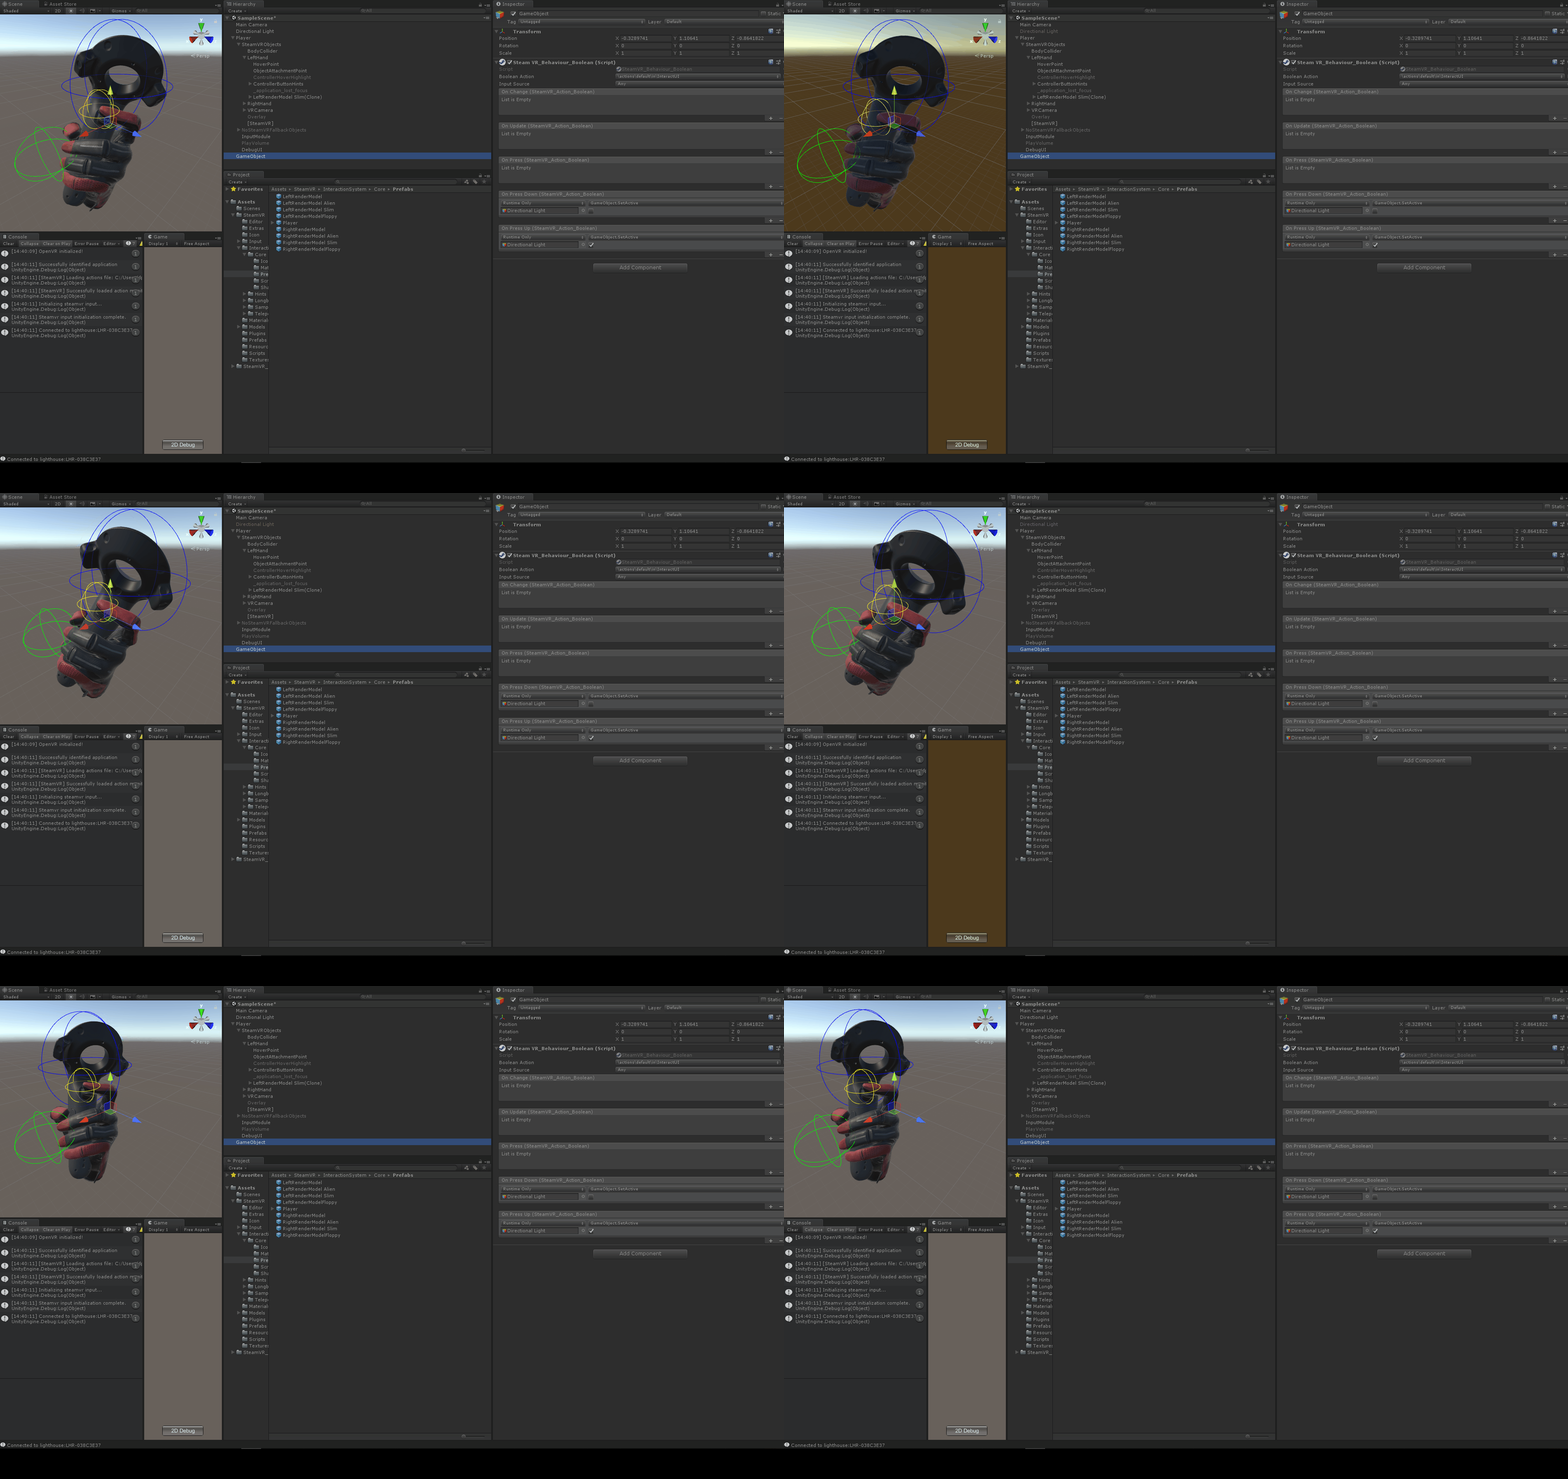
- Open your empty sample scene and add the SteamVR Player prefab into the hierarchy. You find the player at Assets\SteamVR\InteractionSystem\Core\Prefabs
- Create an empty GameObject and add the SteamVR_Behaviour_Boolean component to it
- Add a callback for the OnPressDown and OnPressUp event
- Drag the directional light into the object field and enable/disable it on PressUp/PressDown.
For the BooleanAction select /actions/default/in/InteractUI (you find it in the dropdown menu of the SteamVR_Behaviour_Boolean component)
And that's it already.

Final Words
Of course, you can do a lot more with the new input system, like creating, binding and assigning new custom input actions. However, at the moment it comes with quite some bugs as well. I still covered those in the video accompanying this blog post. Check it out here if you want to dive deeper into the new SteamVR plugin.
If you are interested in learning more about Unity - especially VR | AR | MR development, stay tuned for more!
And as always, if you have any questions or remarks let me know: dinesh@univrsitas.com
Cheers